Voice Call
How to configure the Voice Call component in Ilevia Manager with ClickSend, to receive voice alerts from the Ilevia server.
Introduction
This component lets you receive a voice call from the Ilevia server that repeats the message entered in the “Content” parameter. It is useful for receiving voice alerts in real time on all devices connected to the account in the Ilevia Control app.
Component properties
The component title and icon are customizable. See the “Common Properties” guide.
GUI
This component was created using the Graphic UI gateway.
You can refer to the “Gateway / Protocols” chapter for more information.
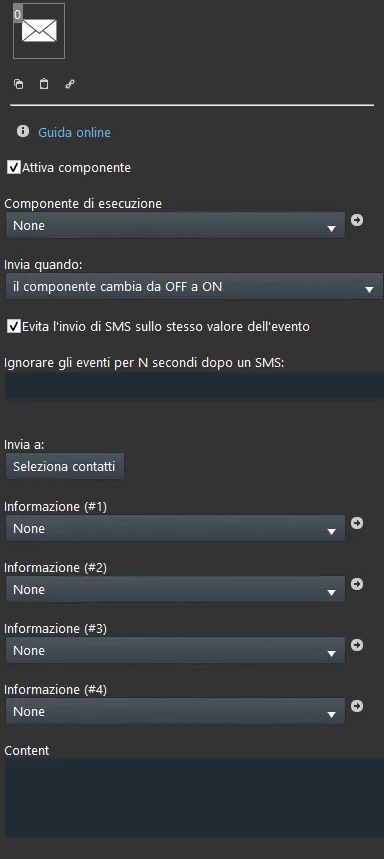
Enable component: checkbox that, when selected, defines when the function is enabled or disabled in the system.
Trigger component: Option list, Colored info, Text info, Switch, Lock, Button: component that triggers the voice call to be sent;
Send when:
State change from OFF to ON: the Voice Call is started only when the state changes from OFF to ON.
Change from ON to OFF: the Voice Call is started only when the state changes to OFF.
On every change: the Voice Call is started every time the state changes, both from OFF to ON and from ON to OFF.
ON event: the Voice Call is started only when the component has an ON state event.
OFF event: the Voice Call is started only when the component has an OFF state event.
Run on every event: the Voice Call is started every time the event changes state.
User selection: list of Contacts that will receive the Voice Call. To import the contacts, click the “Select contacts” button and drag the Contact components into the window. For the Contact component configuration, click here.
Additional information can be added to the Voice Call message (up to 4 items):
Information (#1): Option list, Info, Colored info, Text info, Slider, Switch, Safe switch or Adjustable value components;
Information (#2): Option list, Info, Colored info, Text info, Slider, Switch, Safe switch or Adjustable value components;
Information (#3): Option list, Info, Colored info, Text info, Slider, Switch, Safe switch or Adjustable value components;
Information (#4): Option list, Info, Colored info, Text info, Slider, Switch, Safe switch or Adjustable value components;
Content: content of the Voice Call that will be sent when the state changes. The information set above must be added to the voice call content using the # symbol followed by the information number (e.g. #1, #2, etc.).
Component configuration
The following steps explain how to configure Voice Call to receive voice calls from the Ilevia server.
Step 1:
The Voice Call service relies on an online service that allows calls to be made to recipients. Create a new account on the ClickSend website before continuing.

Step 2:
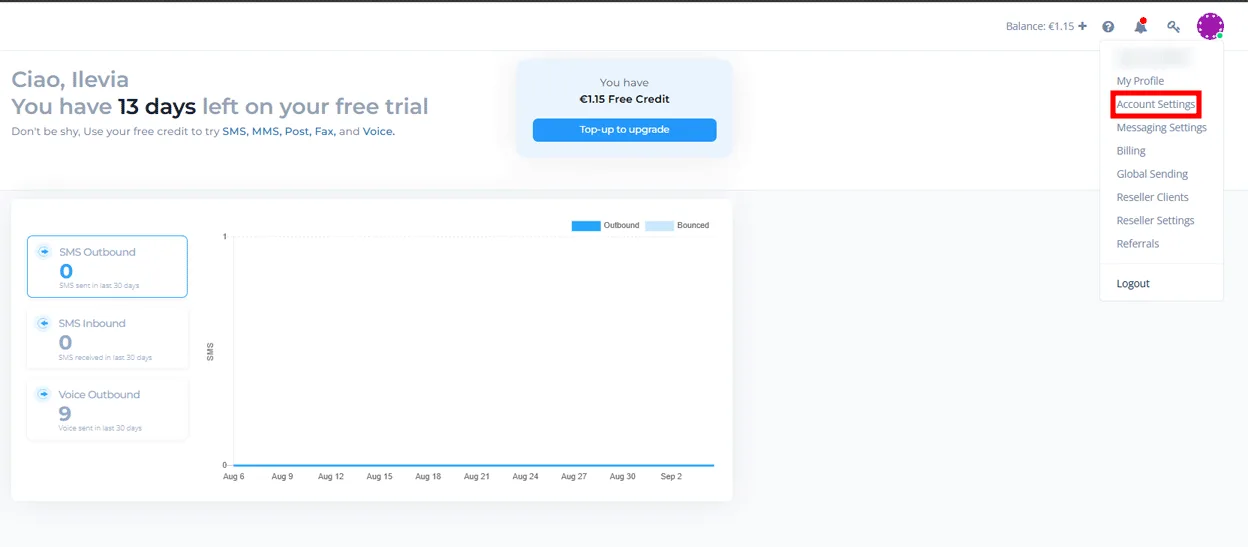
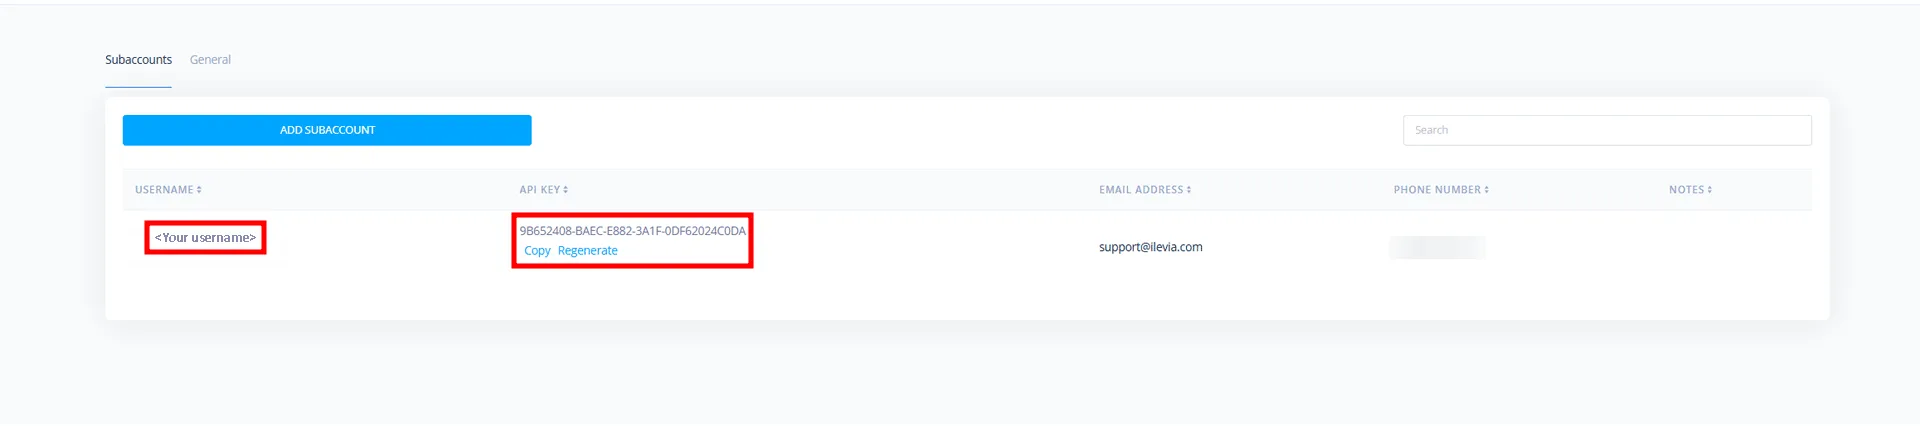
Once you have logged in to the ClickSend account, open the Account Settings menu and copy the Username and the API Key.
Step 3:
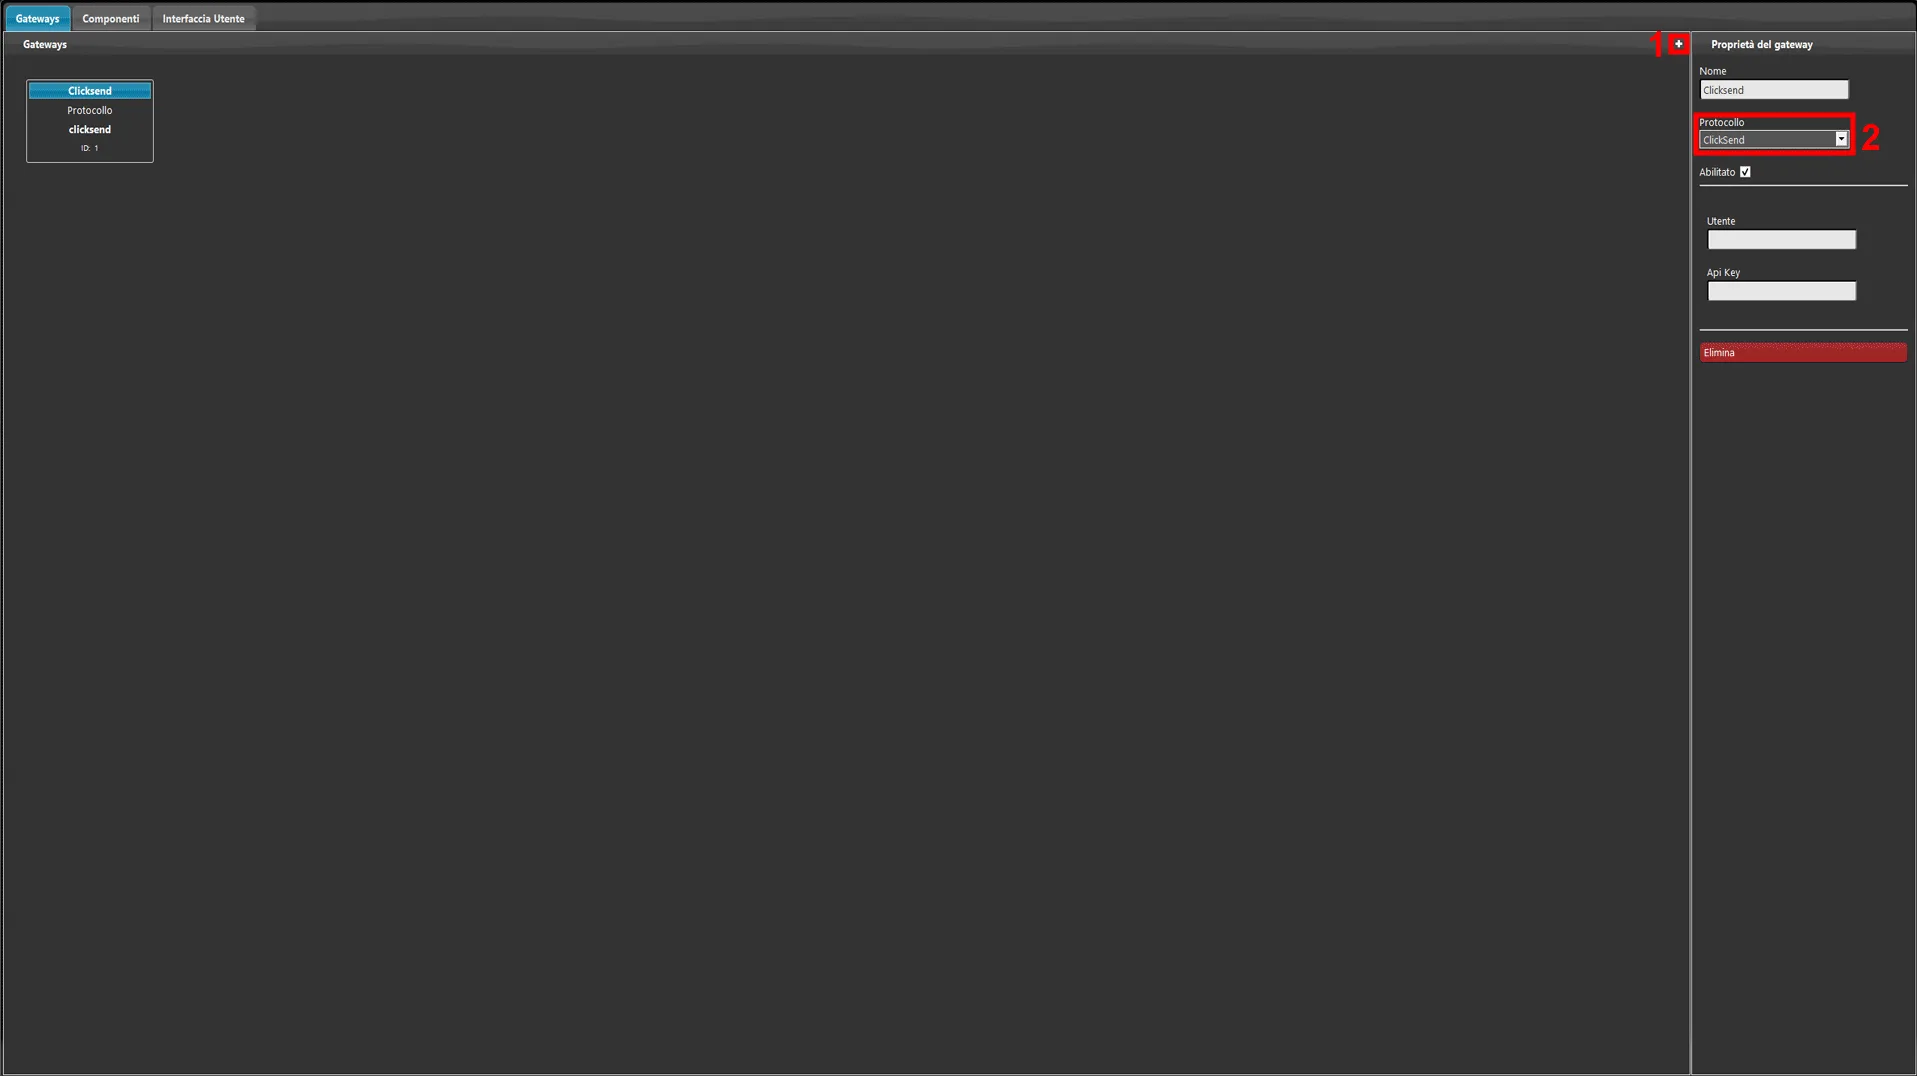
Open the Ilevia Manager software, 1. go to the Gateway section, add a new gateway and 2. select the ClickSend protocol.
Step 4:
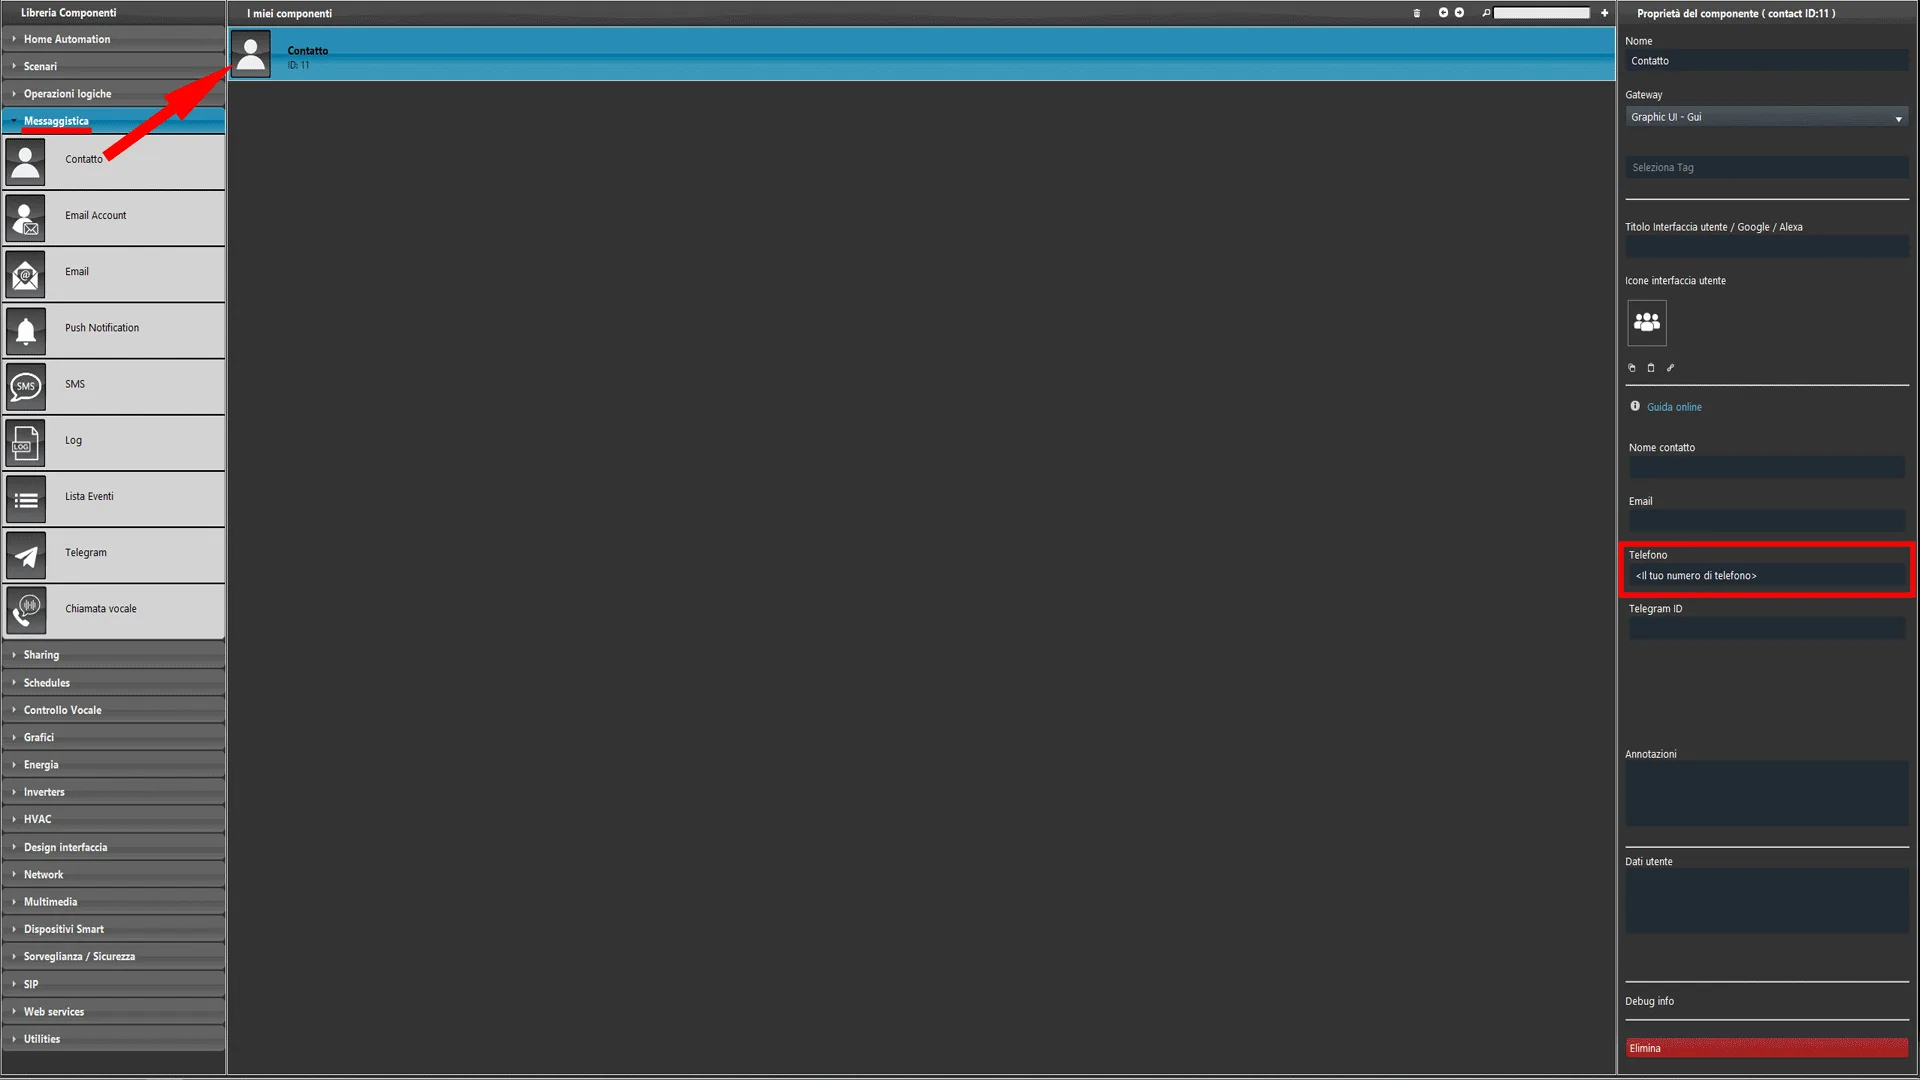
Go to the Components section, open the Messaging menu in the Component Library, add a new Contact component and set the recipient phone number that will receive the call.
Step 5:
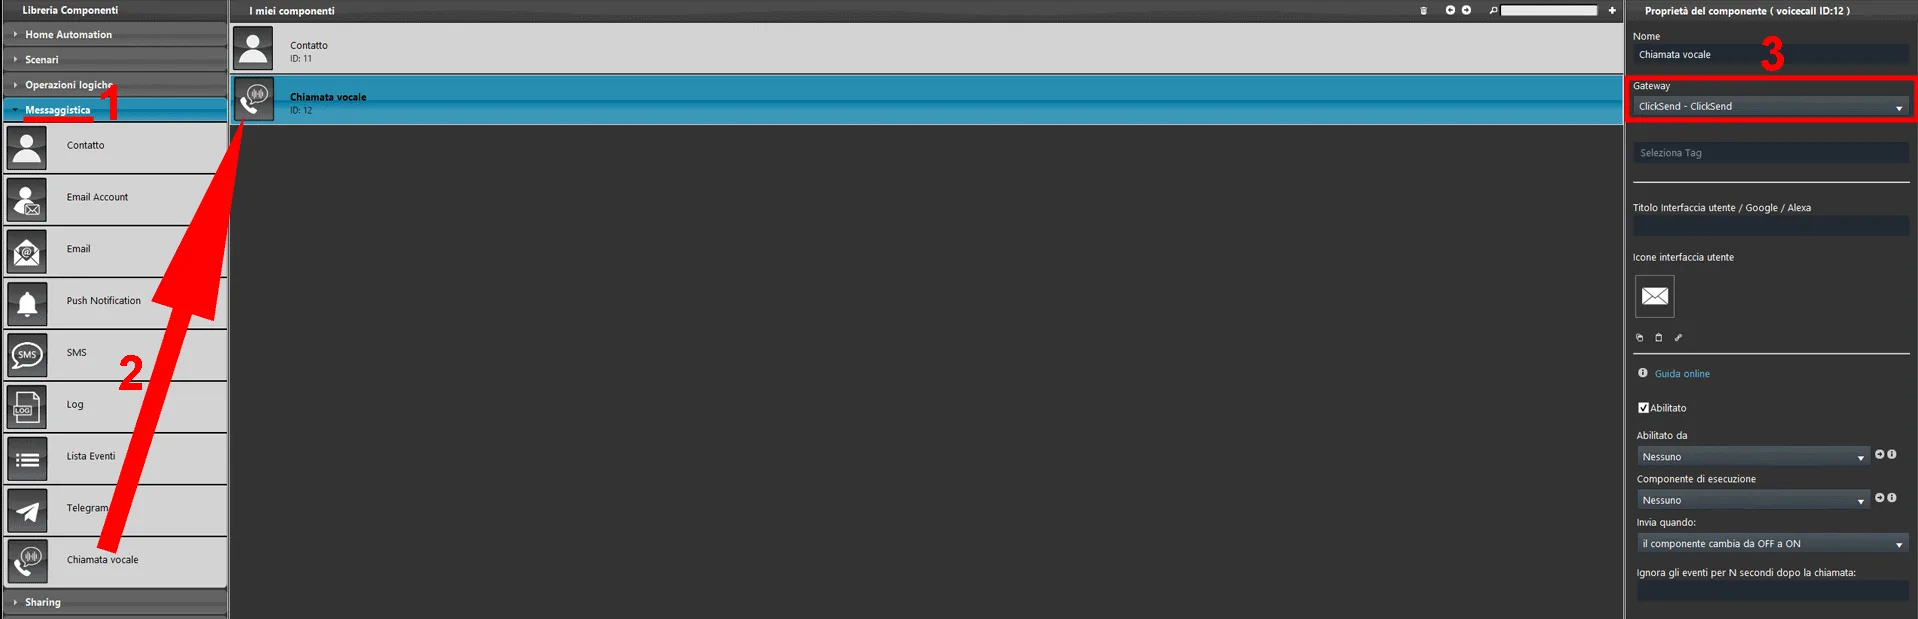
Add a new Voice Call component and assign it the ClickSend gateway created just now.
Step 6:
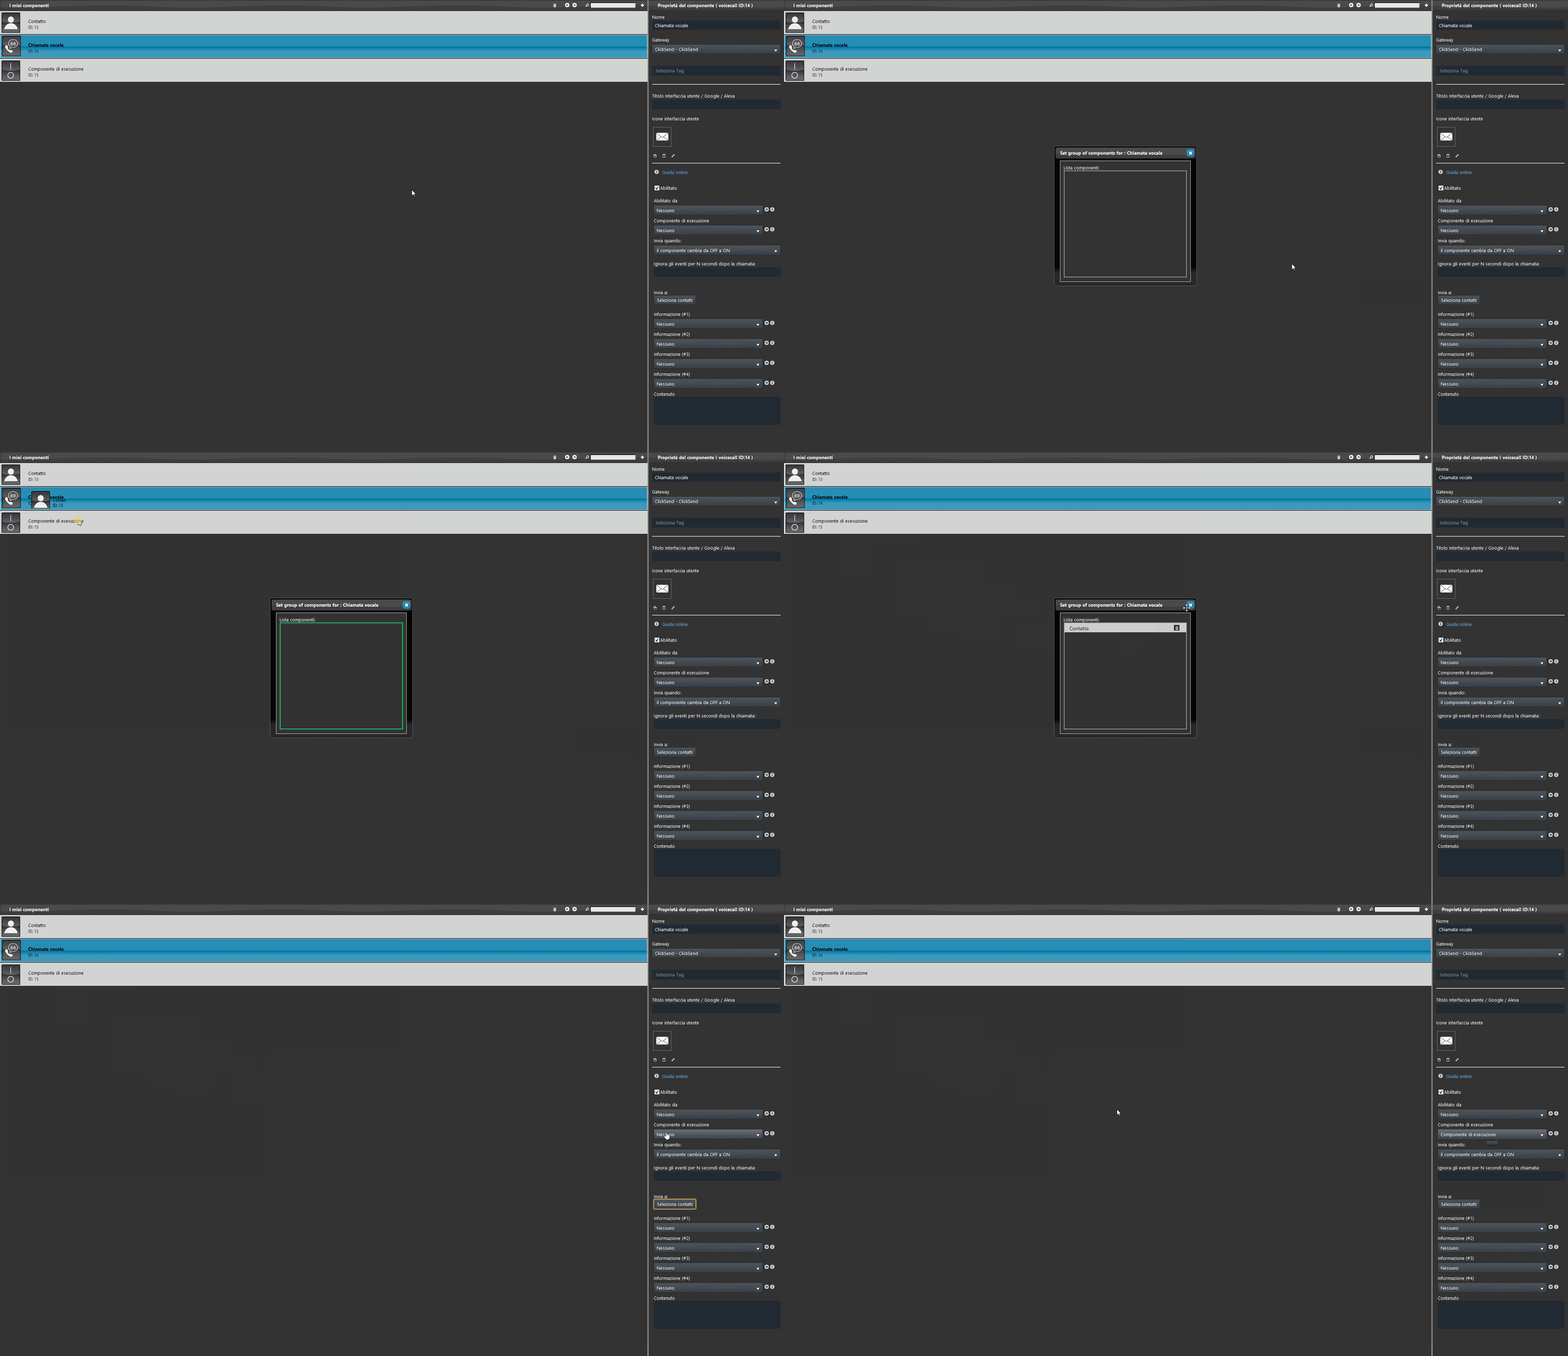
Choose one of the following components in the project: Switch, Button, Colored info, Text info, Lock or Option list. It will act as the trigger to start the voice call. Then add the Contact component to the contact list of the Voice Call component.
Step 7:
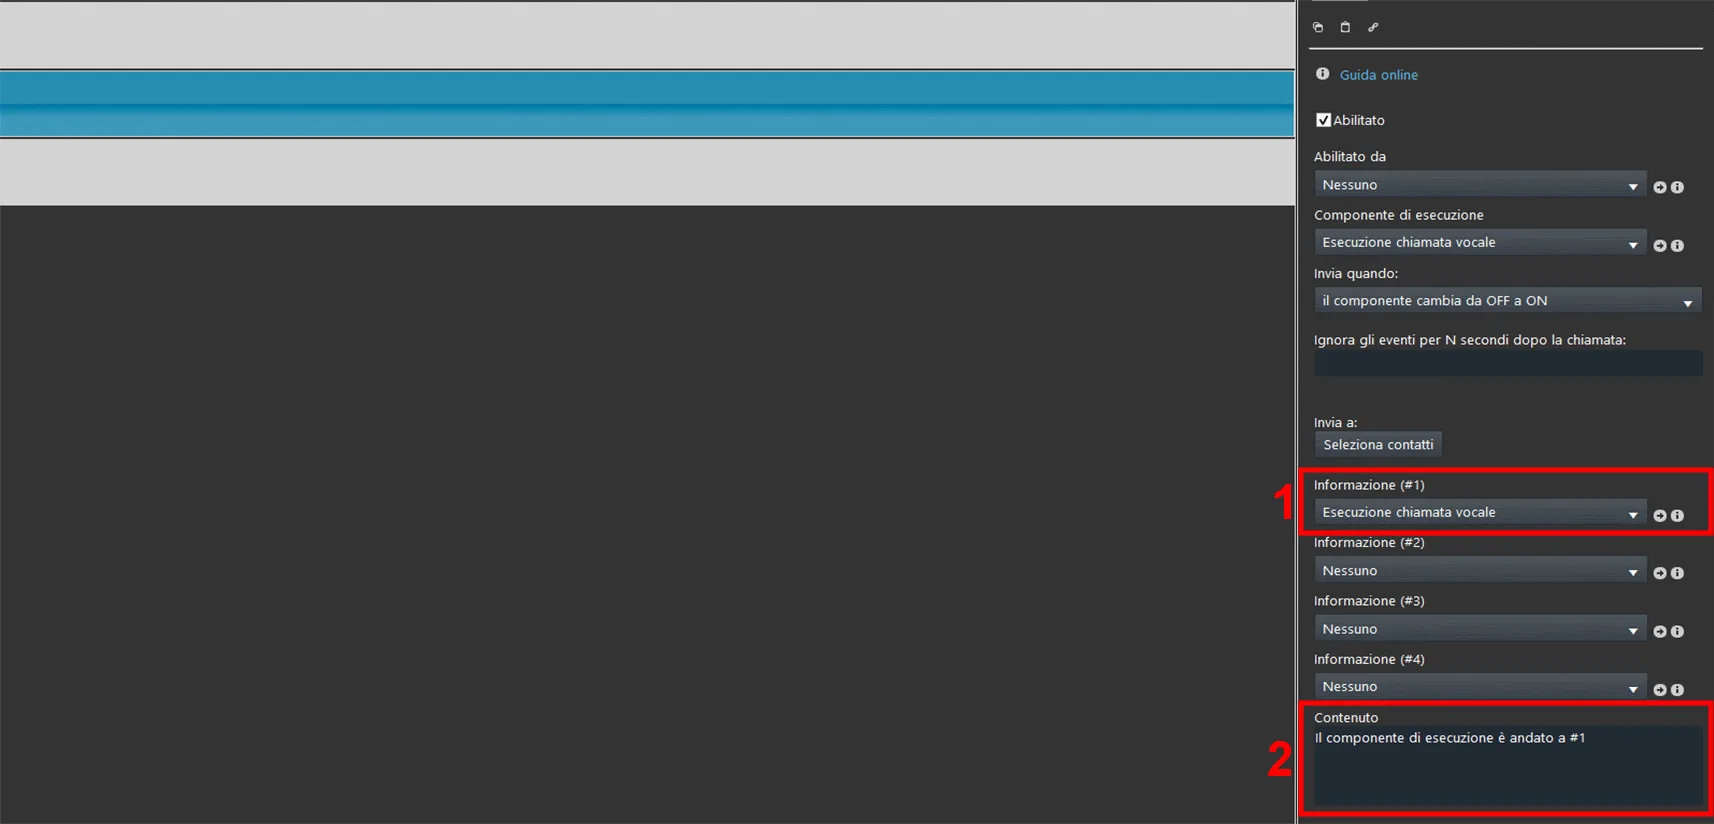
1. Add information in the Information parameter of the Voice Call component, 2. then fill in the Content parameter with the message that will be read to the user receiving the call.
Step 8:
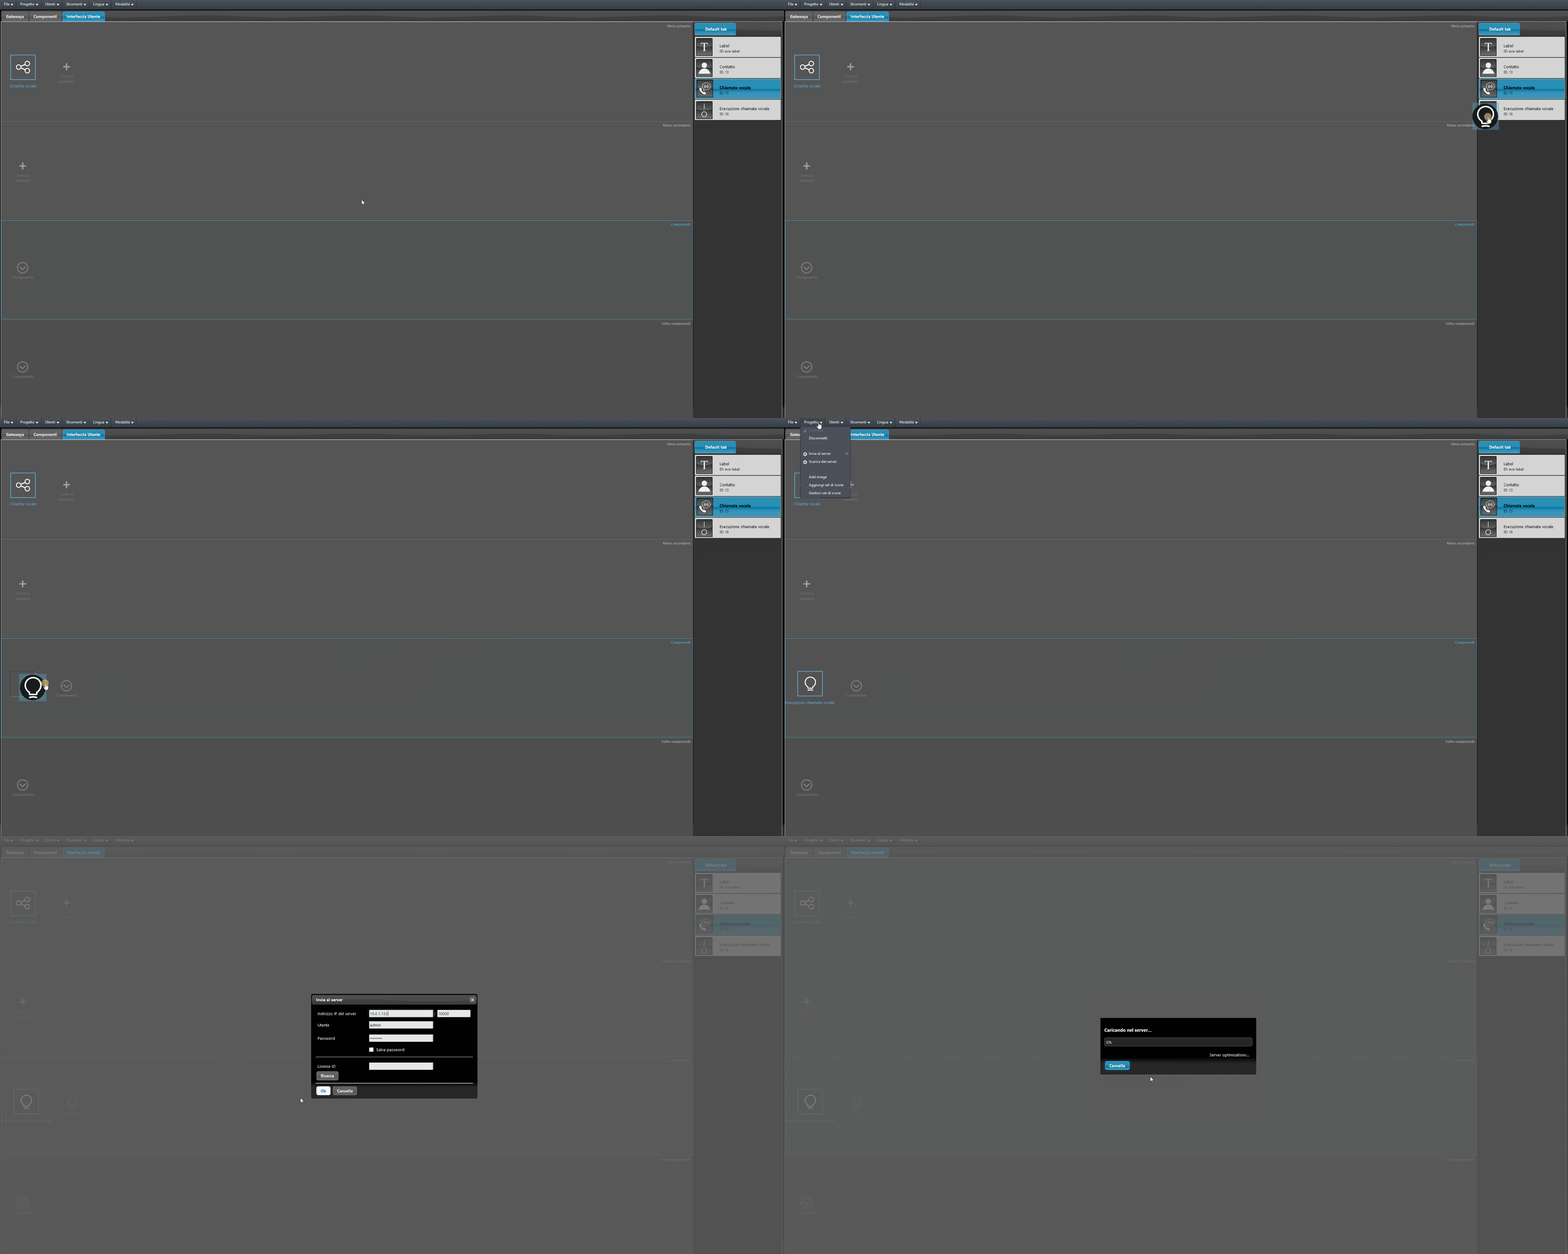
Go to the User interface section and add the component that starts the Voice Call.