
Using ILEVIA Control from a smartphone
Find devices and use lights, climate, shutters, favorites, and events in the ILEVIA Control app, with Italian paths and screens.
With ILEVIA Control you can find the devices in your system, send commands, and view statuses and schedules. To get started, learn how to identify where a device is, which command you are using, and which value is shown on the screen.
This guide describes the interface in Italian and the main paths on smartphone. The images come from the Smartphone demo: in the real system, names, devices, and available functions depend on the configuration and the permissions of your account.
Go to the activity you need
The five main sections
Section | When to use it |
|---|---|
Home | You know which floor or room the device is in. |
Functions | You want to find all devices of a type or open a function category. |
Favorites | You want to reach the items you use most often. |
Events | You want to view programs and scheduled actions. |
Activities | You want to view the activities available in the log. |
Before you start
Open the app and sign in to the system with the access set up by the installer. To connect the app from the QR code or open it from Manager, see Access to ILEVIA Control in the X1 Plus guide.
To follow the examples without using a real system, open https://app.ilevia.com, tap DEMO, and choose Smartphone.
To set Italian, open the Settings gear, choose Language, open the language selector, and choose Italian.
The interface language and custom names are two different things. A room or device can keep an English name even when the menus are in Italian.
How to read this guide
The following sections explain how to find a command, open its details, and interpret its controls. The examples illustrate app usage: the values in the images are not recommended settings for your system.
Finding a device and opening its commands
You can reach the same device either from the room or from its function. Choose the path that matches what you already know: the room where it is located or the type of command you are looking for.
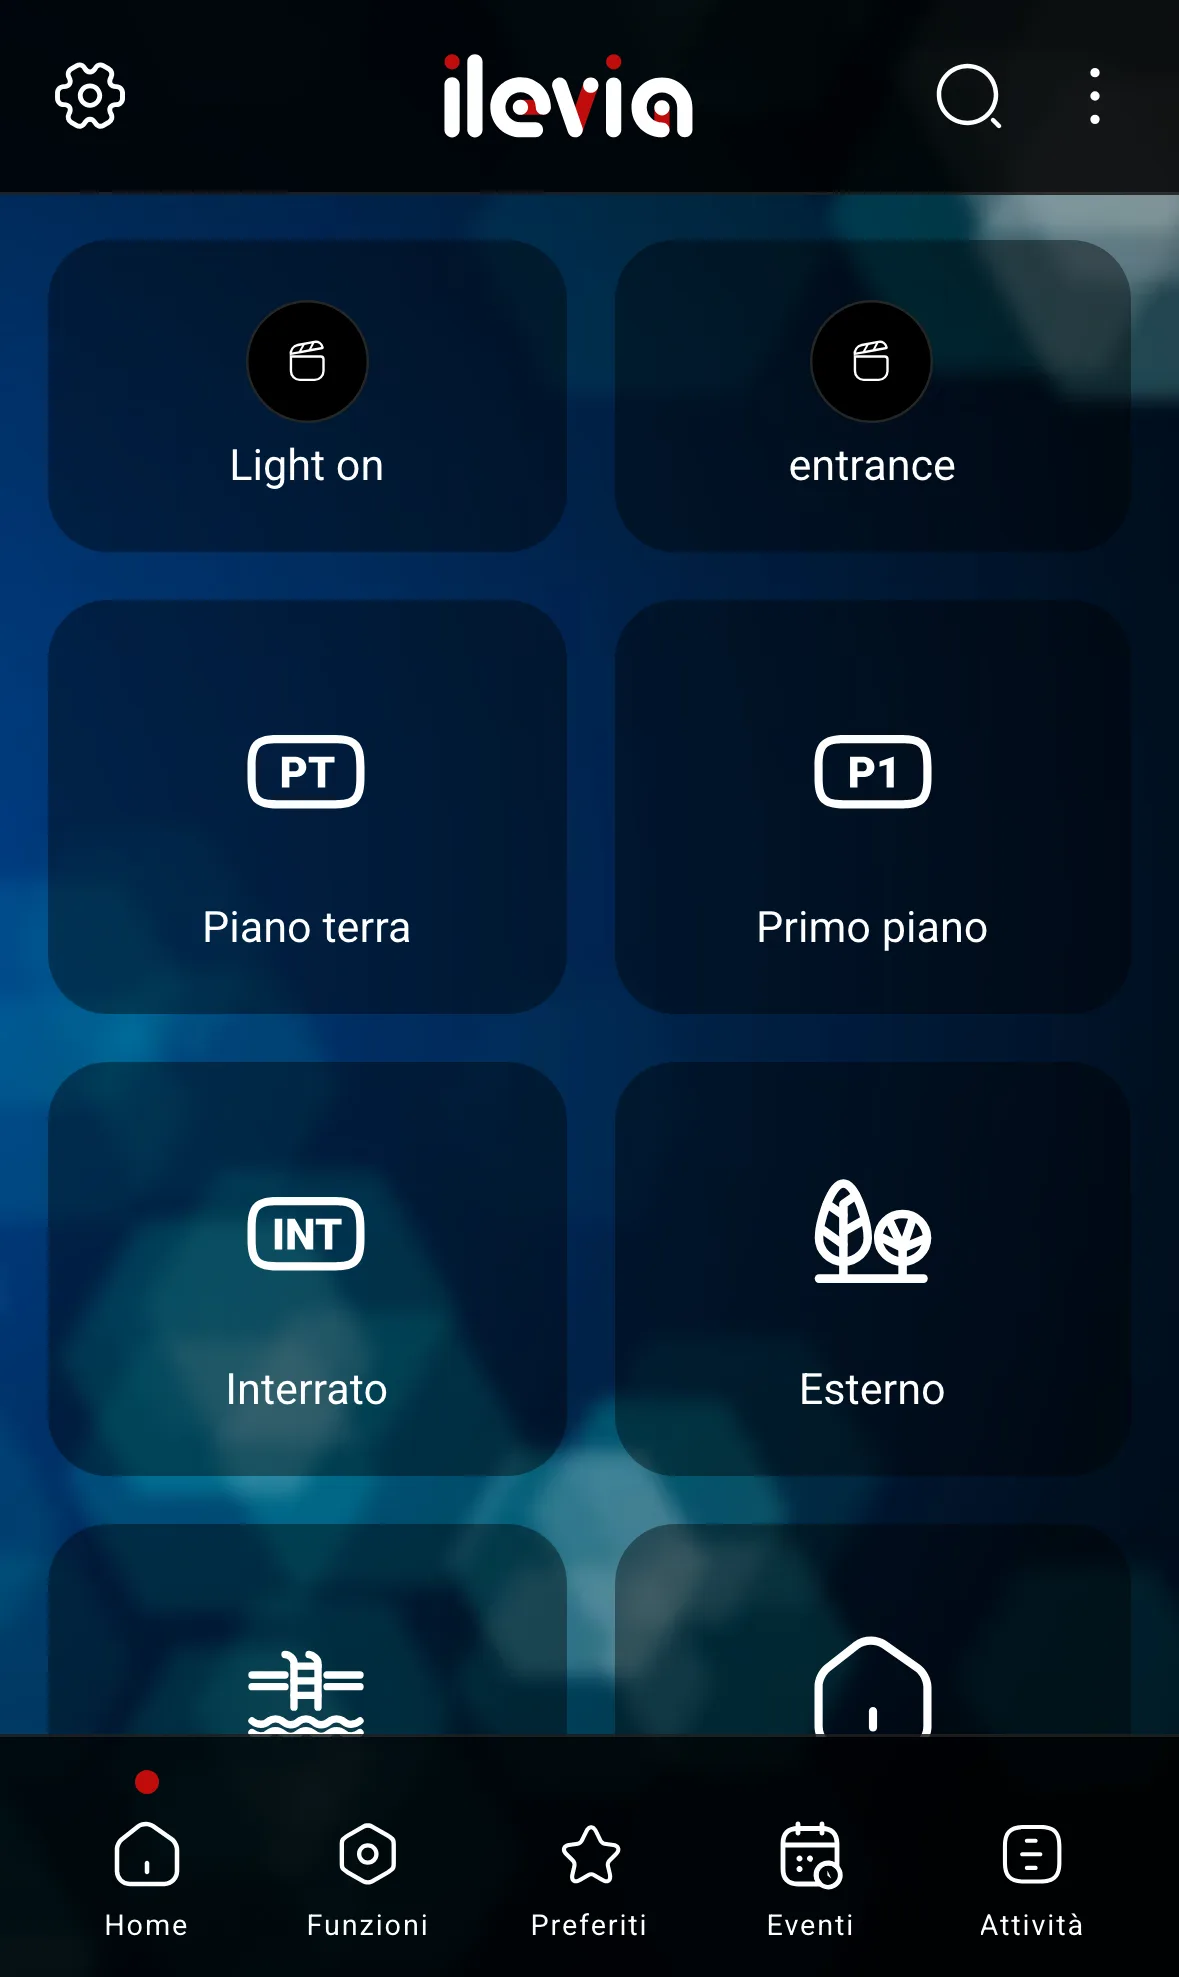
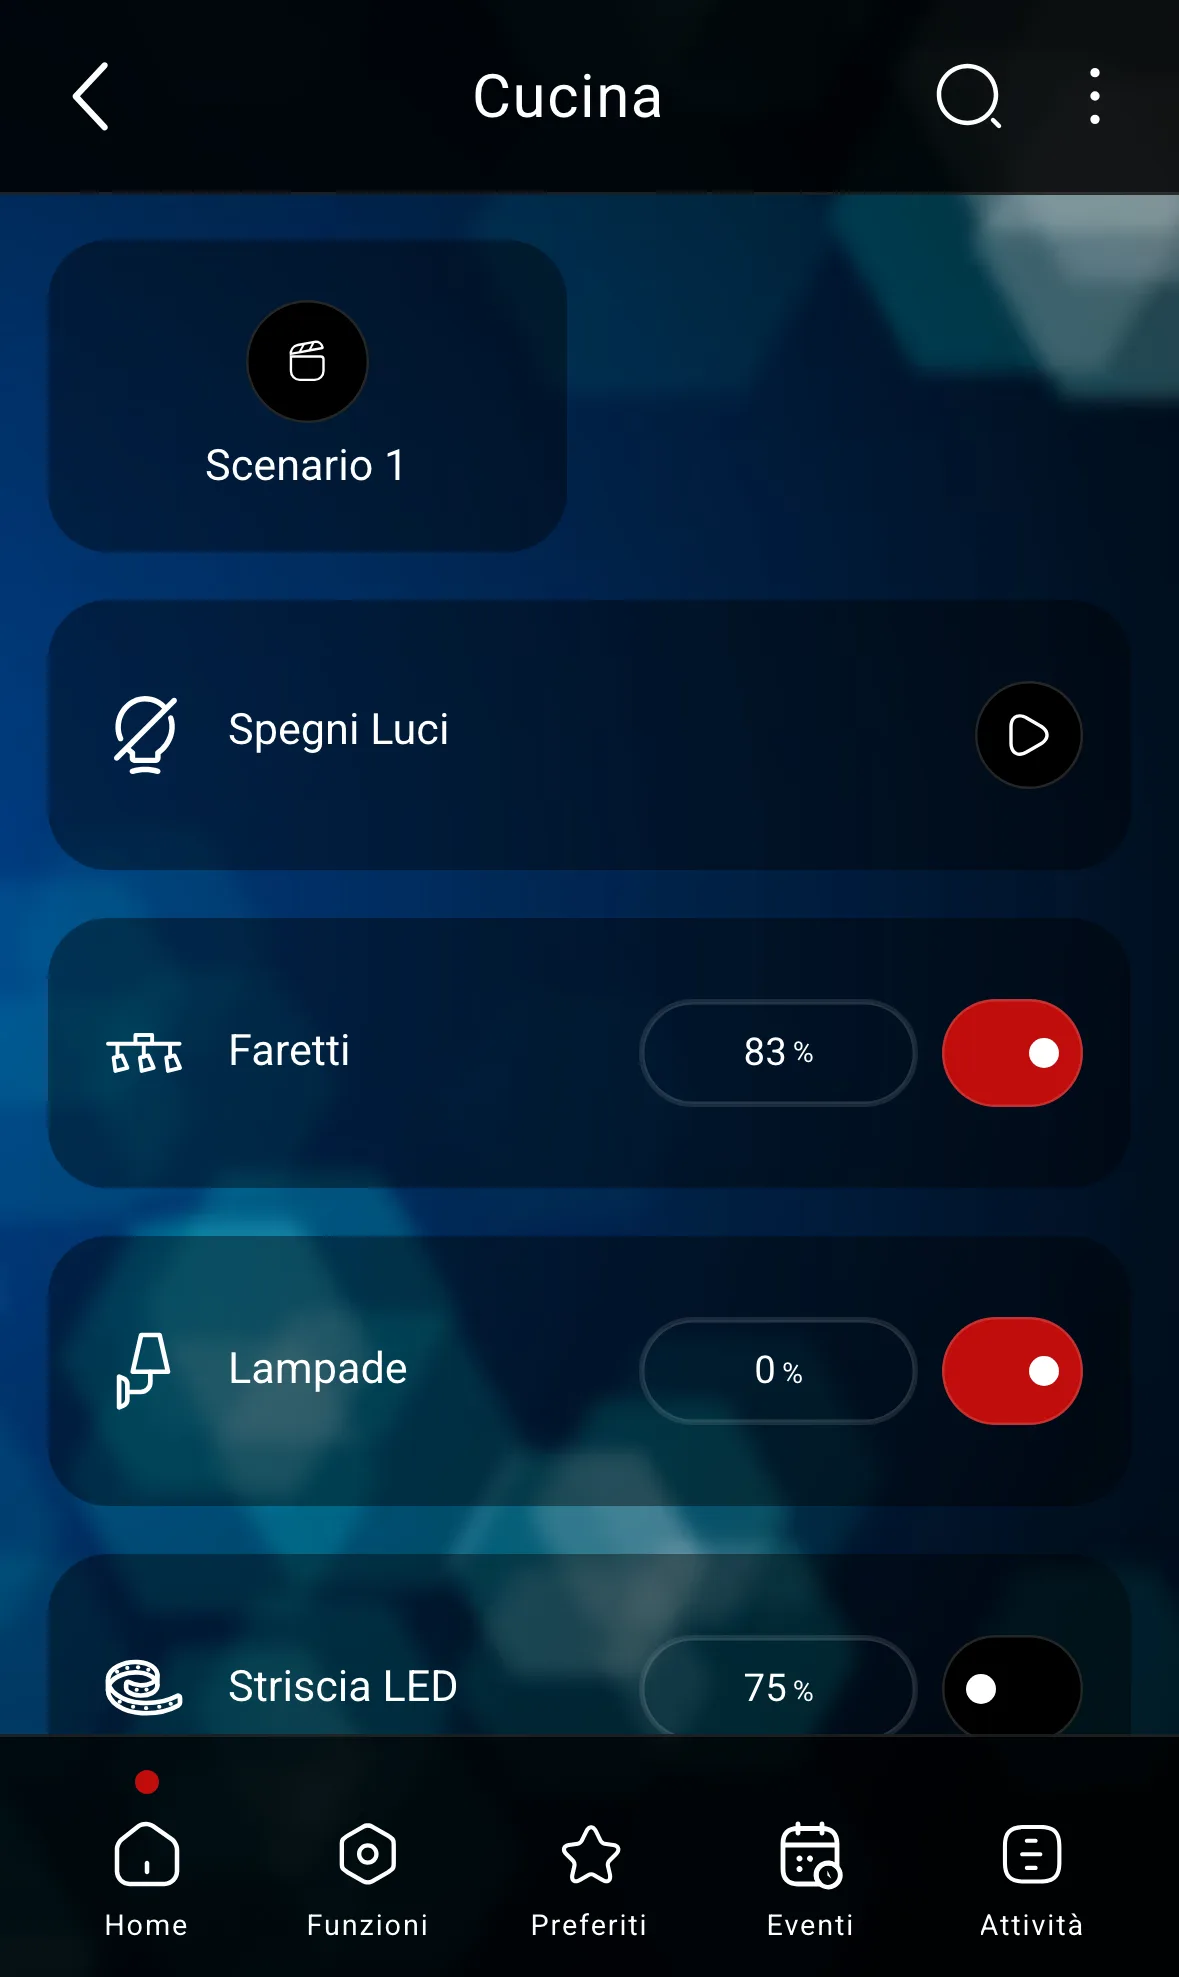
Left: Home with floors and areas of the system. Right: Kitchen with room devices and statuses.
Starting from the room
Tap Home in the bottom bar.
Open a floor or area, for example Ground floor.
Open the room, for example Kitchen. Scroll the page to also see devices lower down.
Tap the device name or tile to open its details. Use the arrow to go back to the previous level and the X to close the details.
Starting from the device type
Open Functions → Devices and choose the appropriate category, for example Motorizzazioni or Temperature. In the list, always check the room path: two devices can have the same name.
Some tiles have a direct command next to the name, such as a switch. Tapping that command sends the action; opening the details instead lets you see the available controls.
Switching on lights and adjusting temperature
The details change depending on the device. A dimmable light offers a percentage level; a thermostat distinguishes the set value from the available environmental information.
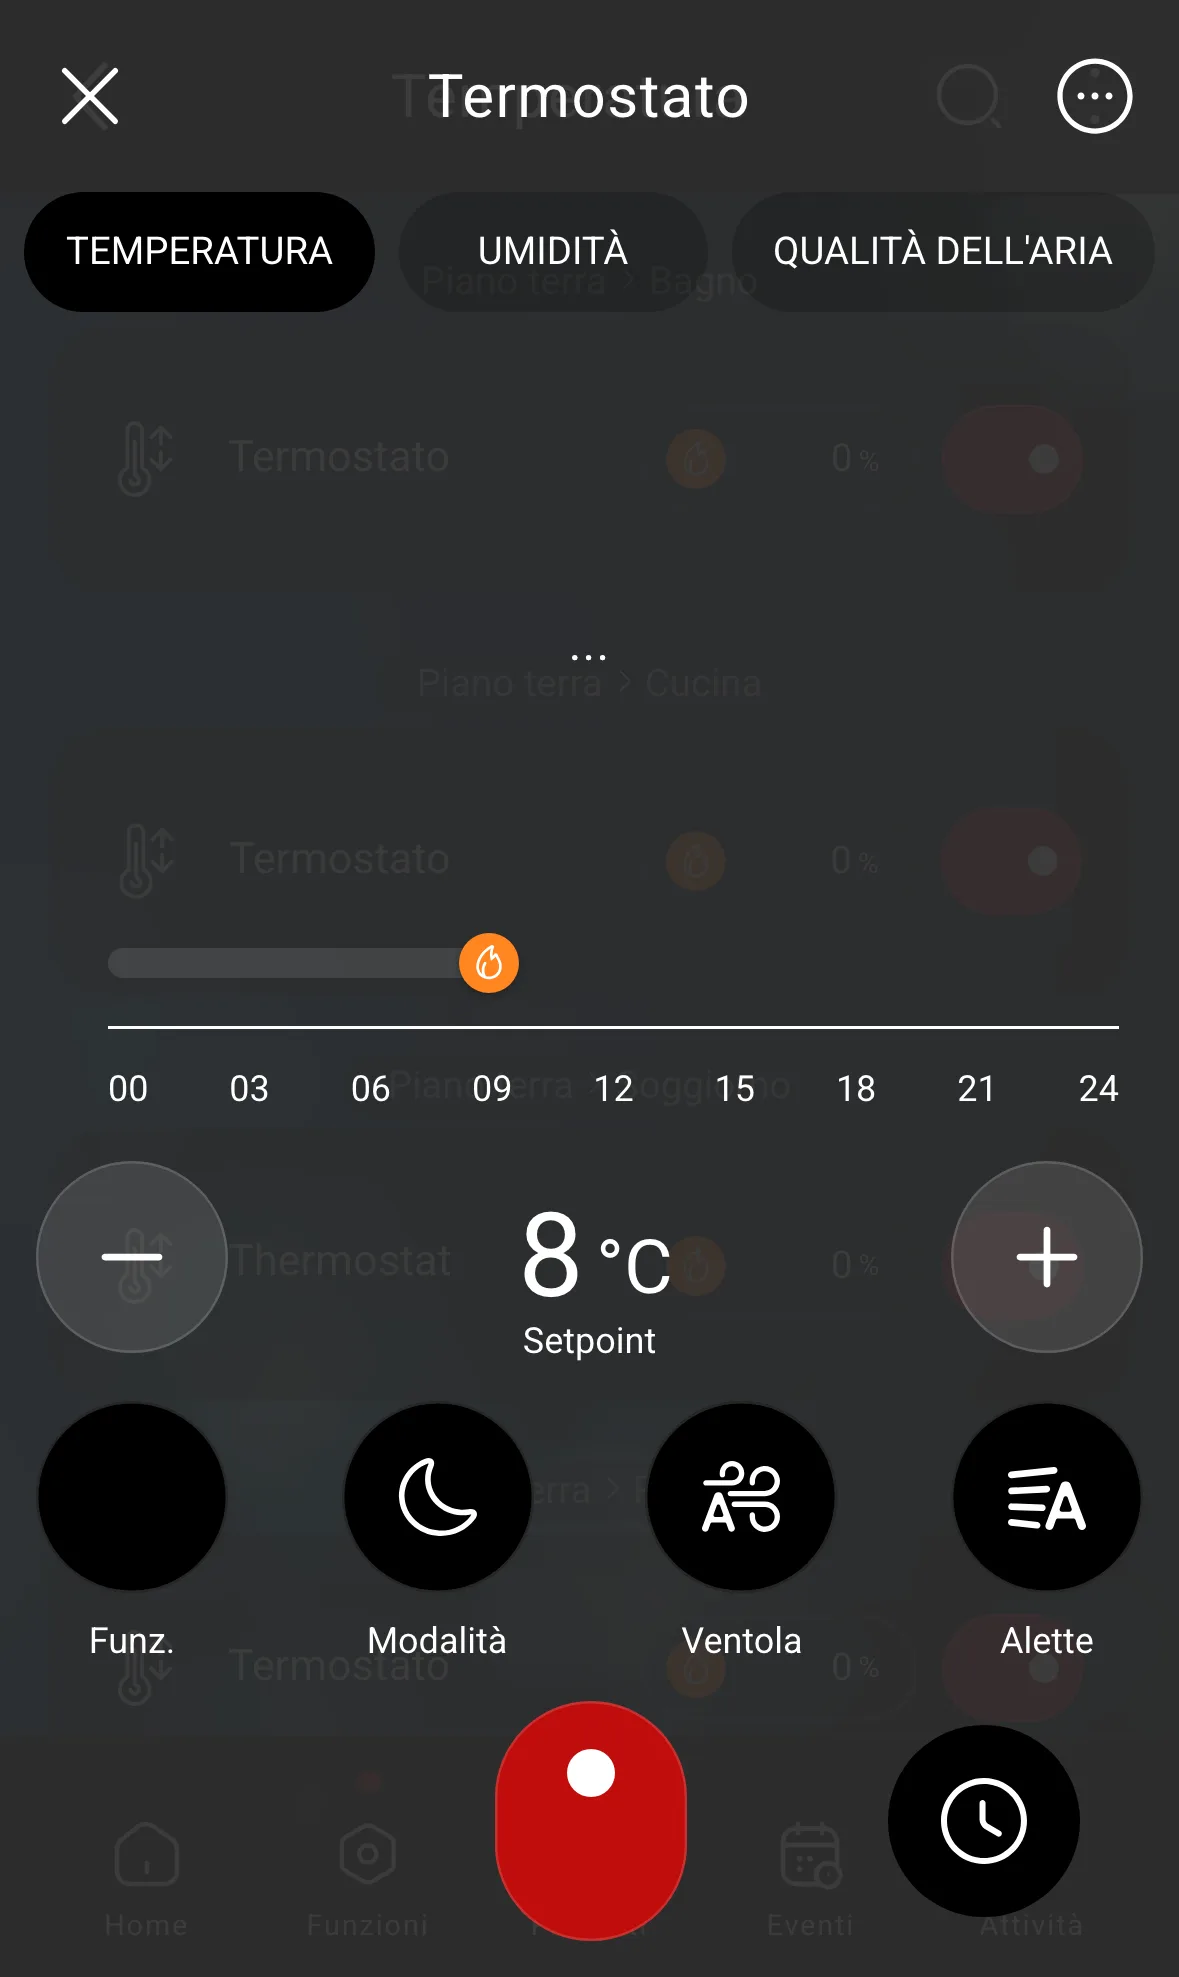
Spotlights and thermostat in the detail view.
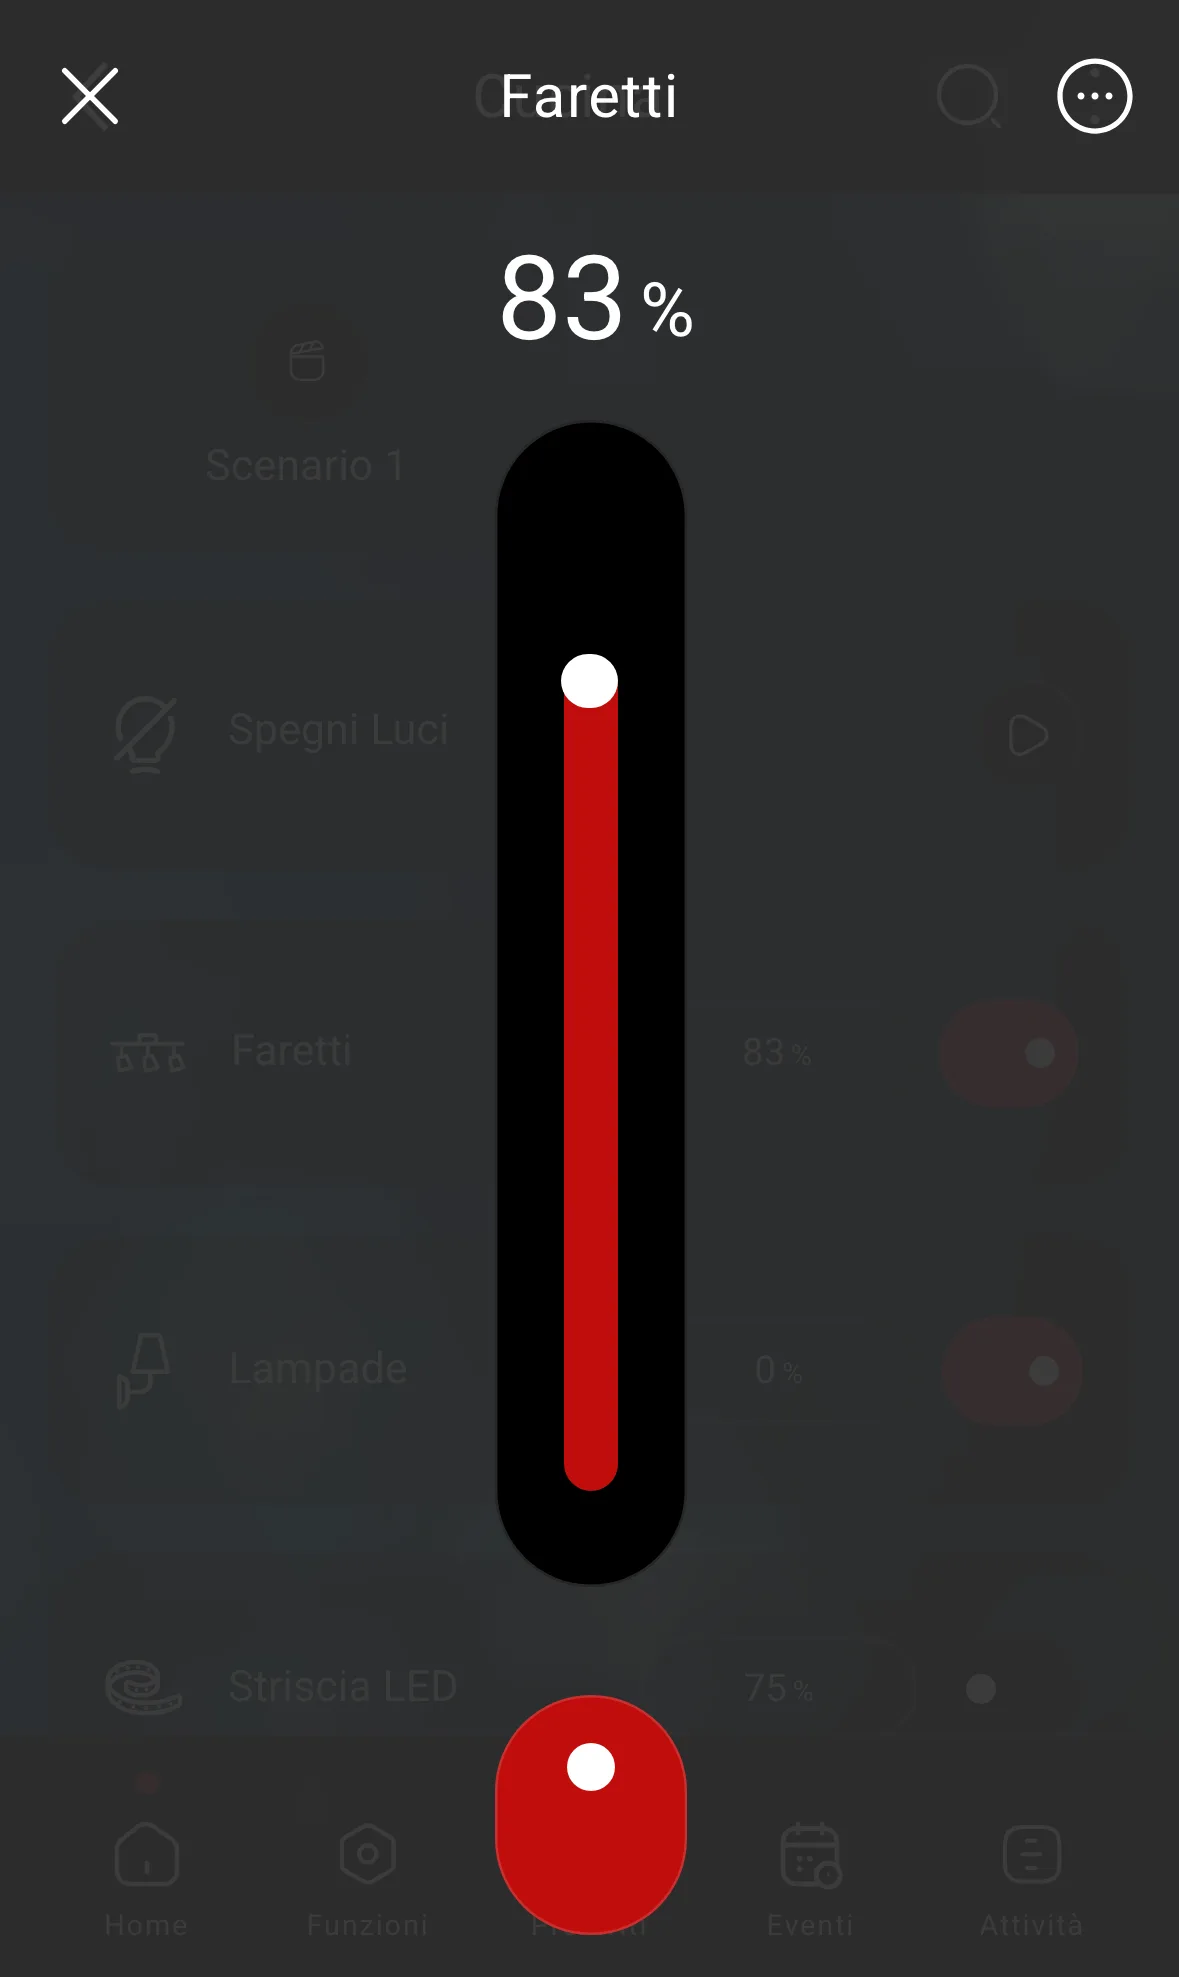
Switching a light on or adjusting it
Open the room and locate the light.
Use the switch on the tile, or open the details and use the control at the bottom, to switch it on or off.
If the light is dimmable, move the vertical slider and check the percentage. A higher value corresponds to a higher requested light level.
Close with the X to return to the list.
Setting the desired temperature
Open the room Thermostat, or reach it from Functions → Devices → Temperature.
Find Setpoint: it is the desired temperature, not the measured temperature.
Use + or − to change the Setpoint and check the new value.
Check the Funct., Mode, Fan, and Louver controls only if they are available on your device. The options depend on the HVAC system.
Changing the Setpoint sets a new desired temperature. The measured temperature changes over time, depending on the system response. The Temperature, Humidity, and Air Quality cards may show different data depending on the available sensors.
Moving shutters and reading sensors
Motorizzazioni let you control elements such as shutters and coverings. Sensors, instead, are used to read a condition, for example the status of a door or a window.
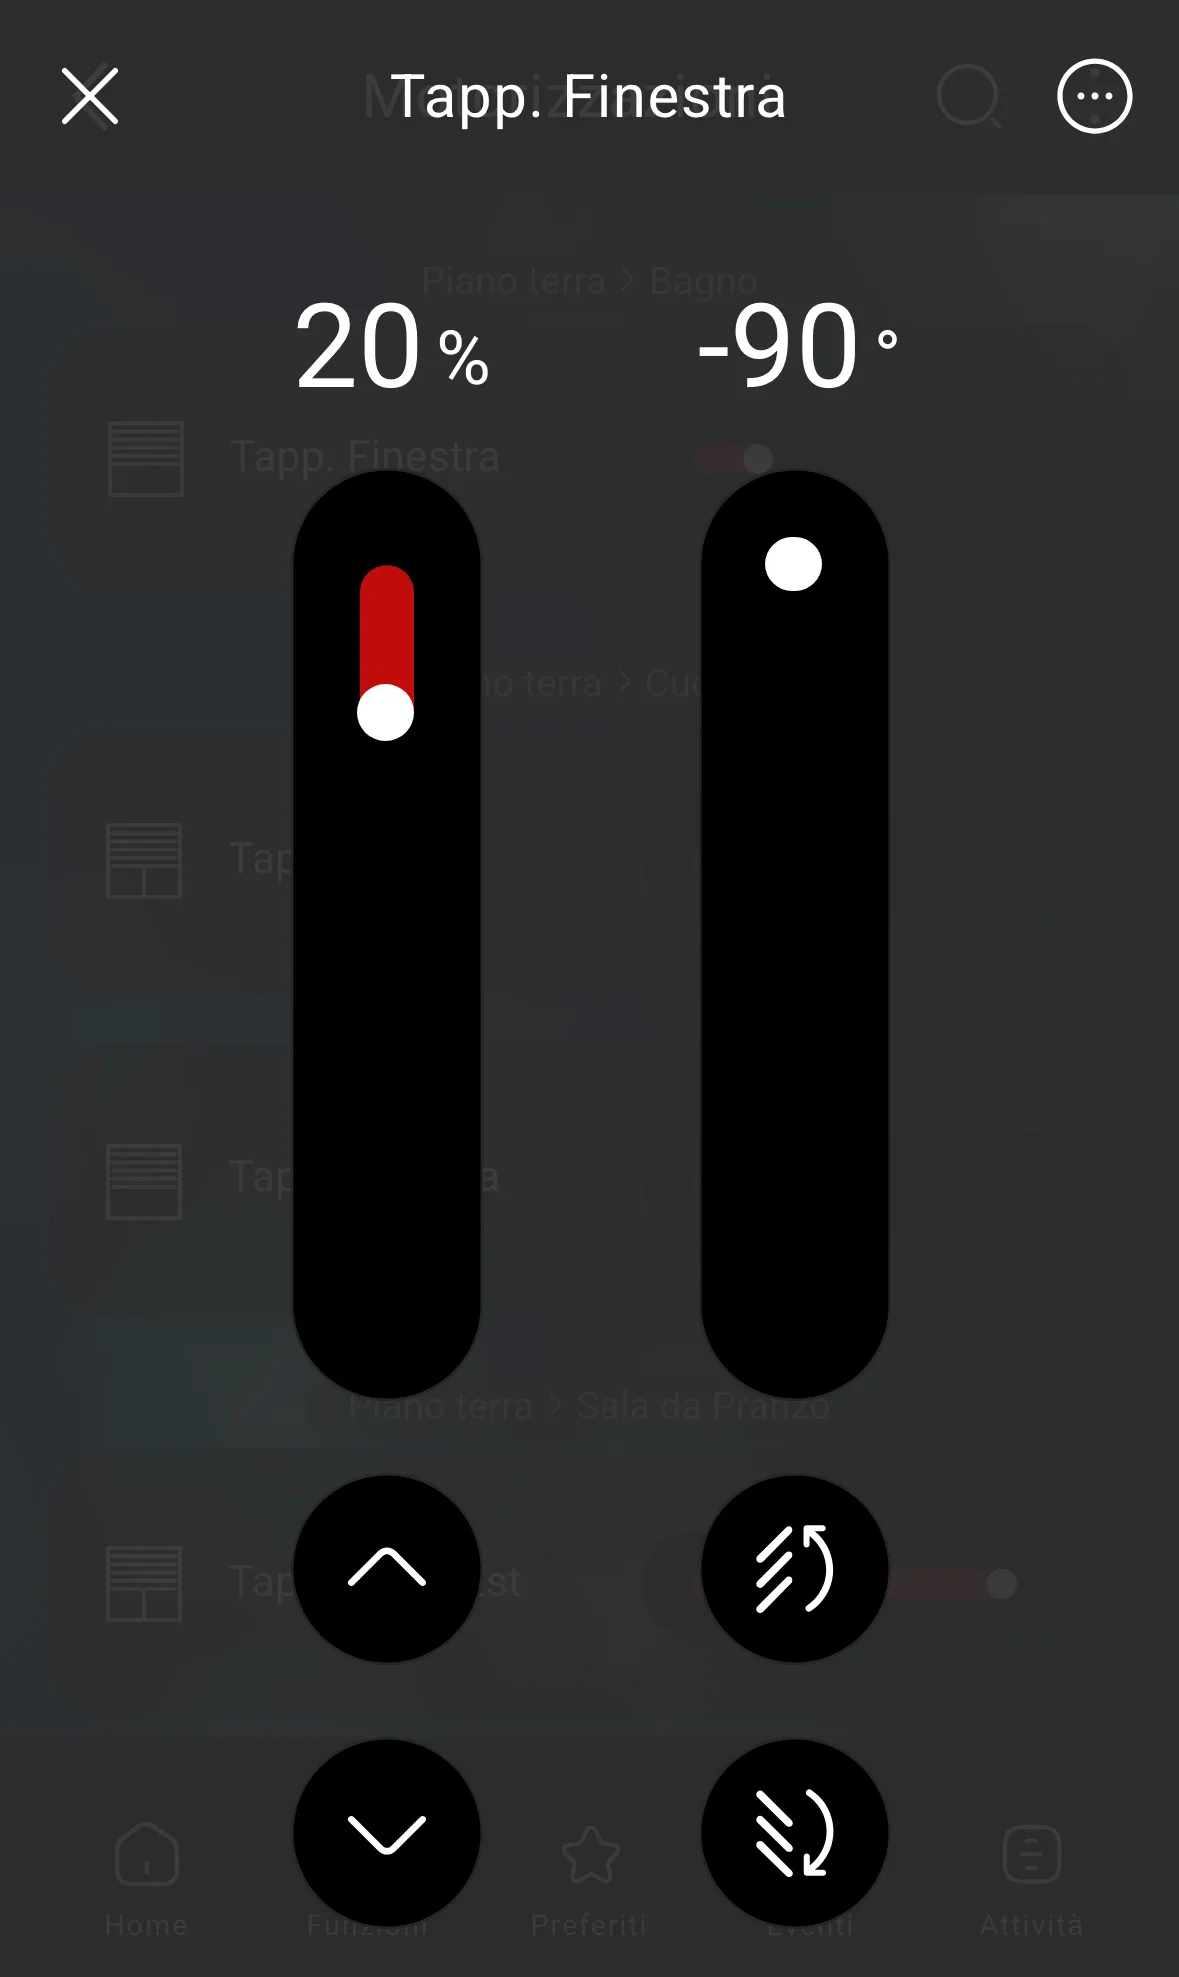
Details of a motorized device with percentage position, angle, and directional controls.
Using a motorized device
Open the device from the room or from Functions → Devices → Motorizzazioni.
Check the name and the room before sending the command.
Use the available directional arrows to request movement. If a percentage slider is present, you can select a position.
If the device controls slats, use the angle control, expressed in degrees, to adjust their orientation.
Percentage position and angle are two separate adjustments. The meaning of the travel limits and the commands actually available depend on the motorized device configuration: do not infer the open state from the number alone without knowing your system.
Interpreting a sensor status
In the room you may find entries such as Door Sensor and Window Sensor, with Open or Closed indications. These texts describe a state read by the system; they are not commands to open or close the window.
If a value is not available or seems inconsistent with the actual situation, check the system connection and device information before considering it updated.
Using Favorites and scenarios
Favorites collect items you want to reach quickly. A scenario, instead, recalls a set of preset actions for a situation, such as turning off multiple lights or preparing an environment.
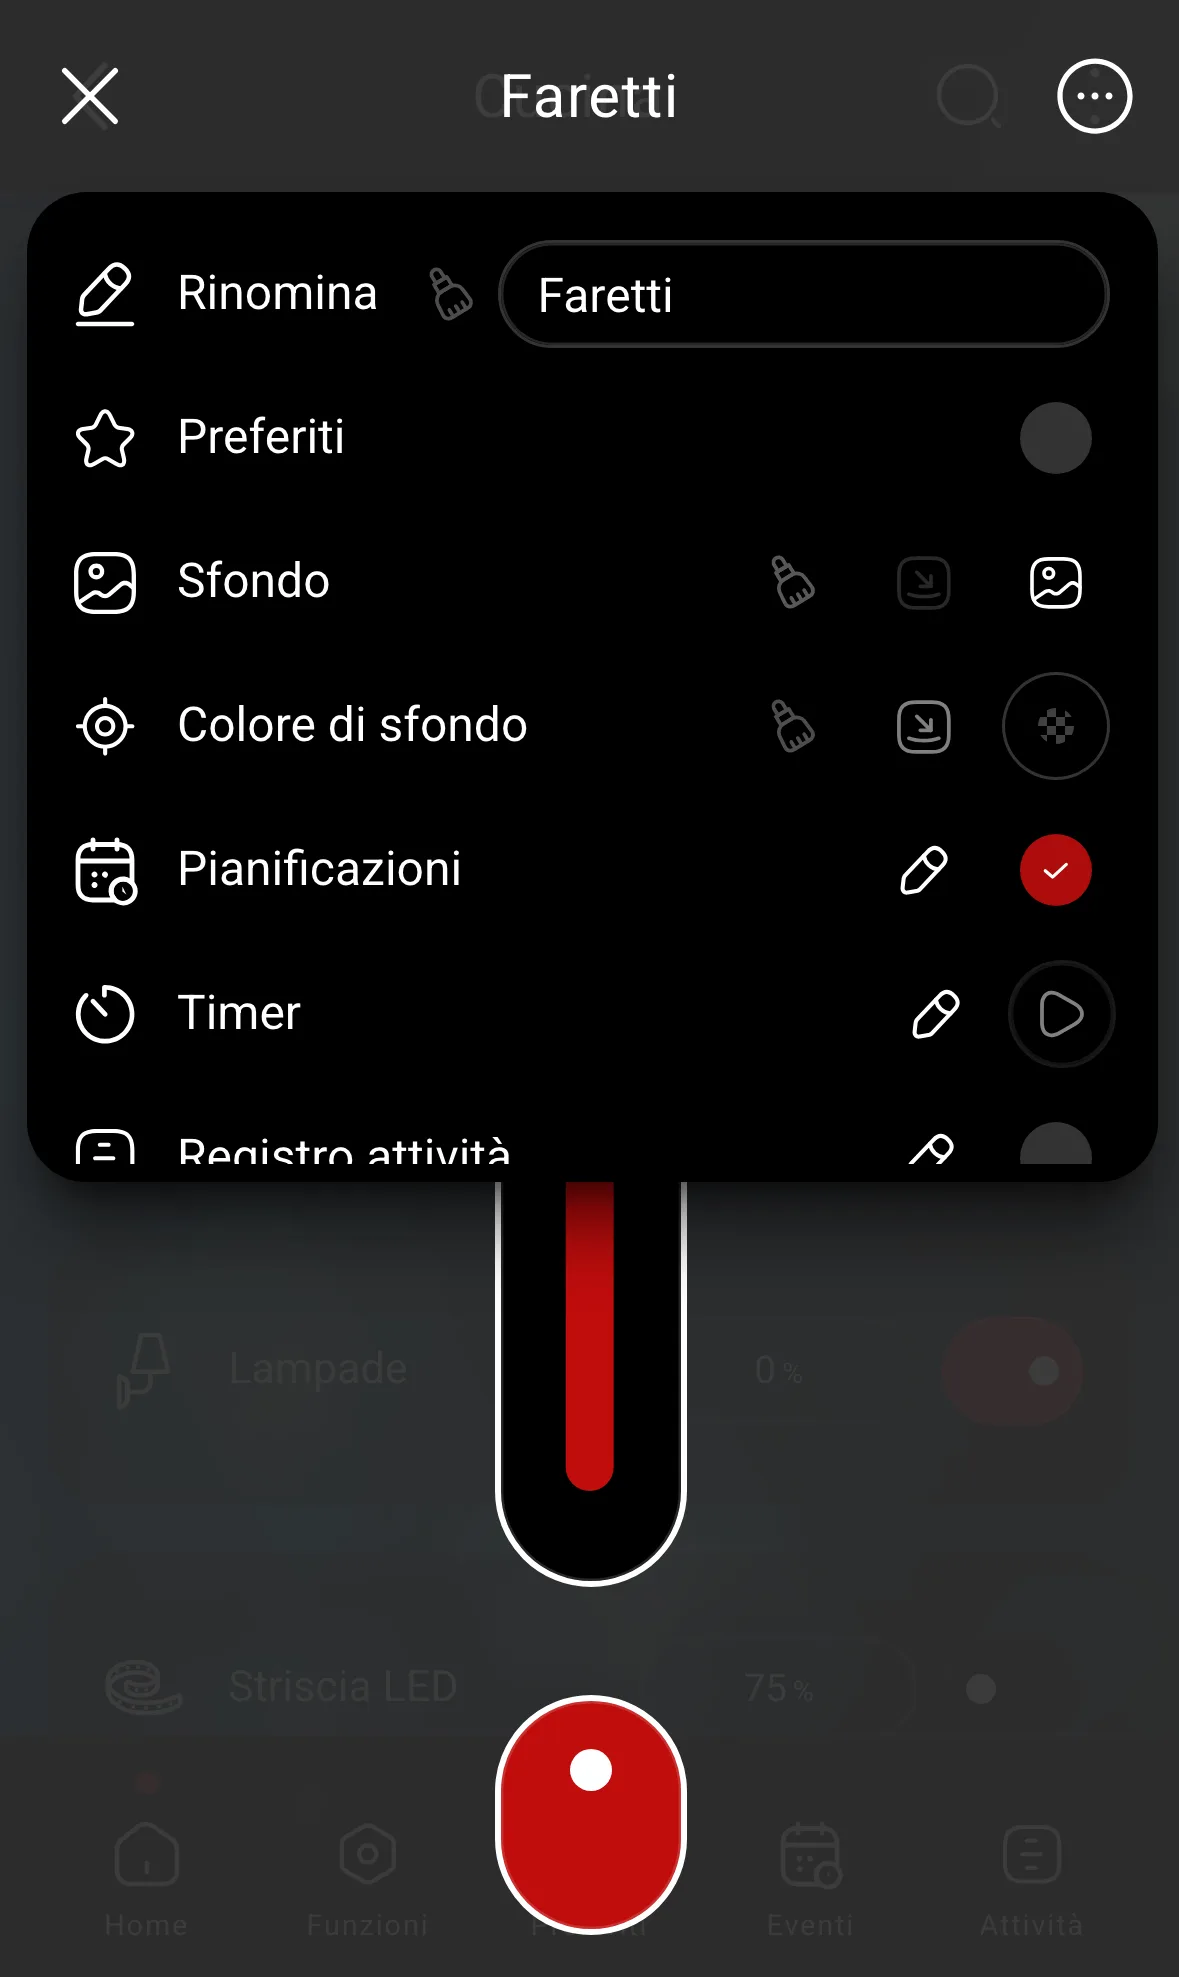
Left: Favorites with items from different rooms. Right: Device menu with the Favorites item and other options.
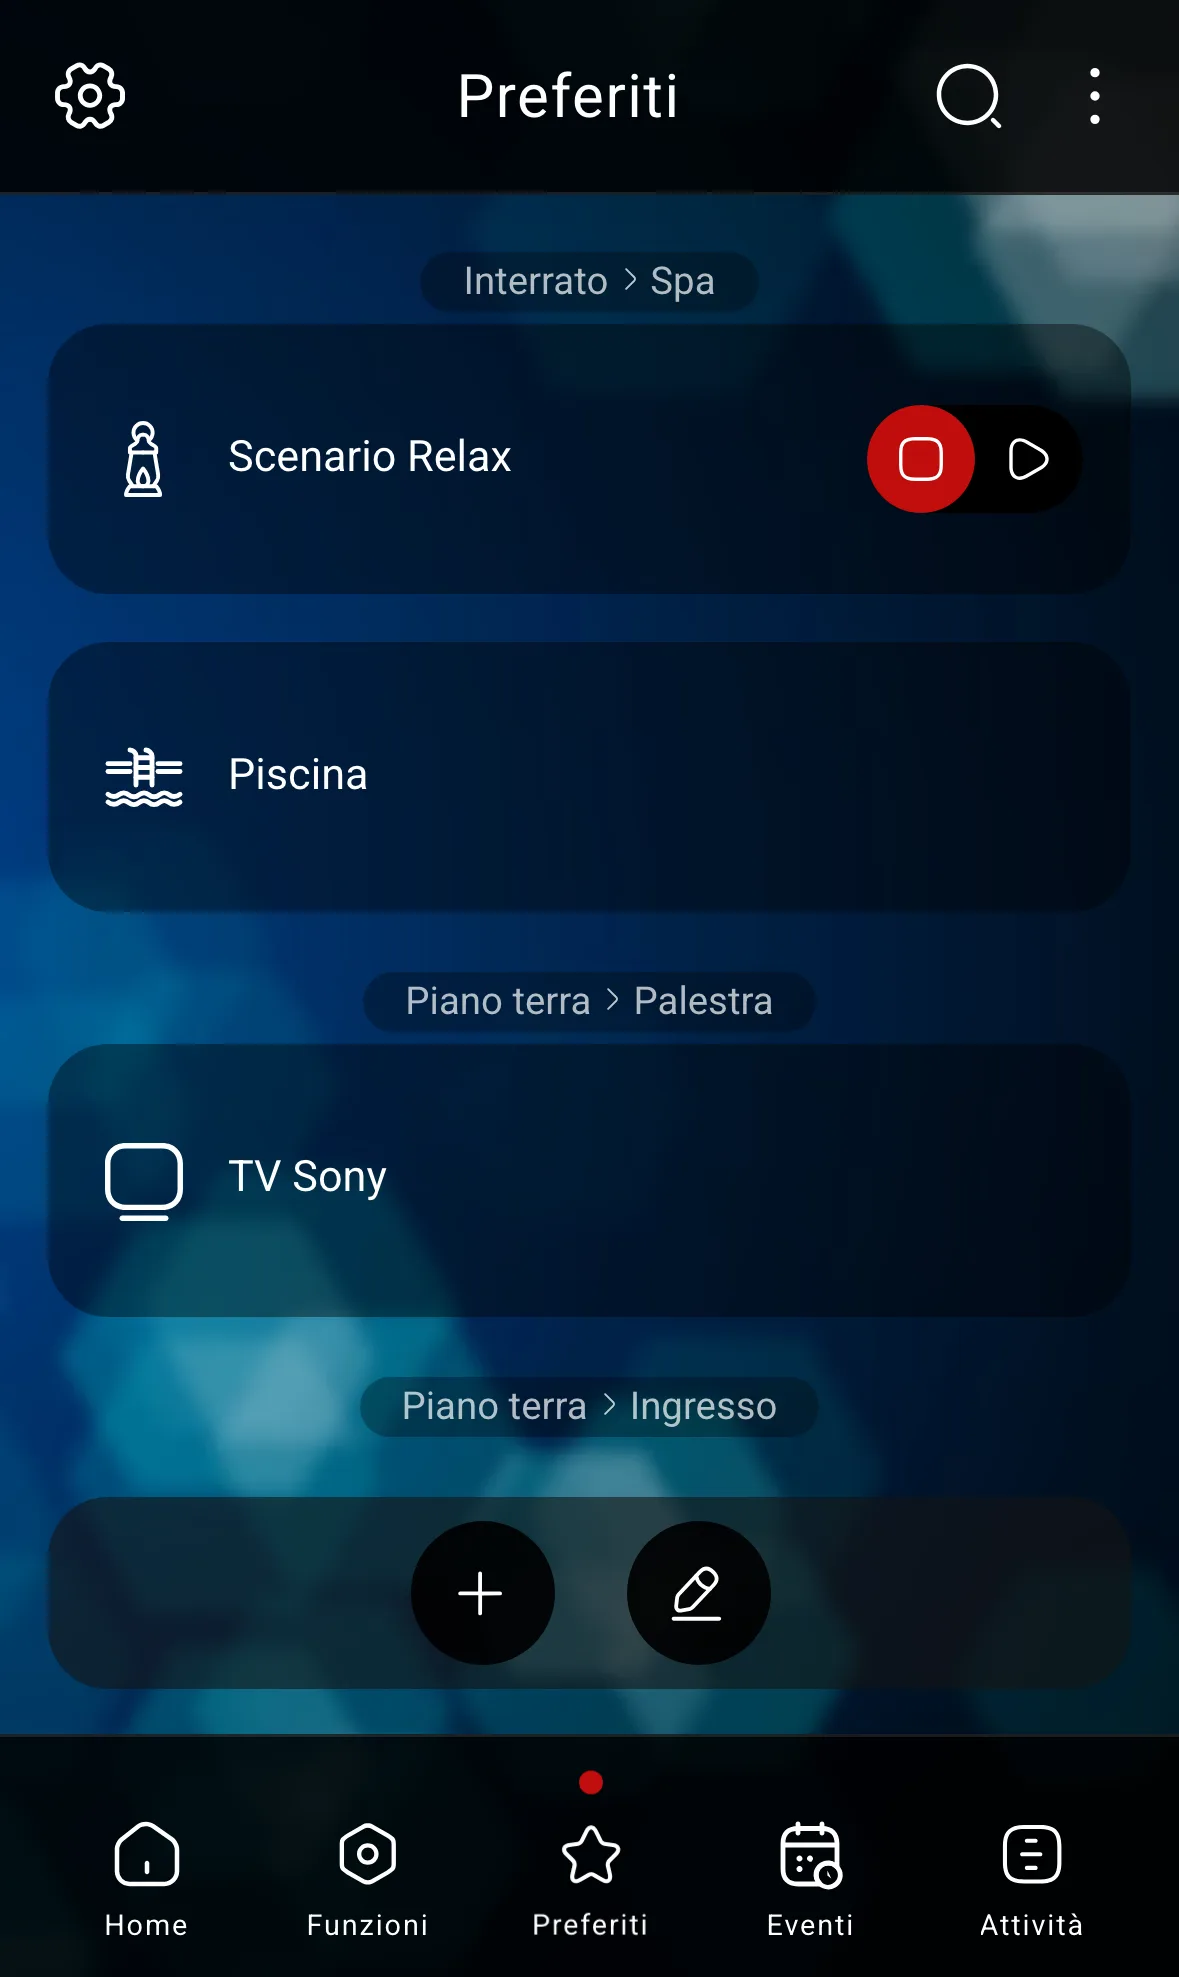
Accessing and selecting Favorites
Tap Favorites in the bottom bar.
Check the room path and open the desired item. Its commands remain those of the original device.
To choose whether to include a device in the collection, open its details and tap the three-dot menu.
Use the switch next to Favorites. Return to the collection and check the result. Available options depend on permissions.
Recalling a scenario
Open Functions → Scenarios, or find the scenario in the room where it is available.
Check the name and the actions associated with your system configuration.
Use the start command, shown by the triangle when available.
A scenario can act on multiple devices. The name can be customized: to know exactly what it will do, refer to your system configuration. The three-dot menu may also offer Schedules, Timer, Activity log and Notifications for the single device.
Viewing schedules and events
The Events section concerns scheduled actions. A schedule groups multiple events; each event contains the actions to be performed and the related time conditions. The Activity log is a separate section.
Left: Events in Edit view with the list of schedules. Right: View view with schedule, date, time and description.
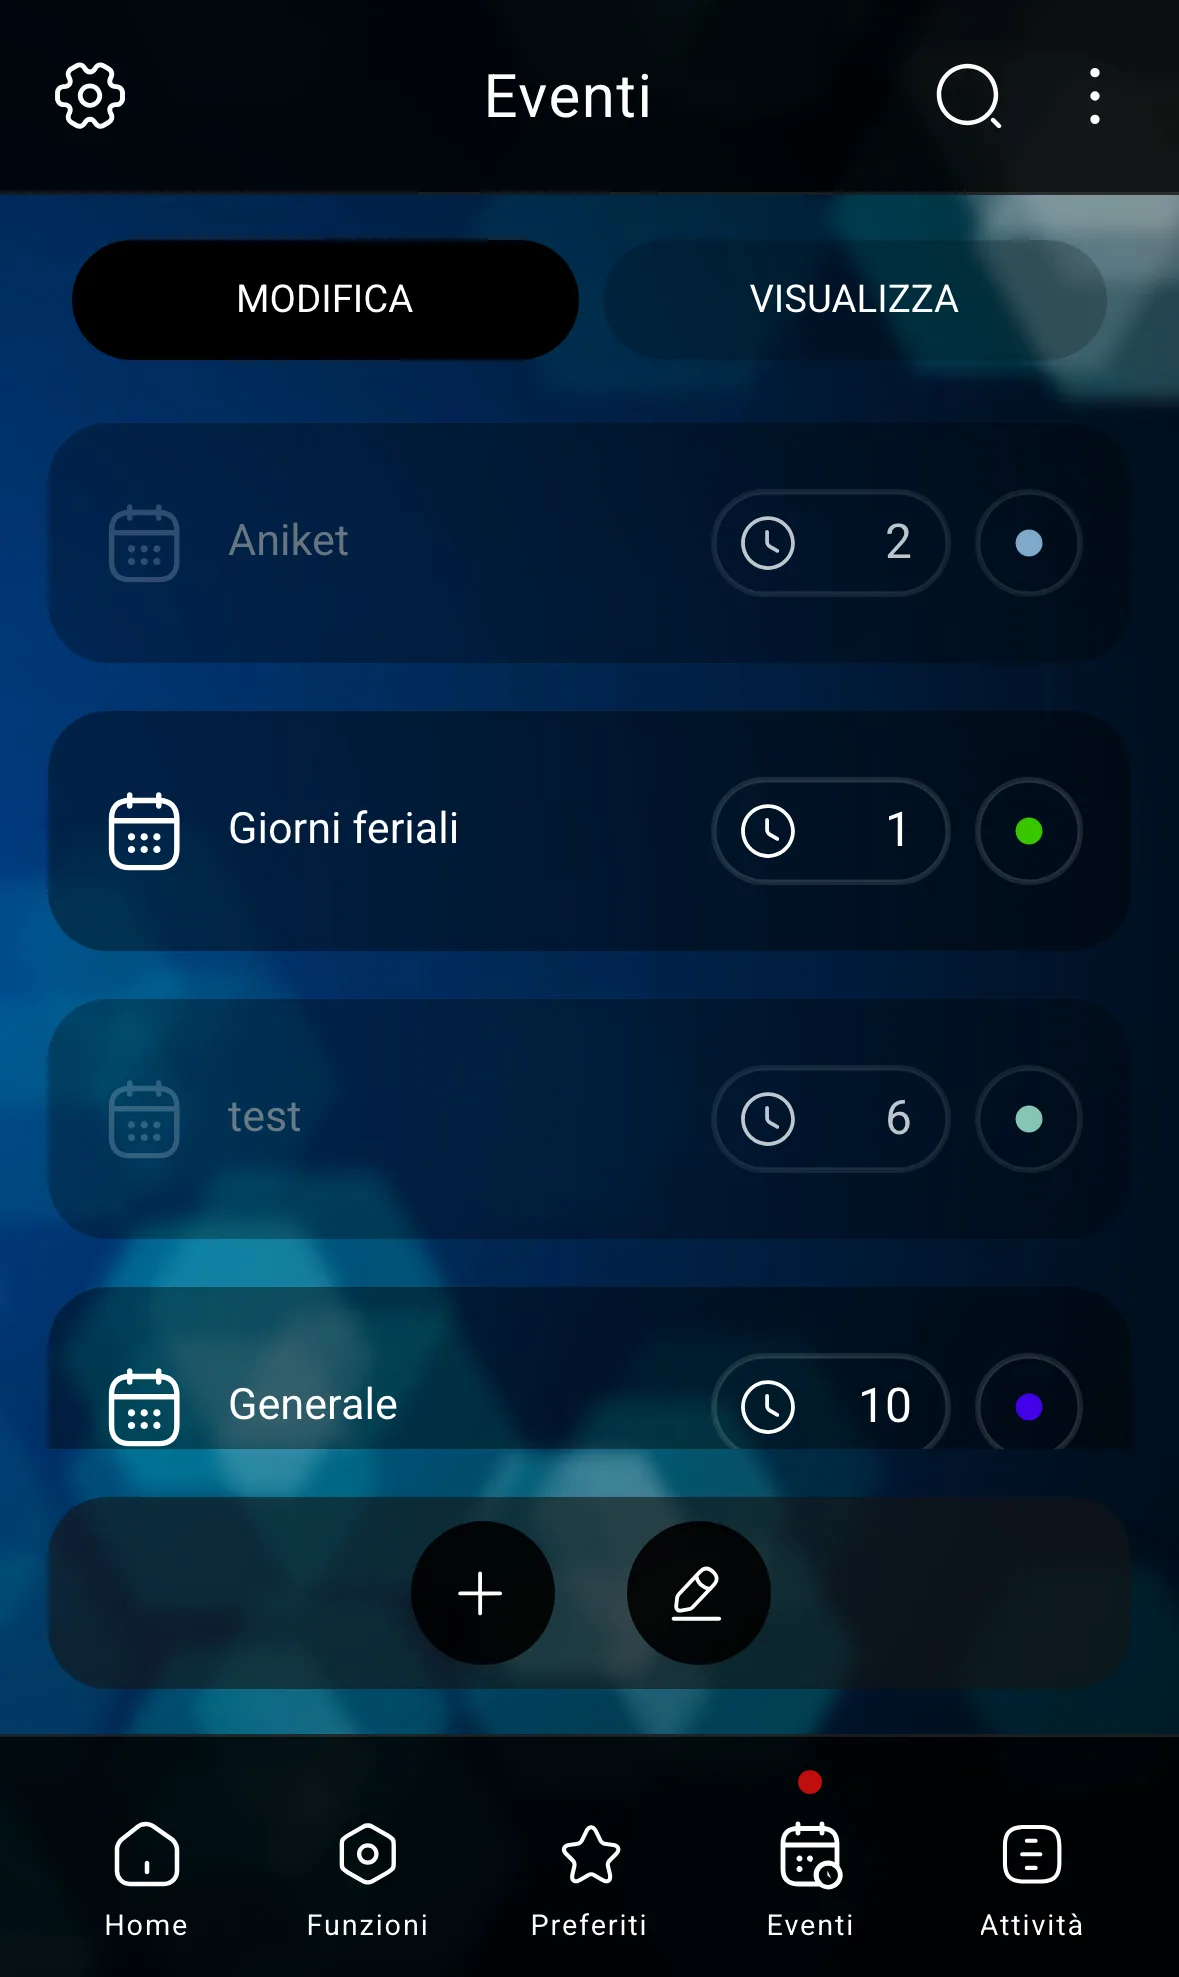
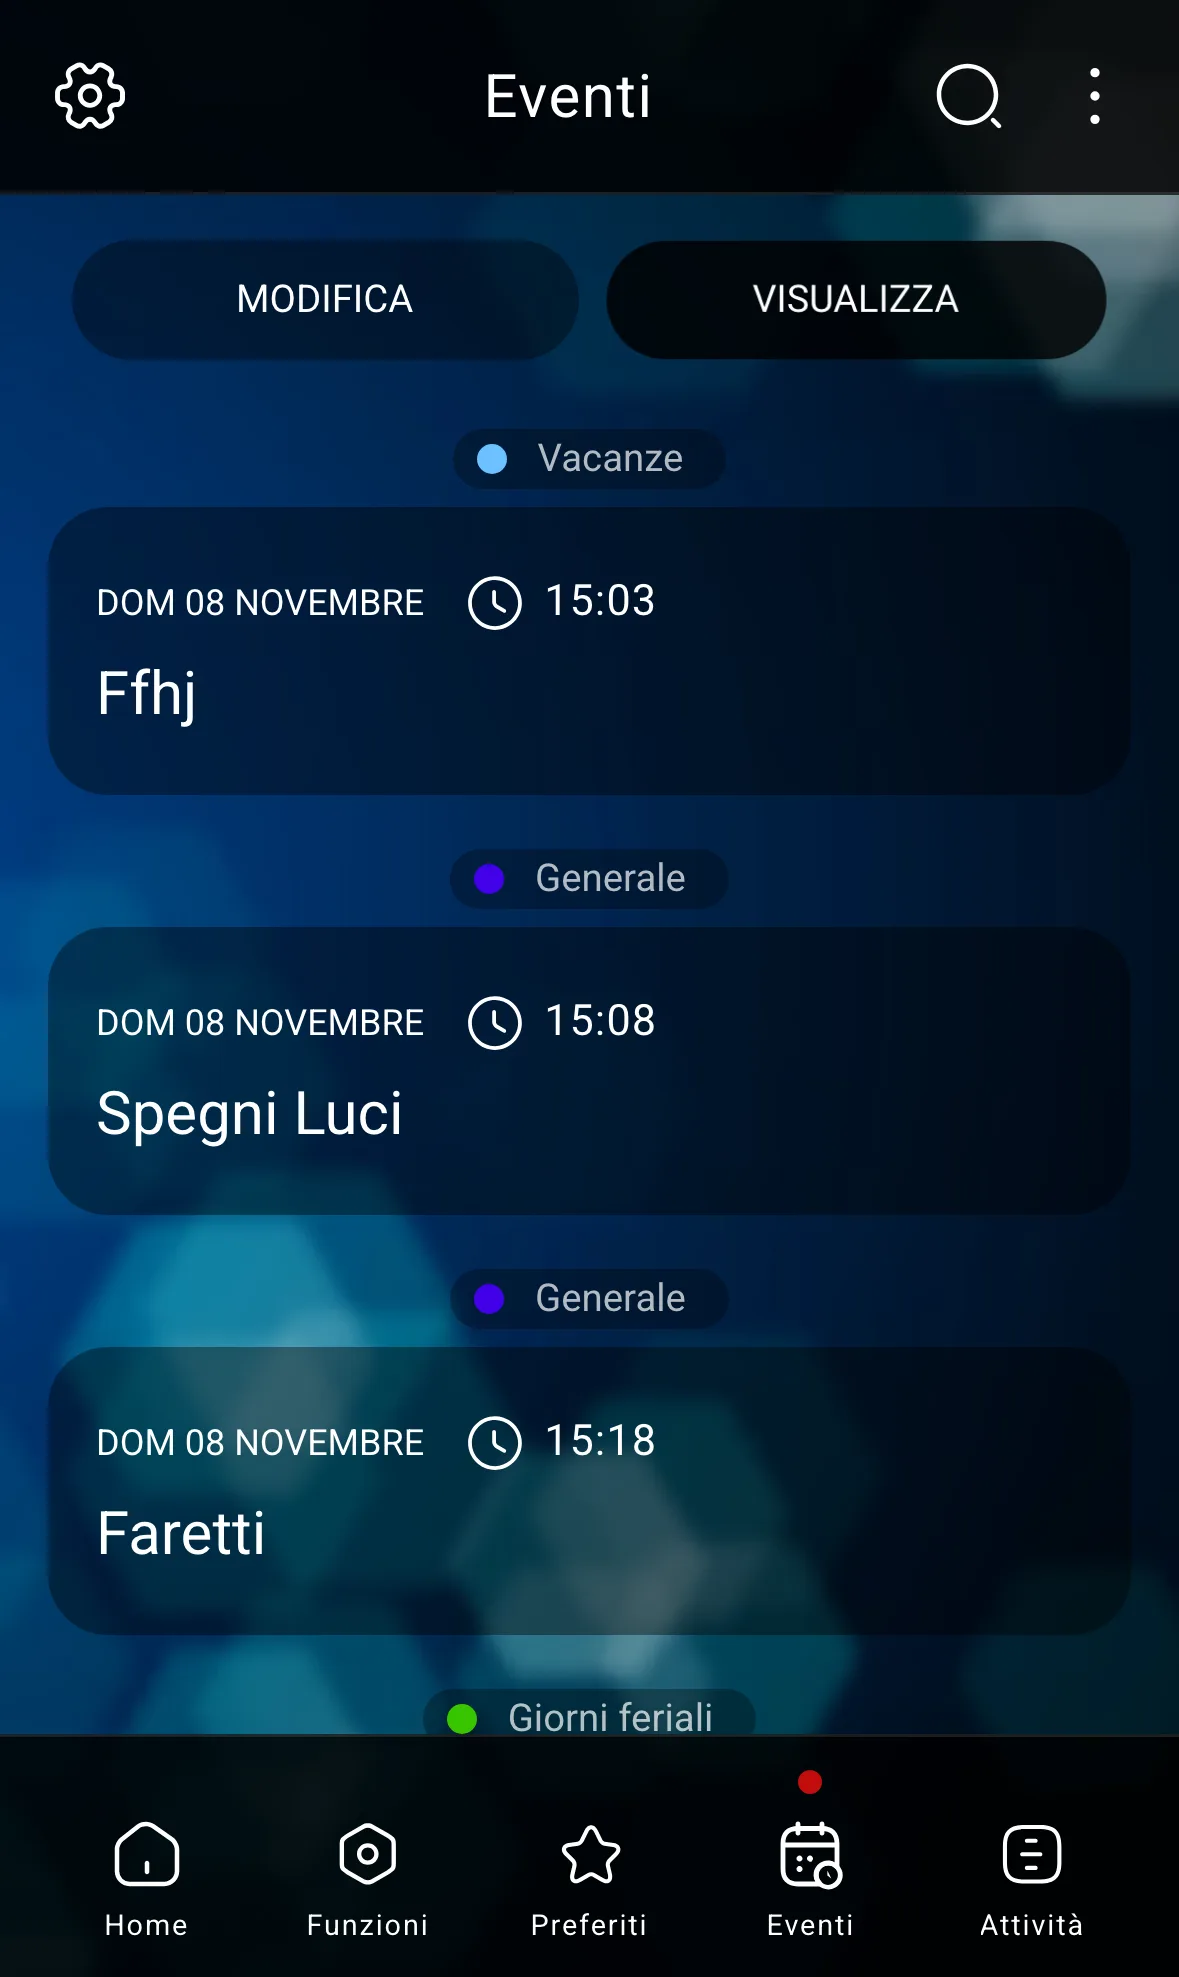
Understanding what is scheduled
Open Events from the bottom bar.
Select Edit to see the schedules, for example Weekdays or General.
Open the schedule to view its events.
Return to the list and select View to read the events in chronological order.
For each entry, check the schedule, date, time and description.
The View view helps you understand when actions are planned; it is not confirmation that they were executed. To verify what happened, check the device states and the activities available in the log.
Manual command or schedule
A manual command is requested while you are using the device. A schedule defines a future action. Before changing either one, consider the automations already configured: for their specific interaction, refer to the installer’s instructions.
Reading and preparing a schedule
The details of an event let you review the devices involved and the planned time for the action. Before confirming a change, check both the time and the associated commands.
Left: Event details with involved devices and OK button. Right: Time edit with Time, Sunrise, Sunset and time offset.
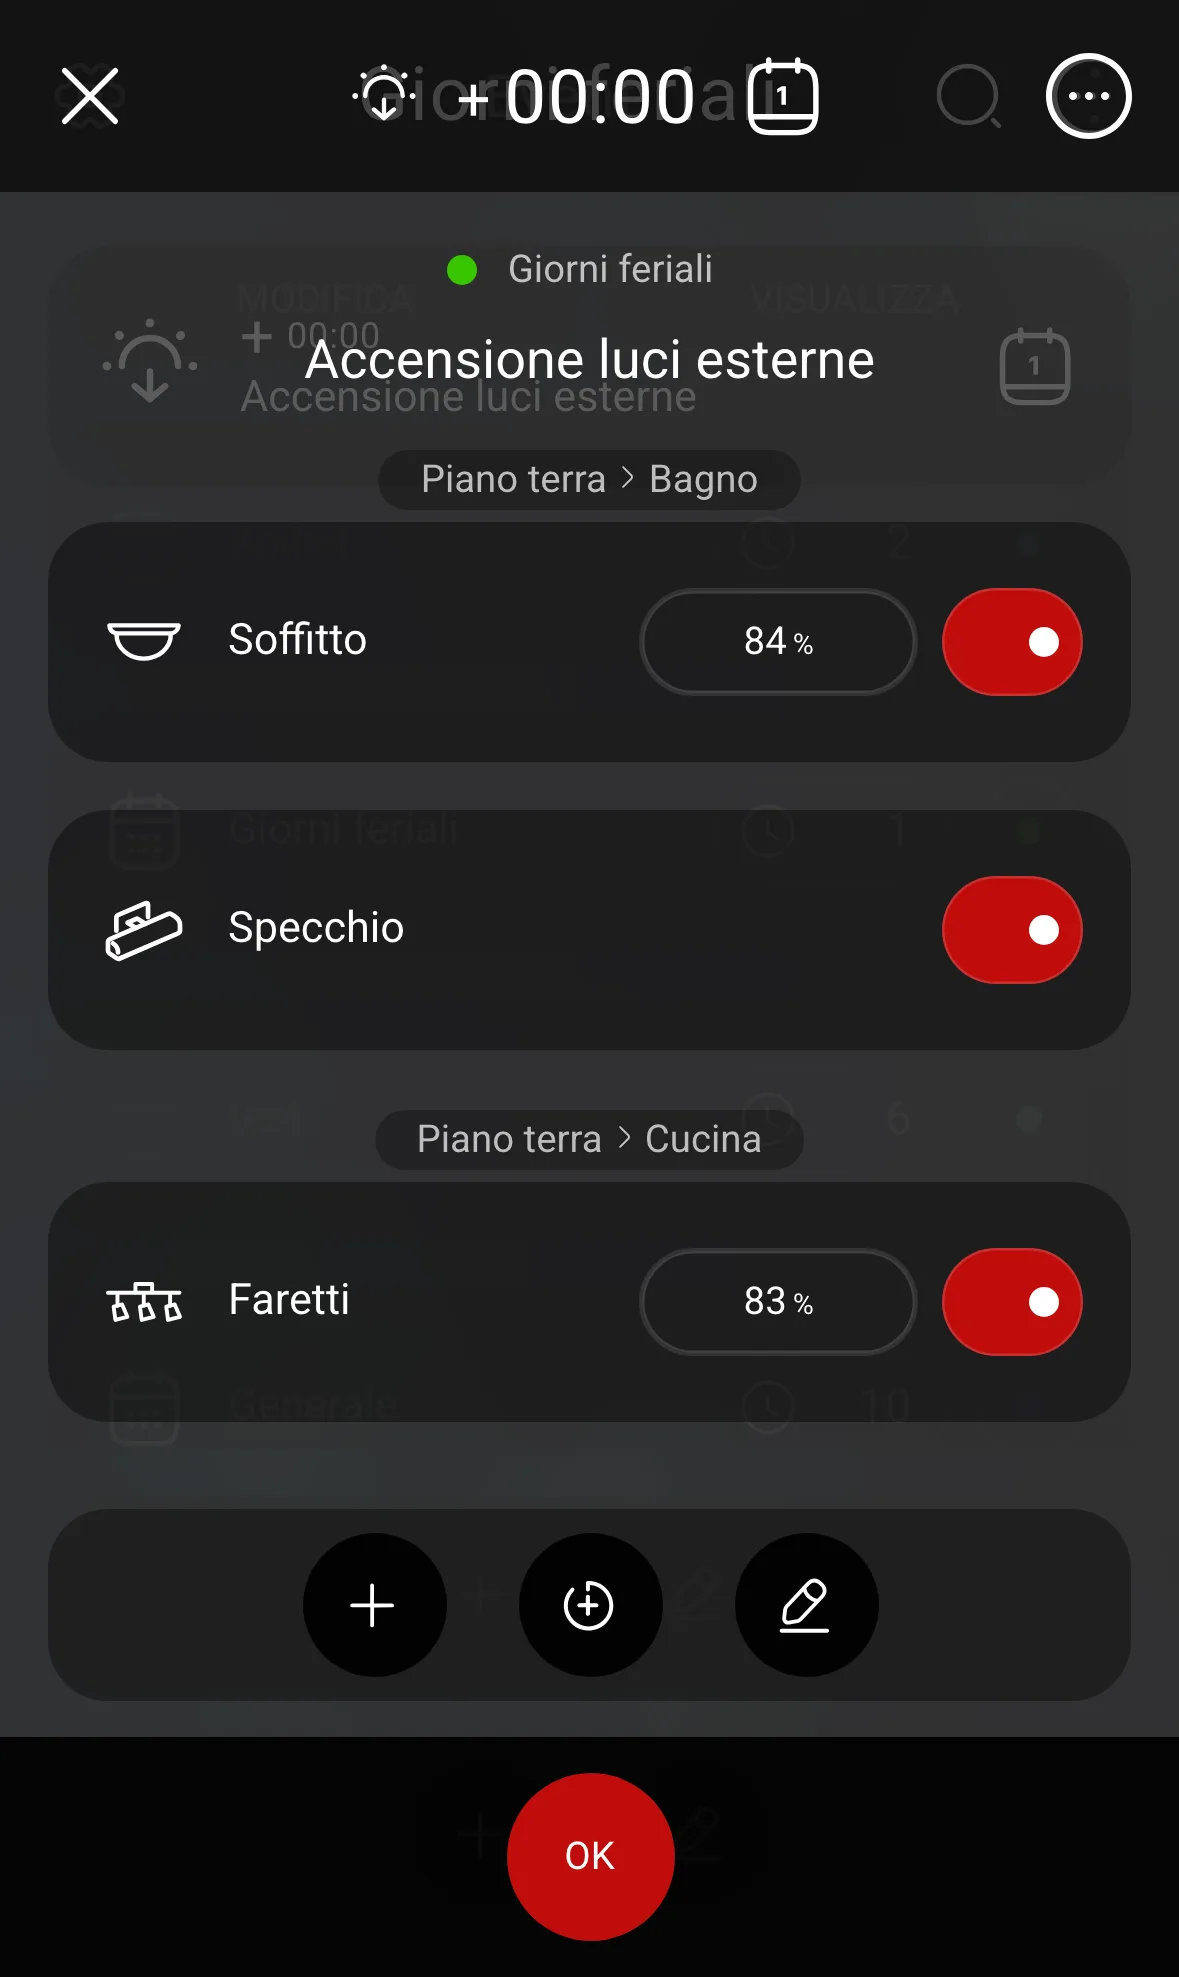
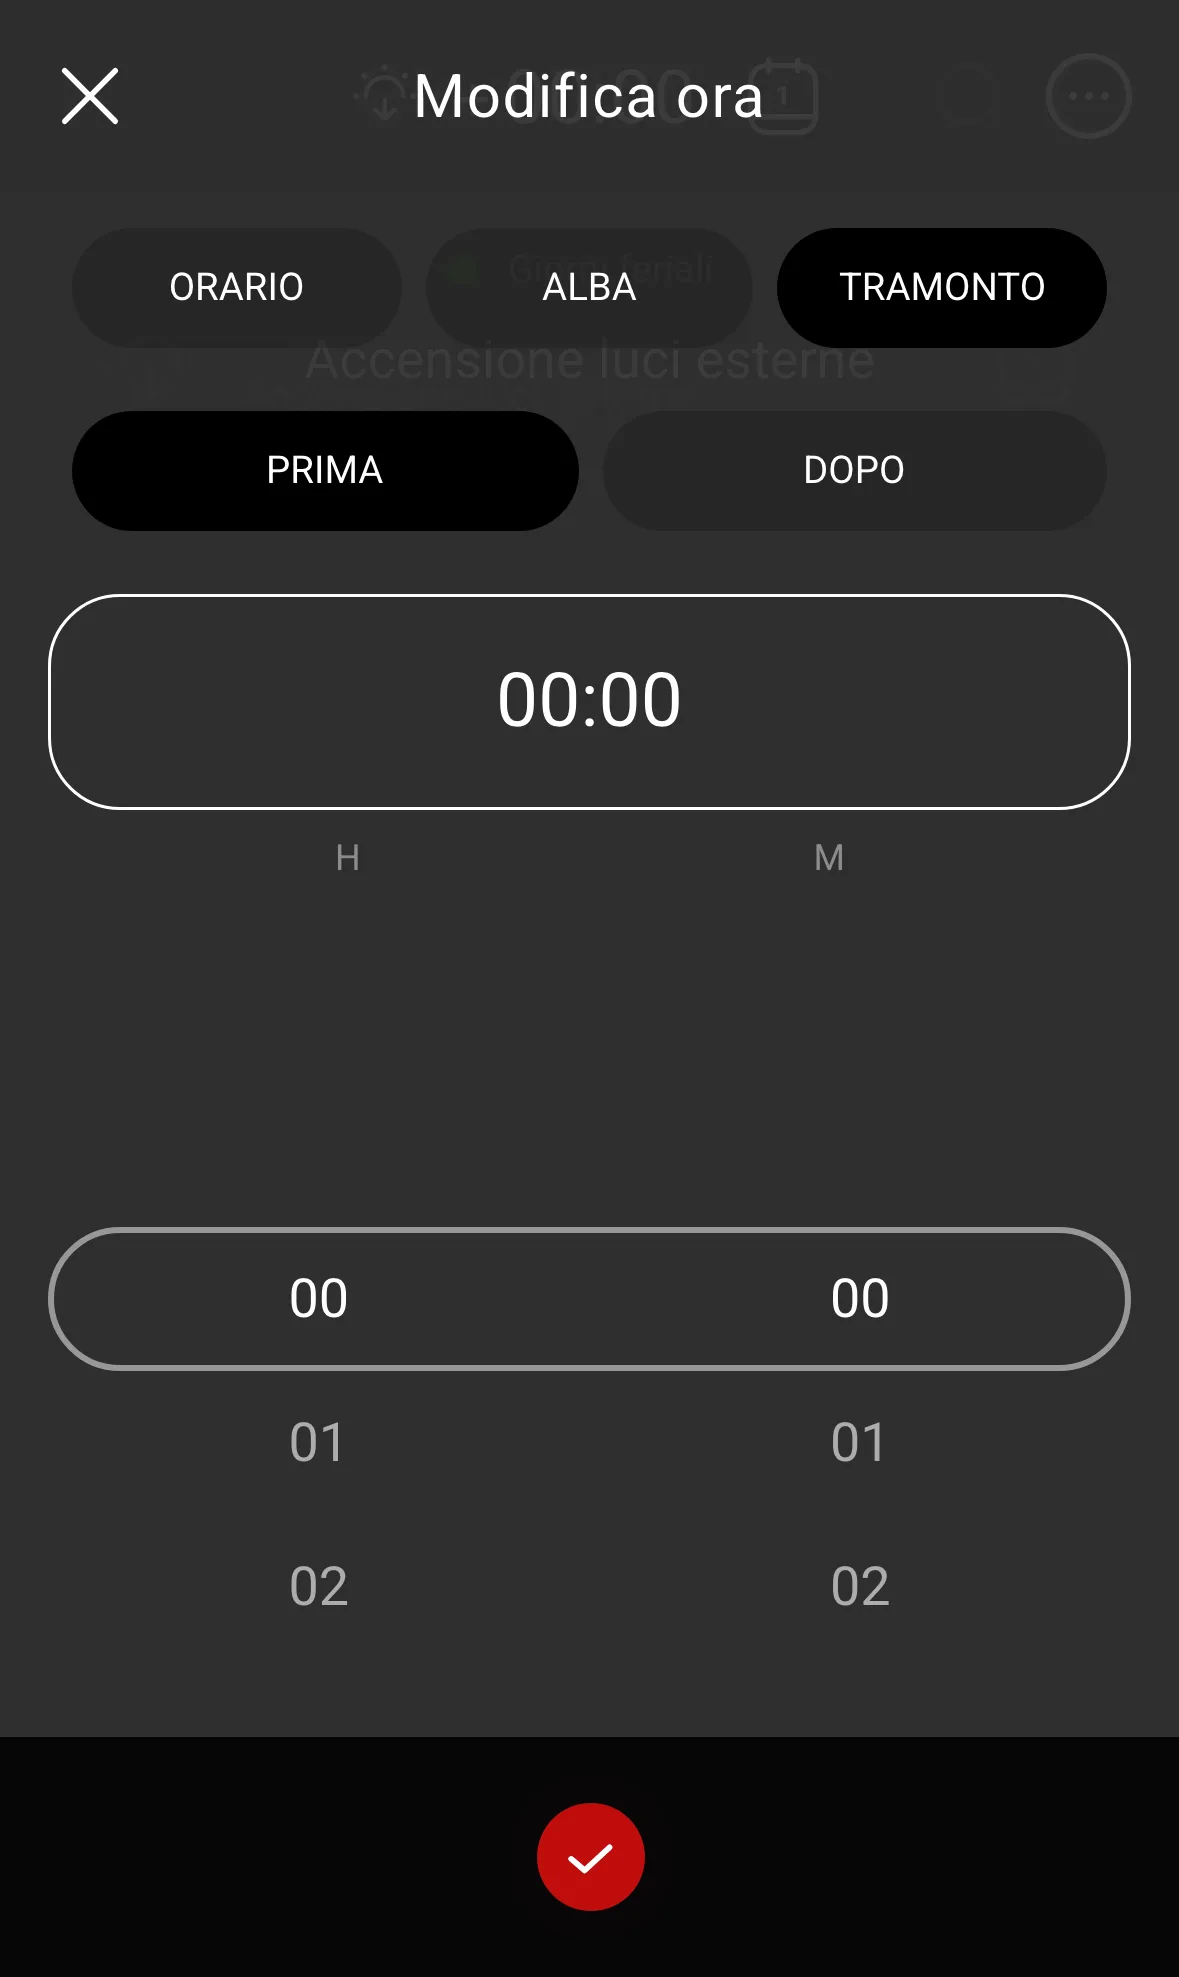
Reviewing an existing event
Open Events → Edit and choose the schedule.
Tap the event to open its details.
Read the name and check the rooms and devices included. The event name alone is not enough to identify all its actions.
Tap the time indication at the top to open Time edit.
Distinguish a fixed Time from a Sunrise or Sunset reference. With Before or After, the value indicates an offset from the selected reference.
Example: “Sunset, After, 00:15” means fifteen minutes after sunset; not 00:15. For sun-based events, also check that the system location is correct in the settings.
On screens that require confirmation, use the check mark and then OK only after checking the data. To leave without continuing, use X. Then verify the result in the list and in View.
If warnings appear about missing devices or unrecognized references, cancel the change and have the configuration checked. Creating new schedules and calendar rules requires a dedicated procedure, depending on the available configuration.
Viewing activity and settings
Use Activity to view the available log and Settings for app preferences. The items shown depend on your account, permissions and configured functions.
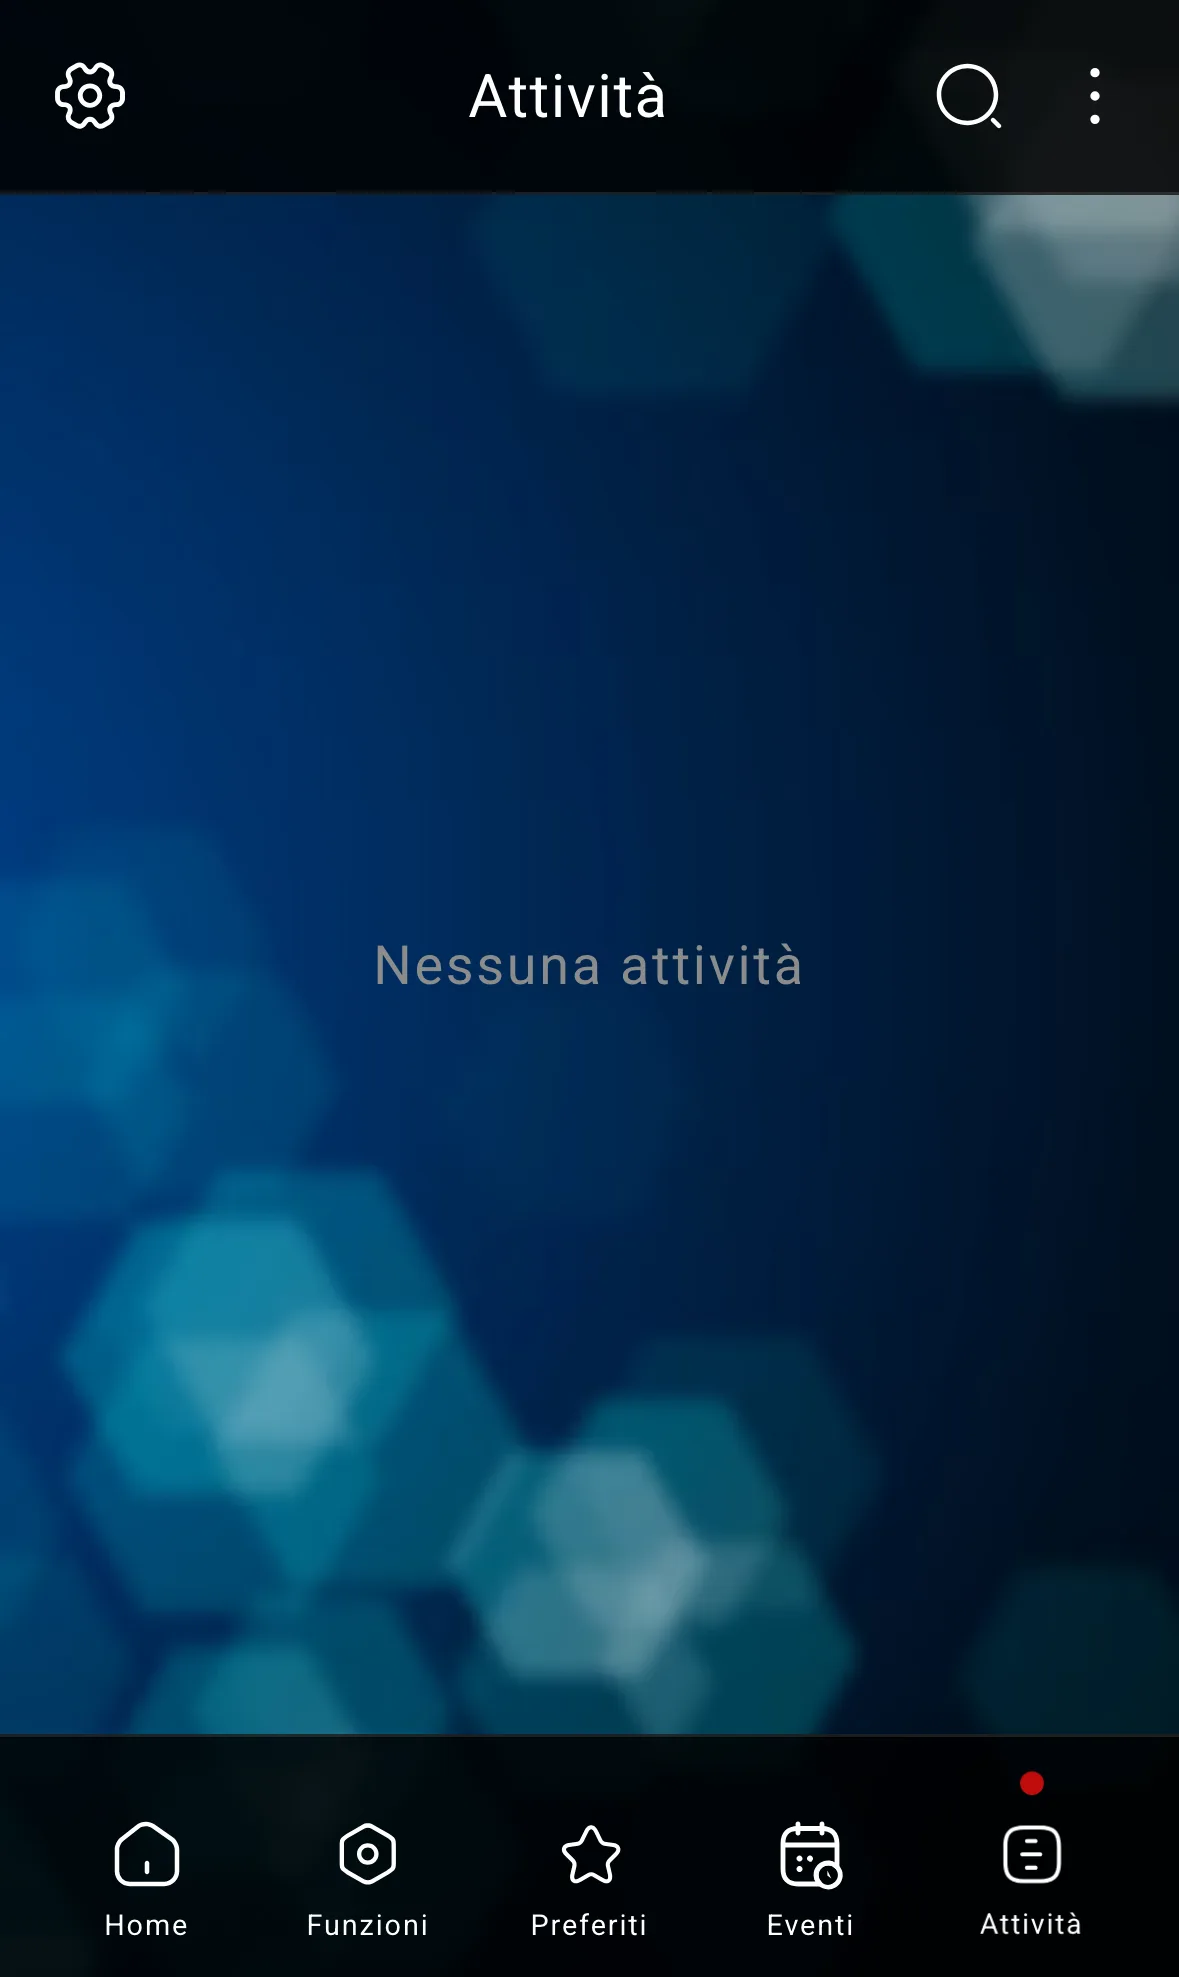
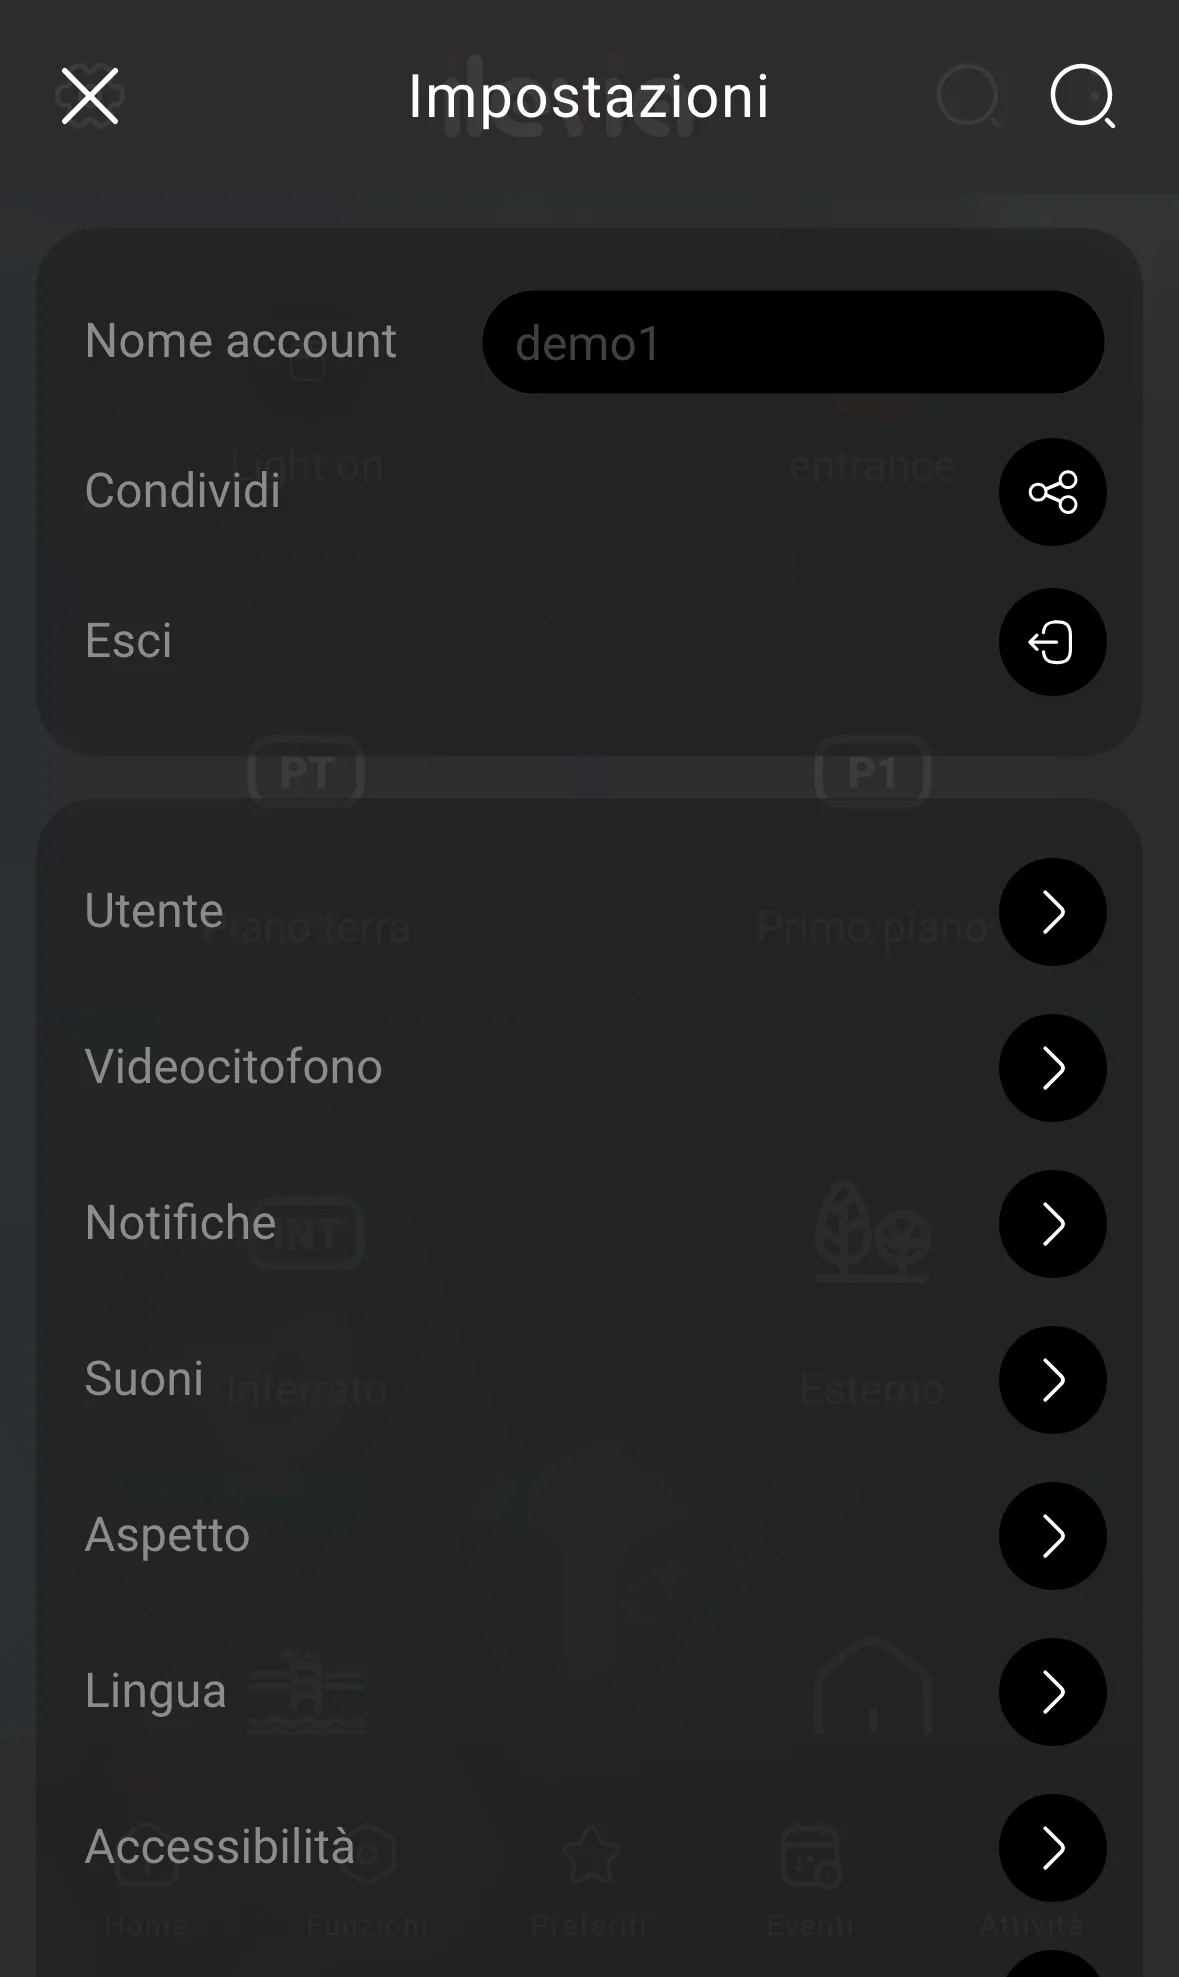
Left: Activity when there are no entries to display. Right: Settings with Language, Appearance, Notifications and other preferences.
Viewing the log
Tap Activity in the bottom bar.
Check the entries shown. The message No activity indicates that there are no items to display in this view.
If you are looking for information on a single device, also check the Activity log item in its three-dot menu.
The absence of entries neither confirms nor rules out the execution of a command. The availability of records depends on the configuration and accessible data.
Adapting the app to your preferences
From Home, tap the gear to open Settings. In Language, choose Italian; in Appearance you will find the available visual preferences. Notifications and Sounds concern alerts, while Permissions and Accessibility gather the options relevant to your usage environment.
Moving from the examples to your own system
The images in this guide are taken from the Smartphone demo, with Italian interface, accessed on 8 November 2026 at https://app.ilevia.com. The demo helps you learn the paths and controls; it does not validate the response of a physical system. In real use, always verify the correct device, the connection, and the resulting status.
If a function is missing, a value does not update, or a command does not produce the expected result, provide support with the environment, the device name, and any displayed message.