
Vivaldi Multiroom Giove
How to integrate Vivaldi Giove CA20/21 and Giove FreeNET multiroom systems with the ILEVIA server: guided procedures in ilevia Manager and components created for each zone.
The Vivaldi Giove multiroom systems distribute audio across multiple areas of the home. ilevia Manager integrates them with two guided procedures, which create all the components for each zone: power on, mute, source, volume, tone, radio, and track information. For the overall overview, see Multimedia devices.
Commands are handled by the server logic: install the Logic module and, after loading the project, wait a couple of minutes for it to start.
Giove CA20/21
Step 1. In the Components tab, open the Multimedia category in the Components Library and drag Vivaldi Multiroom Giove CA20/21 into My components.
Step 2. Fill in the wizard:
Field | Meaning |
|---|---|
Name | Name of the gateway and group. |
Gateway Type | How the matrix is connected: serial port iCONTROL4.0 RS232 - A or - B, or TCP/IP. With TCP/IP, Gateway IP Address and Gateway Port appear (default 10001). |
Giove ID | Giove matrix identifier. |
Start From ID | Number of the first zone (Giove Free) to be created. |
Number of Devices | How many zones to create. |
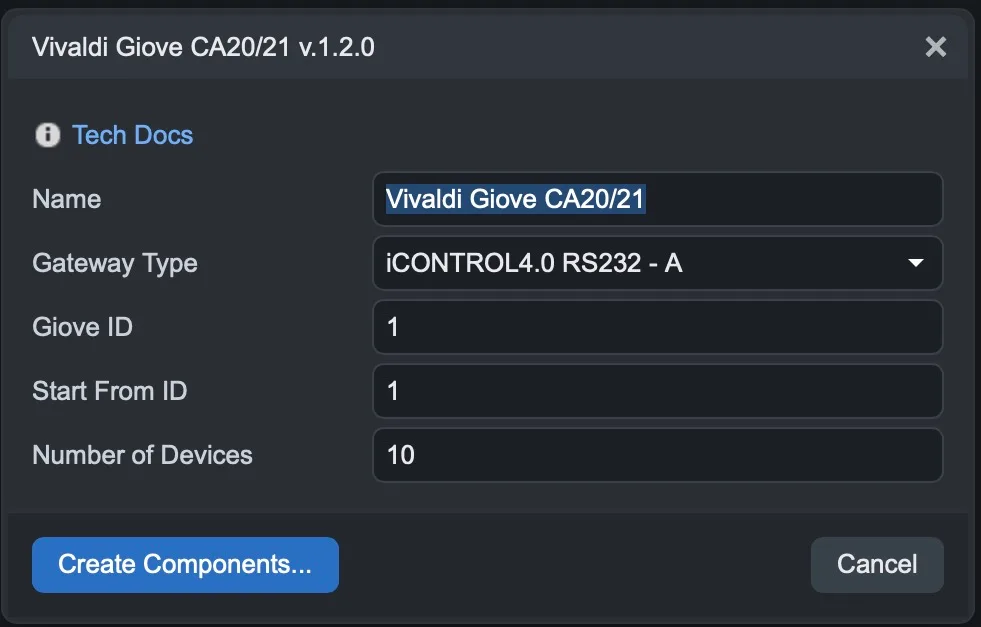
Step 3. Press Create Components…. The group is created with:
CA20/21: the matrix Scenarios and IR commands;
a Giove Free group for each zone, with On/Off, Mute, Source, Volume, Bass, Treble, Radio Tuner and Track and Album information.
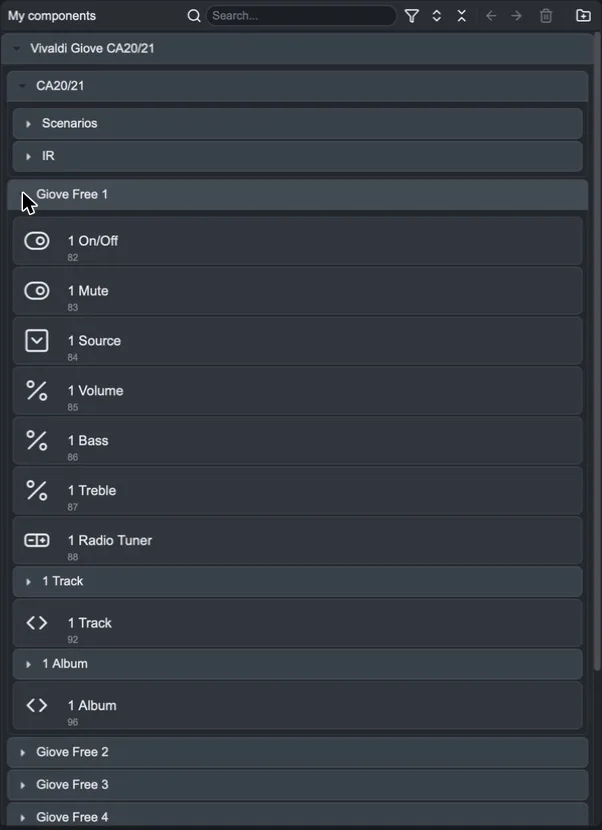
Giove FreeNET
Step 1. Drag Vivaldi Multiroom Giove FreeNET into My components.
Step 2. Fill in the wizard:
Field | Meaning |
|---|---|
Name | Name of the gateway and group. |
Gateway Type | The port to which the Giove units are connected: iCONTROL4.1L RS485-A/B, iCONTROL4.0+ RS485-A/B, EVO Vision, CA28 Light/Plus or TCP/IP. |
Device Type | The model: Giove FreeNET MK3, Giove FreeSource MK3 or Giove FreeNET MK2. |
Start From ID | Address of the first device. |
Number of Devices | How many devices to create. |
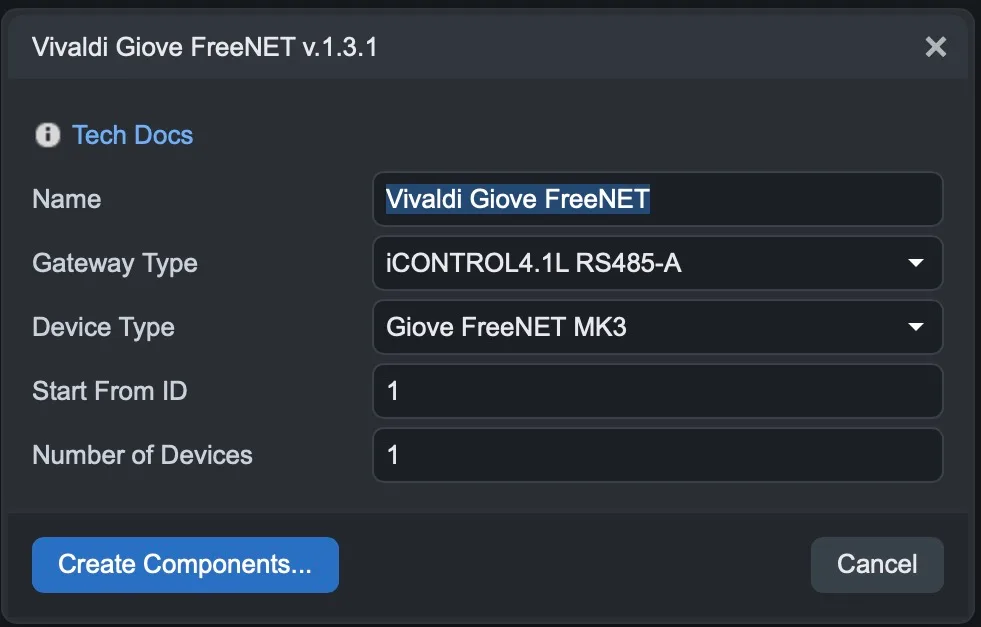
Step 3. Press Create Components…: a group is created for each device with its commands.
Finish
Add the components to the user interface and upload the project with Project > Upload to server.