
Installation and update of the Logic module
How to install and update the Logic module (Ilevia Logic) on the Ilevia server from Ilevia Manager or from the web interface, and how to check its version and status.
Installing the Logic module from Ilevia Manager
LOGIC MODULE INSTALLATION FROM ILEVIA MANAGER
Start Ilevia Manager. Select “Project” from the menu bar and then “Connect” (Figure 1).
The connection window will open, where you must enter the correct details to connect to the server (Figure 2).
This process allows Ilevia Manager to remain connected to the Ilevia server.
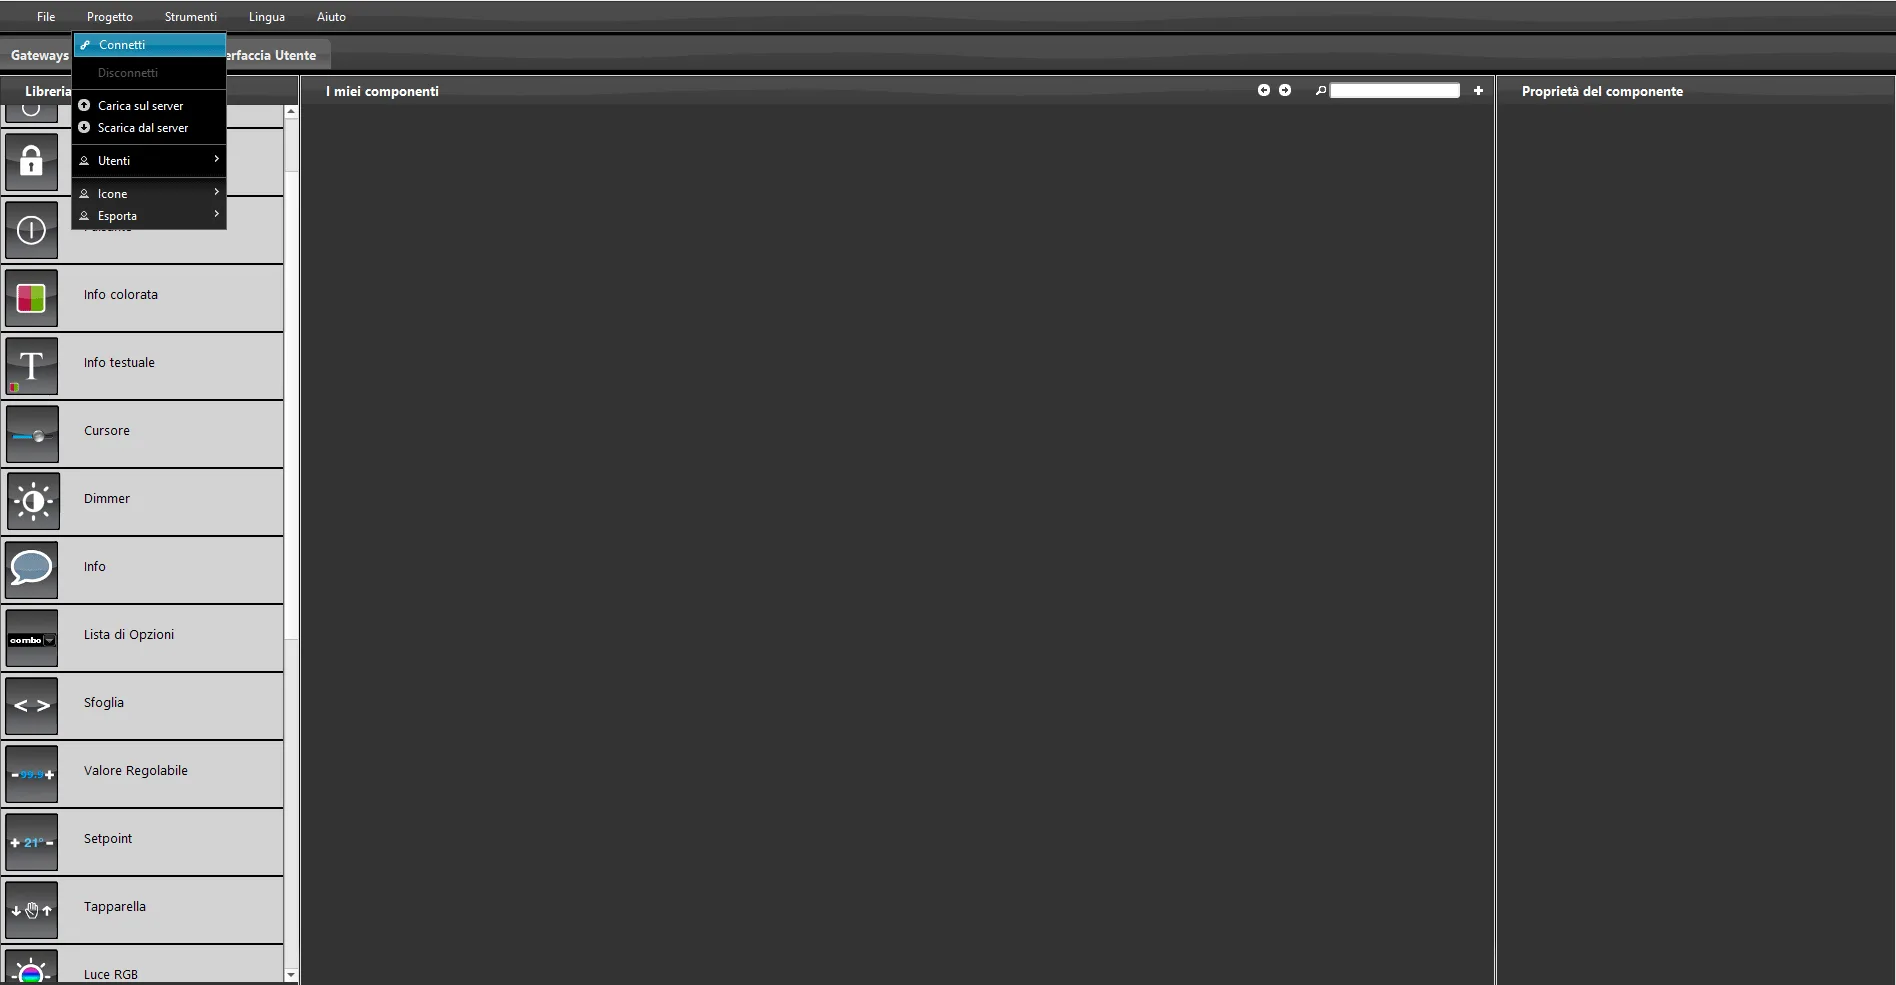
Figure 1
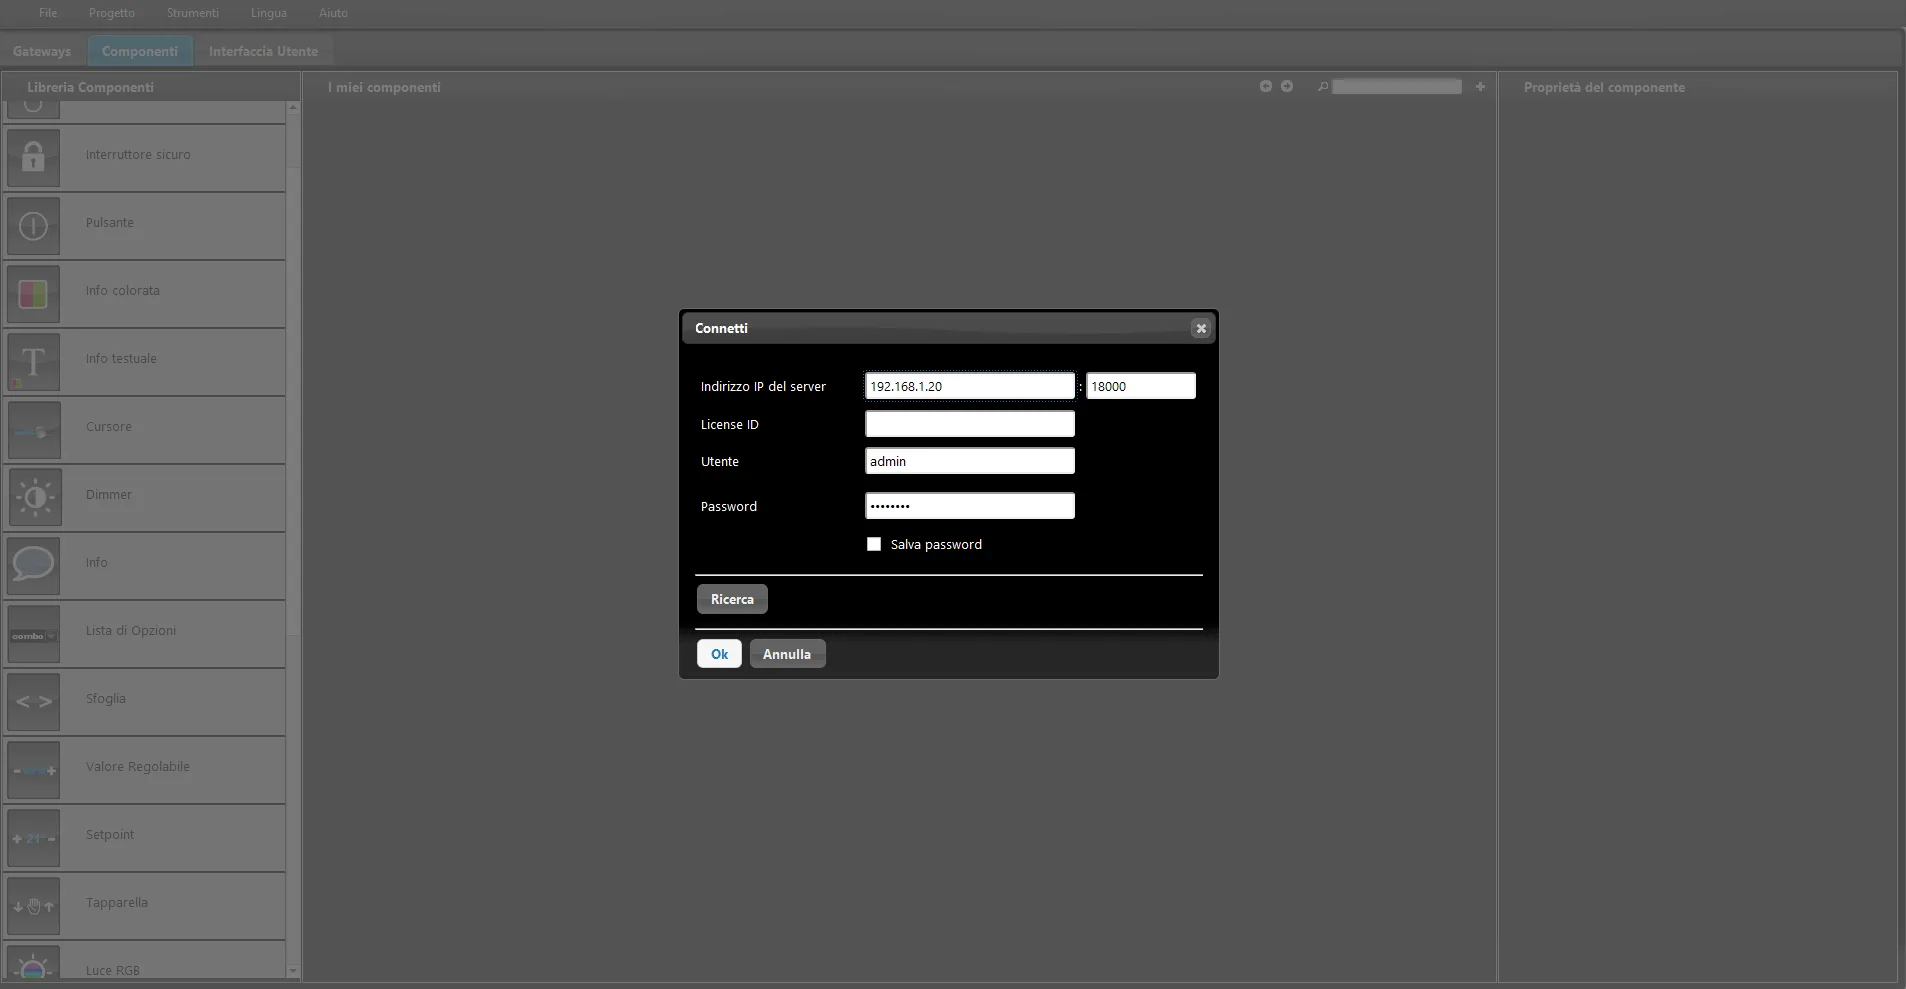
Figure 2
Select “Tools” from the top menu and then “Additional modules” (Figure 3).
The additional modules window will open, where you can find the download for Ilevia Logic and the list of all available additional modules (Figure 4).
Select “Download to PC” to download the available module update. This option appears only if an update is available.
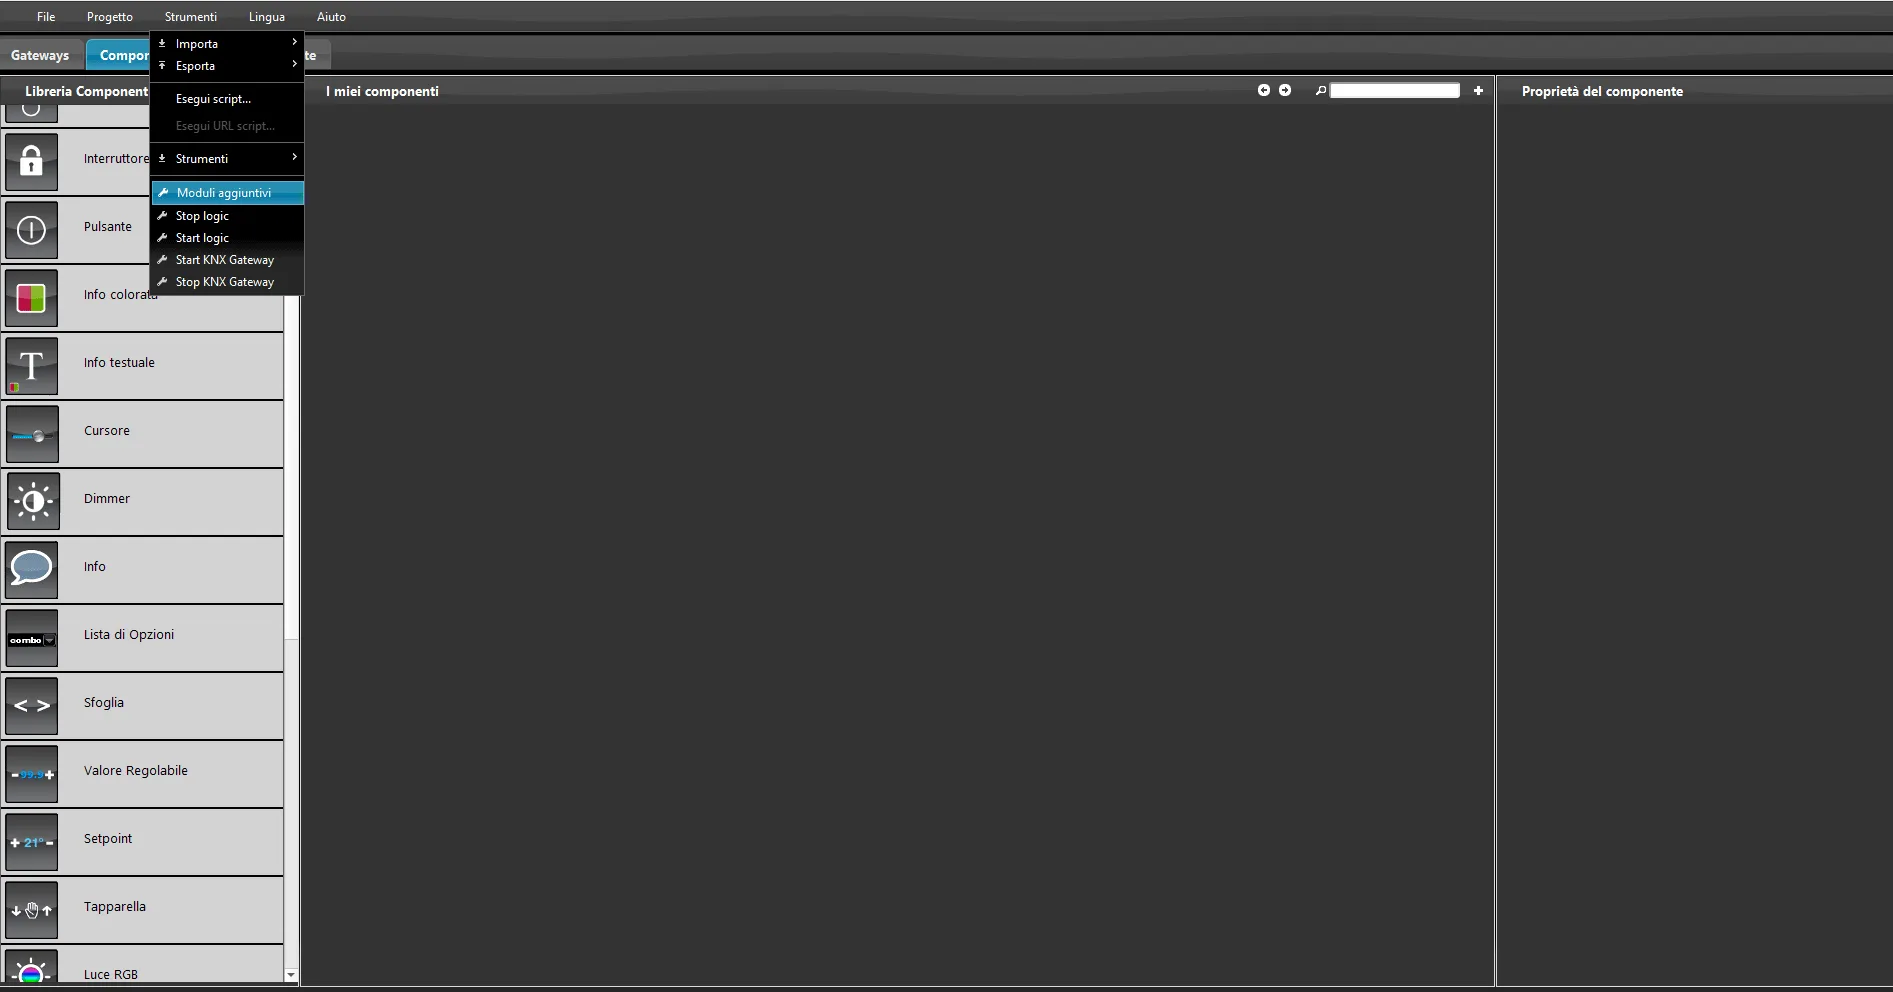
Figure 3
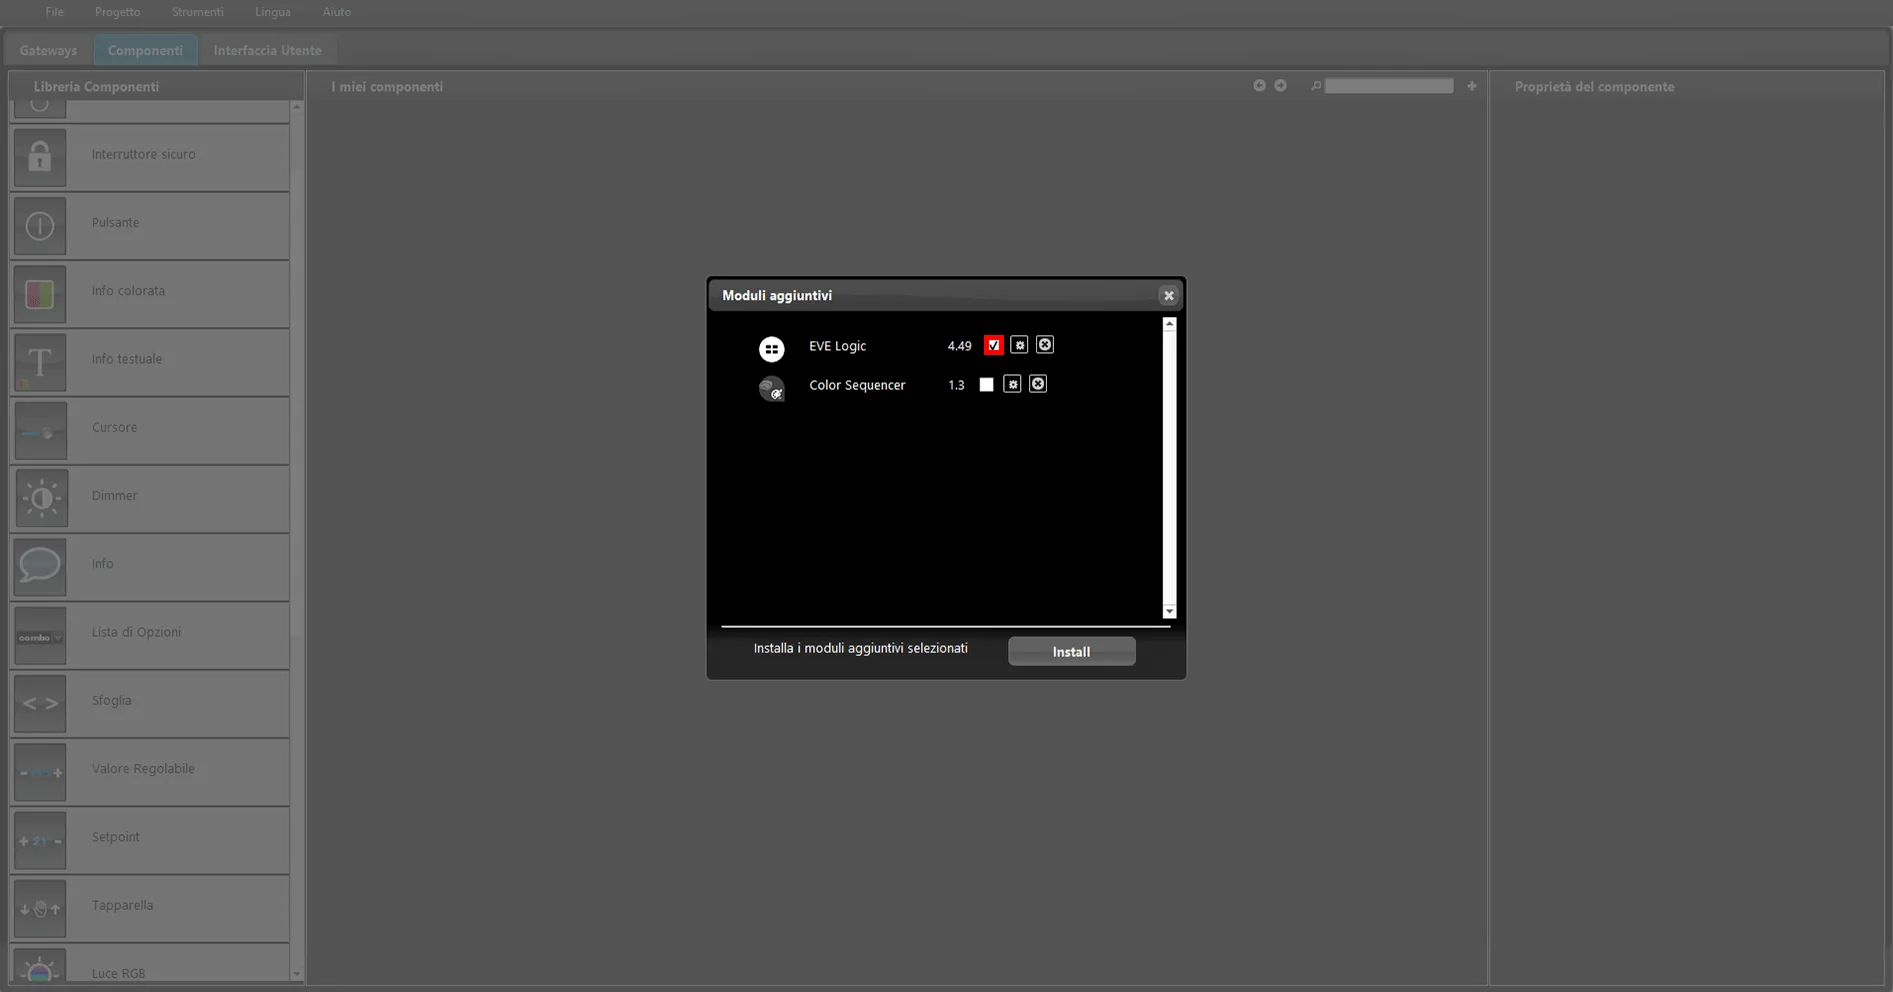
Figure 4
After downloading, you must complete the installation on the Ilevia server; otherwise the additional module will not work.
Select the checkbox for the Ilevia Logic module, then click the “Install” button to install it on the Ilevia server (Figure 5).
Once installed, the plugins will work correctly.
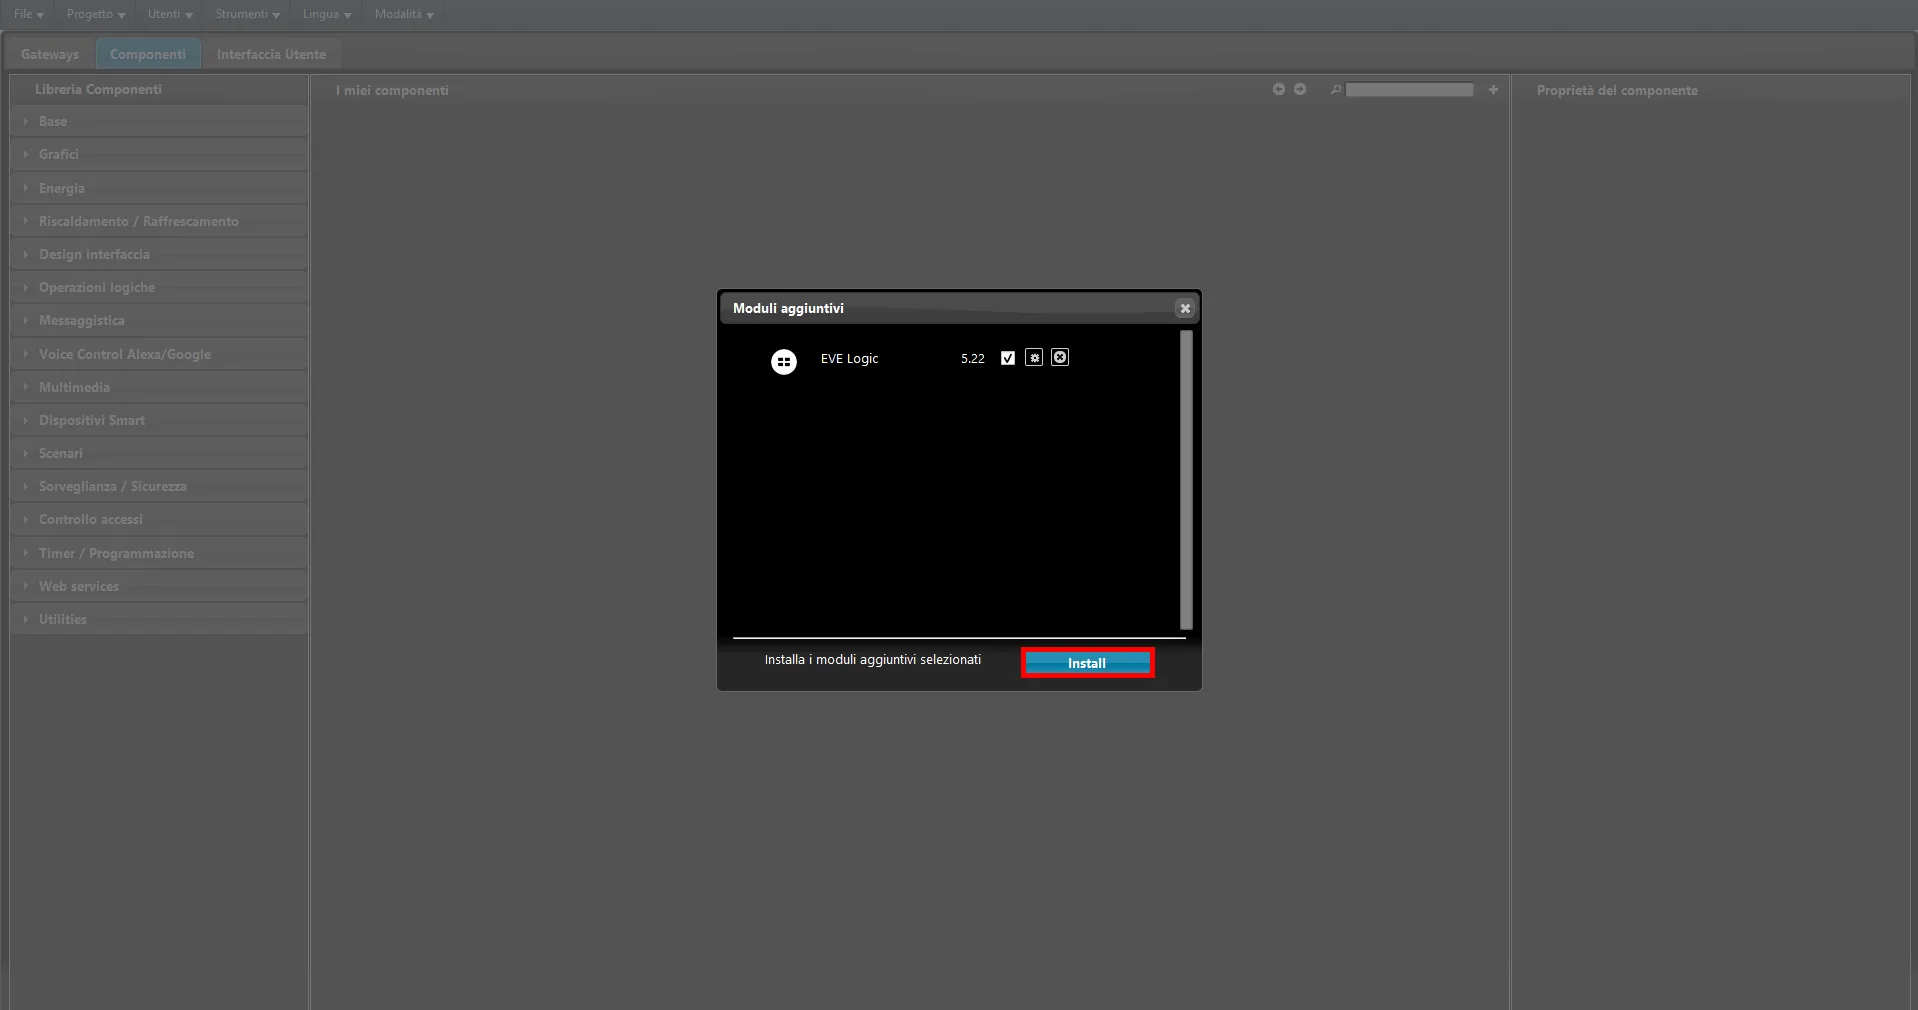
Figure 5
Updating the Logic module from the web interface
Step 1:
Connect to the web interface of your Ilevia server: open the browser and enter the server IP address.

Step 2:
Enter your credentials: the administrator password, if you have changed it, otherwise the default password (password). Then press Enter.
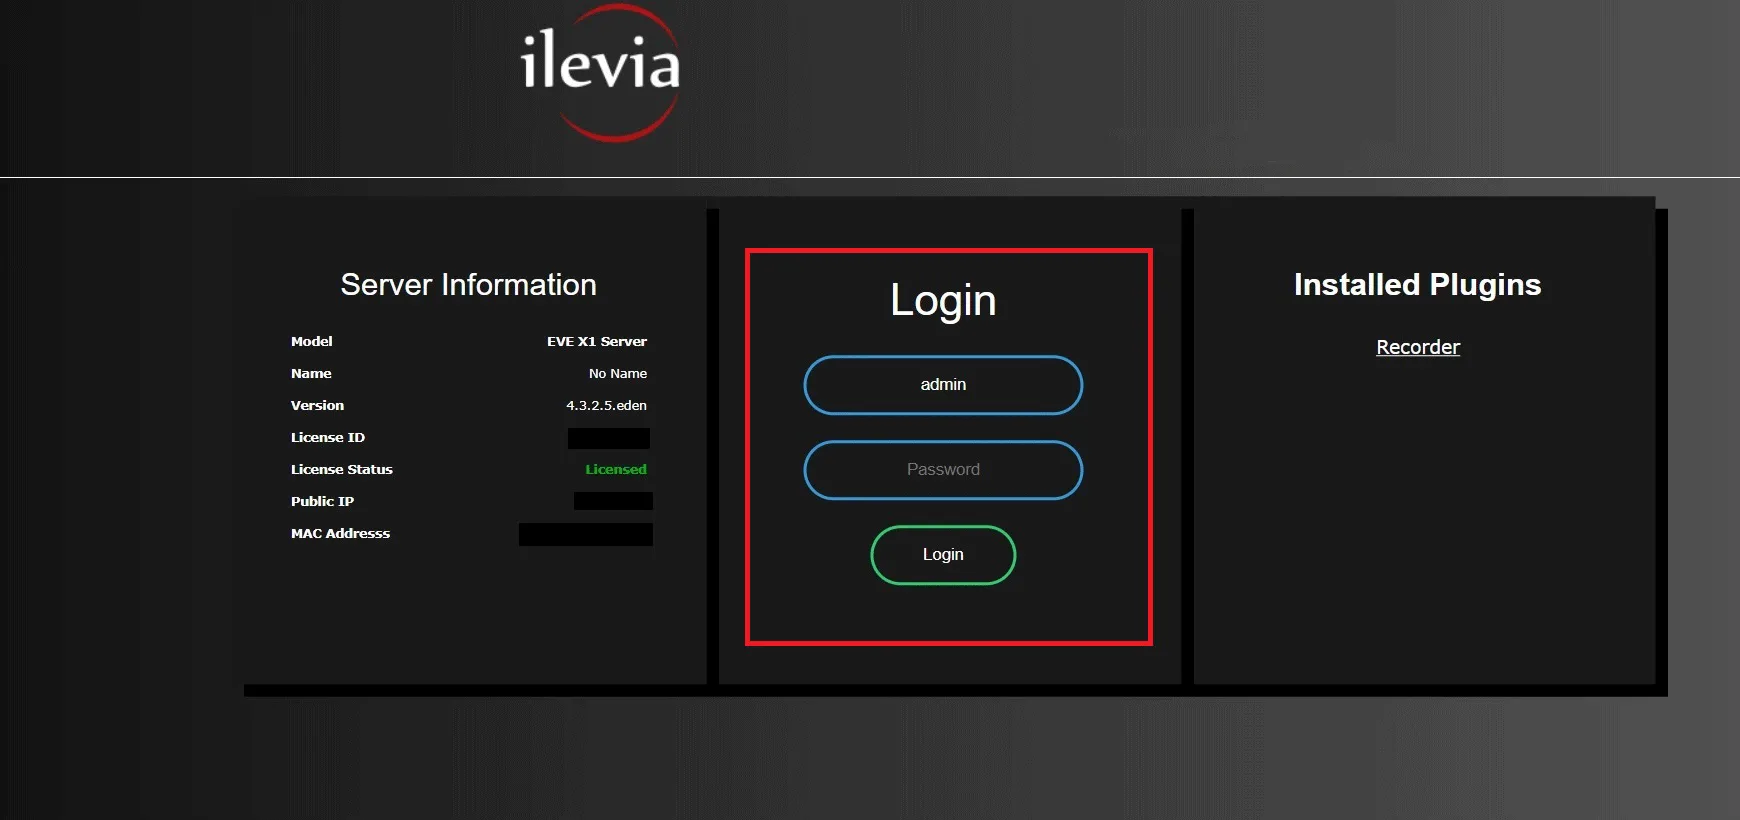
Step 3:
Go to the Utility menu and, to check whether Logic module updates are available, click the “Check now” button next to “Online Logic Module”. If an update is available, the new version appears in the center of the section, as shown in the following image.
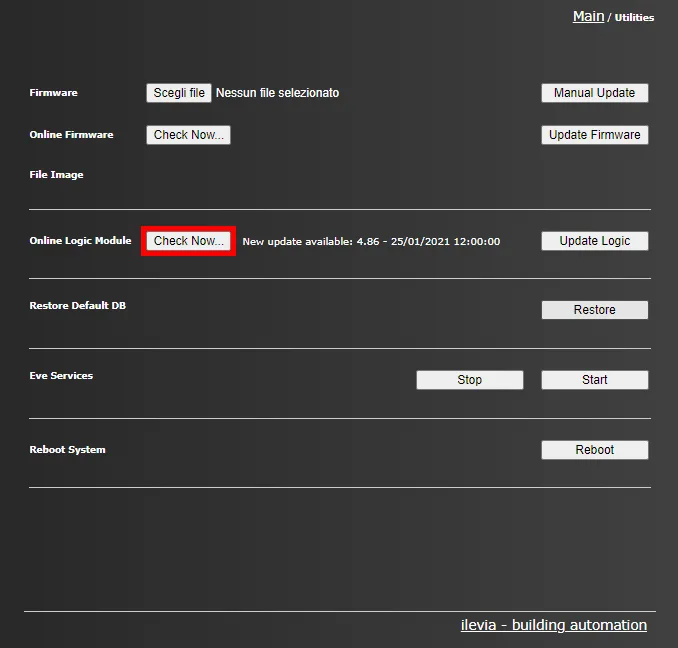
Step 4:
To start the Logic module update, click the “Update logic” button on the right side of the screen: the download starts and the update is installed automatically on the server.
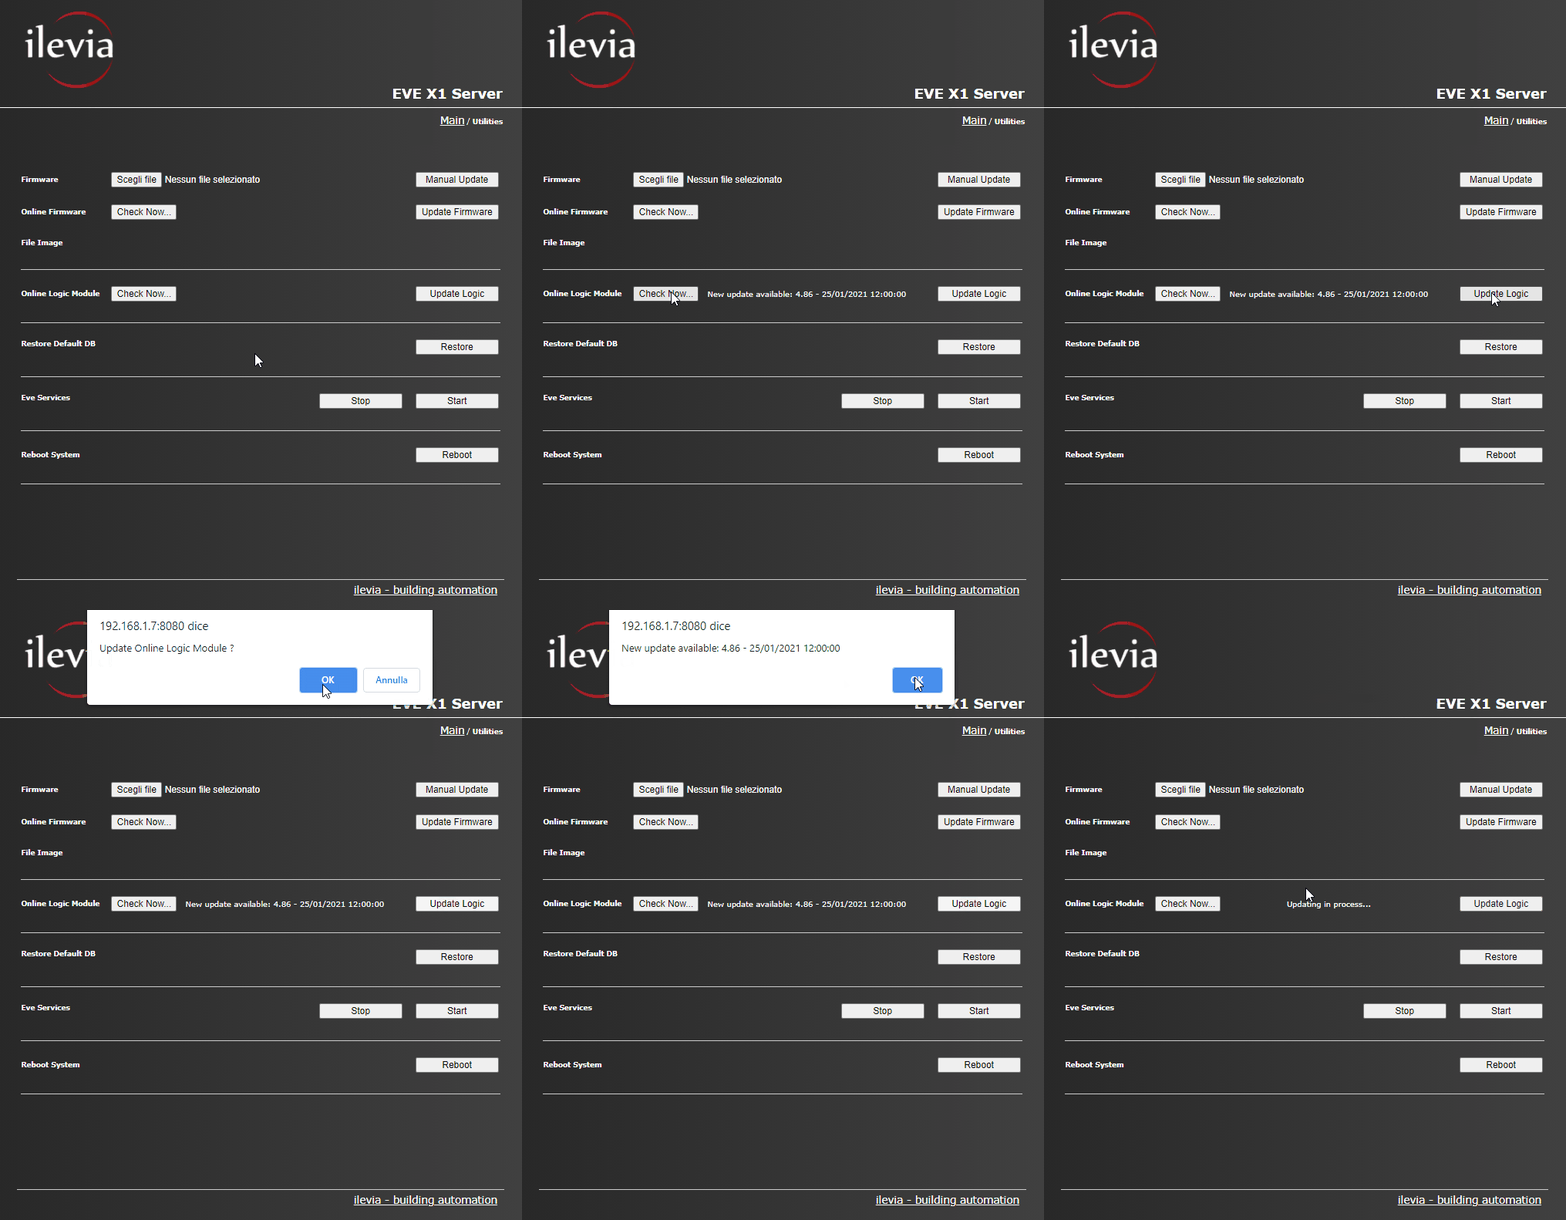
Viewing the version and status of the Logic module
To make sure the Logic module has started correctly, check the Ilevia Remote Plus application (for more information on its configuration, click here). Once you are connected to your account, press and hold the Home icon at the top left and click the information menu.

In the information menu, scroll to the bottom: here you will find two items:
Logic Version: the version of the Logic currently installed on the Ilevia server you are connected to.
Logic Status: the current status of the Logic module. If it is active, it is shown with a solid green circular icon

, if it is stopped with an empty red circle
