Dahua video intercom
How to integrate a Dahua intercom with the ILEVIA server via SIP: configuring the intercom, the SIP Client and IP Camera components in ilevia Manager, and the ILEVIA Control app.
This guide explains how to integrate a Dahua intercom with the ILEVIA server to receive calls in the ILEVIA Control app. It was written using the DHI-VT03311Q-WP model (firmware 2024-12-20 V4.800.0000000.1.R) and also applies to other Dahua intercoms. For the general logic, see Video intercom.
Intercom configuration
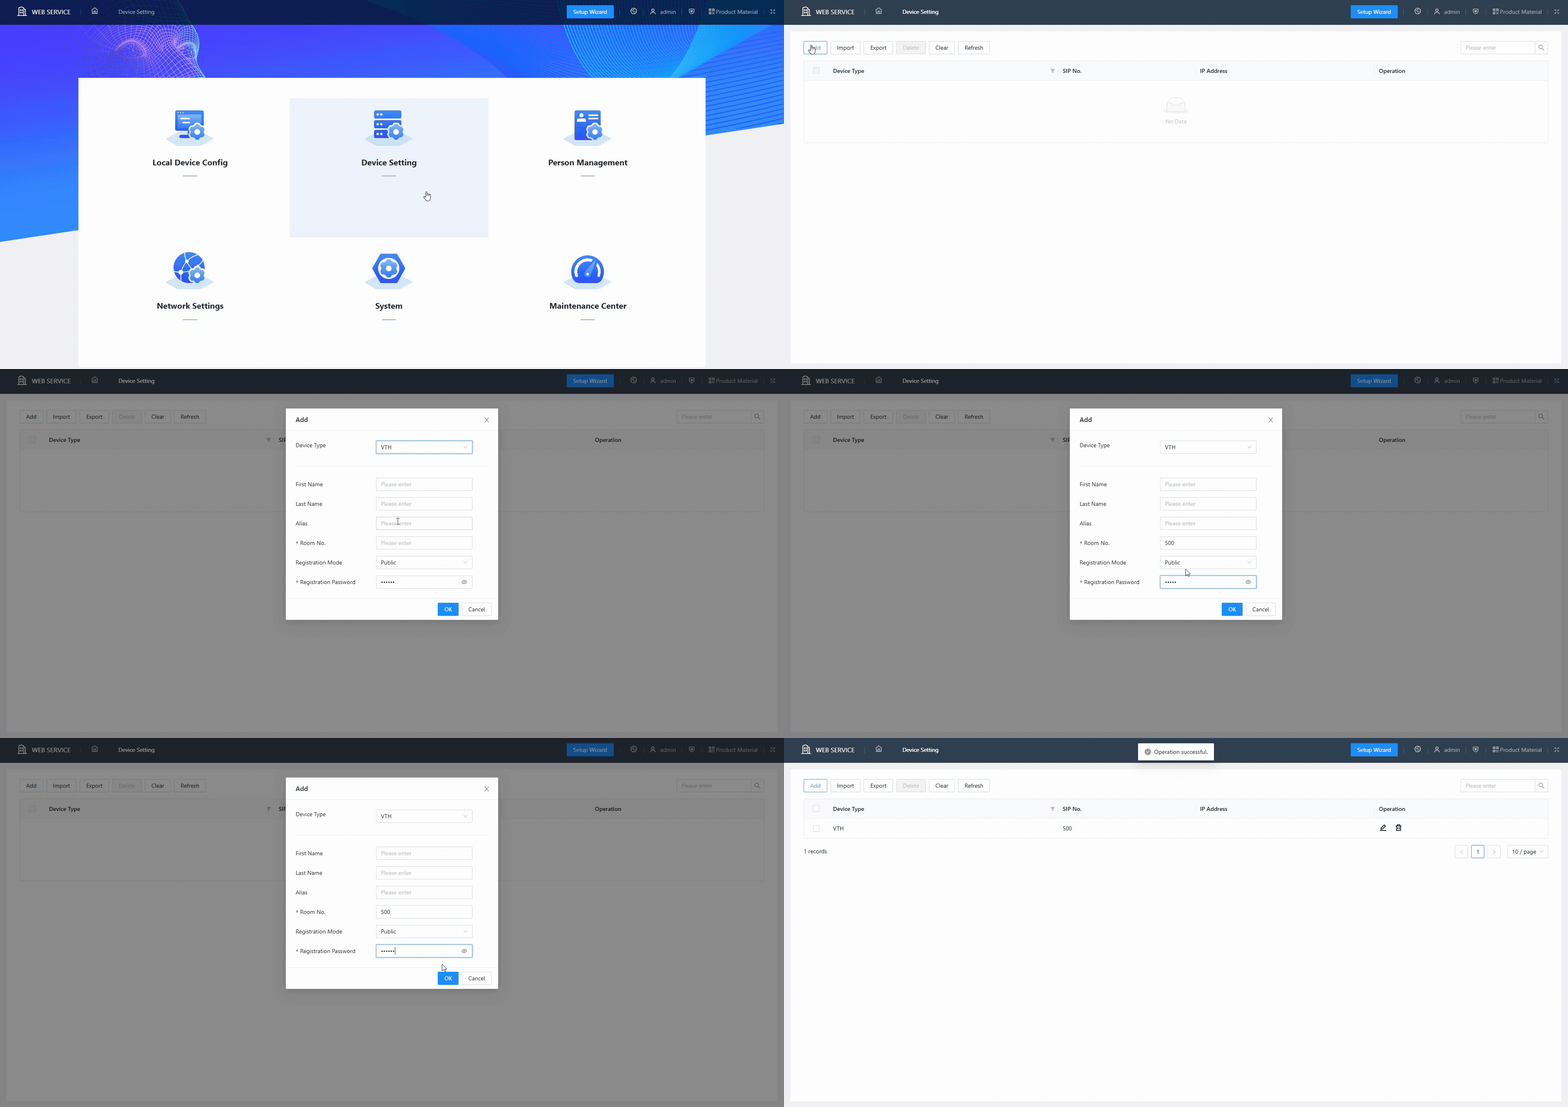
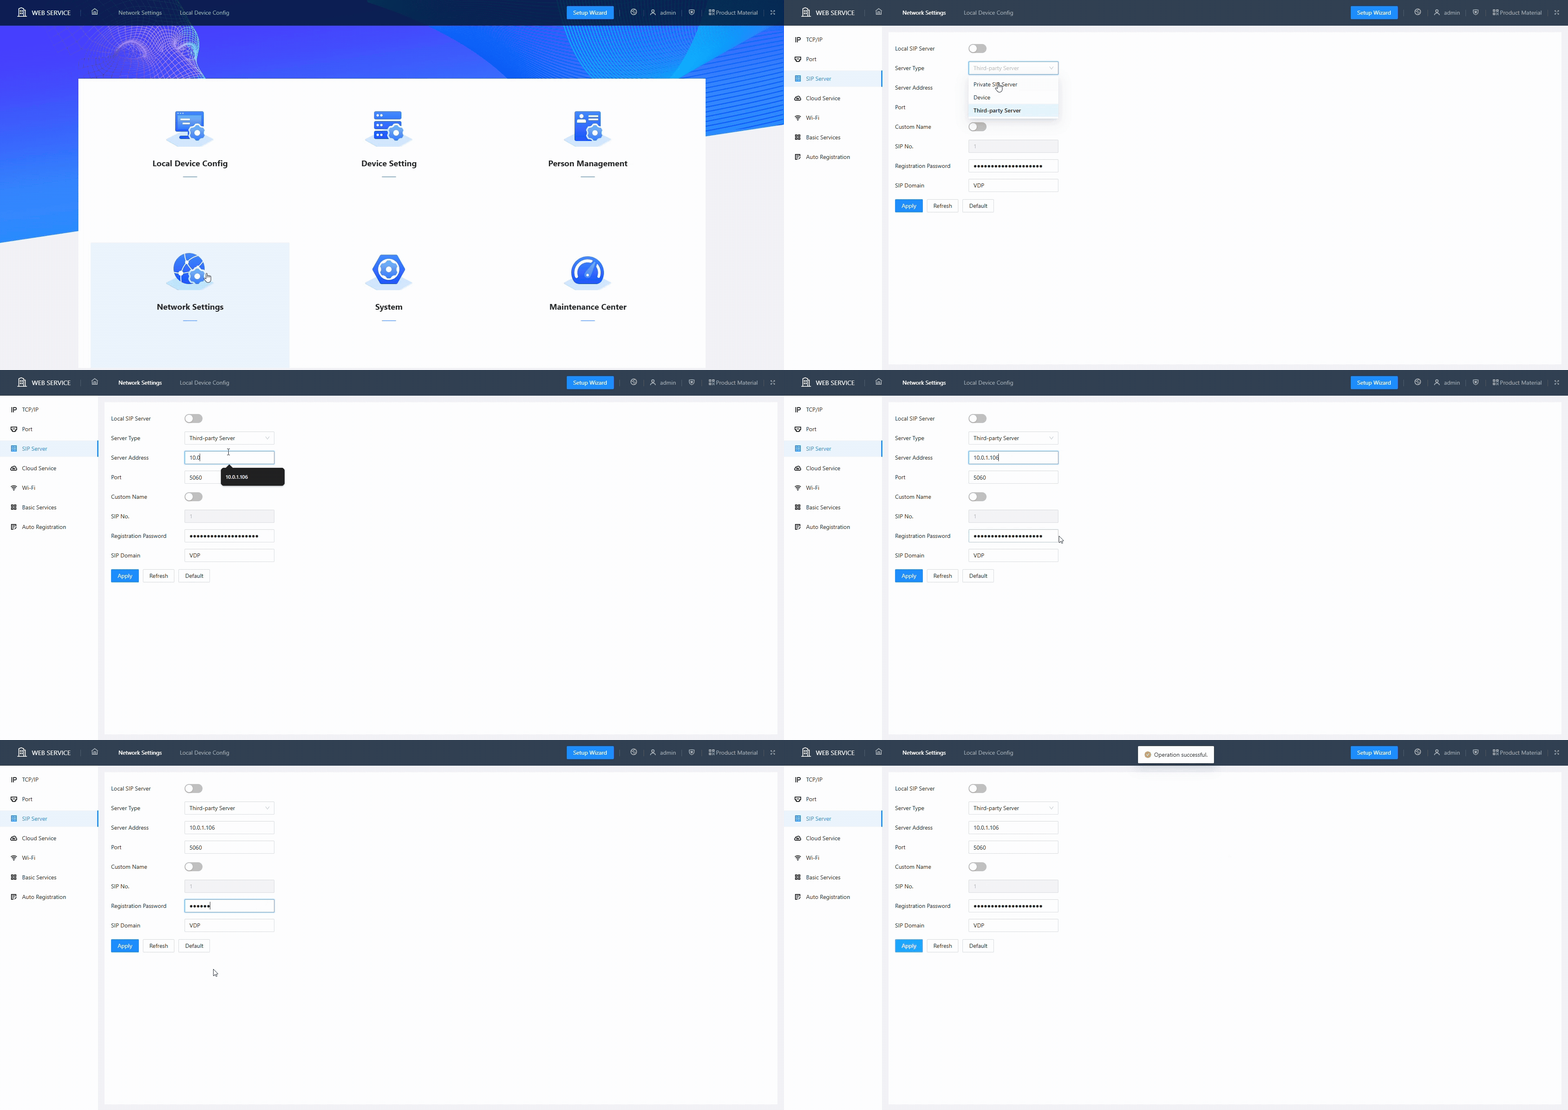
Step 1. Access the Dahua intercom web page, open Device Settings, and click Add. Select VTH under Device Type, enter a Room No. (e.g. 500) and a Registration Password of your choice, then click OK. This is the "virtual" device that the ILEVIA Control app will use to receive the call.
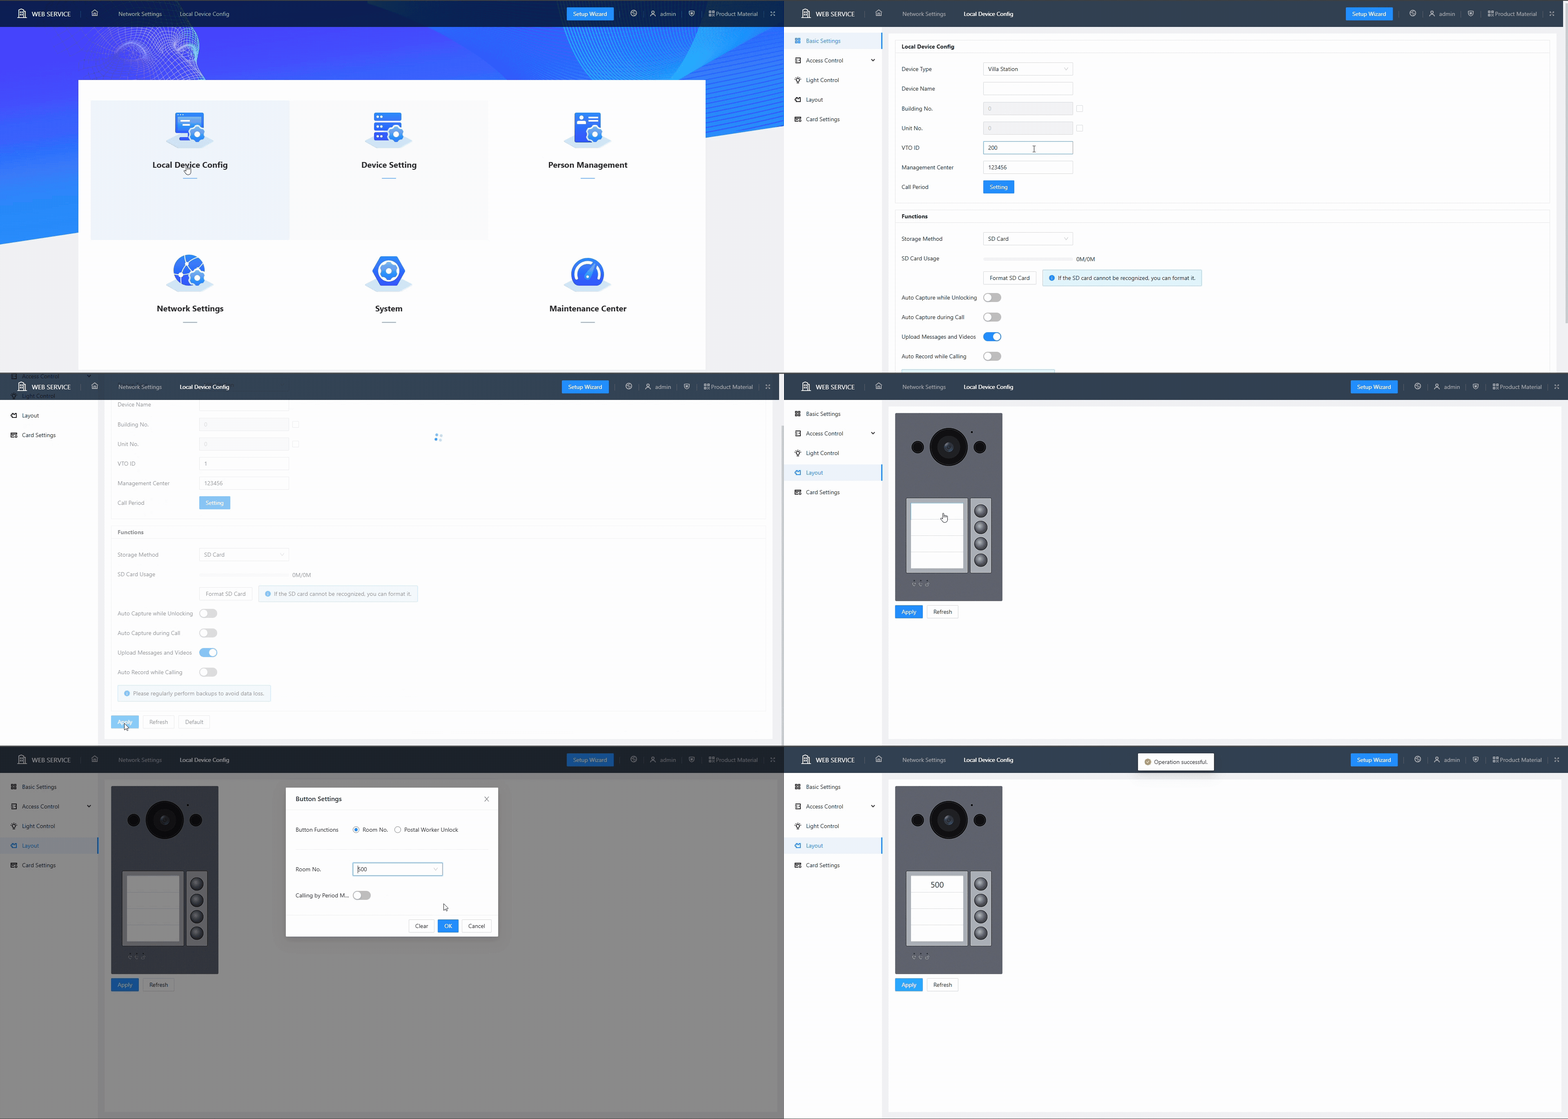
Step 2. Return to the home page and open Local Device Config. Under Basic Settings, set a VTO ID (e.g. 1), which identifies the physical intercom, and click Apply. In Layout, click the button that should send the call, select the number from step 1 under Room No., click OK, then Apply.
Step 3. Return to the home page and open Network Settings. Under SIP Server, set Server Type to Third-party Server, enter the ILEVIA server IP address in Server Address and a password of your choice in Registration Password, then click Apply.
Configuration in ilevia Manager
Step 1. In the Components tab, open the SIP category in the Components Library and add two SIP Client components: one for the app (in the example Ilevia Control App) and one for the intercom (Entry intercom).
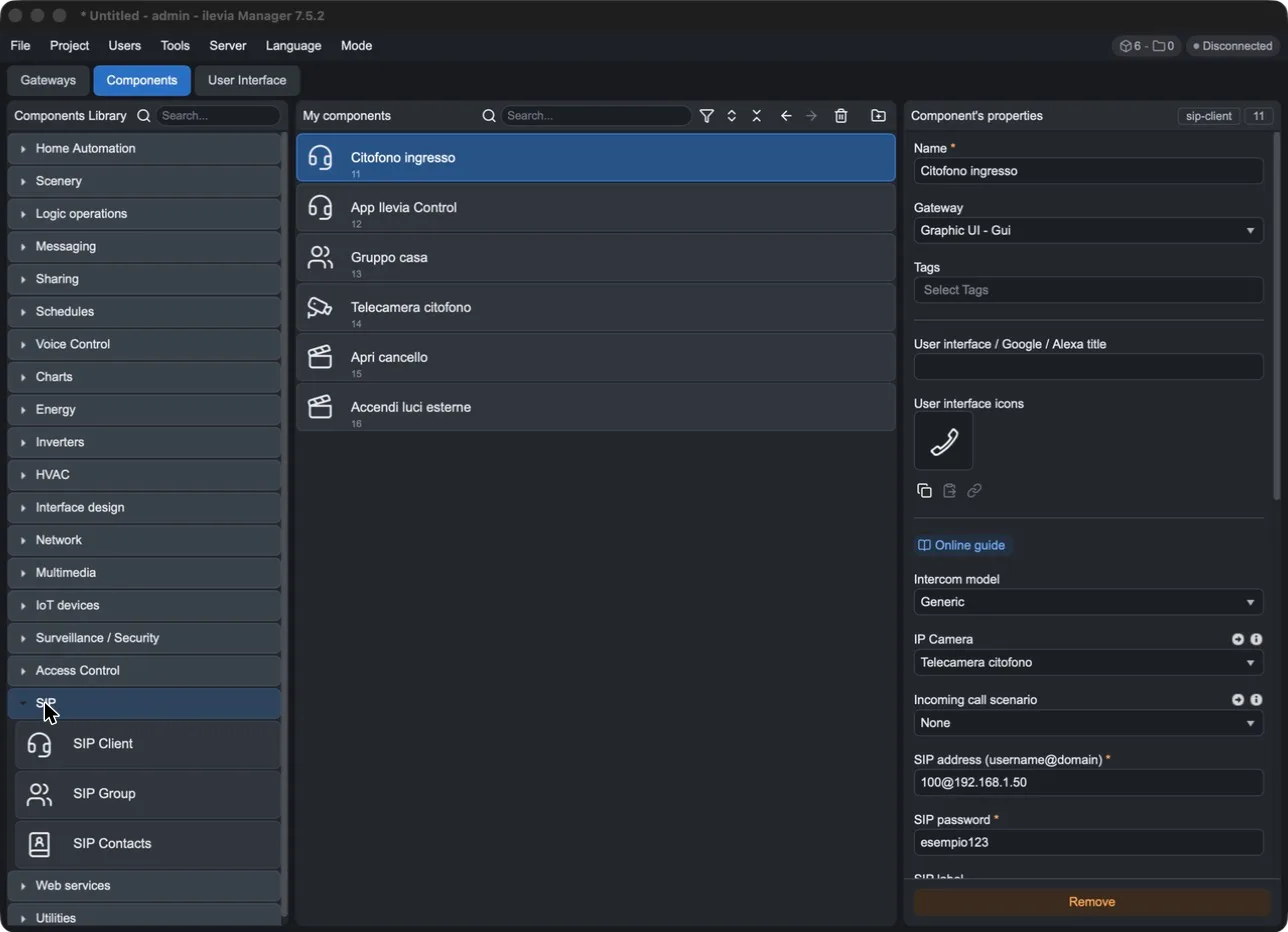
Step 2. Select the SIP Client for the app and fill in:
SIP address:
<Room No.>@<ILEVIA server IP>, using the Room No. from step 1;SIP password: the Registration Password from step 1;
For users: the users who must receive the calls.
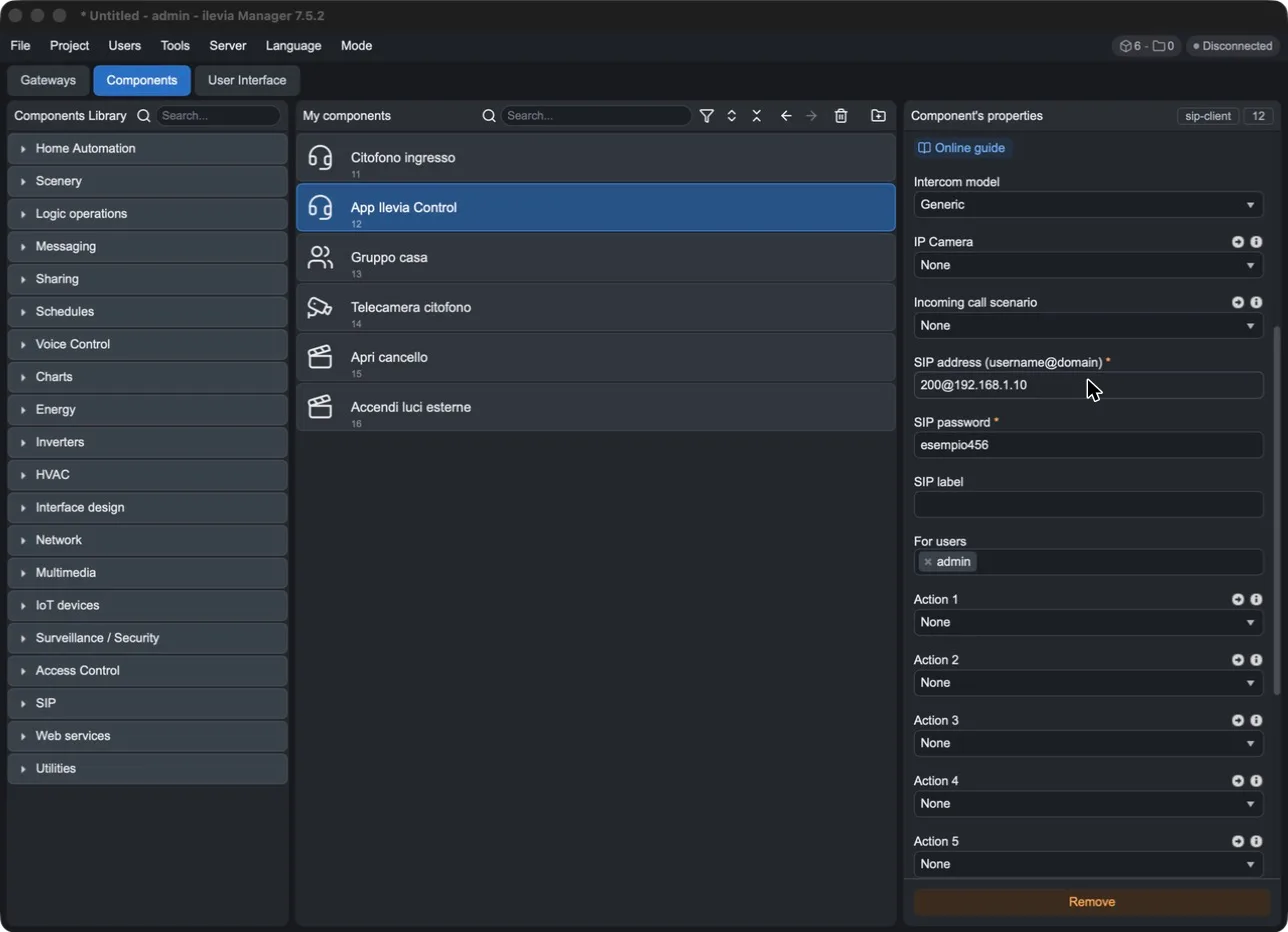
Step 3. Select the SIP Client for the intercom and fill in:
Intercom model: Generic;
SIP address:
<VTO ID>@<Dahua intercom IP>, using the VTO ID from step 2;SIP password: the Registration Password from step 3;
IP Camera: the intercom camera (see below);
Action 1 … 6 (optional): the scenarios to show as buttons during the call, for example gate opening.
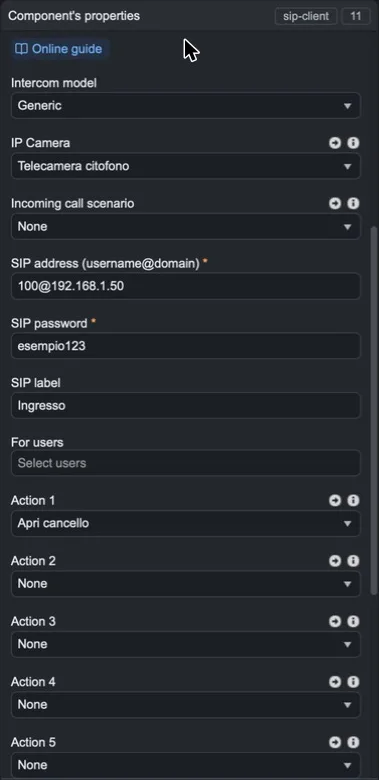
Step 4. Upload the project to the server with Project > Upload to server.
All parameters are explained in SIP Client and SIP Group.
Intercom camera (optional)
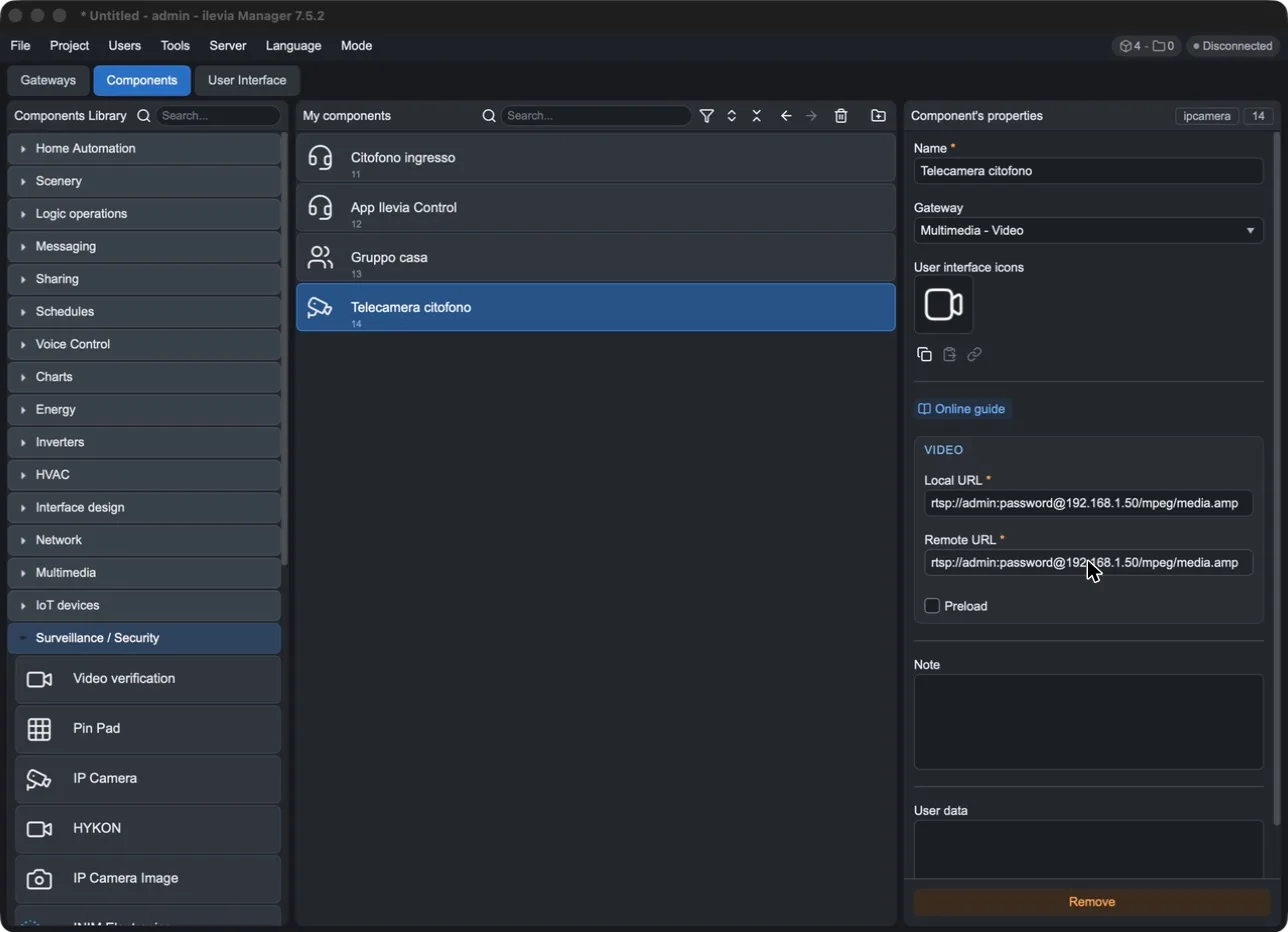
Add an IP Camera component (category Surveillance / Security) and enter the intercom RTSP address in Local URL and Remote URL:
rtsp://<user>:<password>@<intercom IP>/mpeg/media.amp
Replace <user> and <password> with a user from the intercom web page (e.g. admin) and <intercom IP> with its address on the local network. Then connect the camera in the IP Camera field of the intercom SIP Client.
ILEVIA Control app configuration
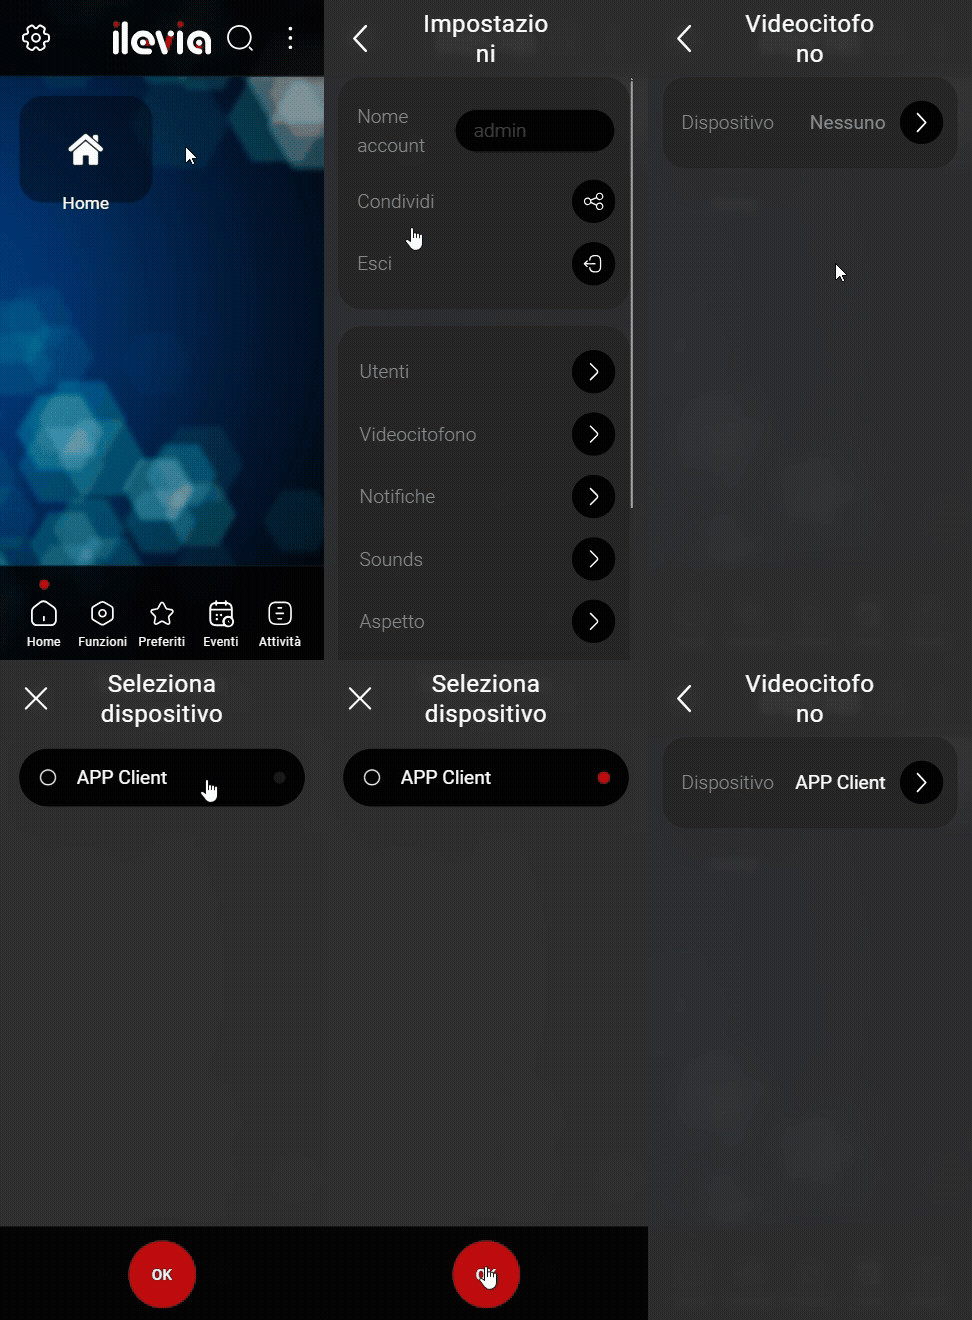
Open the ILEVIA Control app, go to Settings, select Video intercom, then Device. Choose your intercom and press OK.
Test
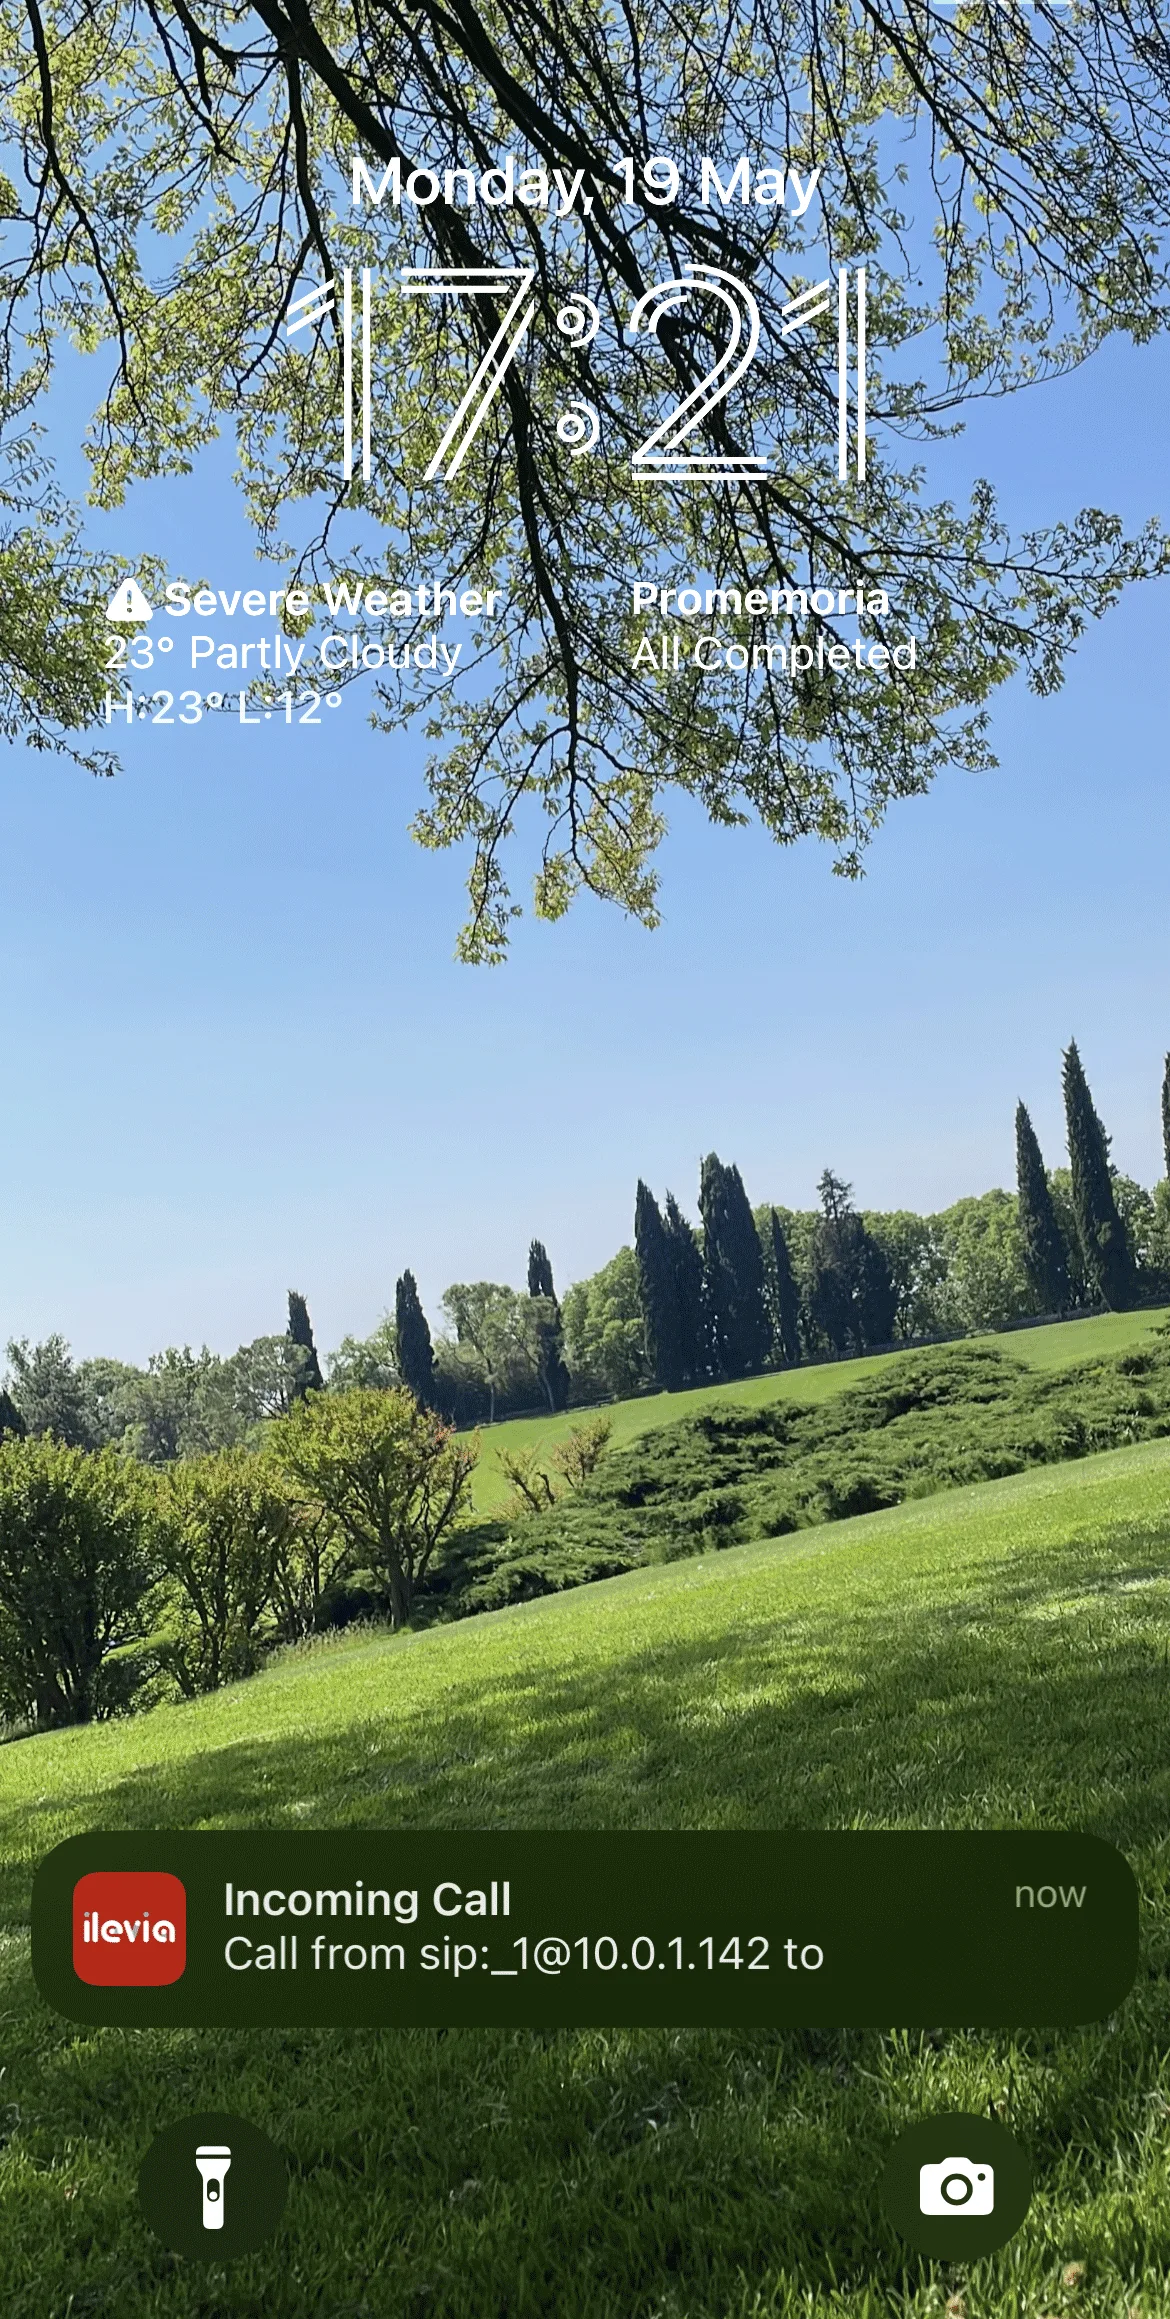
Press the call button on the intercom. If the configuration is correct, when the app is open the call screen appears, where you can answer or reject the call; when the app is closed, you receive a notification.