
Add and remove a gateway
Add and configure a gateway in ILEVIA Manager: commands shown with arrows, field explanations, component association, and removal.
A gateway defines how the ILEVIA server communicates with a plant or device. In this guide you will learn how to add it, configure it, associate it with components, and remove it.
The command names are those of the English Manager interface. The letters in the images help you identify them. Select an image to enlarge it.
Before you begin
If you are working on an existing project, keep a copy of it with File → Save As.
Prepare the required communication data for the protocol: for example network address and port, or device and serial parameters.
The values shown in the images are for illustration only: use those required for your plant.
Recognize commands and fields
1. Add the gateway
Open the Gateways section.
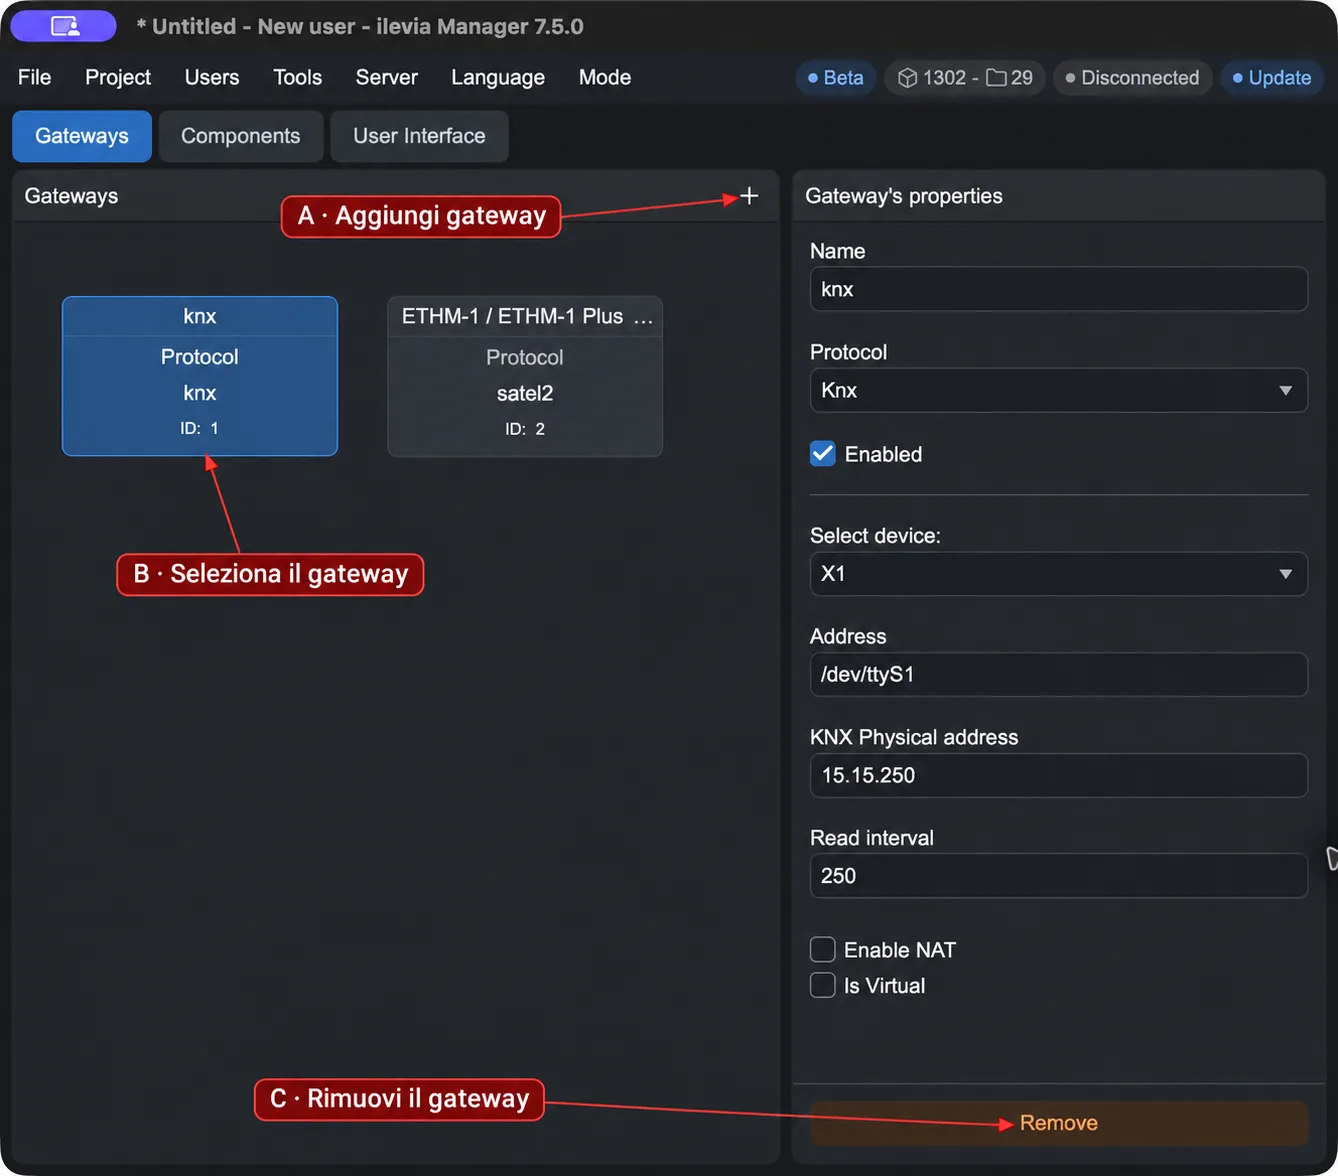
Click Add gateway (+), marked with A in the first image.
Select the new gateway in the list, as indicated by B. Its settings appear in the Gateway’s properties panel on the right.
Alternative method: context menu
In the gateways area, you can also right-click and choose Add gateway. The result is the same as the + button.
2. Set name, protocol, and connection
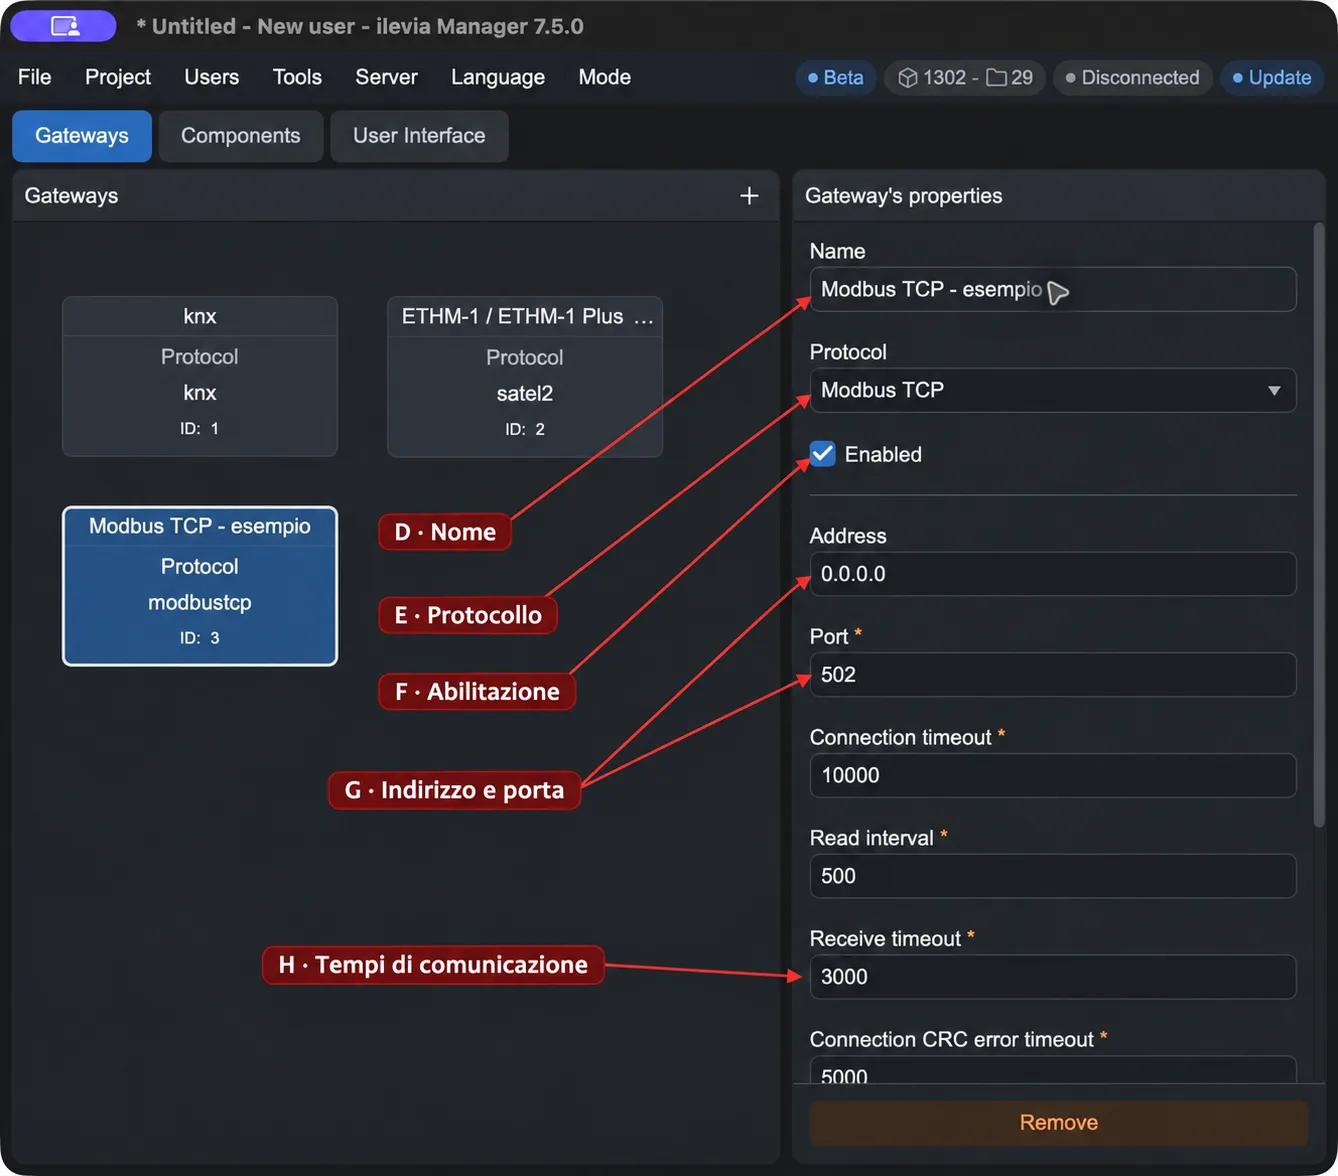
With the new gateway selected, fill in the fields in the properties panel. The second image shows a Modbus TCP example: with other protocols, the connection parameters change.
Reference | Field | What to set |
|---|---|---|
D | Name | A recognizable name, for example Modbus thermal plant. It helps you find the gateway when you assign it to components. |
E | Protocol | The protocol required by the device or system. You can search for it in the selector; the name assigned to the gateway does not automatically choose the protocol. |
F | Enabled | Make sure the gateway is enabled when you want to use it. Disabling it keeps the configuration, while Remove deletes it from the project. |
G | Address and Port | For Modbus TCP, enter the IP address and port of the device or interface to be reached, according to its documentation. |
H | Communication times | Set the read intervals and timeout values according to the device. Read interval sets the time between reads; the timeouts limit the wait for the connection or response. |
The 0.0.0.0 address shown in the screen is the initial value of the example: replace it with the address of your device. For time fields, check the unit indicated in the protocol guide; for example, 3000 milliseconds correspond to 3 seconds.
With KNX, also choose the connection in Select device. An integrated connection in the server, a TCP/IP gateway, and a USB/serial interface may require different fields.
For the available options, see the gateway and protocol overview. For the screen example, see the Modbus parameters guide.
3. Associate the components and apply the changes
Open Components and select the component that must communicate through the new connection.
In the component’s Gateway field, choose the gateway you just configured. Also complete the component-specific parameters.
Save the local project with File → Save.
Connect to the correct server and use Project → Upload to server to apply the configuration to the plant.
Adding a gateway does not automatically create the components or transfer the configuration to the server. Saving on the PC keeps the local file; uploading to the server makes the changes operational.
4. Disable or remove the gateway
If you want to keep the settings but disable the connection, clear the Enabled checkbox (F). If the gateway is no longer needed, you can remove it. First check which components use it and update their associations.
Select the gateway to remove in the list (B).
Click Remove at the bottom of the properties panel (C). Alternatively, right-click the gateway and choose Remove gateway.
In the confirmation message, choose Ok to remove it or Cancel to abort.
Save the project and upload it to the server when you want the change to be applied to the plant as well.
Check the result
The added gateway appears in the list with a recognizable name and the correct protocol.
The affected components are associated with the intended gateway.
After uploading, check the device statuses or readings. If they do not update, check the connection, gateway parameters, and component settings.
For connection and transfer direction, see Save and connect to the server.