Satel Integra control panels
How to import a Satel Integra control panel configuration into ilevia Manager from the XML file and use the Satel widget in the ILEVIA Control app.
Satel Integra control panels are integrated by importing into ilevia Manager the XML configuration file exported from Satel software. The import creates the gateway and the partition, zone, and output components; in the ILEVIA Control app the control panel is managed from the Satel Integra widget. For an overview, see Alarm systems.
Before you start
The XML configuration file, exported from the Satel programming software.
The IP address and TCP port of the control panel Ethernet module (ETHM-1 or ETHM-1 Plus).
The control panel installer code.
Importing the configuration
Step 1. In the Satel programming software, export the control panel configuration in XML format.
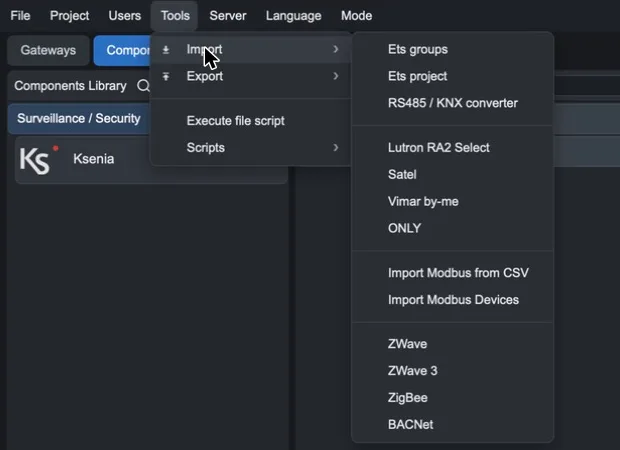
Step 2. In ilevia Manager open Tools > Import > Satel. Alternatively, drag the Satel Integra component from the Surveillance / Security category in the Components Library: the same wizard opens.
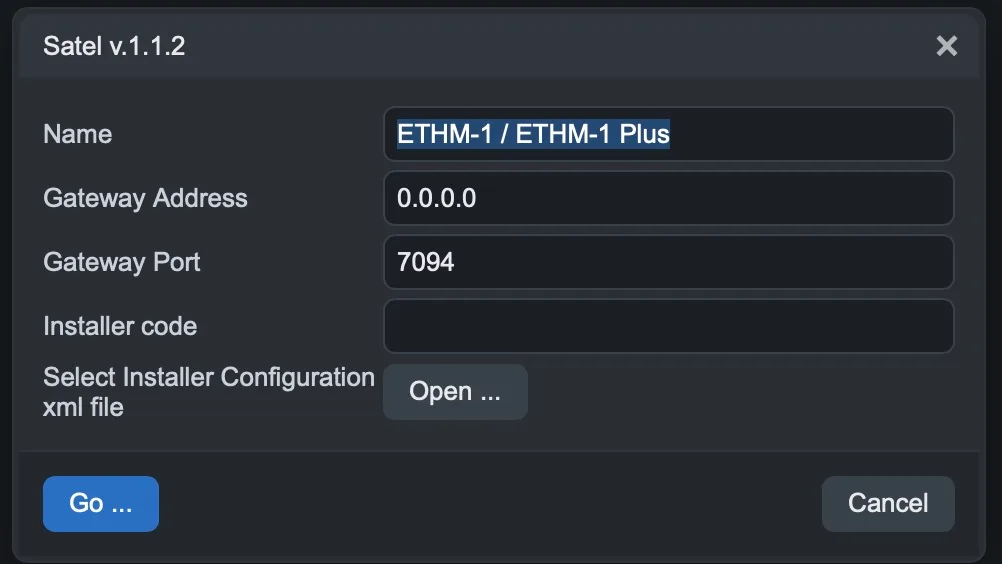
Step 3. Complete the wizard:
Field | Meaning |
|---|---|
Name | Gateway name (default ETHM-1 / ETHM-1 Plus). |
Gateway Address | IP address of the control panel Ethernet module. |
Gateway Port | Module TCP port (default 7094). |
Installer code | Control panel installer code. |
Select Installer Configuration xml file | Press Open … and select the XML file exported in step 1. |
Step 4. Press Go …. When finished, you will find the control panel components (partitions, zones, outputs) in My components and the Satel gateway in the Gateways tab.
Step 5. Add the components to the user interface and upload the project to the server with Project > Upload to server.
The Satel Integra widget in the ILEVIA Control app
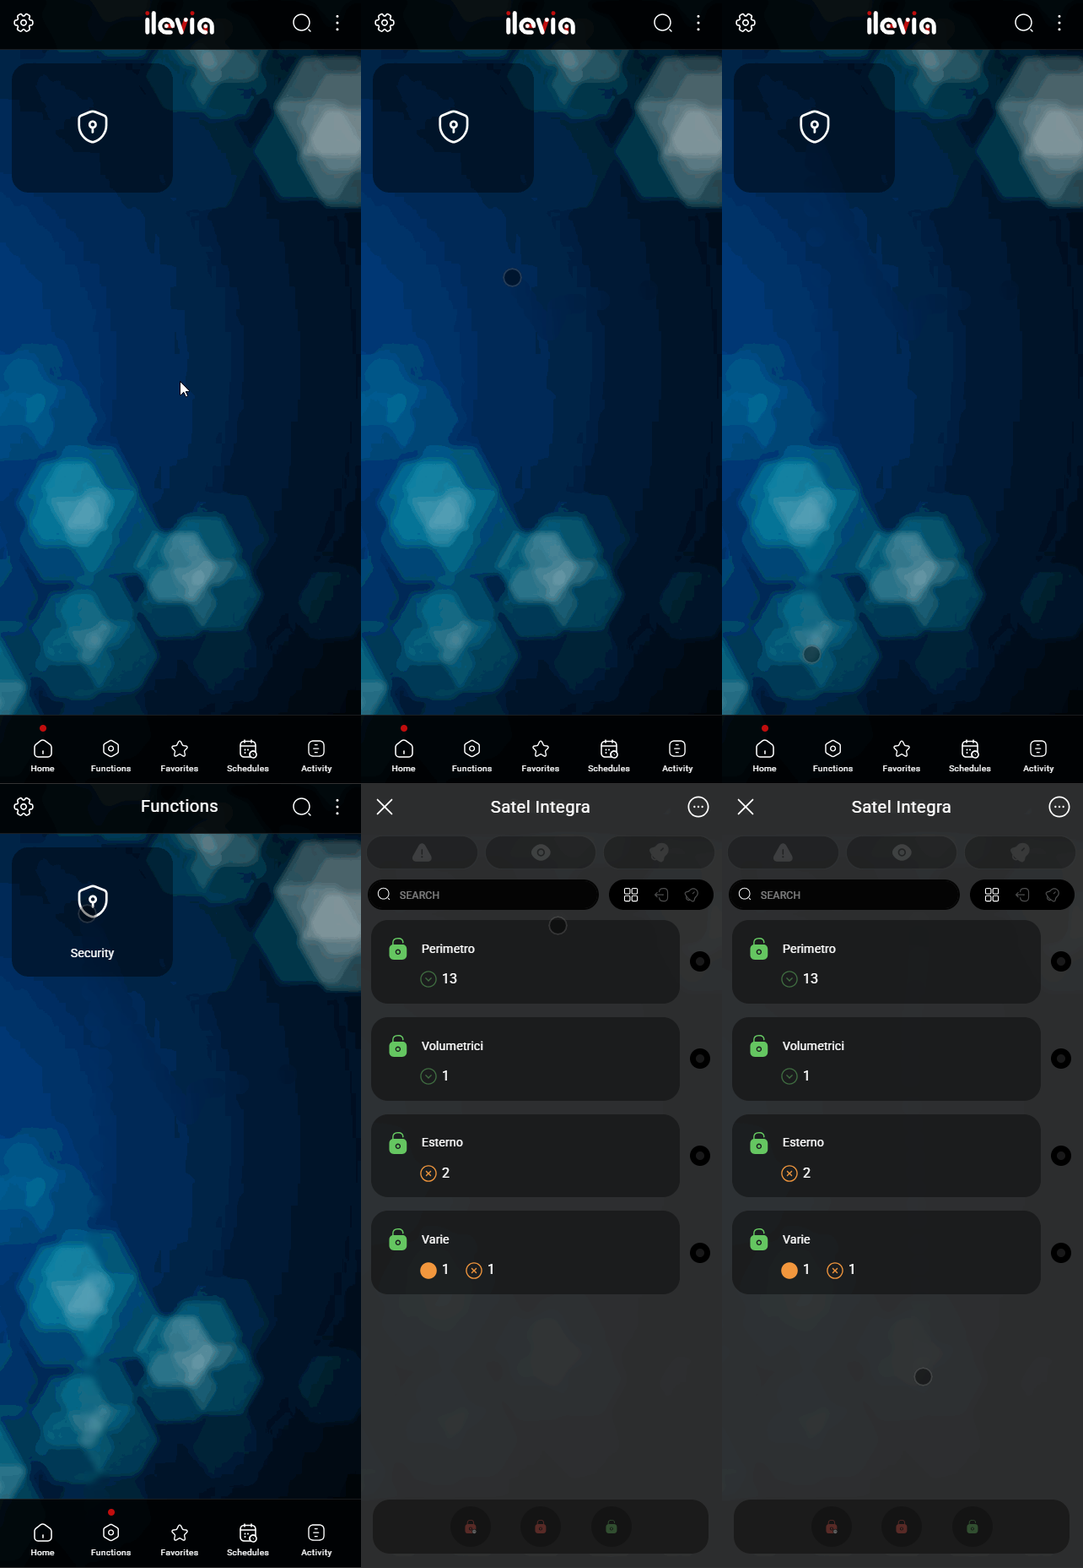
Open the widget from the Home menu or from the Functions menu, which groups the components by category.
Partitions
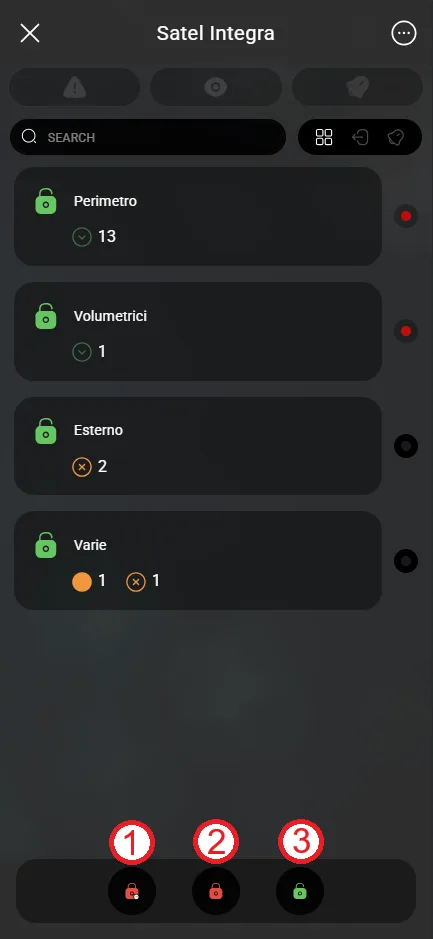
The first tab shows the status of each partition and its zones. At the bottom: 1. temporary arming of the selected partitions; 2. arming; 3. disarming.
Zones
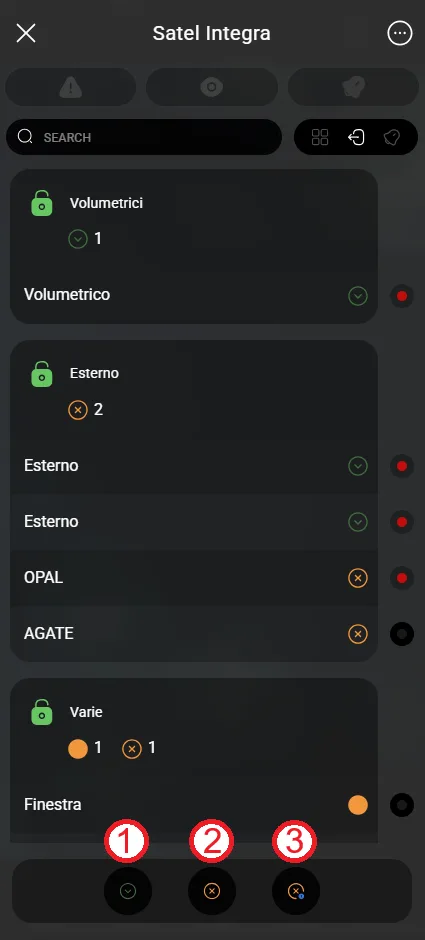
Select one or more zones and use the commands at the bottom: 1. bypass; 2. unbypass; 3. bypass for a set time.
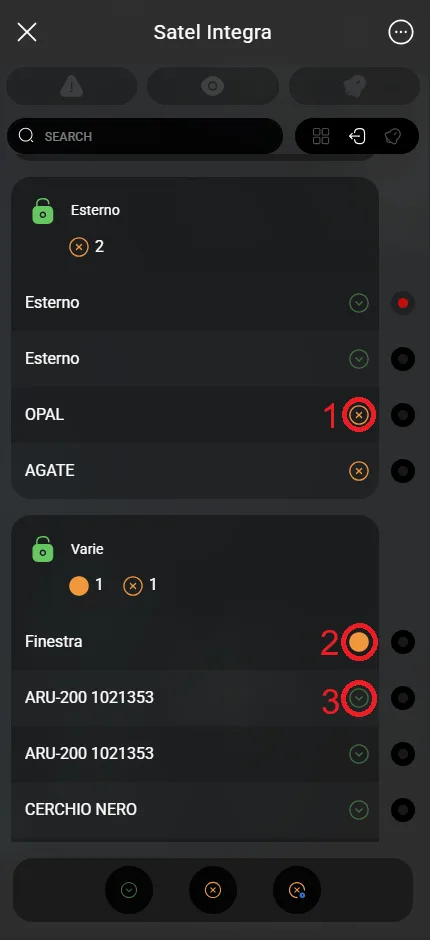
The icons indicate the status of each zone: 1. warning state (for example, a window open); 2. bypassed; 3. enabled.
Notifications
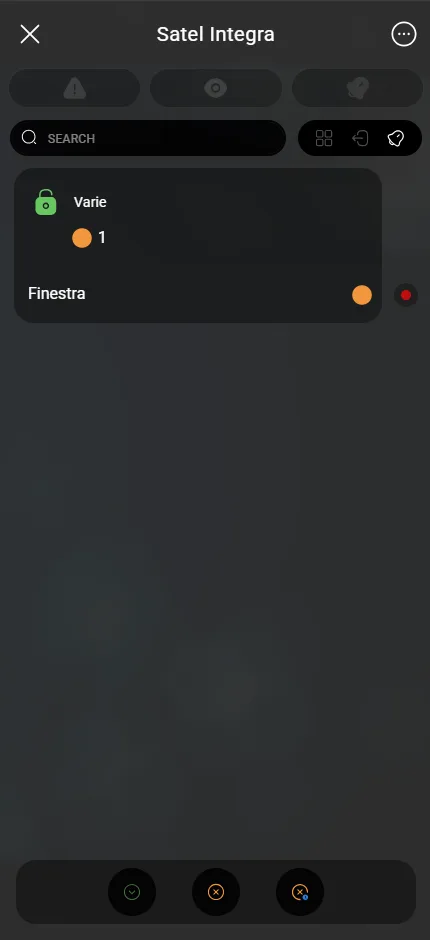
The Notifications tab lists the zones in warning state; from here you can also bypass them, unbypass them, or bypass them for a set time.
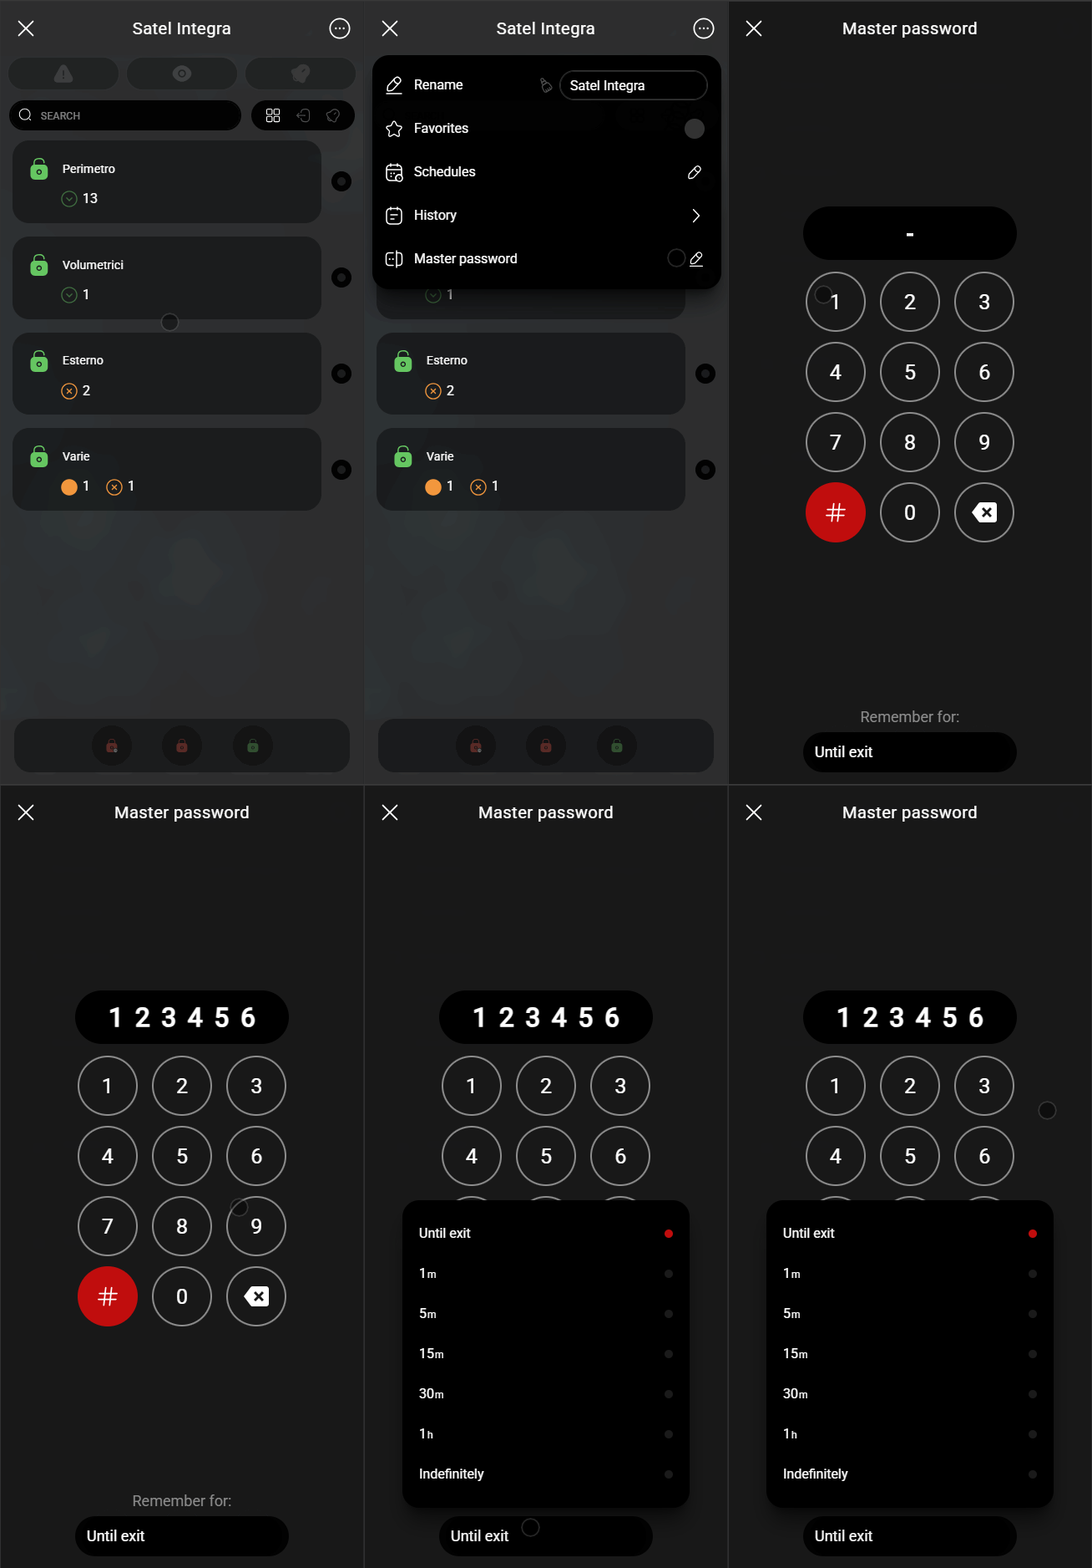
Saving the code
To avoid entering the code for every command, open the Details menu and tap Master Password. Enter the code on the keypad and choose in Remind for how long to save it.