
Blustream HDMI matrix
How to control a Blustream 4×4 HDMI matrix from the ILEVIA server: component parameters, created subcomponents, and mapping between outputs and inputs.
The Blustream component controls a Blustream HDMI matrix with 4 inputs and 4 outputs: from the ILEVIA Control app, choose which source (decoder, console, media player…) to send to each display, enable the outputs, and switch the matrix on or off. For the overall view, see Multimedia devices.
Adding the matrix
Step 1. In the Components tab, open the Multimedia category in the Components Library and drag Blustream into My components. The Blustream group is created with the main component and the Subcomponents group.
Step 2. Select the Blustream component and fill in Configuration:
IP: matrix IP address;
Port: matrix TCP control port.
Step 3. The Output 1…Output 4 fields are already linked to the created subcomponents: leave them as they are, or link your own components.
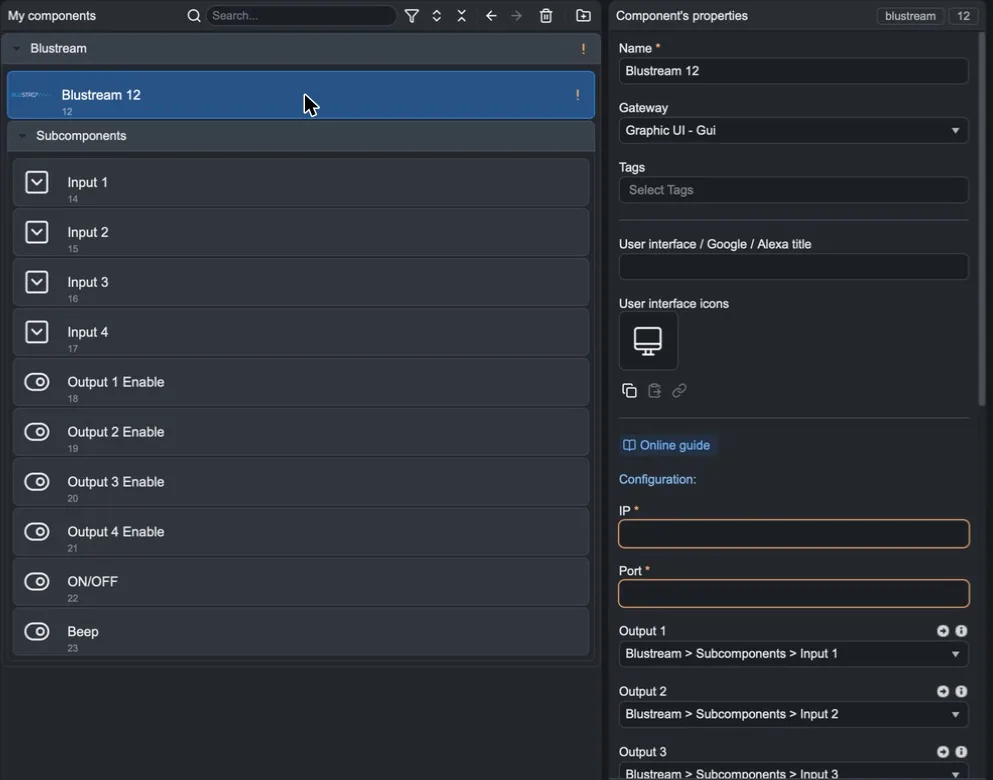
The subcomponents
Subcomponent | Use |
|---|---|
Input 1 … Input 4 | Selectors (combo boxes) linked to outputs 1–4: for each output, choose which input (Input 1–4) to display. |
Output 1 Enable … Output 4 Enable | Enable or disable each output. |
ON/OFF | Turns the matrix on or puts it in standby. |
Beep | Enables or disables the matrix beep. |
Rename the selectors with the display name (for example Living room TV) and customize the items with the source names: the app will be clearer.
Finish
Add the subcomponents to the user interface and upload the project with Project > Upload to server.