
EL.MO intrusion alarm panels
How to connect an EL.MO intrusion alarm panel to the ILEVIA server: guided procedure in ilevia Manager, created components, gateway and compatible models.
The EL.MO. Intrusion Detection component connects the ILEVIA server to an EL.MO intrusion alarm panel over IP network. A guided procedure creates the gateway and all panel status and command components at once, ready to be added to the ILEVIA Control app interface. For the overall overview, see Alarm systems.
Before you start
The EL.MO panel must be reachable on the network from the ILEVIA server (IP address and network interface port).
Have the panel model, unit address and, if required by the panel, user name and password for authentication ready.
Add the panel in ilevia Manager
Step 1. In the Components tab, open the Surveillance / Security category in the Components Library (or search for elmo) and drag EL.MO. Intrusion Detection into My components. The wizard opens.
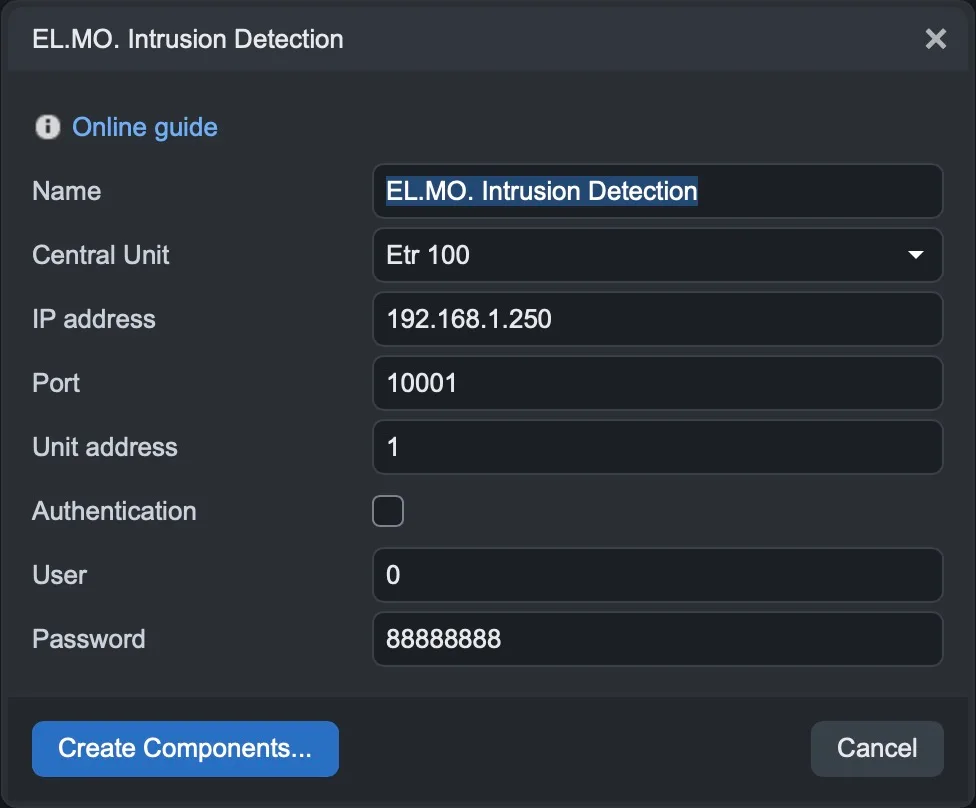
Step 2. Fill in the fields:
Field | Meaning |
|---|---|
Name | Name of the group and gateway that will be created. |
Central Unit | Panel model (for example Etr 100). This determines how many inputs, outputs and groups are created. |
IP address | Panel IP address. |
Port | Communication port (default 10001). |
Unit address | Unit address (default 1). |
Authentication | Enable this if the panel requires login with user name and password. |
User / Password | Credentials used when Authentication is enabled. |
Step 3. Click Create Components…. In My components, a group appears with the selected name (for example EL.MO. Intrusion Detection Etr 100) containing all panel components.
The created components
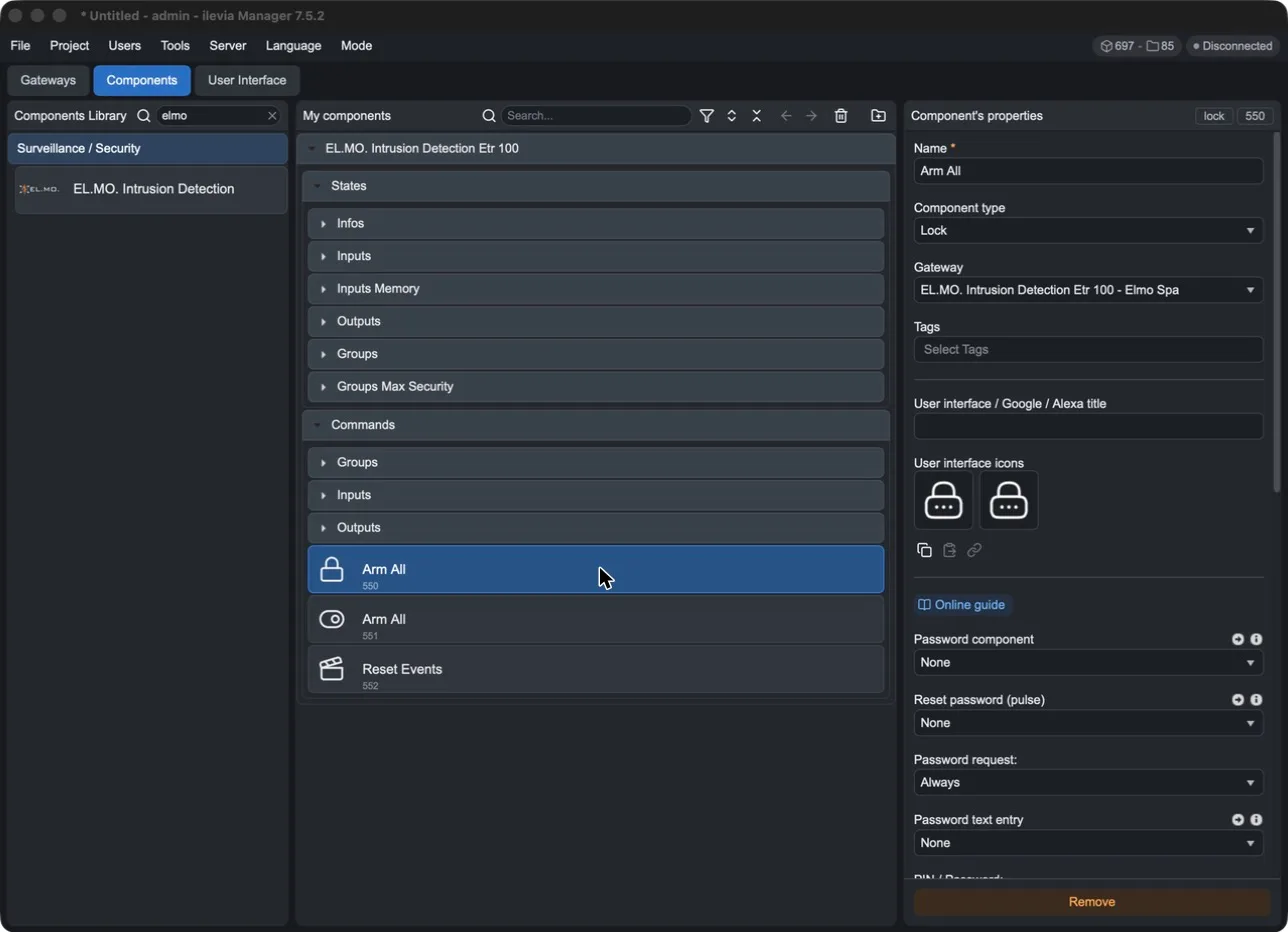
States
Infos: panel information, such as connection status, versions and authentication status.
Inputs: input status (sensors).
Inputs Memory: alarm memory, that is, which input triggered the alarm; it is cleared when the alarm is disarmed.
Outputs: output status.
Groups: arming status of the areas (groups).
Groups Max Security: status of the areas in maximum security.
Commands
Groups: arm and disarm individual areas.
Inputs: include and exclude inputs.
Outputs: activate and deactivate outputs.
Arm All (type Lock): arms and disarms the entire system by requesting a code. In its properties you will find Password component, Reset password (pulse), Password request, Password text entry and PIN / Password, to decide when and how to request the code.
Arm All (type Switch): arms and disarms the entire system without a code.
Reset Events (scenario): clears the panel events.
You can add other components to the group, for example collect the window sensors in a list to check their status before arming the alarm.
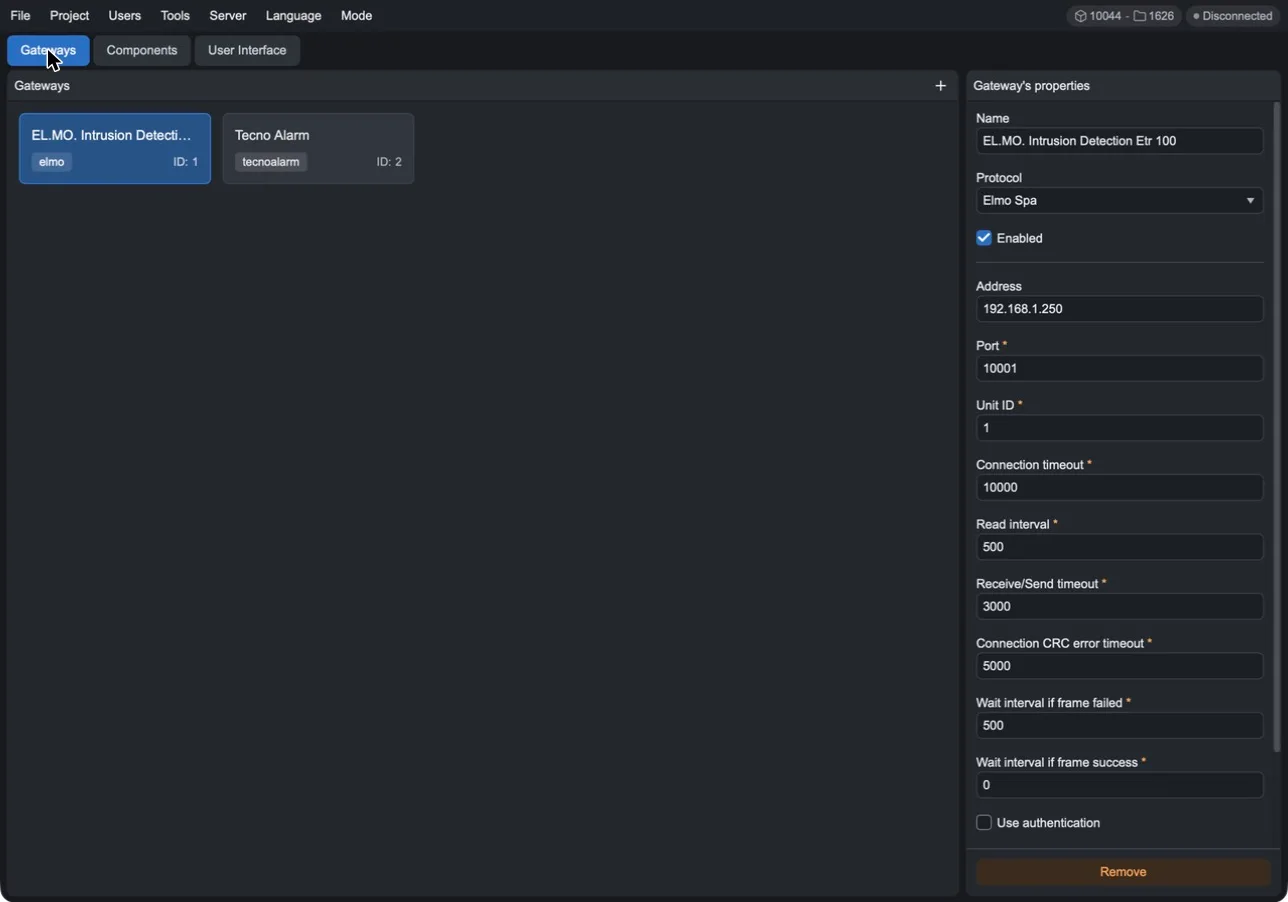
The gateway
The wizard also creates a gateway with the Elmo Spa protocol, visible in the Gateways tab. Here you can later correct Address, Port and Unit ID and adjust the communication timings (Connection timeout, Read interval, Receive/Send timeout and others). The Use authentication option corresponds to the Authentication field in the wizard.
Complete the integration
Add to the user interface the components you want to use from the app (for example Arm All, the area commands and the input statuses).
Upload the project to the server with Project > Upload to server.
Compatible EL.MO panels
Etr 48 line, Etr 100, Etr 128, Etr 256, Etr 512
Etr 100 G2 line, Etr 128 G2, Etr 256 G2, Etr 512 G2
Net 9 line, Net 832
Villeggio Genio Basic, Genio Domo, Genio Smart line
Pregio 1000, Pregio 2000 line
For more information about the panels, refer to the manufacturer's website.