
SIP Client and SIP Group: video intercom components
All parameters of the SIP Client, SIP Group and IP Camera components in ilevia Manager used to integrate a SIP video intercom with the ILEVIA Control app.
To receive intercom calls in the ILEVIA Control app, you need at least two SIP Clients: one represents the intercom, the other the app that answers. With a SIP Group you can make multiple apps ring together, and with an IP Camera you can see who is calling.
Adding components
In the Components tab, open the SIP category in the Components Library and add the components by double-clicking them or dragging them into My components. The category contains SIP Client, SIP Group and SIP Contacts.
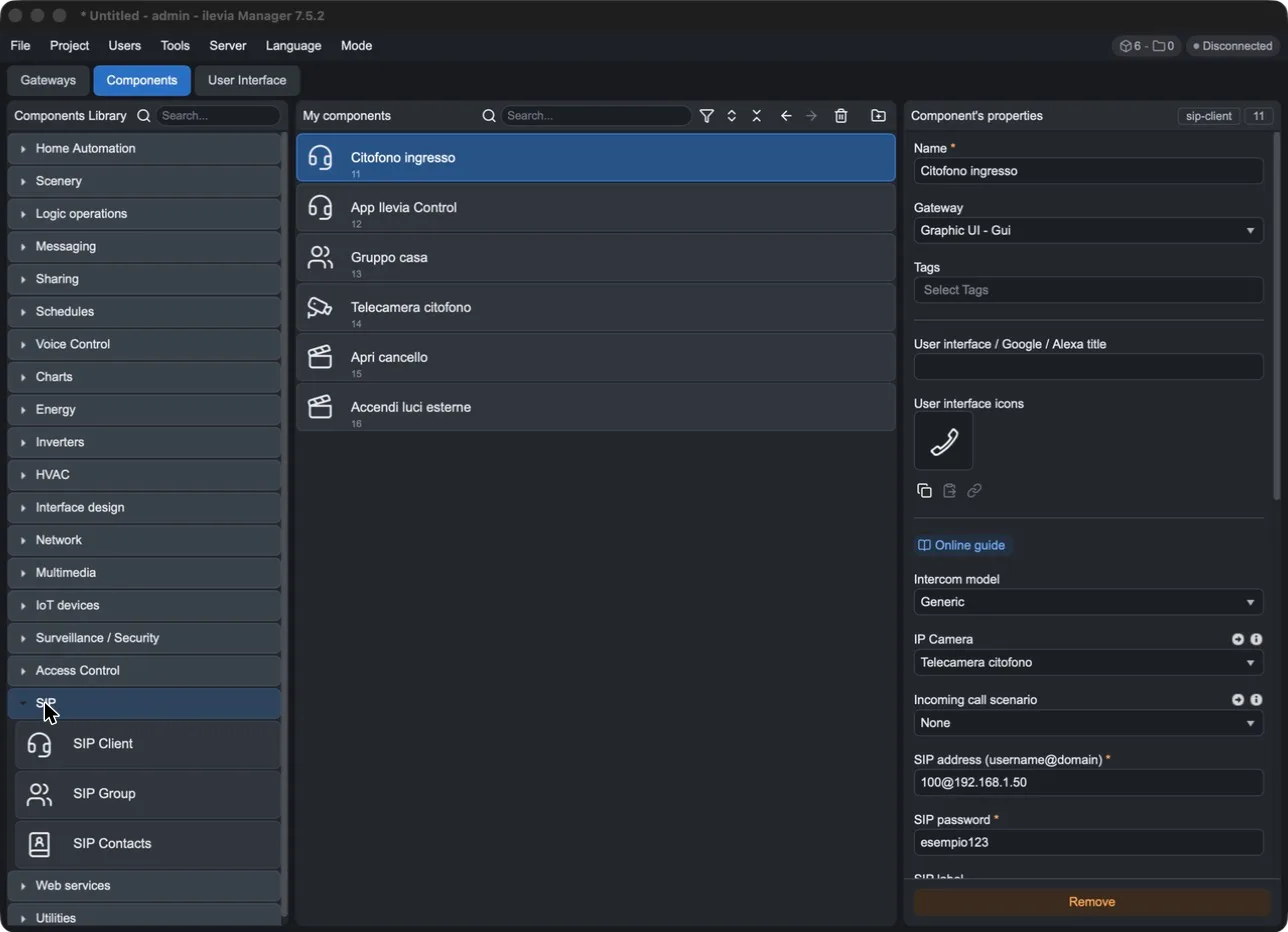
SIP Client
Parameter | Meaning |
|---|---|
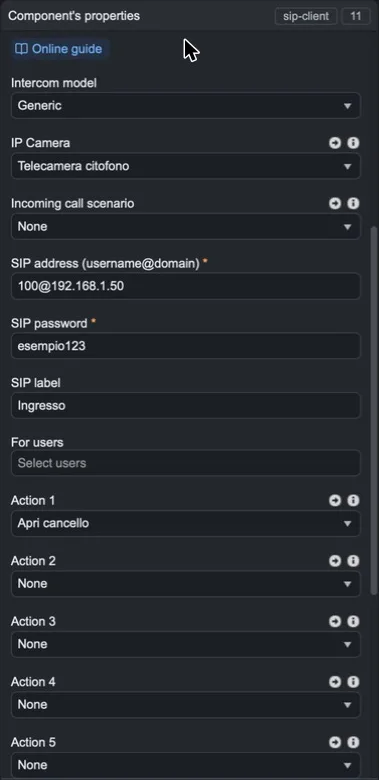
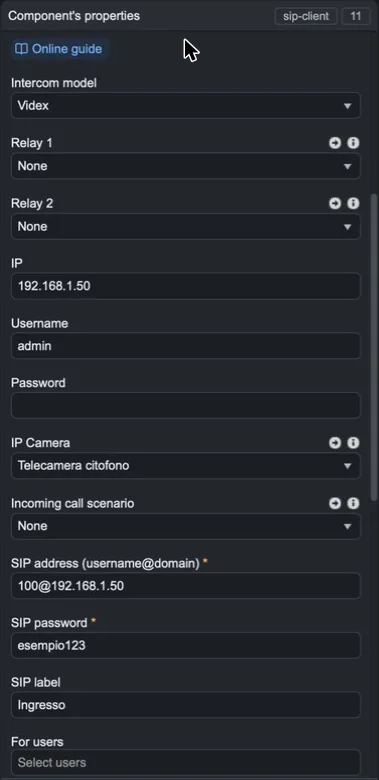
Intercom model | Intercom model: Generic, Videx, Vimar SIP 41007, Akuvox R20BX3, Akuvox E16C, 2N. For supported models, additional parameters appear (see below). Use Generic for the app and for intercoms not listed. |
IP Camera | The camera to display during the call. With the Vimar SIP 41007 model, this field does not appear. |
Incoming call scenario | A scenario to run when a call comes in. |
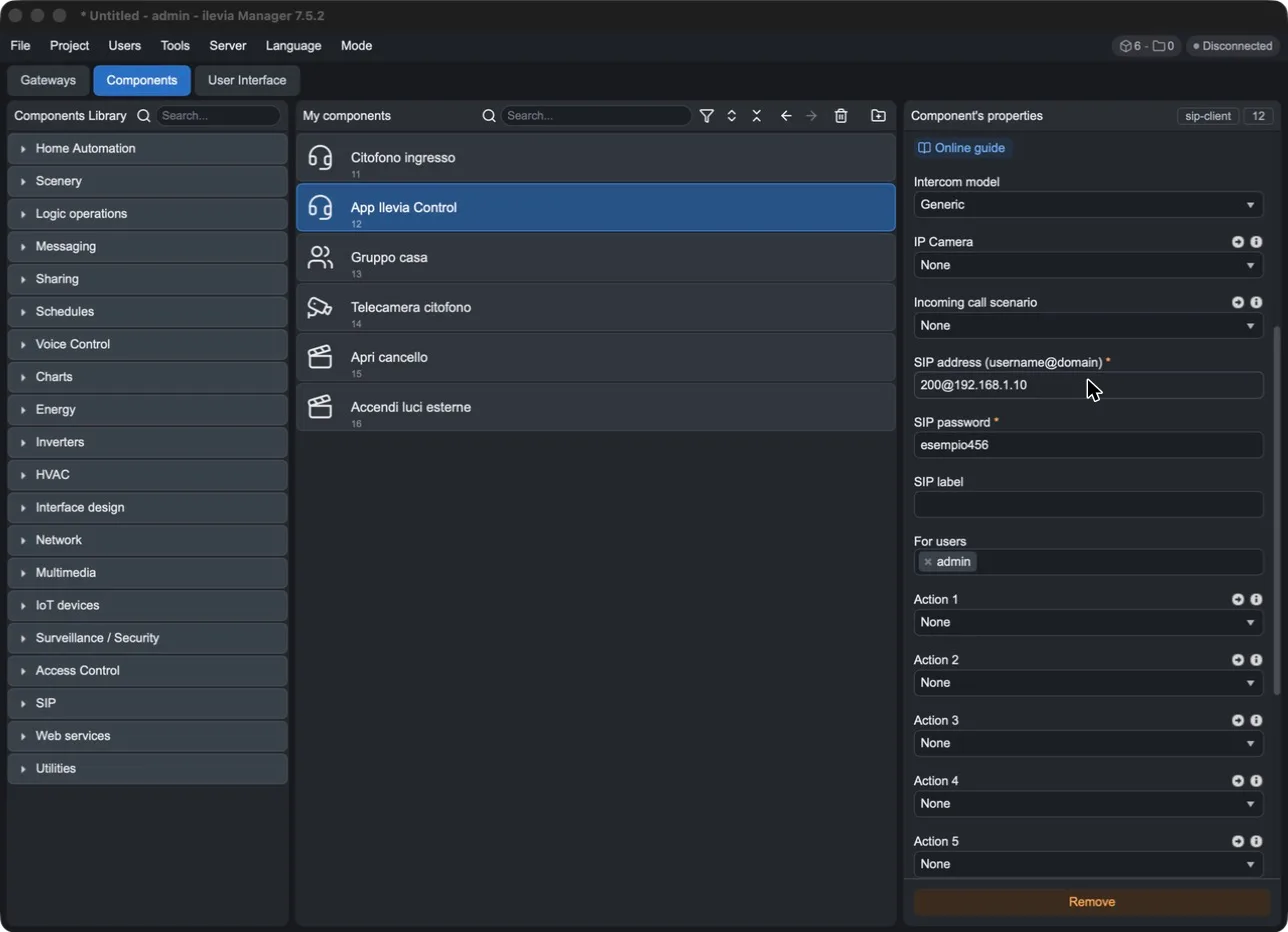
SIP address (username@domain) | The SIP address: |
SIP password | The password for the SIP account, the same as set on the intercom. Required. |
SIP label | A descriptive label (e.g. Entrance). |
For users | The project users who receive the call in the app. |
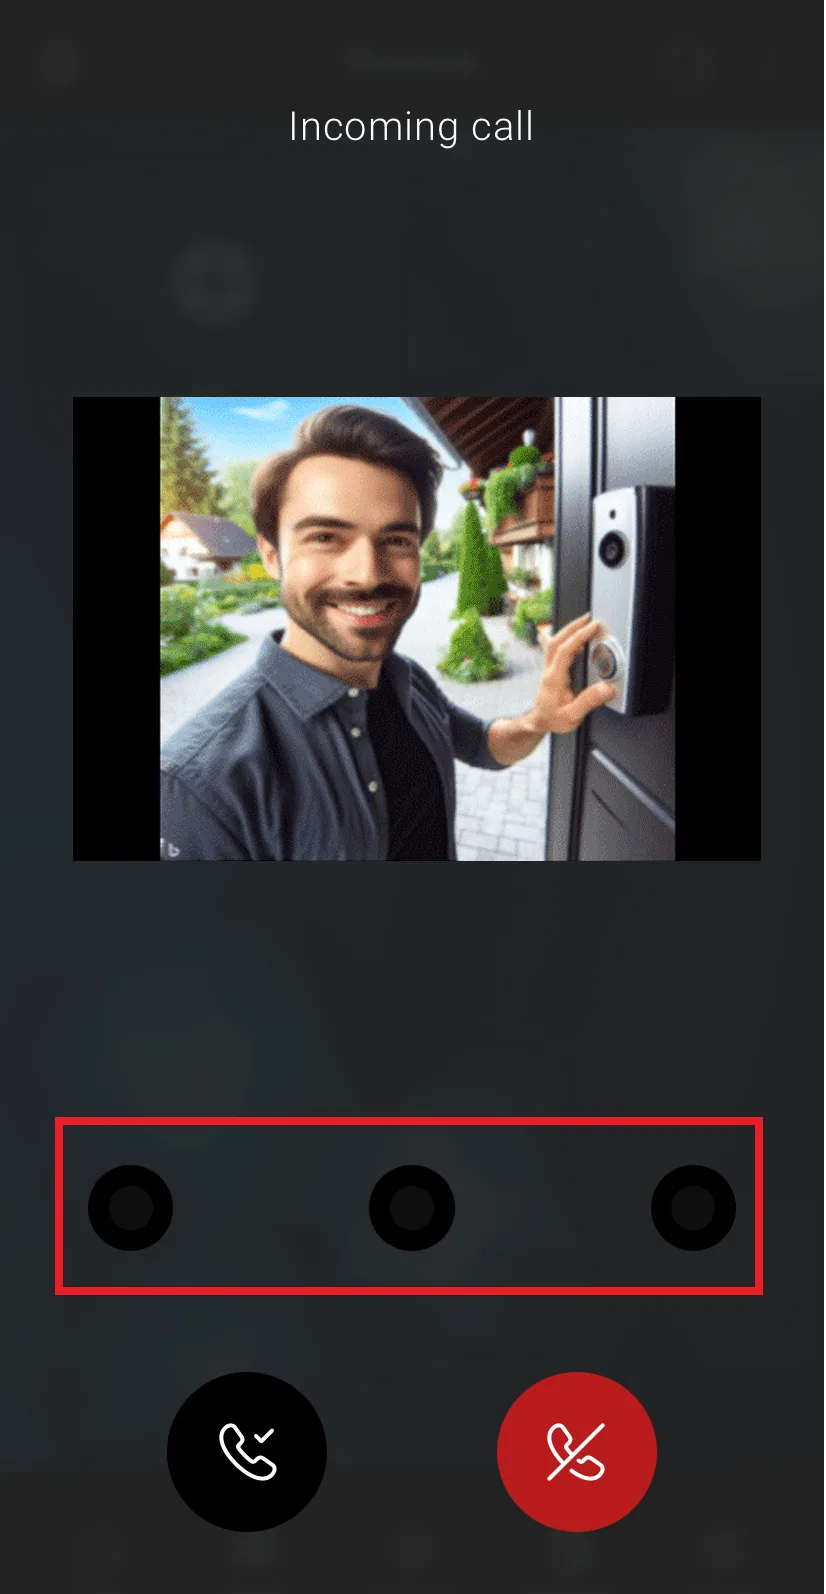
Action 1 … 6 | Up to six scenarios that appear as buttons on the call screen, for example Open gate or Turn on outdoor lights. |
Actions during the call
The scenarios linked in Action 1 … 6 appear as buttons on the app call screen after answering. First create the scenarios in the Scenery category, then select them in the Action fields.
Parameters by model
With some models, the SIP Client shows extra fields used by the server to control the intercom:
Model | Additional parameters |
|---|---|
Videx, Akuvox R20BX3, Akuvox E16C | Relay 1, Relay 2 (Switch components that control the intercom relays), IP, Username, Password of the intercom |
2N | Relay 1 … 4, IP, Connection (HTTPS or HTTP), Username, Password |
SIP Group
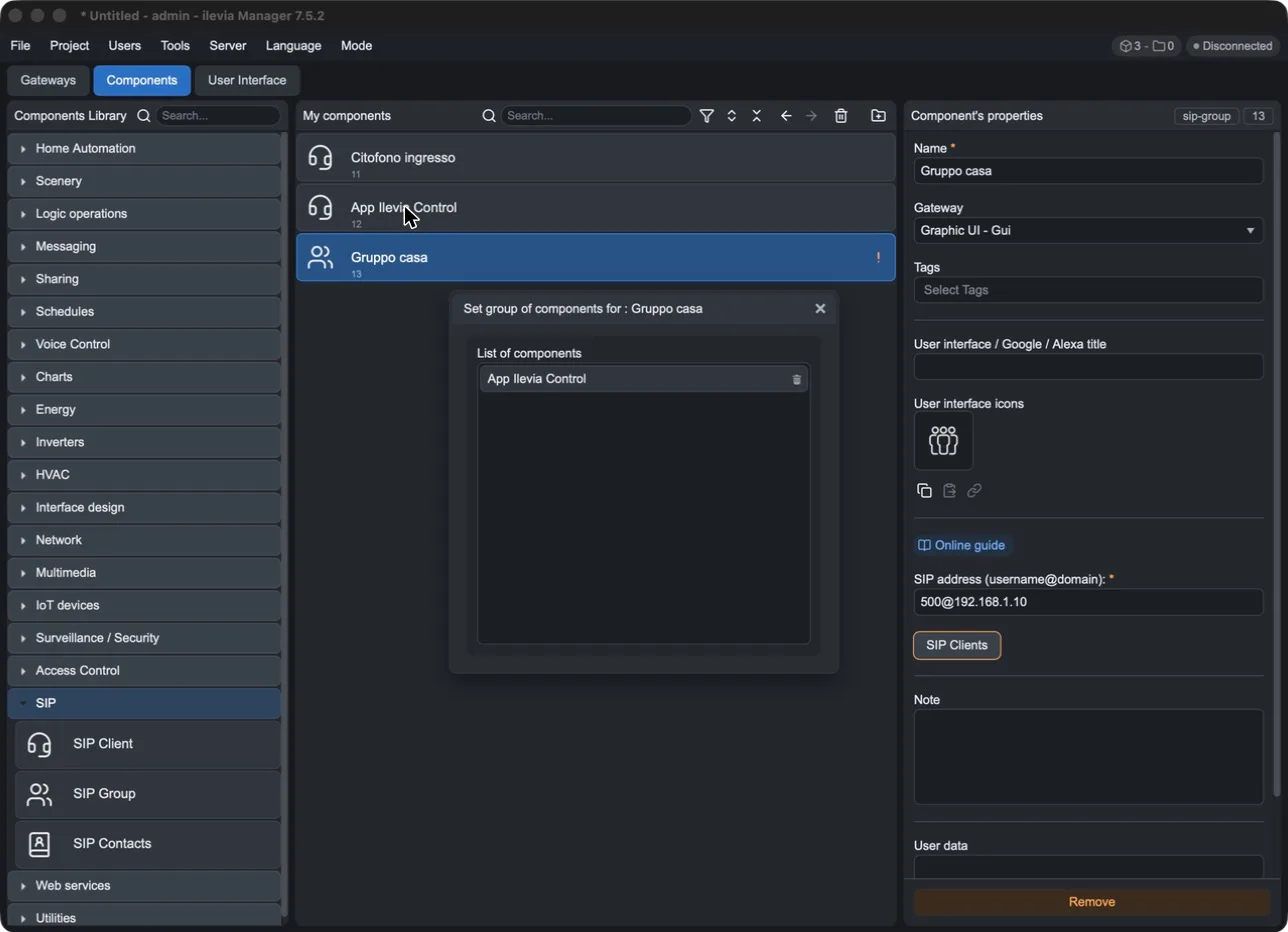
The SIP Group is a SIP address that collects multiple SIP Clients: when the intercom calls the group address, all clients in the group ring.
Parameter | Meaning |
|---|---|
SIP address (username@domain) | The group address, in the form |
SIP Clients | Opens the list of the group's clients: drag the SIP Clients from My components into the list; use the trash can to remove them. |
IP Camera
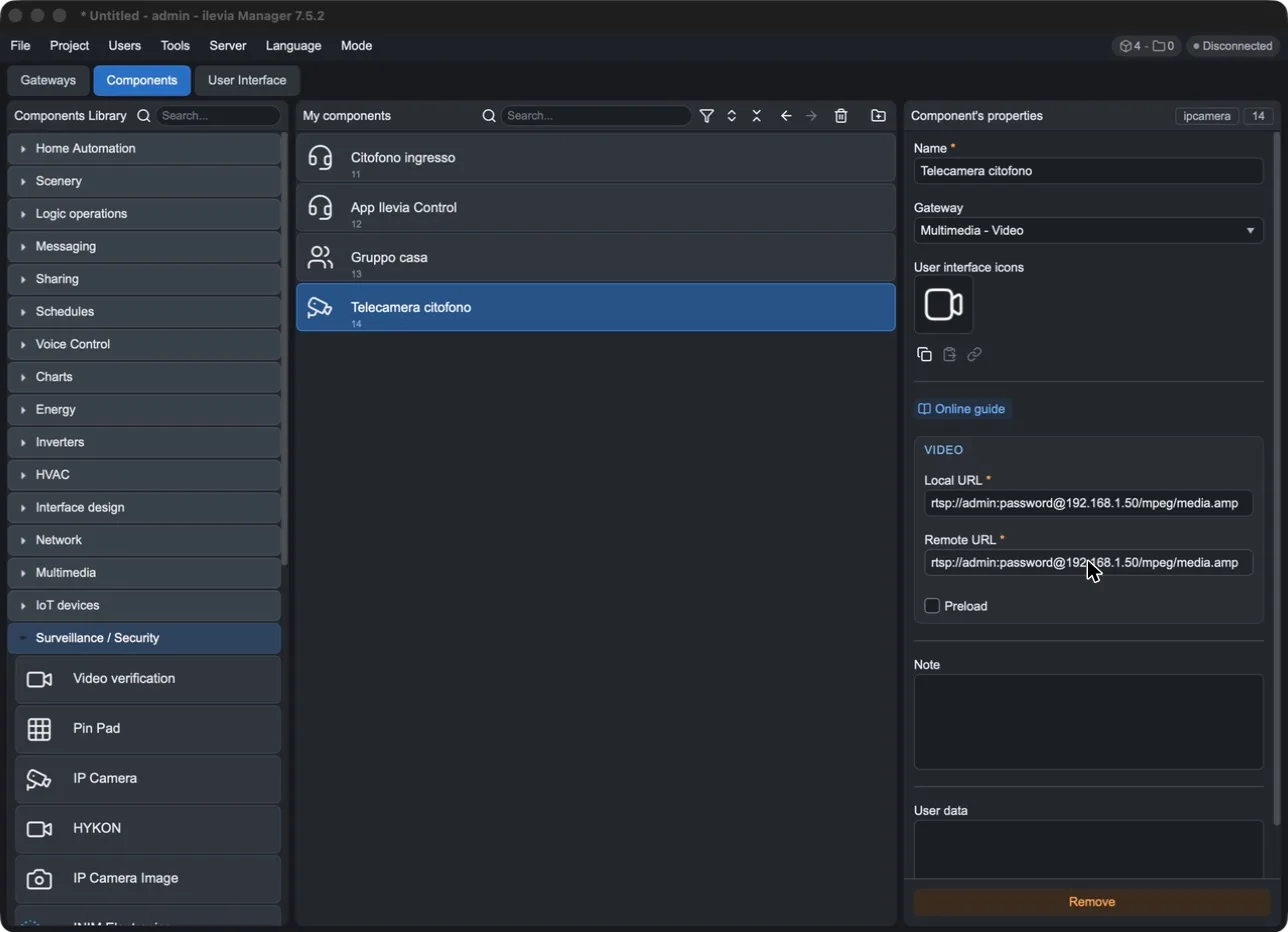
To view the intercom video, add an IP Camera component (Surveillance / Security category) and link it in the IP Camera field of the intercom SIP Client.
Parameter | Meaning |
|---|---|
Local URL | The video stream address used on the local network, usually RTSP: |
Remote URL | The stream address used remotely. |
Preload | Preloads the video. |
After configuration
Upload the project with Project > Upload to server.
In the ILEVIA Control app, open Settings > Video intercom > Device, choose the intercom, and press OK.
Ring the intercom: with the app open, the call screen appears; with the app closed, you receive a notification.