
Example project for the Lock component
Guide to understanding the Lock component with an example project configured within the Ilevia Manager software.
Introduction
This guide explains how to set up the Lock component from scratch in Ilevia Manager, starting from an example project. See the Lock component page for more information.
Preparation and loading of the project in Ilevia Manager:
Extract the example project zip file (downloadable at the bottom of the page);
Open Ilevia Manager, go to the top left and click File – Open; click “Ok” in the message that appears and select the file you just extracted;
Start the virtual machine or the Raspberry;
Download and install the latest logic files by following this guide.
Component configuration
Step 1: open the Ilevia Manager software and go to the Components section. Add the following components in the My components section:
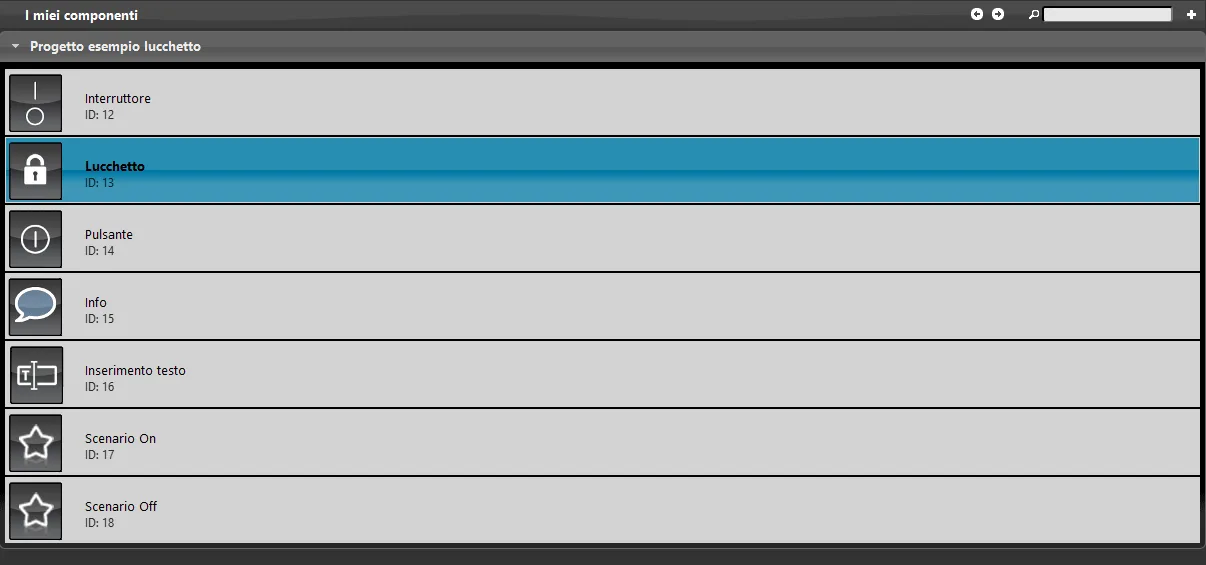
Step 2:
In this example, the Lock component, every time it is unlocked, changes the state of a Switch component, linked respectively to the Off/0 and On/1 parameters in the Lock component properties. Add the Switch component within the Scenario, making sure to set the correct value to assign to the Switch when the scenario is executed.
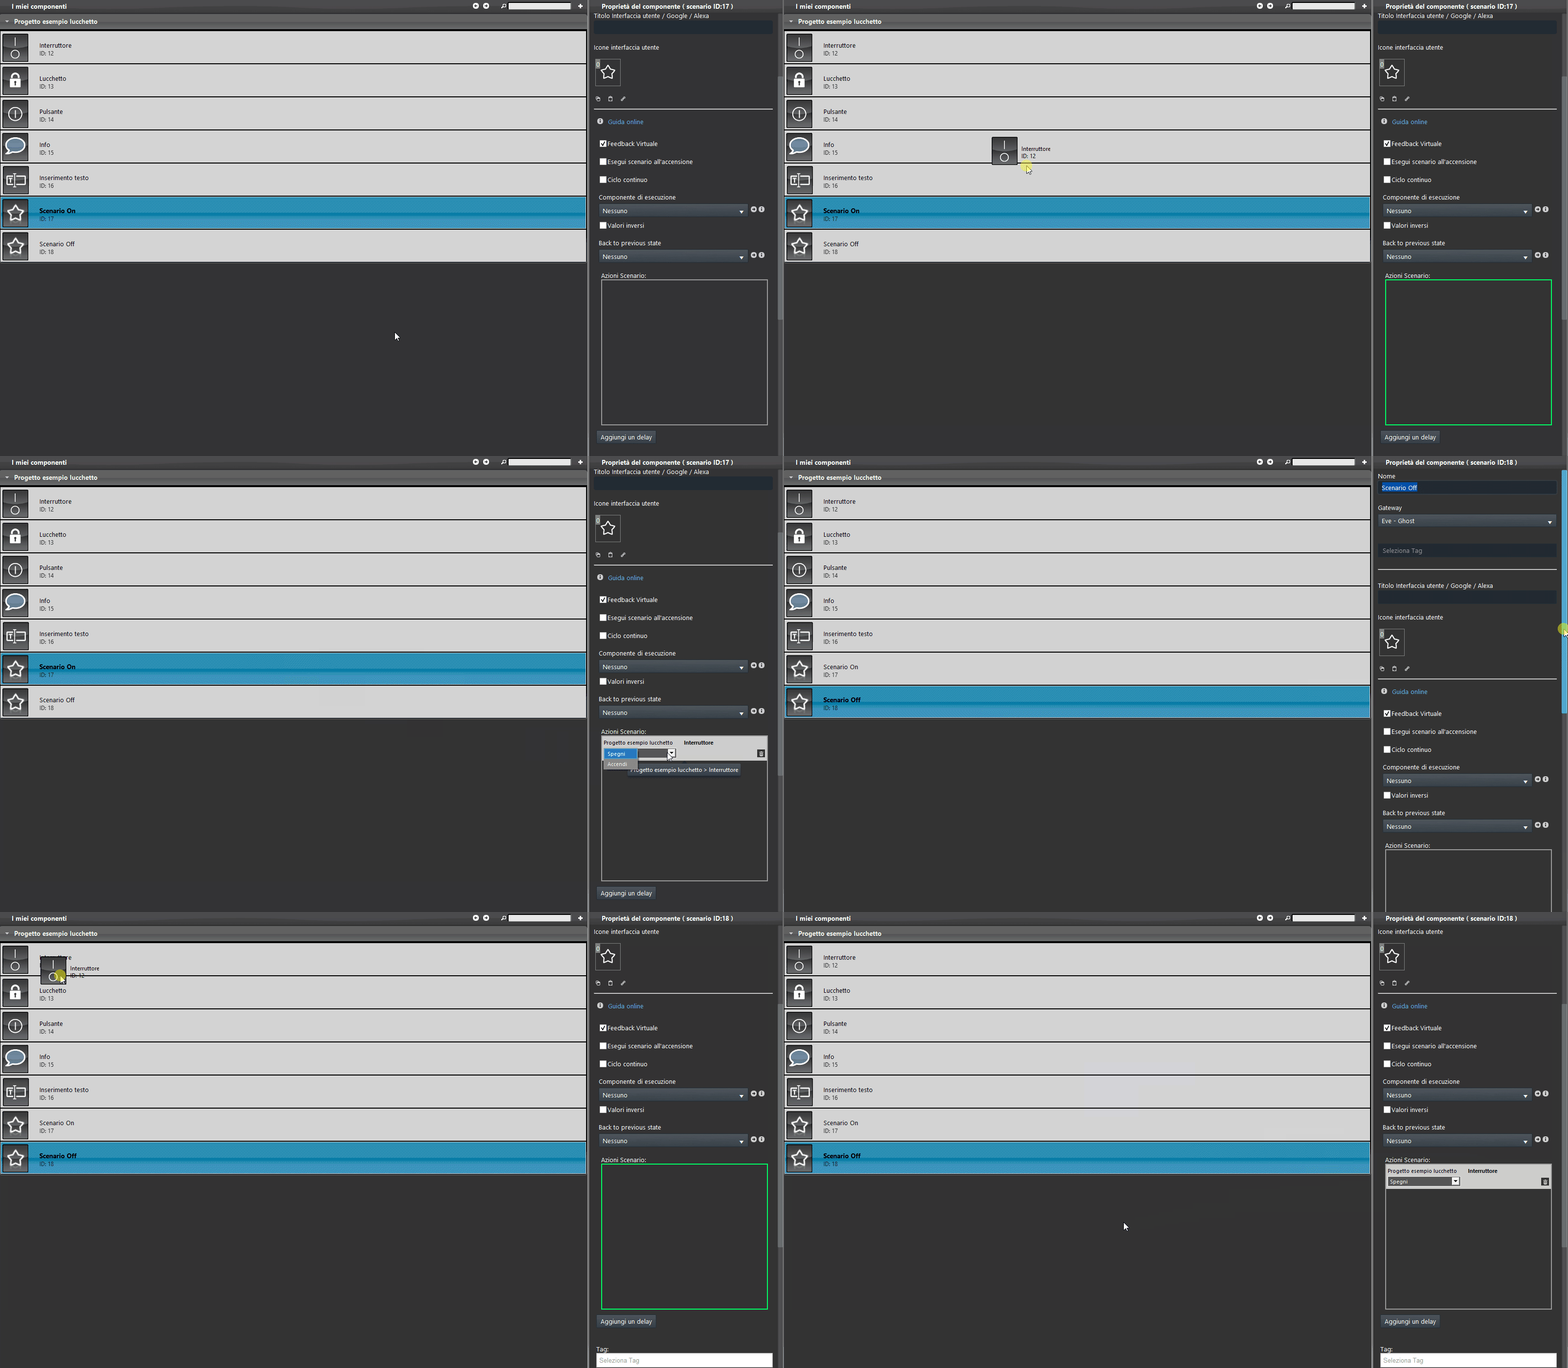
Step 3:
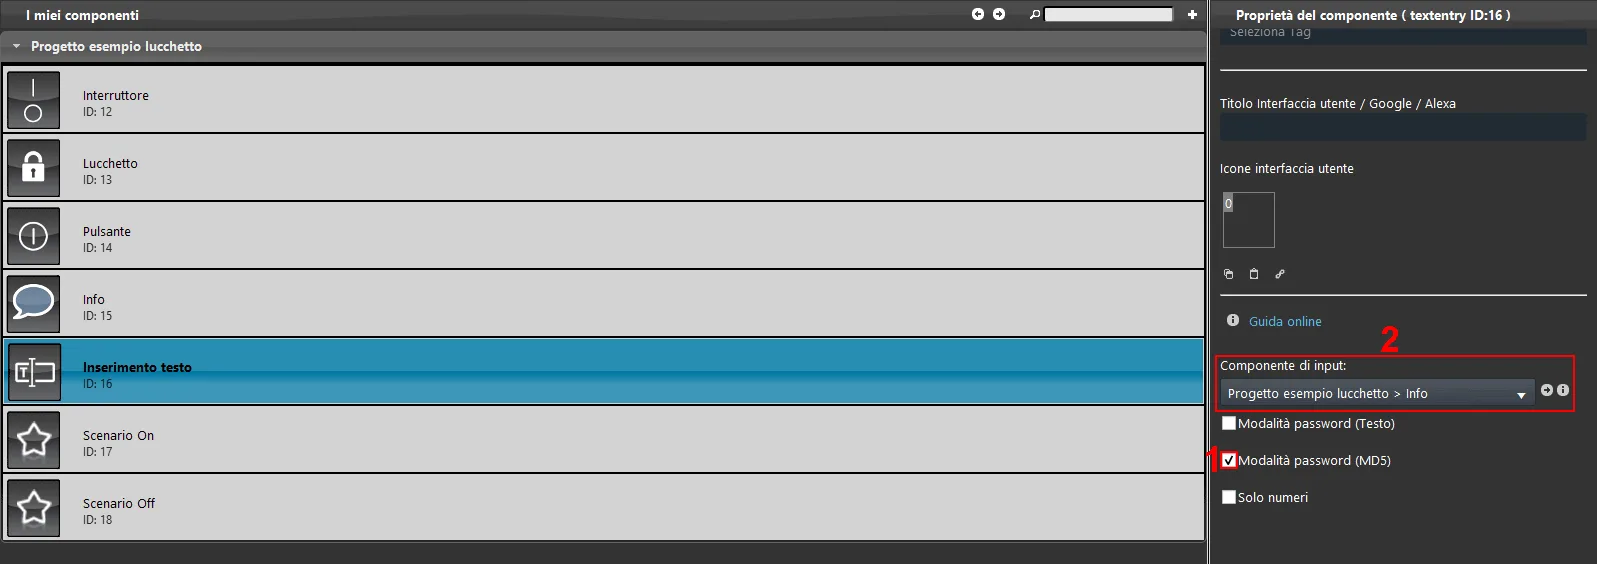
1. Set the Text input component to encrypt the password entered by the user: select Password mode (MD5).
2. Then connect the Info component in the Input component parameter.
Step 4:
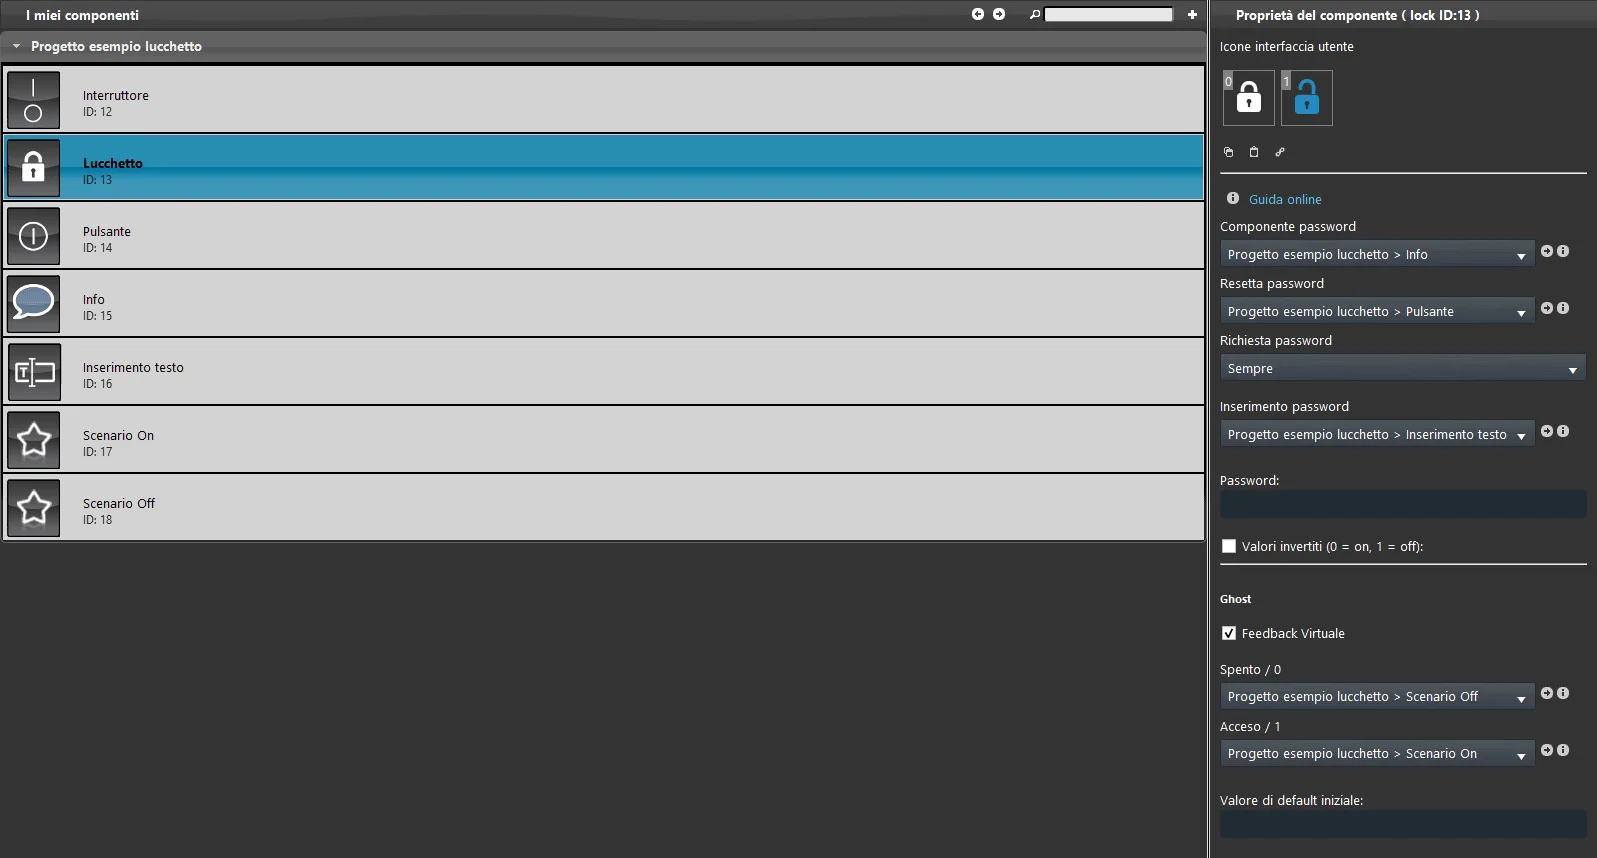
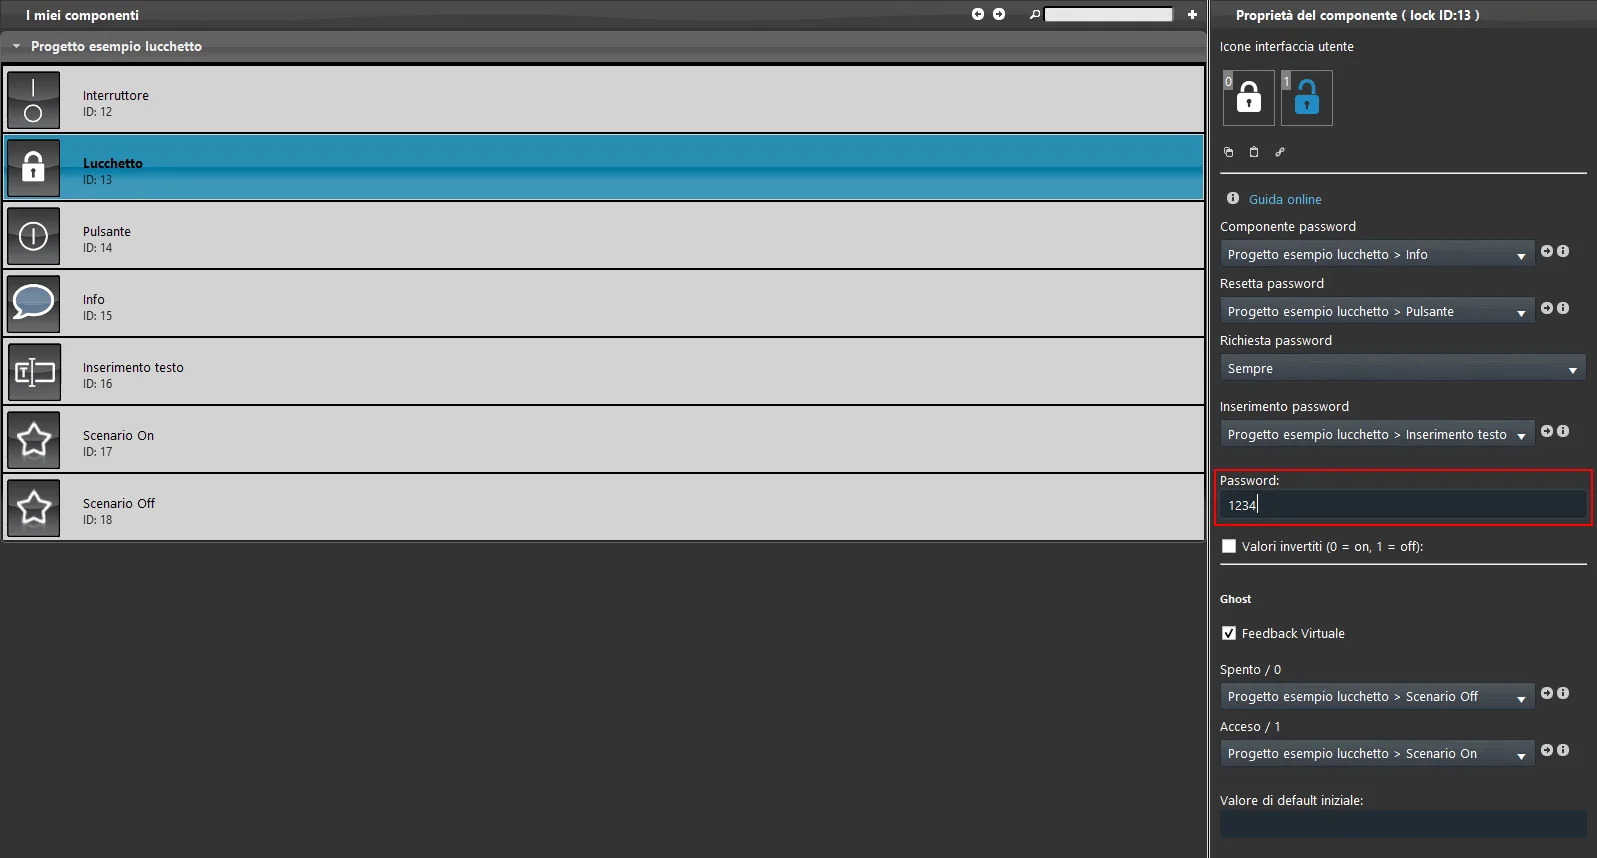
Once all components have been added to the project, connect each component to the corresponding parameter in the properties of the Lock component, as shown in the image below.
Step 5:
Set the password that will be requested by the Password parameter of the Lock component. In this example, the password is 1234.
Step 6:
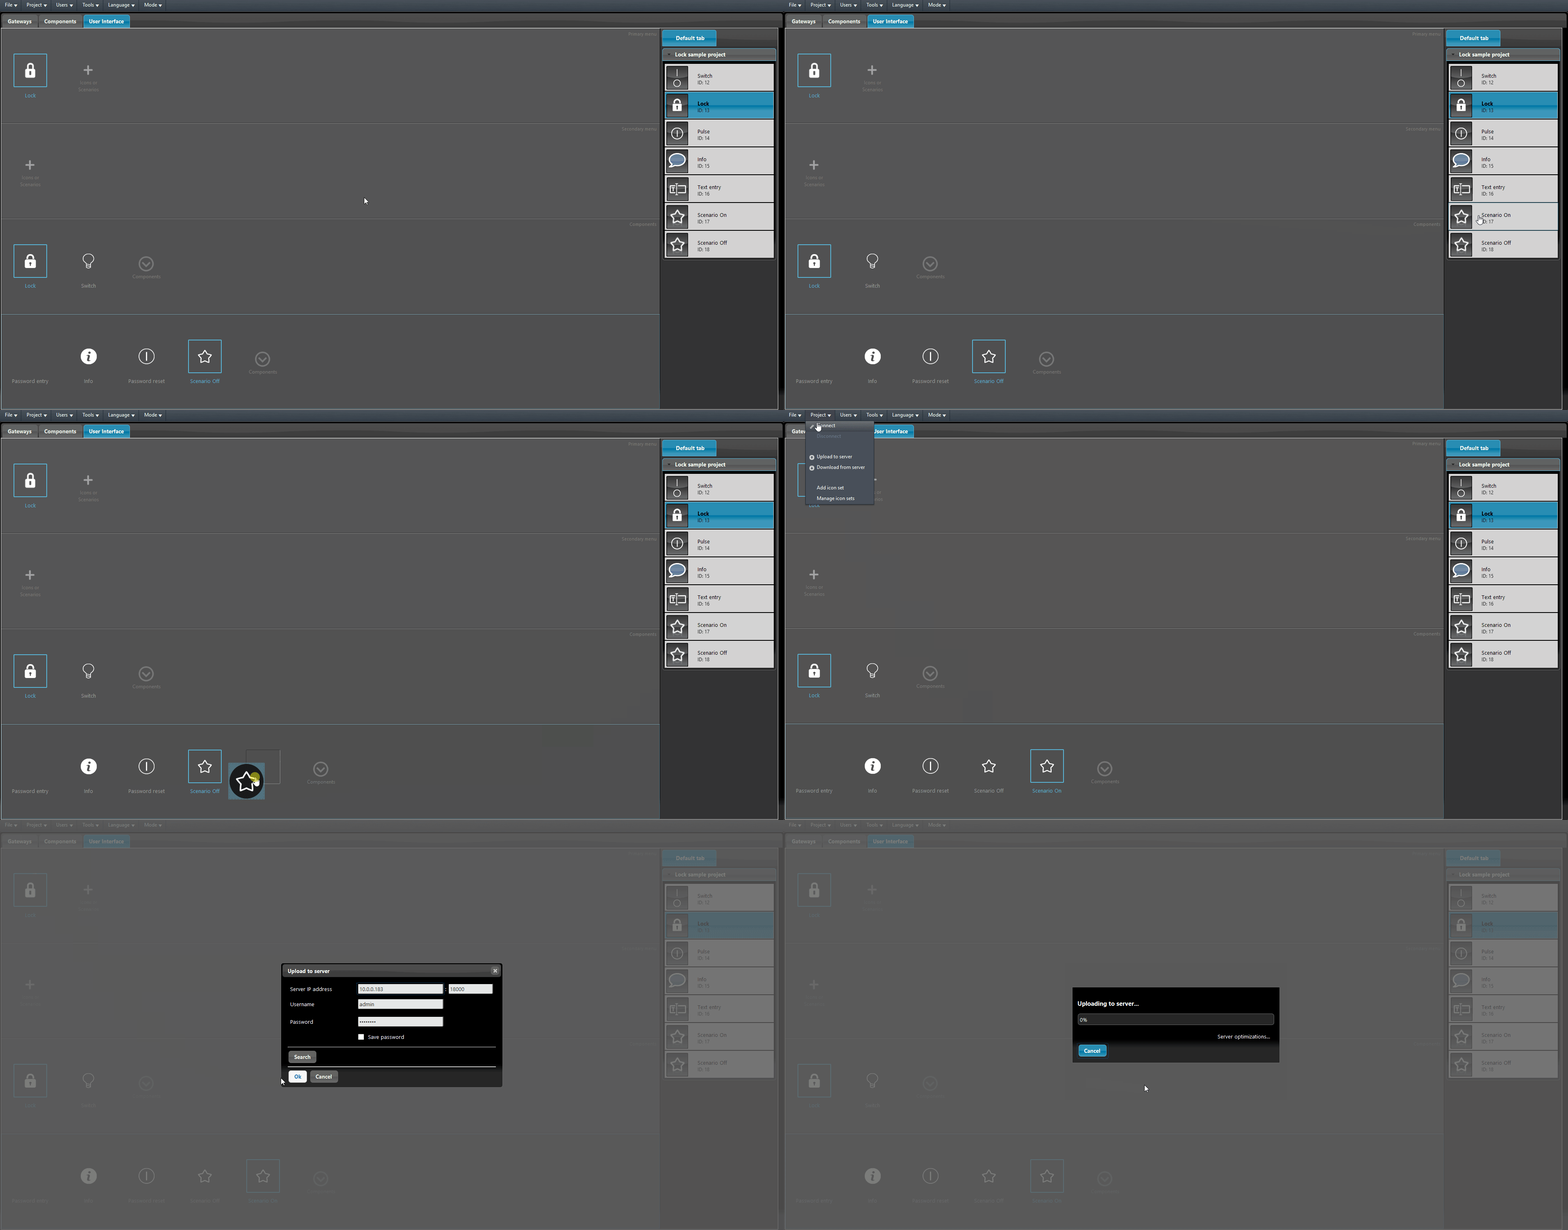
Go to the Interface Editor section in Ilevia Manager and add the components to the user interface (in this example, the classic user interface style was used). Finally, upload the project to the X1 server.
Visual result in the user interface
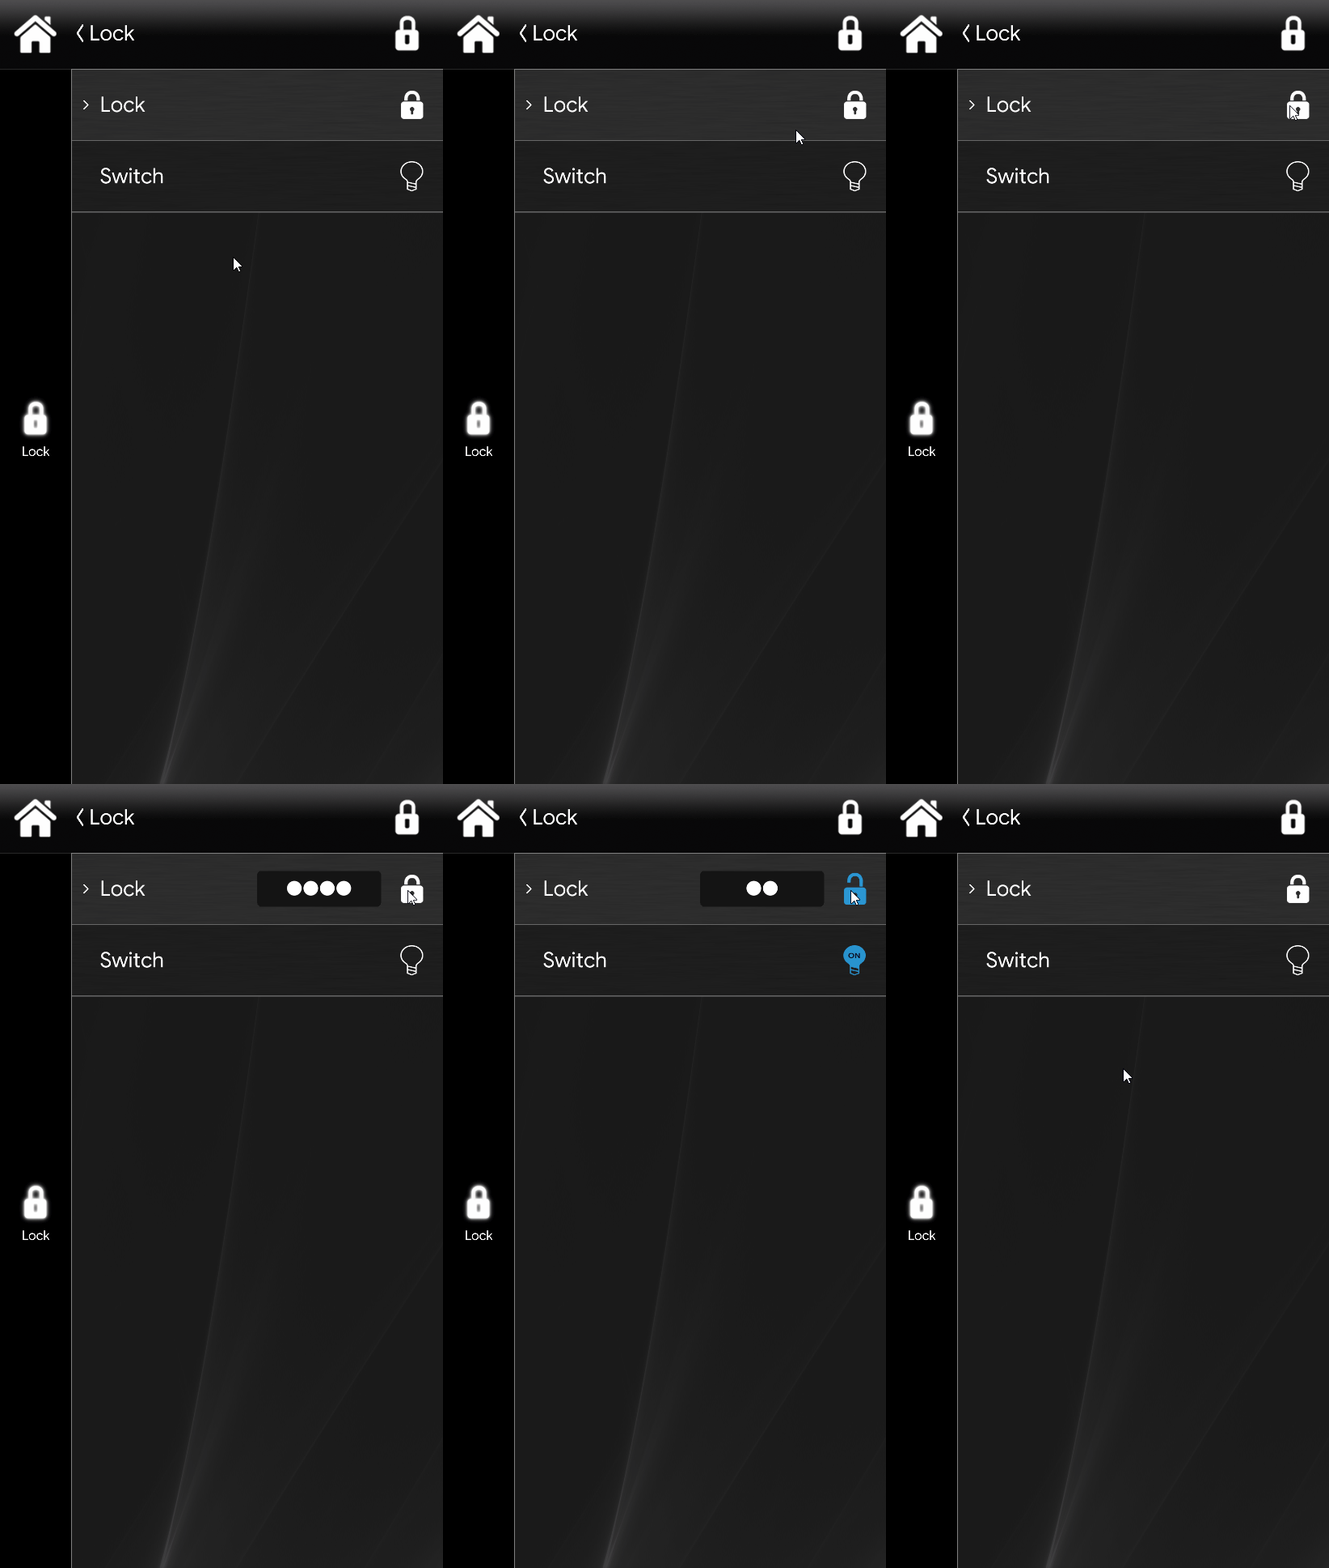
This is one of the visual results of the Lock component in the Ilevia user interface (style Classic).
Click the Lock icon and enter the password. If the password is correct, the component unlocks and executes the scenario. The same happens when trying to lock the component.
Download the example project to try it.