Scenario
How to set up the Scenario component in Ilevia Manager and how it appears in Ilevia Control, with Classic and Maps interfaces.
Introduction
The Scenario component allows you to create a sequence of actions programmed by the user or triggered by other events.
Use cases
The user wants to perform a series of actions when they get home, for example turning on the living room lights and setting the thermostat to 25 °C.
Component properties
GHOST
This component was created using the GHOST gateway.
You can refer to the chapter “Gateway / protocols” for further information.
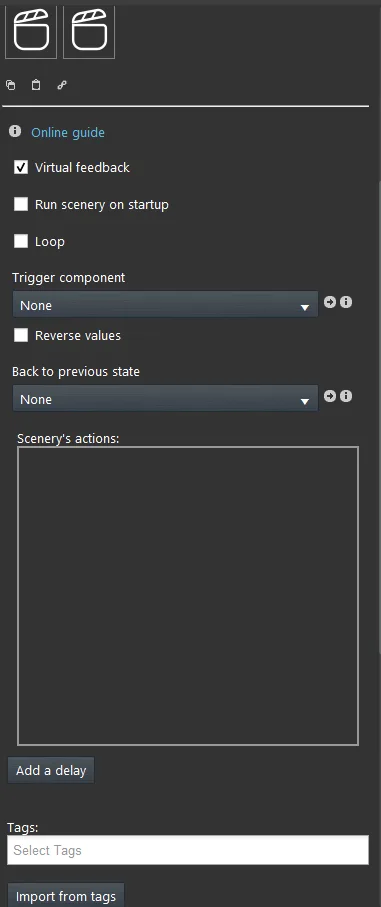
Virtual Feedback: see the guide to the “KNX protocol”;
Run scenery on startup: the scenario is executed when the project is loaded on the server and when Ilevia is active;
Loop: allows you to repeat the actions in a loop;
Trigger: this is the trigger component (optional) for the scenario (Switch or Timer);
Start when Off: the scenario starts when the trigger switches to OFF;
Scenario actions (Scenery’s actions): this is the list of actions that the scenario will perform when it is activated:
Category: component category;
Title: component title;
Options list: select the command;
Delete: select the trash icon to remove the component from the scenario;
Add a delay: allows you to add a delay in the scenario list;
Import from tags: by applying a tag to the components to be imported in the Scenario actions pane and clicking the Import from tags button, the components with the specified tag are imported automatically.
KNX
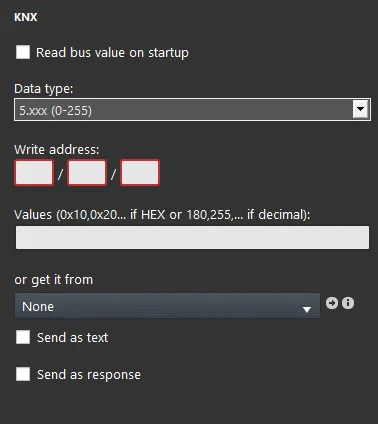
You can also configure the scenario in ETS and simply enter its write address in the component properties. This is the case for a Scenario component configured with the KNX gateway.
This is an example with a KNX gateway.
Execute Scenario on startup: see the guide to the “KNX protocol”;
How to configure a virtual scenario
Add the Scenario component within the My Components section and make sure it has EVE-GHOST as gateway.
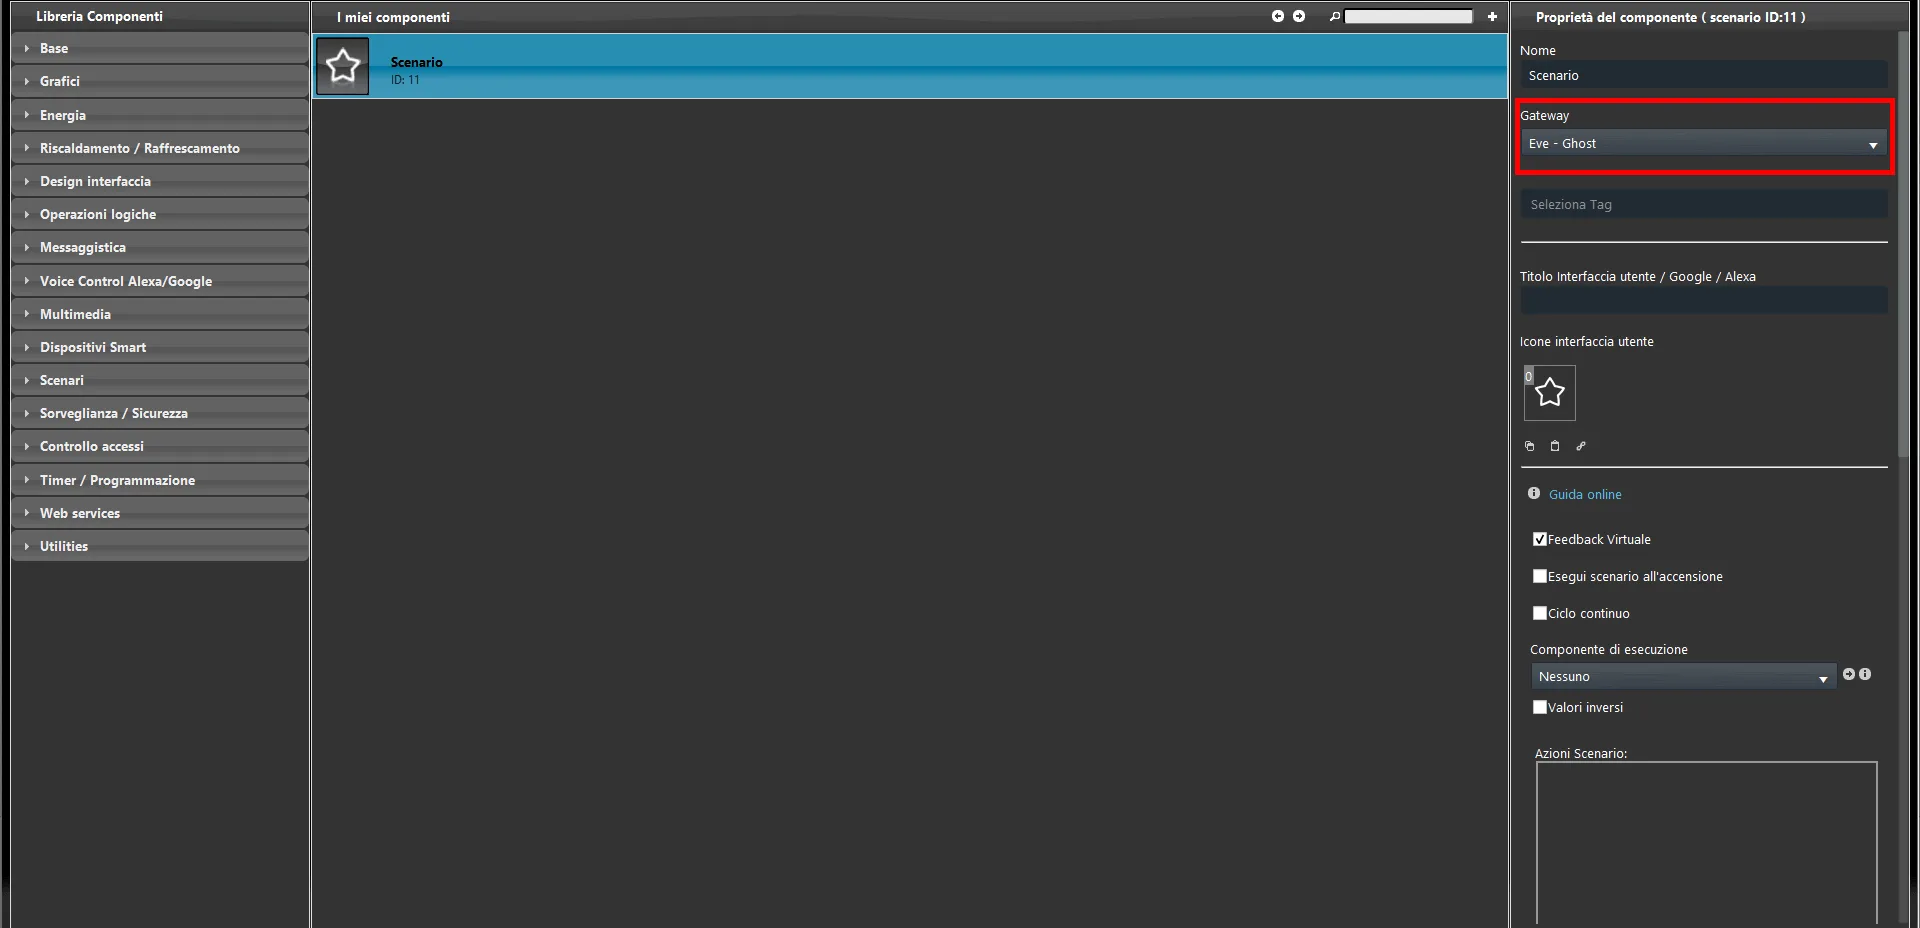
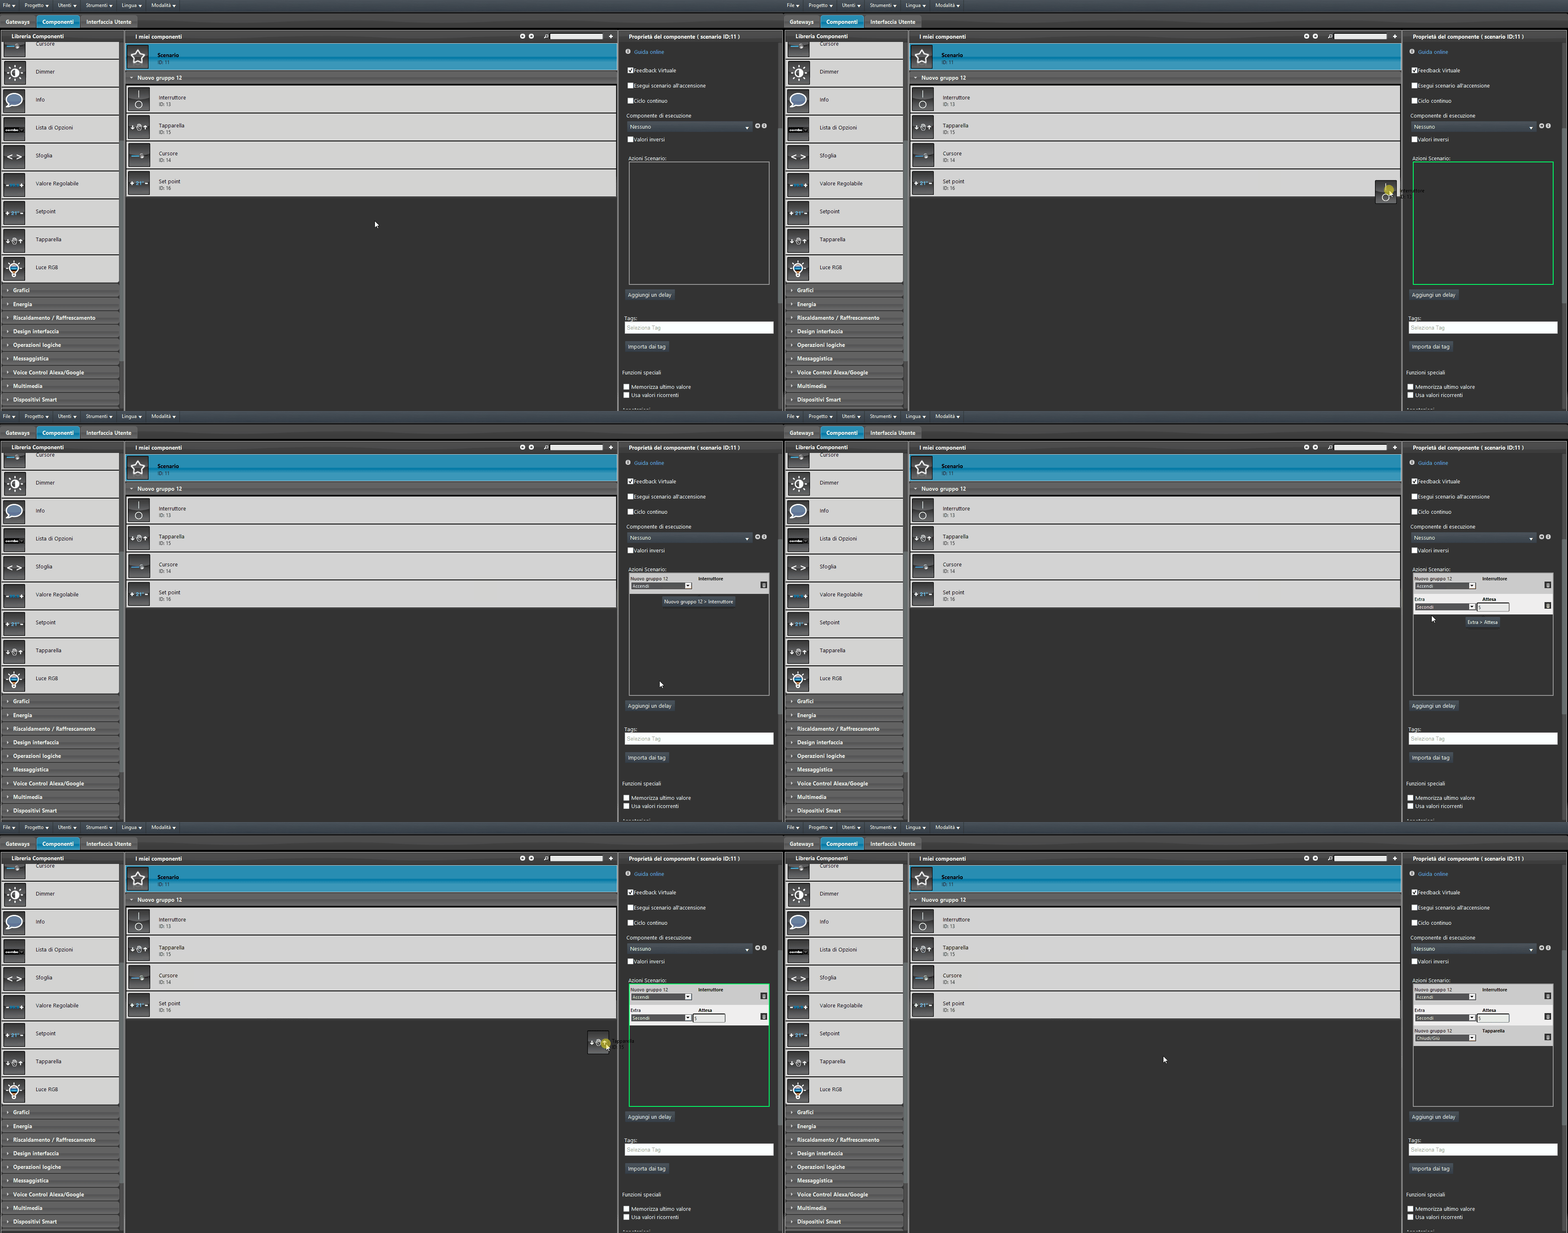
Then add the components you want the Scenario to control and choose the action that each added component will perform when the Scenario is executed.
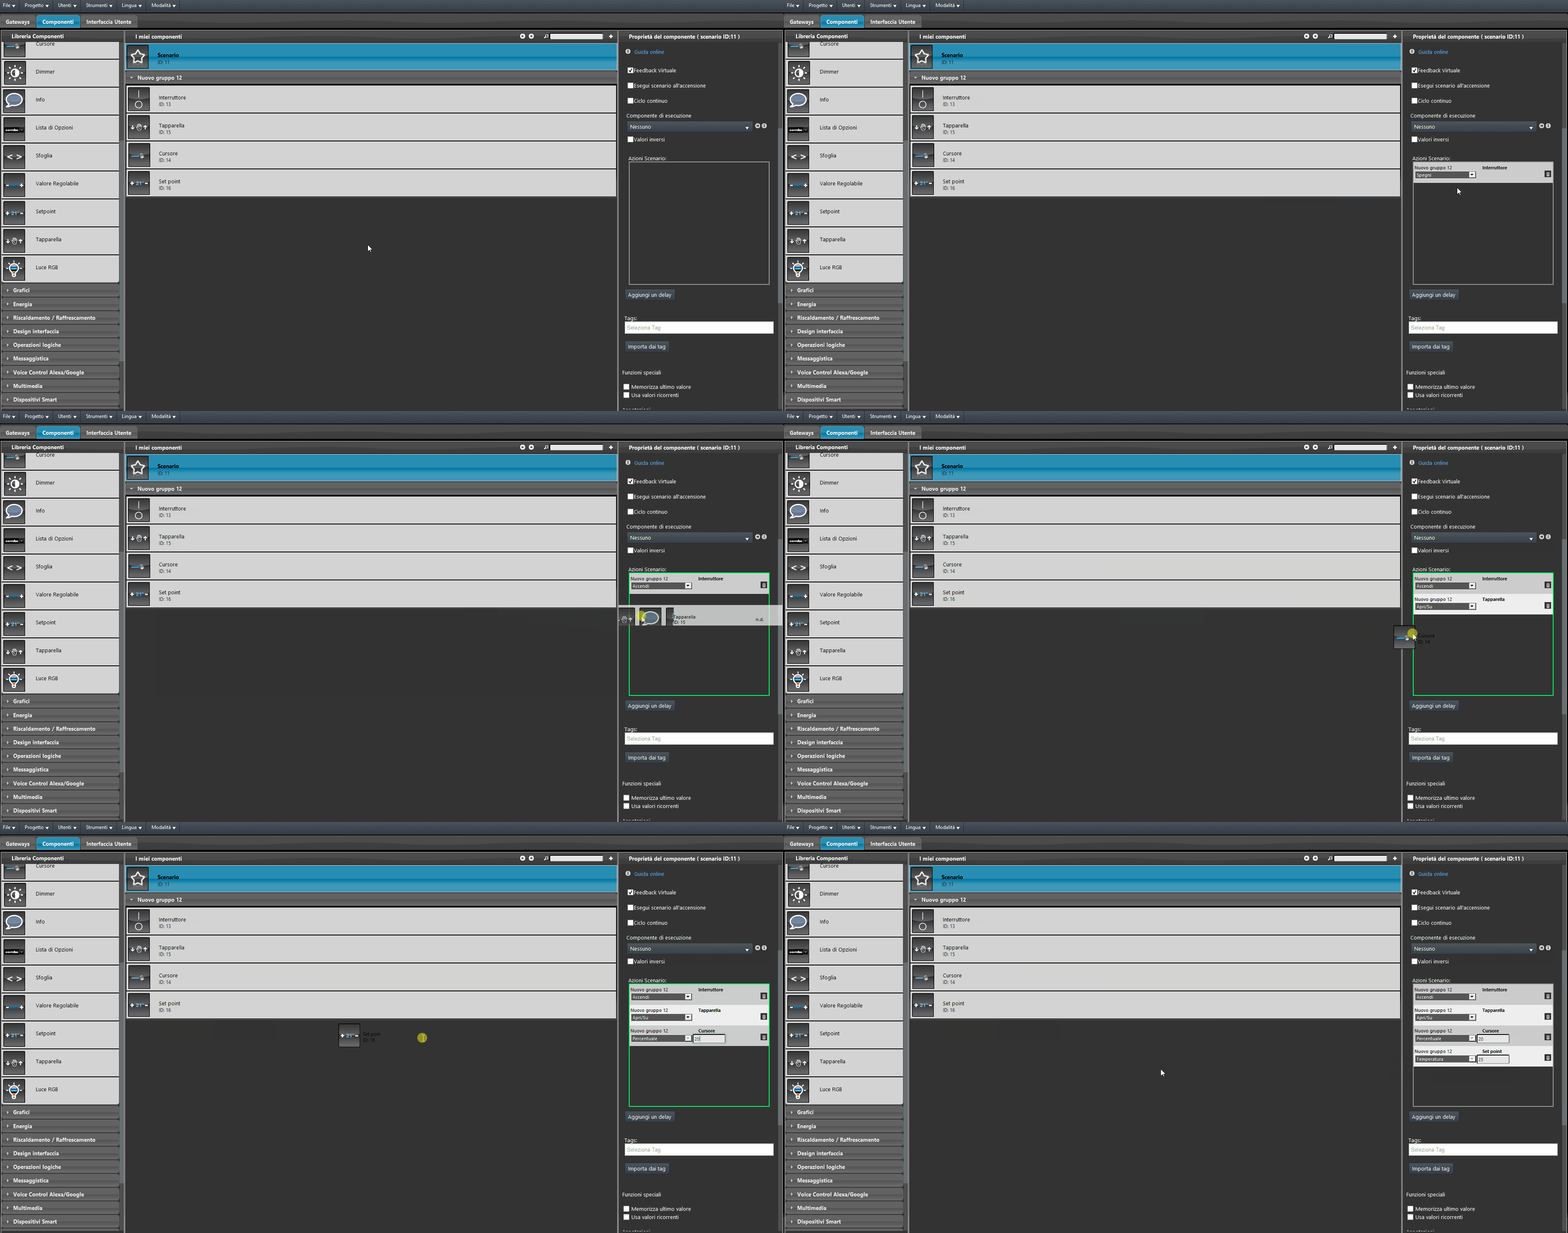
If needed, you can add delays between one action and the next. Delays can be set in Minutes, Seconds, or Milliseconds.
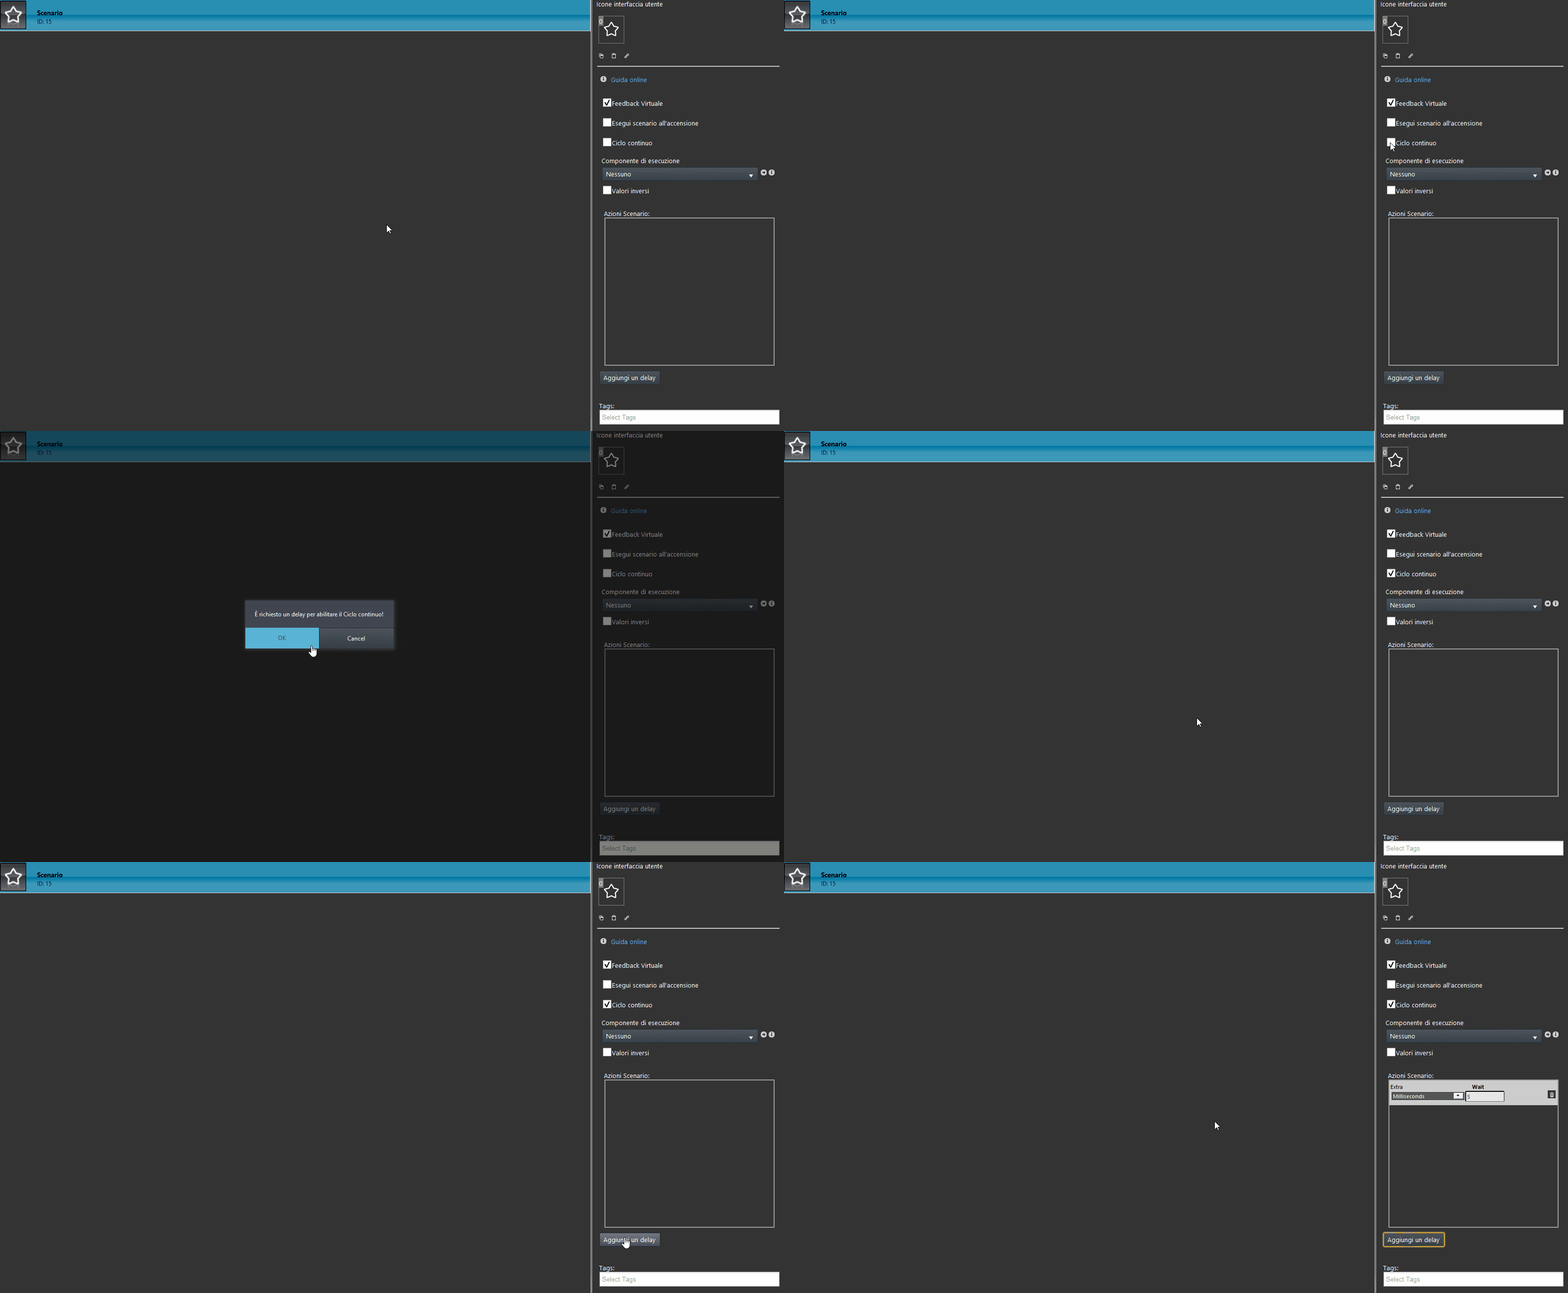
How to set the Loop option in the Scenario component
Once the Loop check box is selected, you need to add a Delay in the Scenario actions section; the added delay has 5 seconds as the default time.
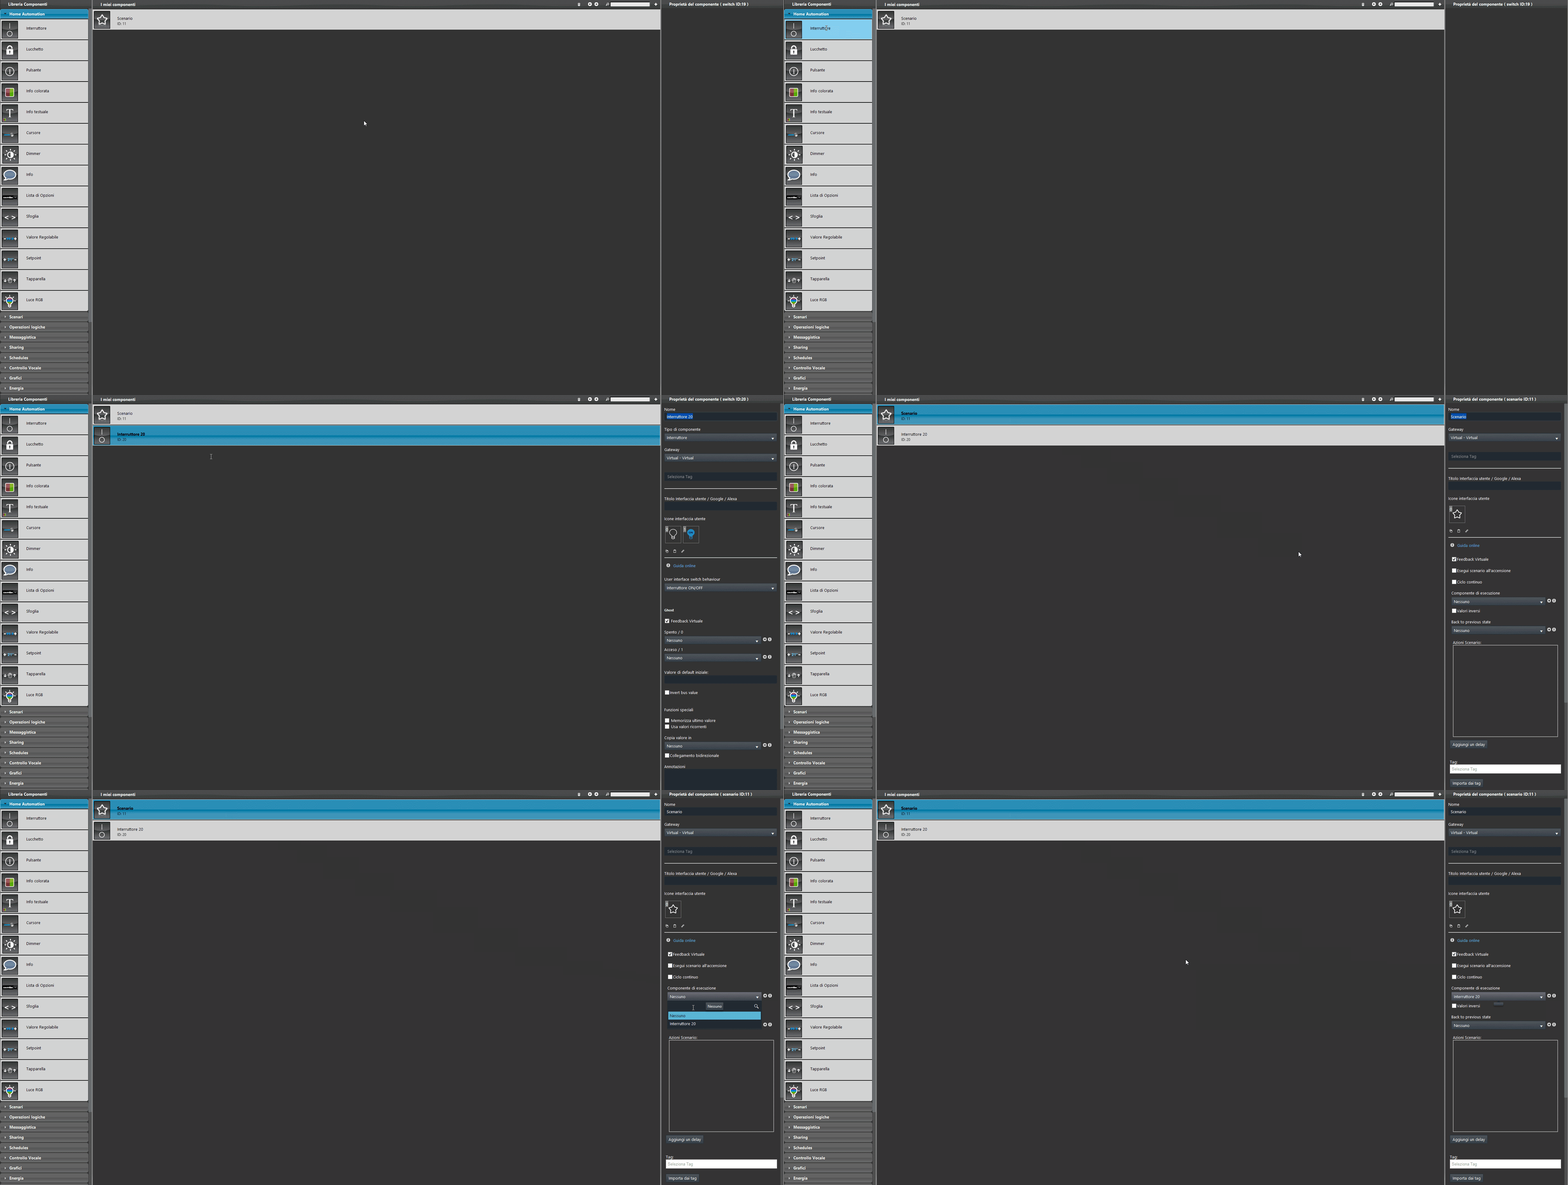
Add a Switch component to the project and connect it to the Scenario component from the Execution component options list, in its properties.
There are three possible display modes: “CLASSIC”, “MODAL”, and “HIDDEN”. For more information, see the “Common properties” guide.
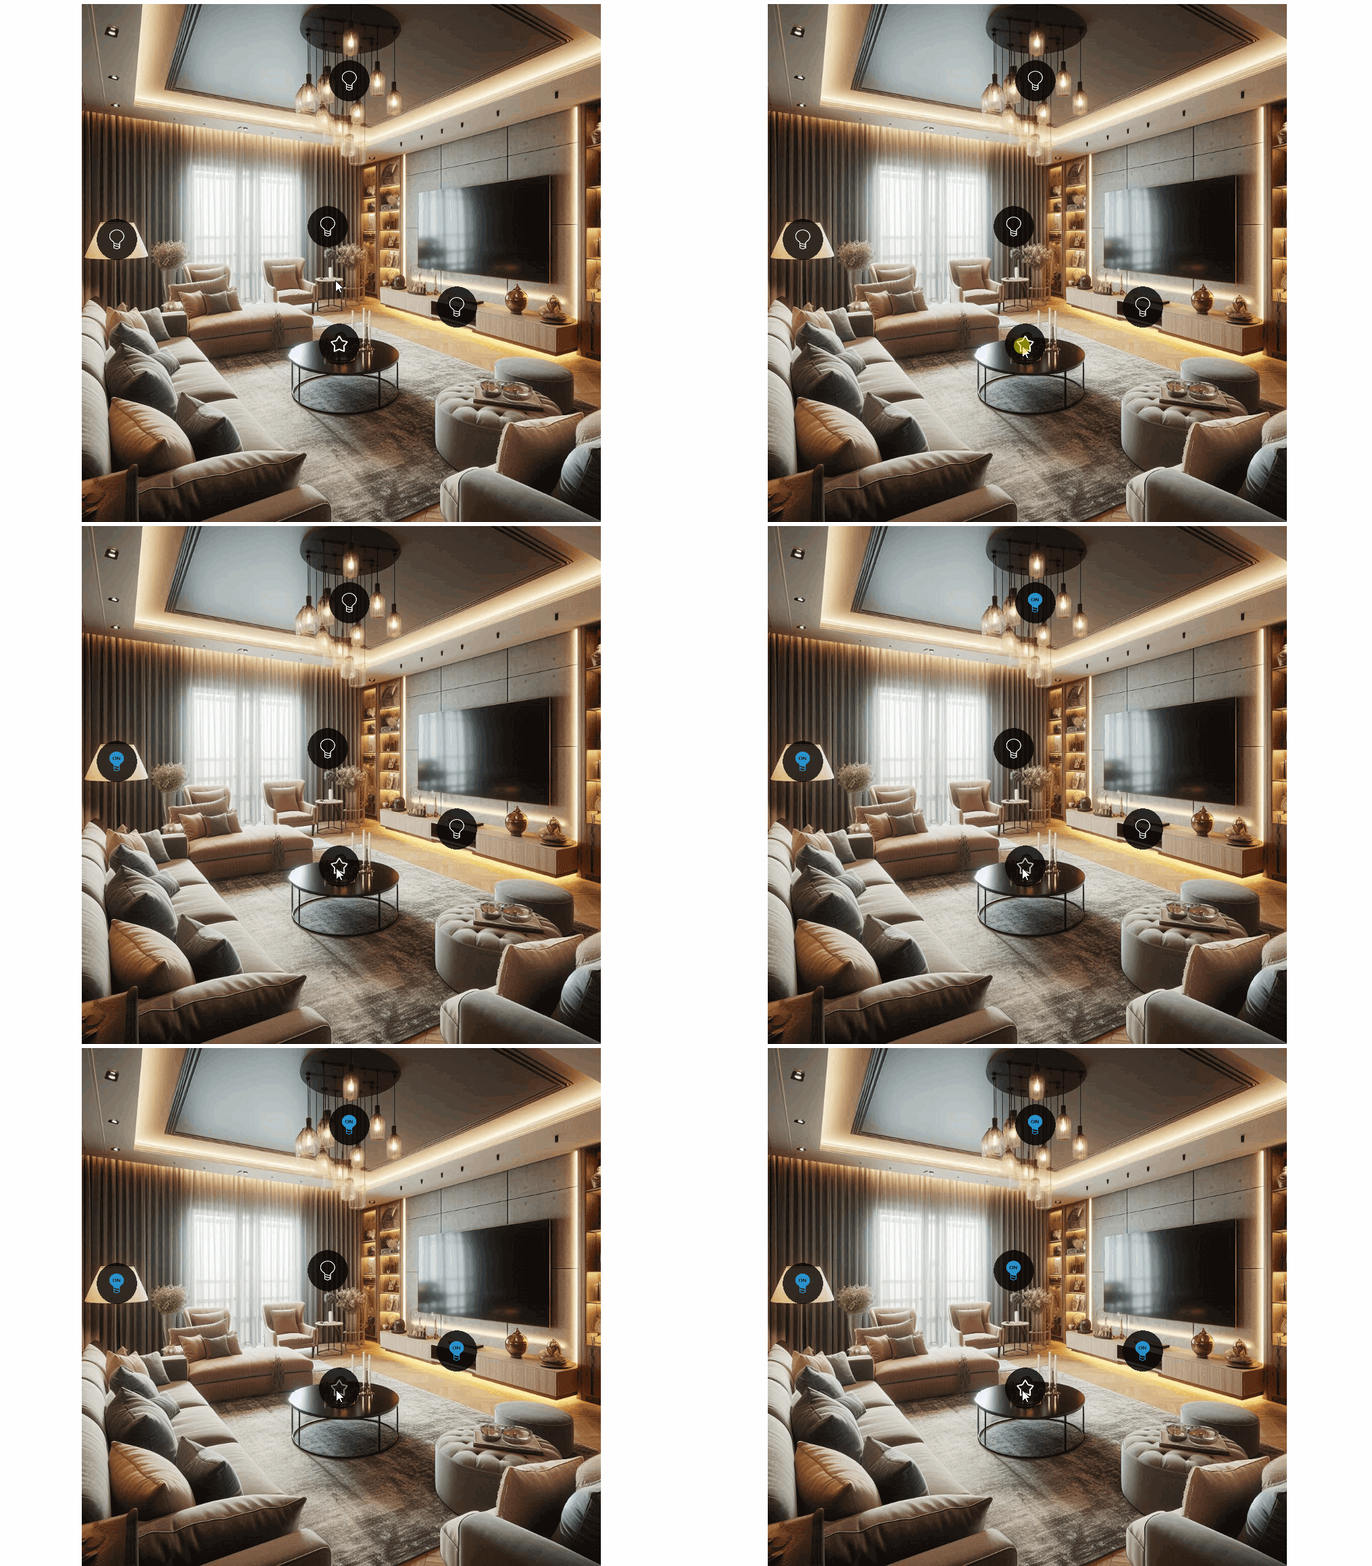
Here is the result of the component in Ilevia Control (Classic style).
The scenario icon starts blinking when the scenario is started.
All scenarios → Scenario faceplate

Scenario “All lights on” (Scenario faceplate)
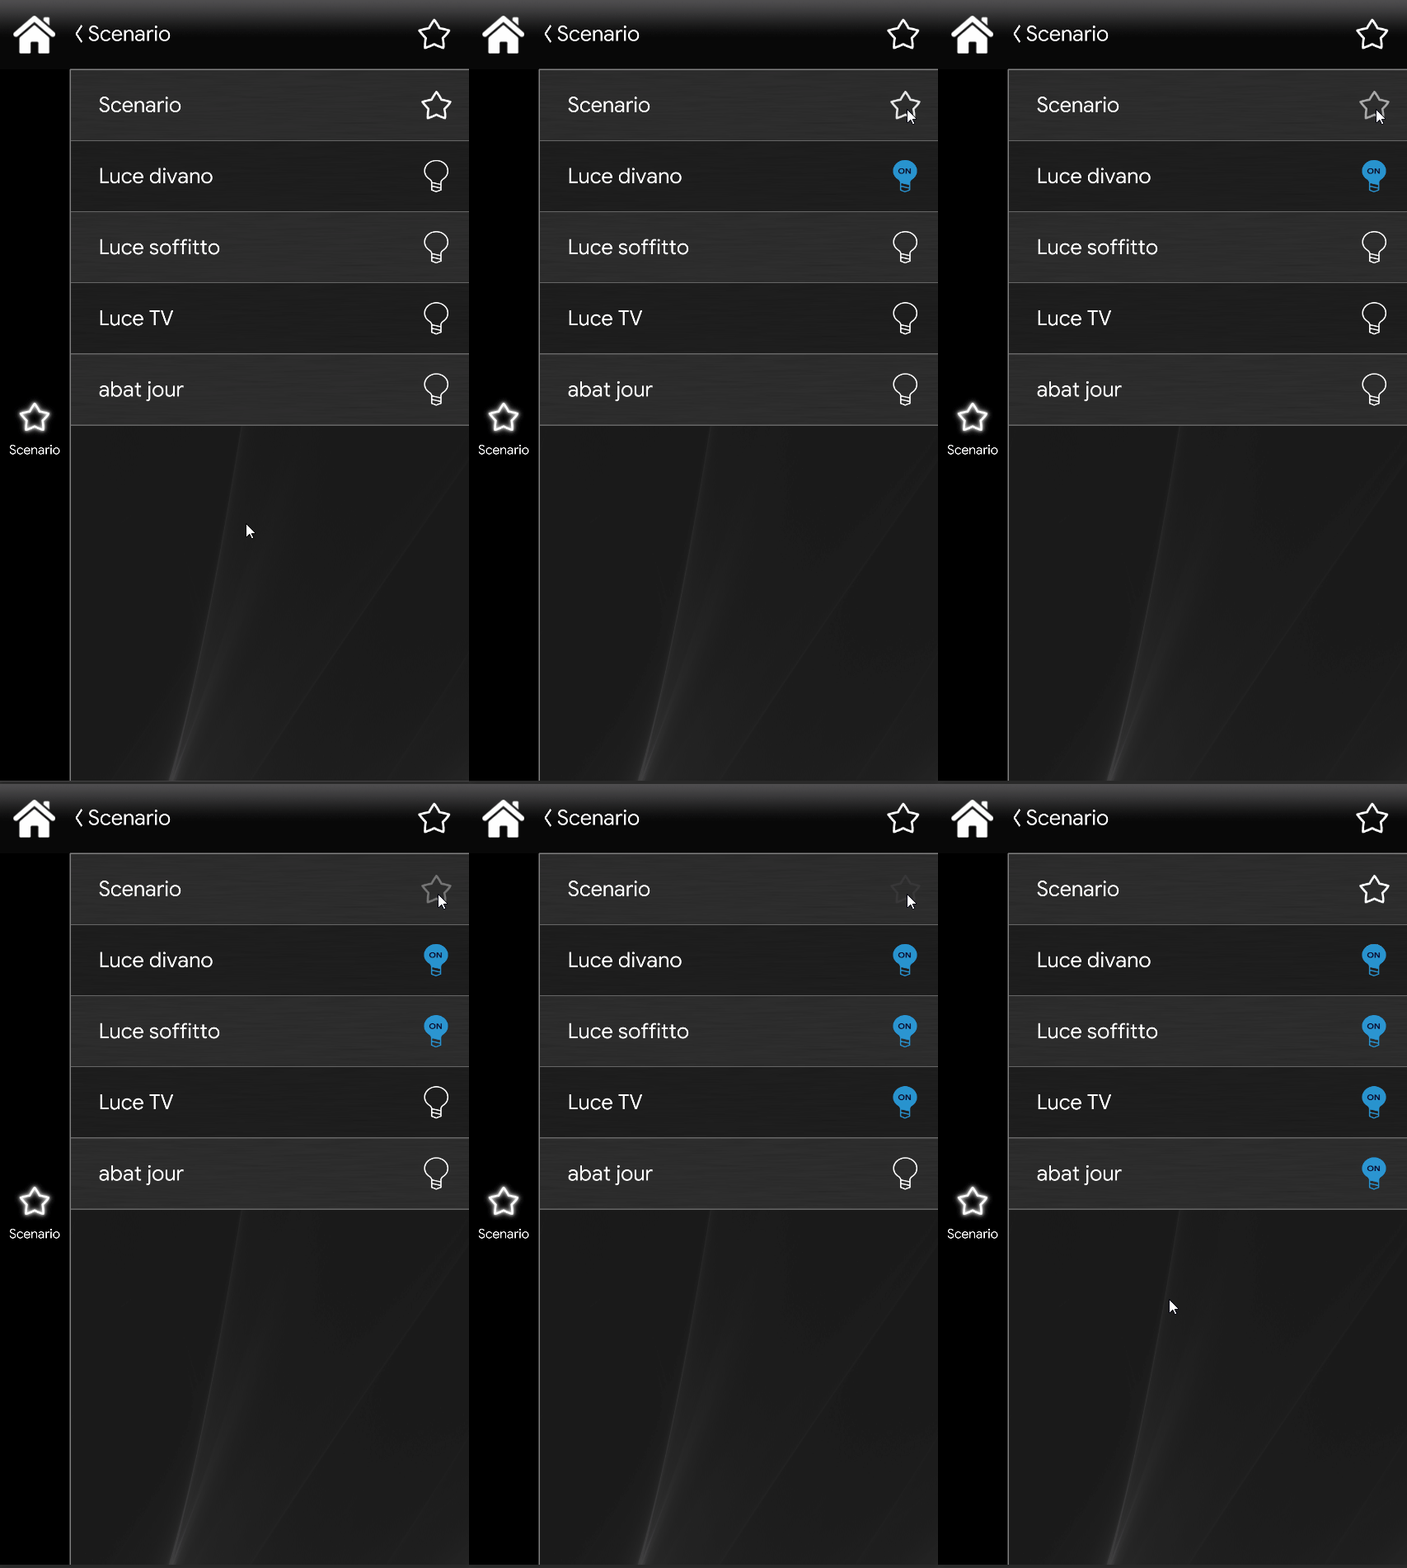
This is just one of the possible results of the component in Ilevia Control (Maps style).
The icon can be changed as needed, from the symbol to the color and size.
In this case, we see the default icon:
Any Scenario ⇒ Scenario Icons

Scenario “All lights on” (Customizable icon)