
Script
How to use the Ilevia Manager Script component to write custom JavaScript logic: available commands and examples with downloadable projects.
Introduction
Thanks to the Script component, you can implement new and custom logic on the system, from the simplest to the most complex, by writing lines of code in the JavaScript programming language.
Use cases
The user wants to create an external script to implement a color cycle for RGB lights.
The user wants to create a JavaScript script to create a custom condition.
The user wants to create a JavaScript script to control and set the temperature of an HVAC unit (Controlled Mechanical Ventilation) at a specific time. Click this link to learn more.
The user wants to create a logic with JavaScript to change the setpoint temperature based on the selected season in a list of options if the energy is at an acceptable level. Click this link for more information about this script.
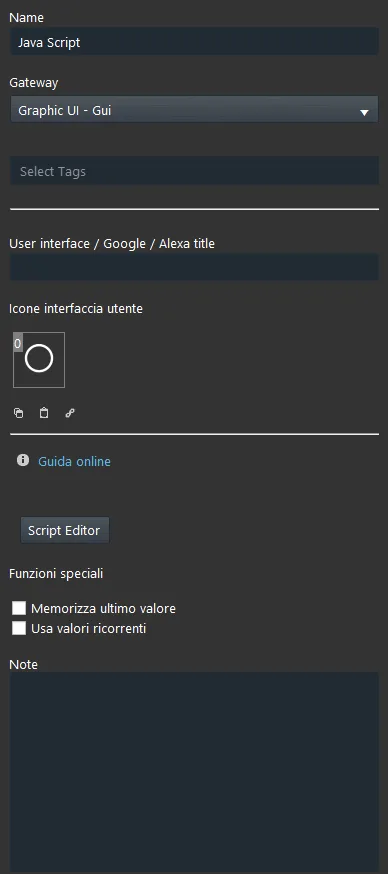
Component properties
The component Title and Icon can be customized. See the “Common properties“ guide.
Script Editor: clicking here opens the editor window, where you can write your script.
Script commands (getValue)
getValueAsString(ComponentID): returns the value of the component, identified by its ID visible in Ilevia Manager, as a text string.
getValueAsInt(ComponentID): returns the value of the component, identified by its ID visible in Ilevia Manager, as an integer (1, 2, 3, 4, 5, etc.).
getValueAsDouble(ComponentID): returns the value of the component, identified by its ID visible in Ilevia Manager, as a decimal number (1.5; 2.4; 3.7, etc.).
getValueAsBoolean(ComponentID): returns the value of the component, identified by its ID visible in Ilevia Manager, as a Boolean value, i.e. true or false.
Script commands (setValue)
setValue(ComponentID, ComponentValue): sets the value of the specified component (for example, a switch, which has values 0/1).
setTrigger(ComponentID, “function”): associates a function with a component, which is executed when the component is activated. To work, it requires both the component ID and the function name.
removeTrigger(ComponentID): removes the trigger set for the component with the specified ID.
setInterval(seconds, “function”): calls the specified function every “X” seconds, with X set by the user.
setTimeout(function, milliseconds): applies a waiting time (timeout), expressed in milliseconds, to the specified function.
removeInterval(“function”): removes the specified function that was previously set with setInterval, stopping its periodic execution.
setTriggerEdge(ComponentID, “changeValue”, “function”): starts a function when the Switch component assumes the specified value (rising or falling edge) in the “Change value” field. It is useful when the function must be executed with the inverse trigger component value.
Additional script functions
log: allows you to keep track of what happens within the script.
HTTPRequest: this method can be used to request data from a web server. An example can be:
var x =HTTPRequest(“URL”);
HTTPPost: the POST method is used to send information and requests to a server.
var x = HTTPPost(“URL”, data);
Note: for any request or suggestion, contact technical support.
Reminder before continuing:
Download and install the Ilevia Logic plugin to enable plugins (link);
After uploading the Ilevia project to the server, wait a couple of minutes for the logic to start.
If…Else statement
EXAMPLE NO. 1
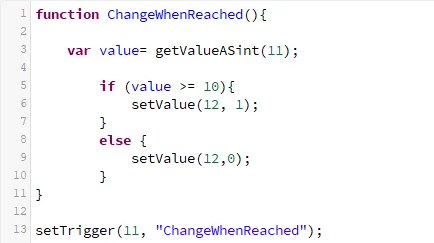
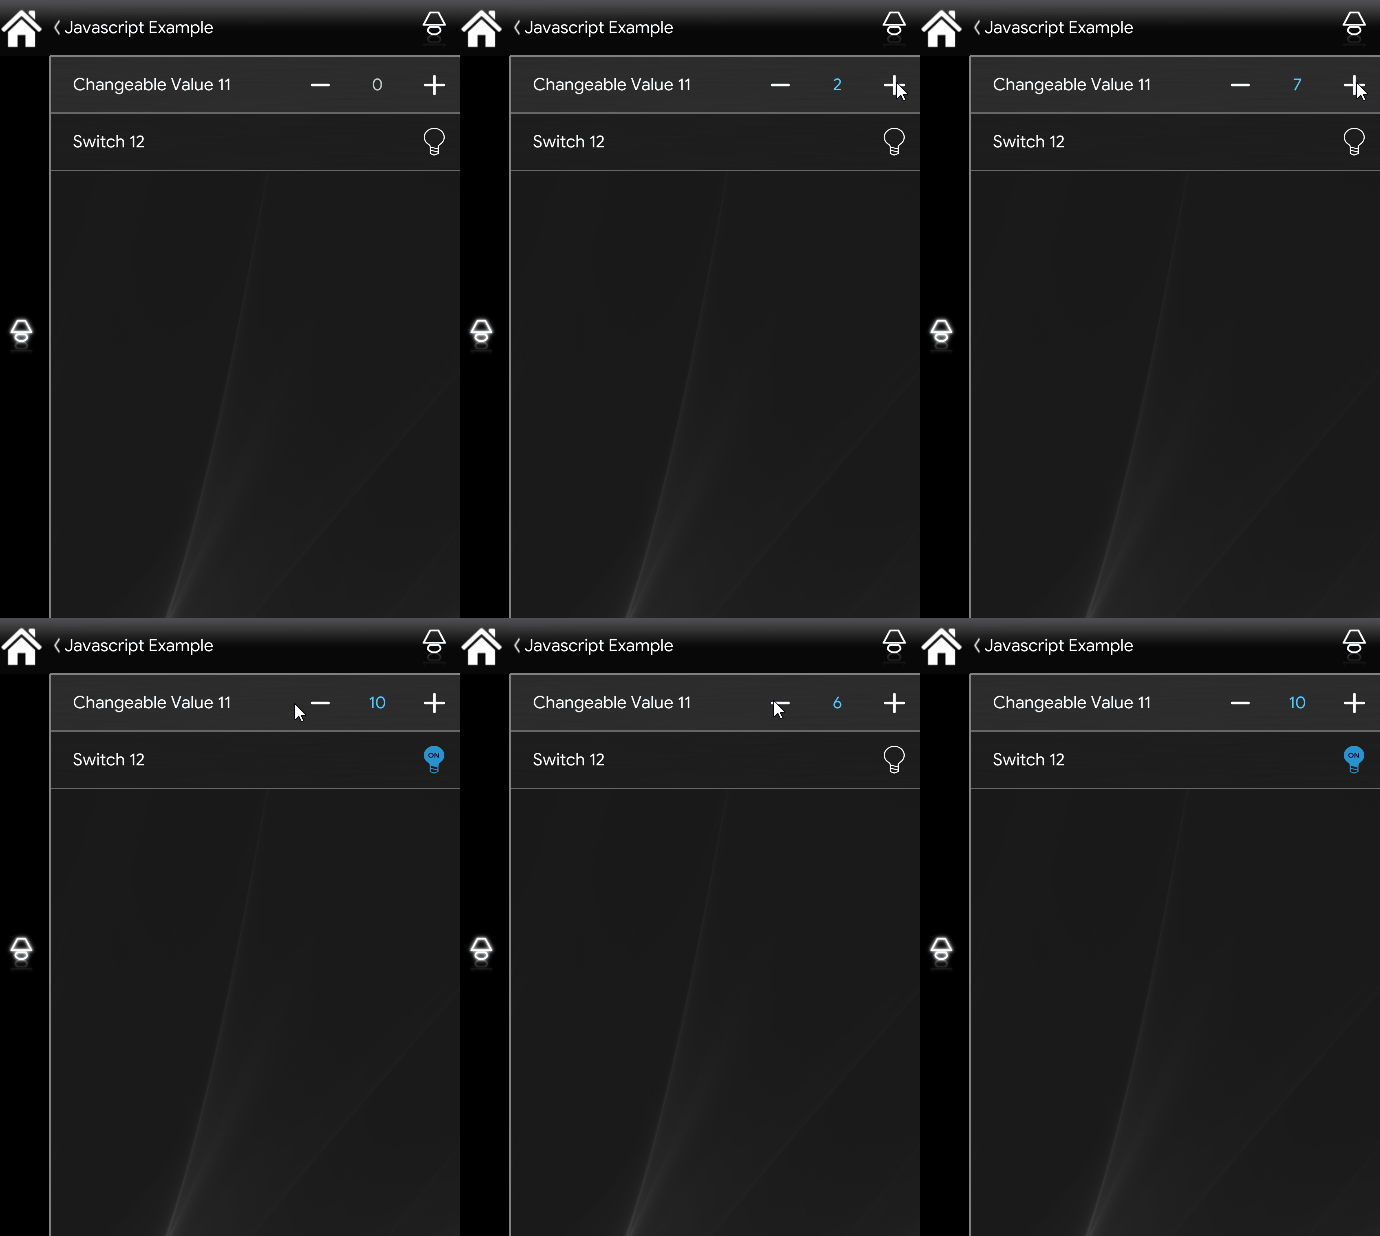
In this example we use a switch with ID “12” and an “Adjustable Value” with ID “14”. With an if statement, you can tell Ilevia Manager to activate the switch when the Adjustable Value reaches 10 or more. A typical use of this script is to make an event happen when a certain value is reached.
DOWNLOAD EXAMPLE PROJECT NO. 1
Download the example project here and try it yourself!
EXAMPLE NO. 2
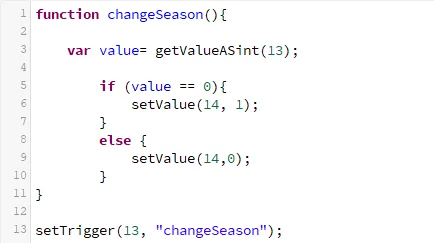
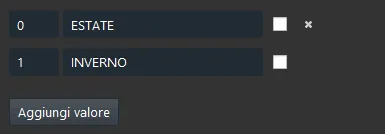
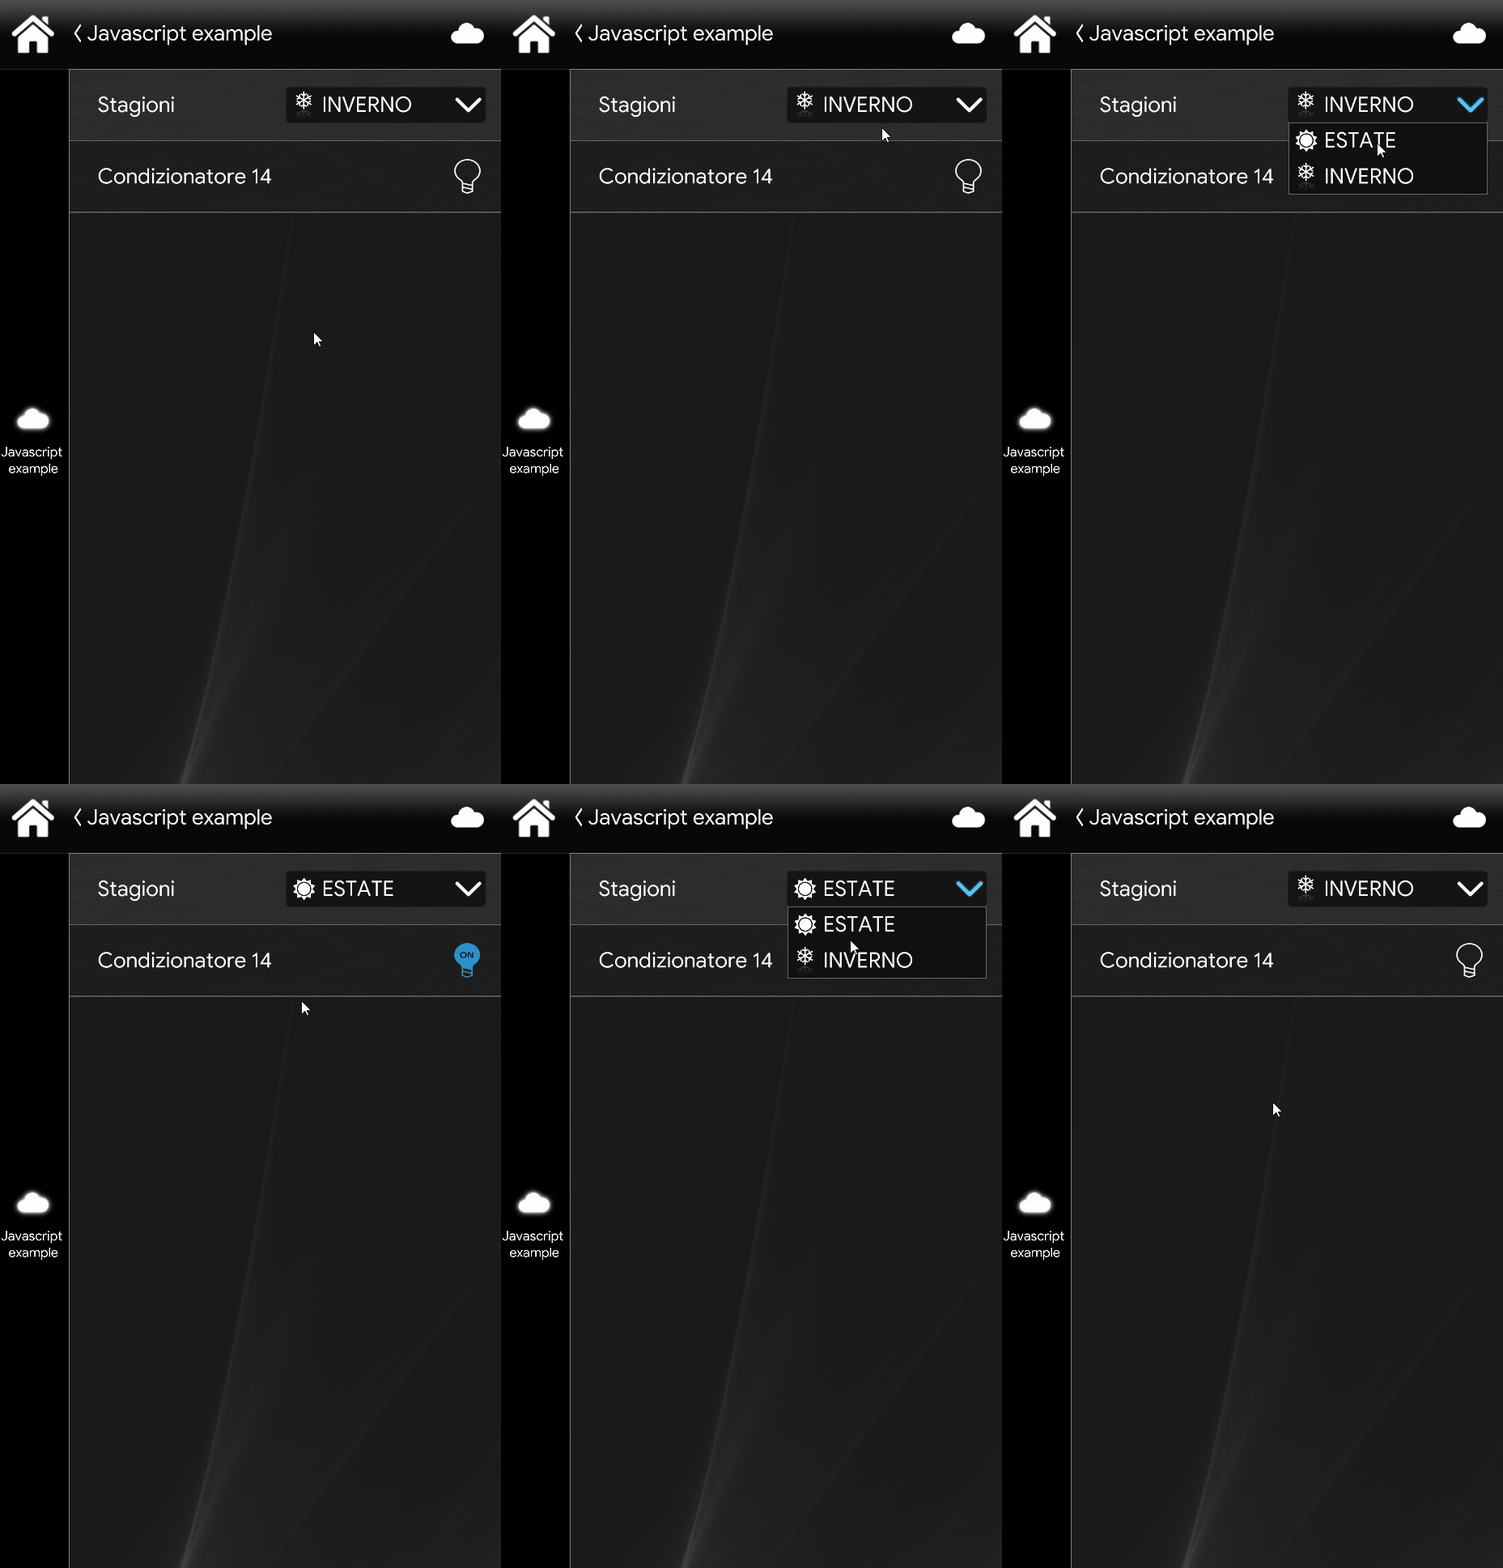
In this example we use a switch with ID “14” and an “Option list” with ID “13”. With an if statement, you can tell Ilevia Manager to activate the switch when the Option list is at index 0; if it takes value 1 instead, the air conditioner turns off. A typical use of this script is to make an event happen when a specific option list value is selected.
DOWNLOAD EXAMPLE PROJECT NO. 2
Download the example project here and try it yourself!
JavaScript functions
EXAMPLE NO. 3
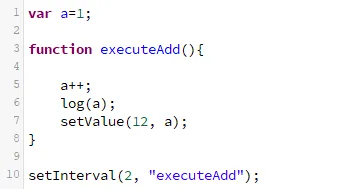
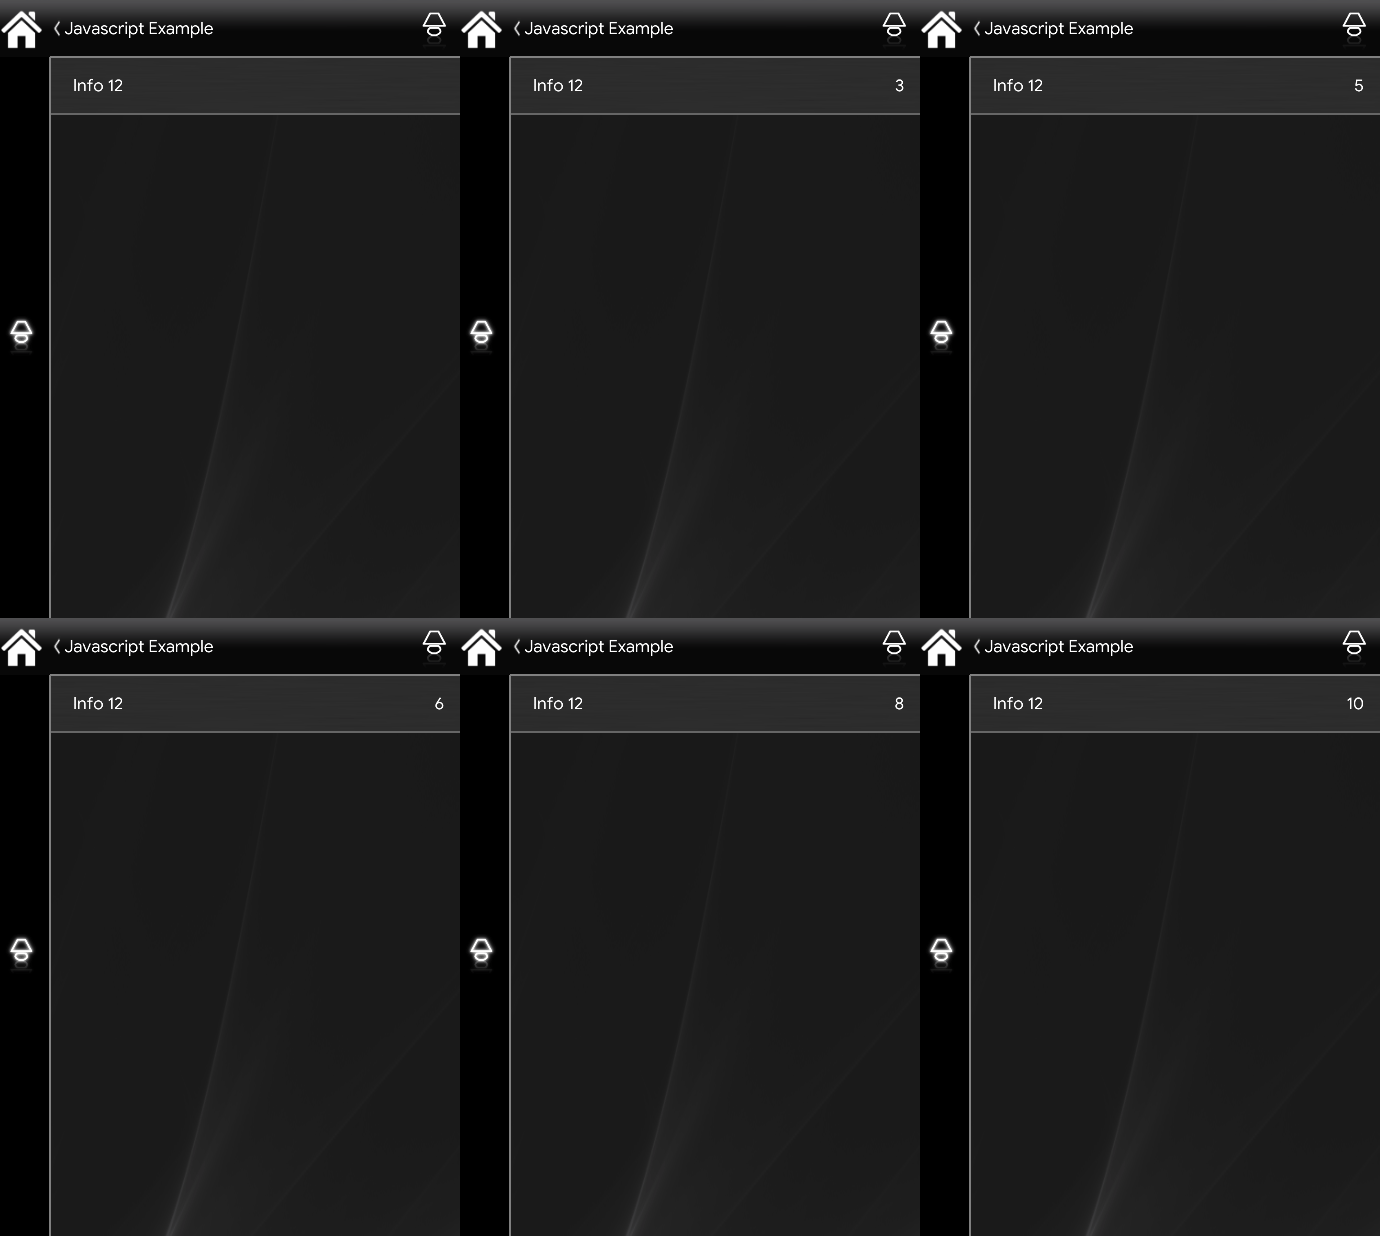
In this example we use setInterval(2,”executeAdd”): as you can see, the first argument in parentheses indicates every how many seconds to increment the value of the variable a by 1 (++); the second argument simply specifies the function to call.
DOWNLOAD EXAMPLE PROJECT NO. 3
Download the example project here and try it yourself!
EXAMPLE NO. 4
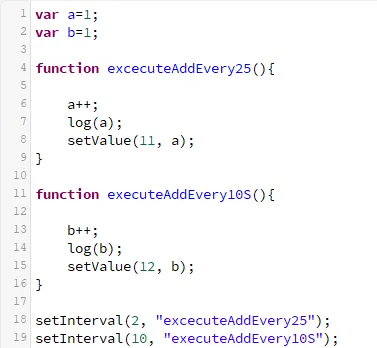
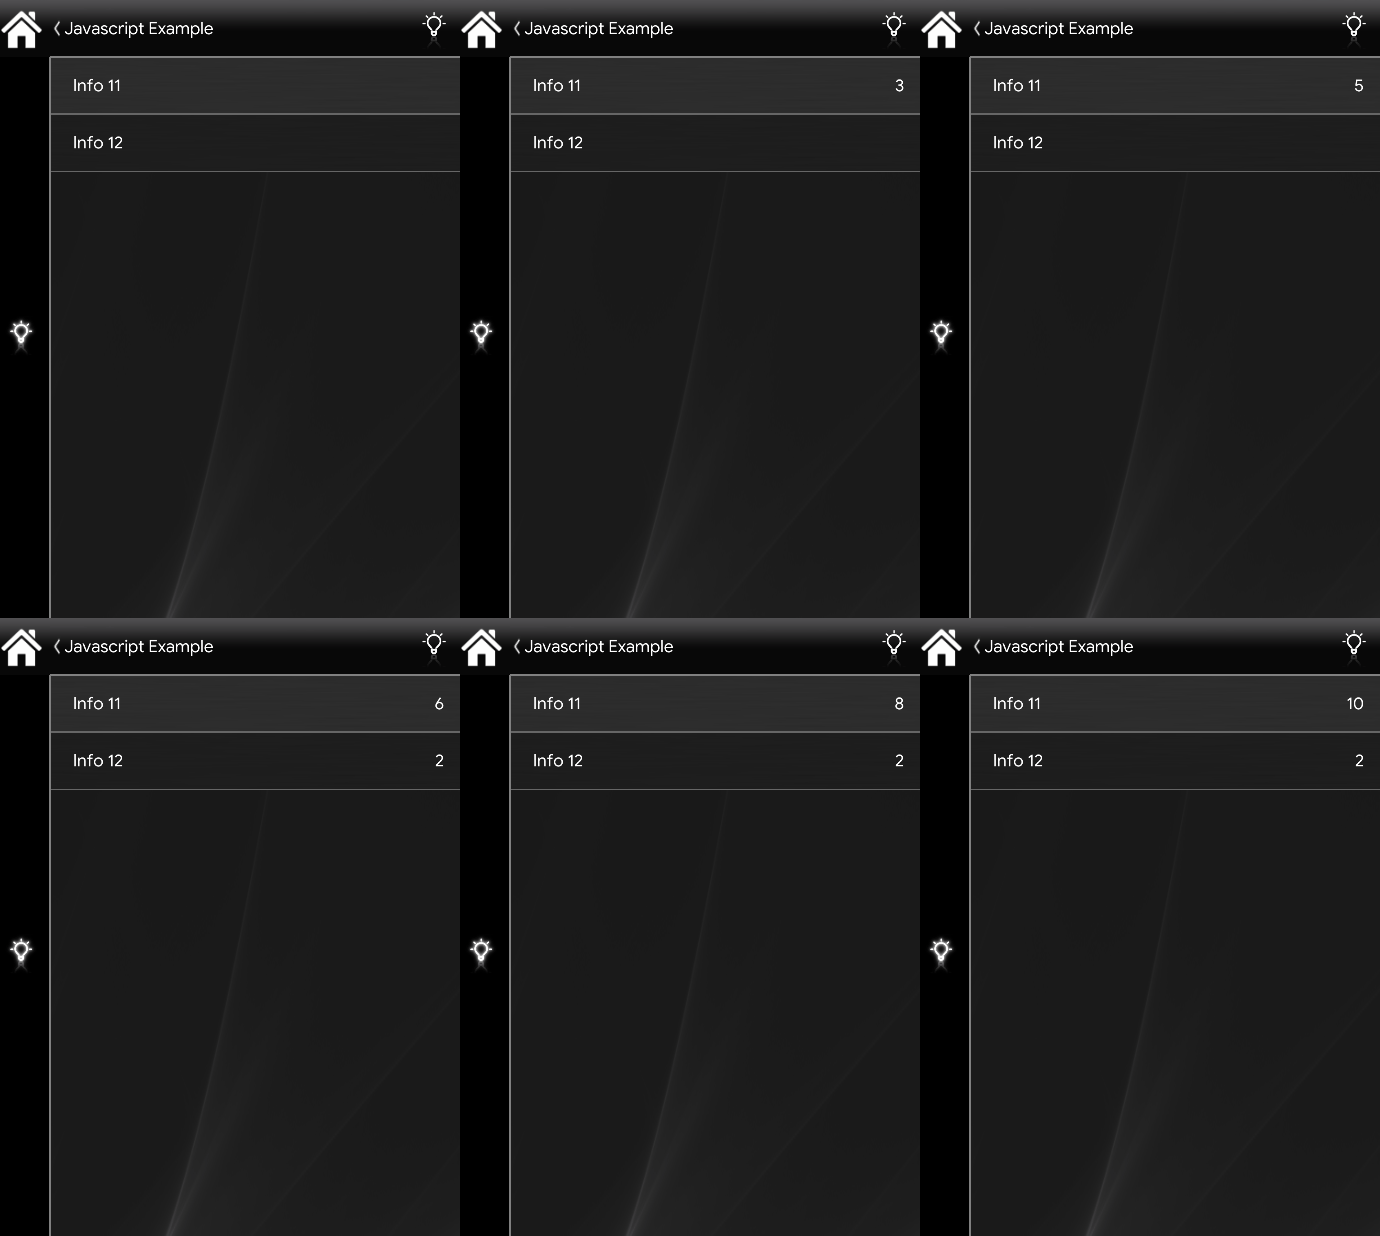
In this example we use two different components with IDs “11” and “12”. Using a function, we add 1 to the value of the first info component every 2 seconds and 1 to the value of the second info component every 10 seconds. To call the function, we include it in the setInterval(2,”executeAddEvery2S”) and setInterval(10,”executeAddEvery10S”) methods. As you can see, the first argument in parentheses indicates every how many seconds to increment the value of the variable a by 1 (++); the second argument simply specifies the function to call, which, as mentioned, adds 1 to the variable a.
DOWNLOAD EXAMPLE PROJECT NO. 4
Download the example project here and try it yourself!
EXAMPLE NO. 5
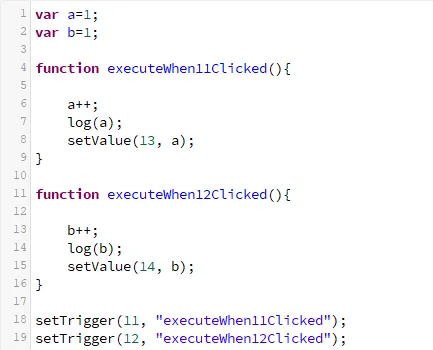
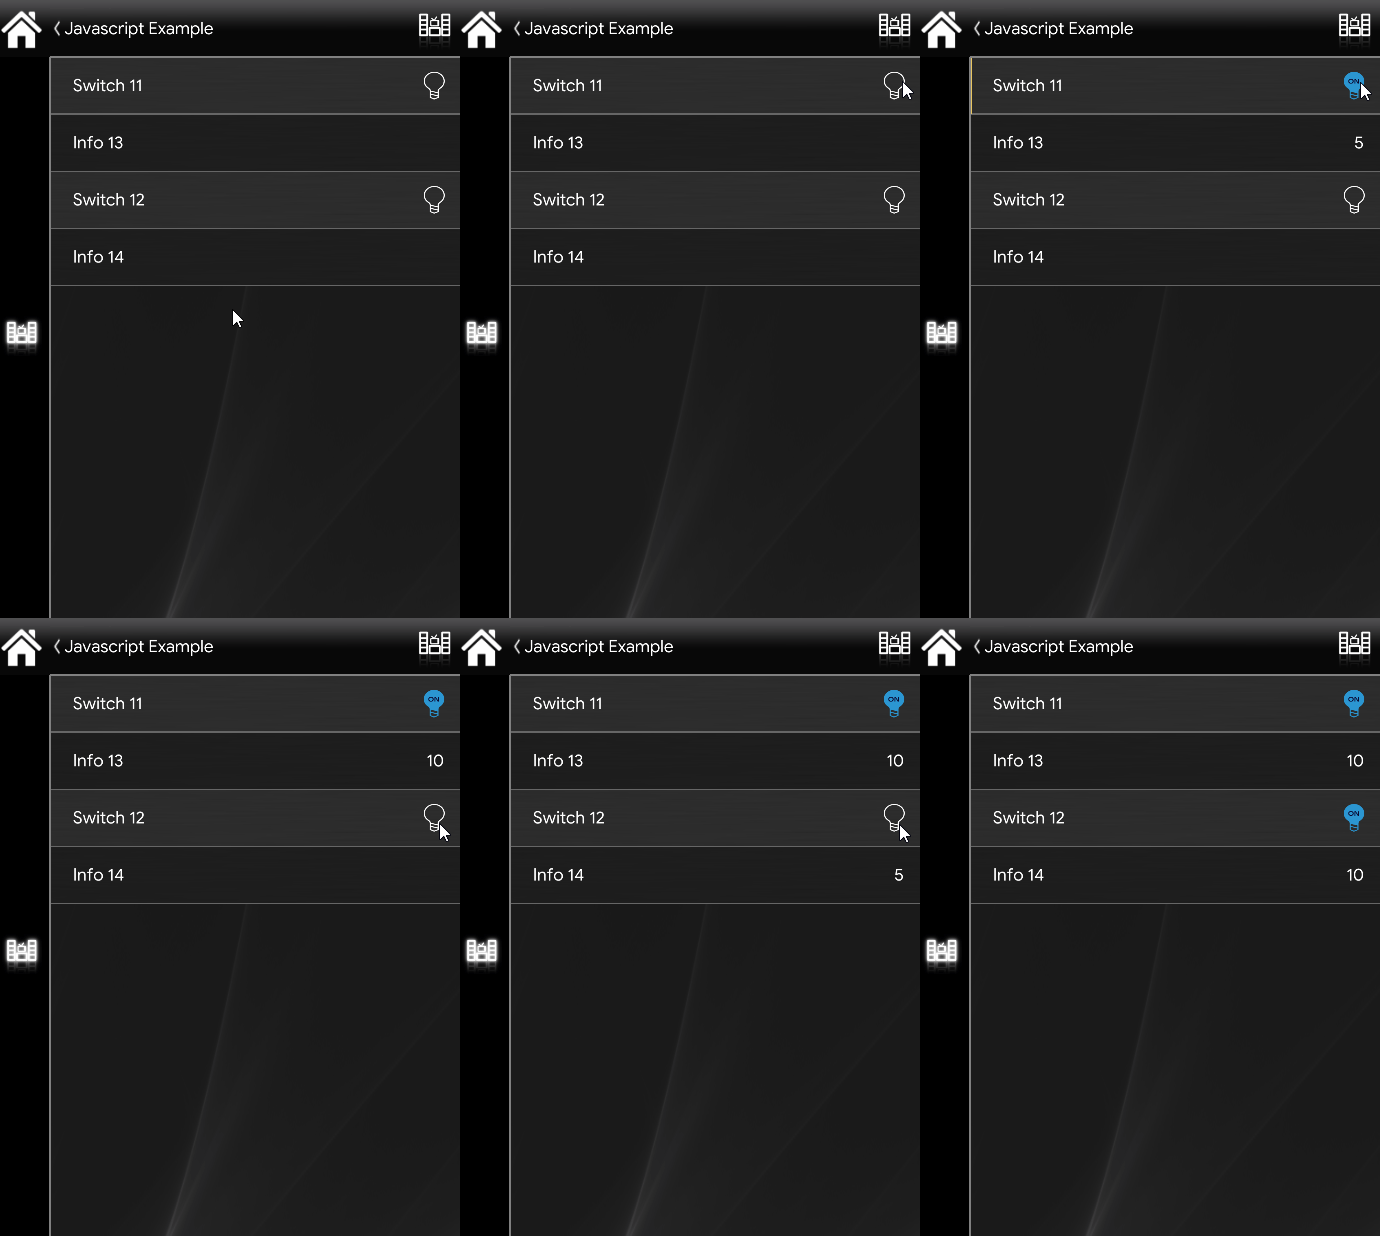
In this example we use 2 switch components with IDs “12” and “13” and two info components with IDs “14” and “15”. Using a function, the value of the first info component is incremented by 1 at every click on the first switch; the same happens when clicking the second switch with the other info component. A typical use of this function is to execute code when something happens. To call the function, we include it in the setTrigger(12,”executeWhen12Clicked”) and setTrigger(13,”executeWhen13Clicked”) methods. As you can see, the first argument in parentheses is the component that triggers the function; the second argument specifies the function to call, which, as mentioned, adds 1 to variable a after clicking component 12 or 13.
DOWNLOAD EXAMPLE PROJECT NO. 5
Download the example project here and try it yourself!
EXAMPLE NO. 6
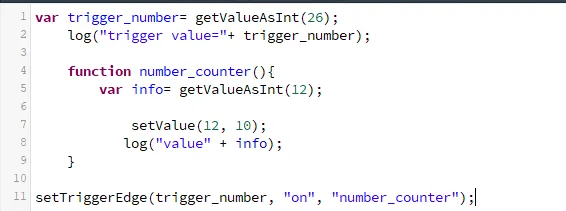
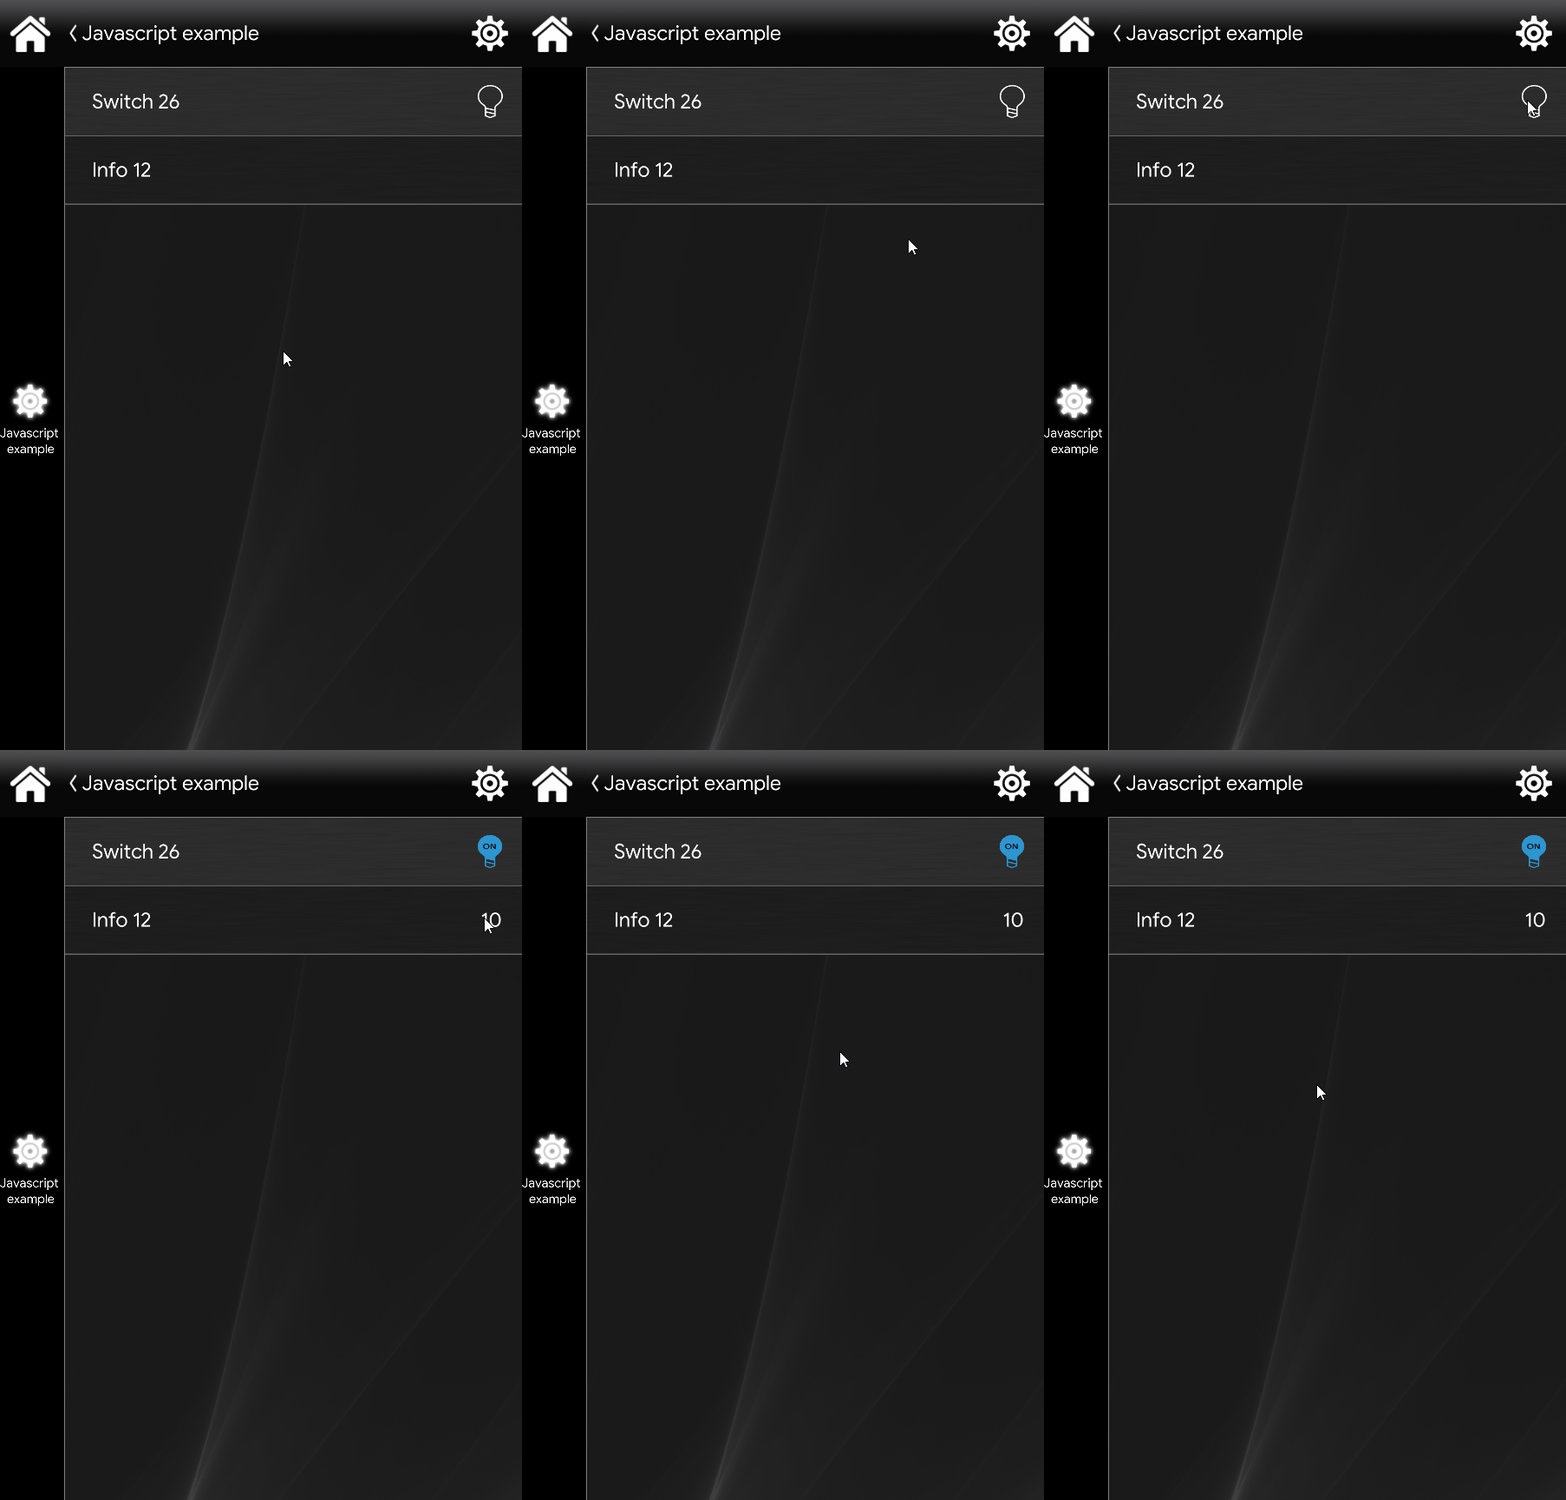
In this example, a component Switch with component ID “26” and a component Info with component ID “12” are used. The function displays a value inside the Info component when the Switch component changes to the On value. The setTriggerEdge method determines the execution conditions for the number_counter function.
DOWNLOAD EXAMPLE PROJECT NO. 6
Download the example project here and try it yourself!
EXAMPLE NO. 7
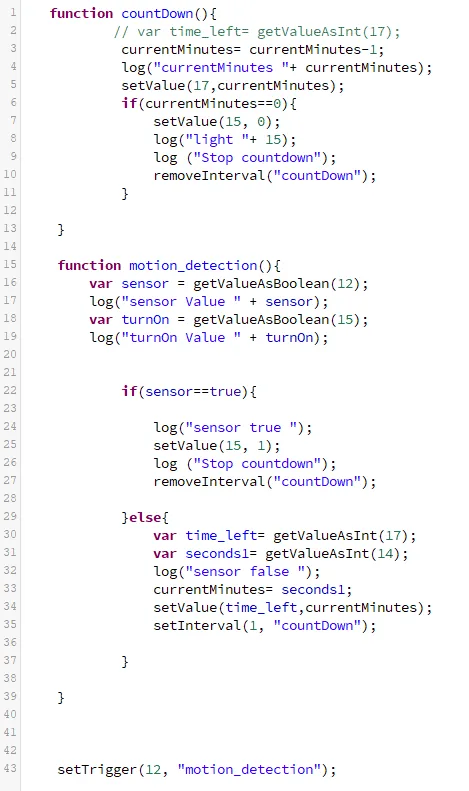
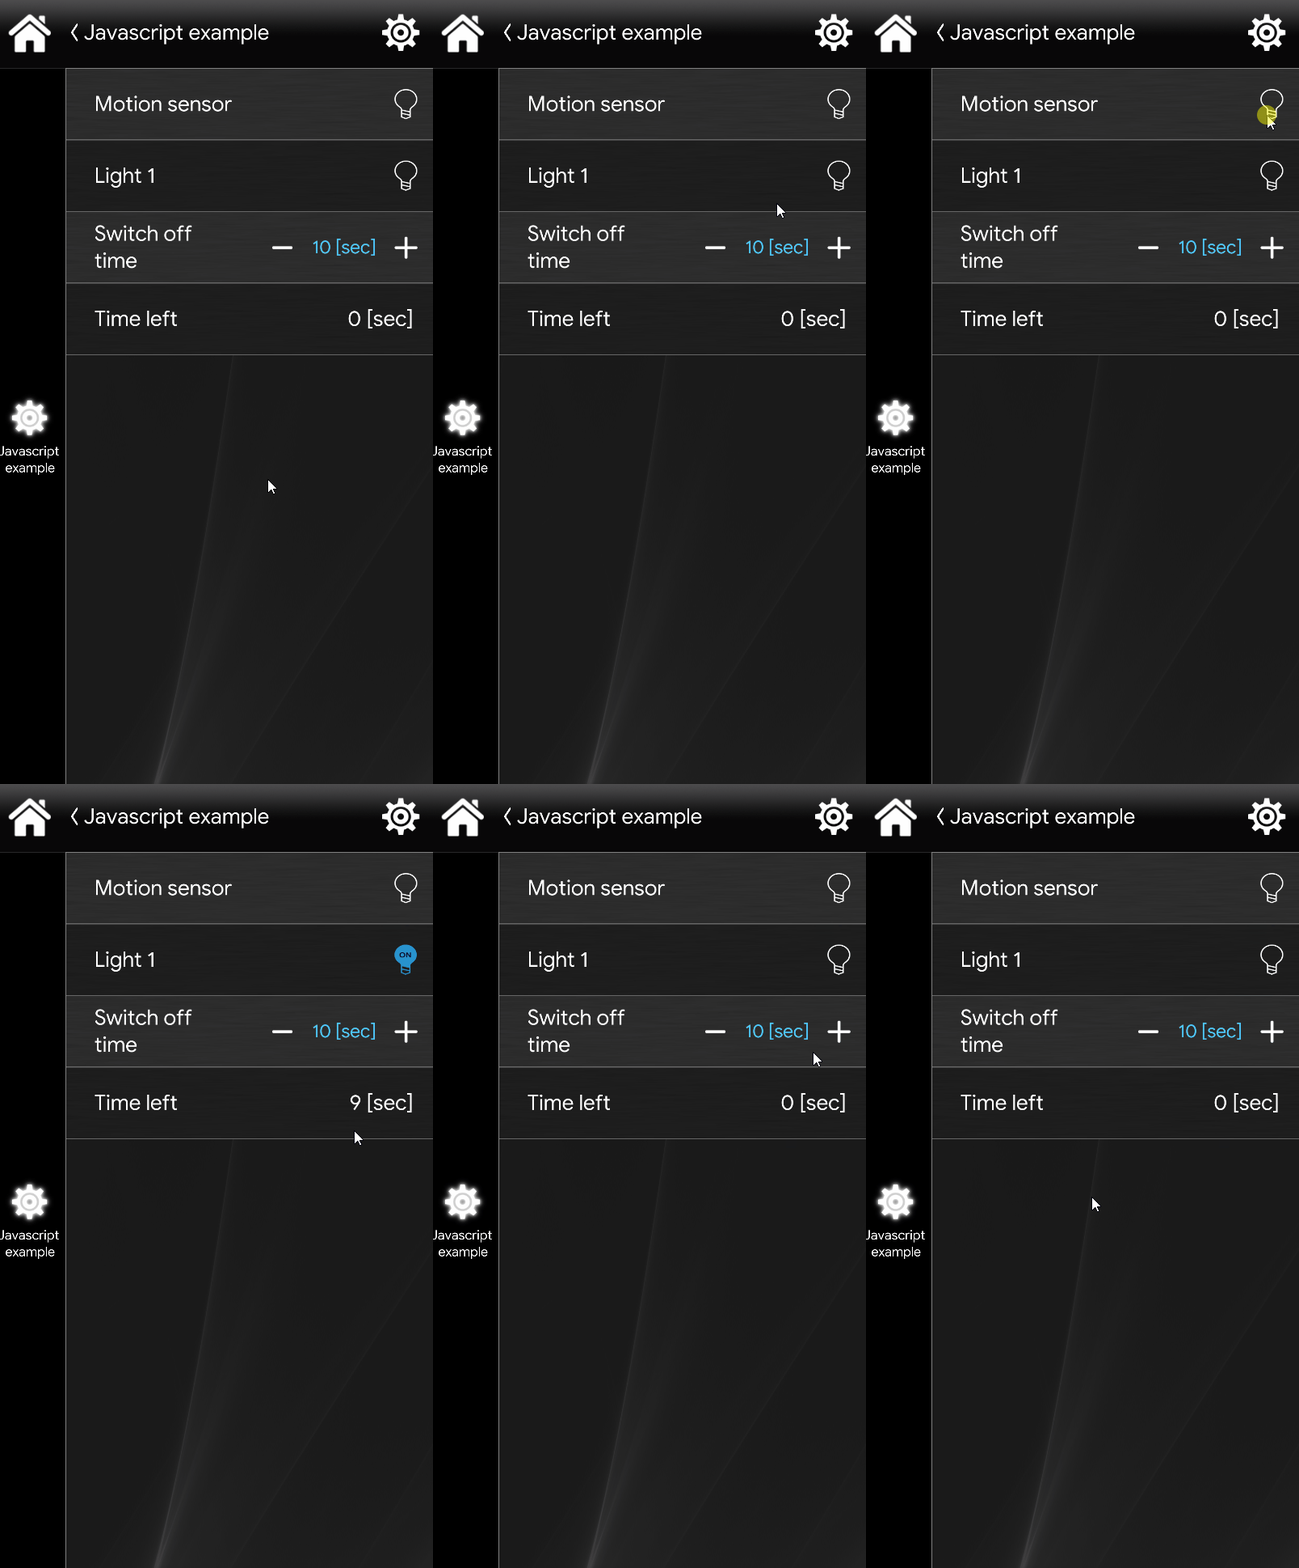
This example explains how to set a time interval that is restarted, with the selected duration, every time a motion sensor detects movement to switch on a light. The first Switch component, with ID “12”, is used as a motion sensor. The second Switch component, with ID “15”, is used to switch on the light. The Adjustable Value component is used to set the duration of the countdown after which the light switches off.
For more information on this script, refer to the guide with the full explanation.
DOWNLOAD EXAMPLE PROJECT NO. 7
The example project can be downloaded from the guide with the full explanation: try it yourself!
EXAMPLE NO. 8
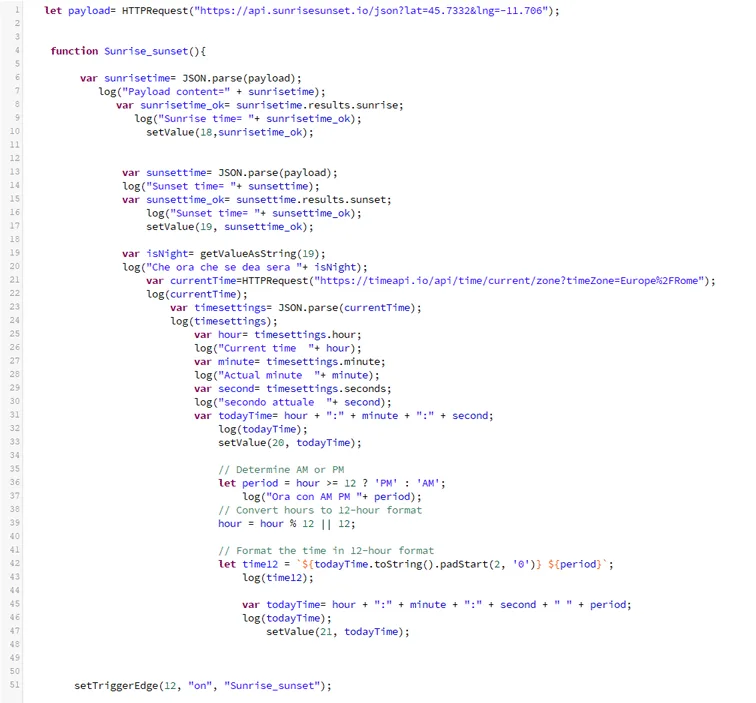
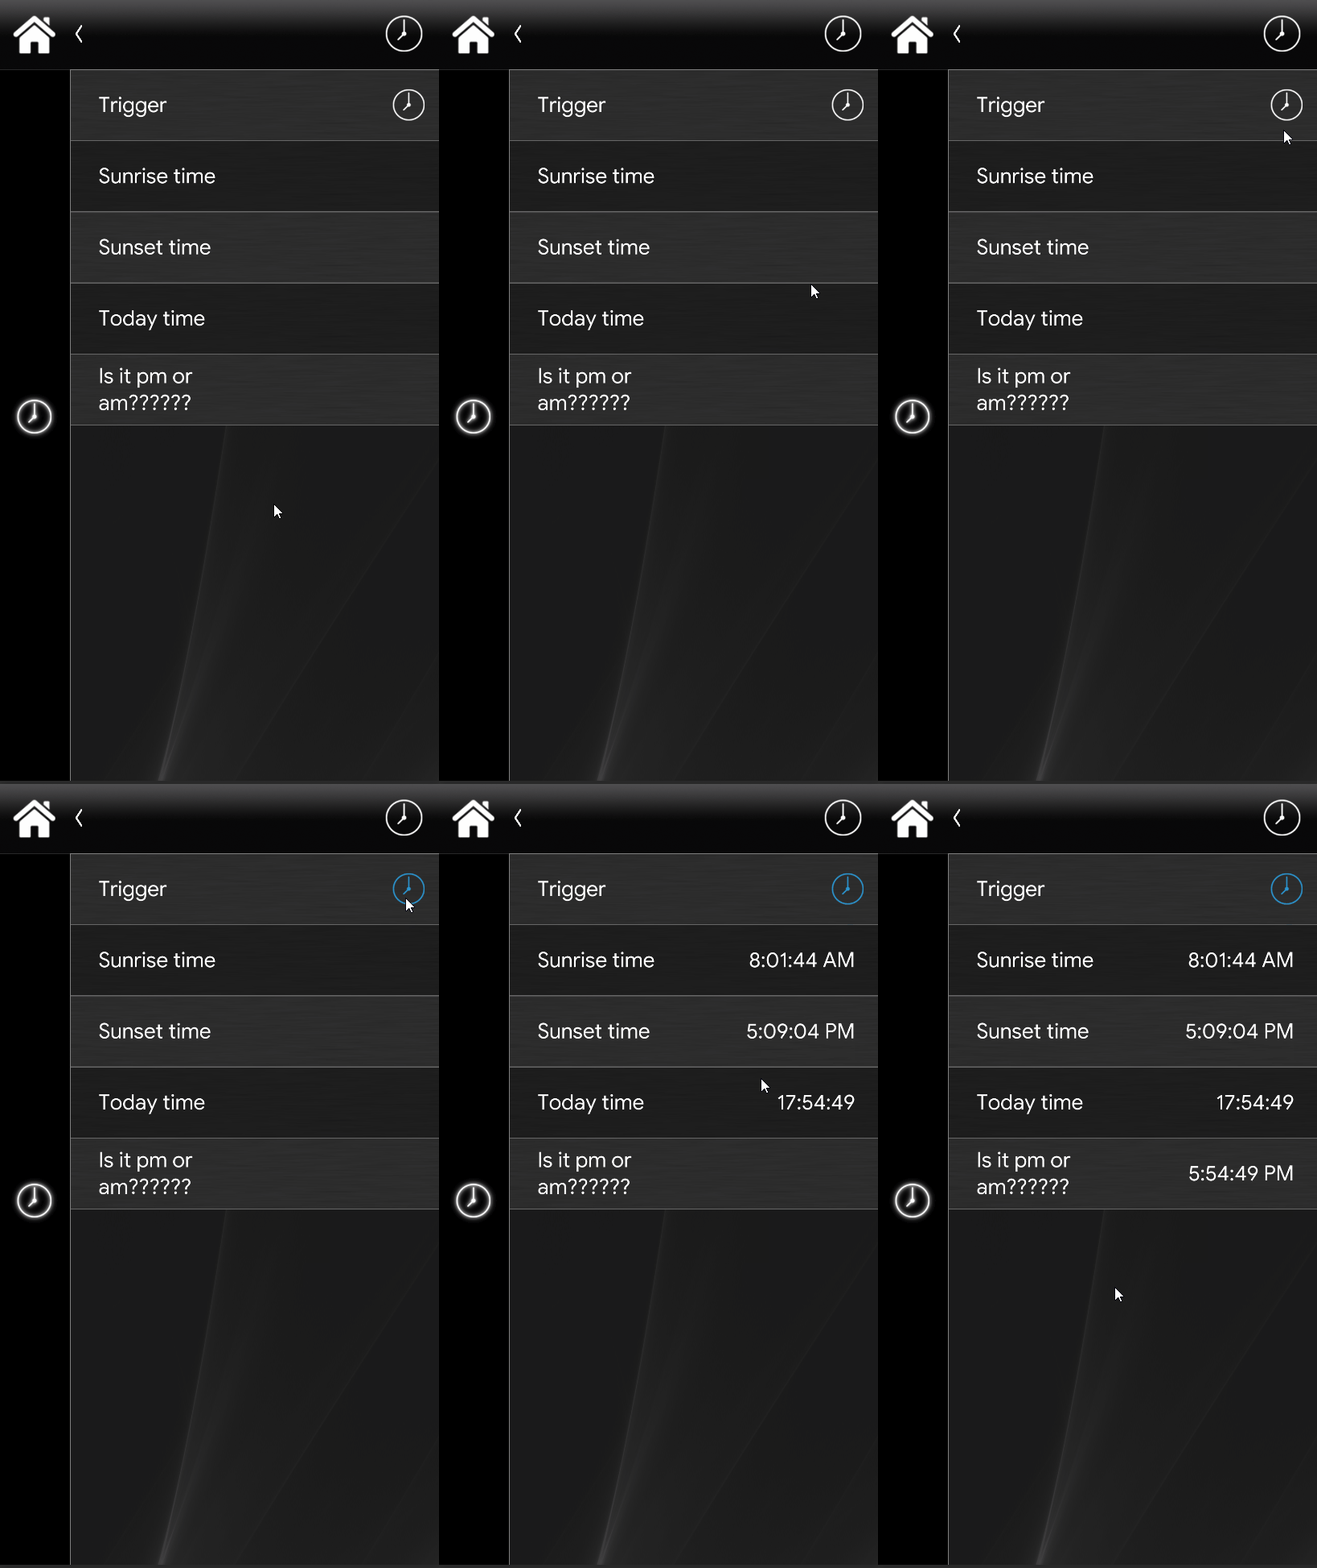
This example explains how to retrieve sunrise time, sunset time and current time online for specific coordinates, from online APIs, using the HTTPRequest method; the script then processes the current time, converts it from 24-hour format to 12-hour format, and finally checks whether it is AM or PM.
For more information on this script, refer to the guide with the full explanation.
DOWNLOAD EXAMPLE PROJECT NO. 8
Download the example project here and try it yourself!
EXAMPLE NO. 9
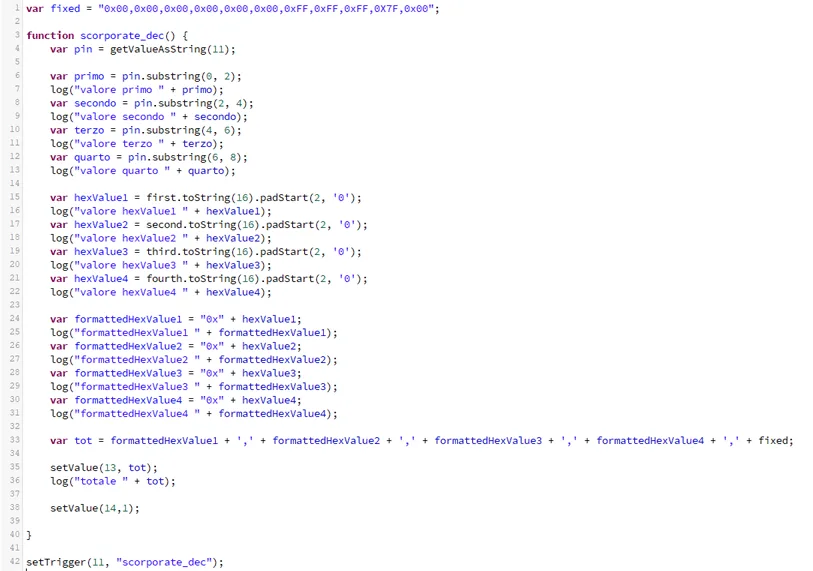
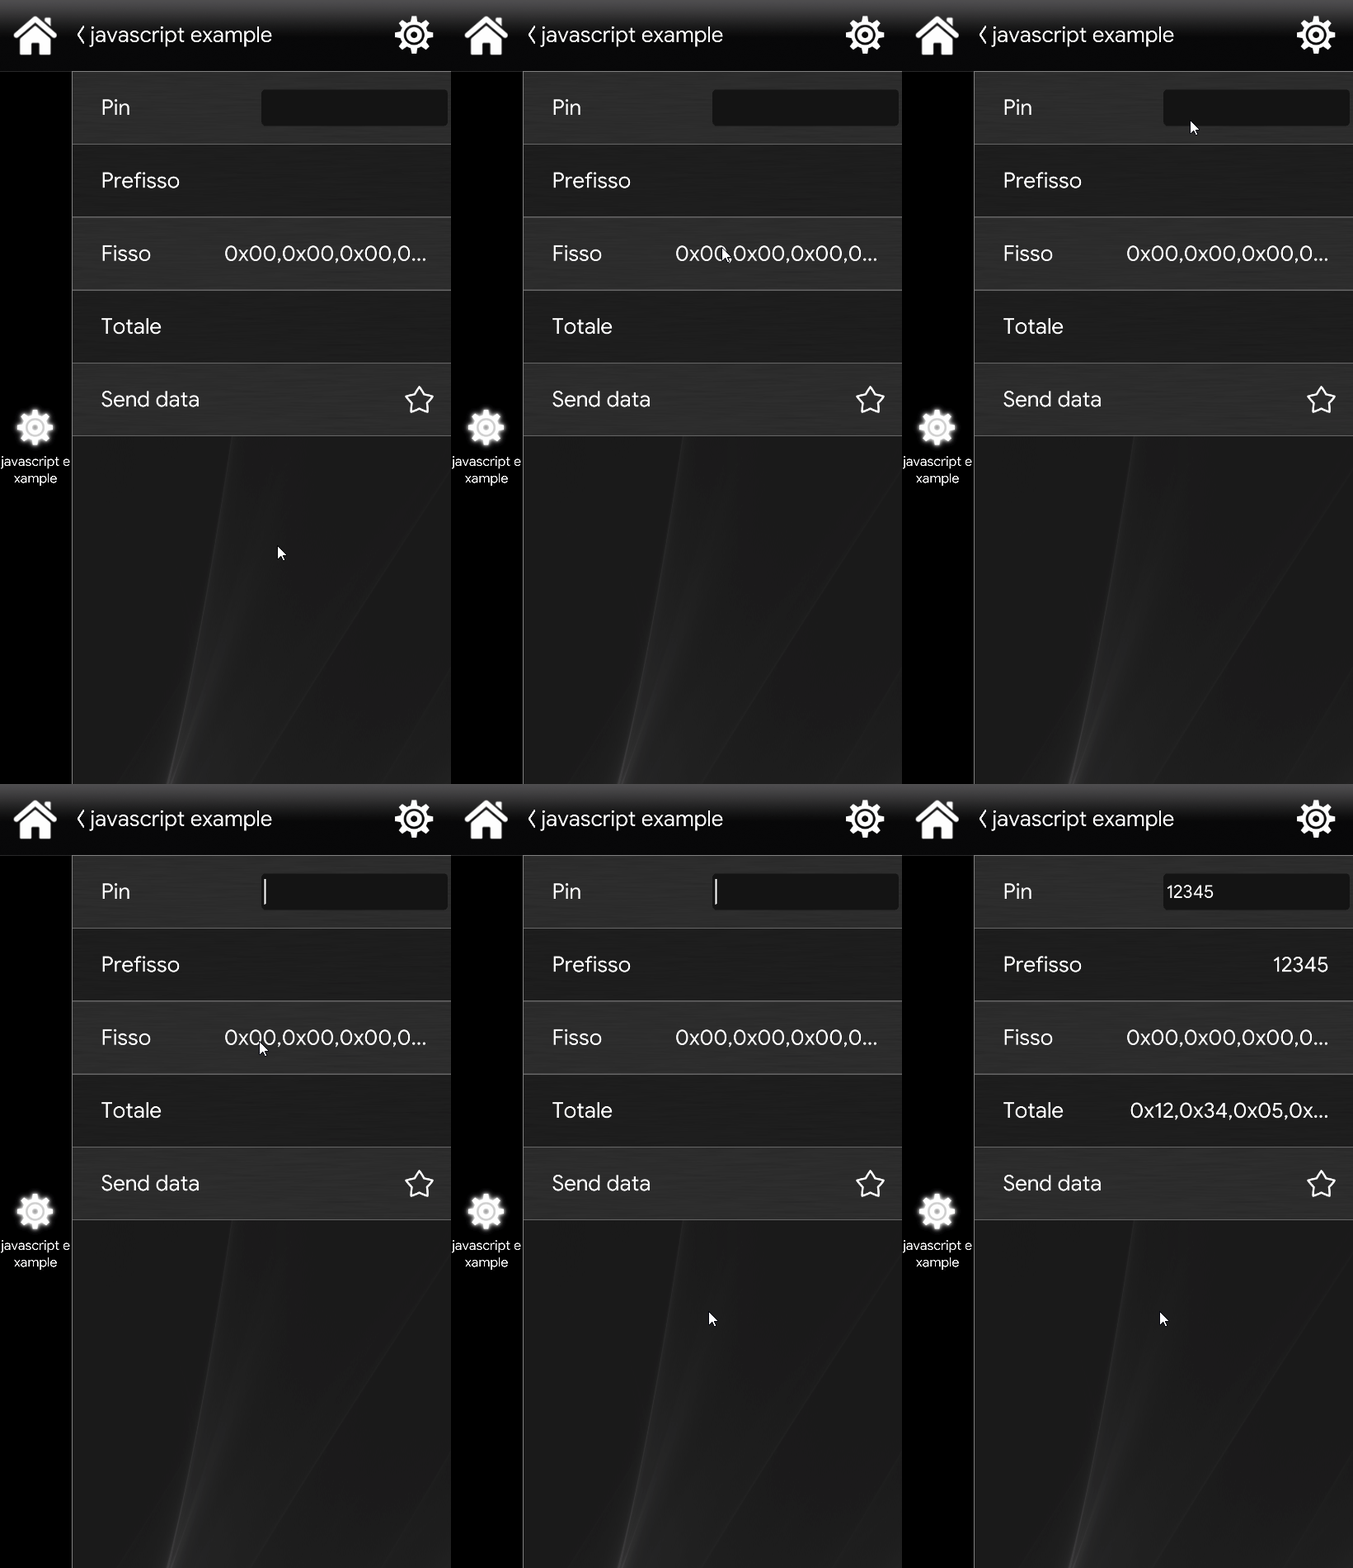
This example explains how to build a script that processes the characters entered by the user in a Text Input component, converts them from decimal numbers to hexadecimal, and finally activates a Scenario component that sends the value on the KNX bus.
For more information on this script, see the explanatory guide here.
DOWNLOAD EXAMPLE PROJECT NO. 9
Download the example project here and try it yourself!