
Smart Scenario
How to configure the Smart Scenario component in Ilevia Manager: execution component, conditions, delays and loop, with a complete example.
INTRODUCTION
Smart Scenario performs a series of actions on multiple components, which can depend on a condition (for example, a sensor value). This guide explains how to set up the Smart Scenario component in the configuration software Ilevia Manager.
Component properties
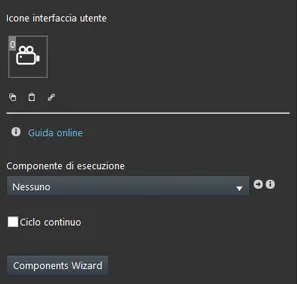
Execution component: Connect a Switch, a Lock, a Colored info or a Text info to run the Smart Scenario.
Loop: When enabled, this option allows the Smart Scenario to run in loop mode.
Component configuration: Opens the component configuration screen for the components that will be triggered when the Smart Scenario runs.
Configuration screen properties
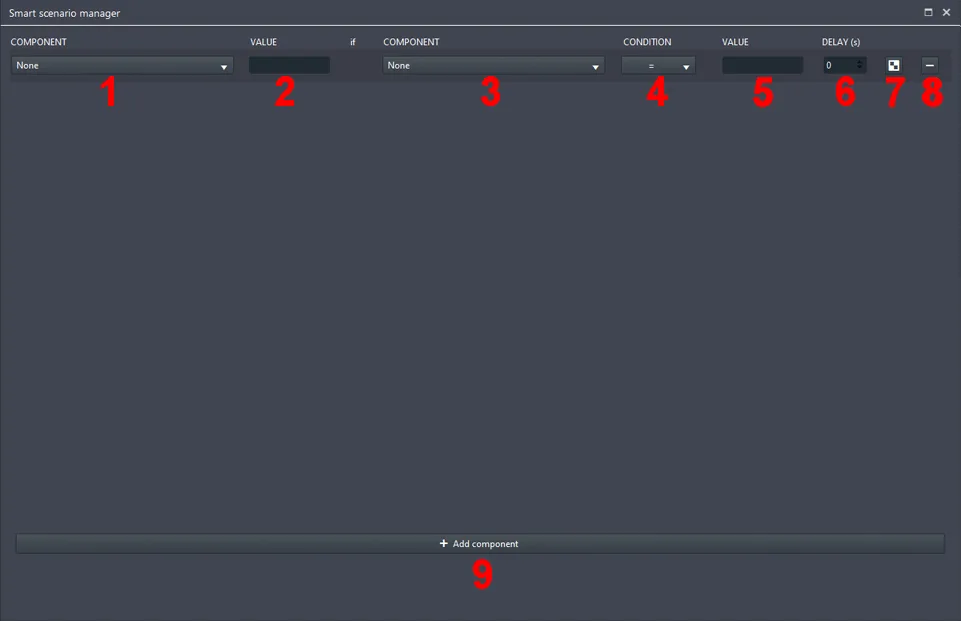
Component: Select the components that will be triggered when the Smart Scenario runs;
Value: Select the exact value to which the component will be set when the Smart Scenario runs;
Condition component: Select the component whose value is checked by the Smart Scenario before performing the action;
Condition: Choose the comparison operator to apply to the condition component value;
Value: This is the value that the condition component must have for the action to be performed when the Smart Scenario is started;
Delay (s): Set a delay, in seconds, between Smart Scenario operations;
Copy row: This button duplicates the current row;
Delete row: This button will delete the selected row;
Add component: This button adds a new row.
Component configuration
In this example, the Smart Scenario component, once executed, opens the shutters and turns on some lights, but only if the brightness detected by the Lux sensor meets the configured condition.
Step 1:
Open the Ilevia Manager software. Go to the Components section.
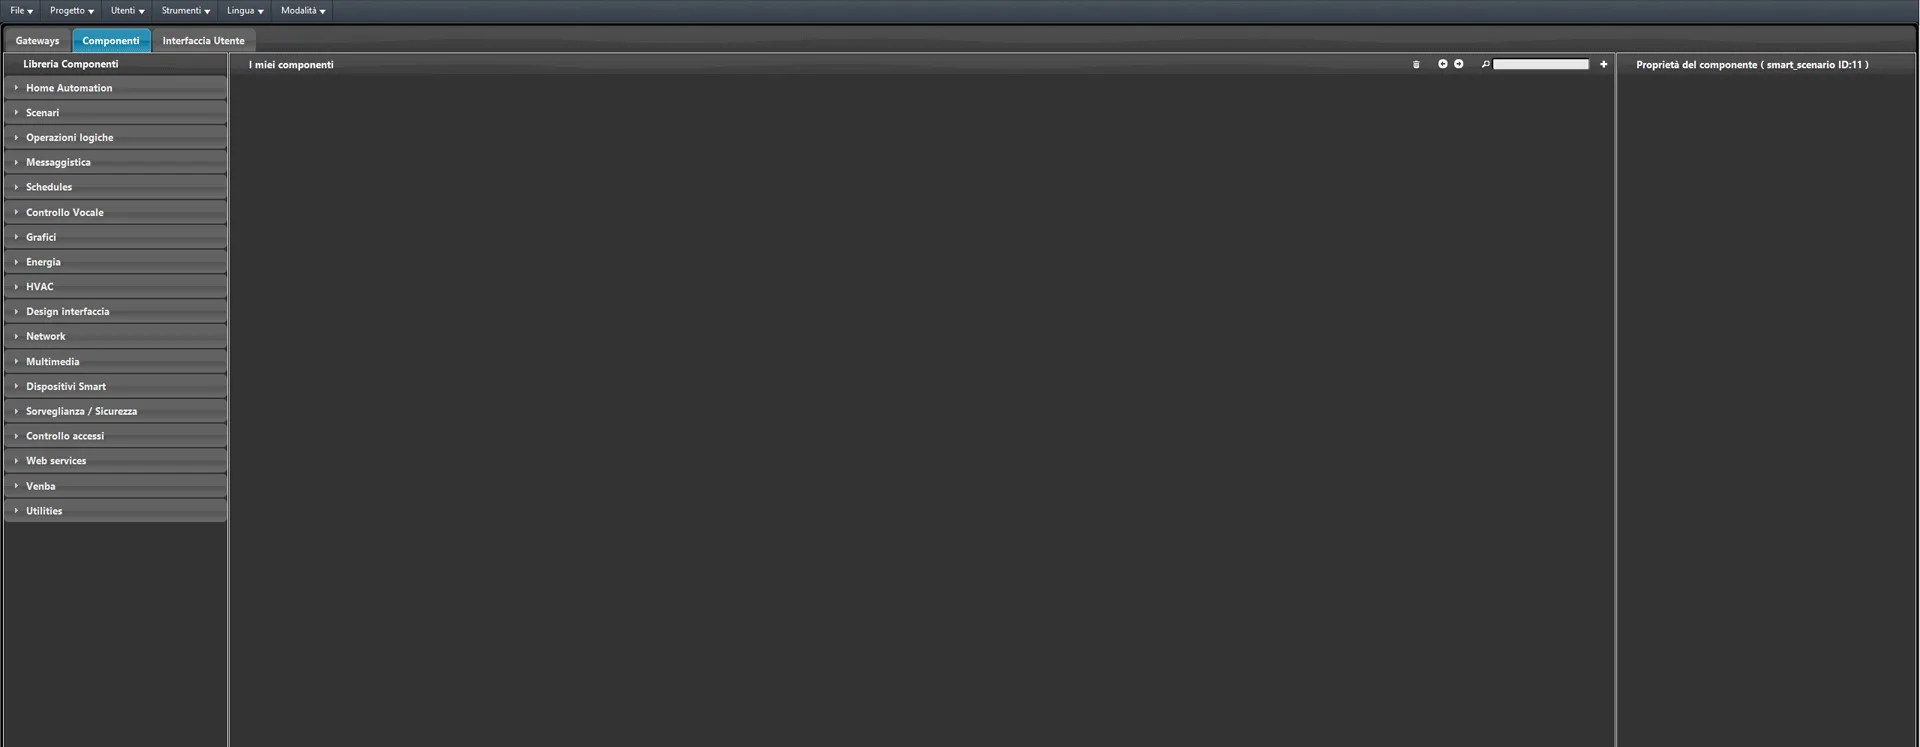
Step 2:
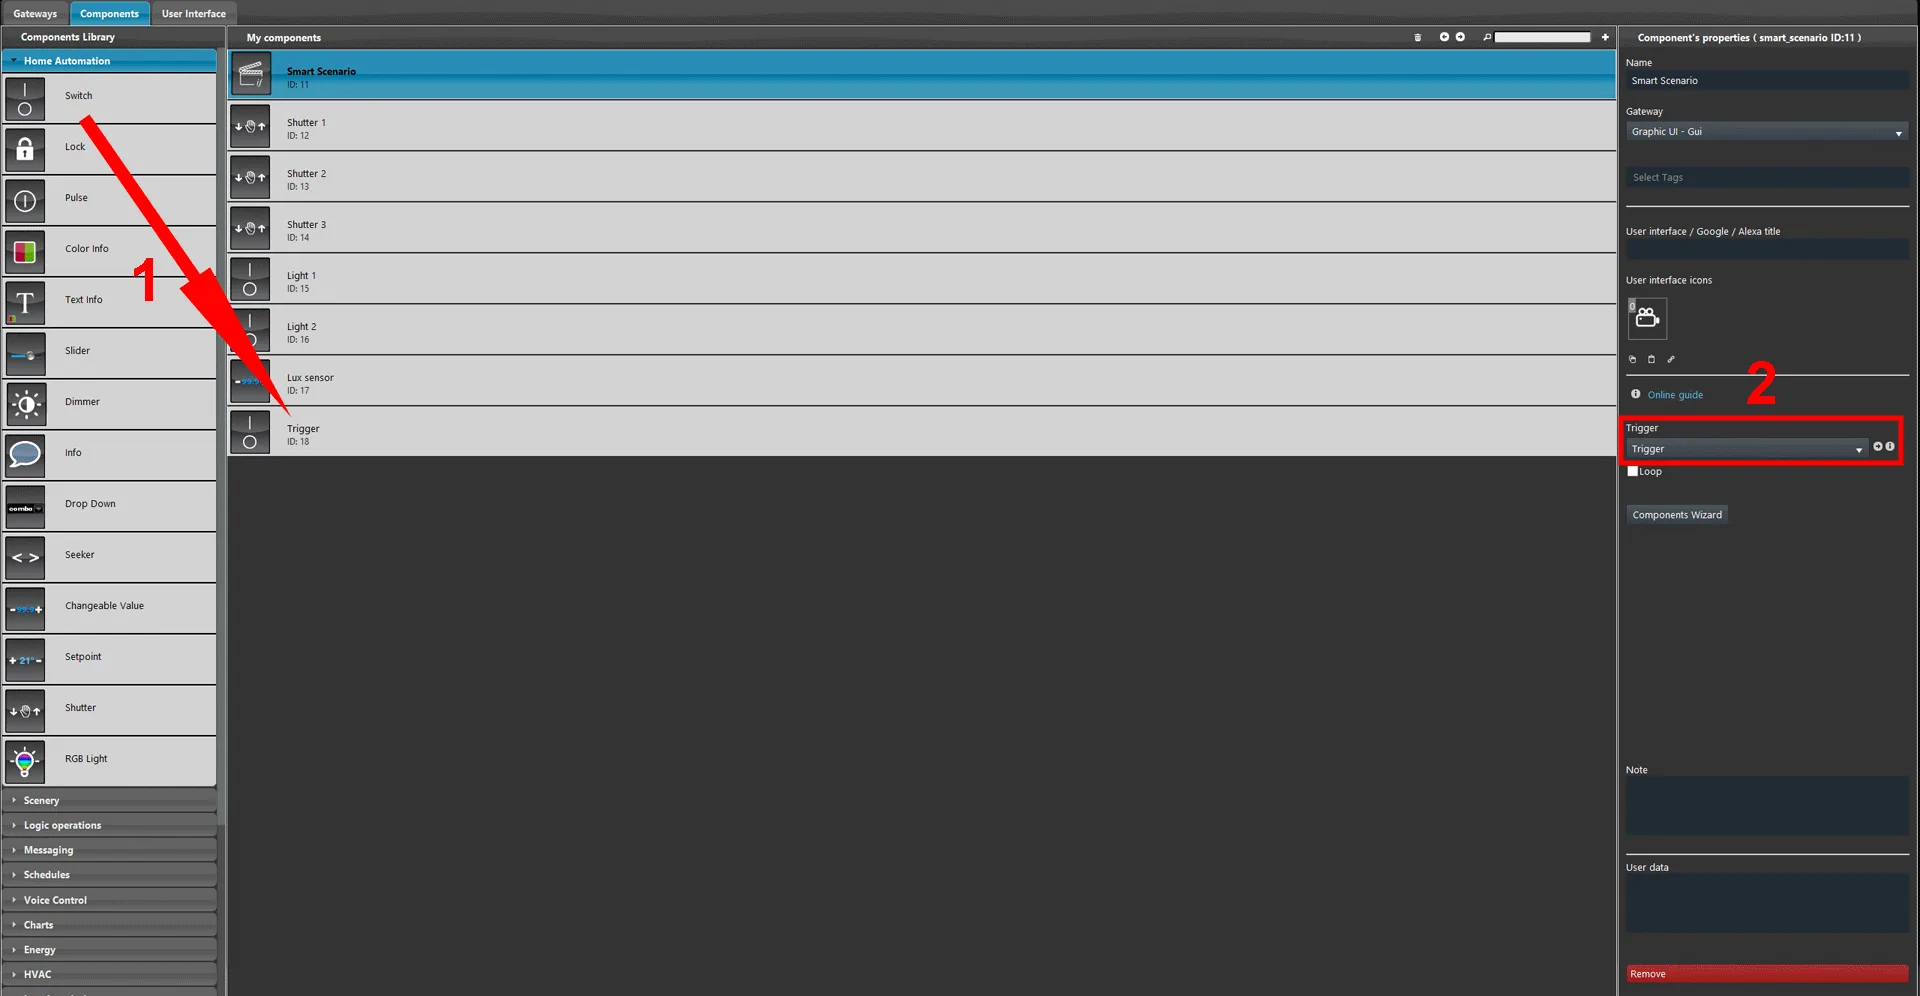
1. Open the “Scenario” section from the Components library of Ilevia Manager; 2. add the Smart Scenario component to the project.
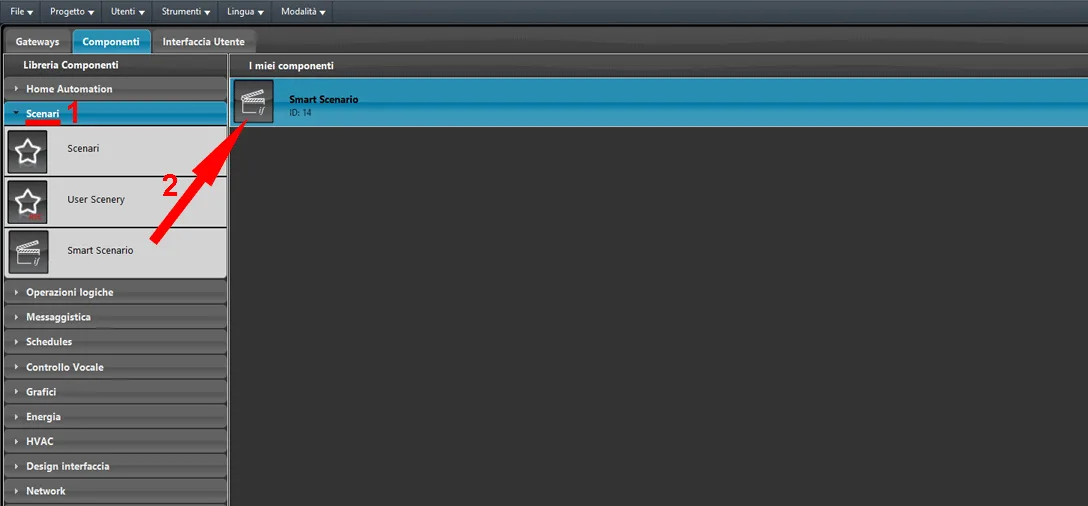
Step 3:
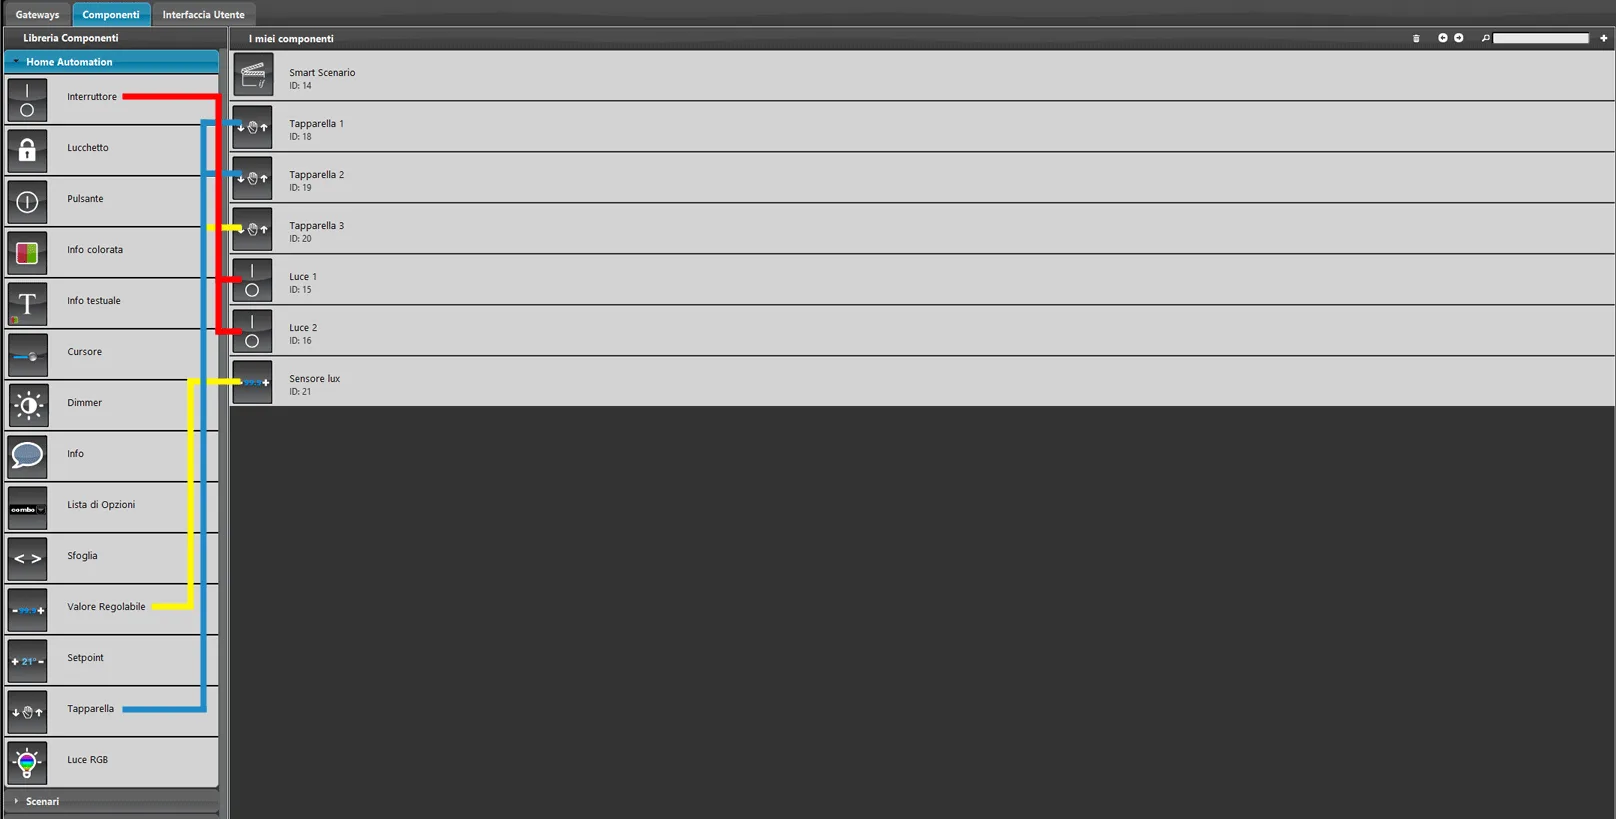
Add 3 Shutter components, 2 Switch components and 1 Adjustable value to the project.
Step 4:
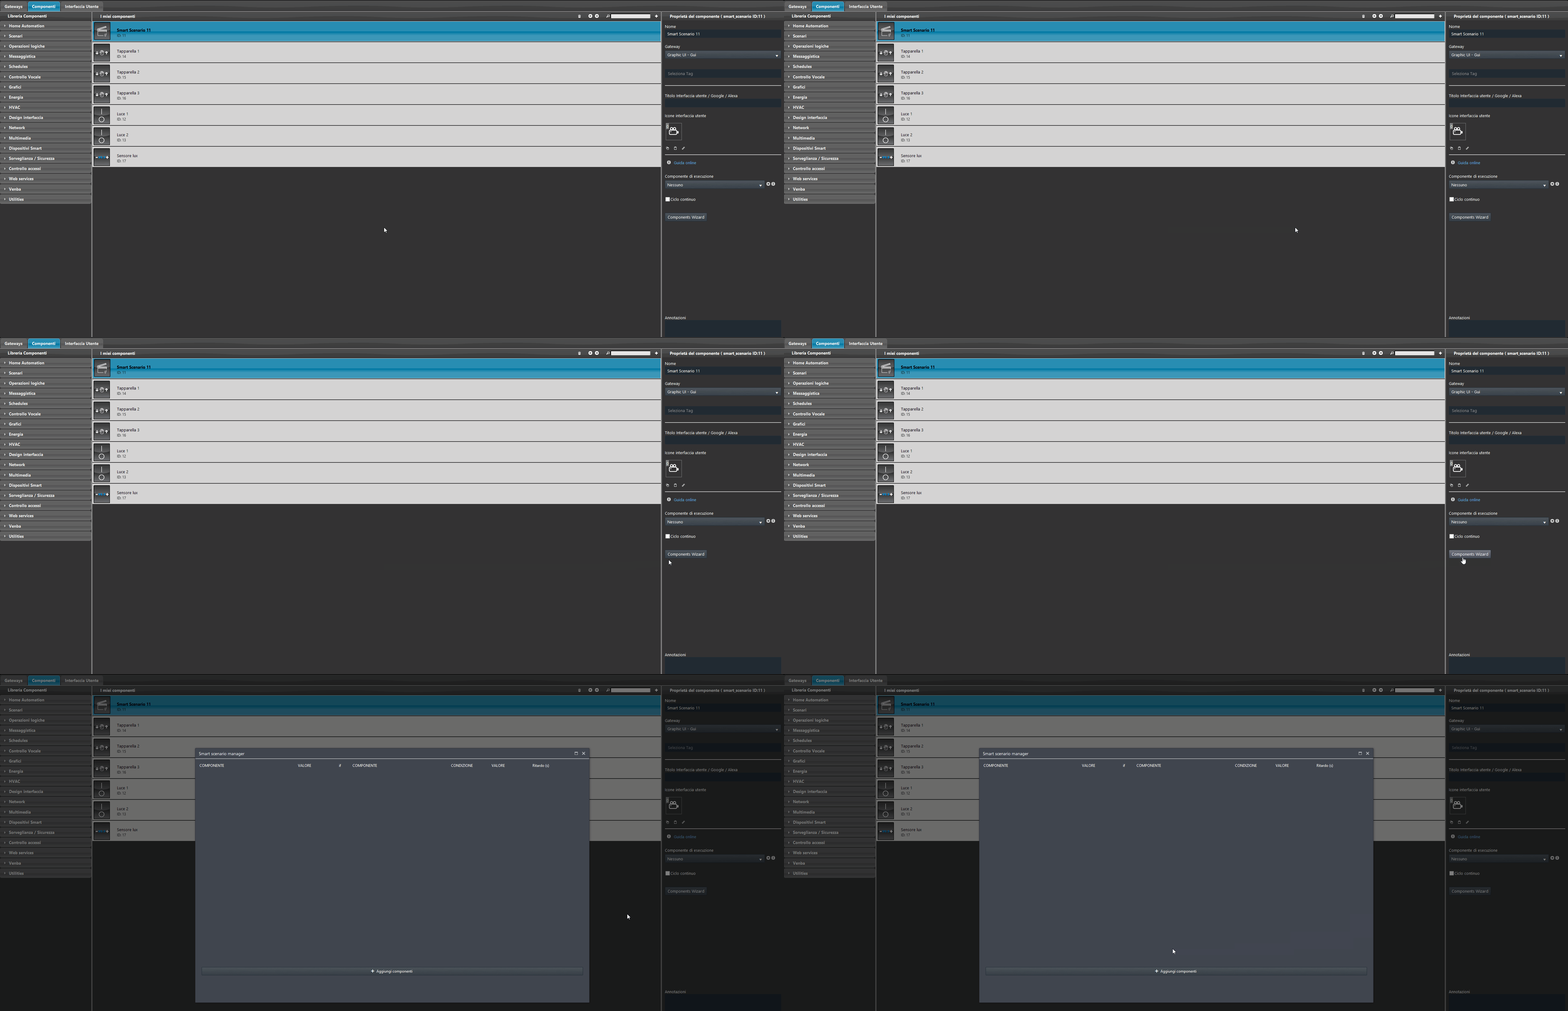
Open the Smart Scenario component configuration screen by clicking the “Configuration wizard” button in the component properties.
Step 5:
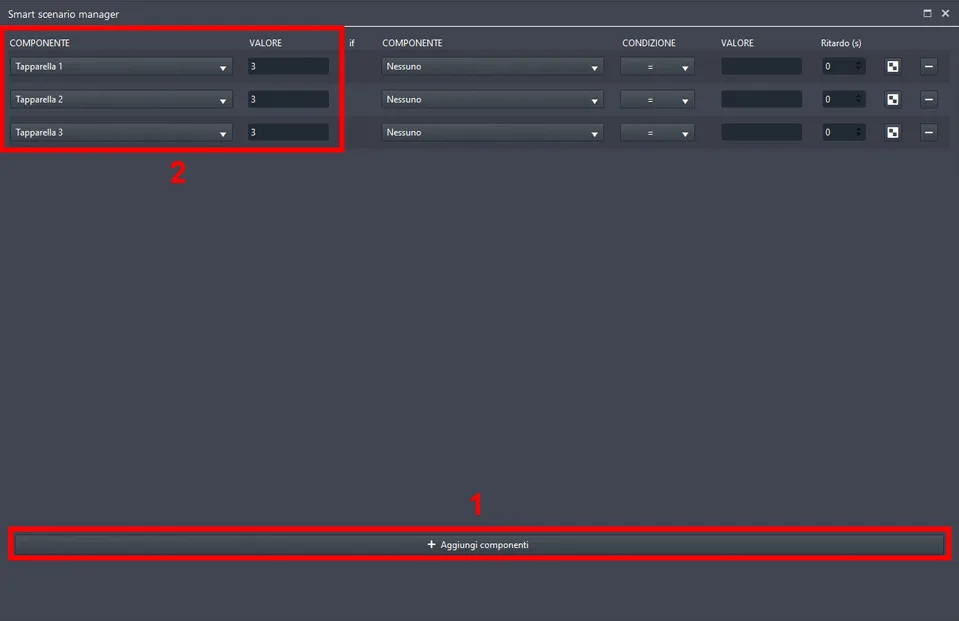
1. Click Add component to create a new row; 2. select a Shutter component that will be triggered by the Smart Scenario once started and select the value to which it will be set. Repeat the procedure for the other shutters.
Step 6:
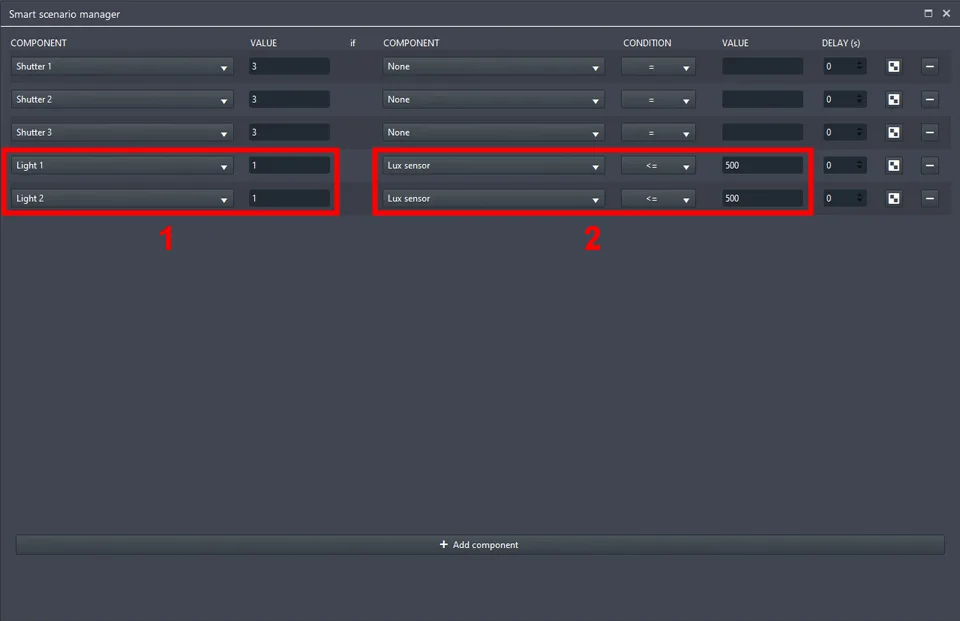
1. Add a new row and select the first Switch component from the Component drop-down menu, then set 1 as the value in the “Value” parameter; 2. add the Adjustable value component: this component will simulate a light sensor; 3. set the condition type (in our case less than or equal to).
Step 7:
Add a new Switch and select it as the execution component of the Smart Scenario.
Step 8:
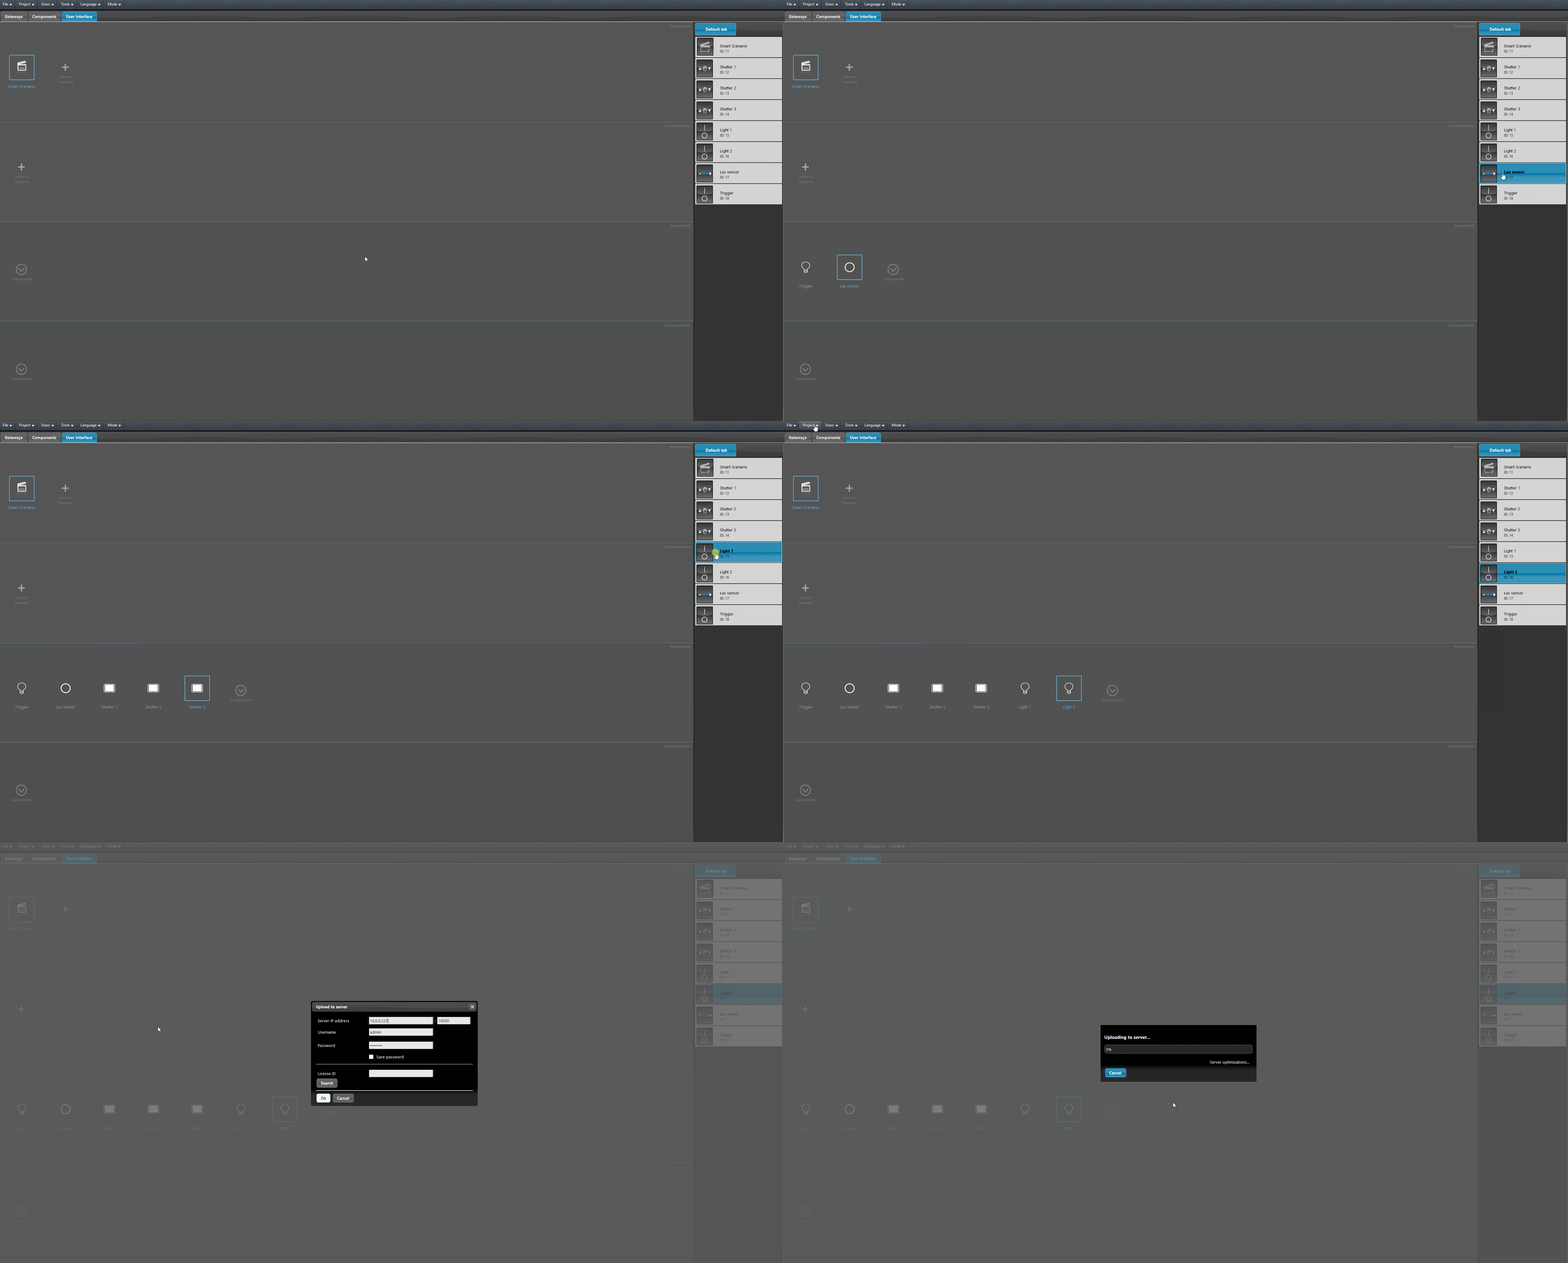
Go to the user interface editor, add the components and finally upload the project to the server.
Result
Step 9:
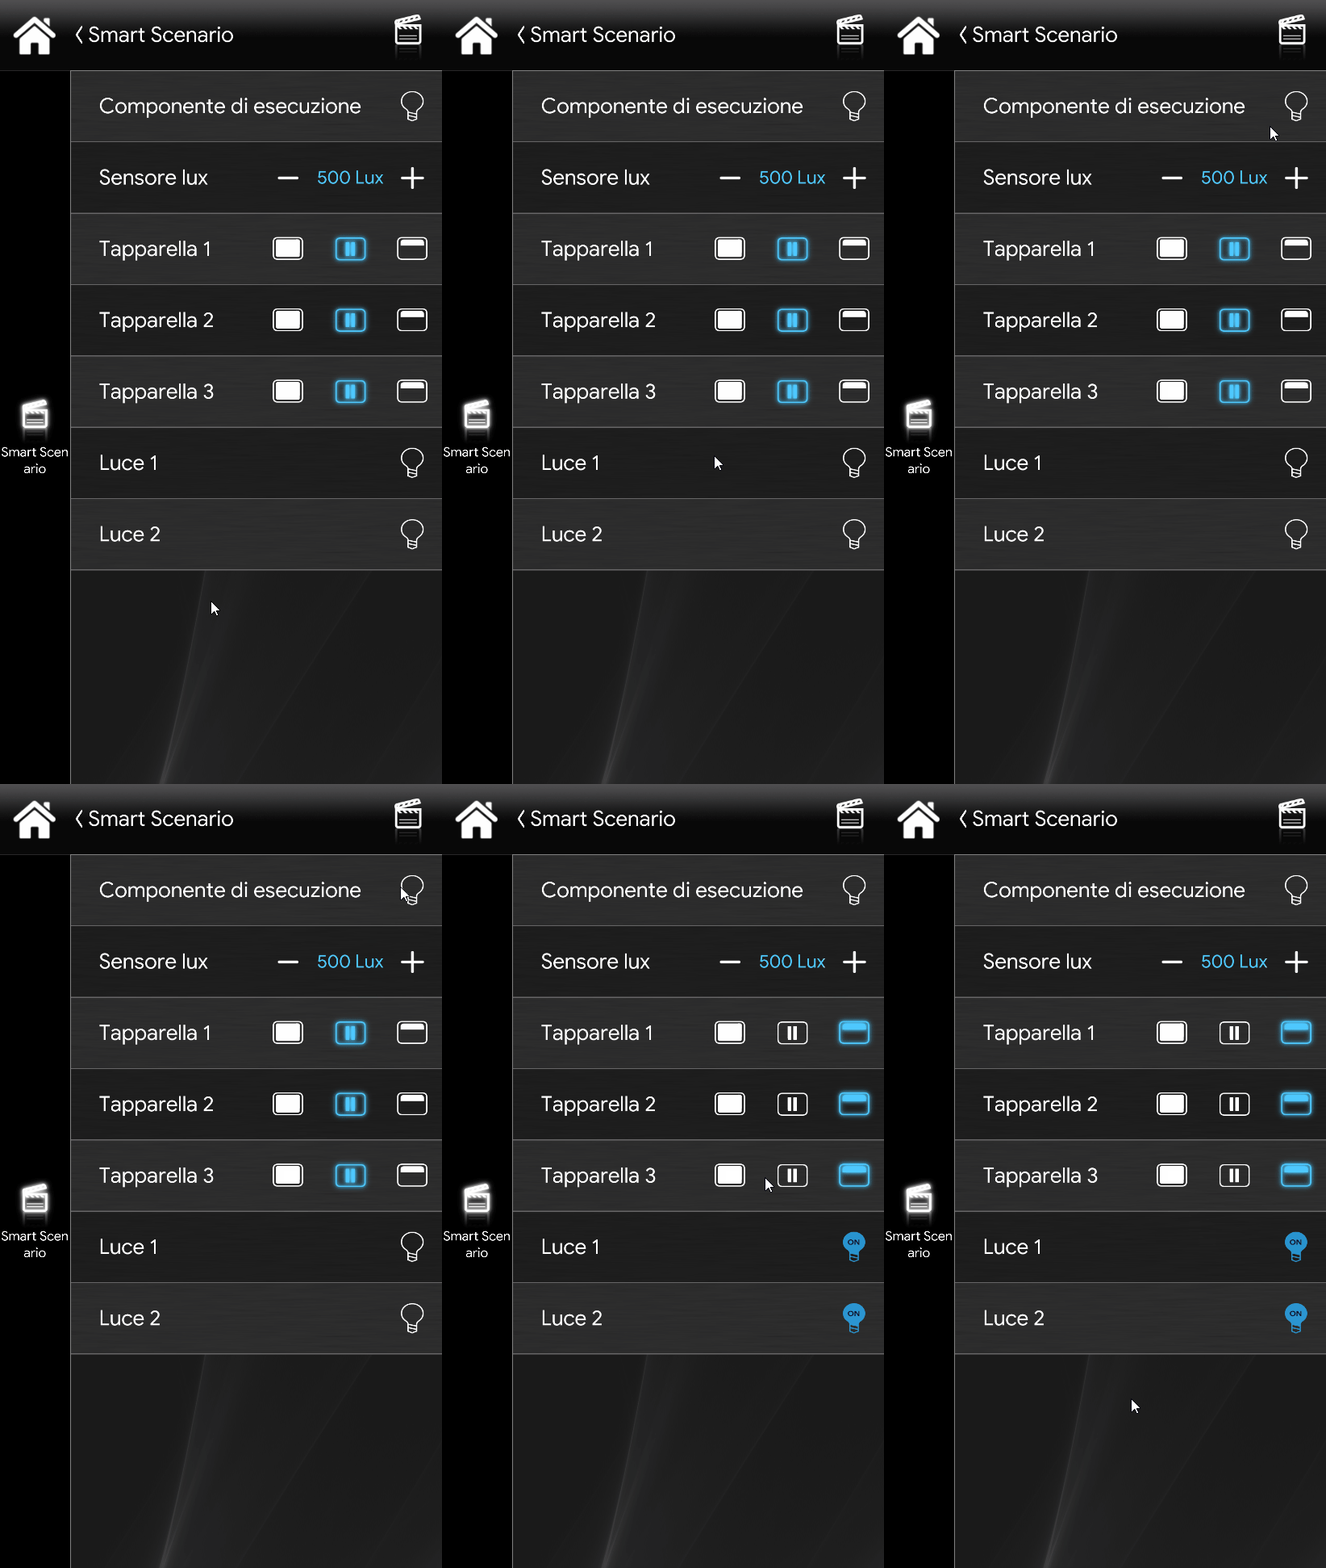
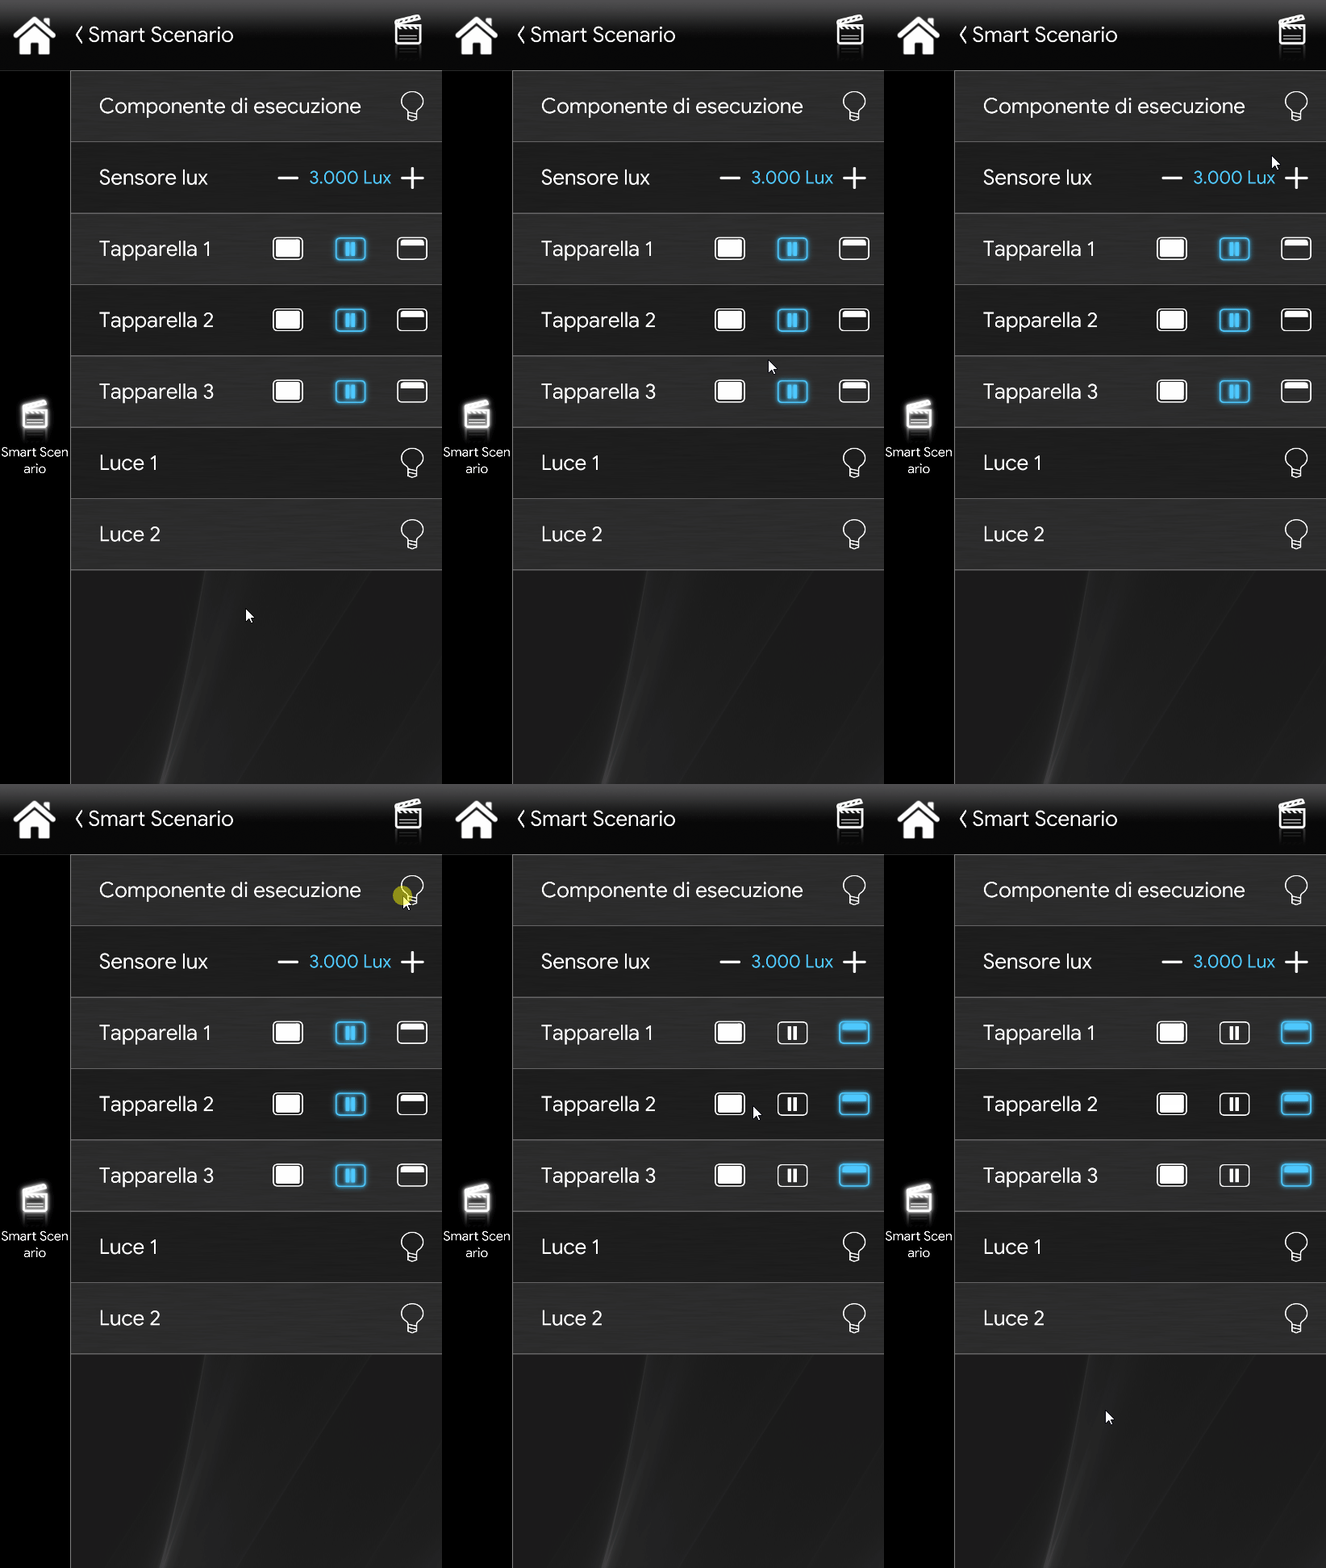
This is the visual result of the Smart Scenario component inside the Ilevia Control app (classic style).
Smart Scenario components with true condition
(Img. 1)
Smart Scenario components with false condition
(Img. 2)
As you can see from the images above, the first example shows the execution of the components once the Smart Scenario is started. In the image on the left (Img. 1), once the Smart Scenario has been executed, all components have been triggered because, in the case of the lights, the sensor value meets the condition specified in the settings. On the contrary, in the other image (Img. 2), lights 1 and 2 were not triggered because the Lux sensor value did not meet the set condition.
Click the link to download the example project and try it out.