
Events controller
How to configure the Events controller component in Ilevia Manager to enable or disable all scheduled events of specific components.
Introduction
The Events controller is a component that allows you to enable or disable all scheduled events of specific components. It is useful when the events to be disabled depend on the season: it prevents the user from accessing each component’s schedules and disabling them manually.
USE CASES
The user wants to disable the scheduled events for Christmas lights.
In summer, the user wants to disable all schedules set on setpoints.
The user wants to disable the scheduled events for irrigation before a garden party.
Component properties
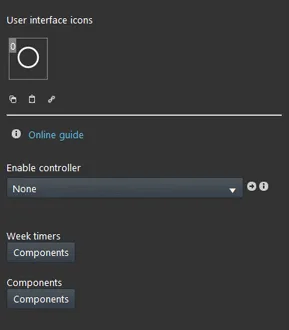
Controller enable: connect an Switch component to enable or disable the Events controller component.
Weekly timers: this list contains all the Weekly timers that will be considered when the Events controller is enabled.
Components: this list contains all components that have a schedule set with one of the Weekly timers added to the previous list.
Component configuration
In this example, a setpoint group is set to bring the temperature to a specific value every day at 18:30. The Events controller will disable these schedules for all setpoints, preventing the user from individually accessing each Setpoint component schedule to disable them one by one.
Step 1:
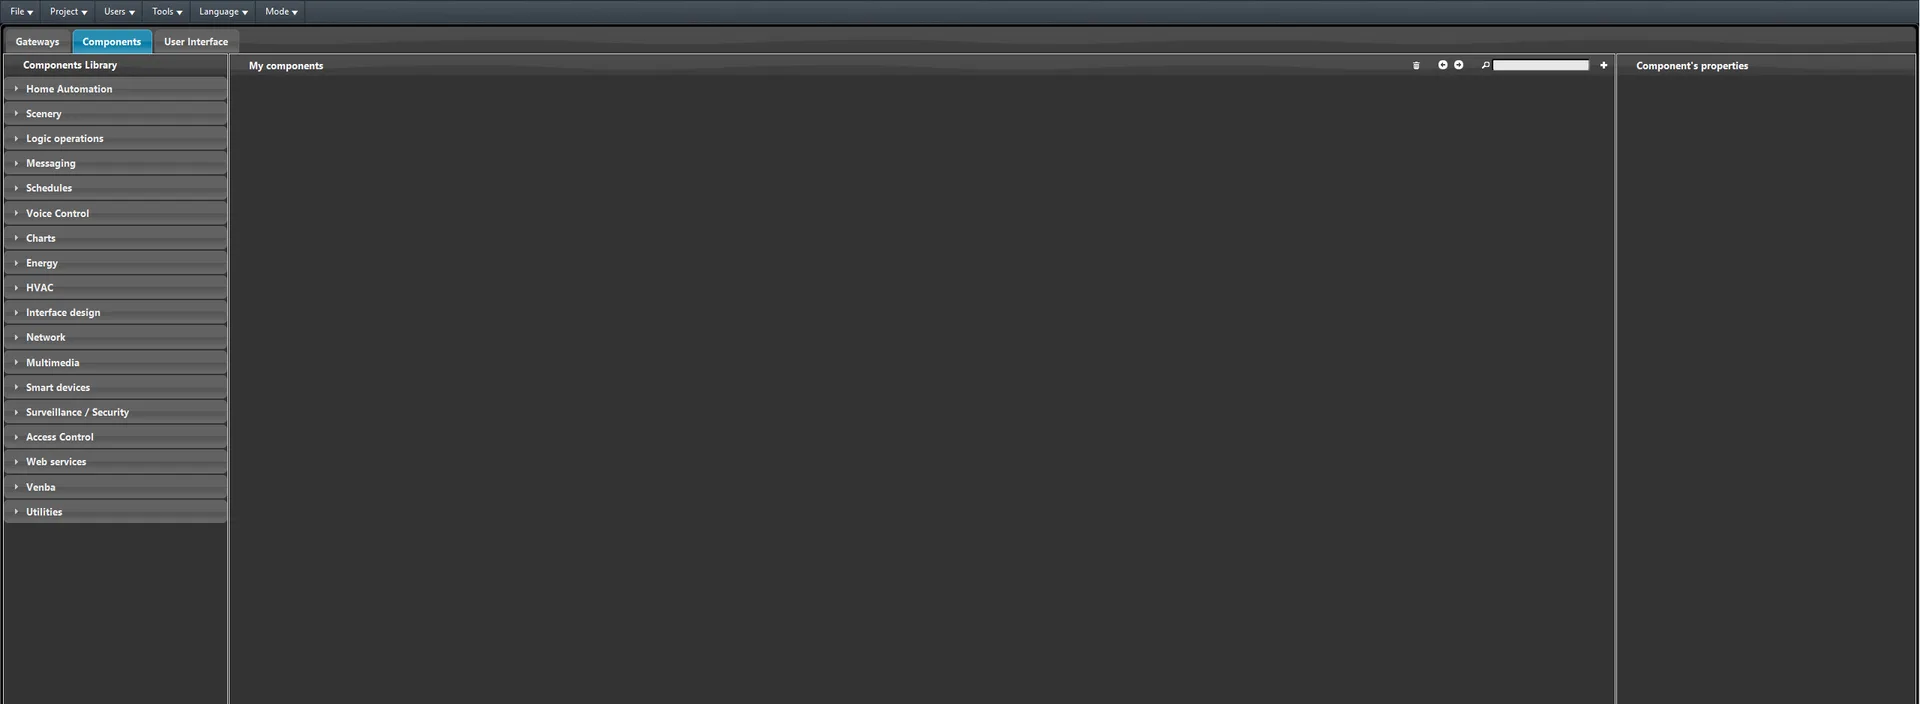
Open the Ilevia Manager software and go to the Components section.
Step 2:
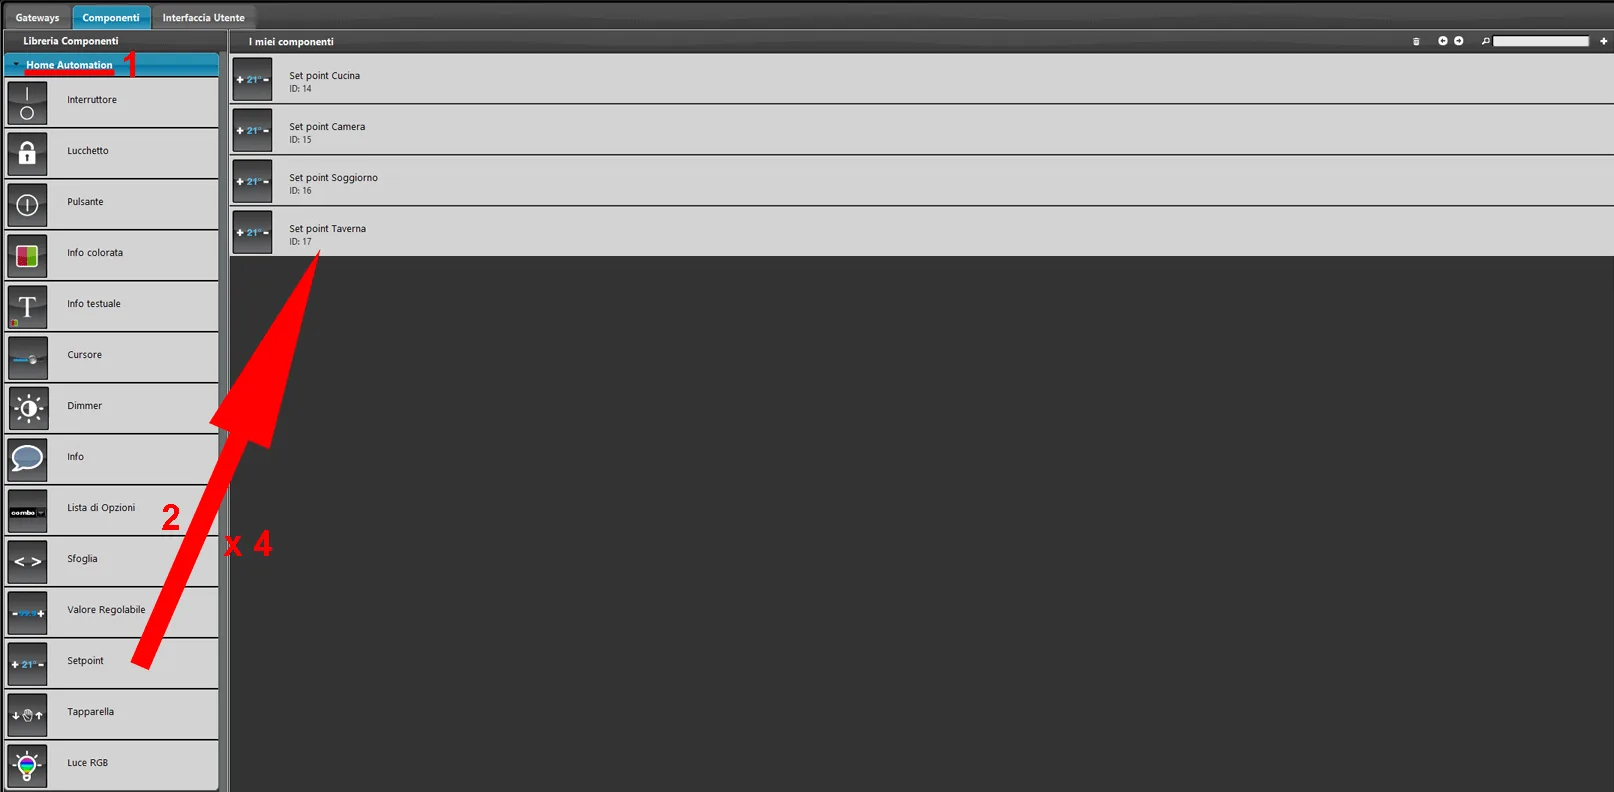
1. Open the Home automation menu in the Components library. 2. Add 4 Setpoint components to the project.
Step 3:
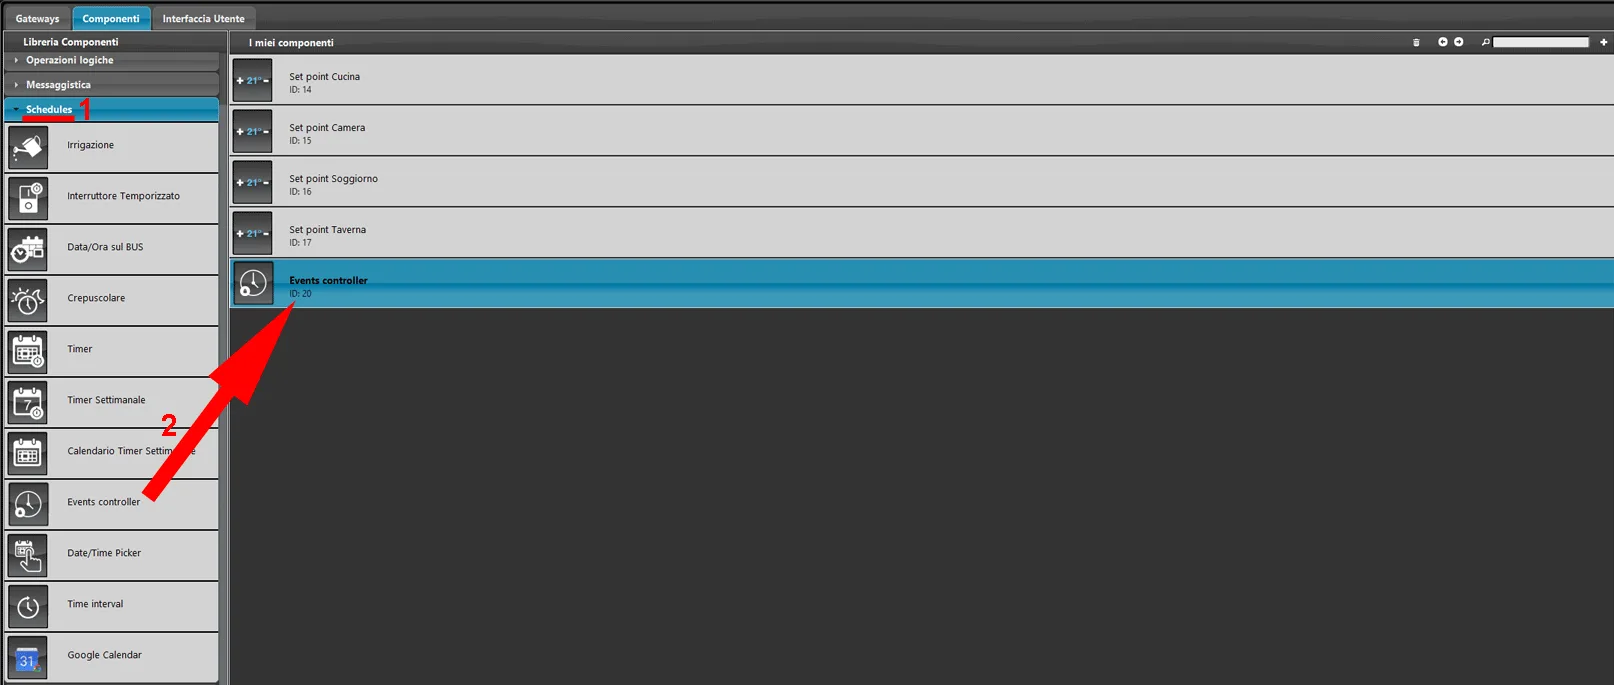
Add an Events controller component to the project from the Schedule menu in the Components library.
Step 4:
1. Add a Switch to the project 2. and connect it to the Controller enable parameter of the Events controller component.
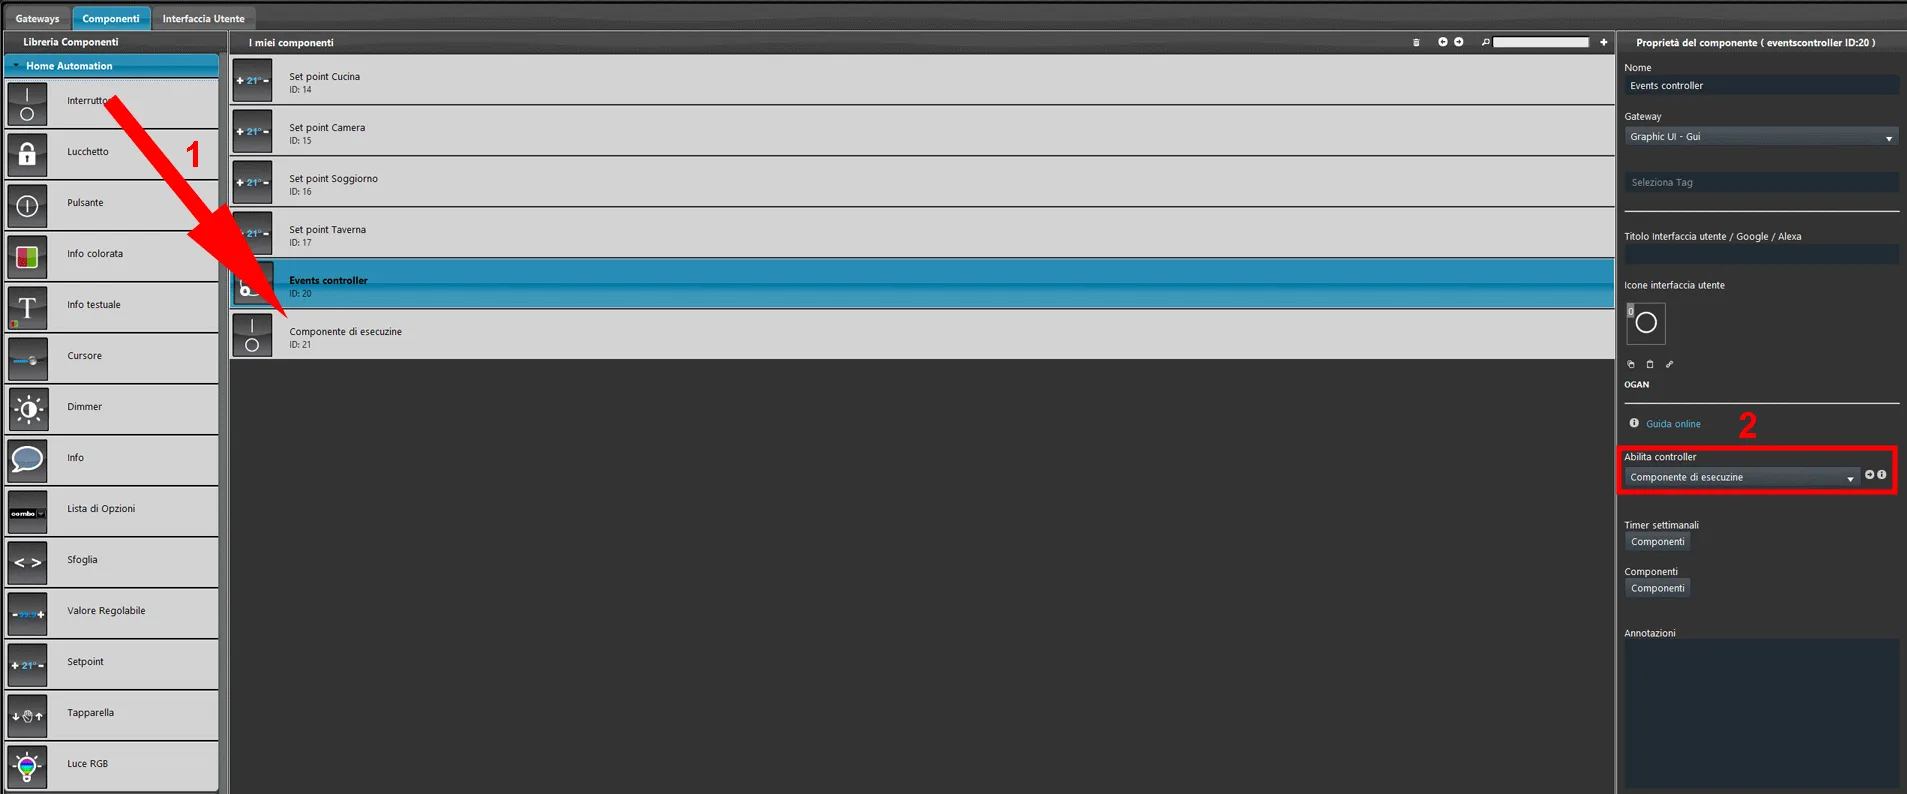
Step 5:
Add a Weekly timer and a Weekly timer calendar to the project from the Schedule section of the Components library.
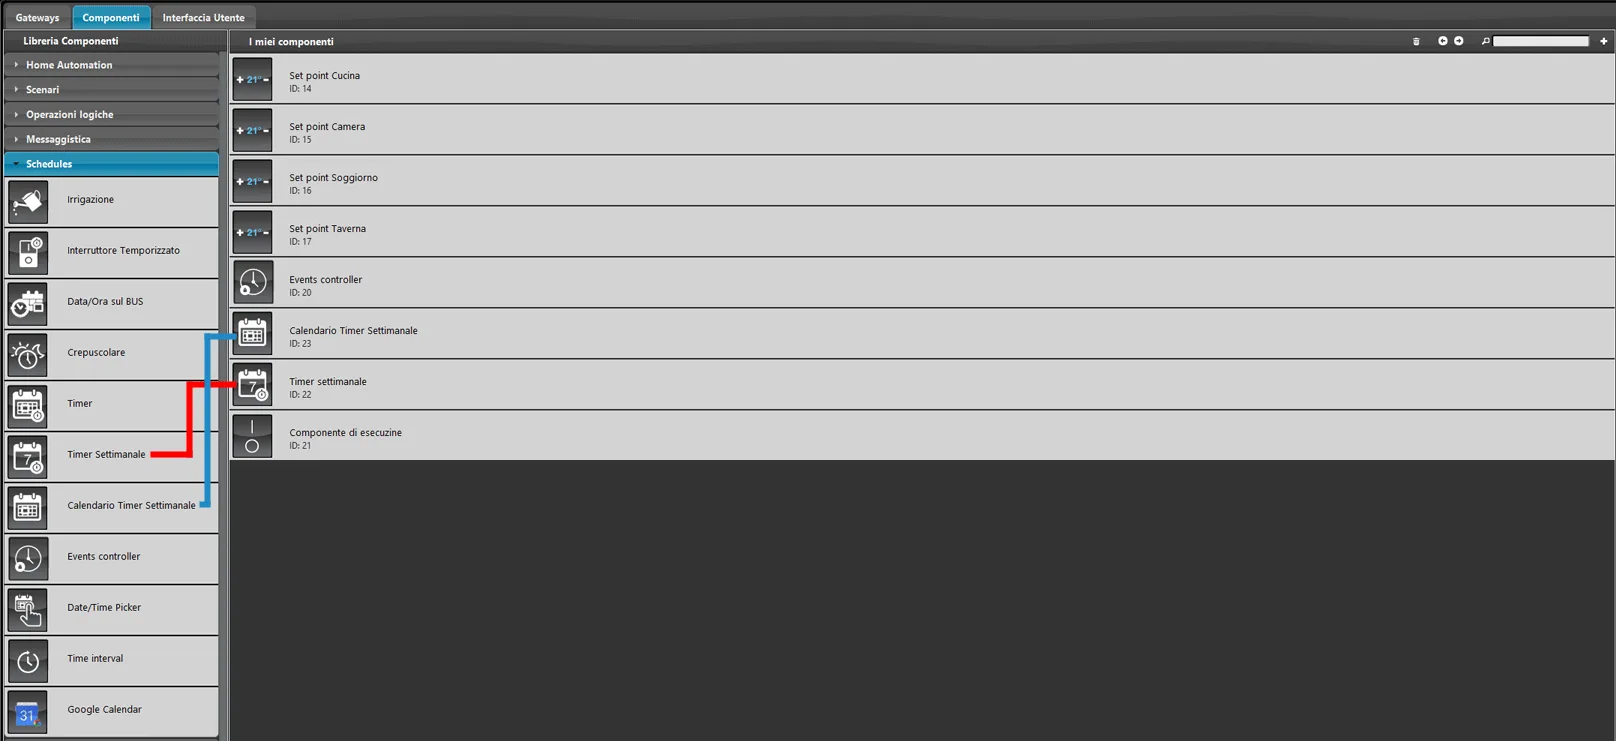
Step 6:
Add the Weekly timer to the Weekly timers list of the Events controller component.
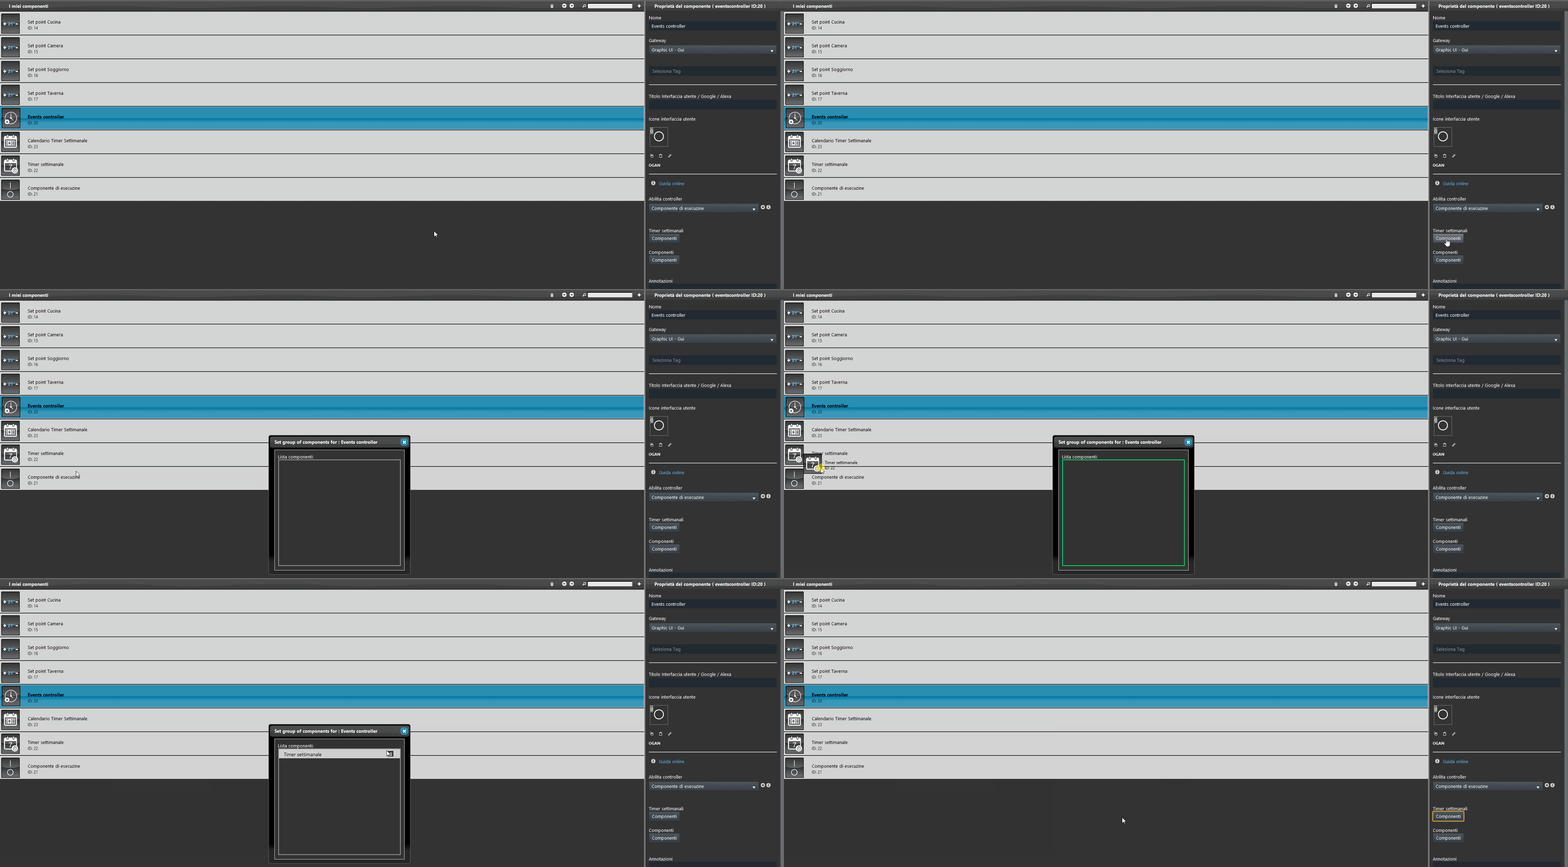
Step 7:
Add the Setpoint components to the Components list in the component properties of the Events controller.
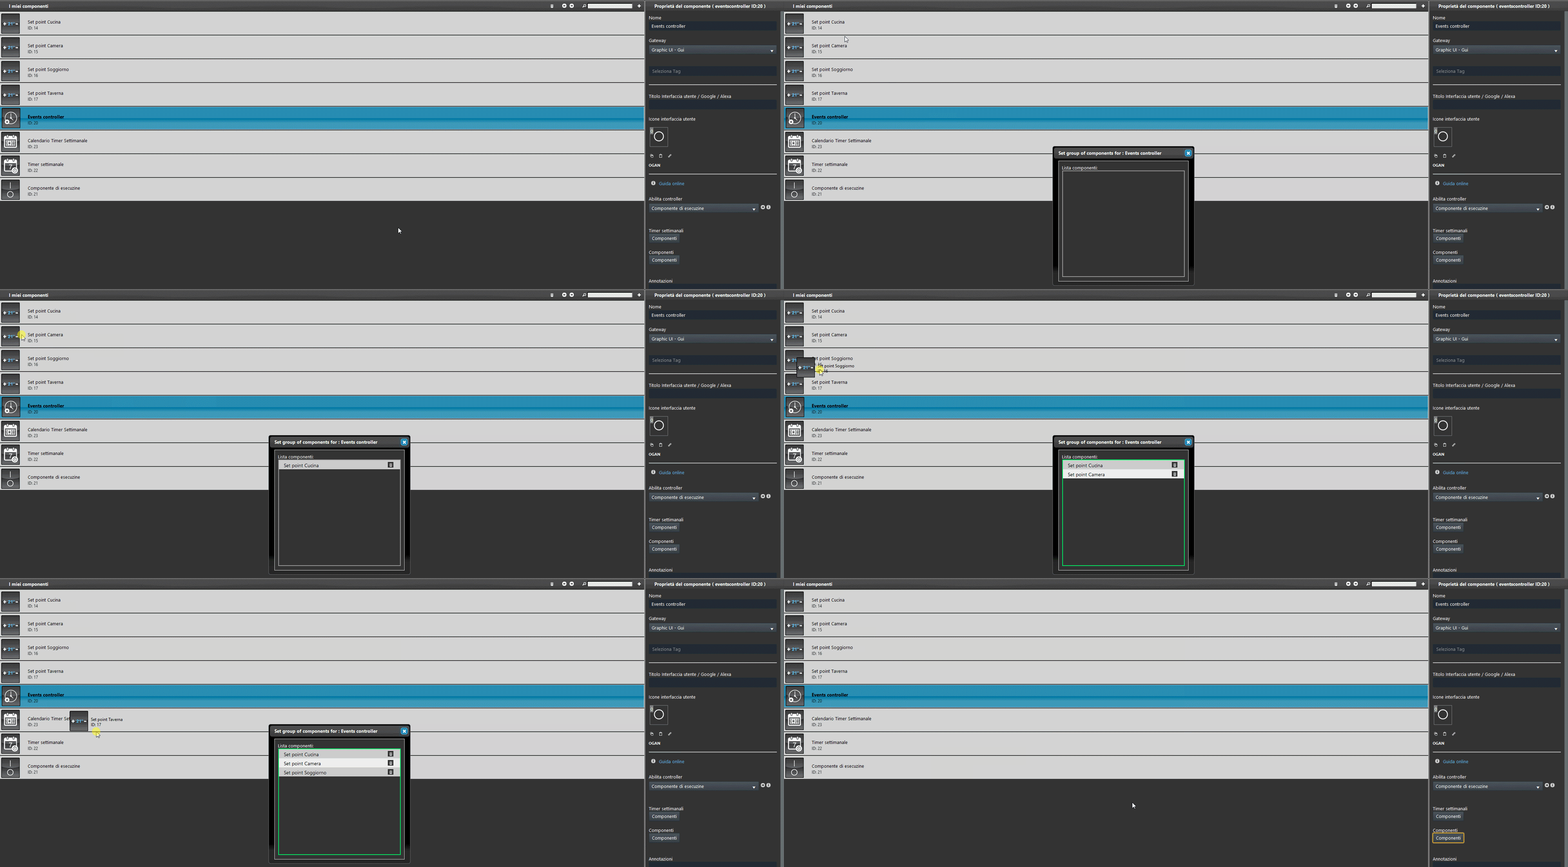
Step 8:
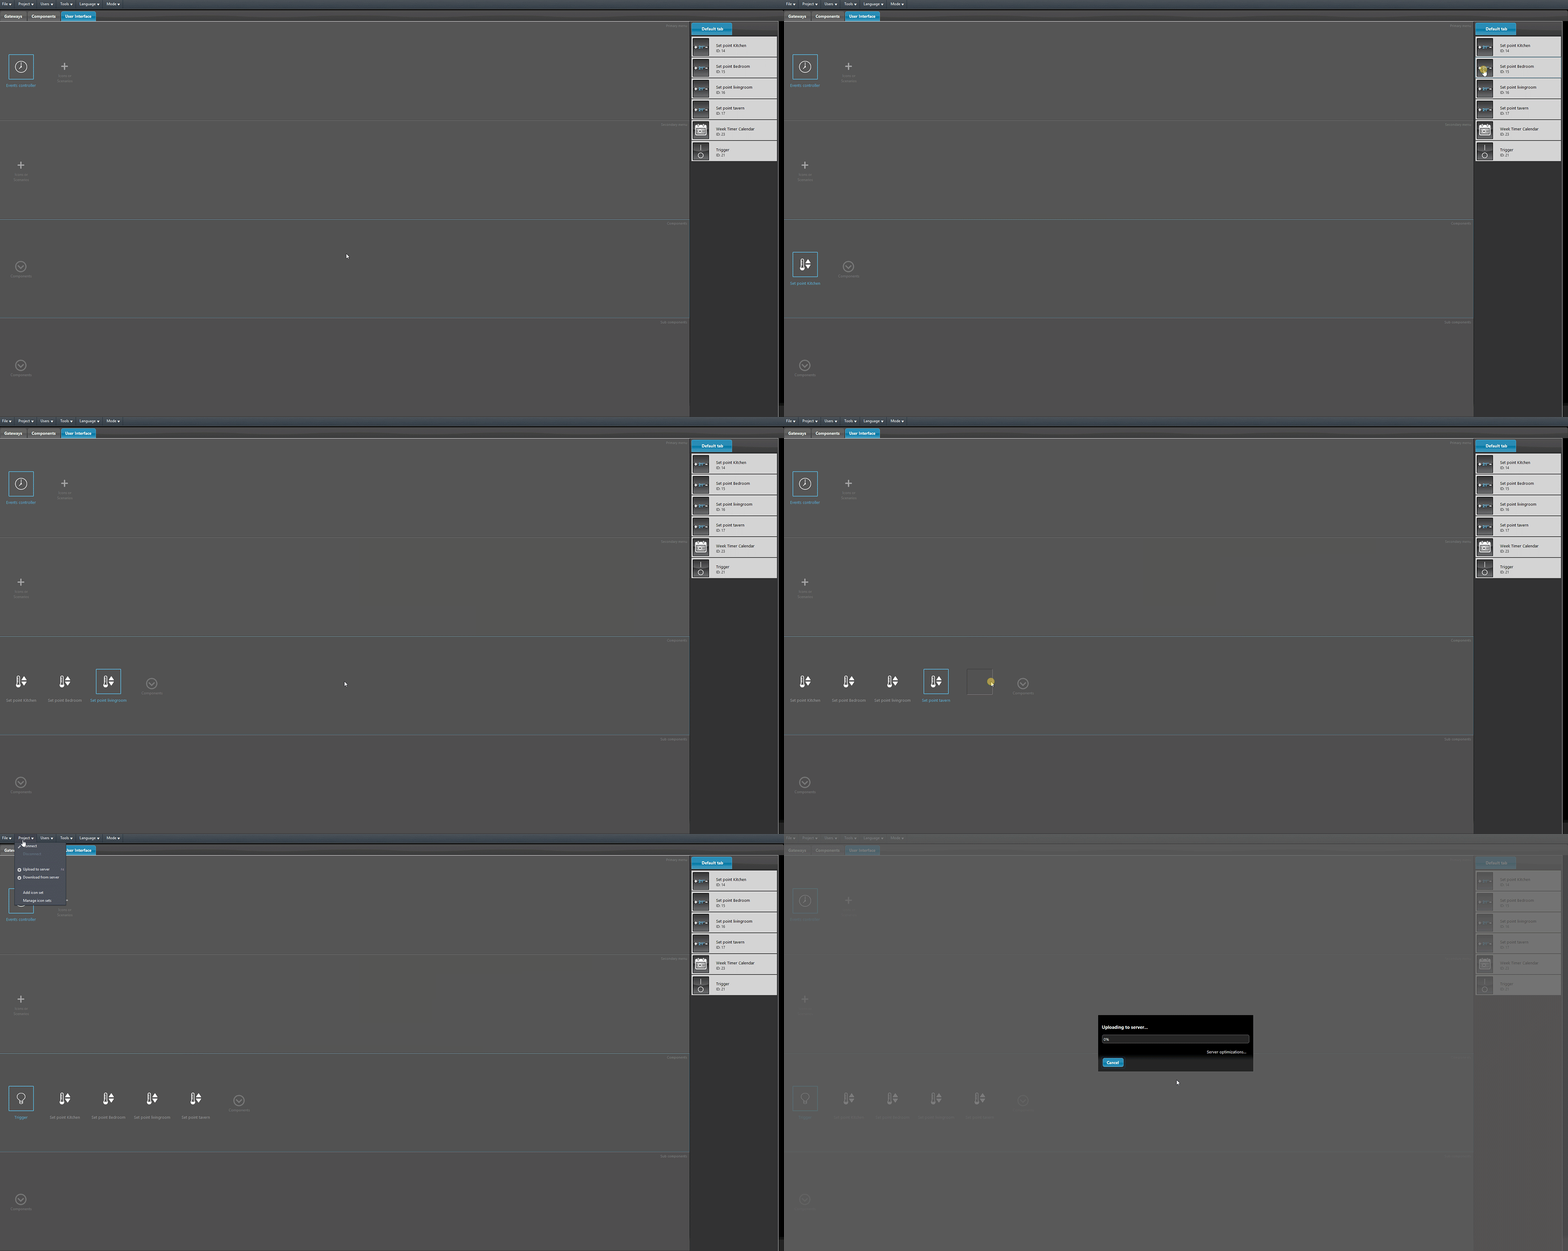
Add the components to the User interface: go to the User interface section, add the components and finally upload the project to the server.
Component test
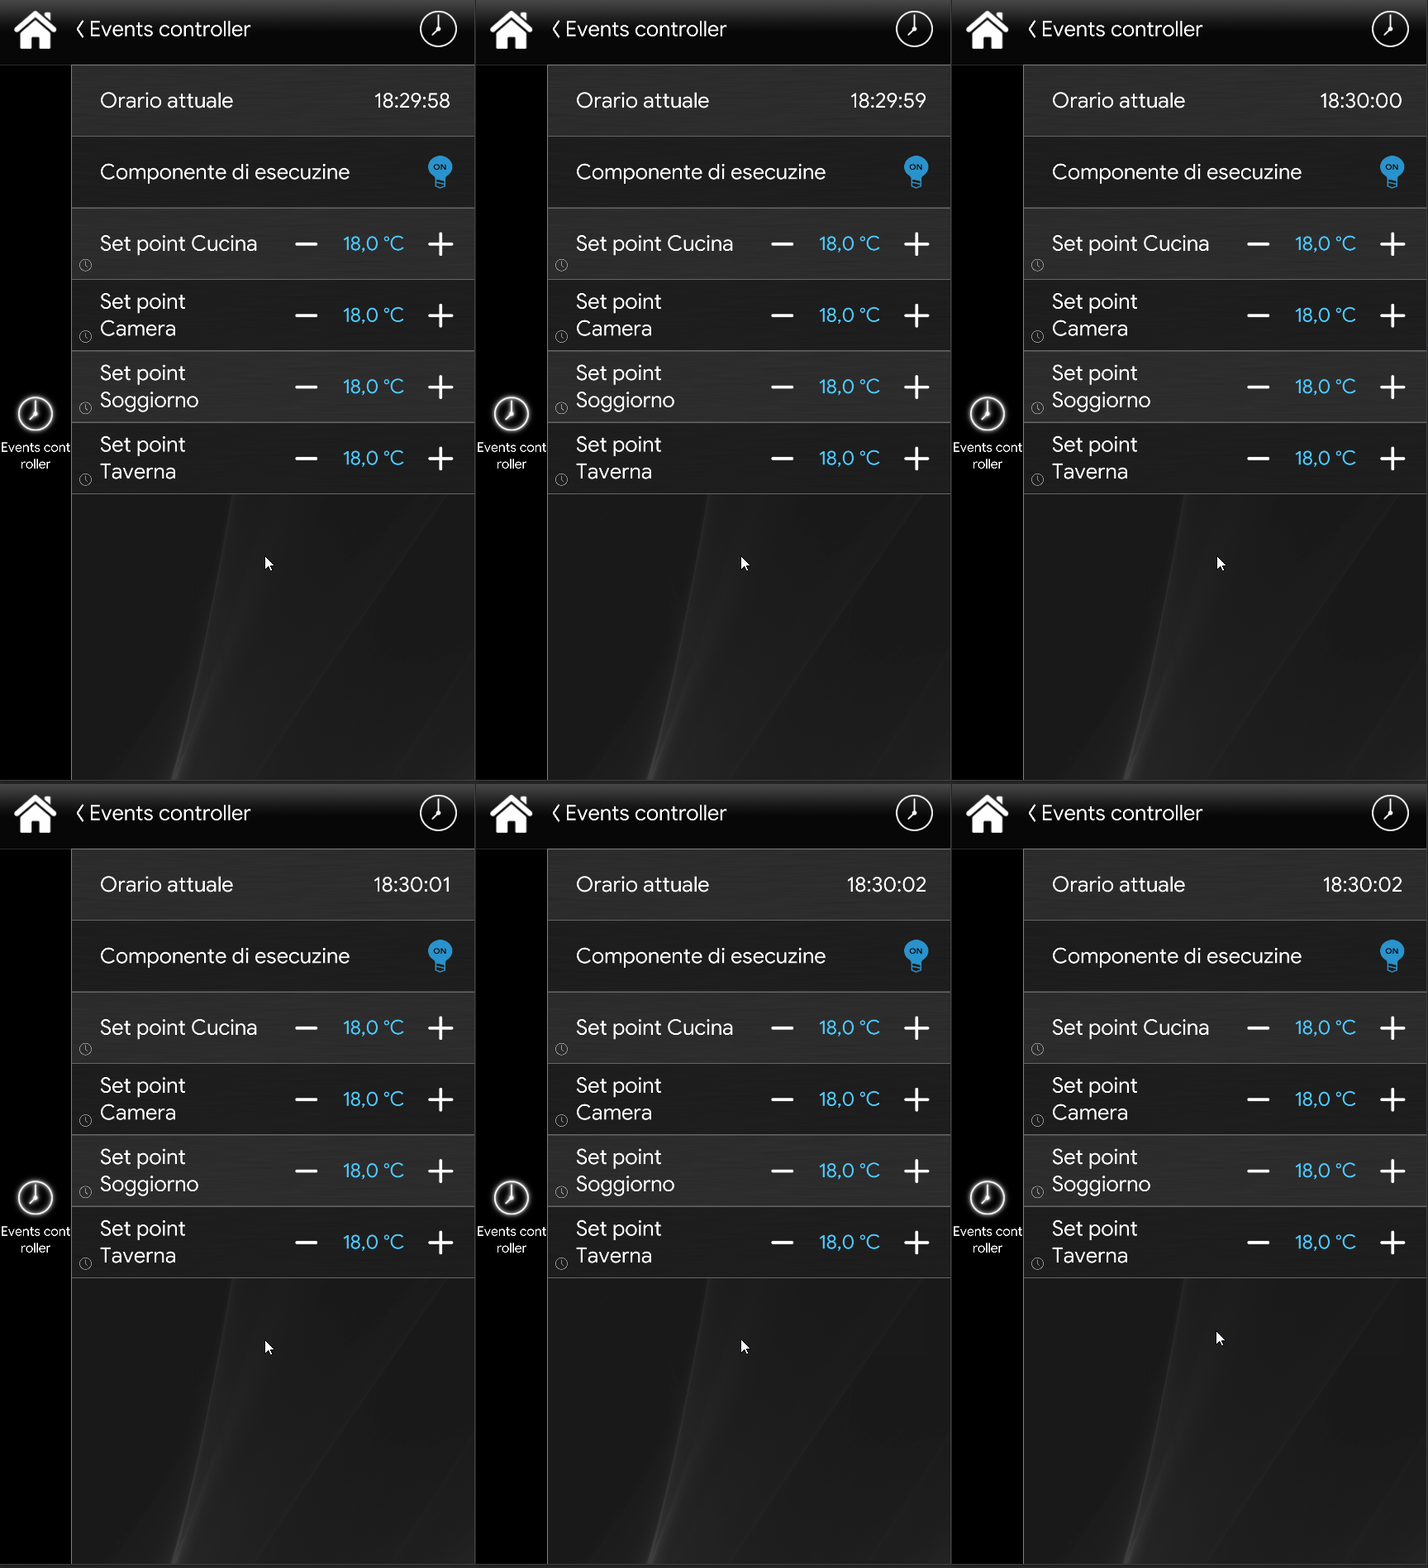
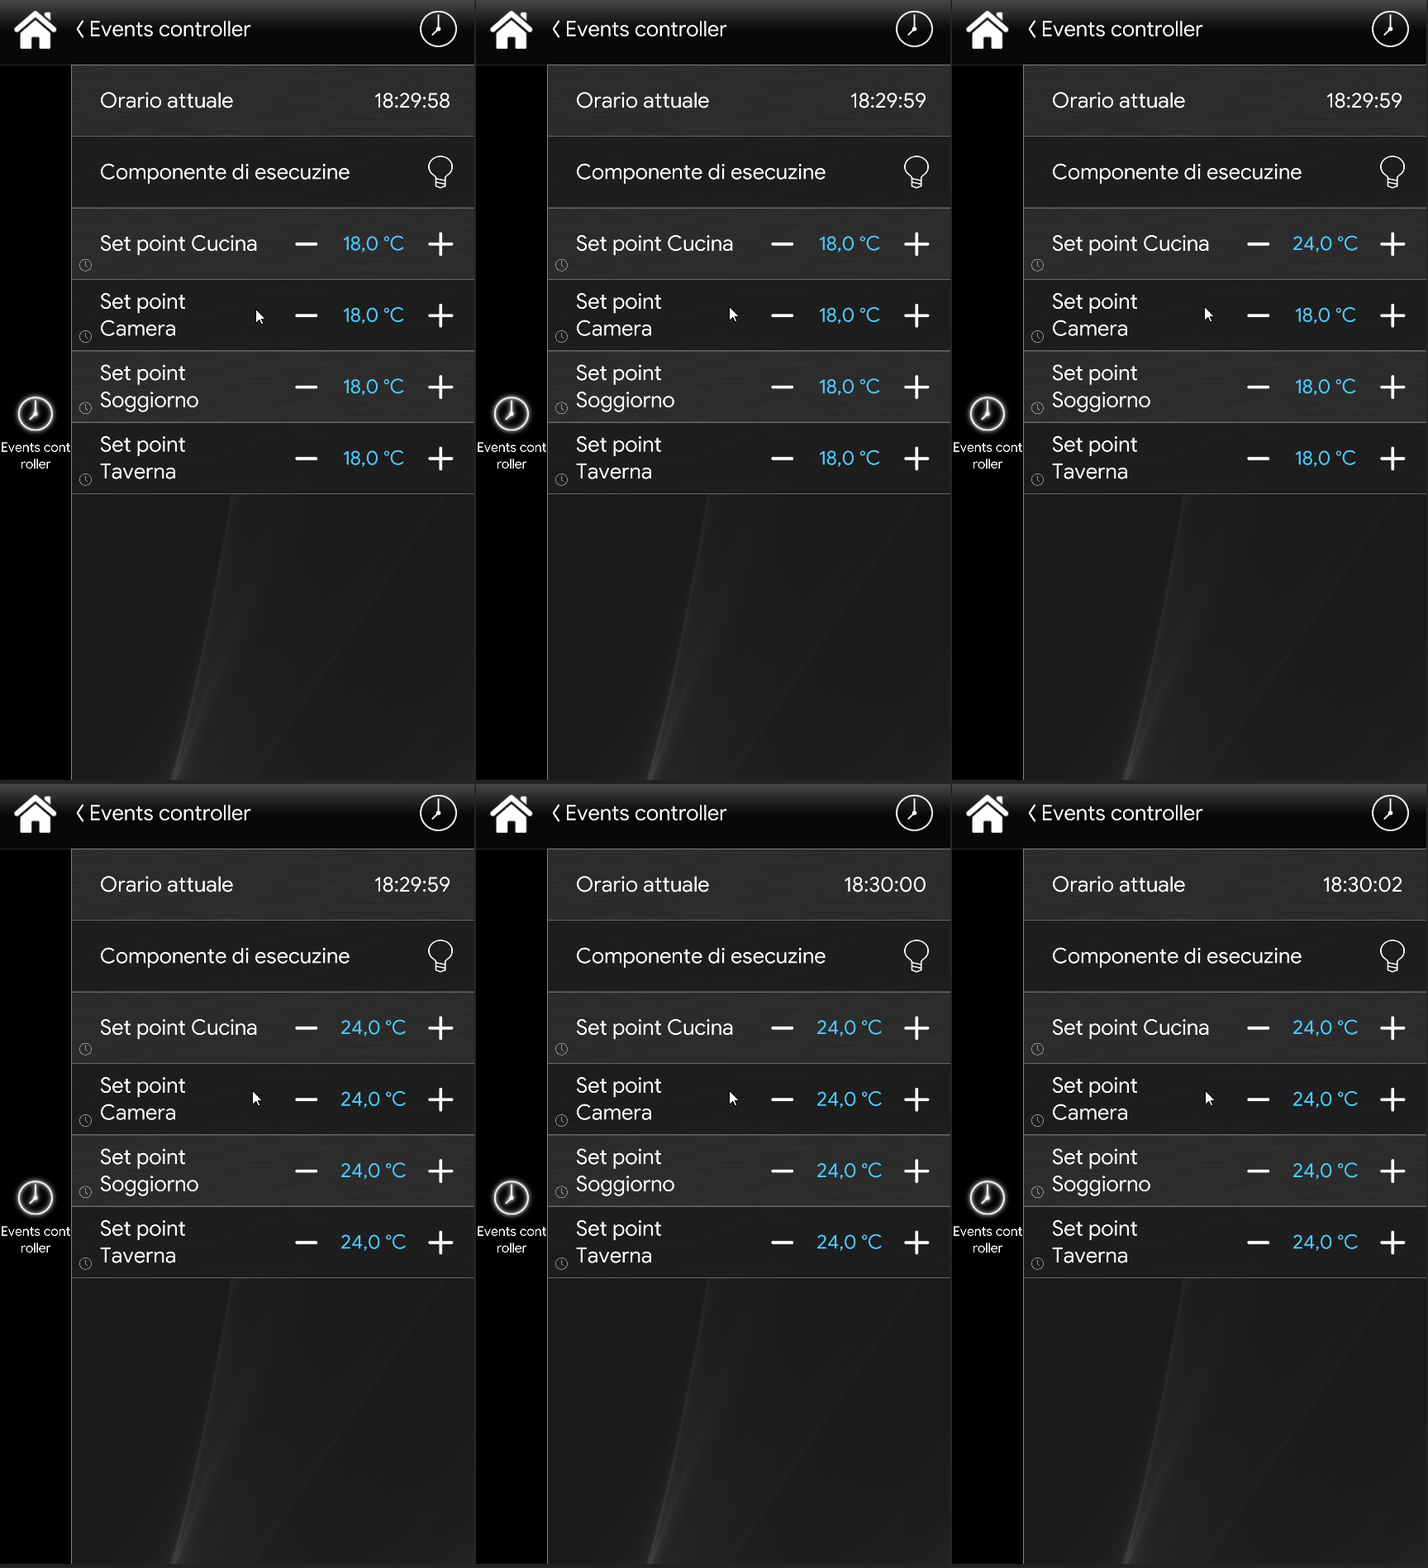
The setpoint is configured to bring the temperature of a thermostat to 24 degrees every day at 18:30. Once the Events controller is enabled, the setpoint no longer follows the configured schedules and therefore does not change.
Component with Events controller enabled
Component with Events controller disabled
Click here to view the example project for the Events controller component.