Irrigation
How to configure the Irrigation component in Ilevia Manager (zones, cycles, pump, sensors) and how to use it in Ilevia Control.
Introduction
This component lets you control the entire irrigation system.
Use cases
The user wants to centralize all the irrigation in the home and control each zone individually.
You can control:
Main pump
Drain actuator
Option to exclude specific sprinklers from the cycle
The ability to use the same area multiple times in the cycle
Option to disable it in case of rain
The user can configure independently:
Number of cycles programmable by the user
Cycle timing definable by the user
The ability to activate the cycles
The ability to activate / deactivate specific sprinklers at any time
The ability to schedule the cycle start using a Weekly Timer
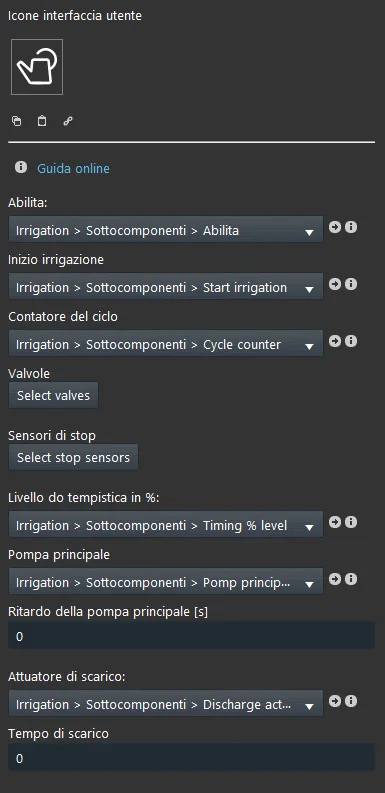
COMPONENT PROPERTIES
The component Title and Icon are customizable. See the guide to “Common properties“.
Start irrigation: Allows you to turn irrigation on / off using, for example, a “Switch“;
Cycle counter: We recommend using a “Adjustable value” component to increase or decrease irrigation cycles;
Valves: In this list, add the Switch components that represent the irrigation valves;
Rain sensors: For this type of component, we suggest using a “colored info” component that can read the value of a rain sensor (0/1);
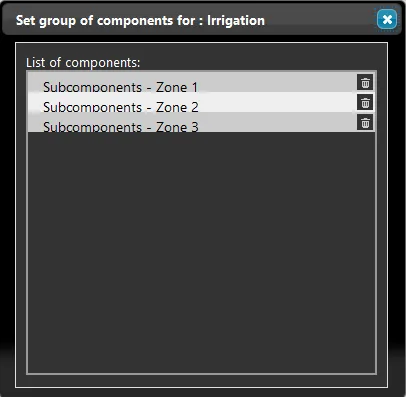
By clicking the components button, the “Components” window opens, where you can drag the “switches” to control, for example, an electric valve. To simplify the operation, we have already added 3 “Zones”;
Main pump: Allows you to turn the main pump on or off, associate a “switch” component;
Main pump delay[s]: This parameter allows you to set a delay for the start of the irrigation pump;
Drain actuator: This parameter allows you to turn the drain actuator on or off during the cold periods of the year to empty the water pipes;
Drain time [s]: Drain time in seconds;
Irrigation component configuration
By clicking the icon of the Irrigation component, you access its interface.
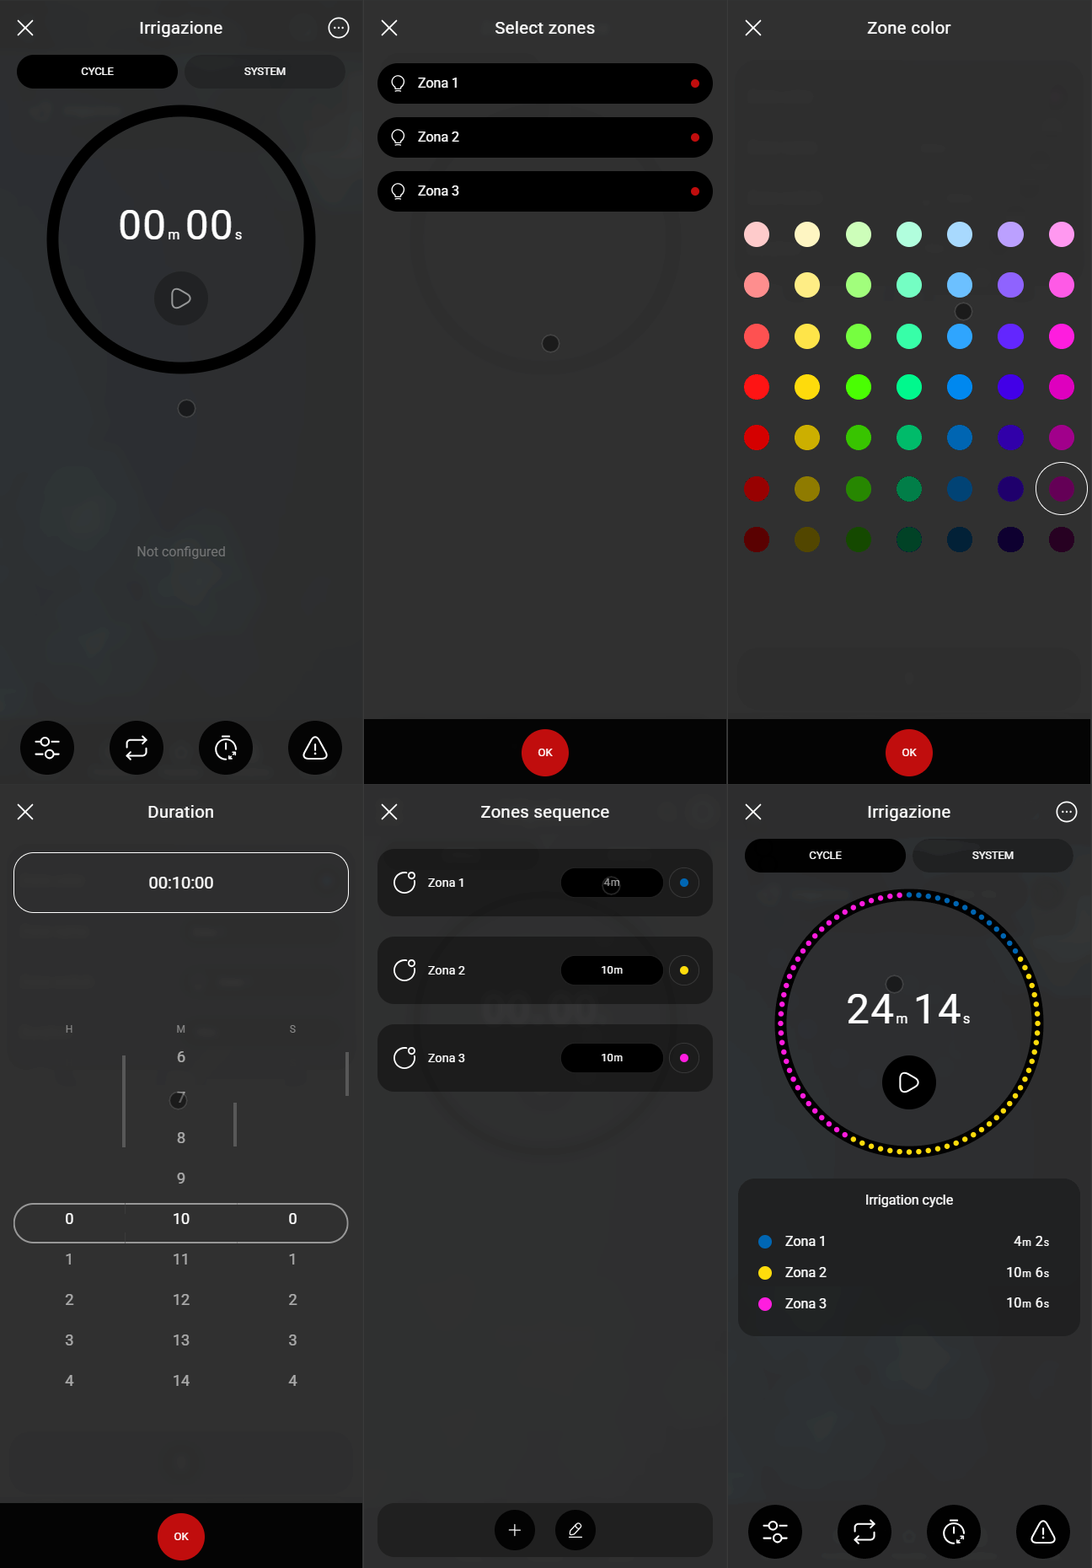
Access the irrigation component (Fig. 1) and click the Zone sequence icon to add the zones to the irrigation cycle: on this screen you can also edit the timing of each zone, the color representing the zone and, if necessary, the zone name (Fig. 2).
Fig. 1
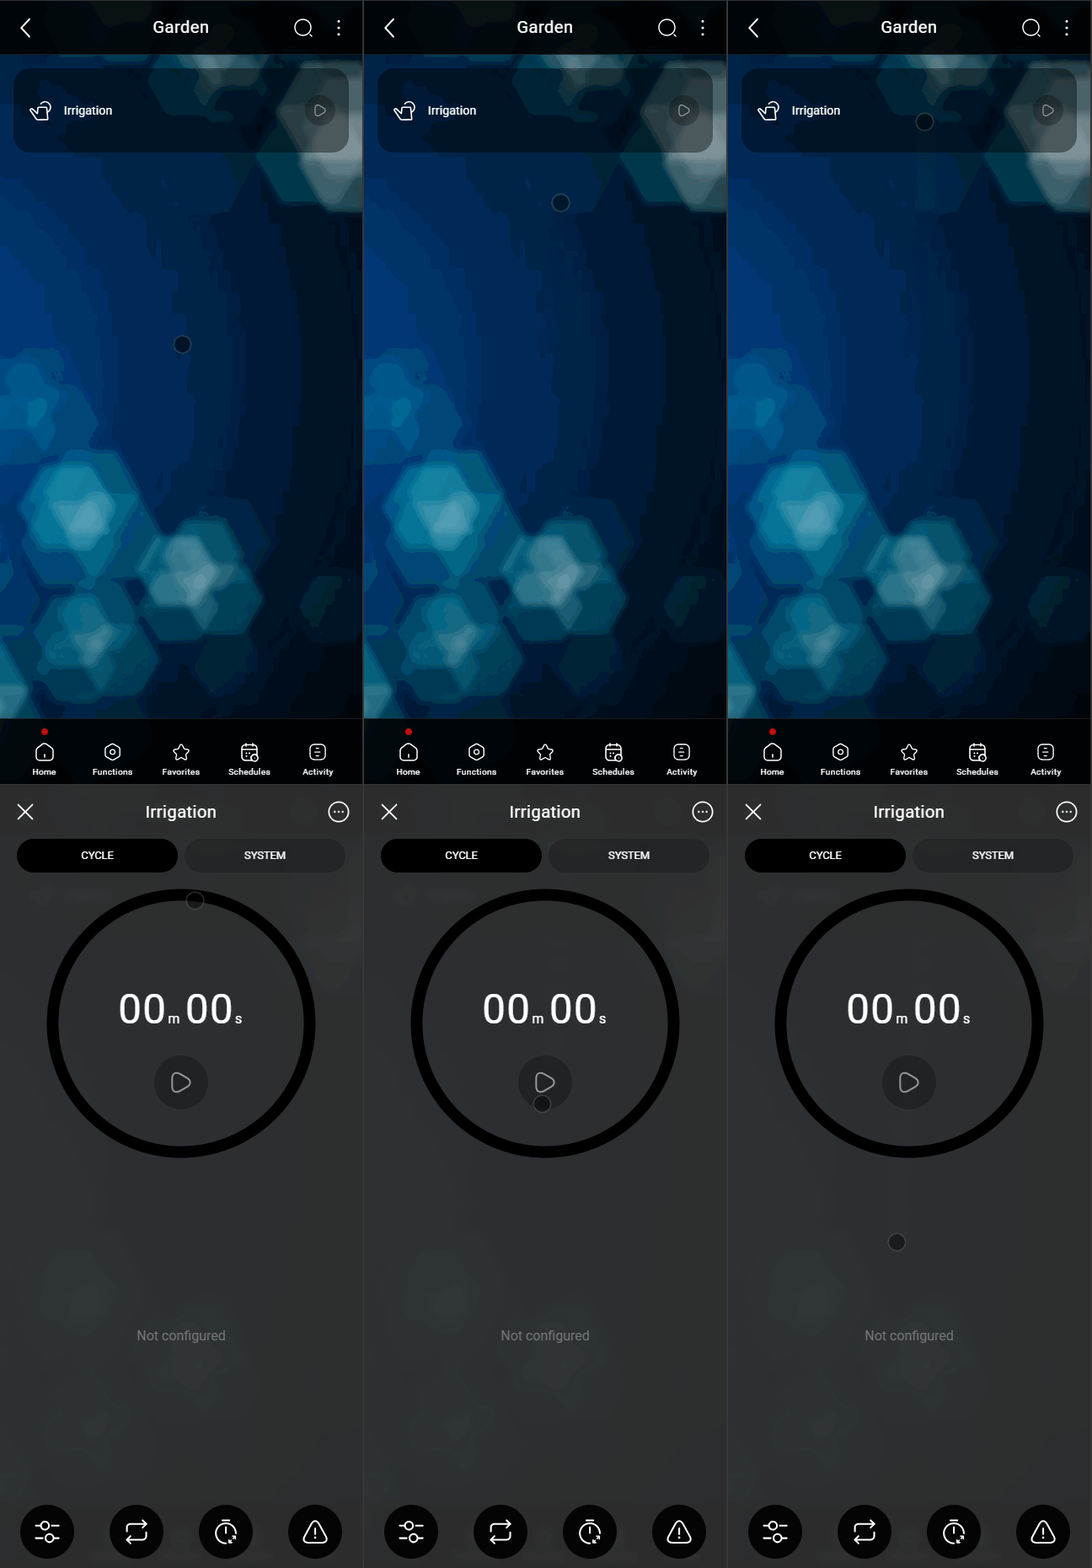
Fig. 2
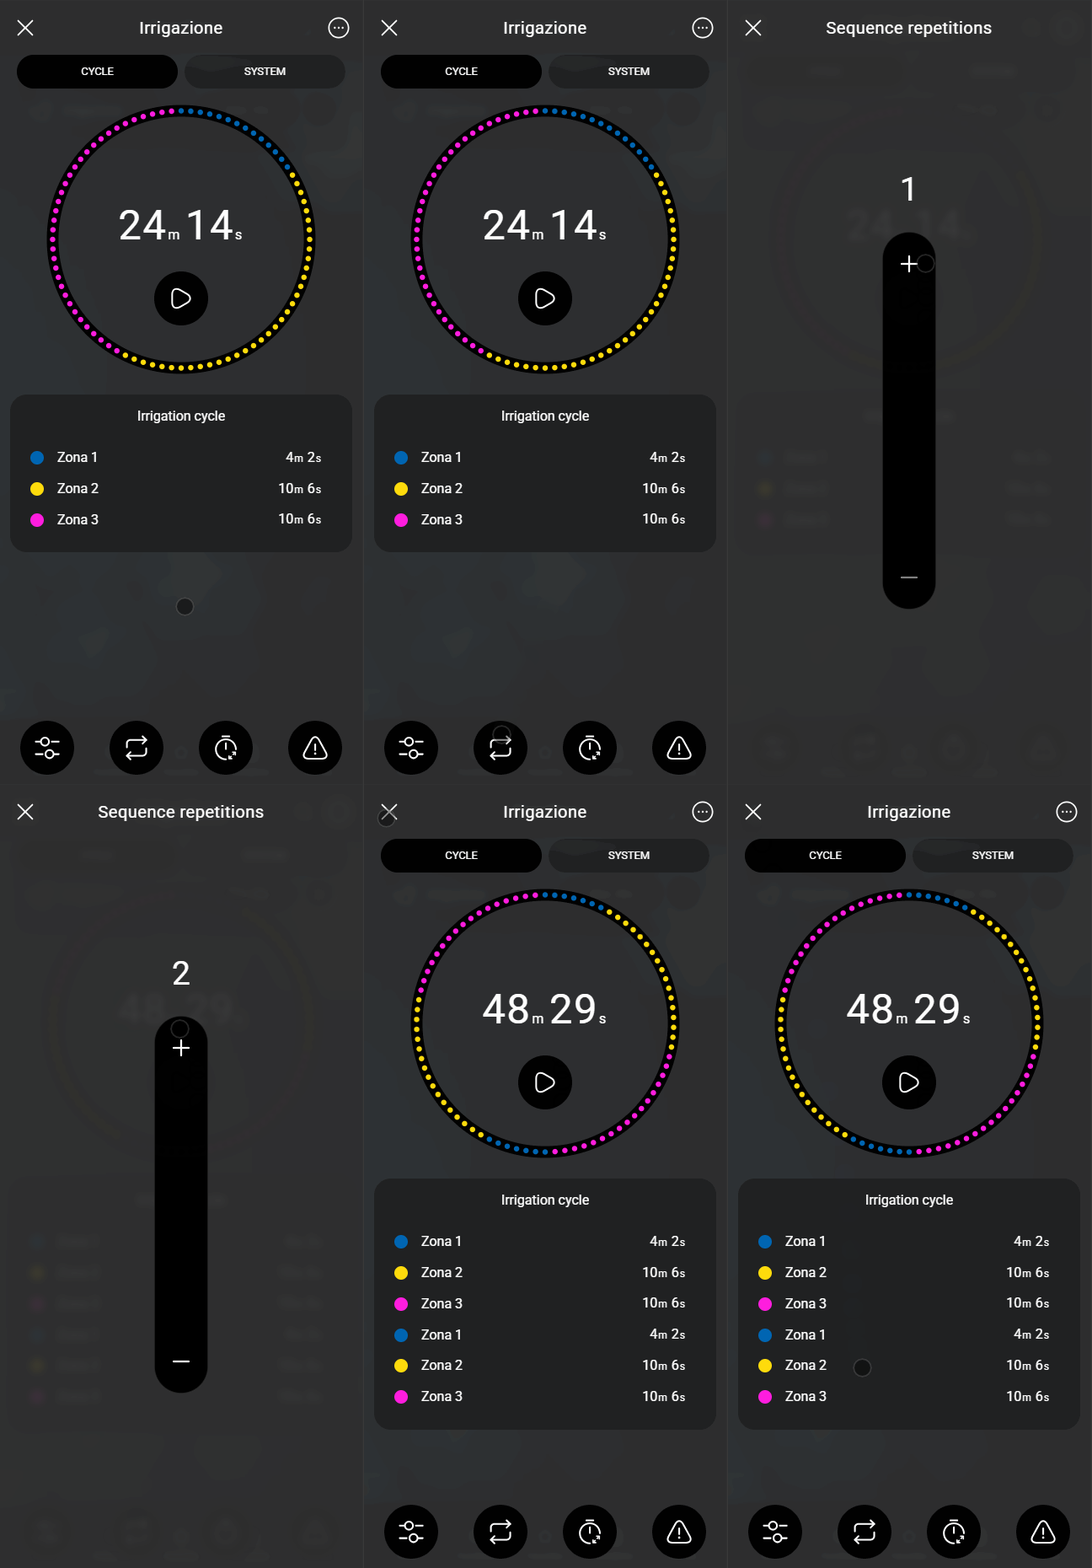
Cycle counter menu. In this screen you can interact with the Adjustable value component, which allows you to modify the cycle counter, that is, how many times the cycle of all the zones in the list is repeated.
Example:
If the Cycle counter is set to 2, then all zones will be activated 2 times.
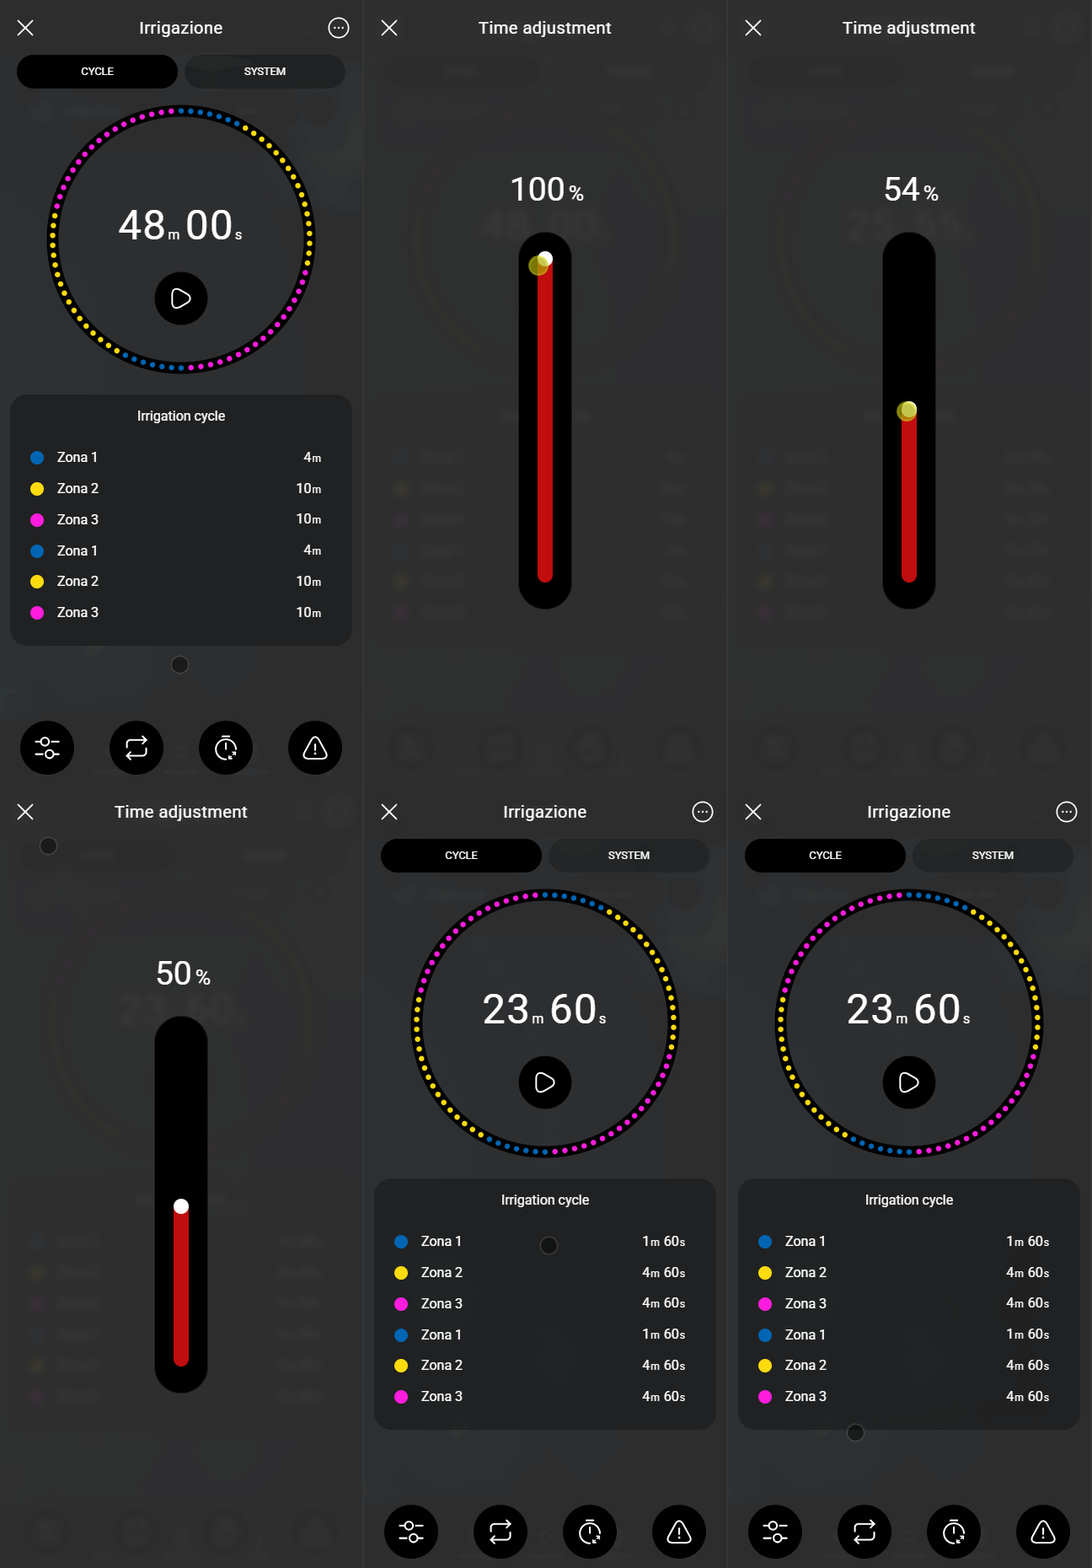
Time adjustment menu: in this menu you can change the % of time that the valve will remain active. Example: if the cycle lasts 10 minutes and the slider is set to 50%, the cycle will last 5 minutes.
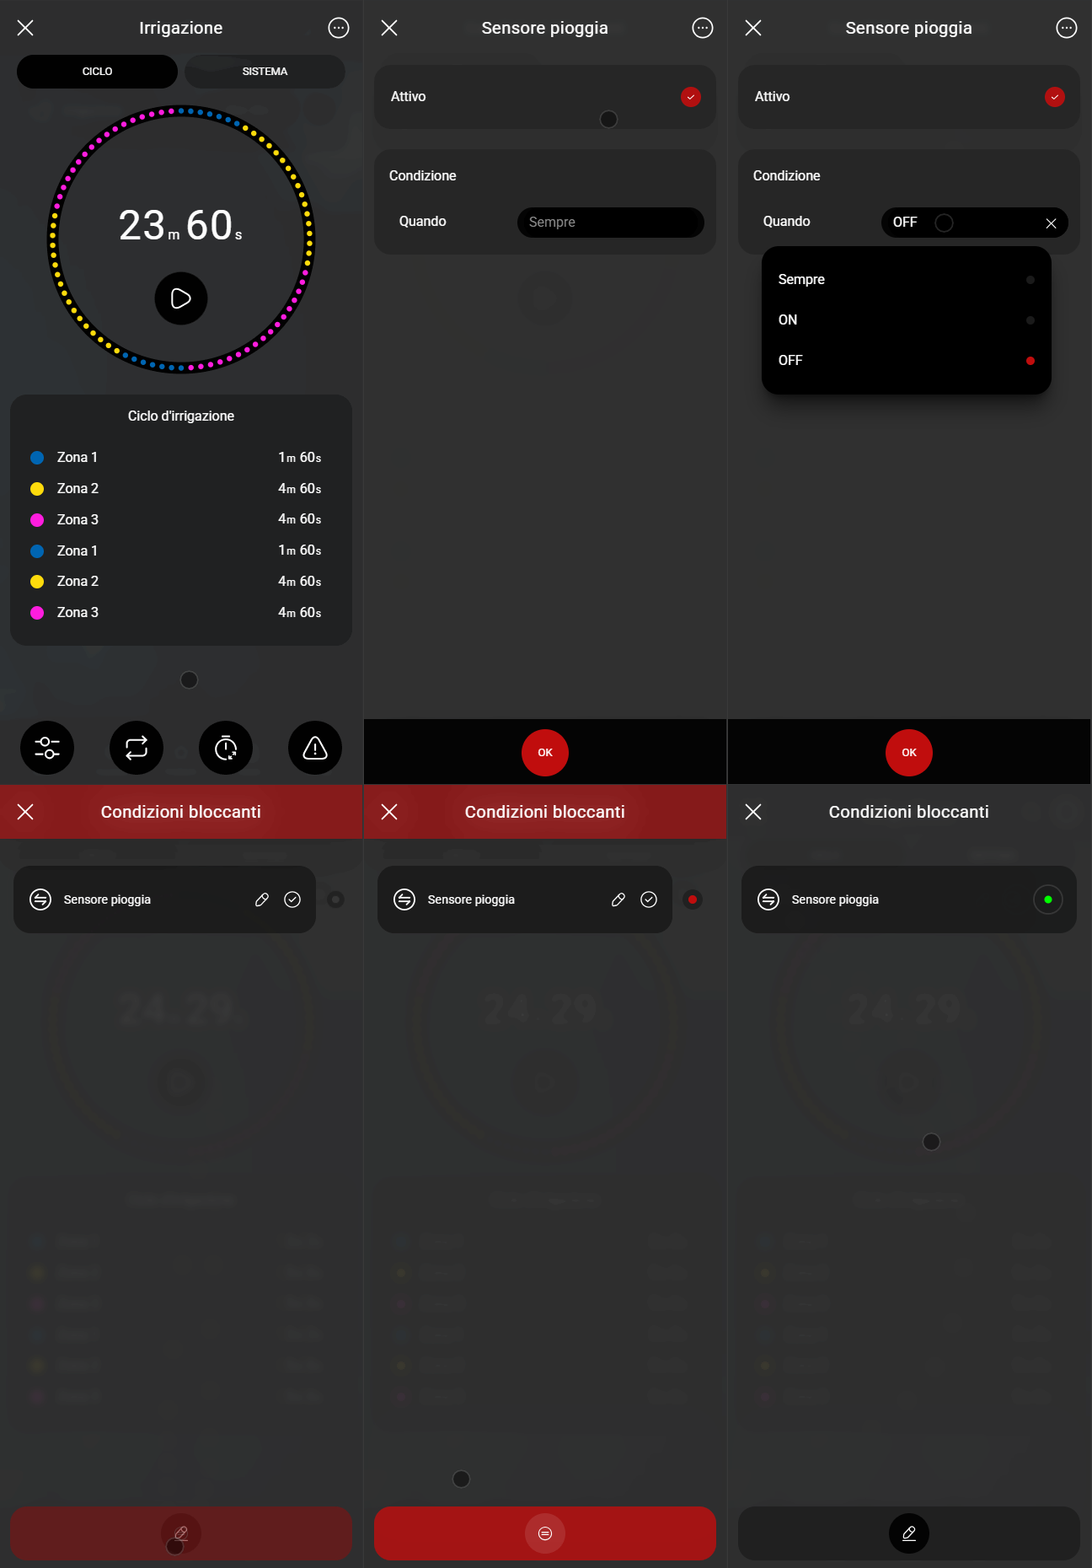
Blocking conditions menu: in this menu you can change the blocking condition of the irrigation component and customize the sensor parameters.
Irrigation start setup
It is very important to understand how Events work.

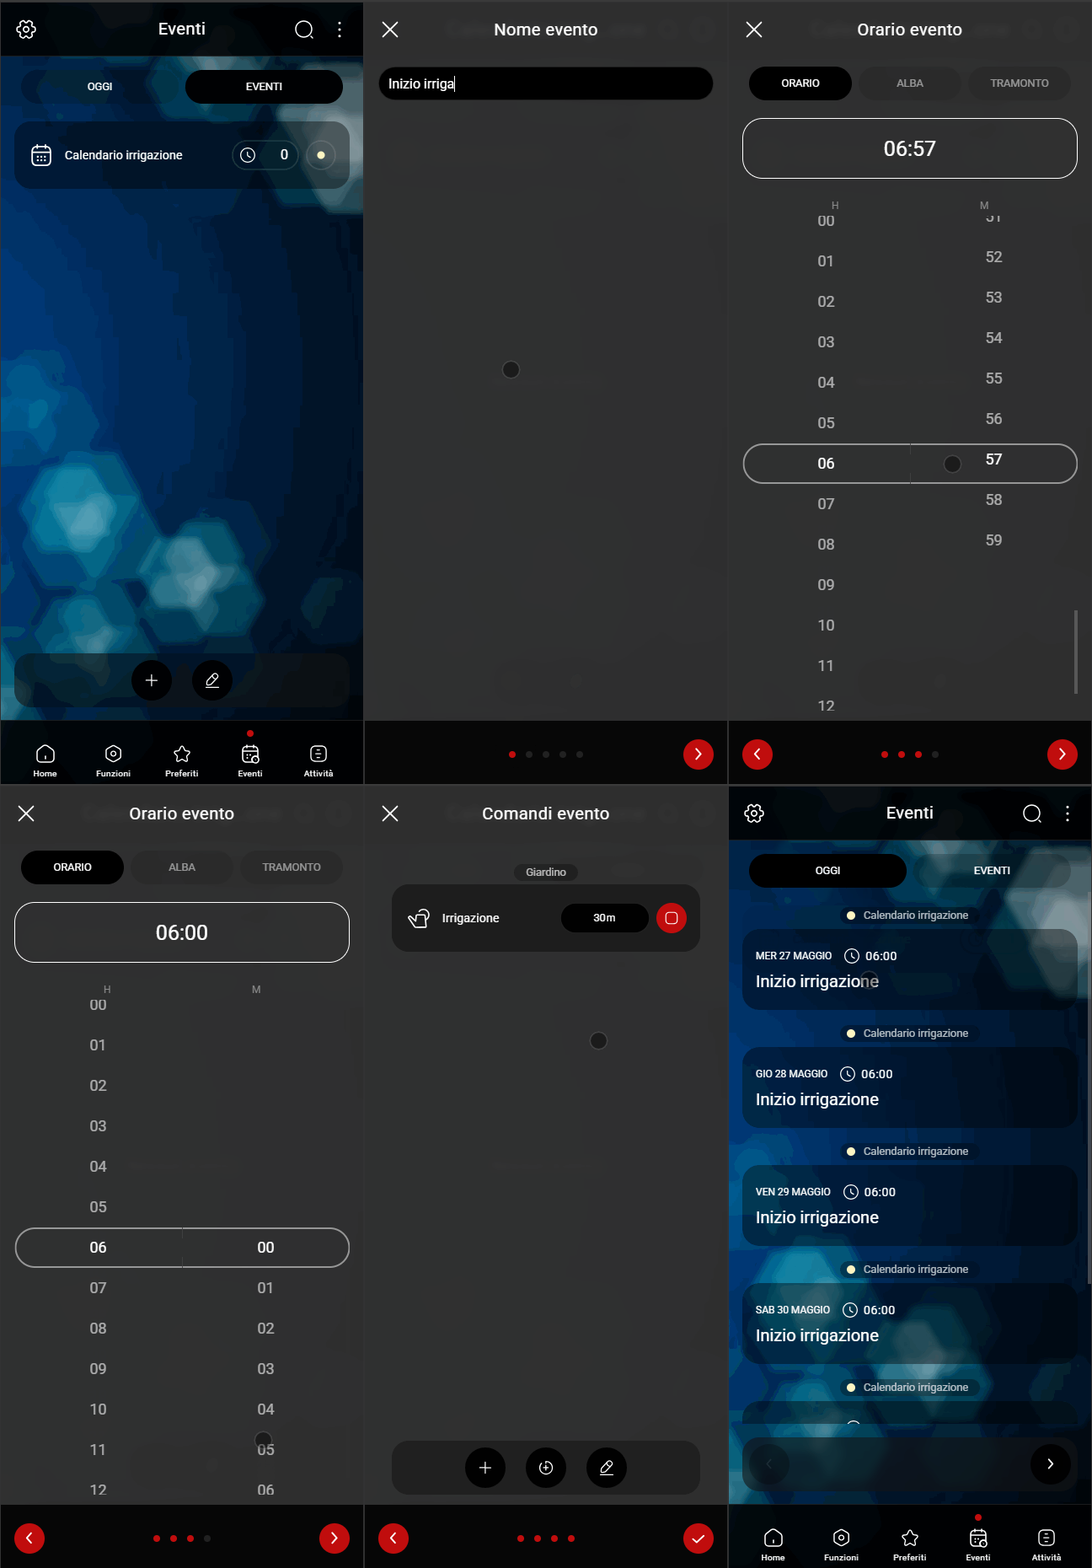
Access the Ilevia Control app and connect to the account. Once connected, go to the Events menu, click the “+” button and add an event.
Give the event a name and select its recurrence. Finally, select the irrigation component and make sure it is set to Play.