Weekly timer and weekly timer calendar
Complete guide on how to set up the Weekly Timer and Weekly Timer Calendar components within the Ilevia Manager configuration software.
INTRODUCTION
In the Ilevia system you can create scheduled events with the Weekly timer and Weekly timer calendar components. These two components let you set up any scenario in your home, for example turning on a light every day at a specific time or setting the heating temperature during the working day at a specific time.
By adding a Weekly timer component and a Weekly timer calendar, the user can set a weekly schedule for any component in the user interface, with a single weekly program.
Sometimes a single week is enough, but other times you need more than one type of week, for example a working week and a holiday week, to make the home behave differently according to the user's preferences.
To create more complex schedules, you can add a second Weekly timer calendar, add as many Weekly timers as you want, and create a new Options list component to select the week type to activate. For the new Weekly timer calendar, you will also need to define which components it refers to: for example, you could have a pool with its own week type, based on the season or on the outdoor temperature, and control only the water set point with a dedicated schedule.
The user can select the active weekly schedule with an Options list component in the user interface, or the week can be changed based on logic: for example, when the outdoor temperature drops below a specific level, the system sets the "Winter" week and activates the behavior defined for the devices scheduled in that week.
USE CASES
I would like to be able to turn the irrigation on 3 times a week starting at 6:00 in the morning.
I would like the outdoor lights to turn off every day at 8:00 in the morning and turn on at 9:00 in the evening.
Weekly Timer
INTRODUCTION
The Weekly timer lets you set and save specific scenarios. You can add as many Weekly timers as you want, but this component cannot work on its own: it requires the Weekly timer calendar component.
Let's explain this component with an example.
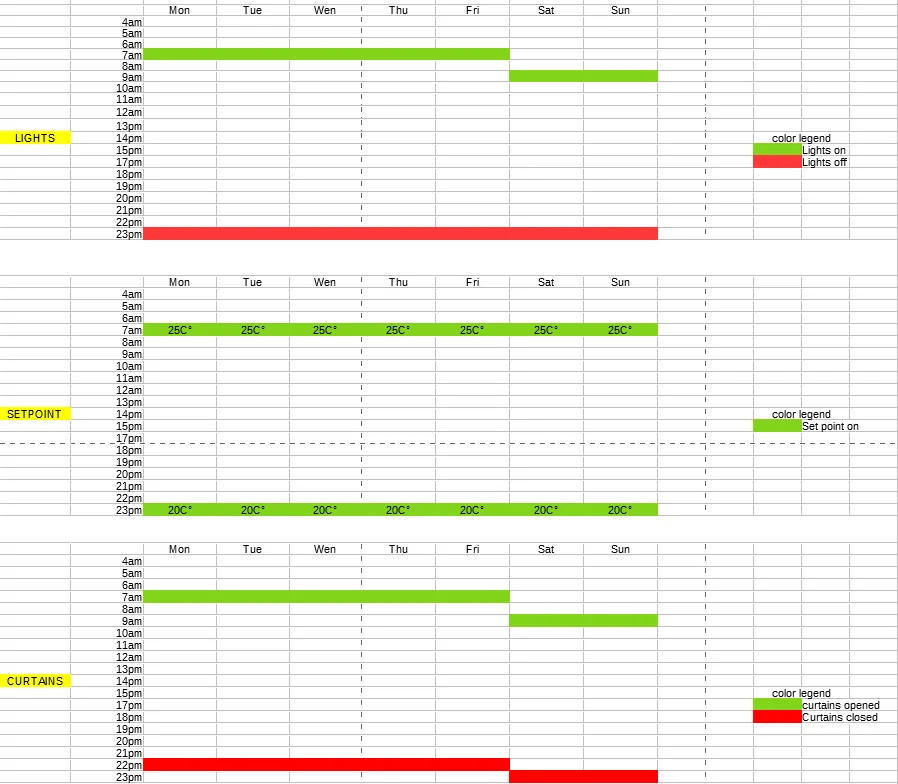
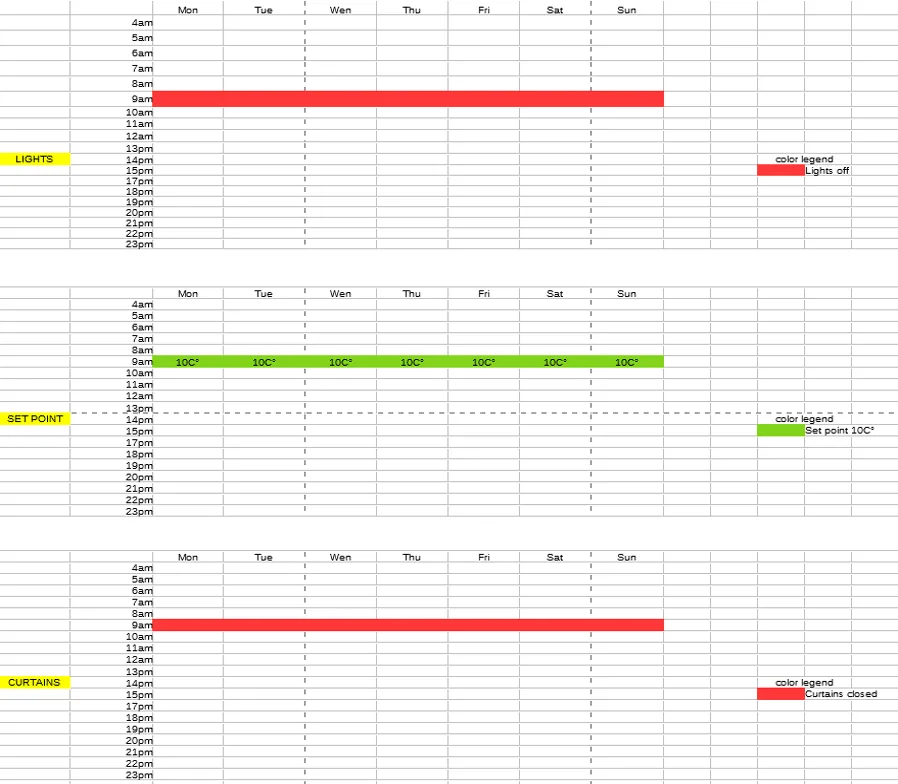
Let's imagine that we have two different week types: the working week, that is, your typical week, and a week when you are away from home, which we will call the Holiday week. As you can see, the Work Weekly timer differs from the Holiday Weekly timer.
In the following example, in the WORK week we will set the behavior of three devices: lights, set points and blinds. Click on the images to view the details.
Later we will explain how to define events using the Ilevia Control app.
WORK WEEKLY TIMER
HOLIDAY WEEKLY TIMER
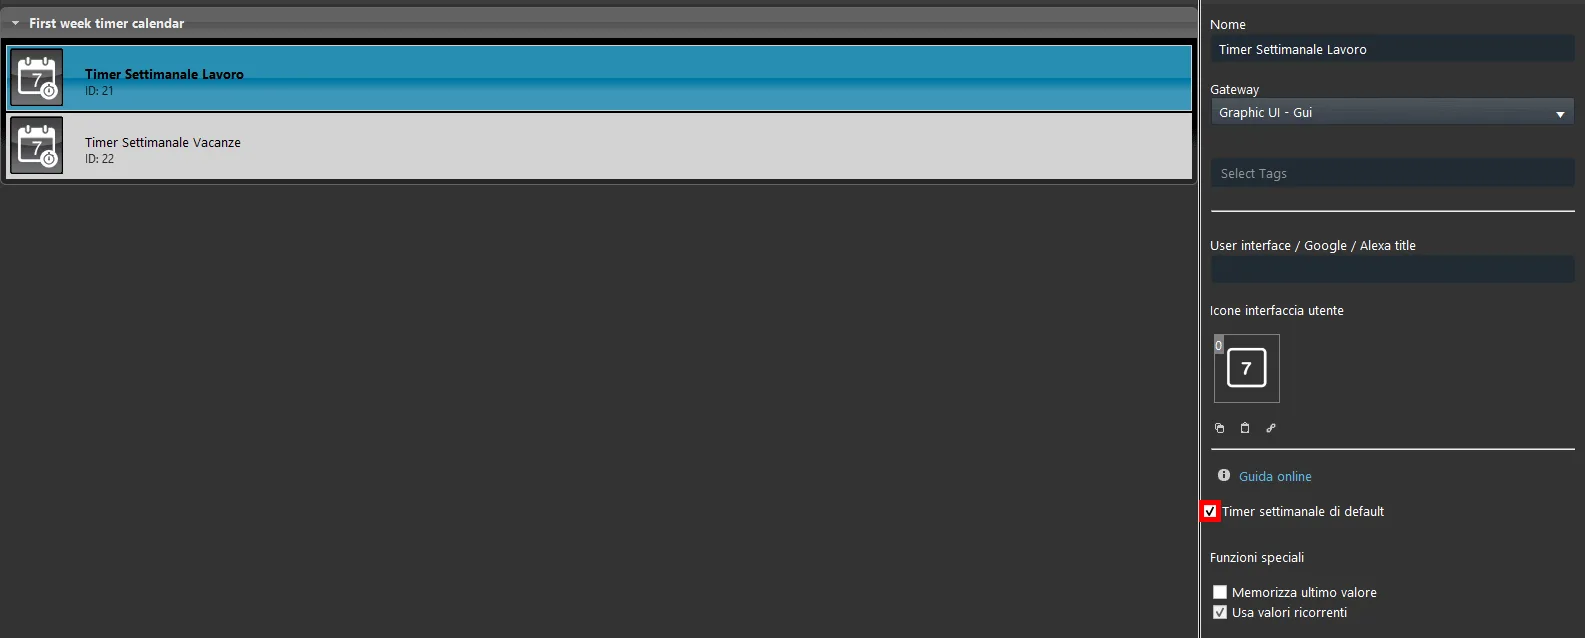
Once you have added the Weekly timers to the project, make sure that the first Weekly timer has the "Default weekly timer" option enabled.
Click here to view the detailed page for the Weekly Timer component.
Week selector
In a multi-week structure, you can use a Week selector, which lets you change the week without having to select the days on which each week is active from the Weekly timer calendar component.
Step 1:
Add a new Options list component in the "My components" area.
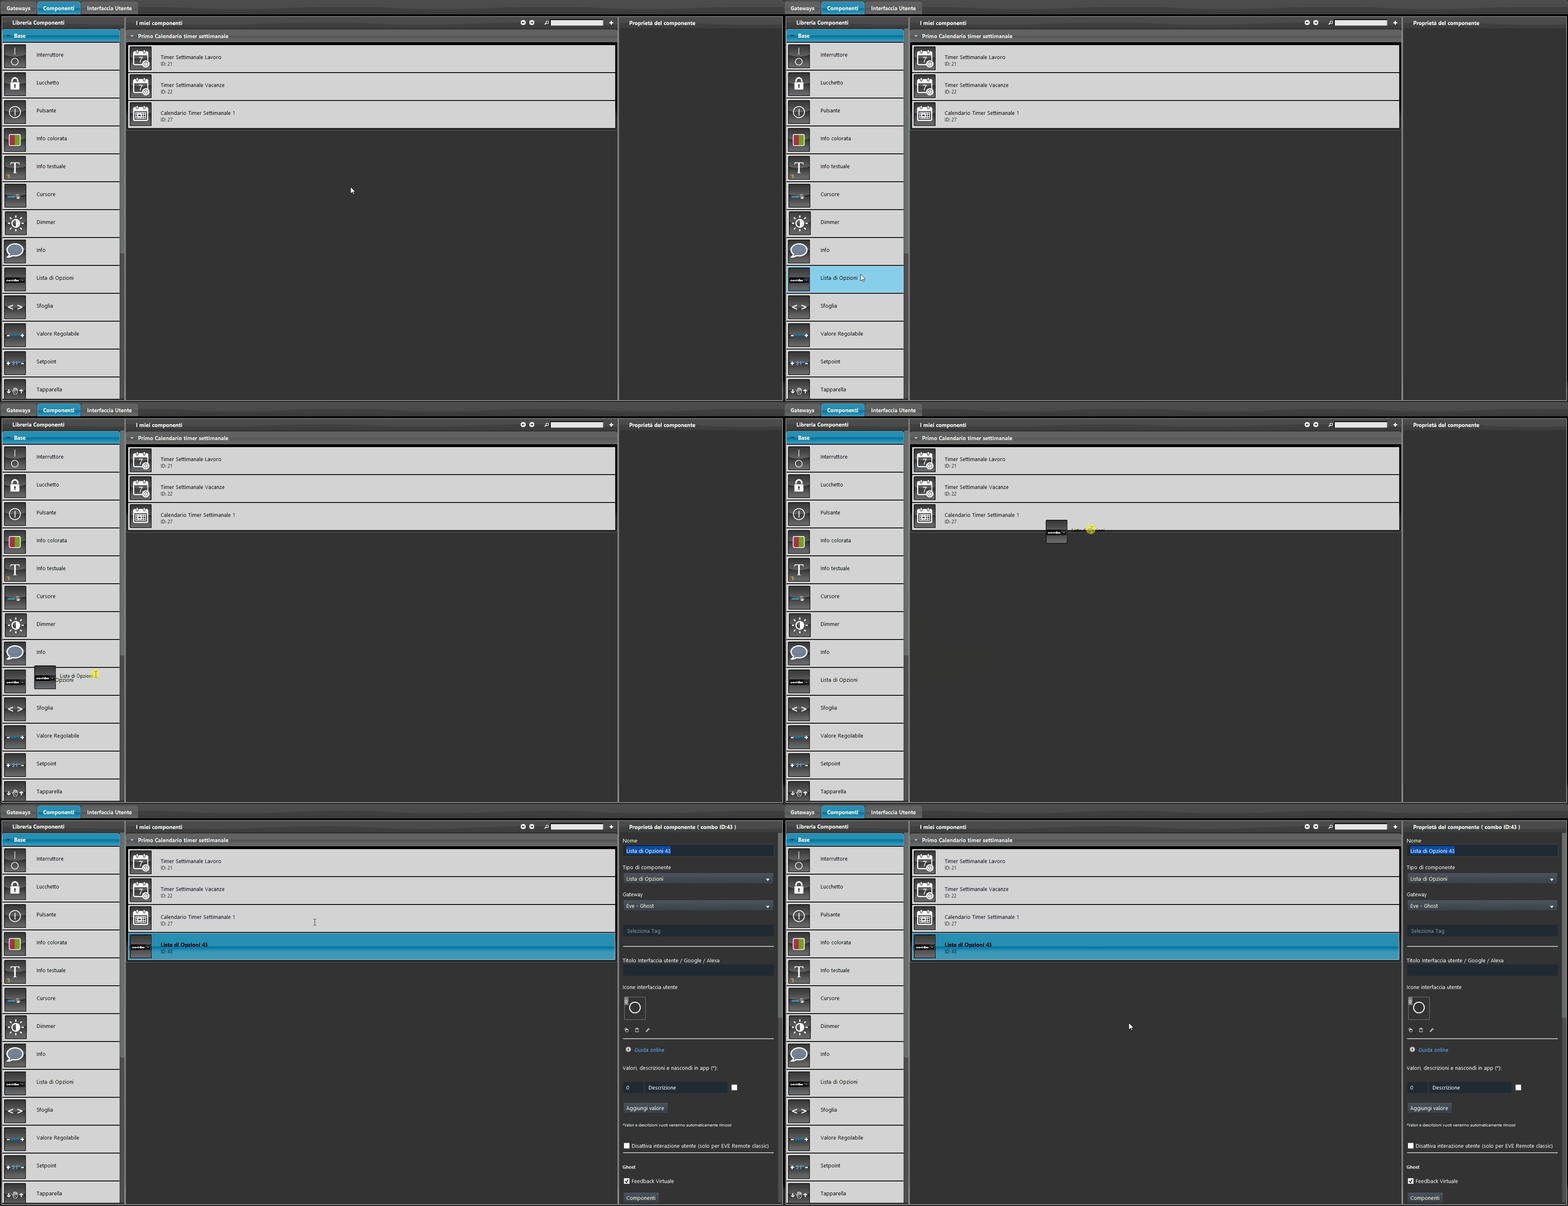
Step 2:
Add the values representing the weeks in the properties of the Options list component.
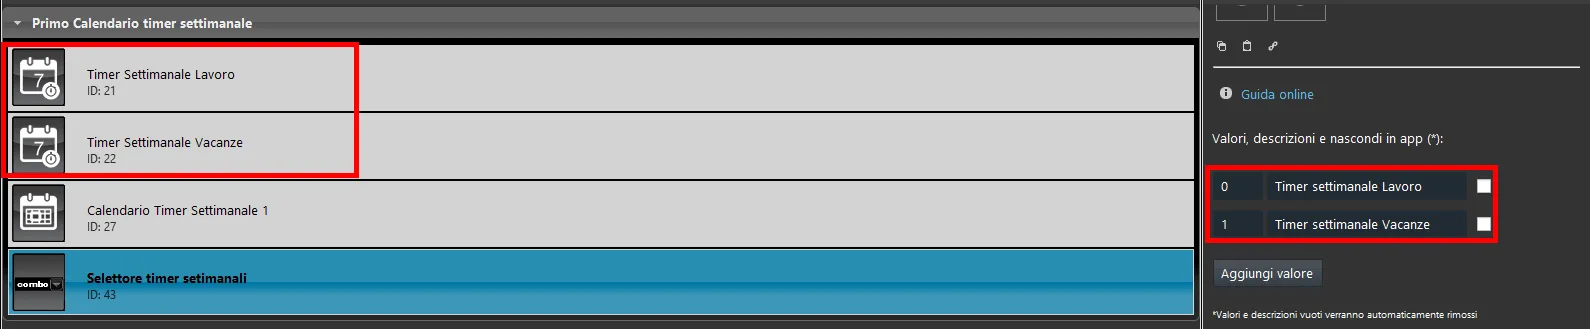
Step 3:
Connect the Options list component to the Weekly timer calendar component by selecting it from the drop-down menu called Week selector.
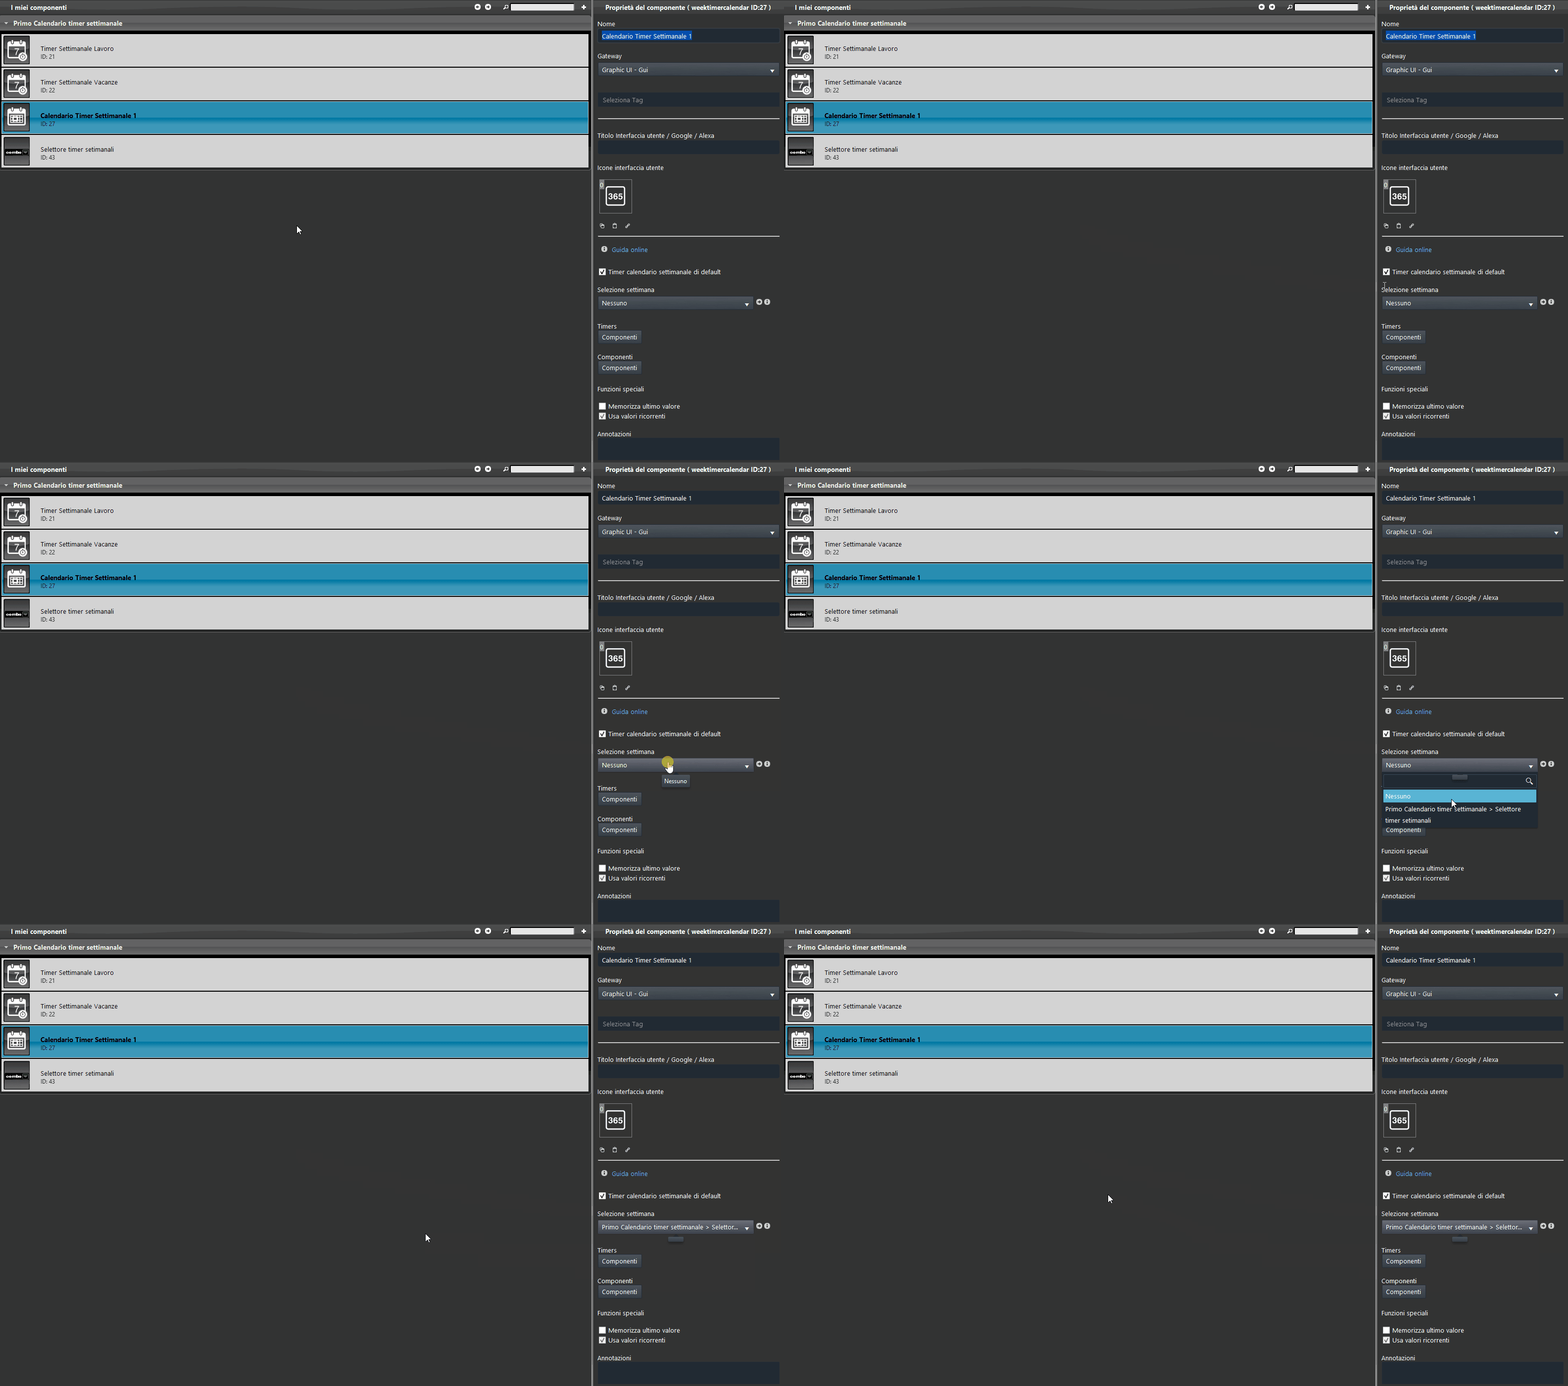
Weekly Timer Calendar
INTRODUCTION
The Weekly timer calendar is the component that collects all the Weekly timers created previously. Each Weekly timer is then scheduled through the Ilevia Control app.
Step 1:
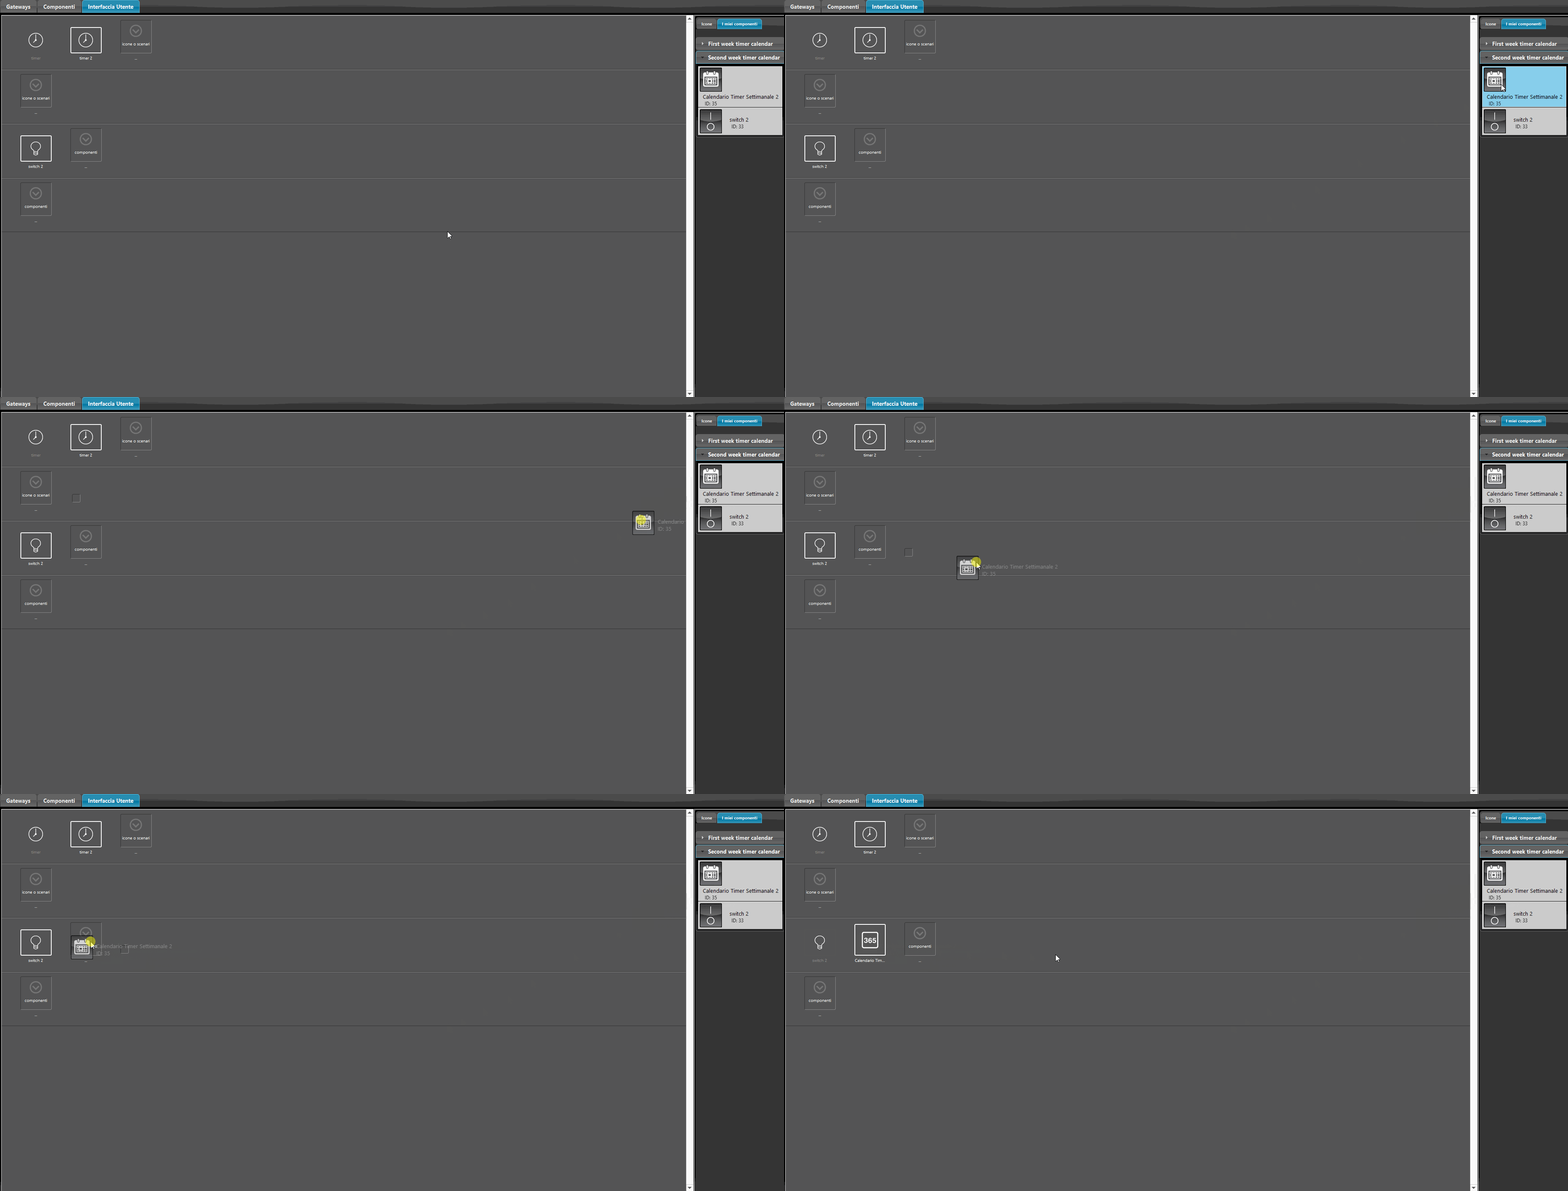
Add the Weekly timer calendar component to the project, upload the project to the server and add the component to the user interface, then upload the project again.
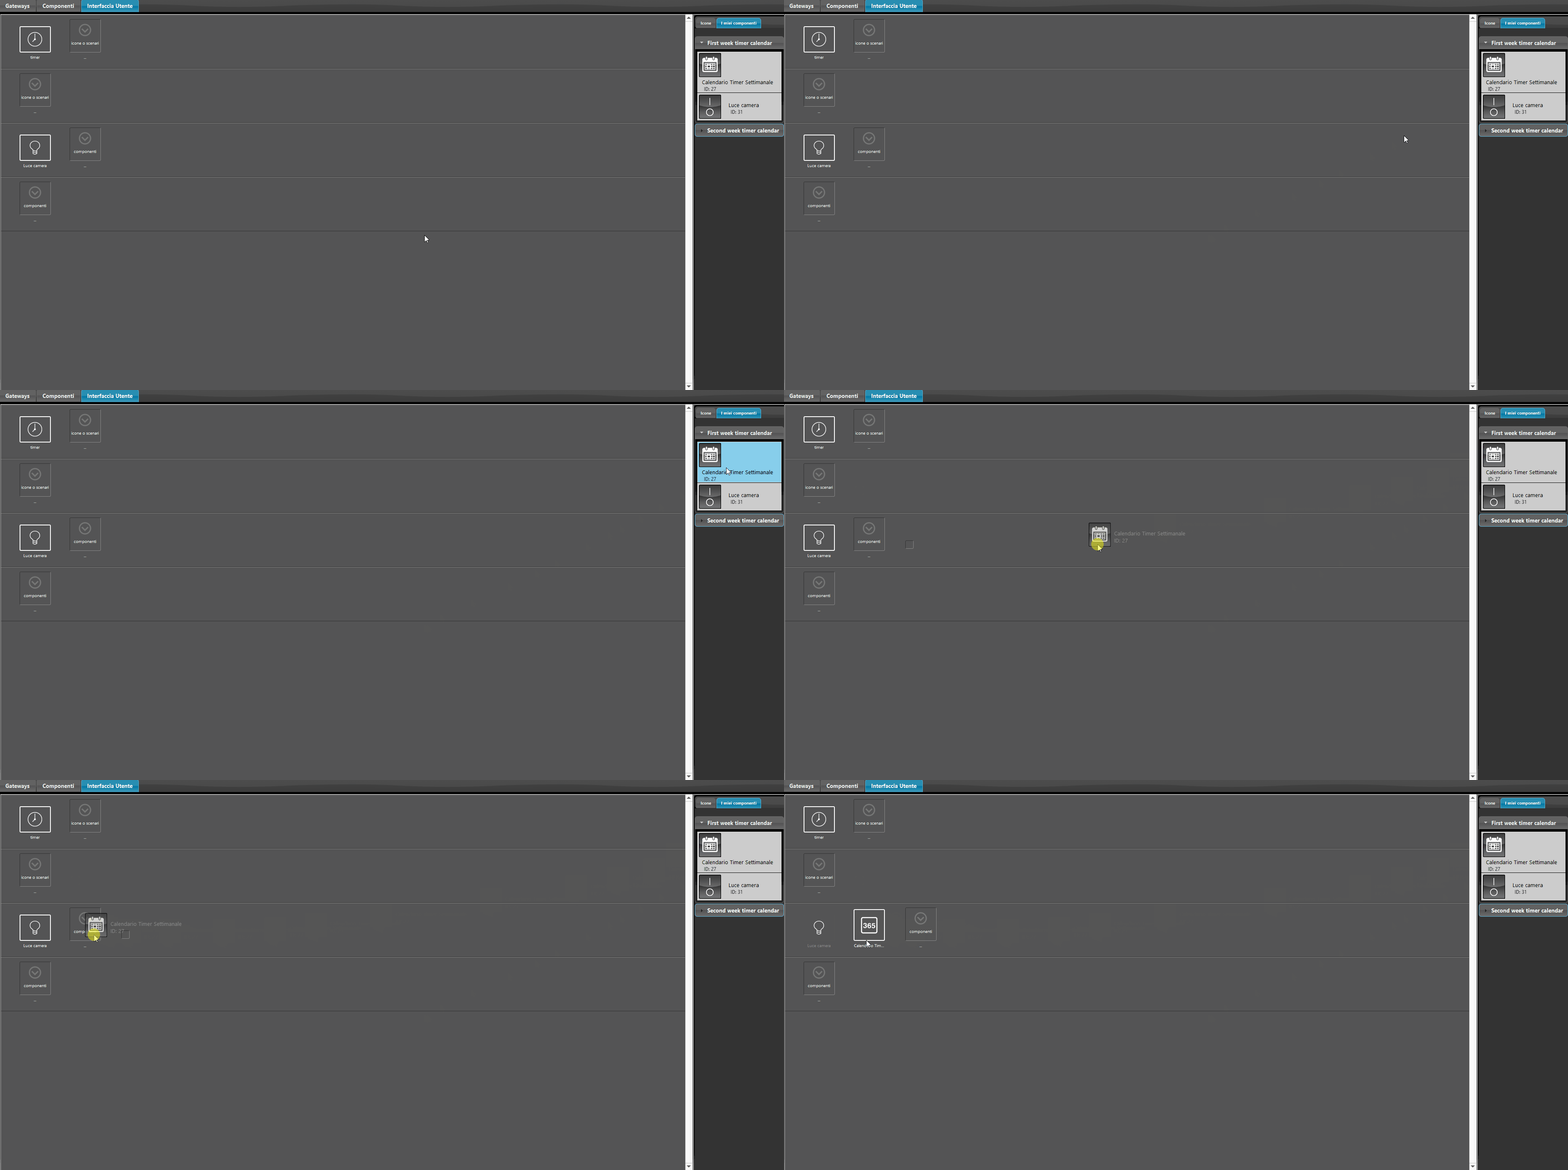
THE TIMERS IN THE ILEVIA CONTROL APP (classic view)
Step 2:
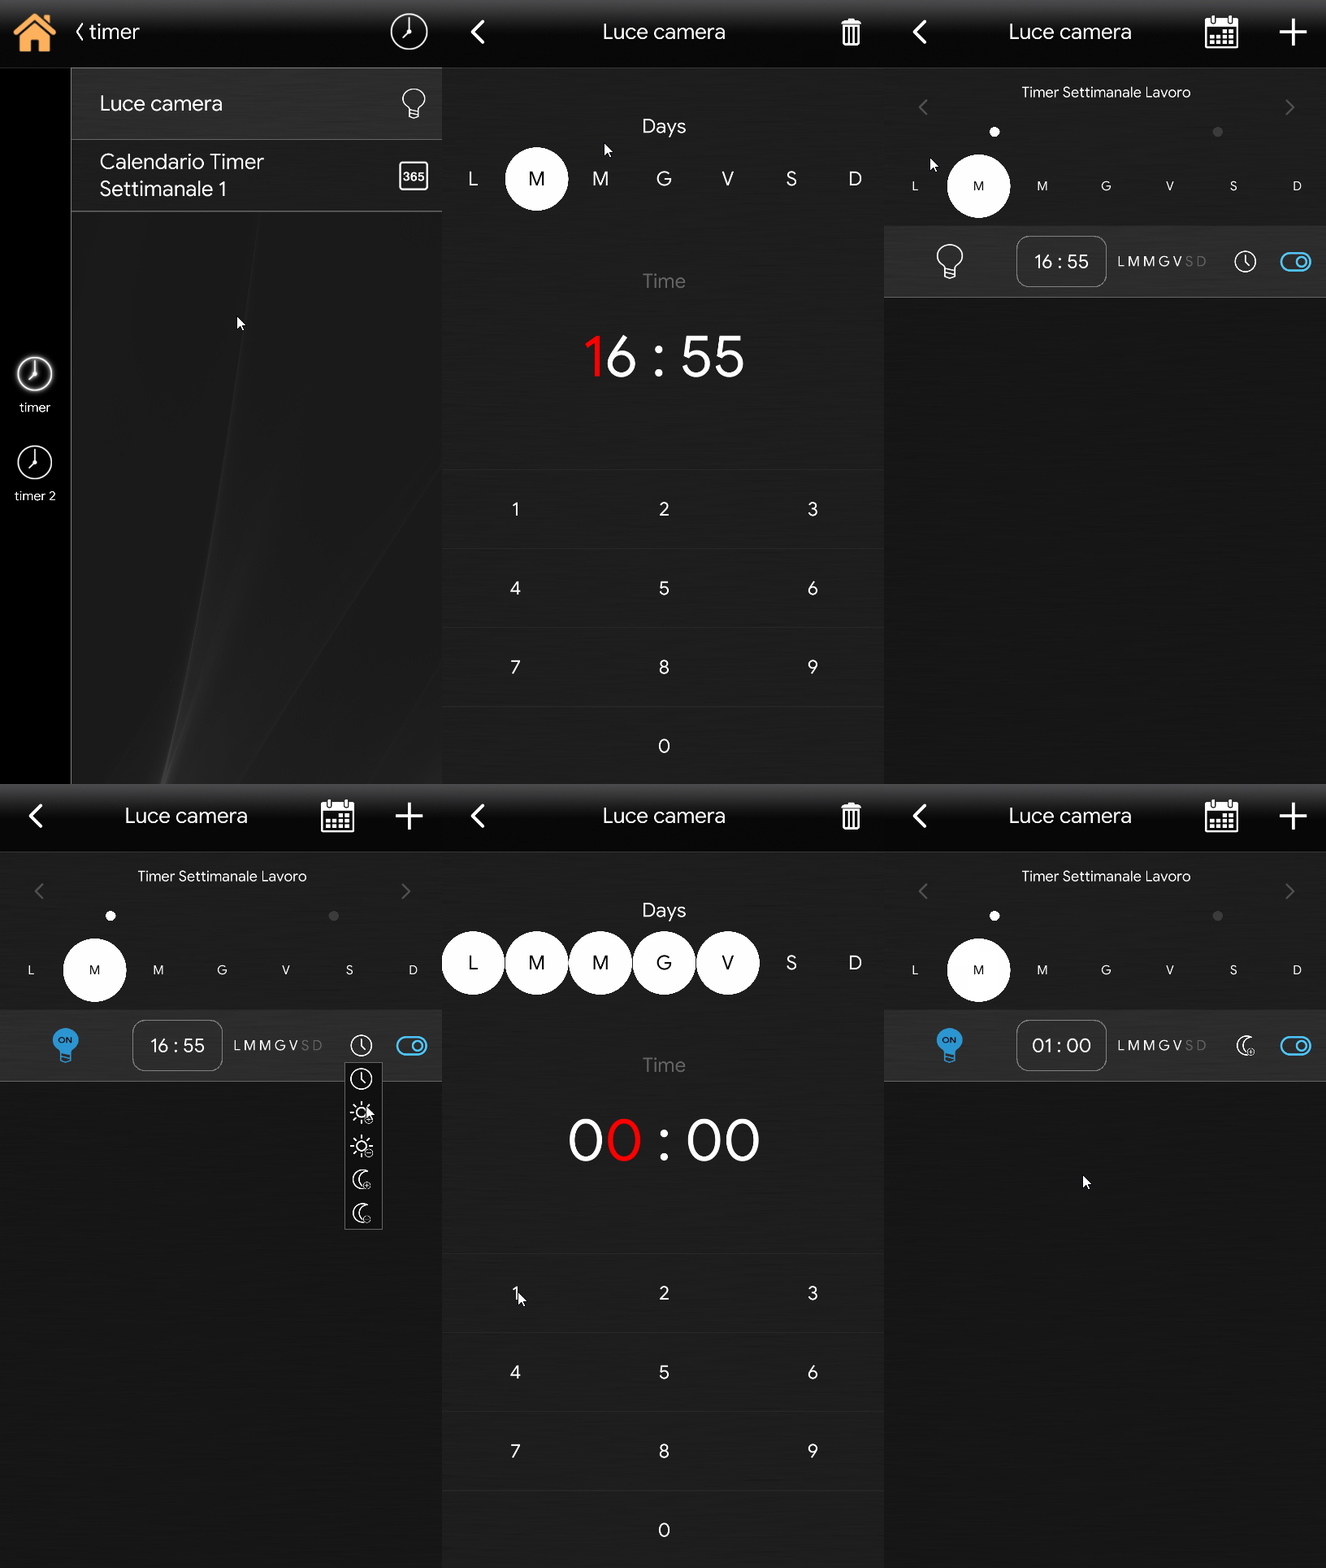
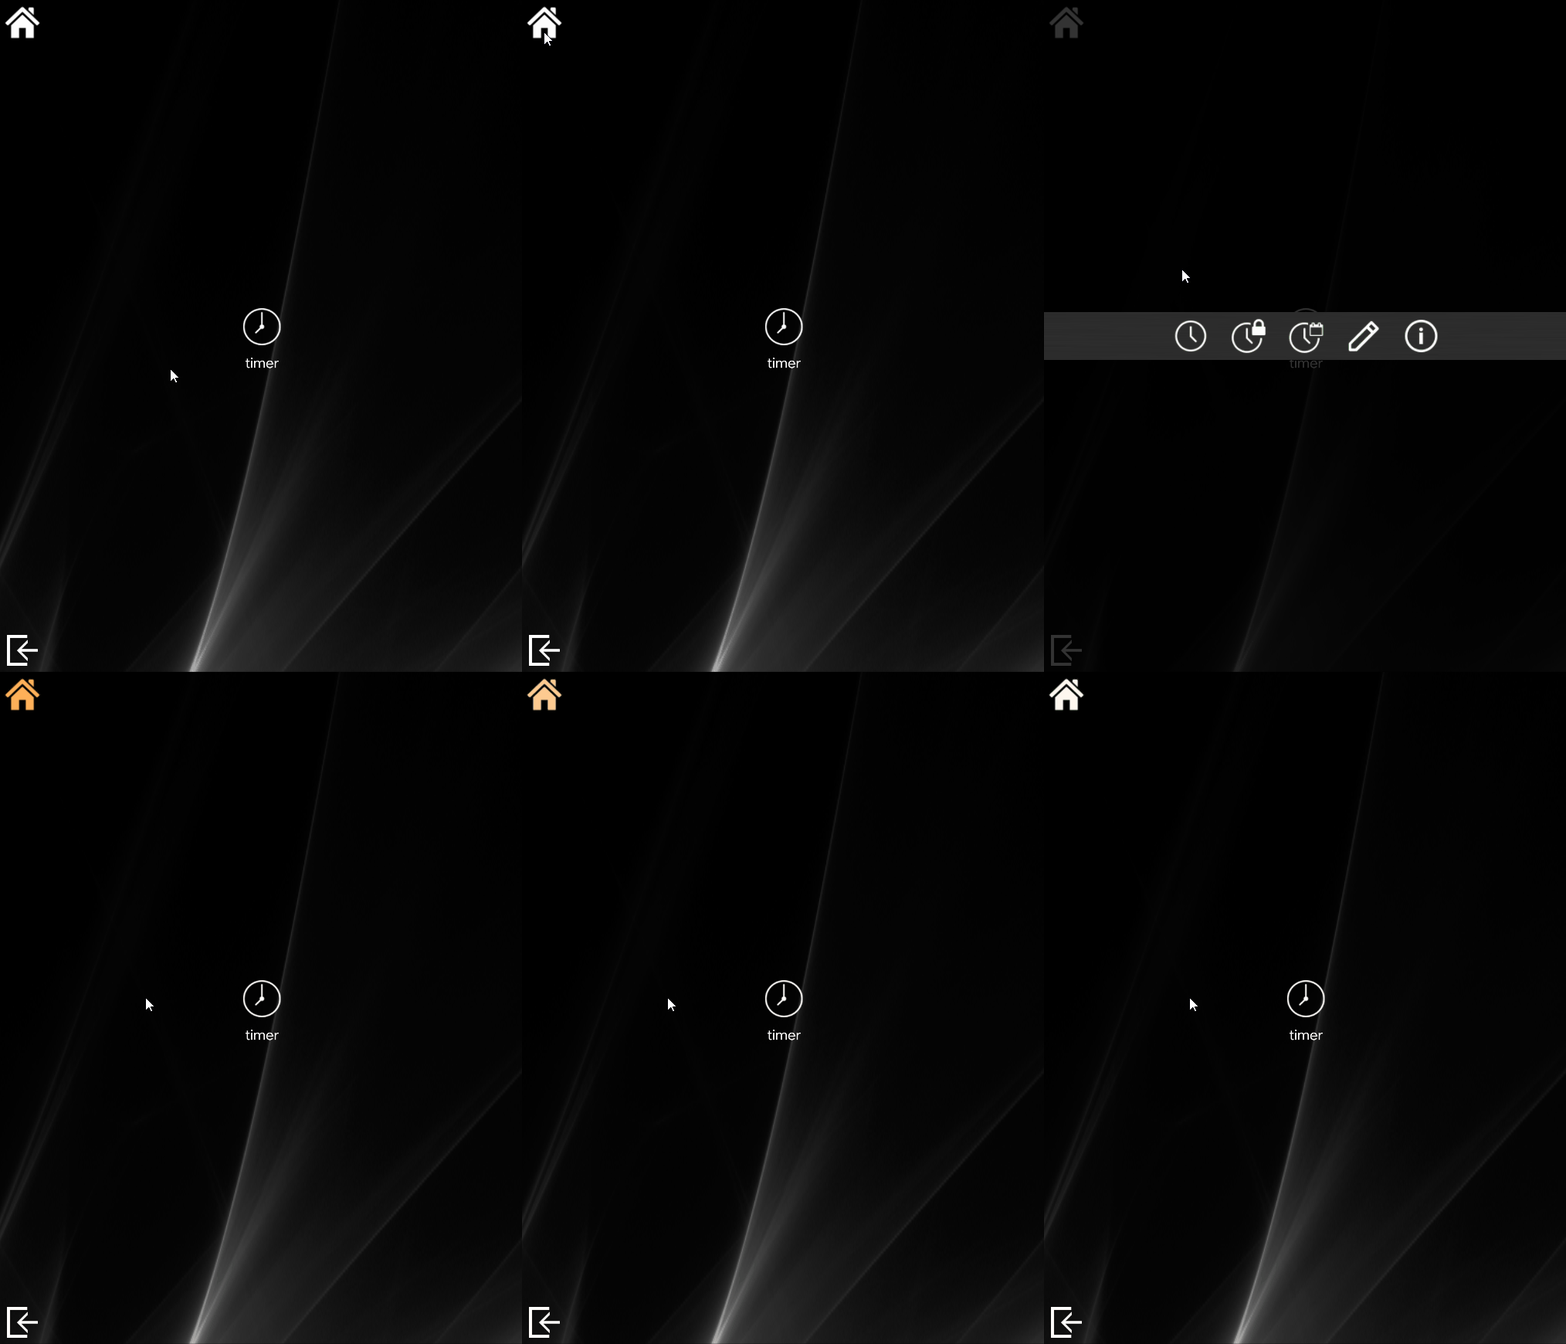
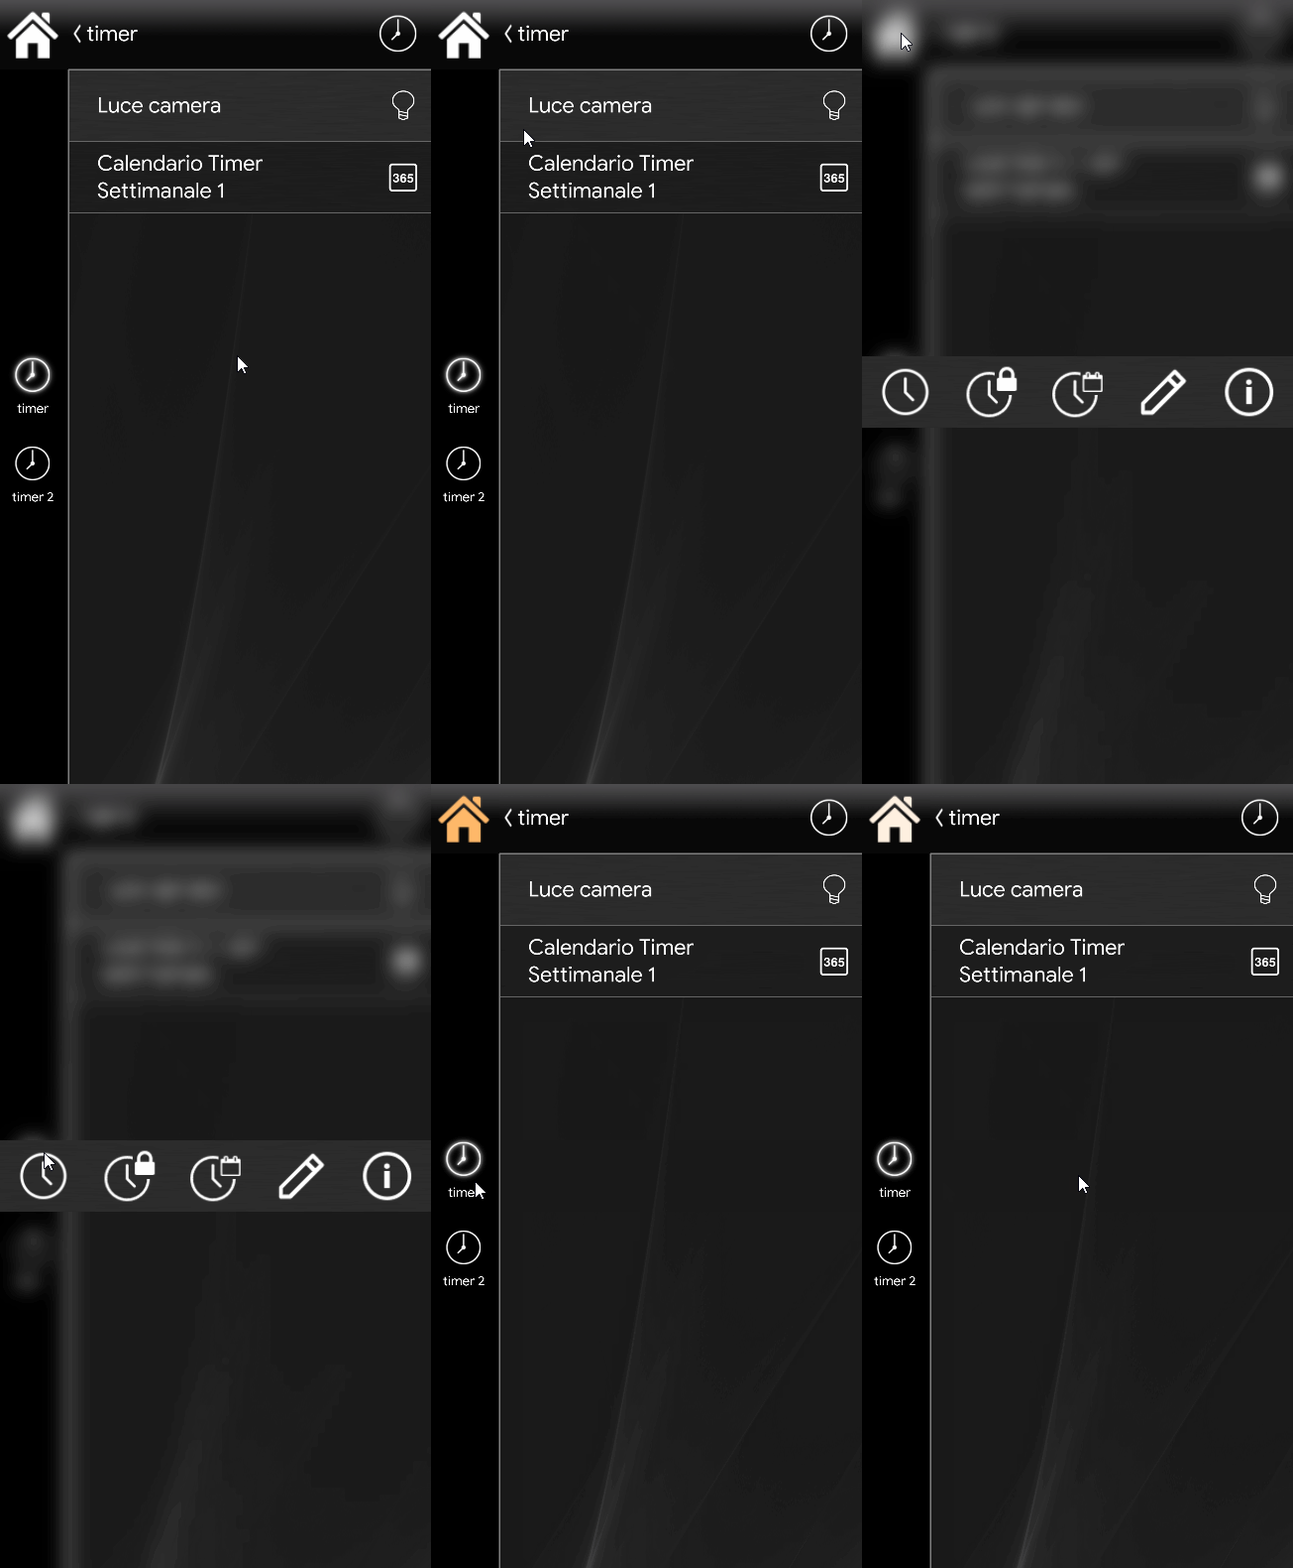
Hold the home icon at the top left of the screen for a few seconds until a menu appears, then click the first clock icon from the left.
Step 3:
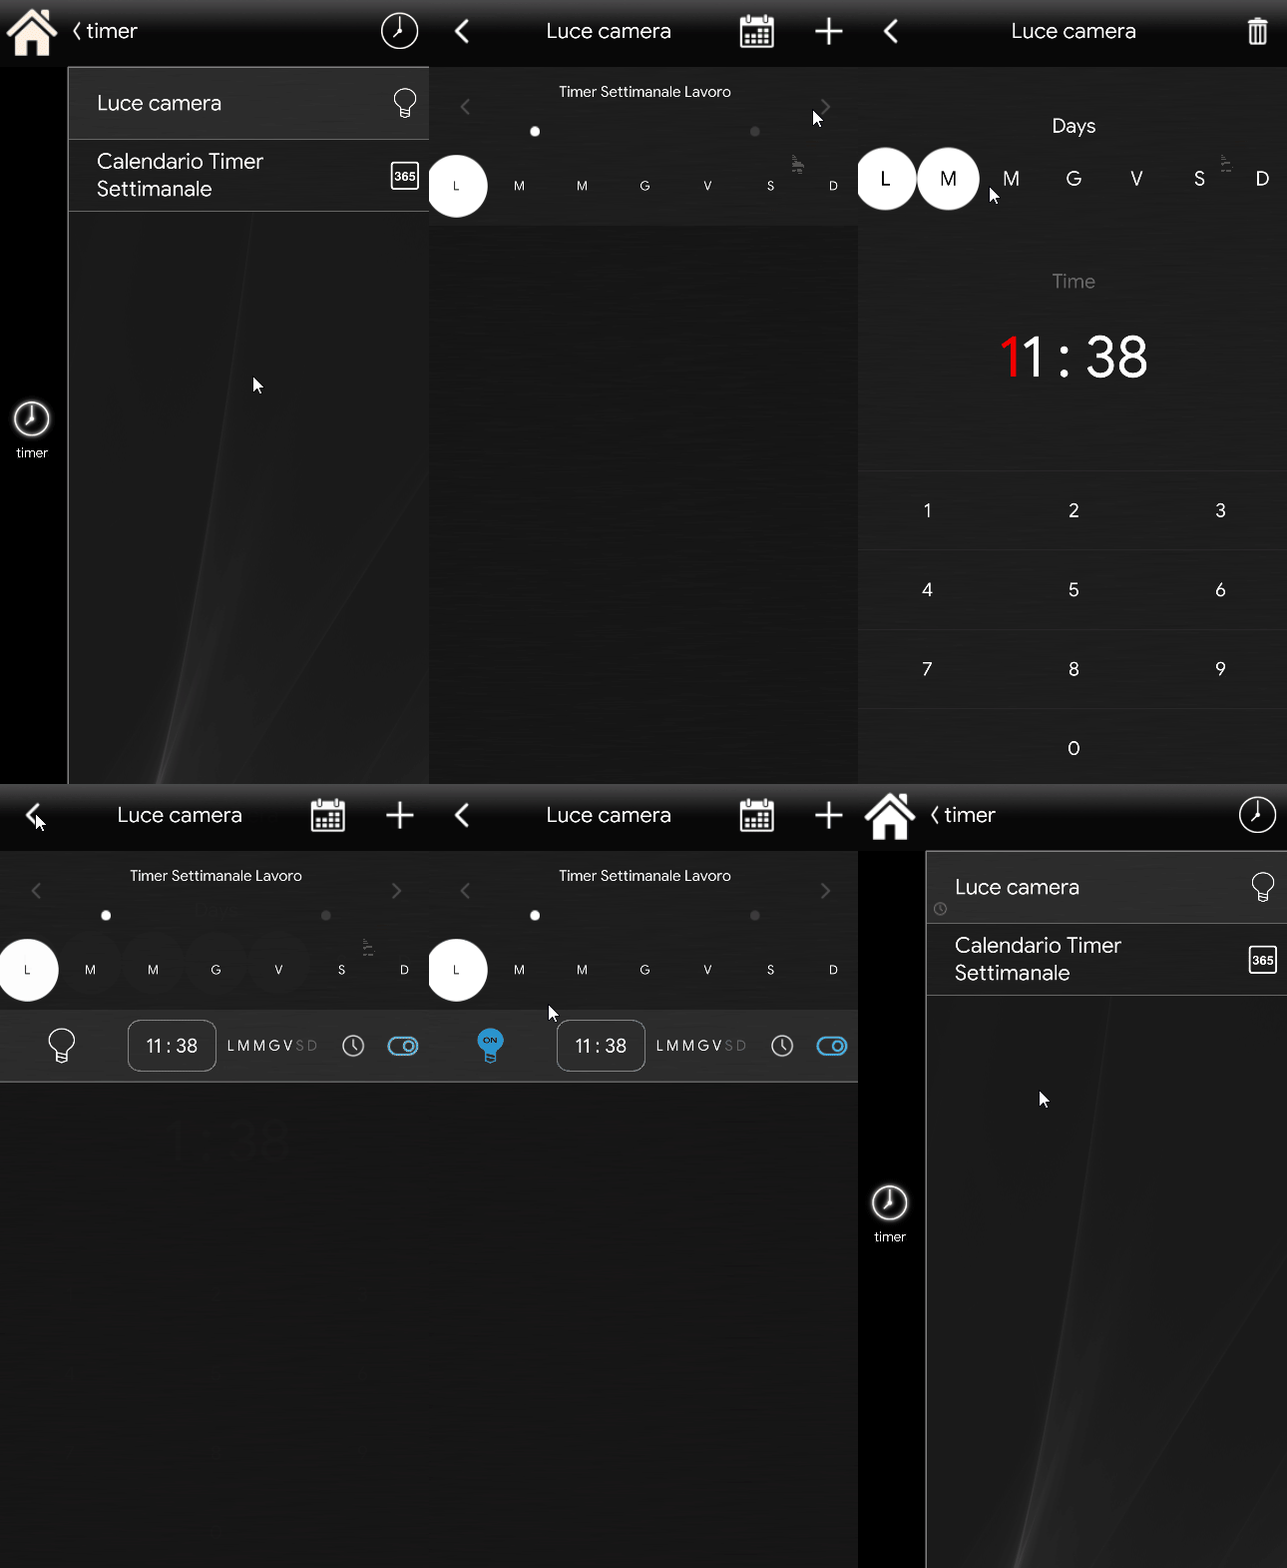
Click the desired component, then click the "+" icon at the top right of the interface. Set a specific time and the days on which the Timer will take effect. To exit the programming interface, click the back arrow at the top left: you will be asked to choose a state for the selected device (in our case, turning the light on). Then click the component icon and choose the state the component will assume when the event is triggered.
Step 4:
Now let’s see how to select the days on which each weekly Timer will affect component programming. Open the menu of the weekly timer calendar component by clicking or tapping its icon in the interface: a calendar will appear. Here the user can select which days and which weekly Timer will affect the programmed components.
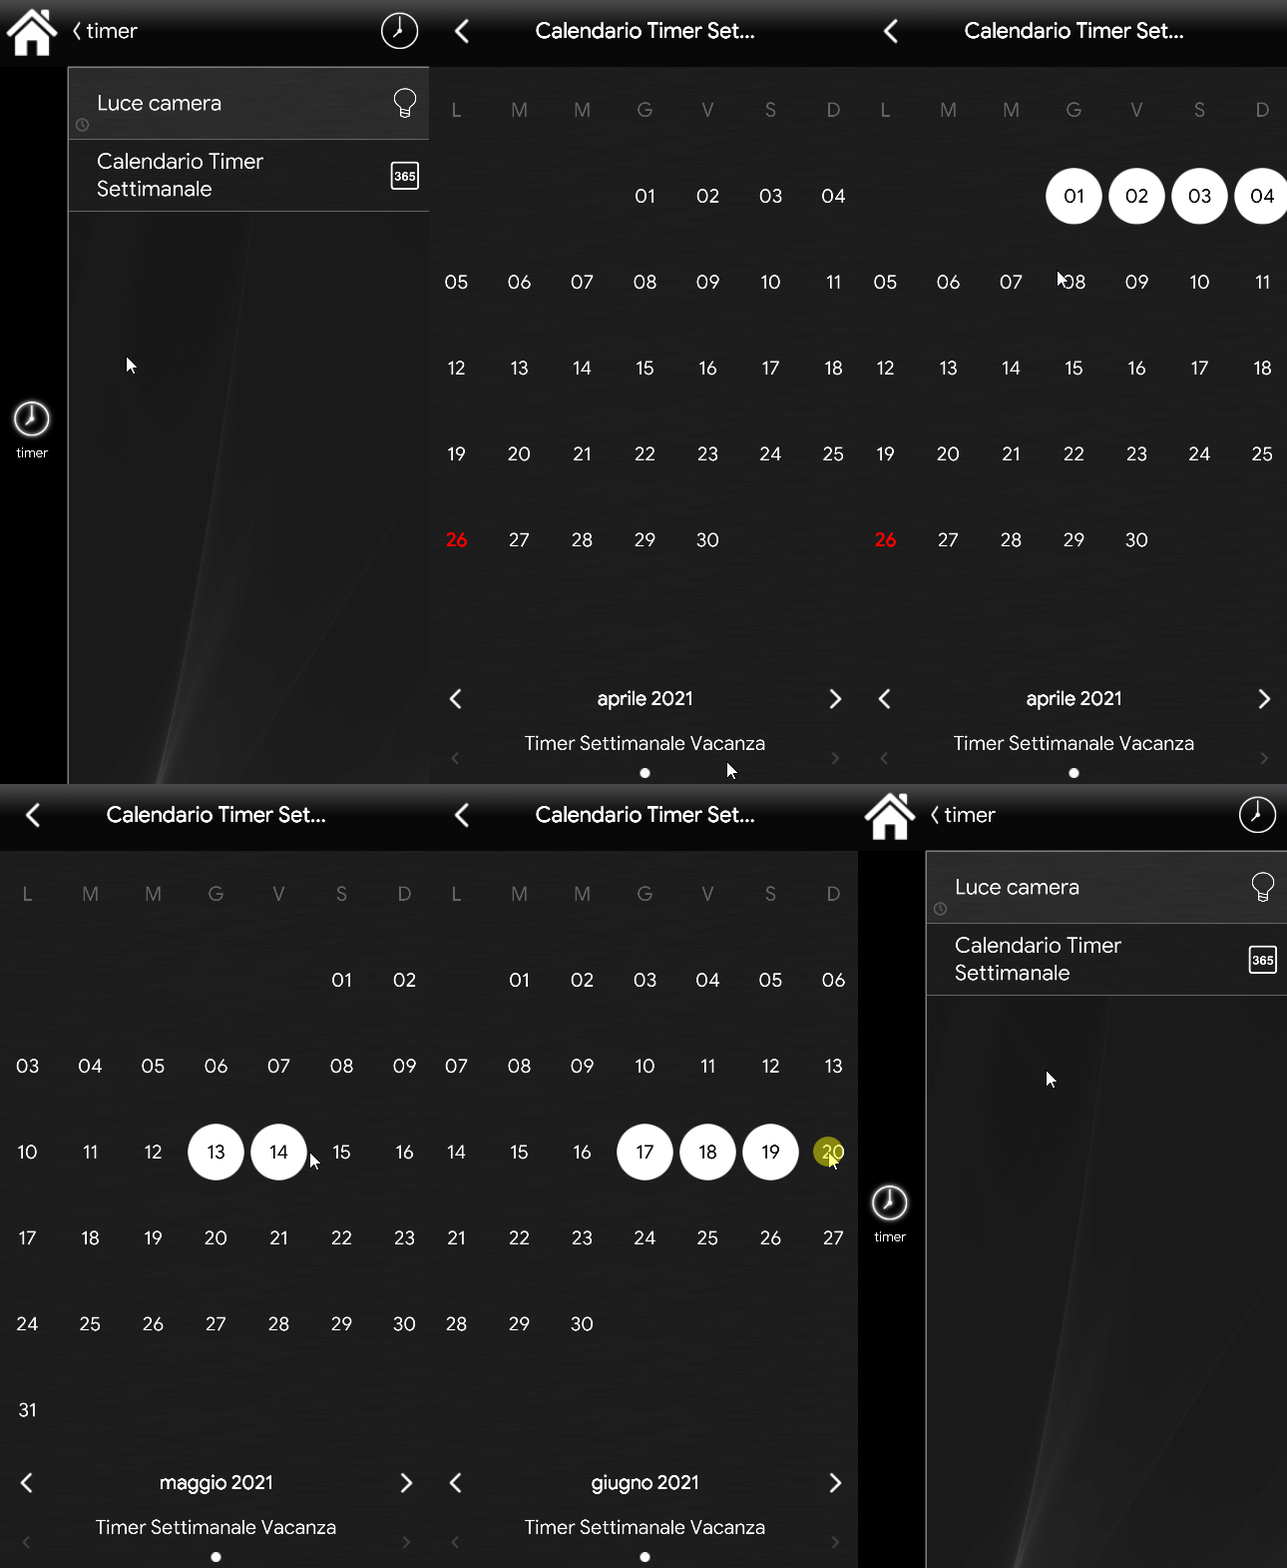
Note: if the second weekly Timer is not selected on the calendar days, the programming of the first weekly Timer "Lavoro" is used.
Click here to view the detailed page for the Weekly timer calendar component.
Why should I have more than one Weekly Timer Calendar within the same project?
Imagine you have two apartments controlled by the same Ilevia server and you want the second one to have a dedicated schedule. By adding a new Weekly timer calendar with its related weekly Timers, you can set the components with separate schedules.
How can the user select the active schedule?
Add at least one new weekly Timer and insert it into the "Timers" menu in the properties of the Weekly timer calendar component. Then add all the components that need to be scheduled by the second Weekly timer calendar in the appropriate component menu, in the component properties, and finally upload the project to the server.
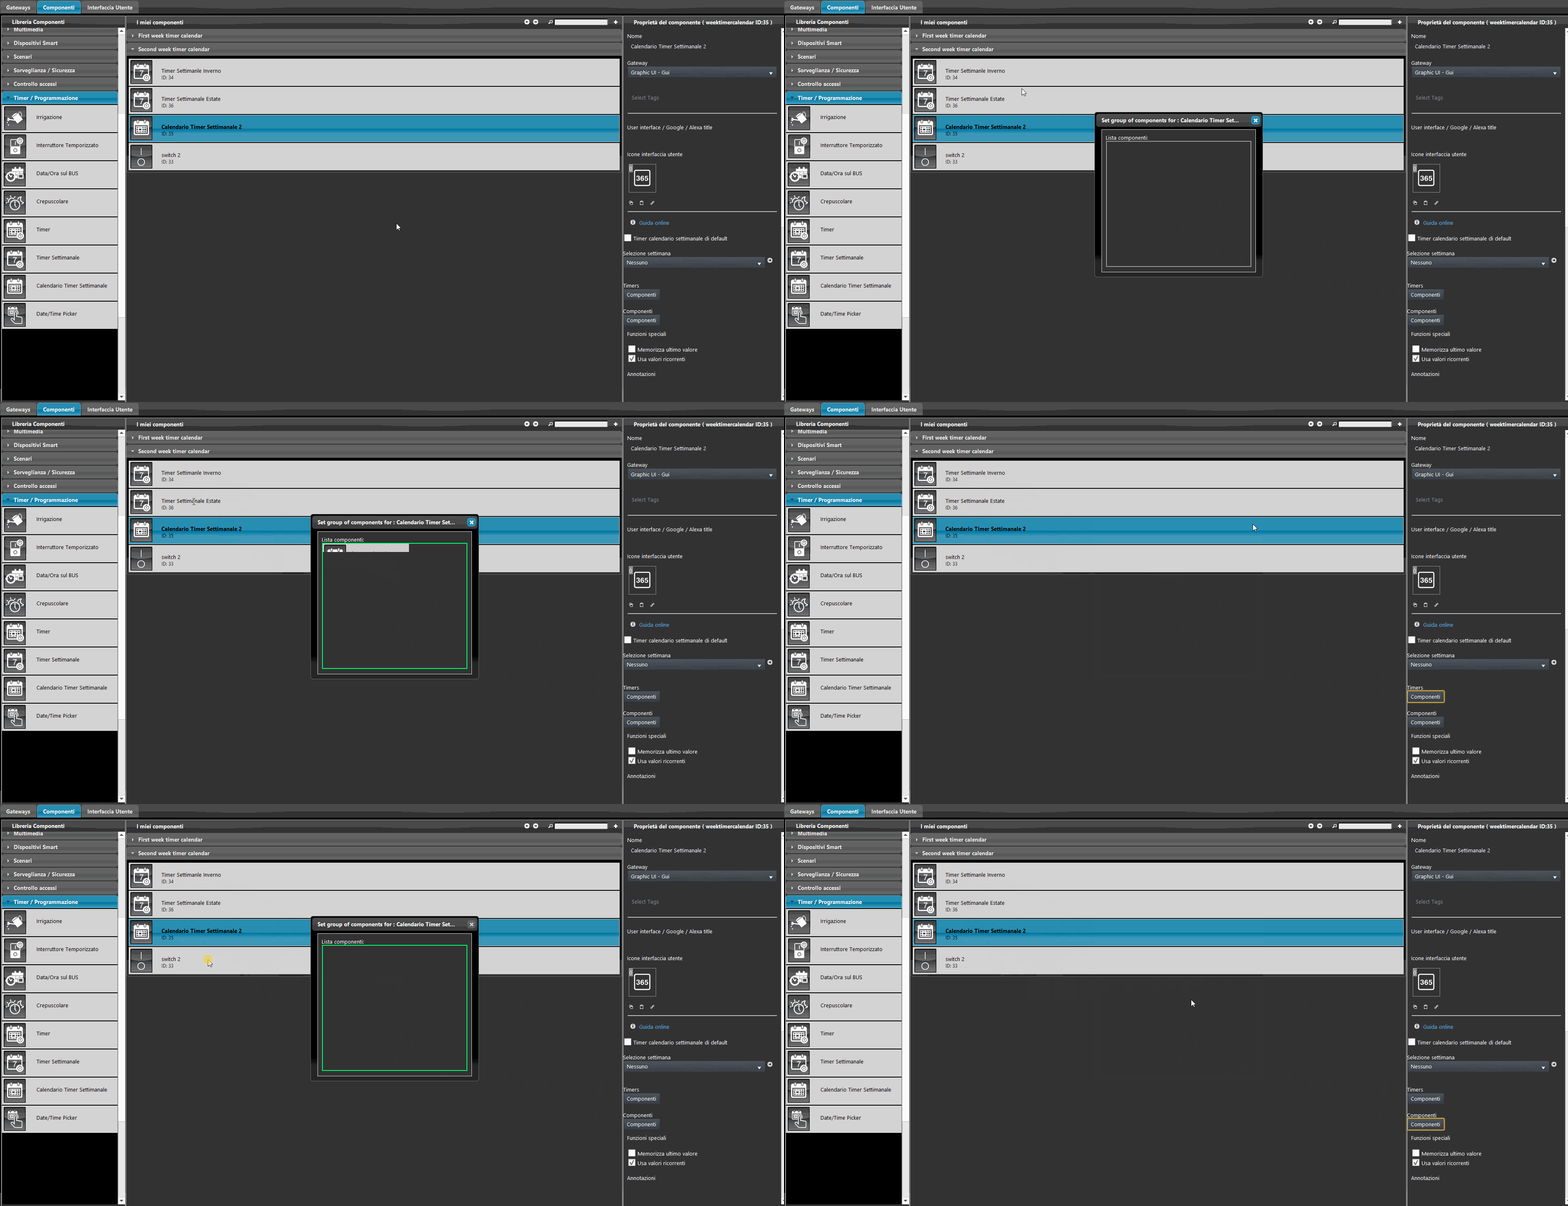
To allow the user to select the active weekly Timer, add the Weekly timer calendar component to the user interface.
Go to where you placed the Weekly timer calendar component in the user interface and click its icon: a new window will appear. Here you can select the days on which each weekly Timer will affect the programmed components. At the bottom of the screen is the weekly Timer selector.
Note: if nothing is selected in the upper calendar, none of the weekly Timers will affect the programmed components.
TWILIGHT COMPONENT WITH WEEKLY TIMER CALENDAR
By adding the Twilight component to the project, you can delay or advance the execution of an event relative to sunrise and sunset.
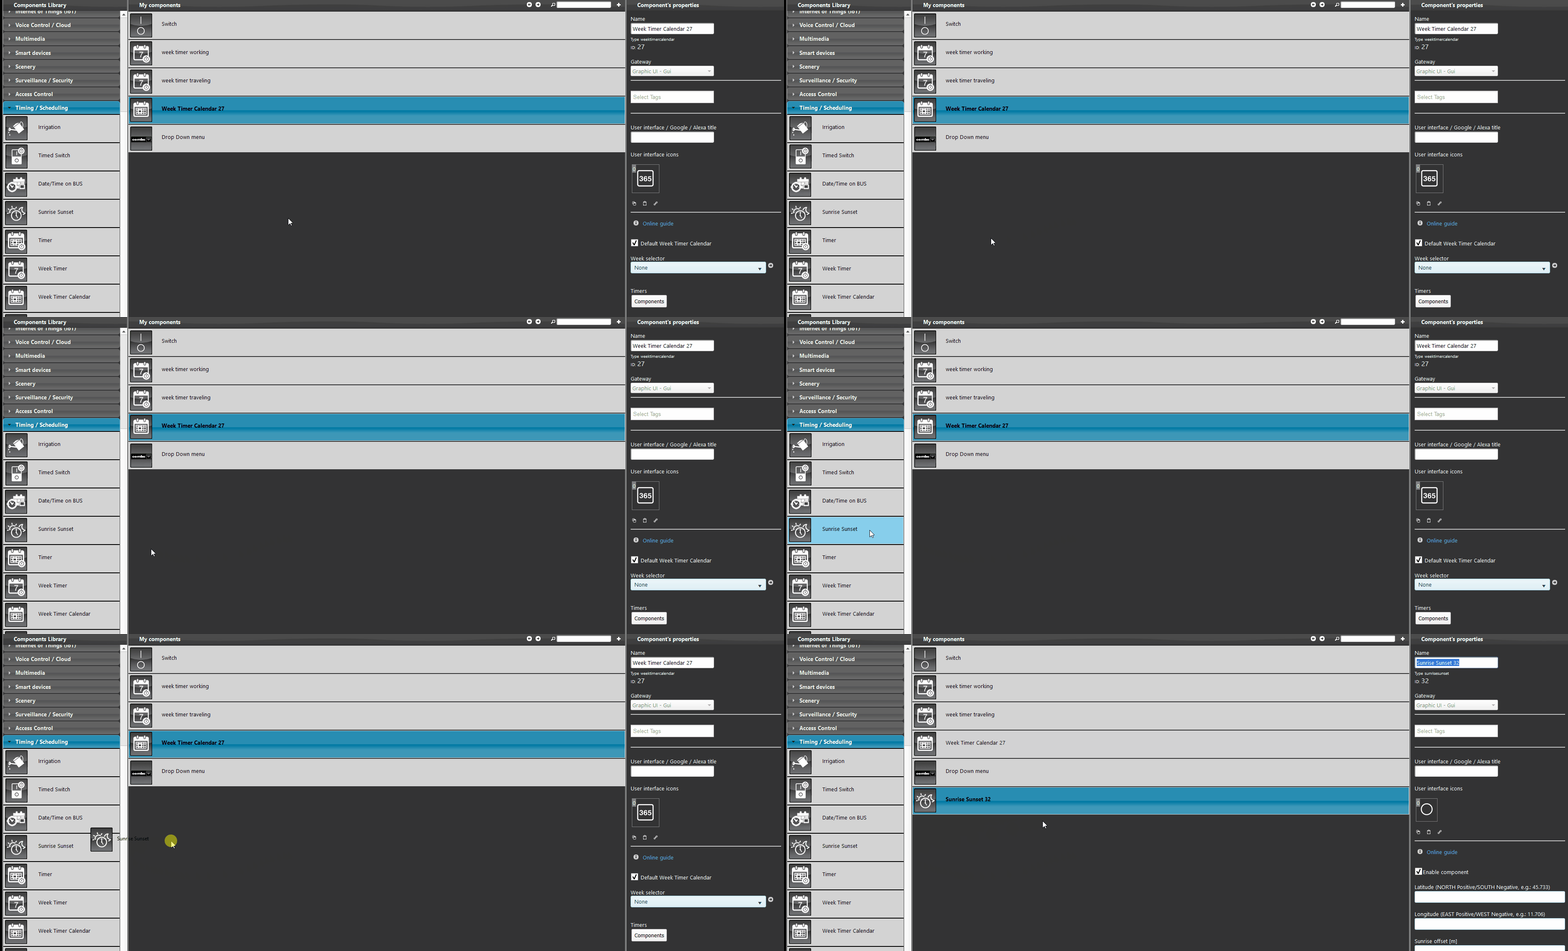
Step 1:
Add the Twilight component to the project.
Step 2:
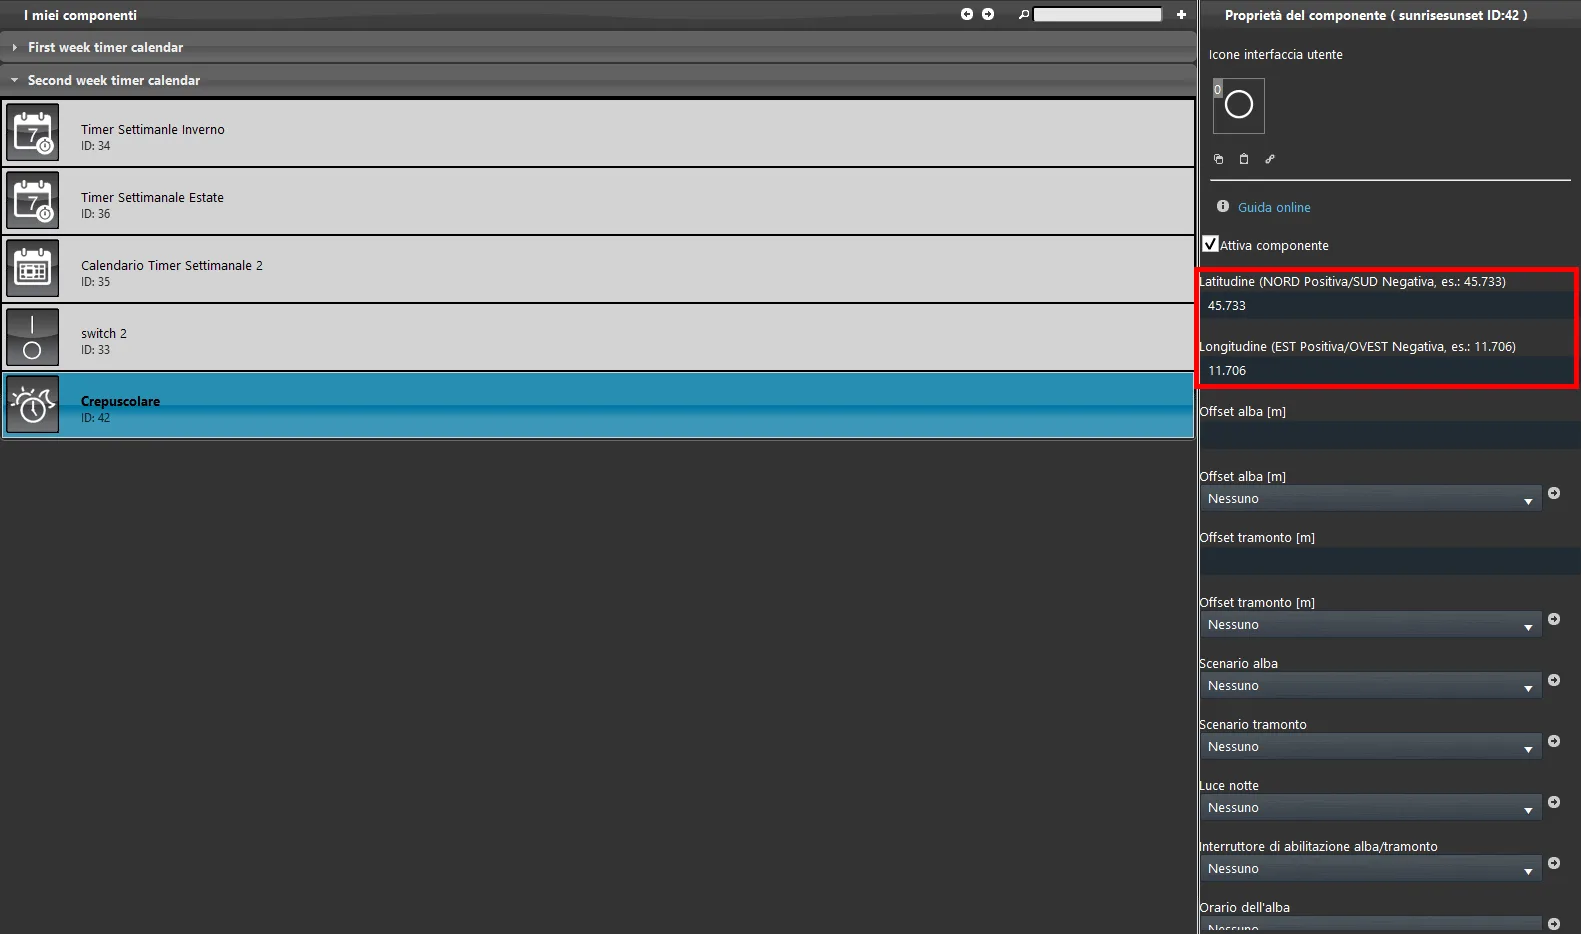
Set latitude and longitude in the component.
You can easily find this information online.
Step 3:
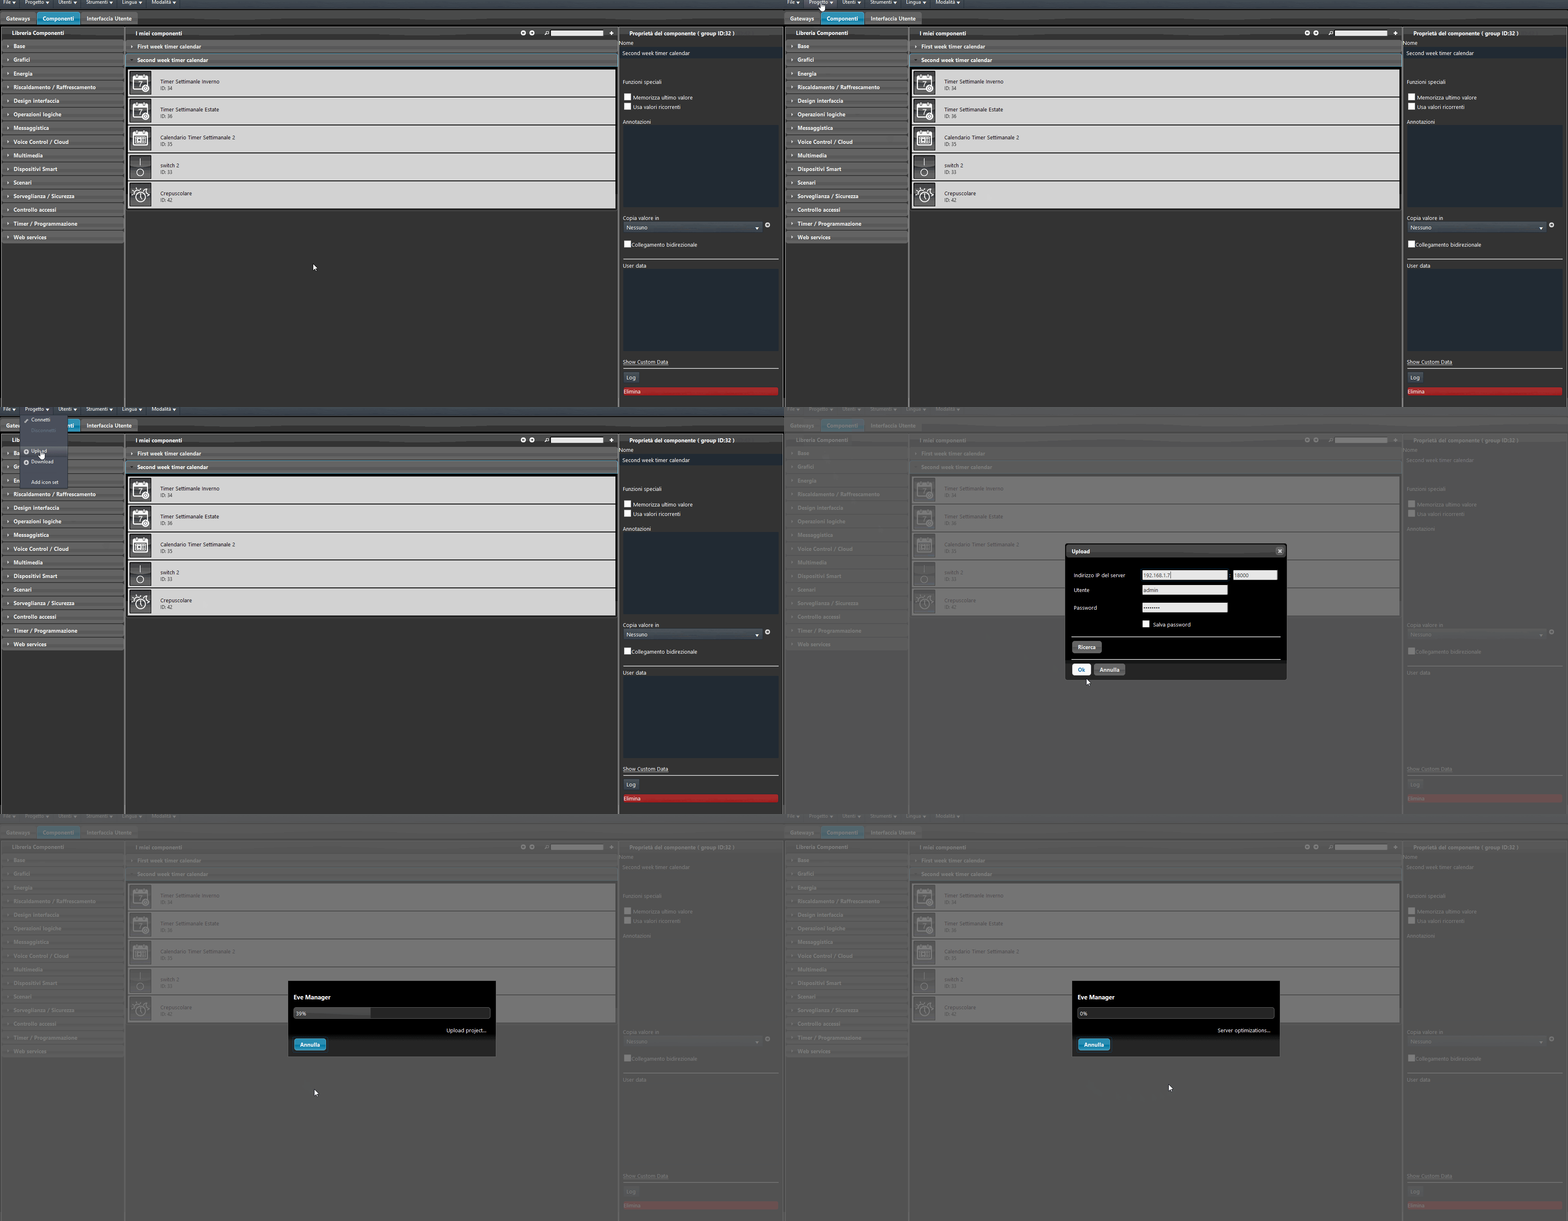
Upload the project to the server and open the Ilevia Control app.
Step 4:
In the Ilevia Control account, press and hold the home icon at the top left of the screen for a few seconds.
Then click the first icon on the left.
1. Click the desired component and press the "+" icon at the top right.
2. Set the days and hours, then click the white arrow icon at the top left.
3. Click the clock icon to the right of the days of the week, in the lower component section.
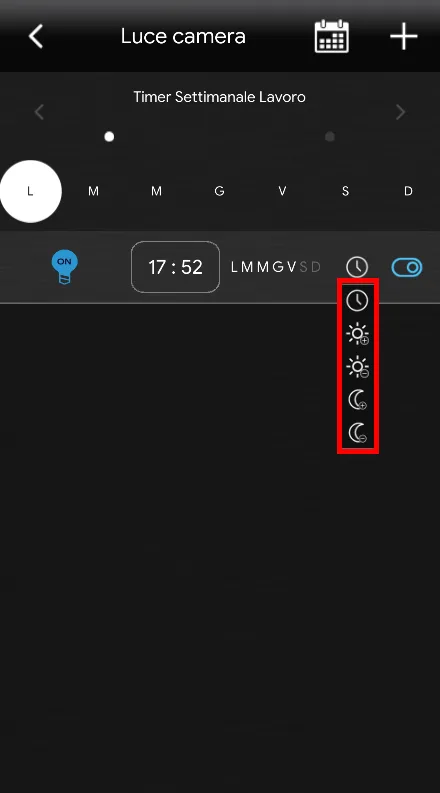
Note:
The first icon adds time to the sunrise event; the same applies to the two sunset icons:
1.

This icon adds time to the sunrise event.
2.

This icon subtracts time from the sunrise event.
3.

This icon adds time to the sunset event.
4.

This icon subtracts time from the sunset event.
Visual result
Below is shown how to create an offset for actuation of the specific schedule: depending on the selected option, the execution of the scheduled event is advanced or delayed. In this case we apply an offset of 1 hour relative to sunset time.