
Google Home with Ilevia: classic procedure (deprecated)
Classic procedure for connecting Google Home to the Ilevia server: configuration of components in Ilevia Manager and linking of the Ilevia Smart Home skill.
Classic procedure (deprecated)
This page describes the classic procedure, now deprecated. If you are integrating the Ilevia server for the first time, if this is a new installation, or if you just want to understand how it works, see the new integration procedure.
How to control your home automation system using Google Home
Ilevia has made it possible to use Google Home with KNX, Vimar By-Me, BTicino My Home, Z-Wave and other Ilevia System protocols.
One of the greatest strengths of our system is the ability to use the Google Assistant app or the Google Home app on your smartphone even on systems not managed by our Ilevia server.
Make sure you use the same Google account for the Google Home app, Google Assistant, and on all Google devices installed for voice recognition.
After installation of our system, the user, without using any app, will be able to control the devices simply by using voice recognition of the Google Assistant or through Google Home devices.
In the following sections, we will explain how to configure a KNX light through Ilevia Manager and the related configuration of the Google Assistant.
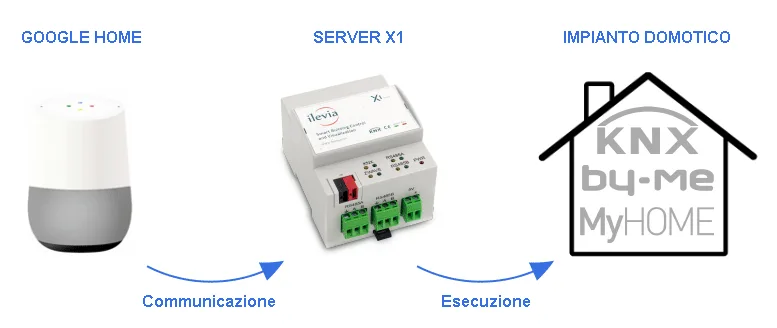
Google Home speakers allow users to speak voice commands to interact with services through Google's intelligent personal assistant called Google Assistant. A large number of services, both first-party and third-party, are integrated, allowing users to listen to music, control video or photo playback, or receive news updates entirely by voice. Google Home devices also have built-in support for home automation, allowing users to control smart appliances and KNX devices with their voice. Multiple Google Home devices can be placed in different rooms in a house to control devices in a specific room. In this guide, you will learn how to set up a KNX light in a living room and control it by voice.
A reminder before you continue:
You do not need to own a Google Home device; you can use Google Assistant on your smartphone/tablet.
Refer to this documentation to configure Google Home devices.
Download and install the updated Ilevia logics to enable the Google plug-in correctly (follow this link);
Update your server with the latest available firmware by following this guide;
Practical guide
Step 1
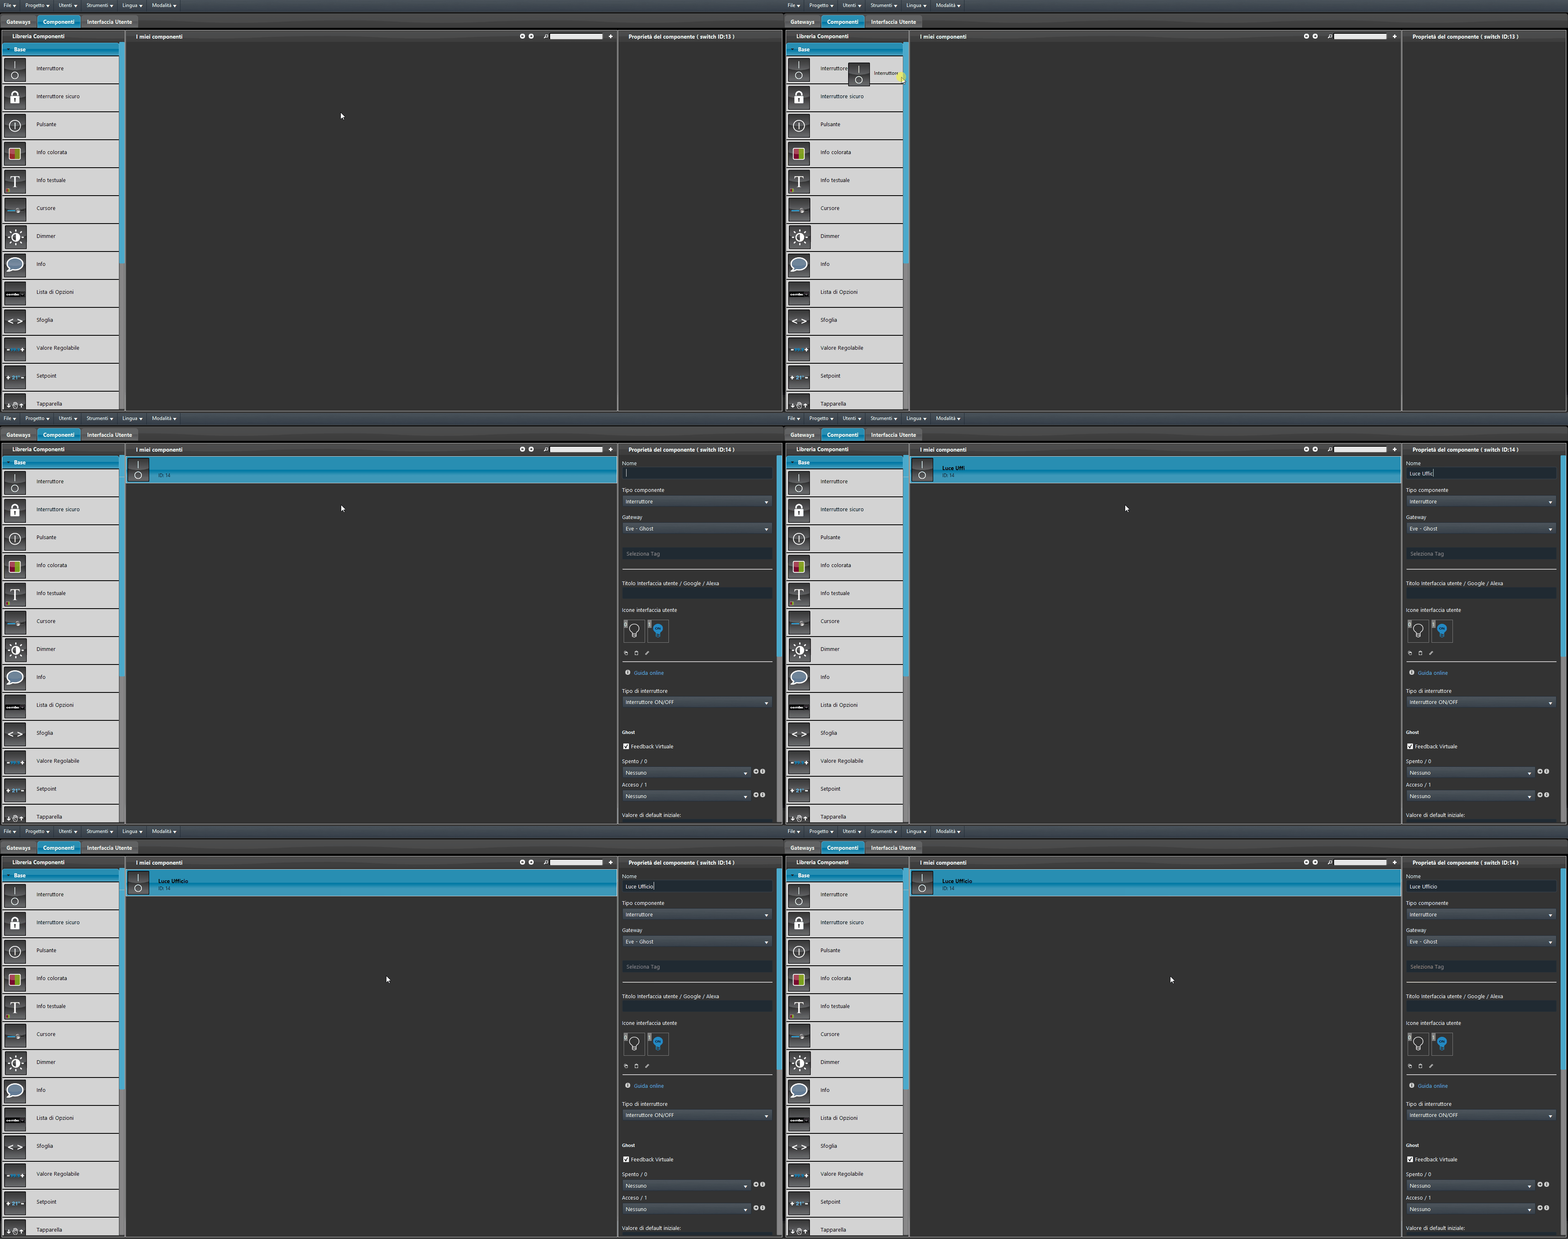
In this guide we will see how to correctly set up a Switch that will turn a light in our living room on and off using a Google Home device. Once you have selected the Components screen, insert a Switch and assign it a Name. In our case “Living Room Light” (you can choose a different name according to your preferences): it will be the keyword to speak to the Google Home device.
Step 2
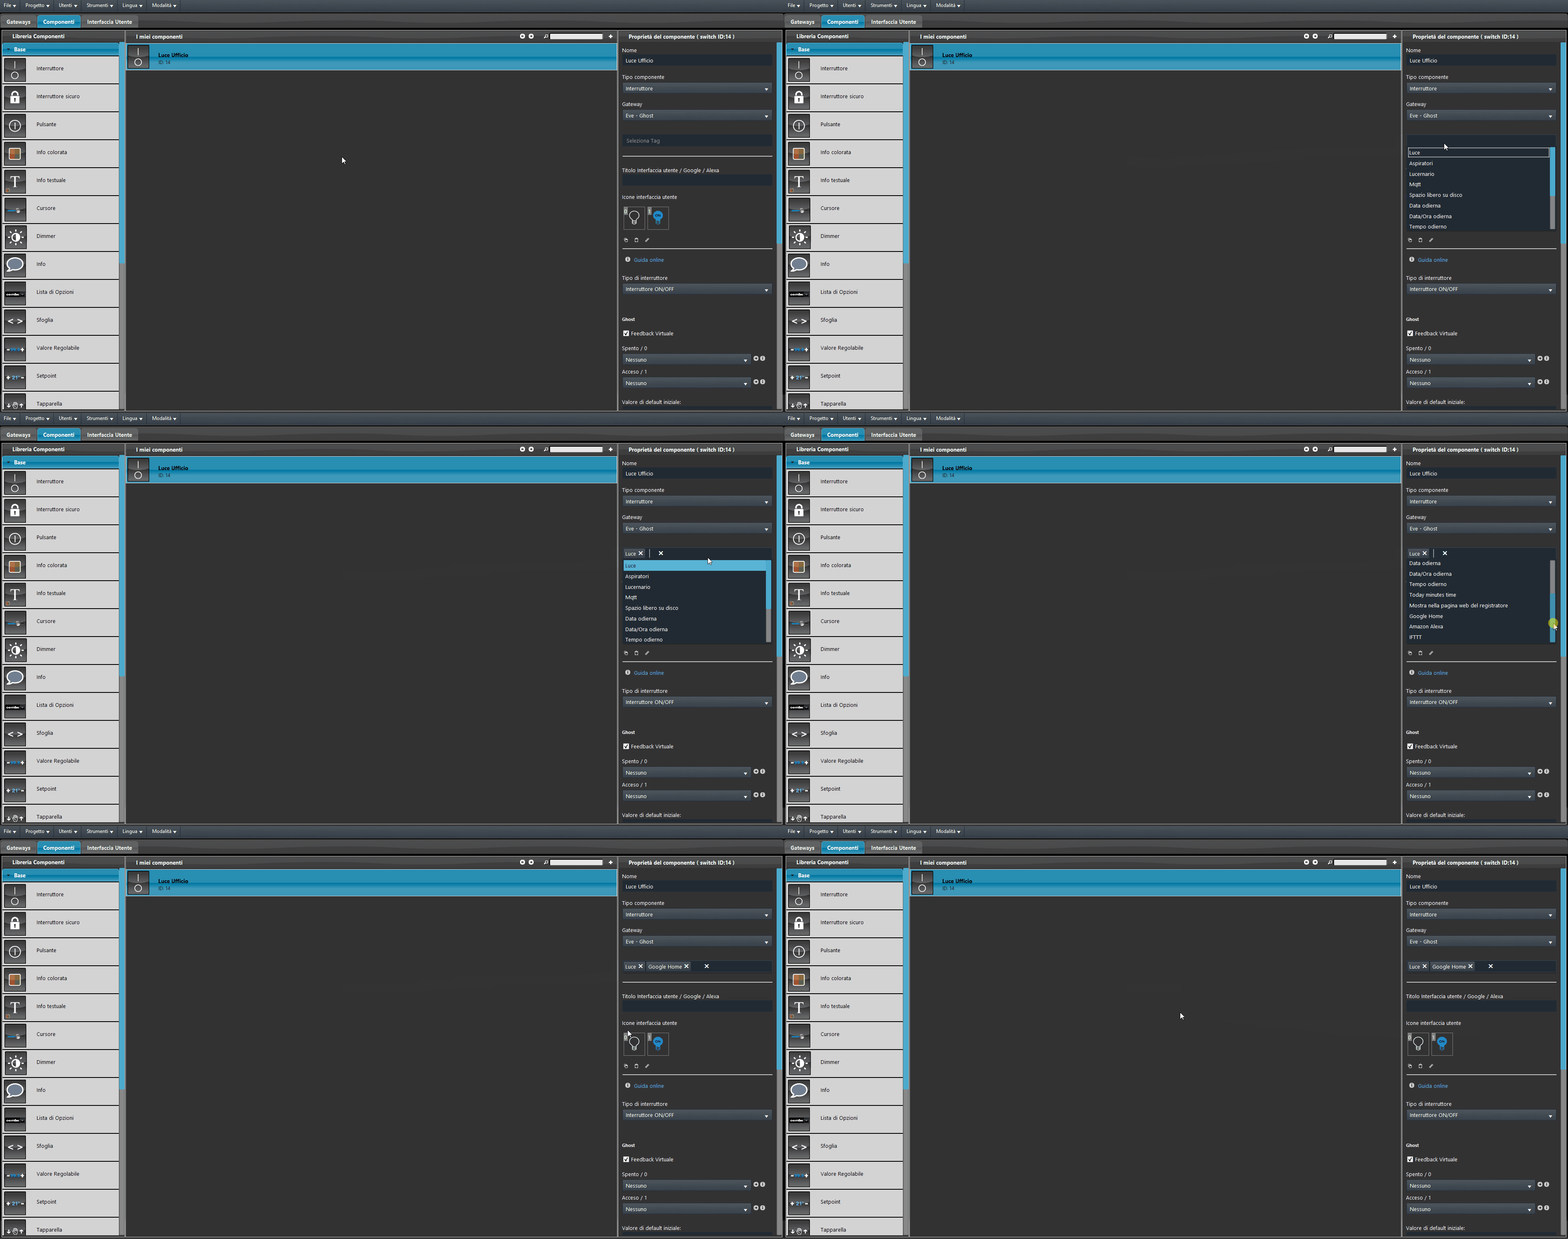
Now inside “Select tags” you will need to select “Light” and “Google Home“, this step will allow you to use the service correctly and correctly identify which device is a Light and which is not. This step must be done for every component in the system that you want the user to be able to control through Google Home; if the selected device is not a Light, you should use only the tag “Google Home“.
Step 3
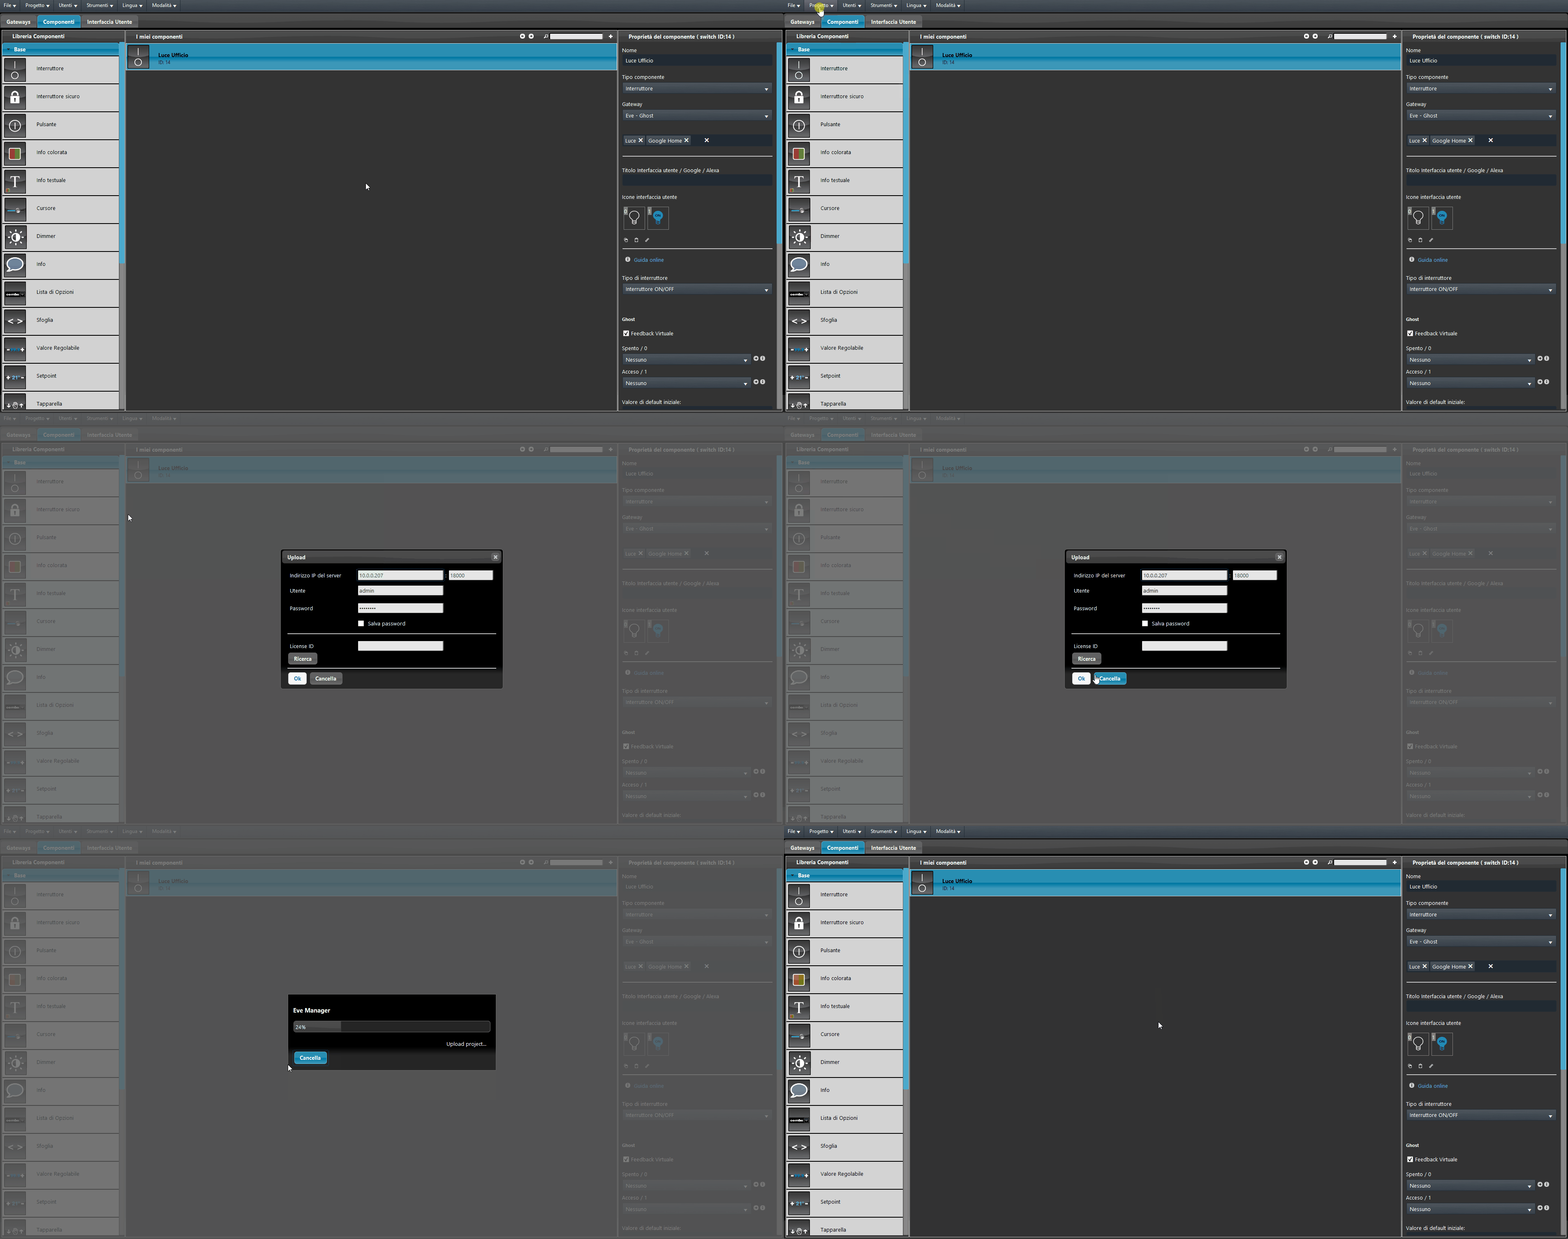
Click Project → Upload to upload the project to the server by entering the connection parameters, then press OK: the upload of the project to the Ilevia server will start. Then move on to the next section, dedicated to the Google Assistant and Google Home apps.
Mandatory operation
Once the project has been uploaded to the server, it is necessary to restart the Logic module. The Logic module is software inside the Ilevia server that handles the project's logic operations, such as the connection between the server and the Ilevia cloud. To restart it, connect to the Ilevia server from the Project menu → Connect, then from the Tools menu choose stop logic and repeat the operation with start logic.
Step 4
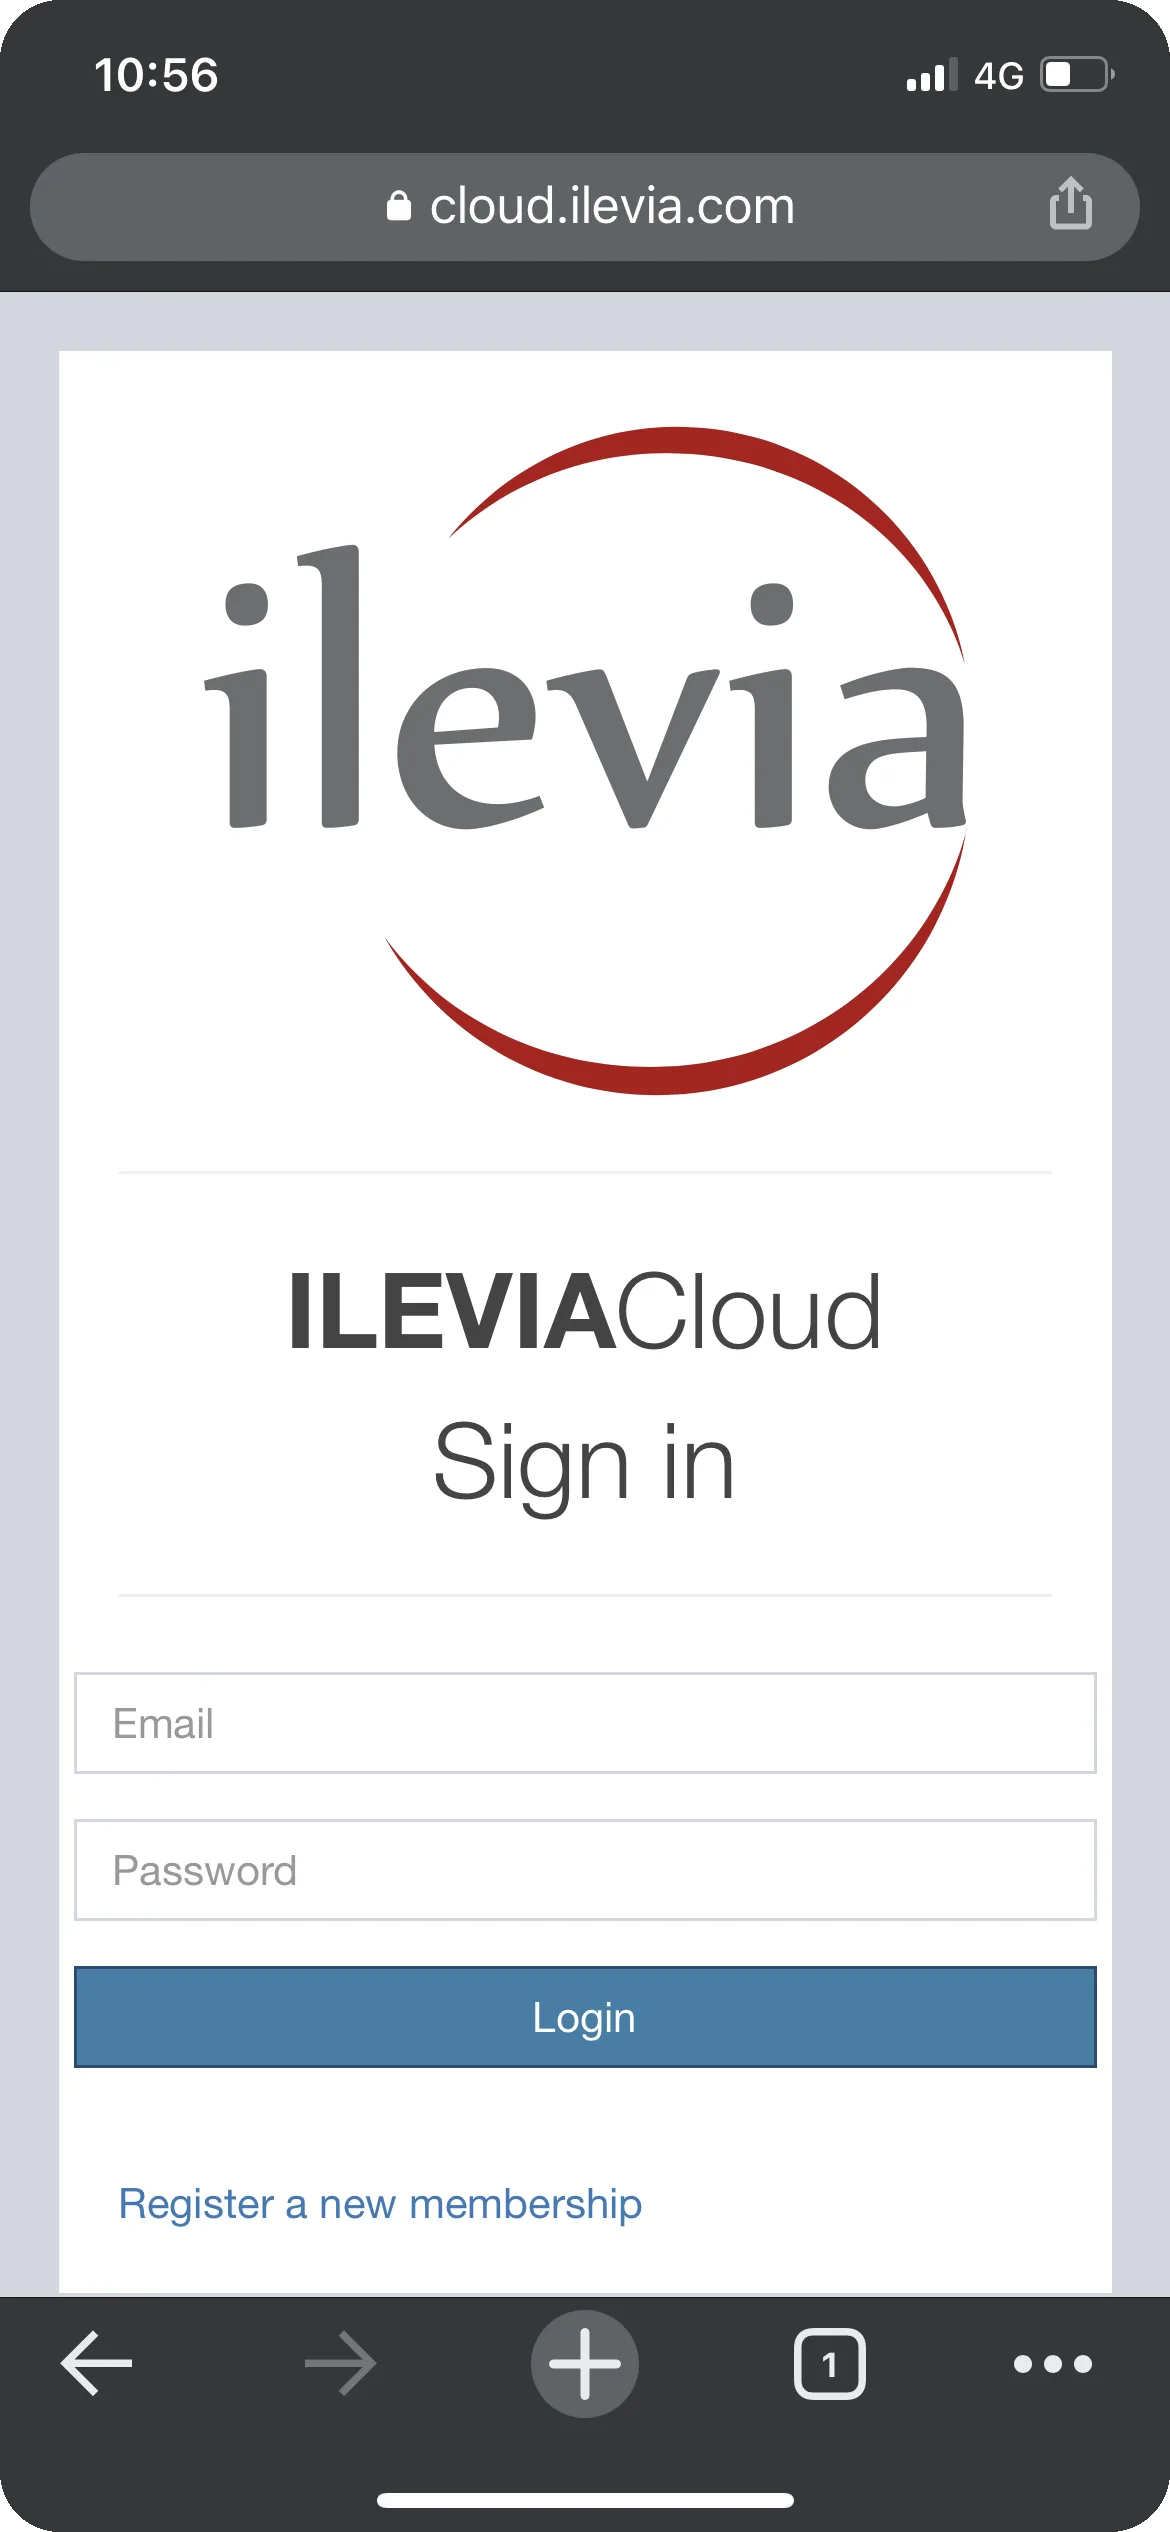
Creating an Ilevia account
Register on the Ilevia cloud
1. Open the browser on your phone or PC;
2. Type www.cloud.ilevia.com in the address bar of your browser;
3. Select the Register a new membership option to create a new account on the ILEVIA cloud;
4. Complete the registration by filling in all the required information and select Sign Up.
Step 5
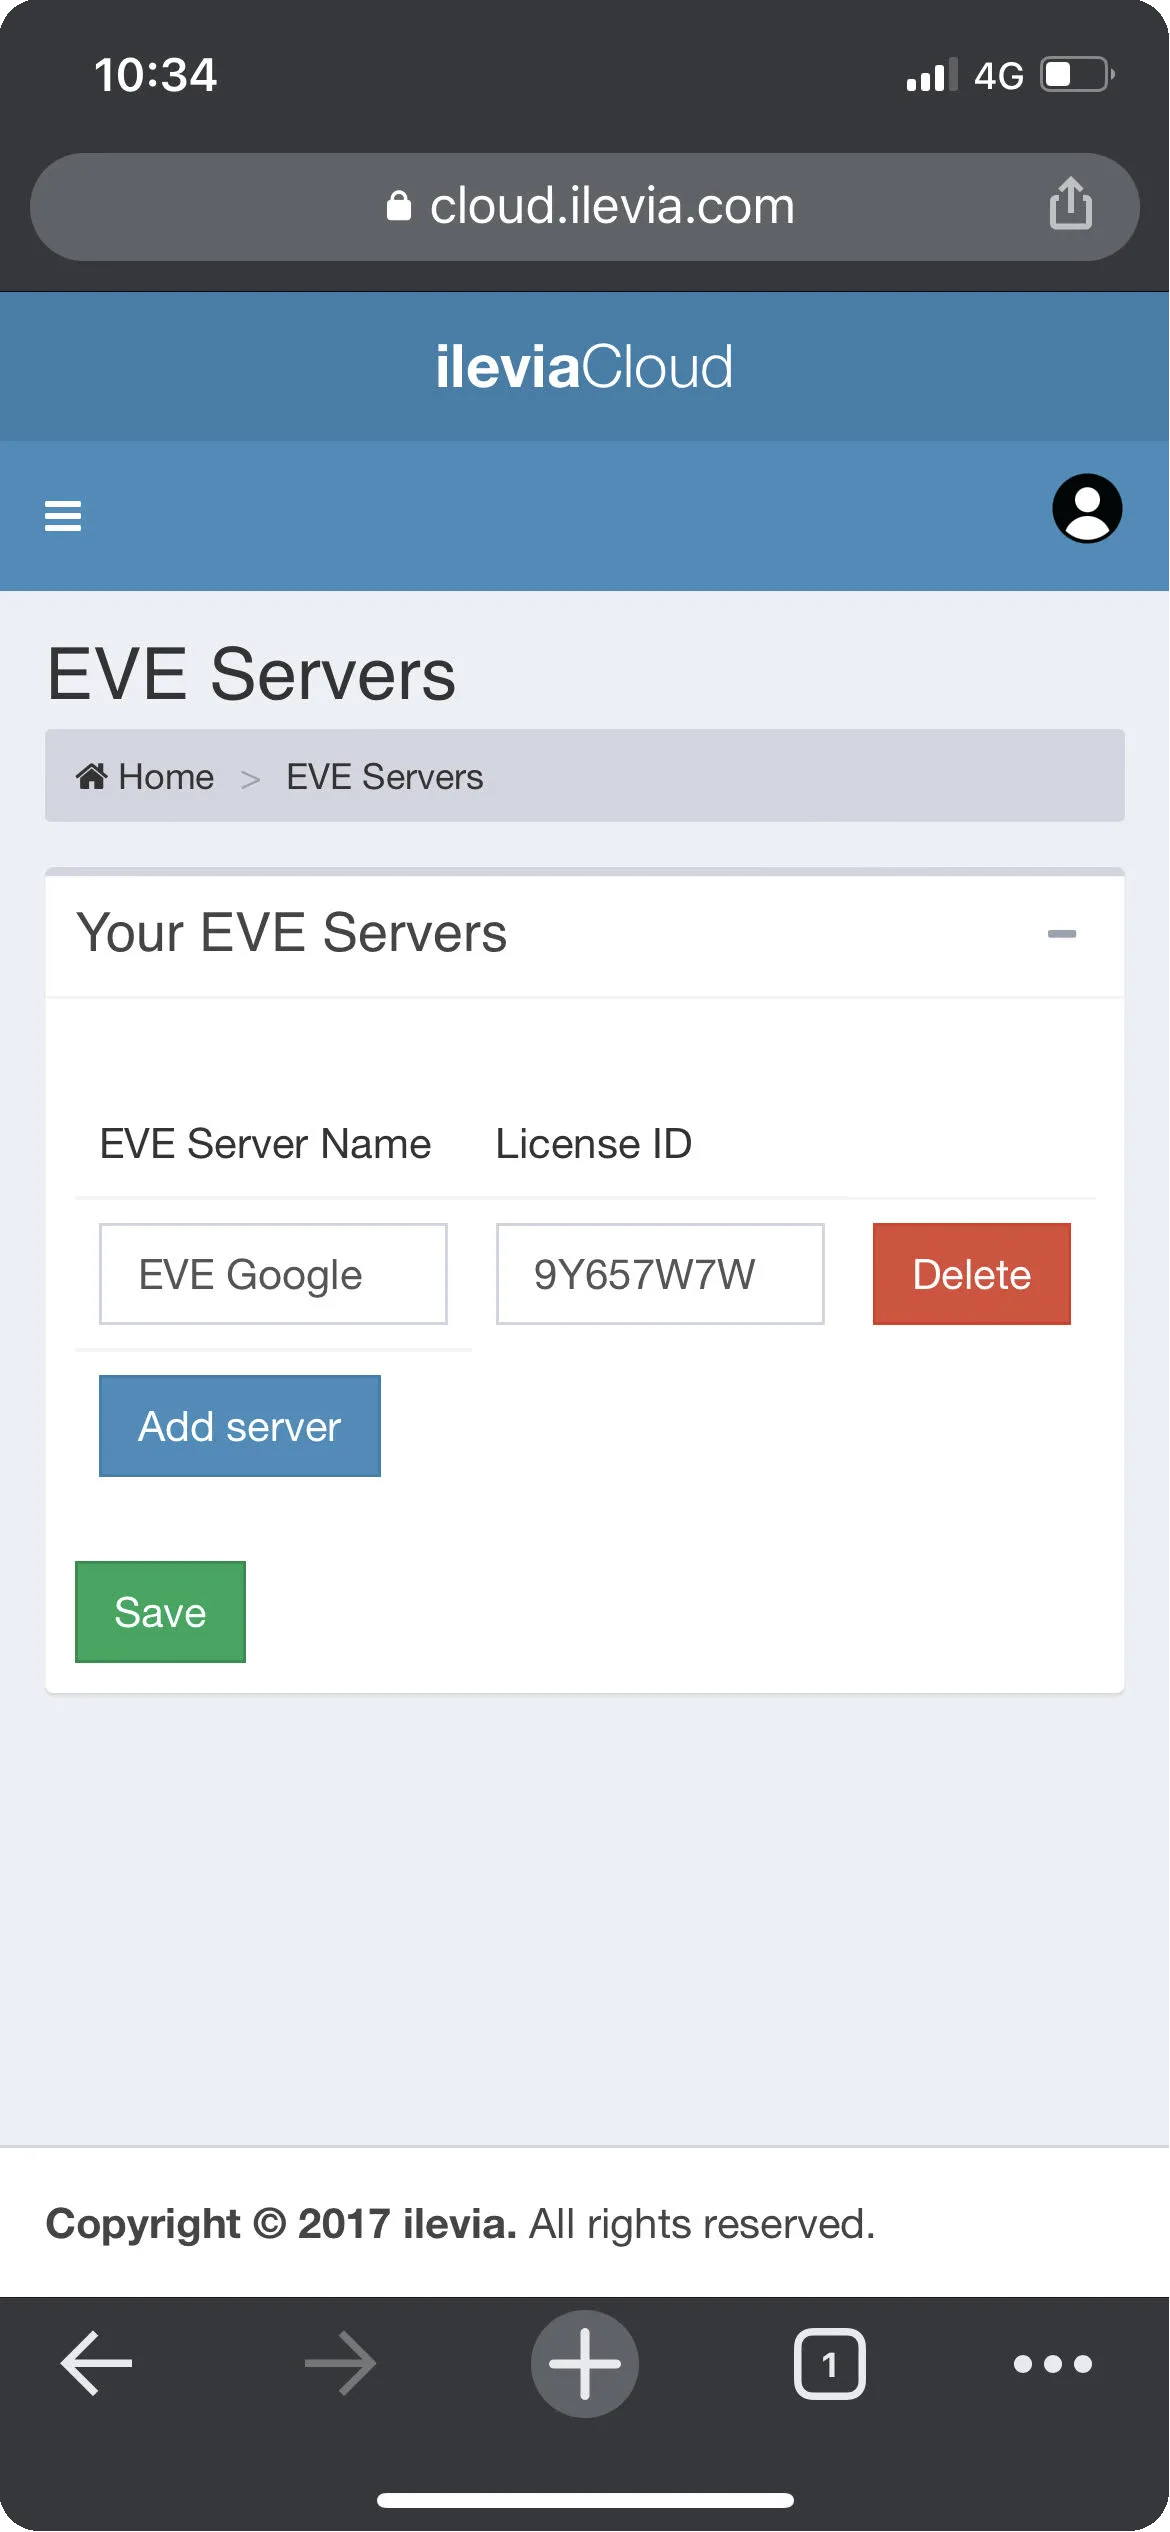
Registering the Ilevia server
Add your Ilevia server to the Ilevia cloud
1. Log in to your Ilevia account;
2. Click the blue “Add server” button;
3. Fill in all the required text fields:
Server Name: you can choose a name according to your preferences.
License ID: to find the license ID, follow this guide.
4. Click the green “Save” button to confirm the operation in the ILEVIA cloud.
Step 6
App configuration
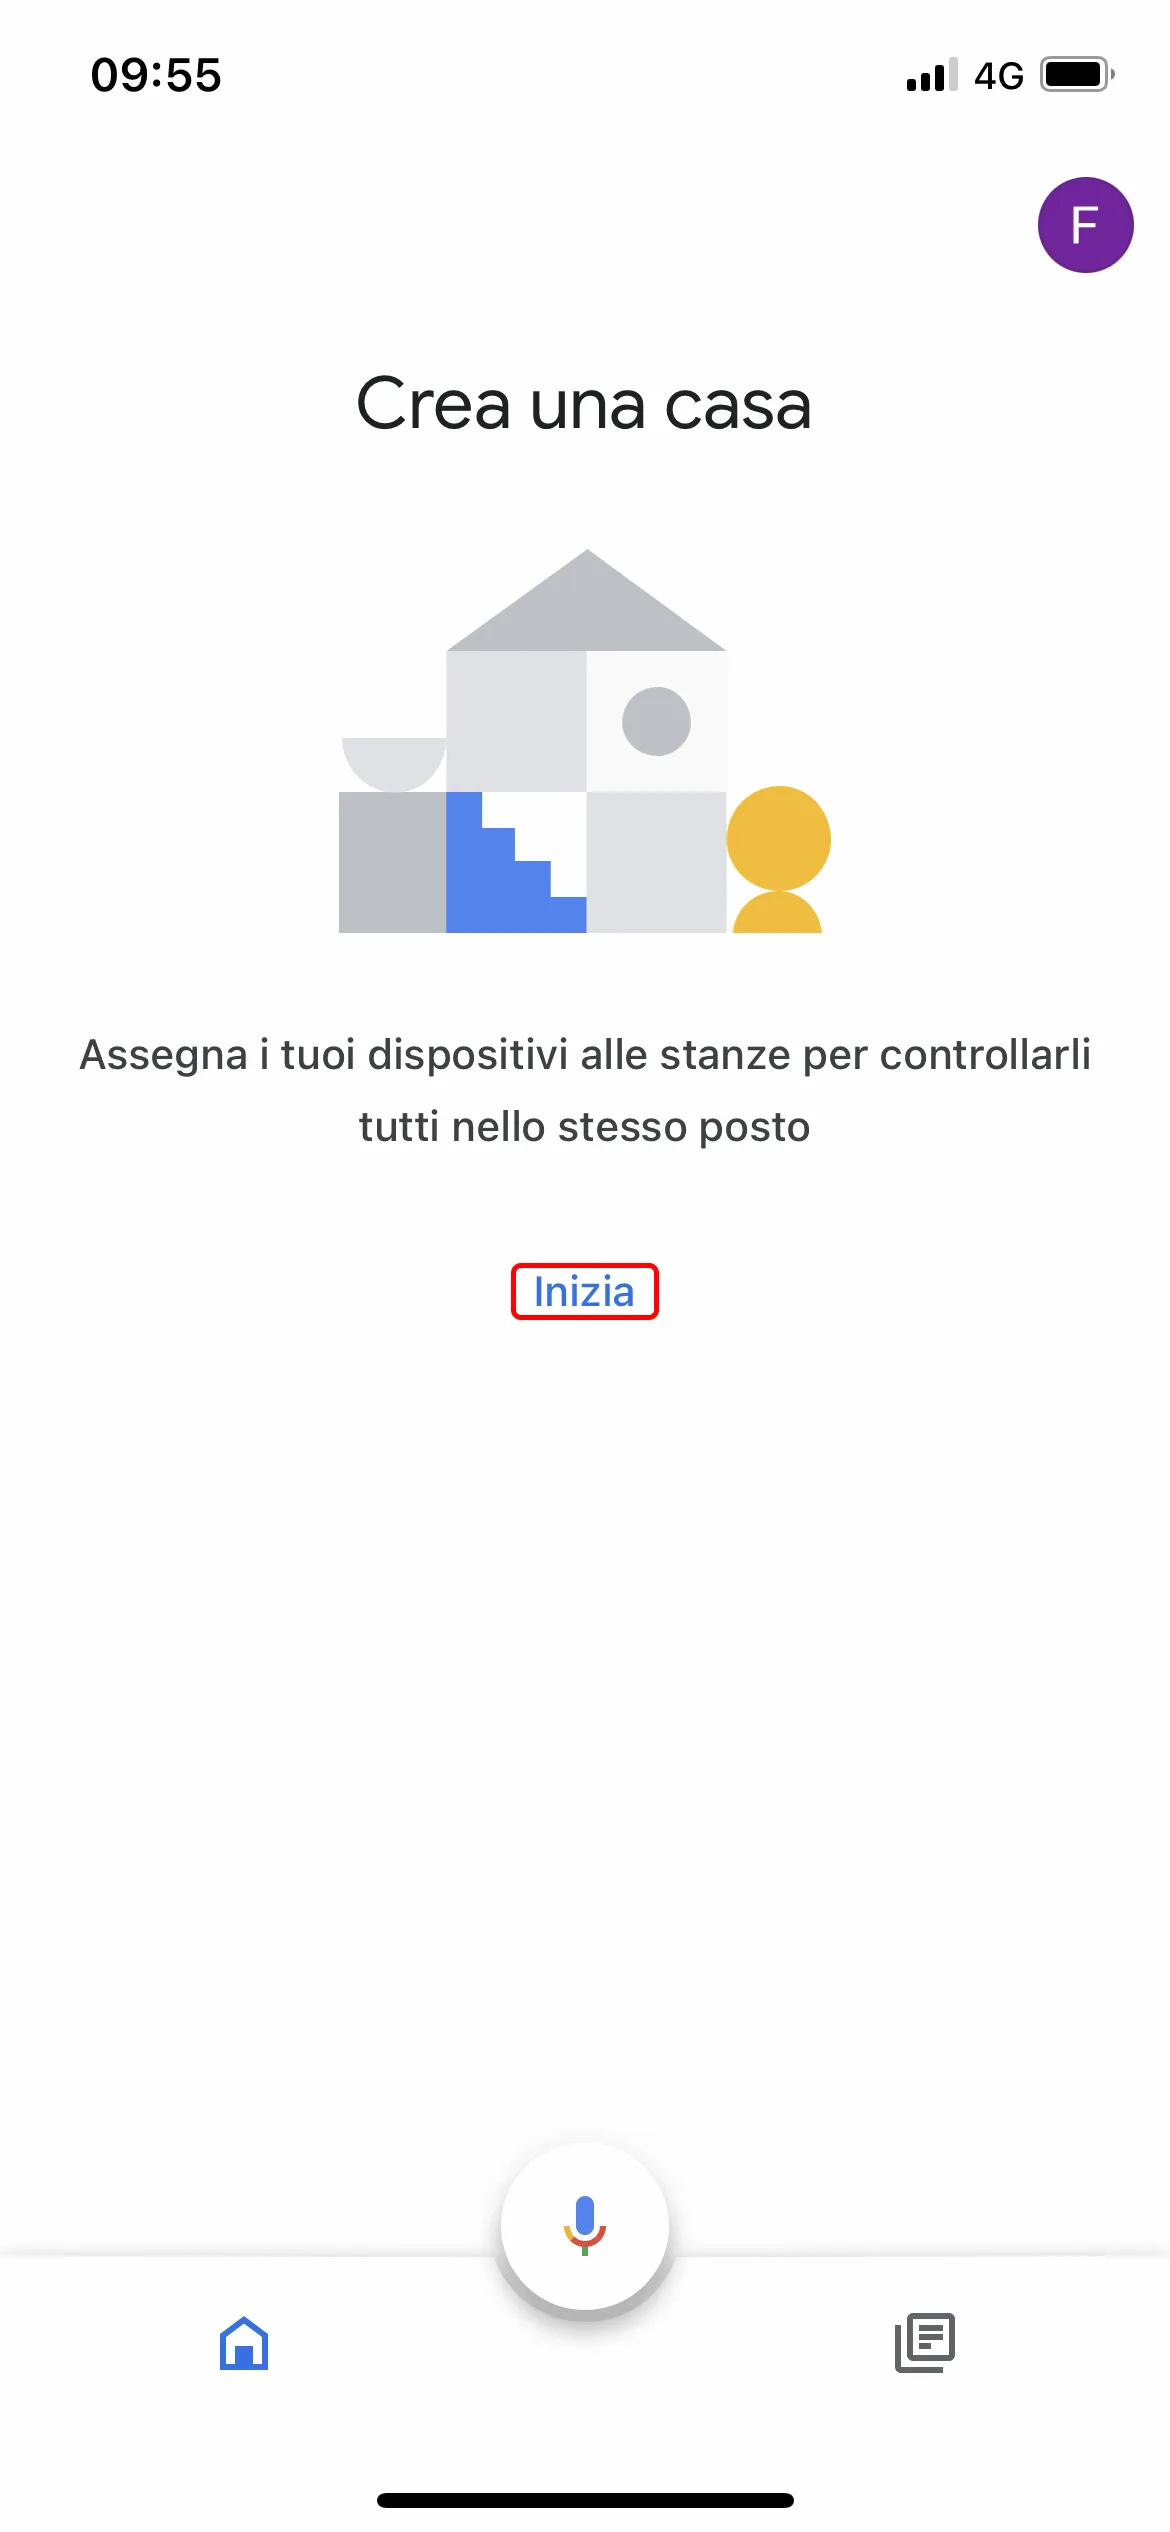
1. After installing the Google Home app, open it: this will be the first screen you see. Press “START”.
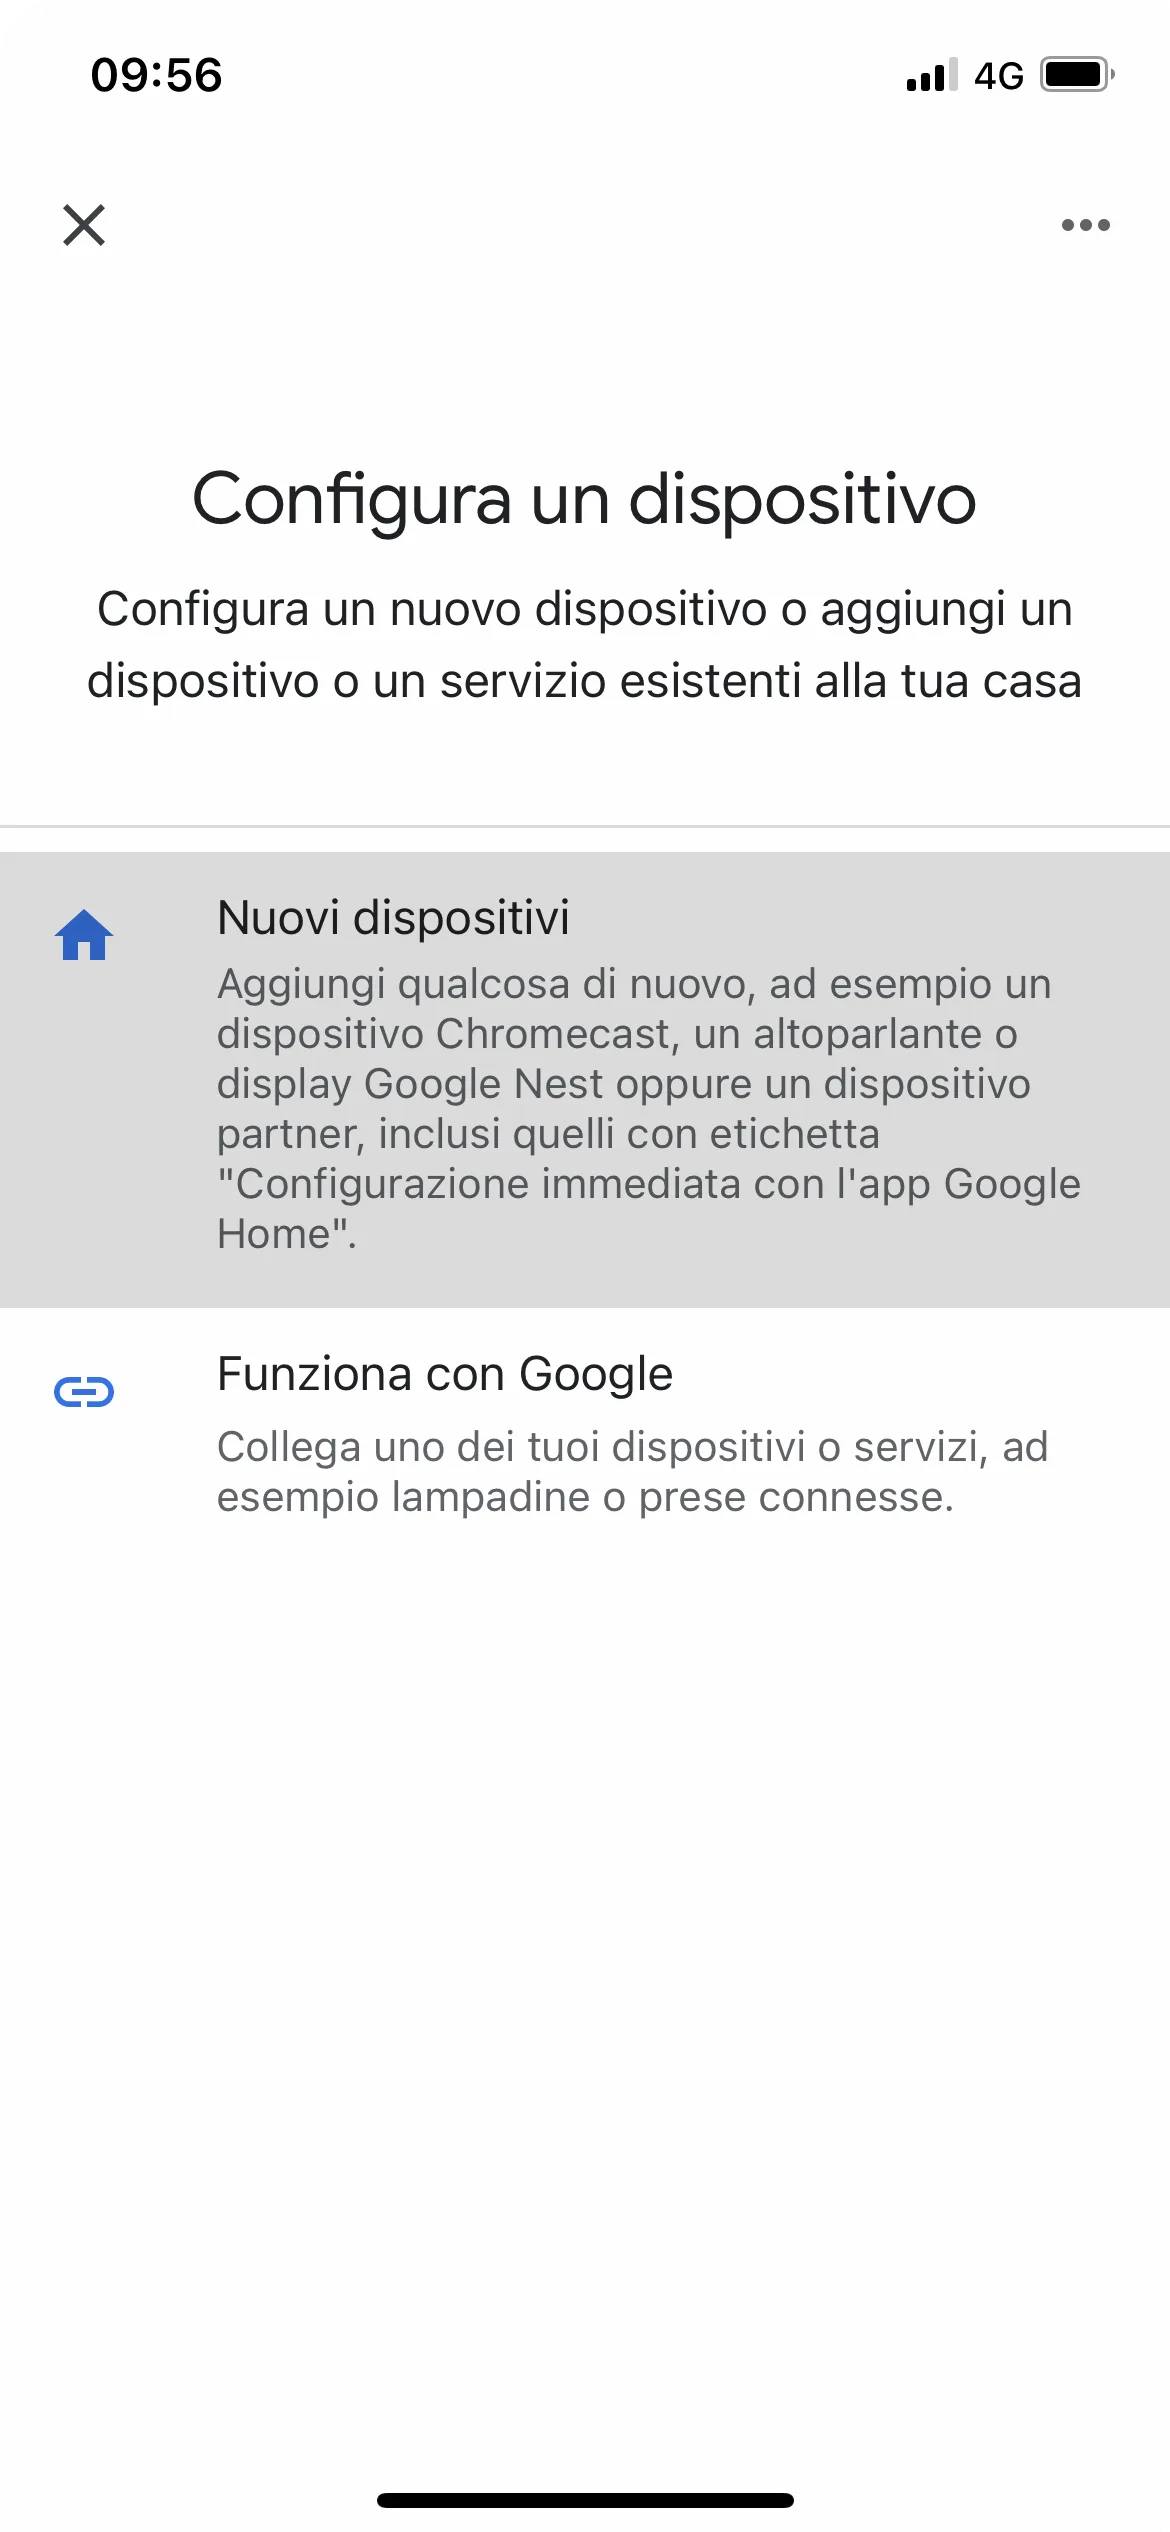
2. Choose new devices.
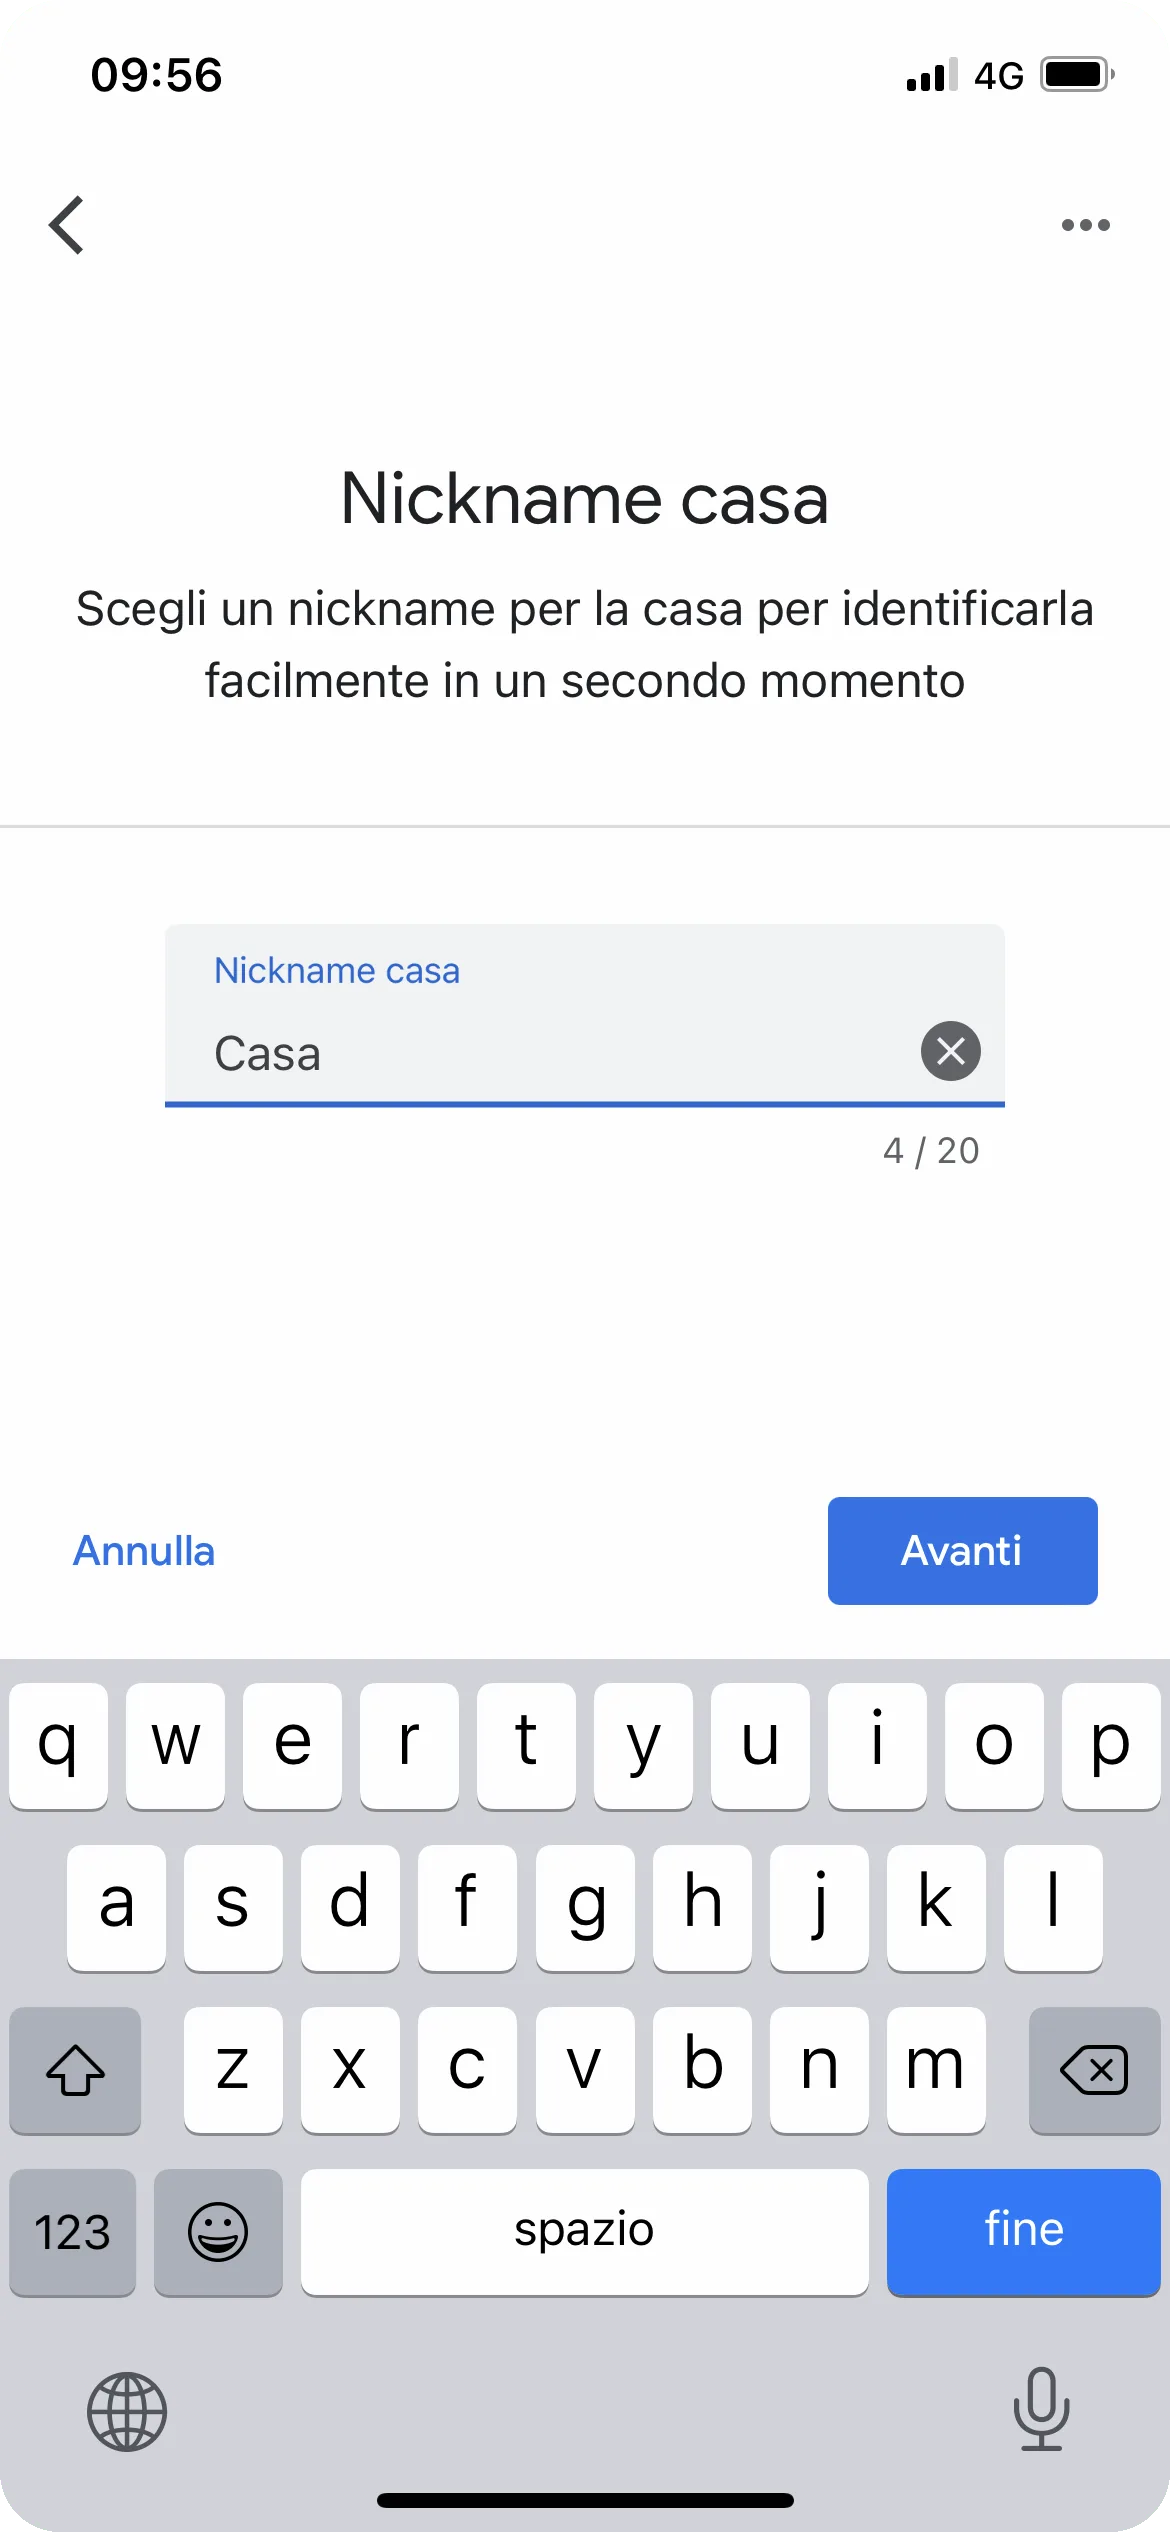
3. Enter a name for the home you are creating.
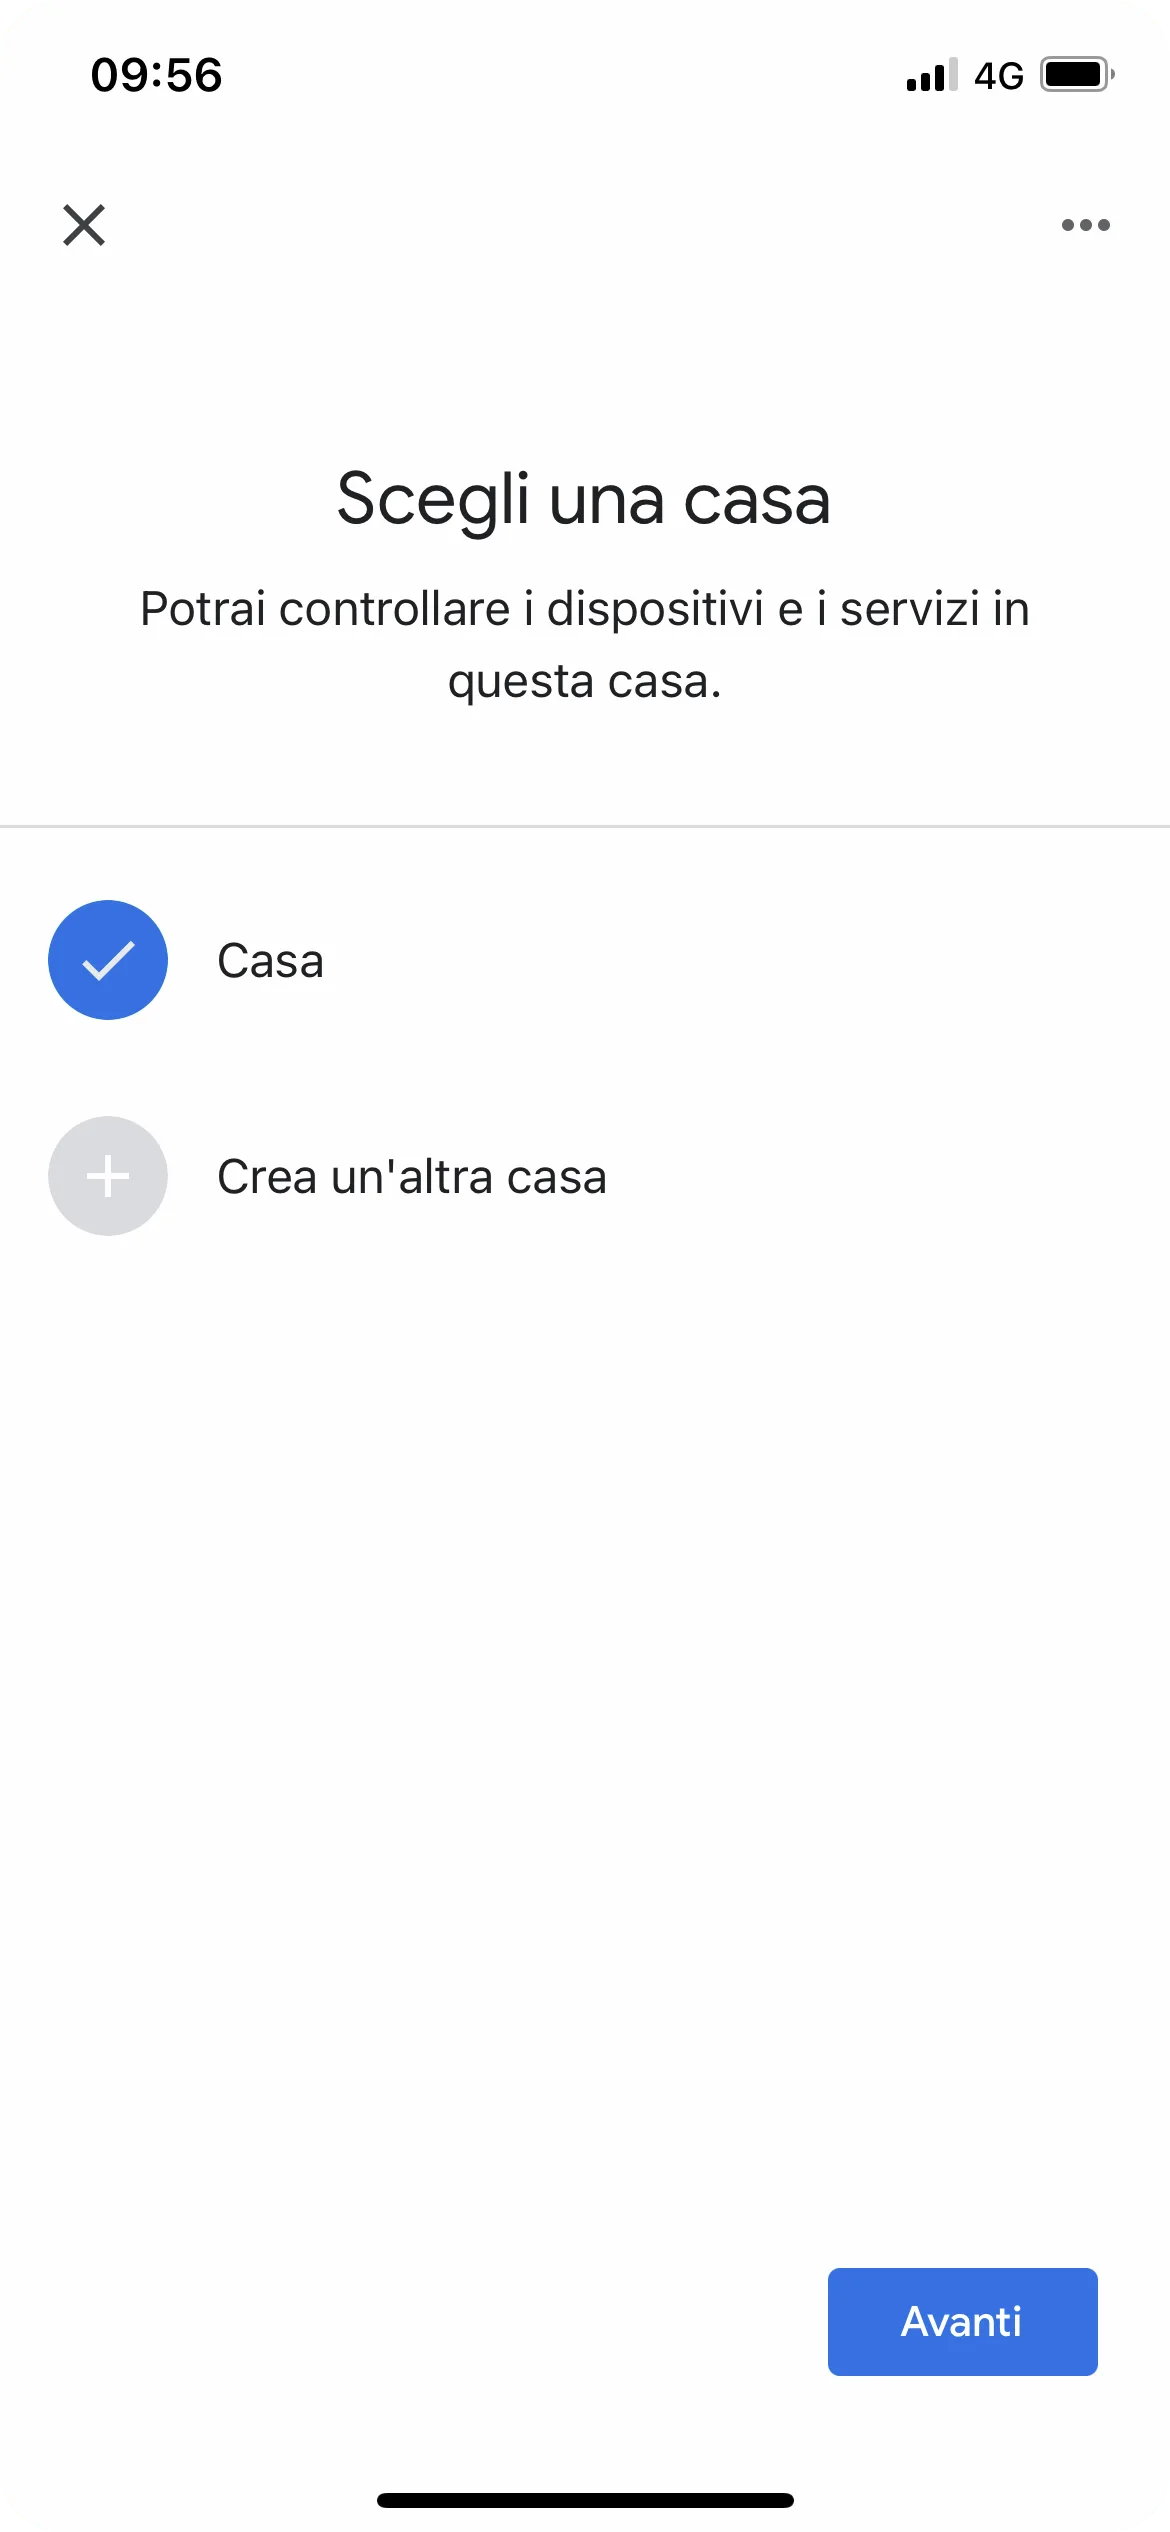
4. Tap Home or Create another home if you have devices in different homes; for this example we will use the Default Home.
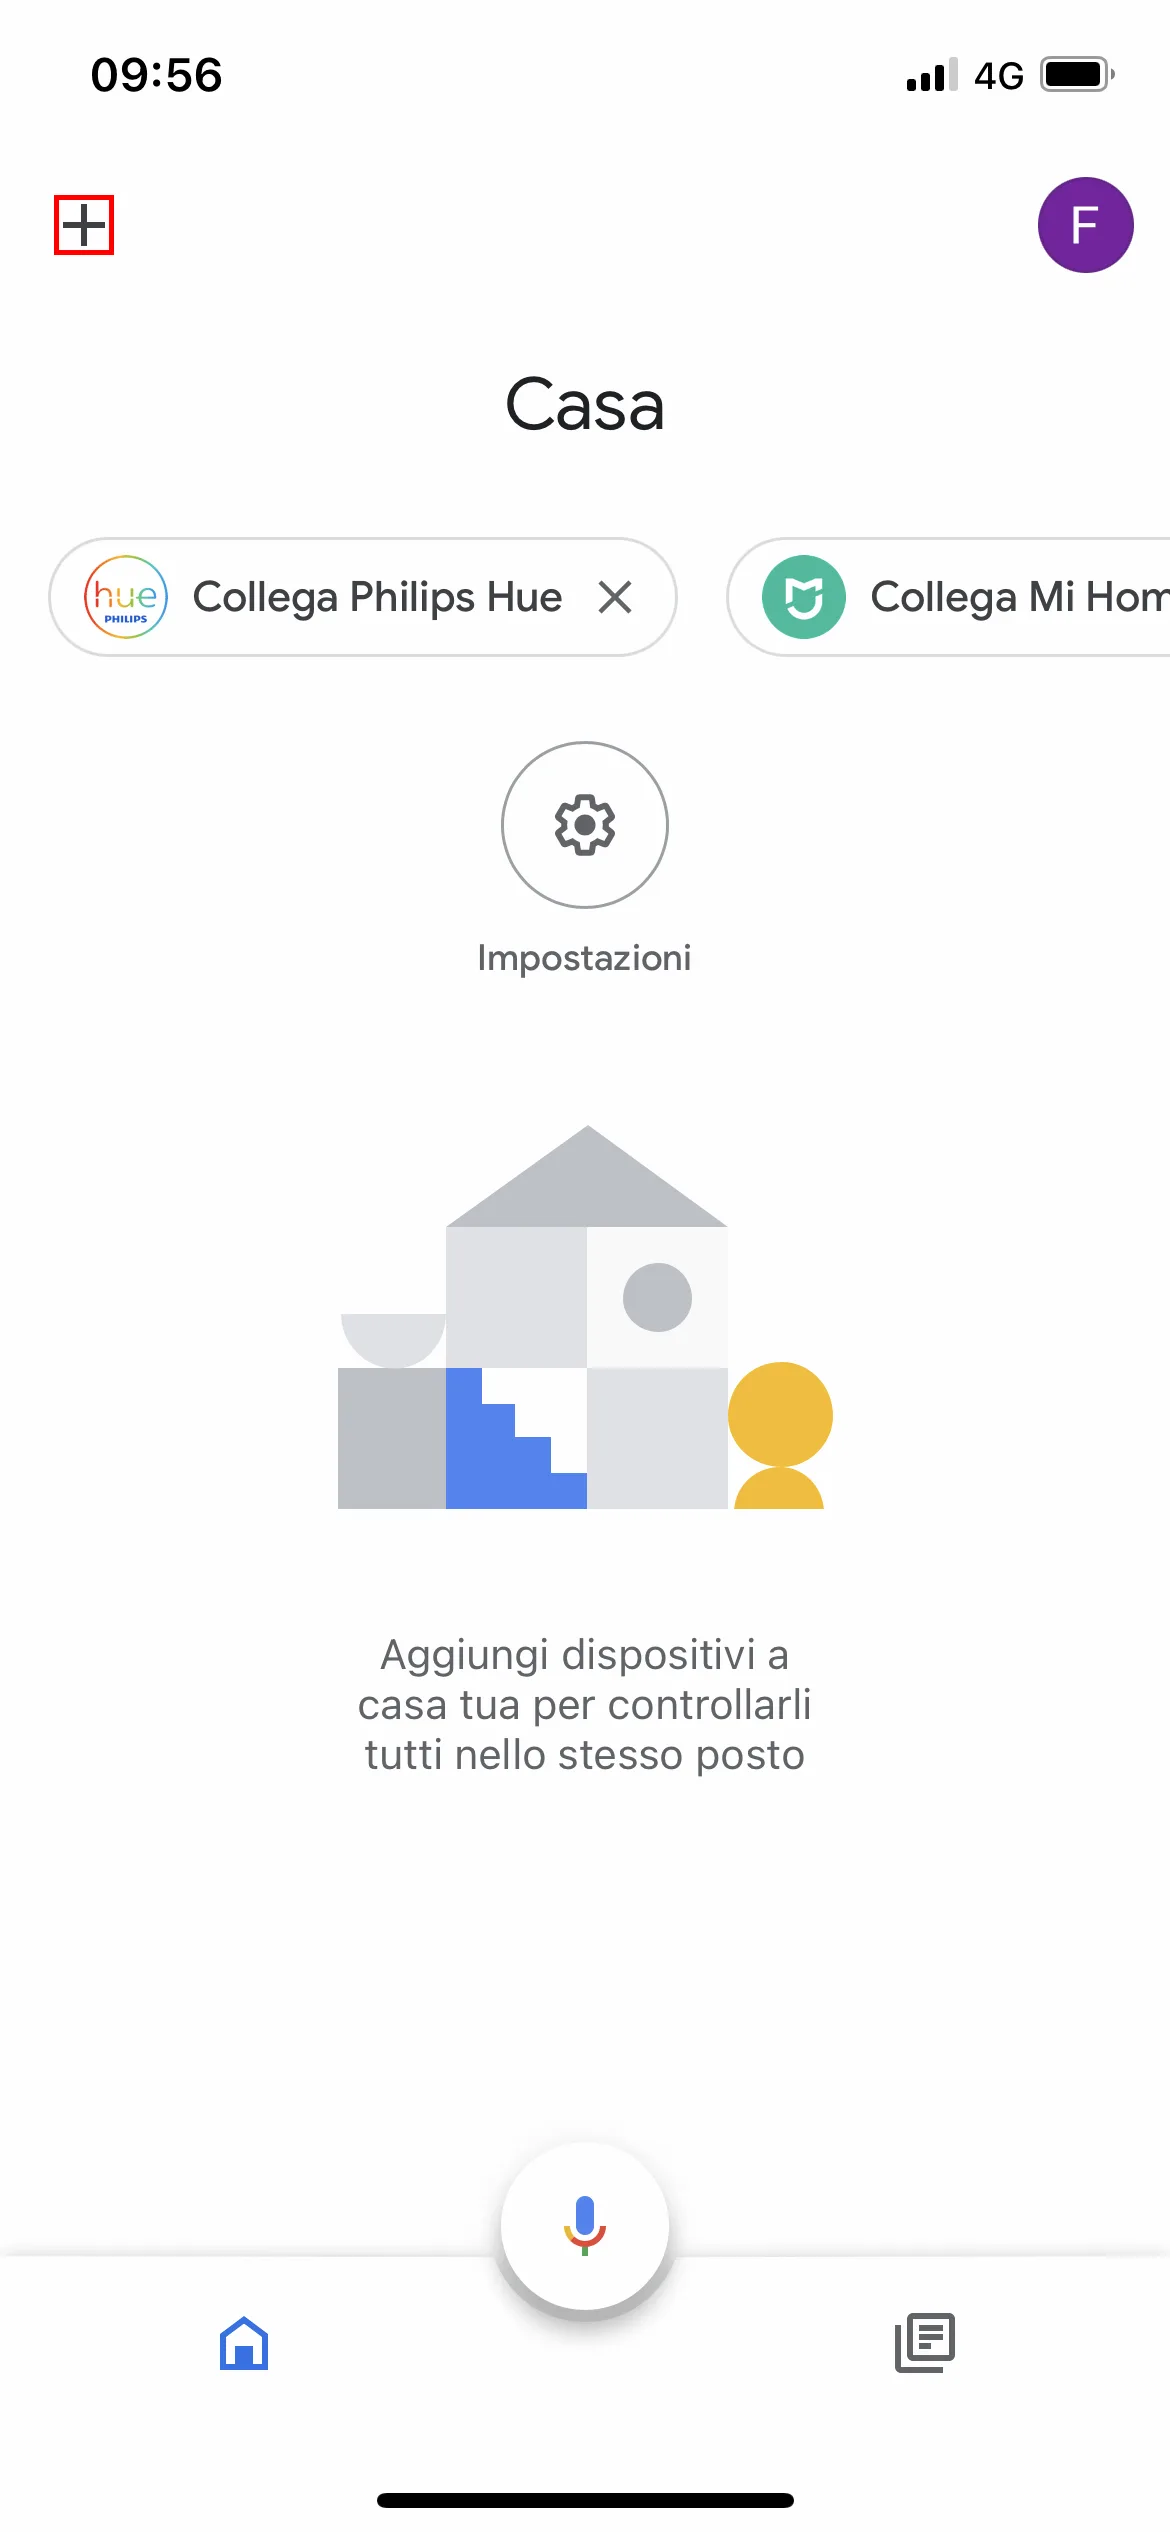
5. Tap + Add.
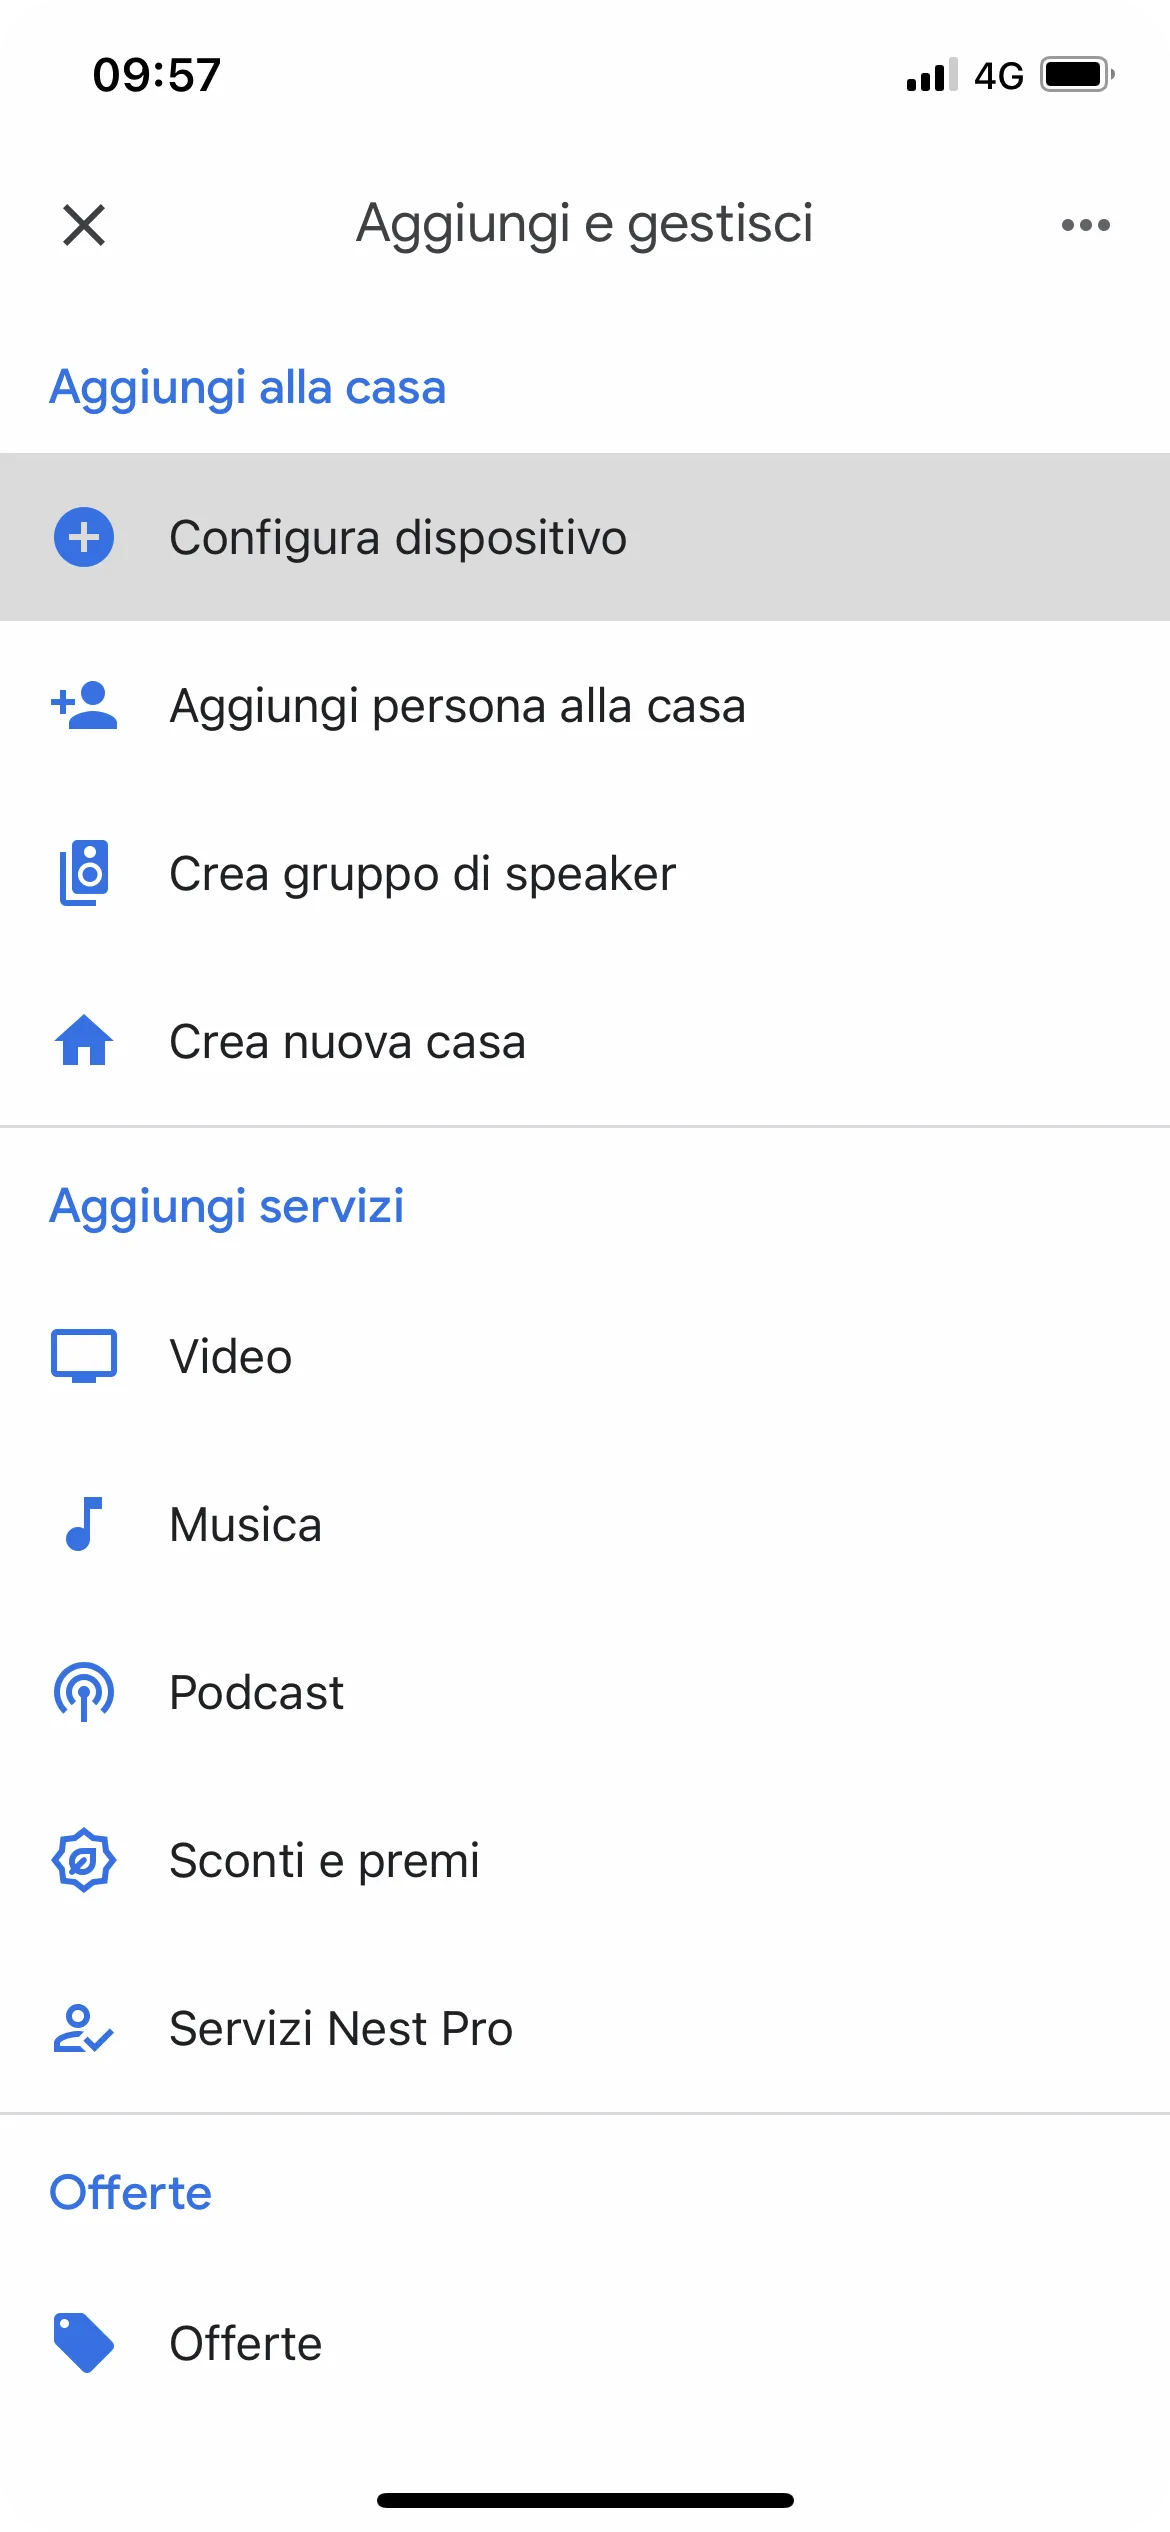
6. Tap Set up device.
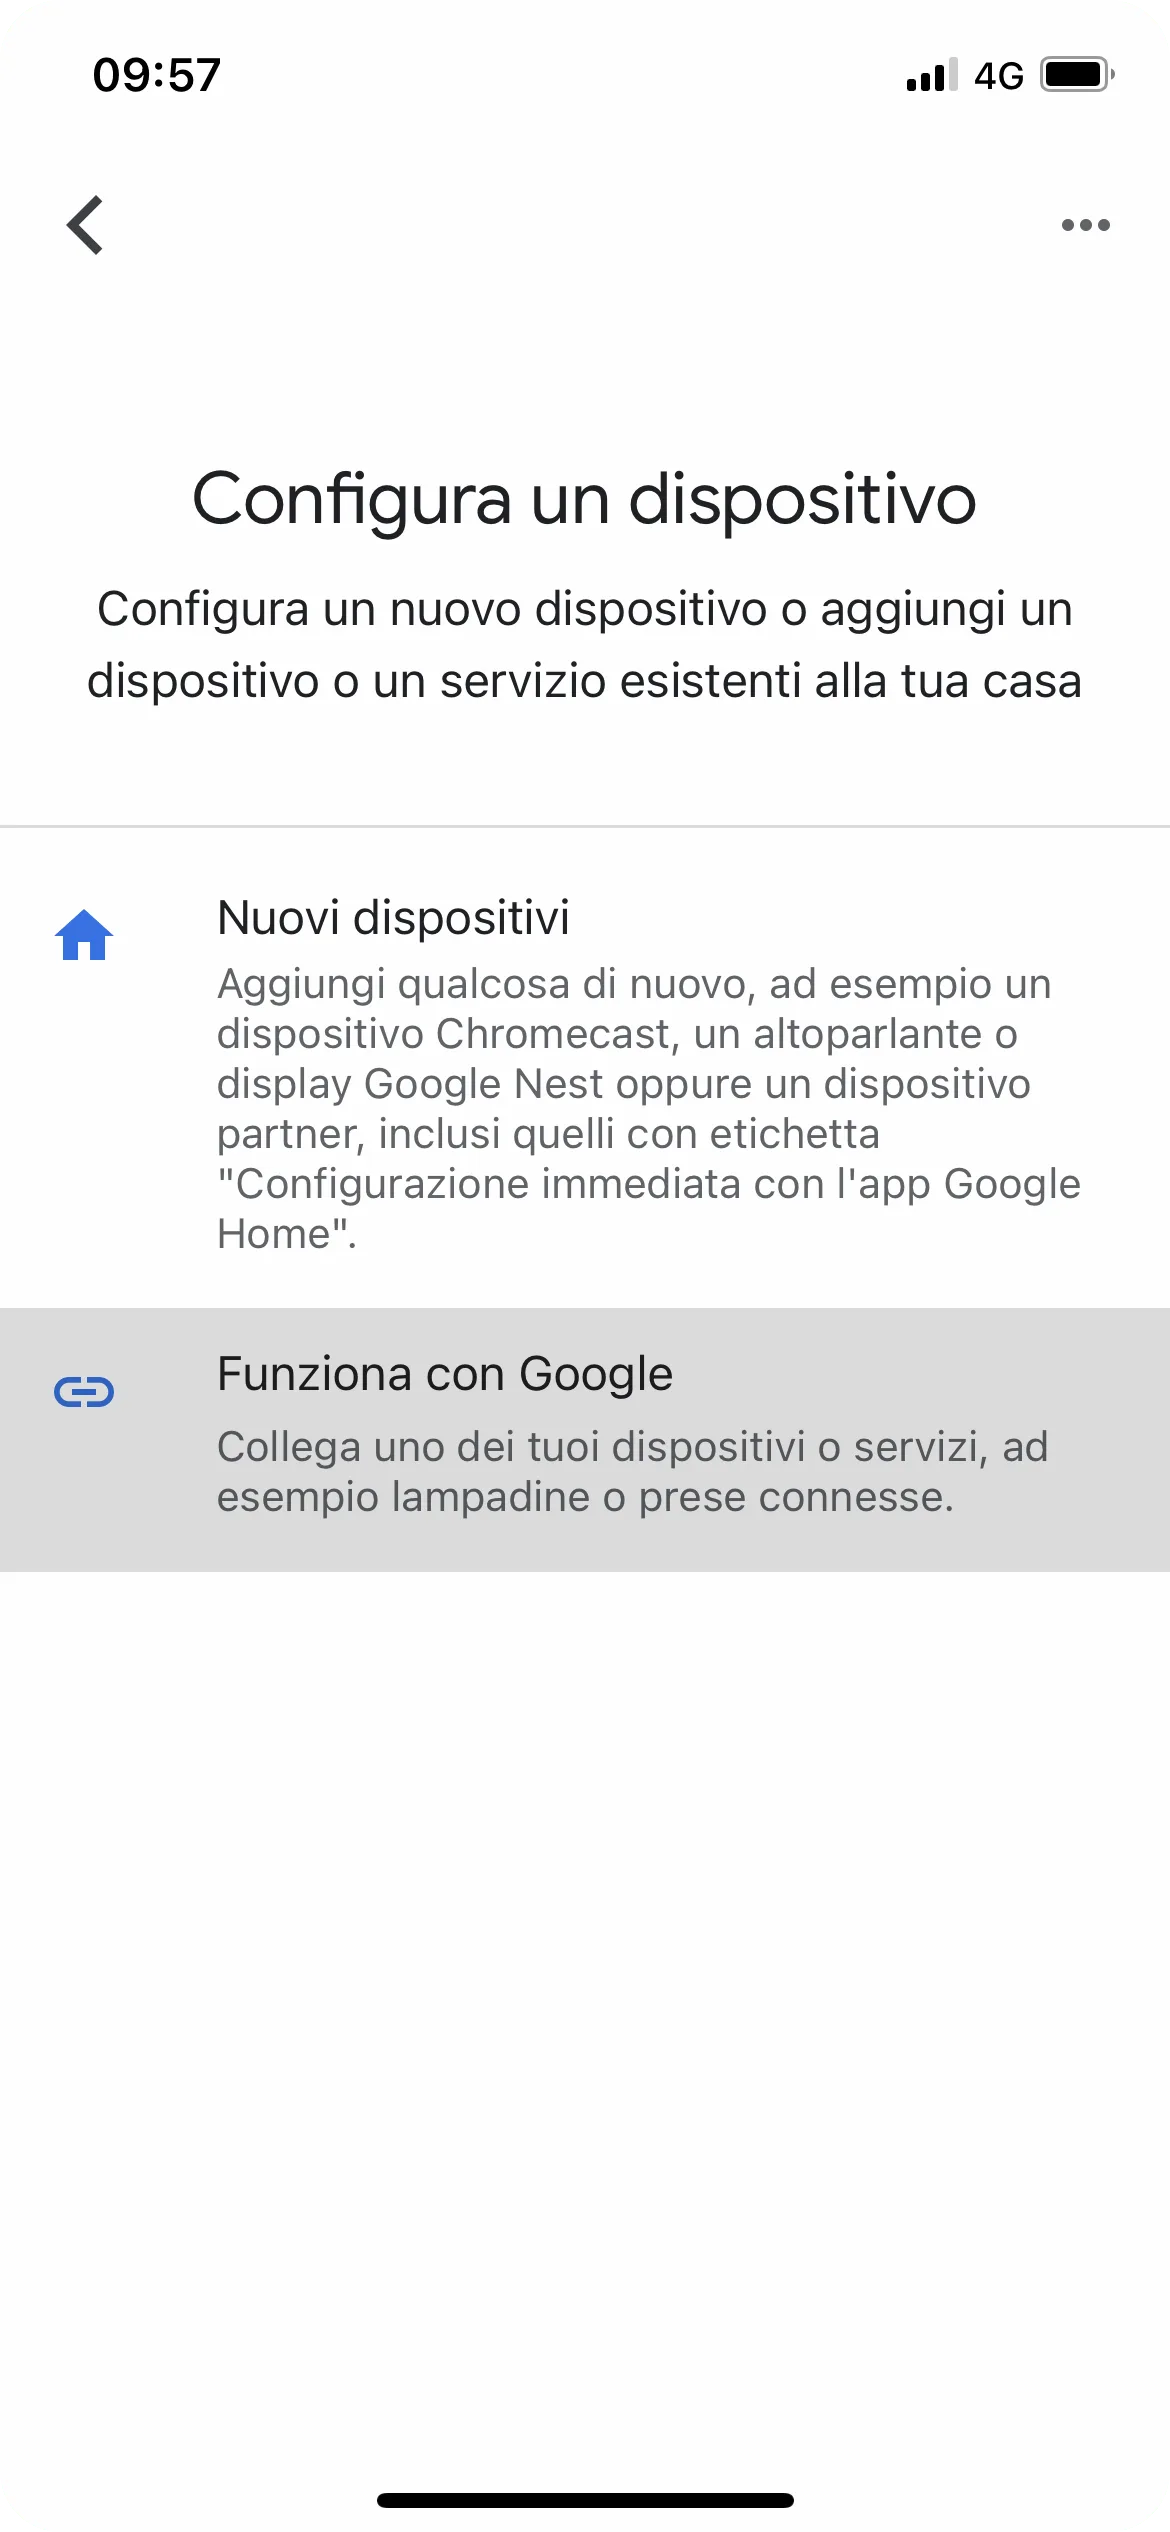
7. Tap Have something already set up?.
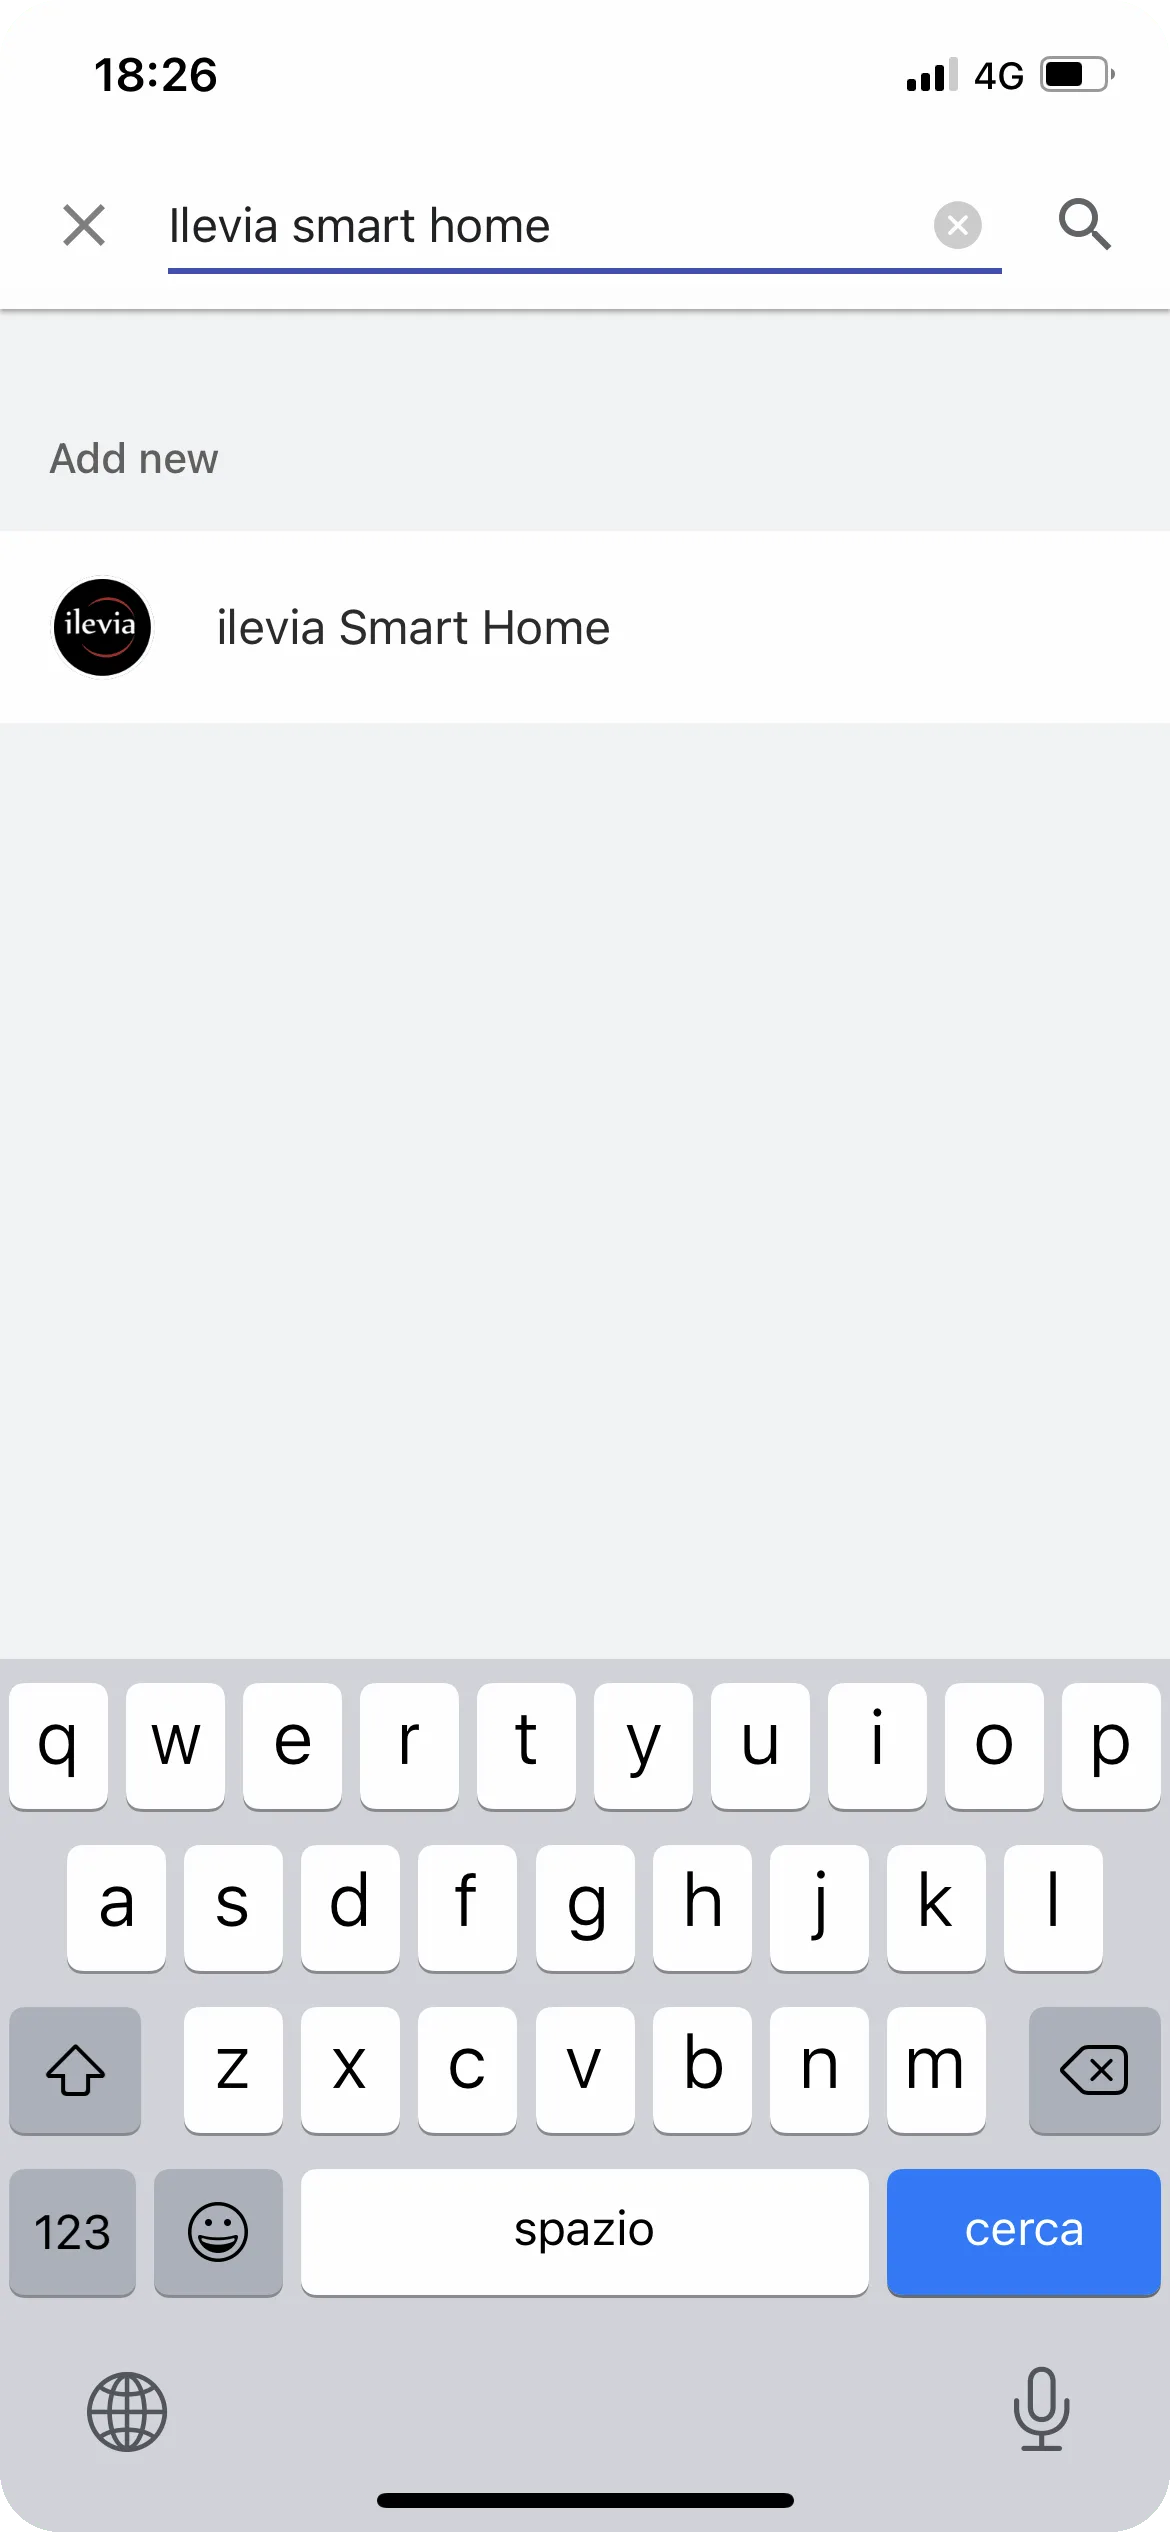
8. Here you will find all companies that support Google Home, search for ilevia Smart Home.
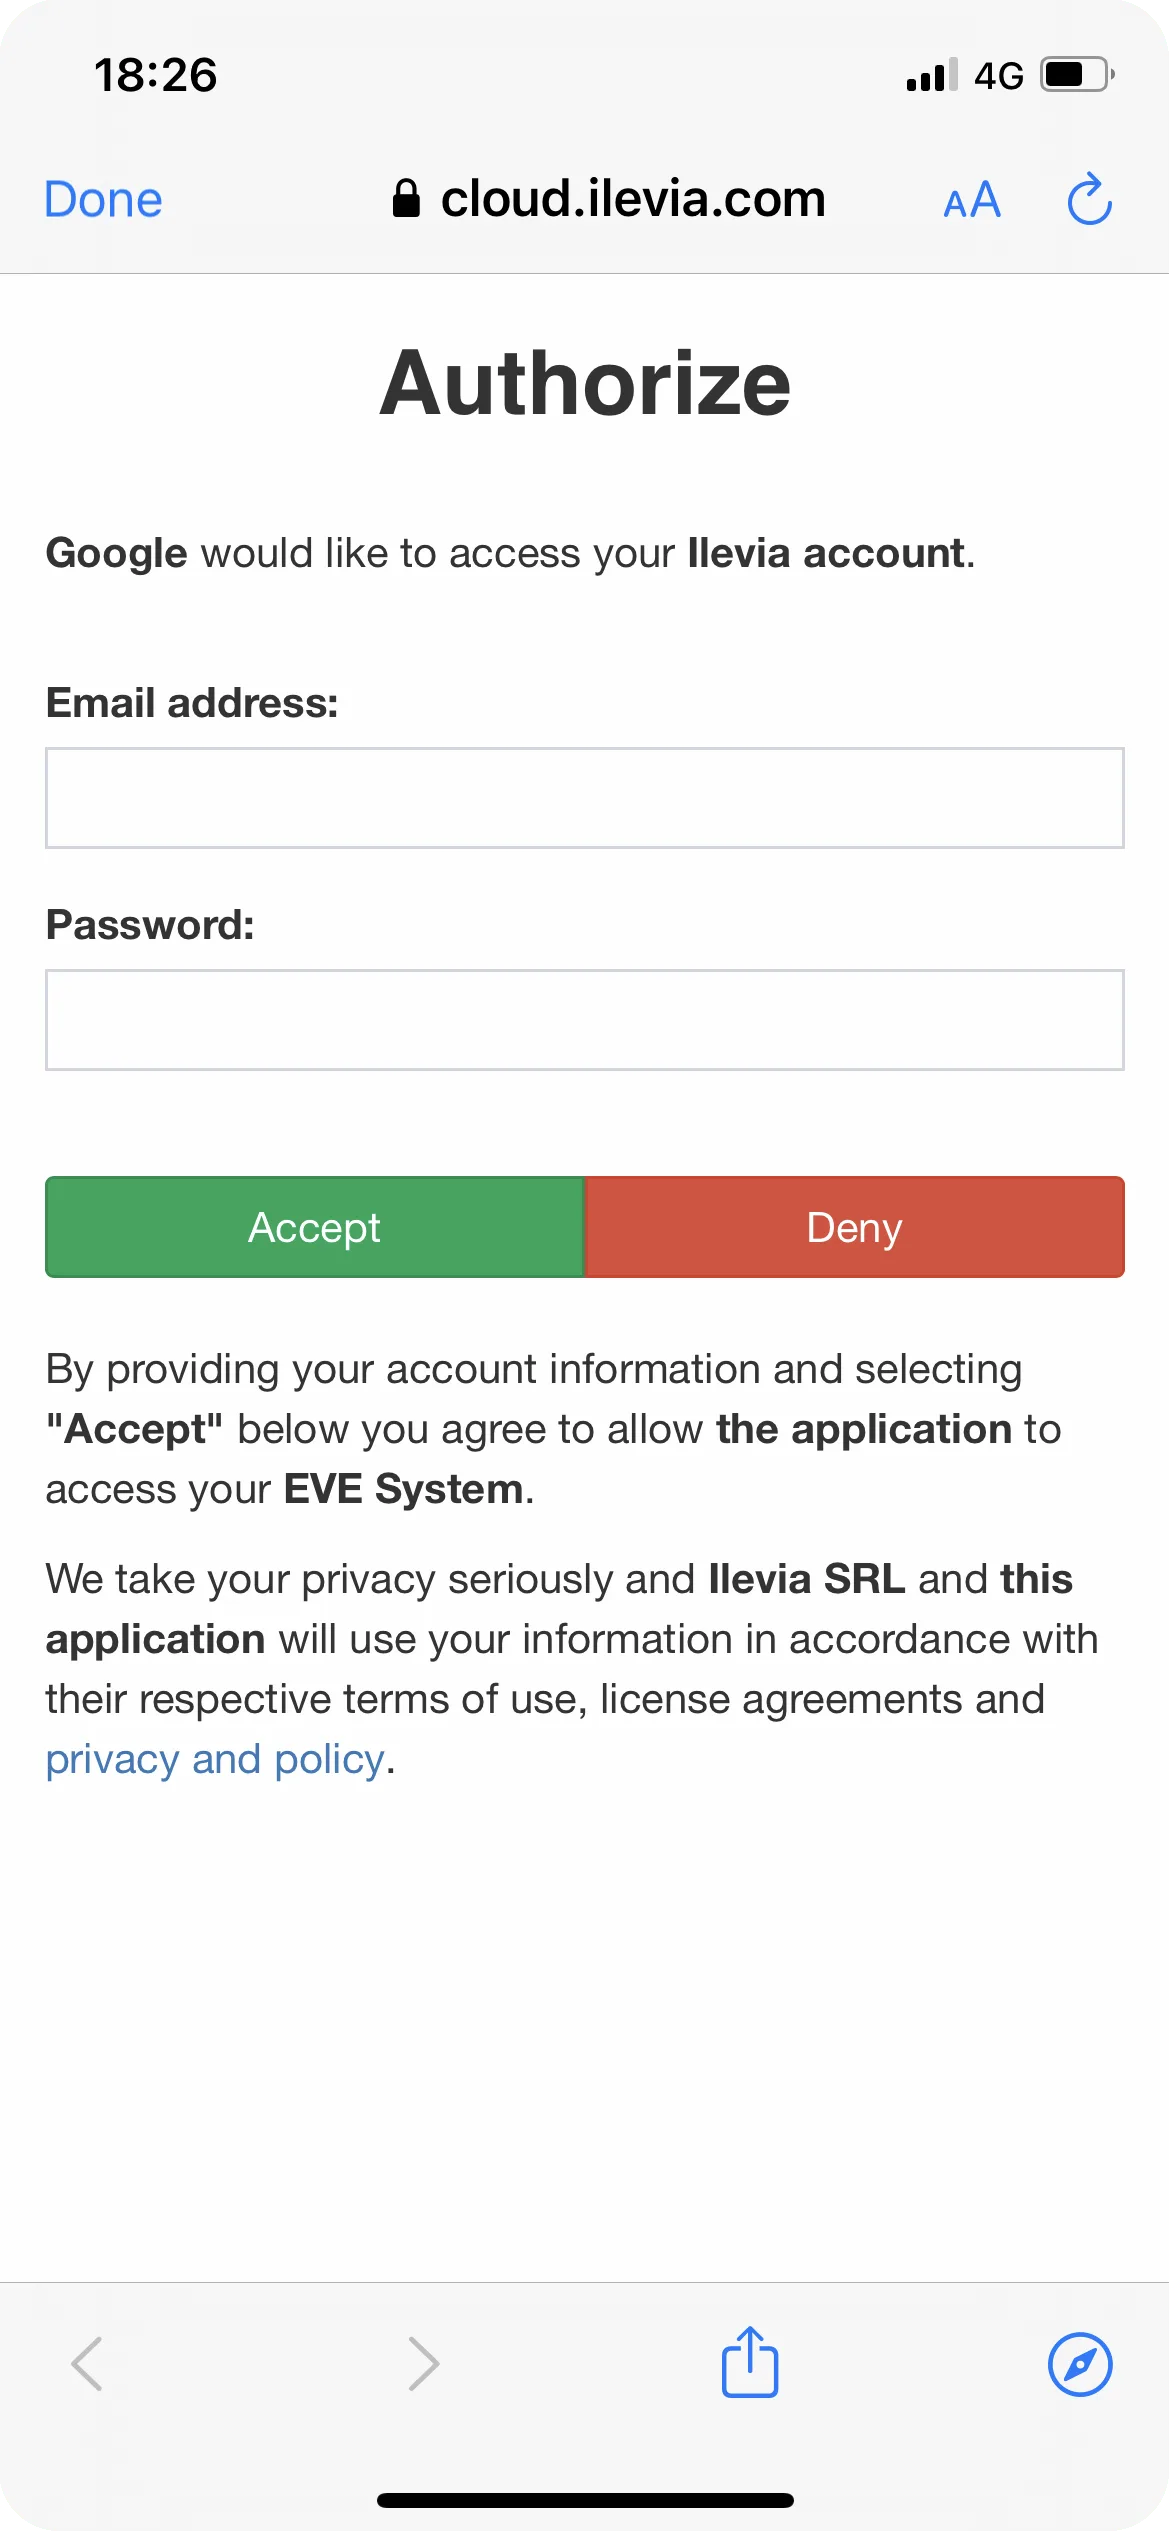
9. Now you need to sign in with the credentials created earlier (if you have not done so yet, go back to Step 4 and complete the registration).
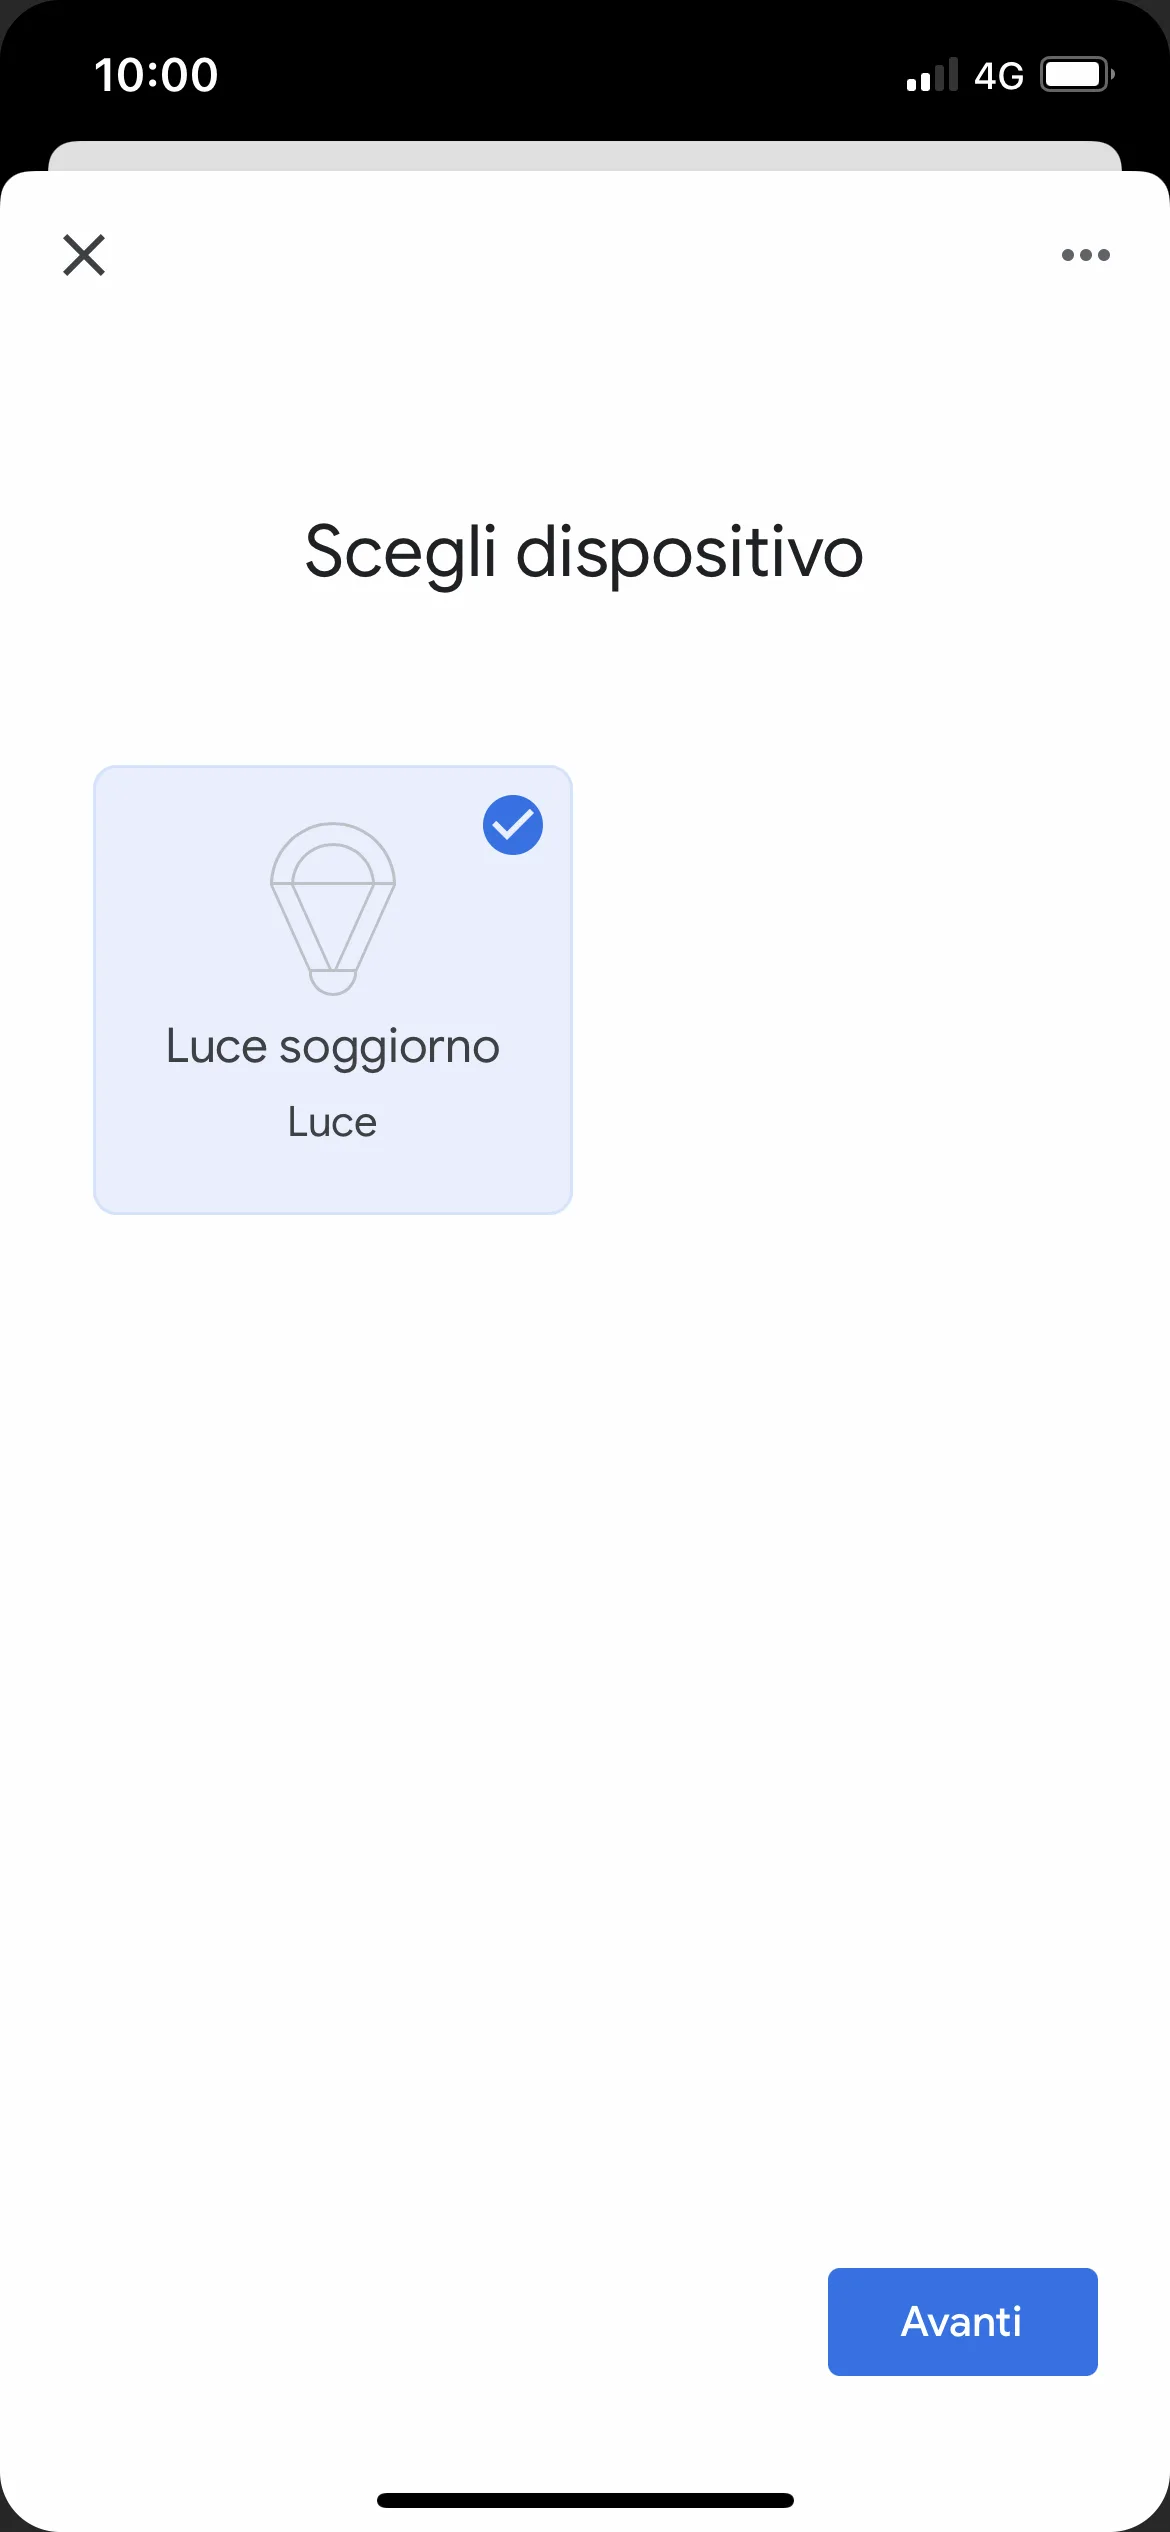
10. Here you can see the devices previously configured in Ilevia Manager, tap the device(s) to link with the Google Home device and tap NEXT.
11. Tap Home.
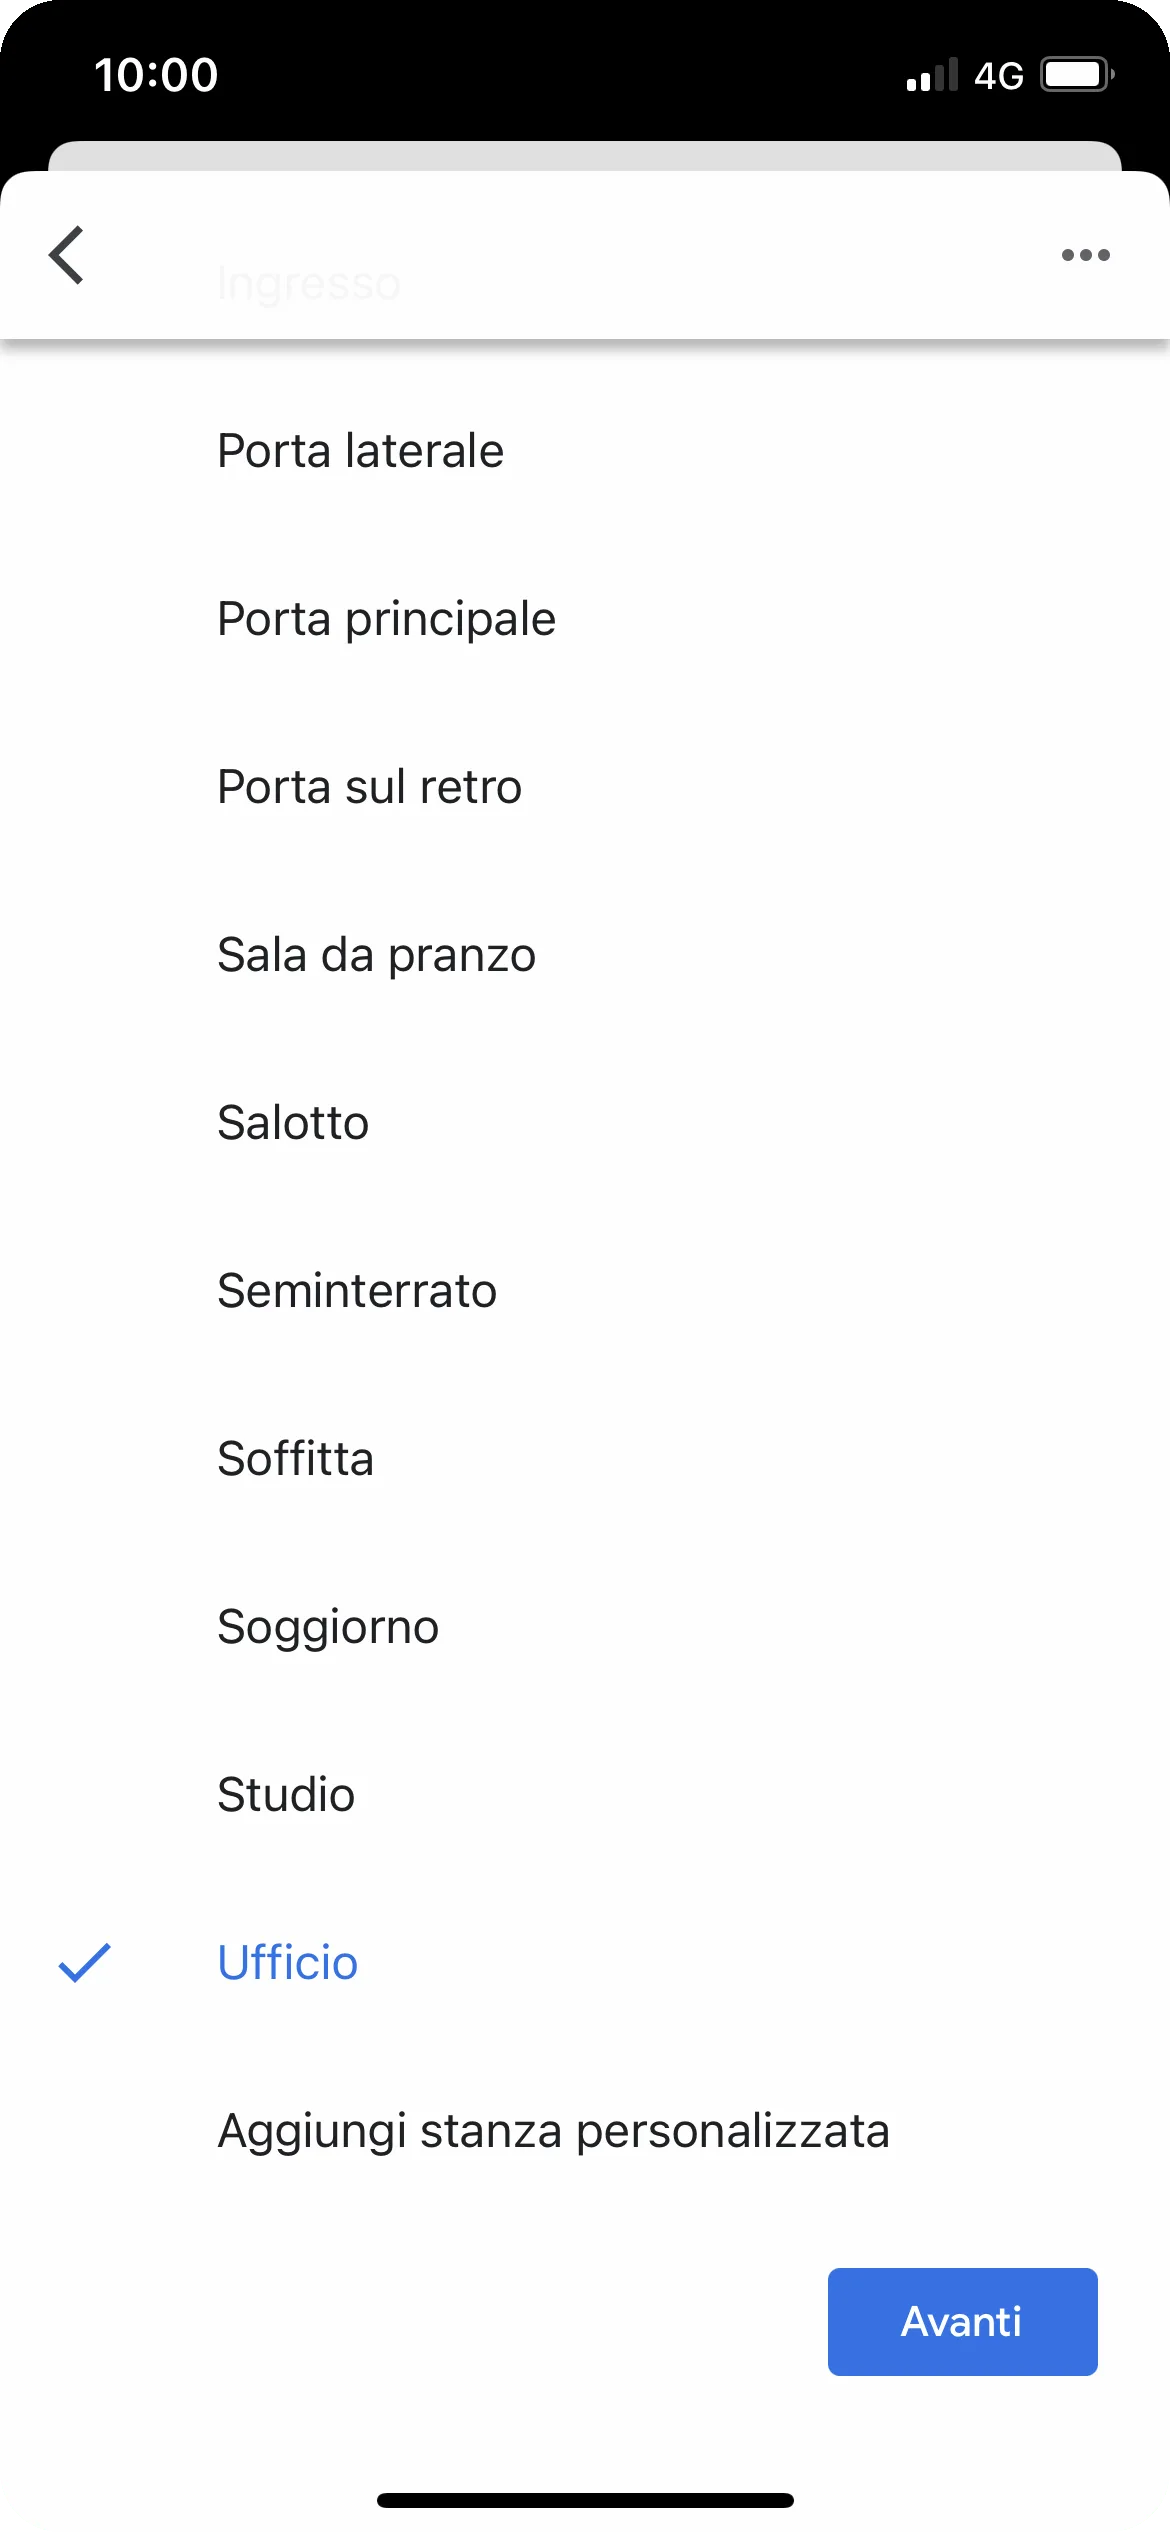
12. Here you can choose where to place your devices; select the room that best suits your needs.
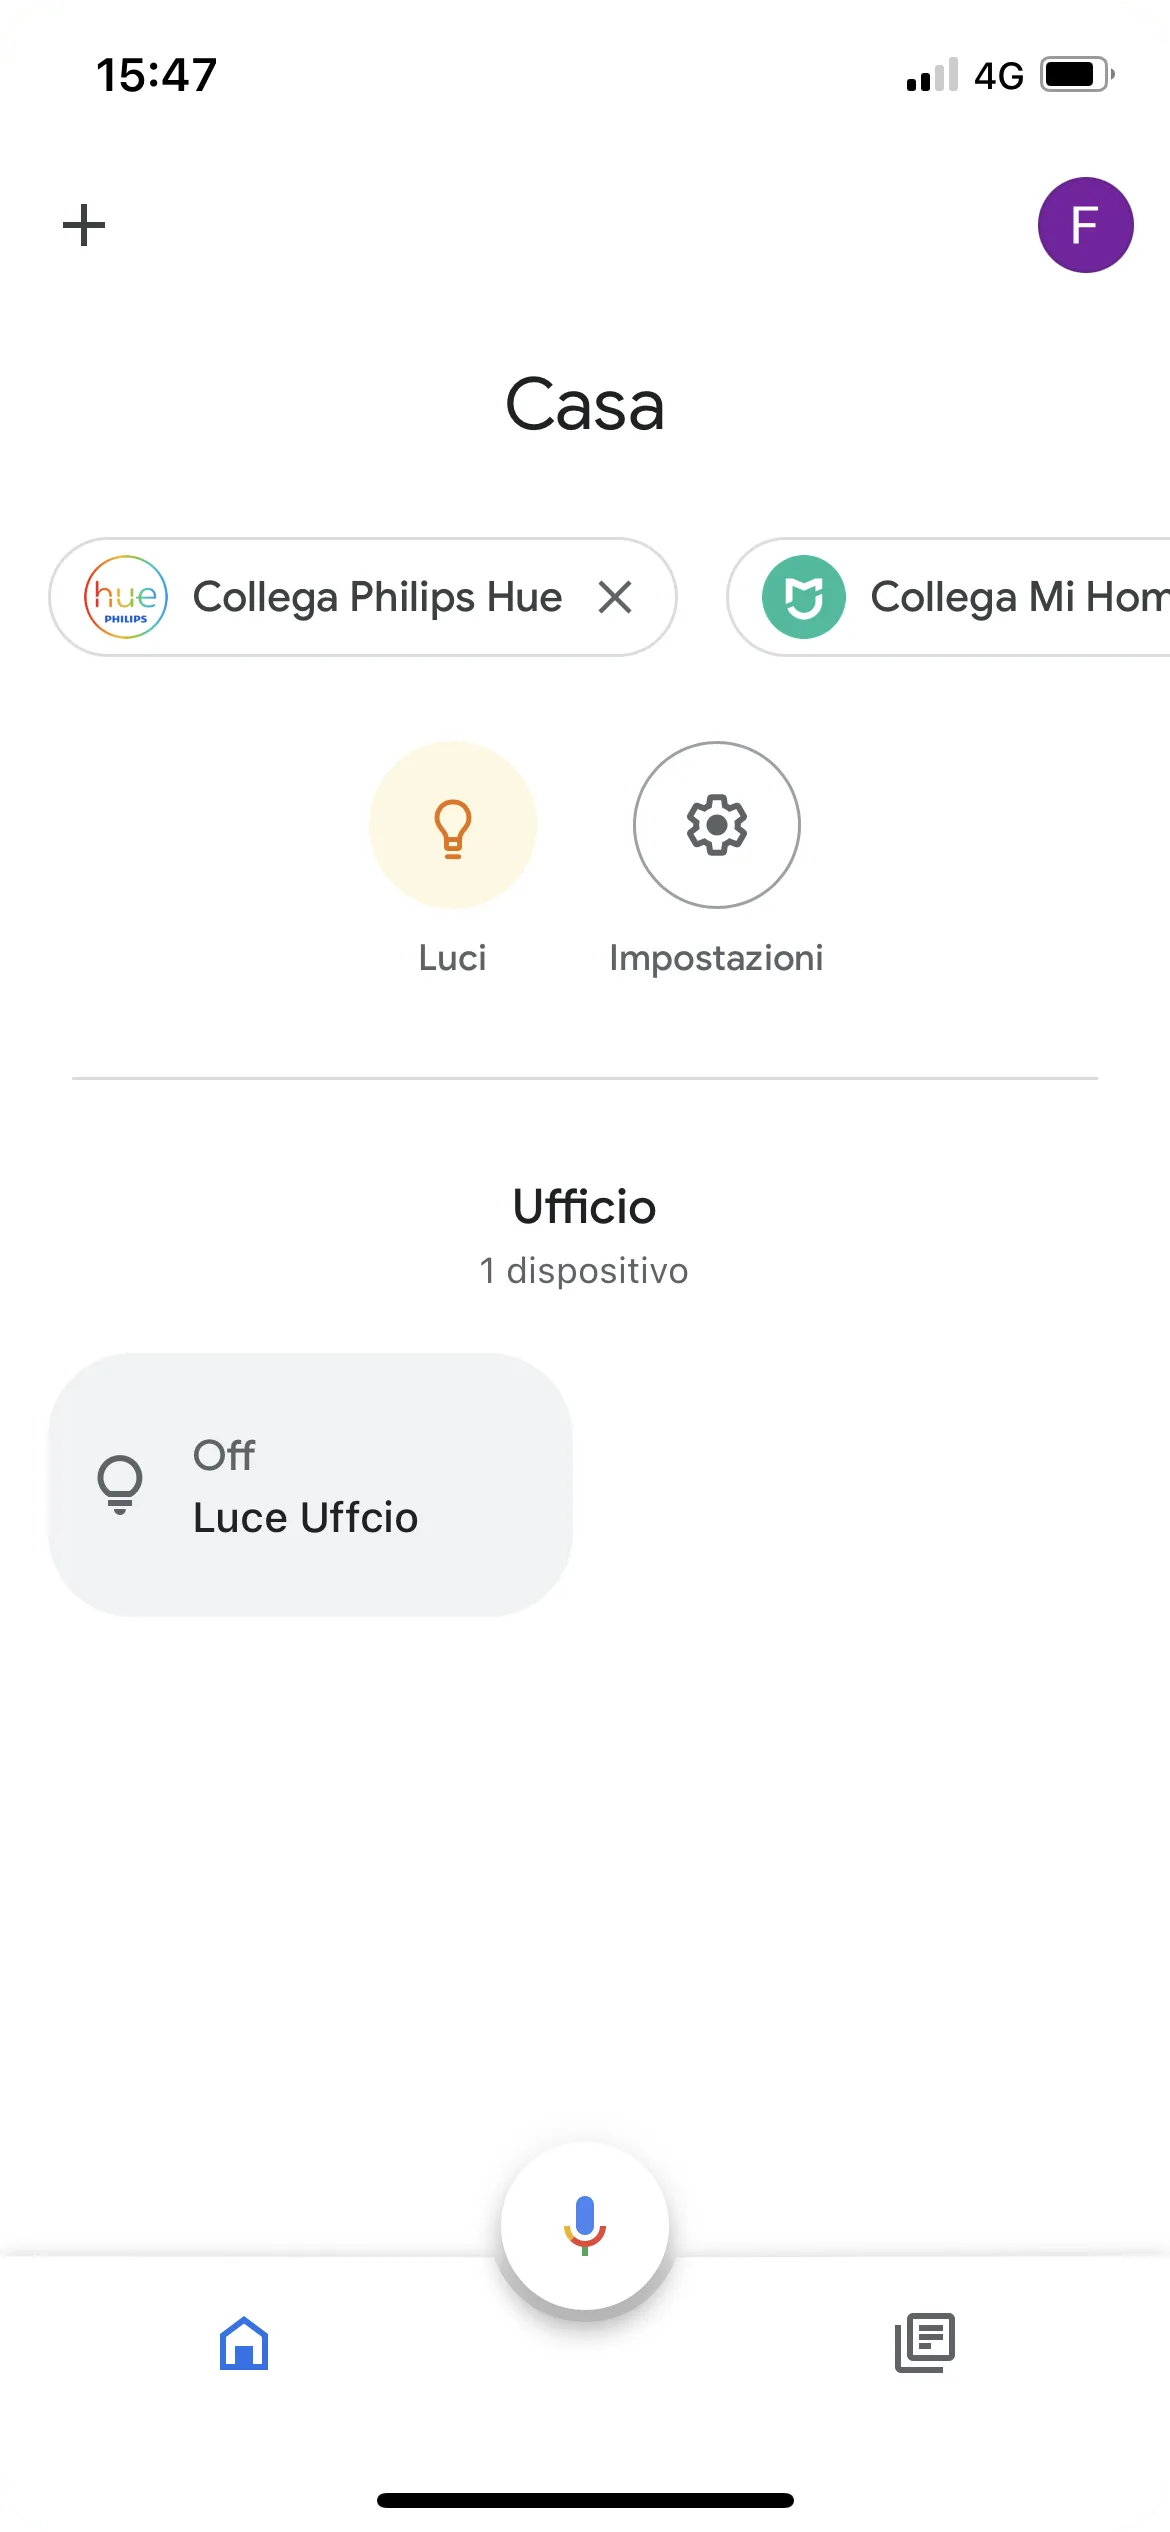
13. You can now see that the components created in Ilevia Manager are available in the Google Home app and ready to use.
Add or remove devices
If you want to add or remove devices such as lights, switches, etc., we recommend following this procedure:
1. Tap + Add.
2. Tap Set up device.
3. Tap Have something already set up?.
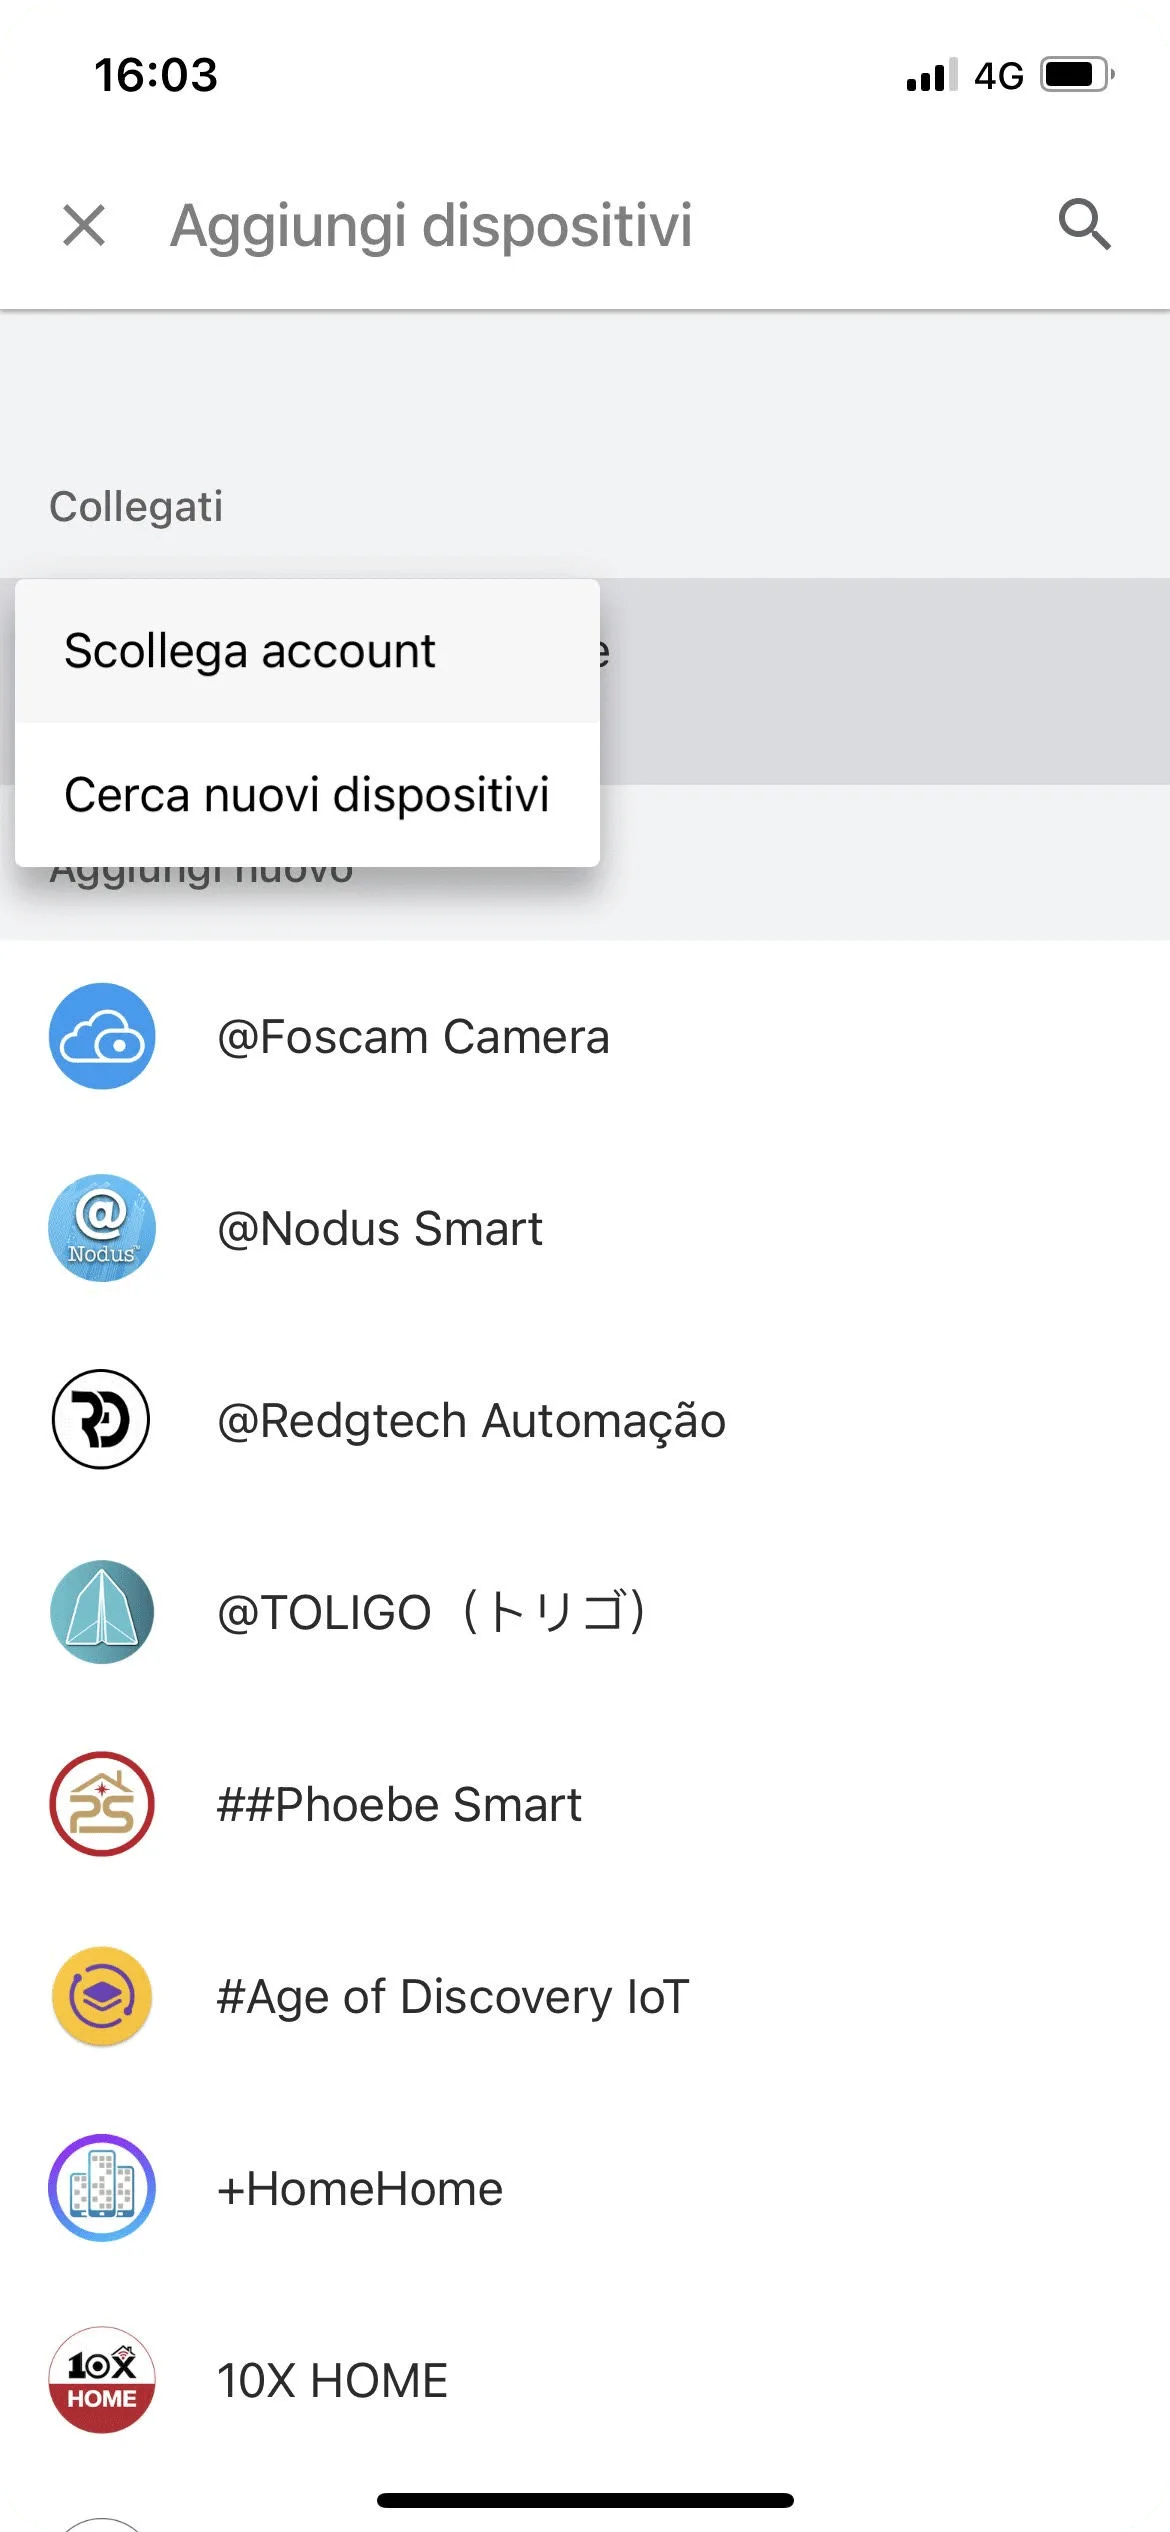
4. Tap ilevia Smart Home and tap Unlink account to disconnect your Cloud account.
5. Now search again for ilevia Smart Home and reconnect the account as explained in Step 6 (points 8 to 10). The devices added or removed will now be updated.
Google Home voice commands list
You can use your voice to enjoy Google Home functions such as Scenarios, Remote Scenarios, Light Activation and thermoregulation, Blinds and much more. To do so, simply follow these examples:
Lights:
To do this: | Say “Ok Google” or “Hey Google,” and then… |
Turn on light | “Turn on <light name>” |
Set light intensity | “Set the brightness of <light name> to xx%” |
Change light color | “Set <light name> to <desired color>” |
Turn on/Turn off all lights in a room | “Turn on/Turn off the lights in <room name>” |
Turn off/Turn on all lights | “Turn on/Turn off all lights” |
“Ok Google, turn on Living Room Light”
“Ok Google, set the brightness of Living Room Light to 20%”
“Ok Google, set Living Room Light to blue”
Switches:
To do this: | Say “Ok Google” or “Hey Google,” and then… |
Turn switch on/off | “Turn on/off <switch name>” |
“Ok Google, turn on/off the Popcorn machine”
Scenario and Remote Scenario:
Note: for this type of component, we recommend following the examples in these guides to better understand how to create a Scenario or a User Scenario. Using the Script component also enables endless customization options, for example for temperature control, blinds and much more.
To do this: | Say “Ok Google” or “Hey Google,” and then… |
Activate | “Activate <scenario name>” |
Activate | “Activate <remote scenario name>” |
“Ok Google, activate Irrigation”
Note: if you later add more components in Ilevia Manager to be controlled via Google Home, you must say to the Google Home device or to Google Assistant “Ok Google, update devices”, so that they are added correctly in your app; otherwise they will not be visible.