
X1 server firmware update
Guide on how to set the server firmware for Ilevia X1 home automation control, and how to check that it has been updated correctly.
This guide explains how to update the firmware of the Ilevia X1 server from the web configuration panel, by checking for updates online or manually with an update file.
Procedure
Perform the following steps:
Step 1: connect the unit to the Ethernet connector;
Step 2: power the hardware unit;
Step 3: open the browser in a new tab;
Step 4: type http://www.ilevia.com/evelocalip.php in the address bar;
The browser will display the list of IP addresses of all servers connected to the local network. If there is only one Ilevia server on the network, you will be automatically redirected to that server's web configuration interface. In the login panel you will find the most important information about the server: firmware version, license status, public IP address, and MAC address.
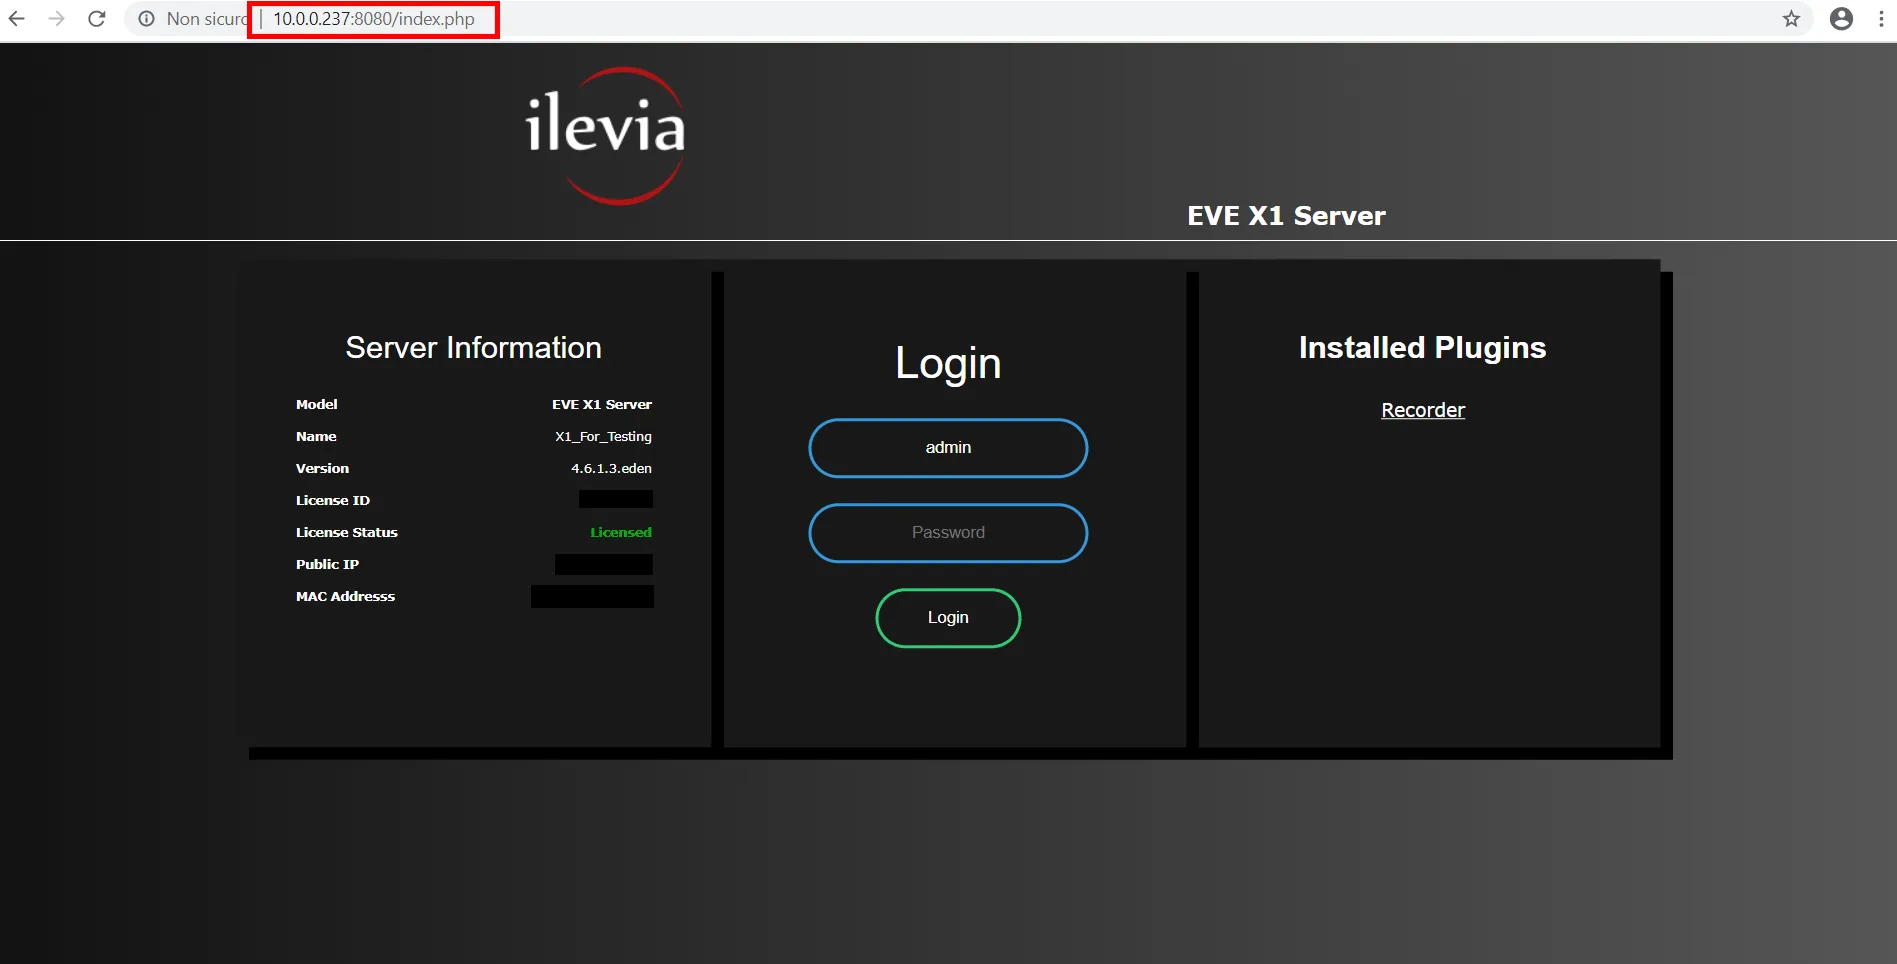
Step 5: enter the credentials in the appropriate text fields (default credentials: username admin / password “password”);
After logging in, the navigation menus will be displayed.
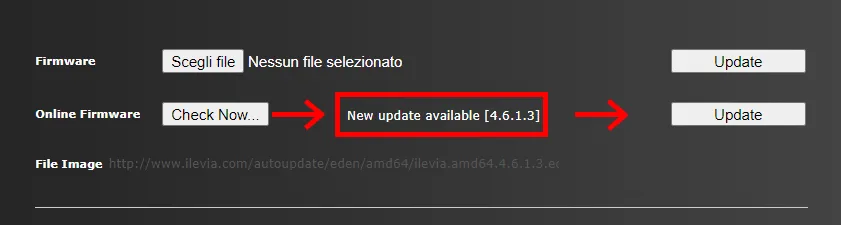
Step 6: open the Utility menu and click Check now to search for firmware updates online;
Step 7: if a new firmware version is available, click Update;
Step 8: wait a couple of minutes for the system to restart, then log in again using the credentials.
If the system is already updated to the latest firmware version, a message is displayed.
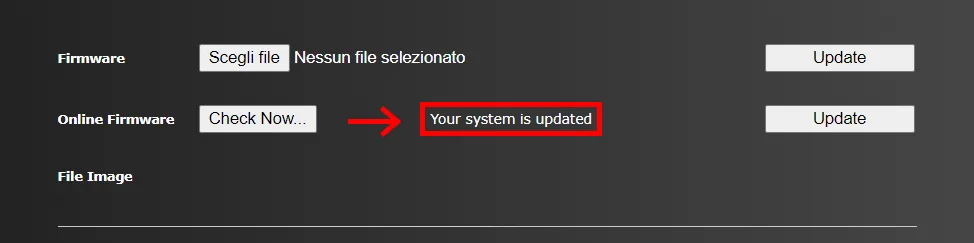
The system is now updated to the latest version.
Manual firmware update
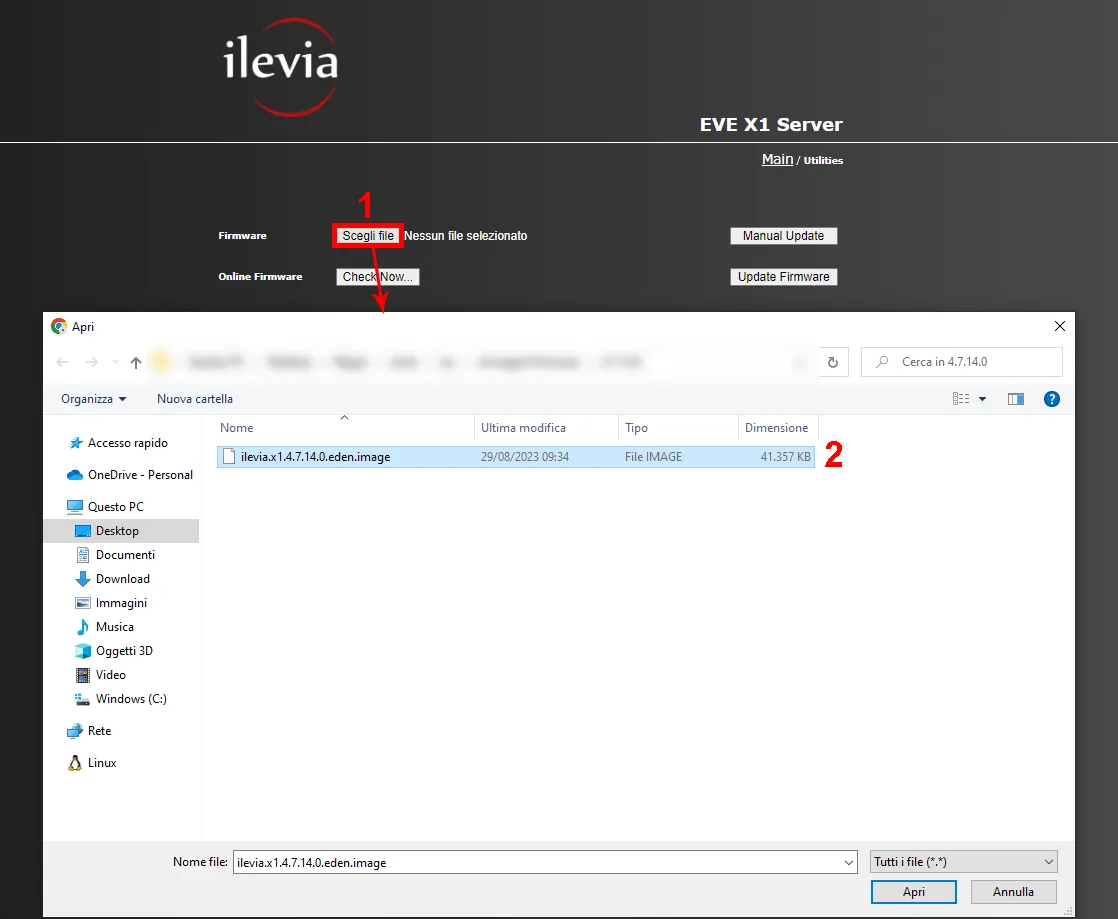
Step 1:
1. From the Utility menu click the “Choose file” button, 2. then select the update file from your computer.
Step 2:
Finally click the “Manual update” button and confirm the action if prompted by the browser.
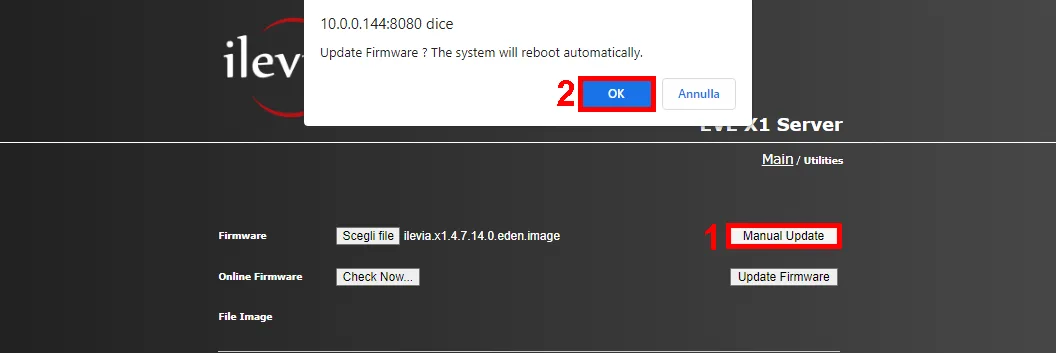
The Ilevia server starts uploading the update file and restarts to complete the operation.