
Recorder Component
How to configure the Recorder component, view the recorded data from the Ilevia server web page, and export or restore it via SFTP.
Introduction
This component records all types of data coming from system components. The recorded data can later be used by other components, such as the Chart component, to create graphs.
It is also possible to define a recording criterion by setting a time interval.
Use cases
The user wants to record the energy produced by the photovoltaic system.
The user wants to record the temperature in order to compare it with the temperature recorded the previous year.
The user wants to record the CO2 level in the home to monitor air quality during the day.
Component properties
GUI
This component was created using the Graphic UI gateway.
You can refer to the chapter “Gateway / Protocols” for further information.
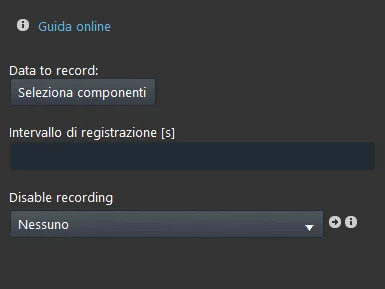
Data to record: the list of components whose data is recorded. You can choose to record components with binary states (e.g. Switch) or with a numeric value (e.g. Info).
To select them, drag the components from the “Components” section into the list area.
Recording interval [s]: sets recording according to the specified interval, in seconds.
If the field is left empty or set to “0”, the Recorder records every second.
Required settings for components inside the Recorder
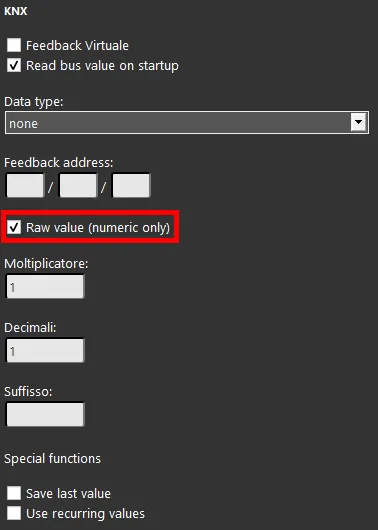
If you need to record data from Info components configured with a KNX protocol, you must select “Raw value (numeric only)”, which enables recording in RAW format (without units of measure).
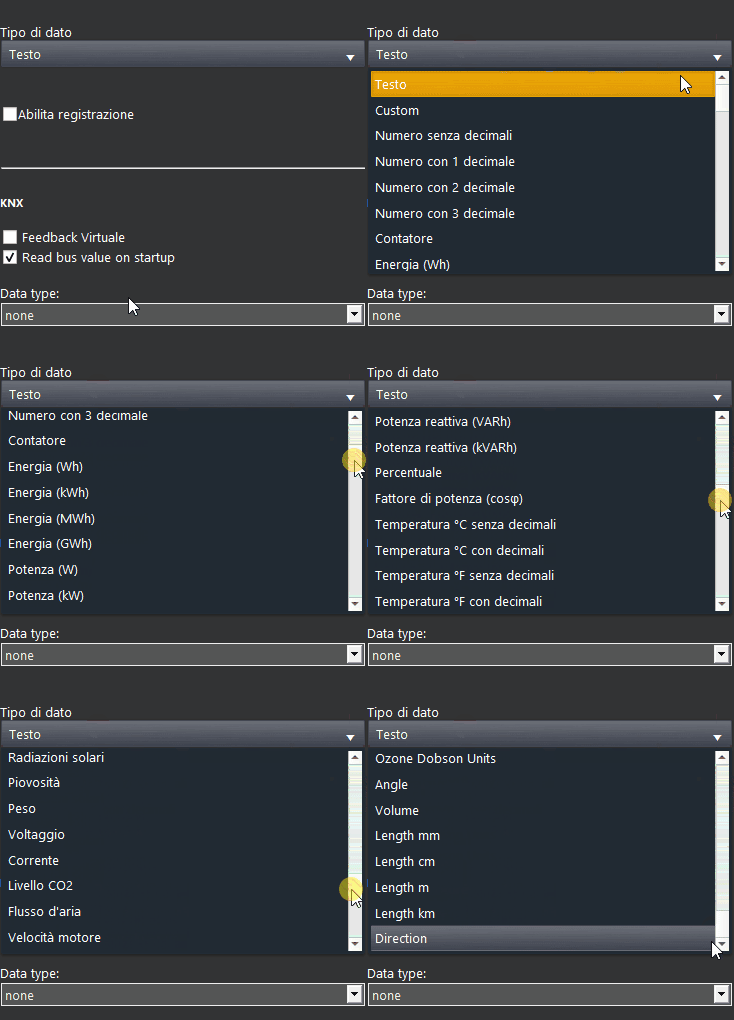
Remember to set the unit of measure of the info component from the options list under “Data type” within the Recorder component properties. This allows the system to distinguish between data coming from sensors or meters, making it possible to create charts of different types.
Power recording
Power is data that changes very frequently. To avoid recording an excessive amount of data, it is useful to specify a recording interval (for example, 30 to 60 seconds).
Large recordings
In case of very frequent recordings, we recommend using the External Recorder component. This component allows you to record one or more data points and send them to an external storage, such as a NAS (Qnap, Synology) or the cloud.
Reminder before continuing:
Download and install the Ilevia Logic plugin to enable plugins (link);
After each project upload, the server needs 2 minutes to become fully operational.
How to view recorded data from the web page
How do you access the Recorder web page?
To view data on the Recorder web page, first configure the components (Step 1 and Step 2), then access the page (Step 3 and Step 4).
Step 1
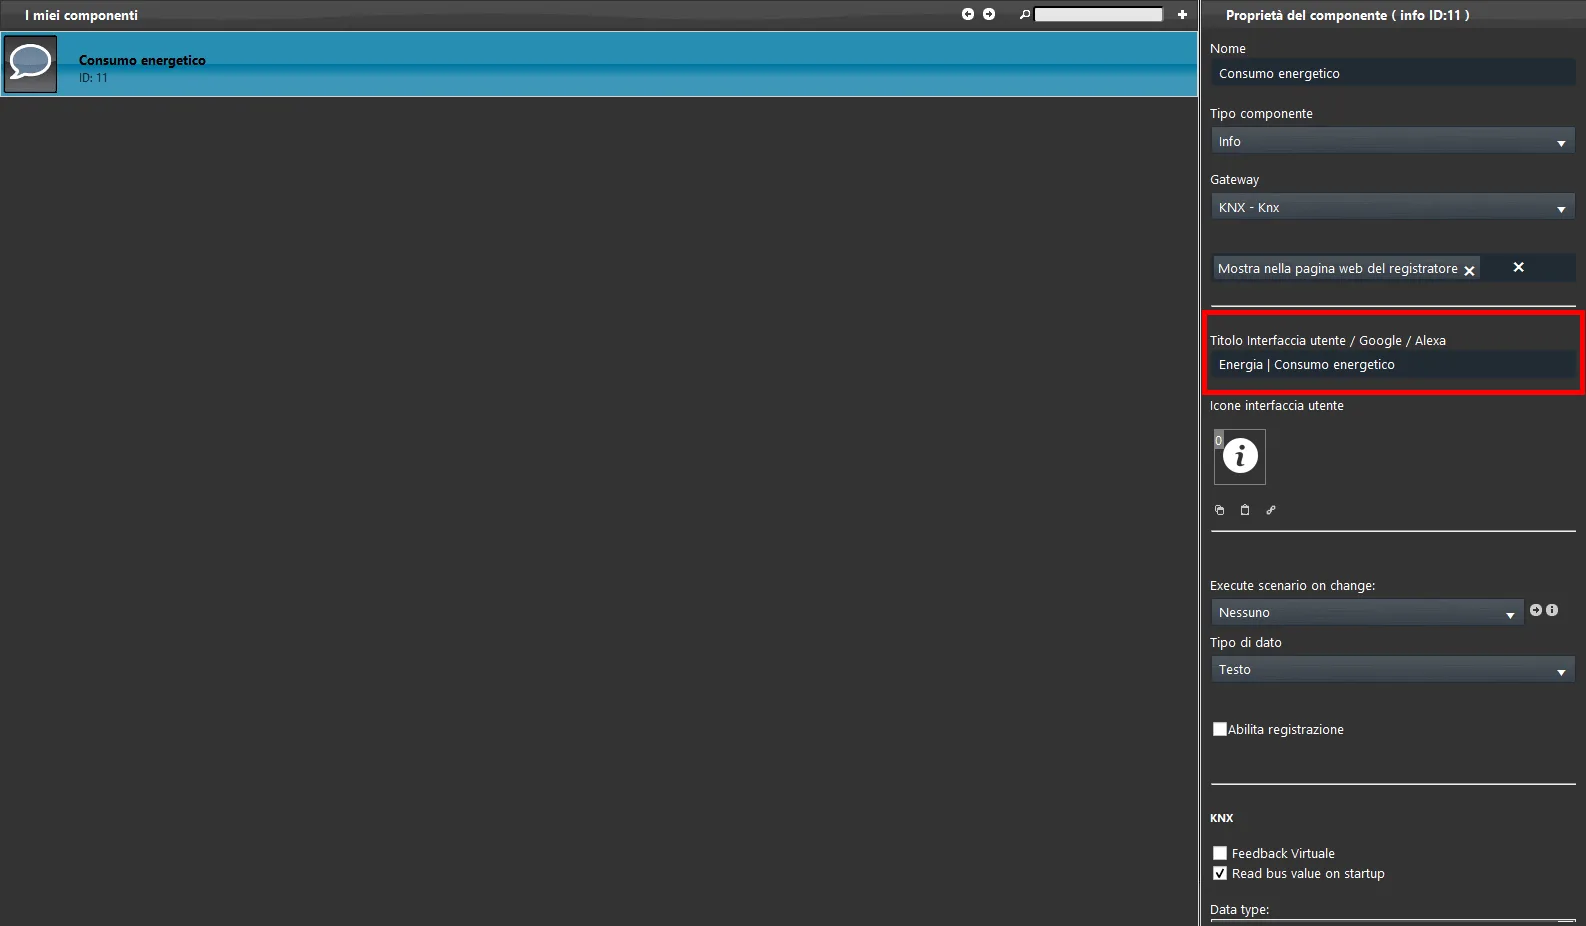
Component configuration requires applying the label “Show on recorder page” in the component properties so that its graph can be viewed on the recorder web page.
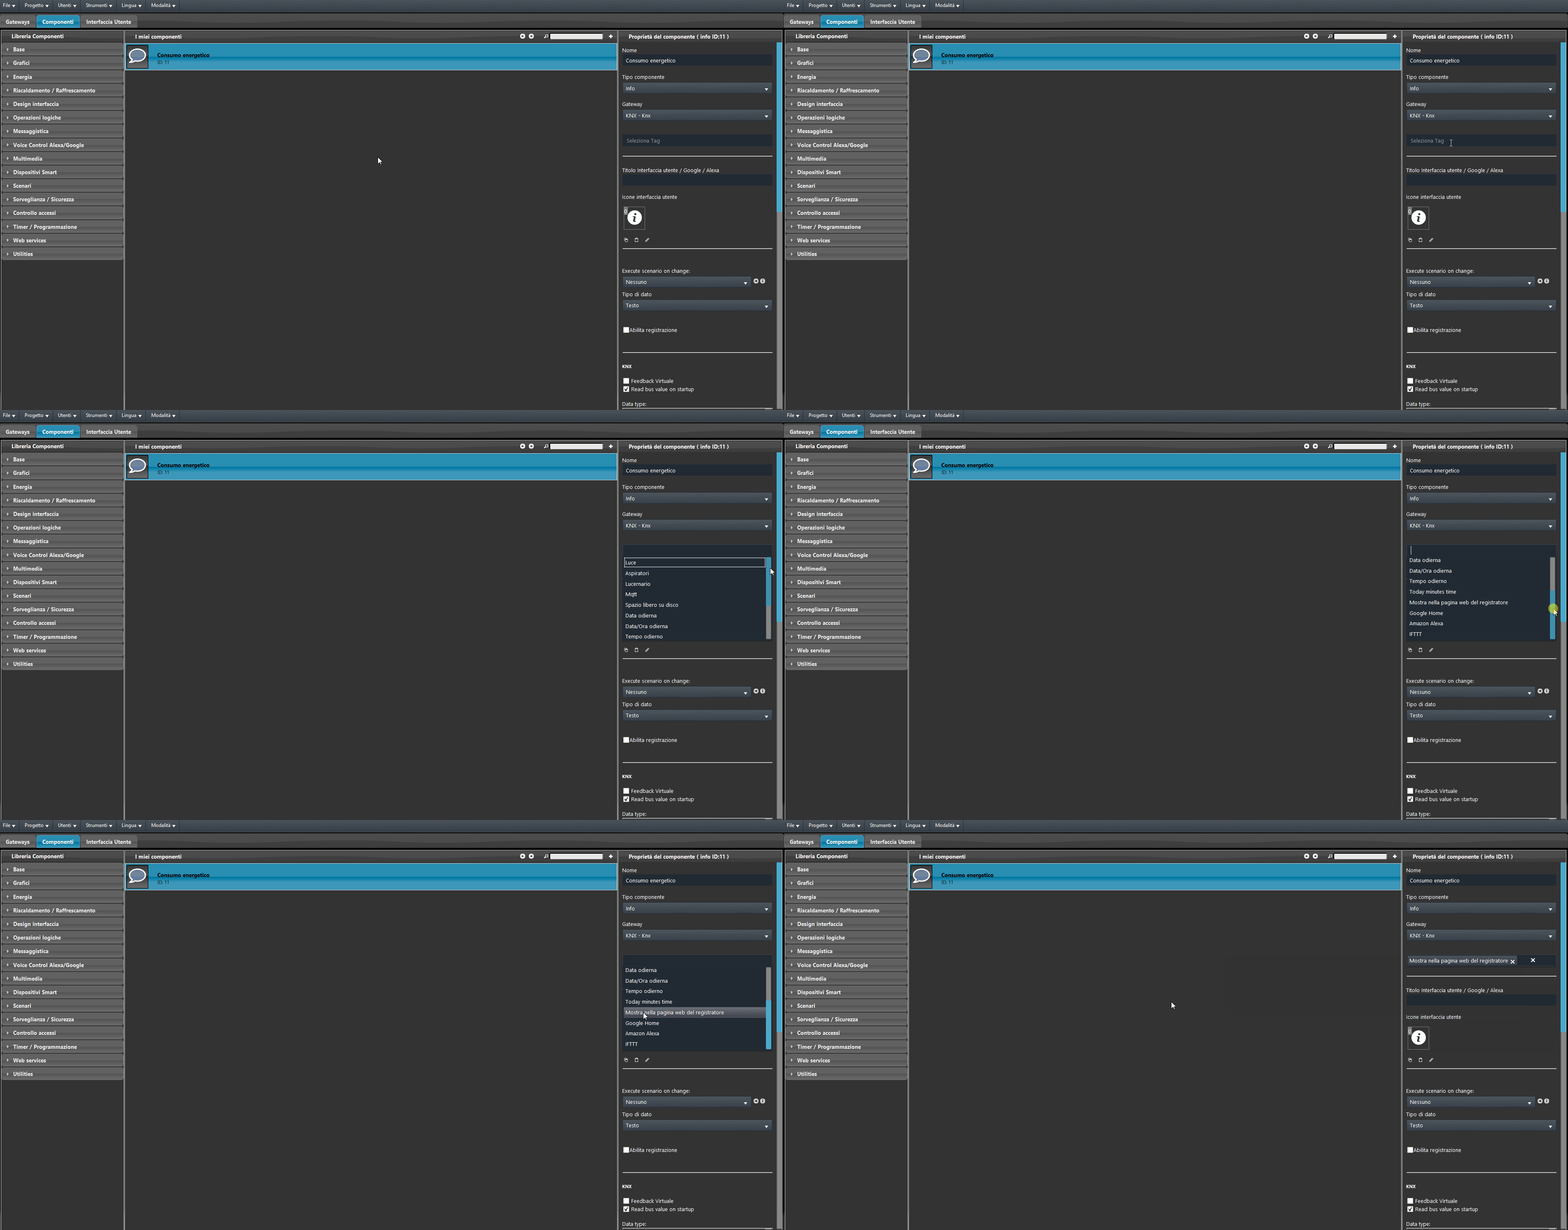
Step 2
Enter a title in the properties of the selected component using the following syntax:
Group Name | Component Name
Step 3
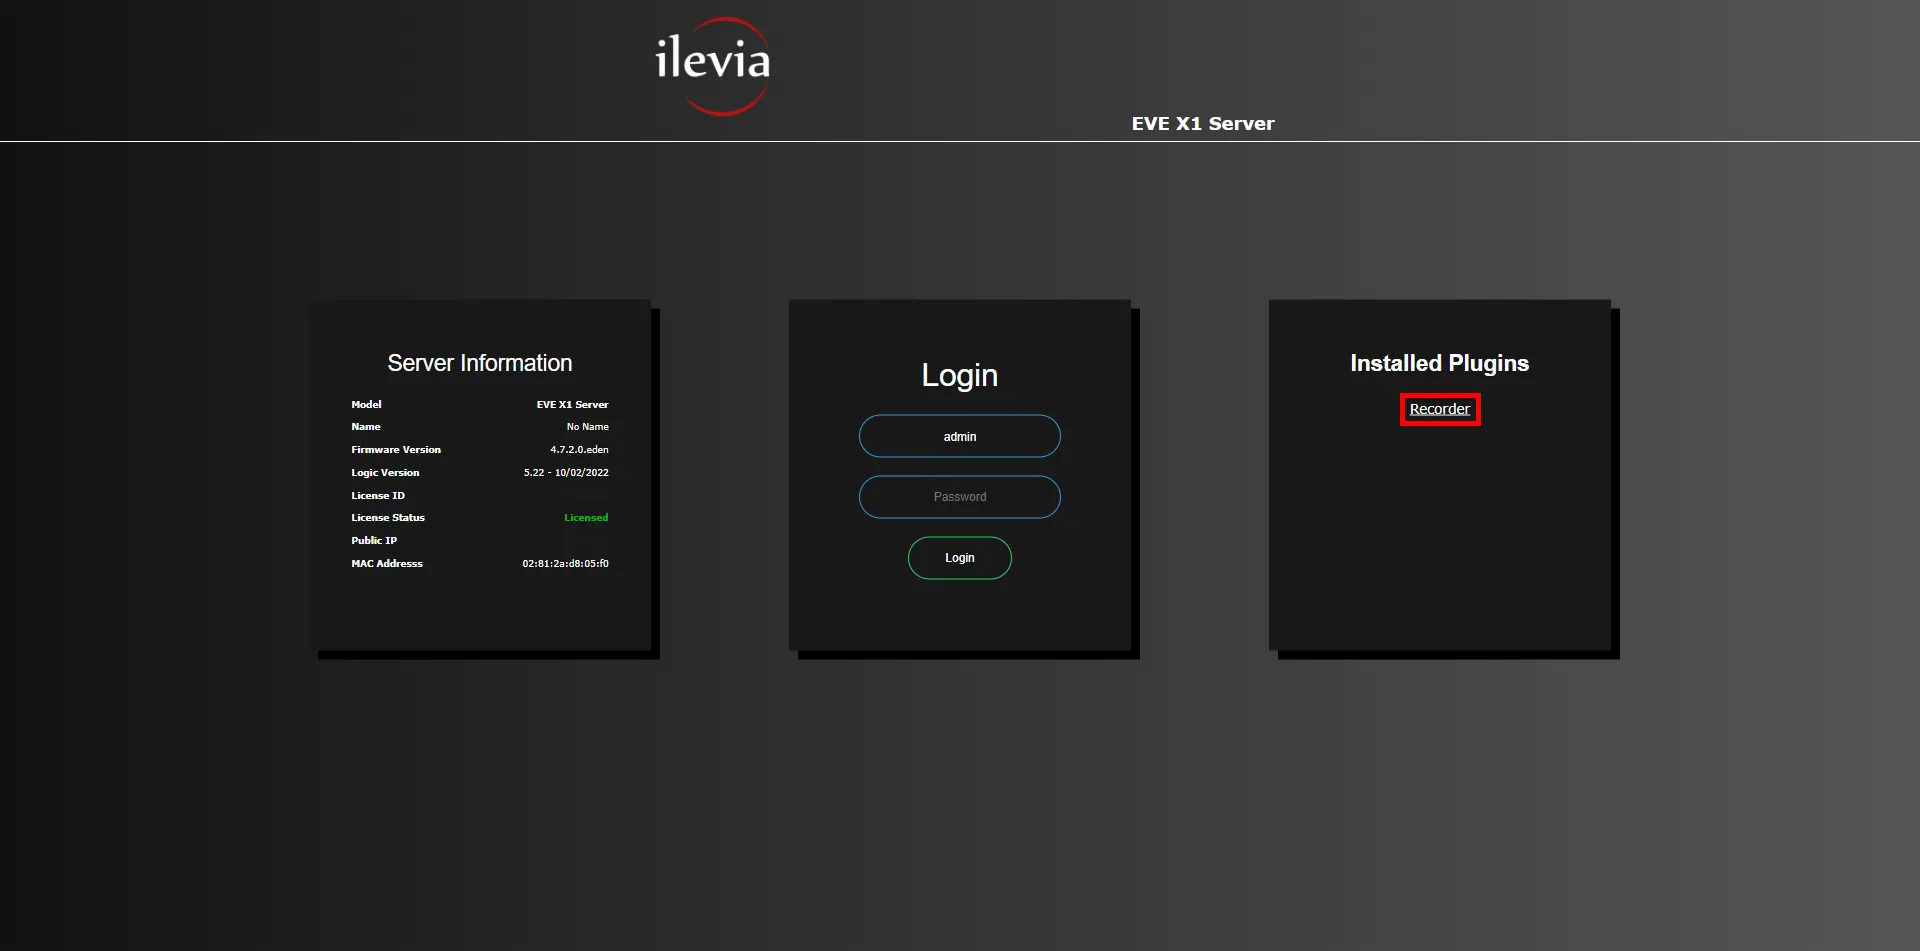
Open the web browser, enter the IP address of your Ilevia server, and click Recorder in the rightmost panel, called Installed Plugins.
Step 4
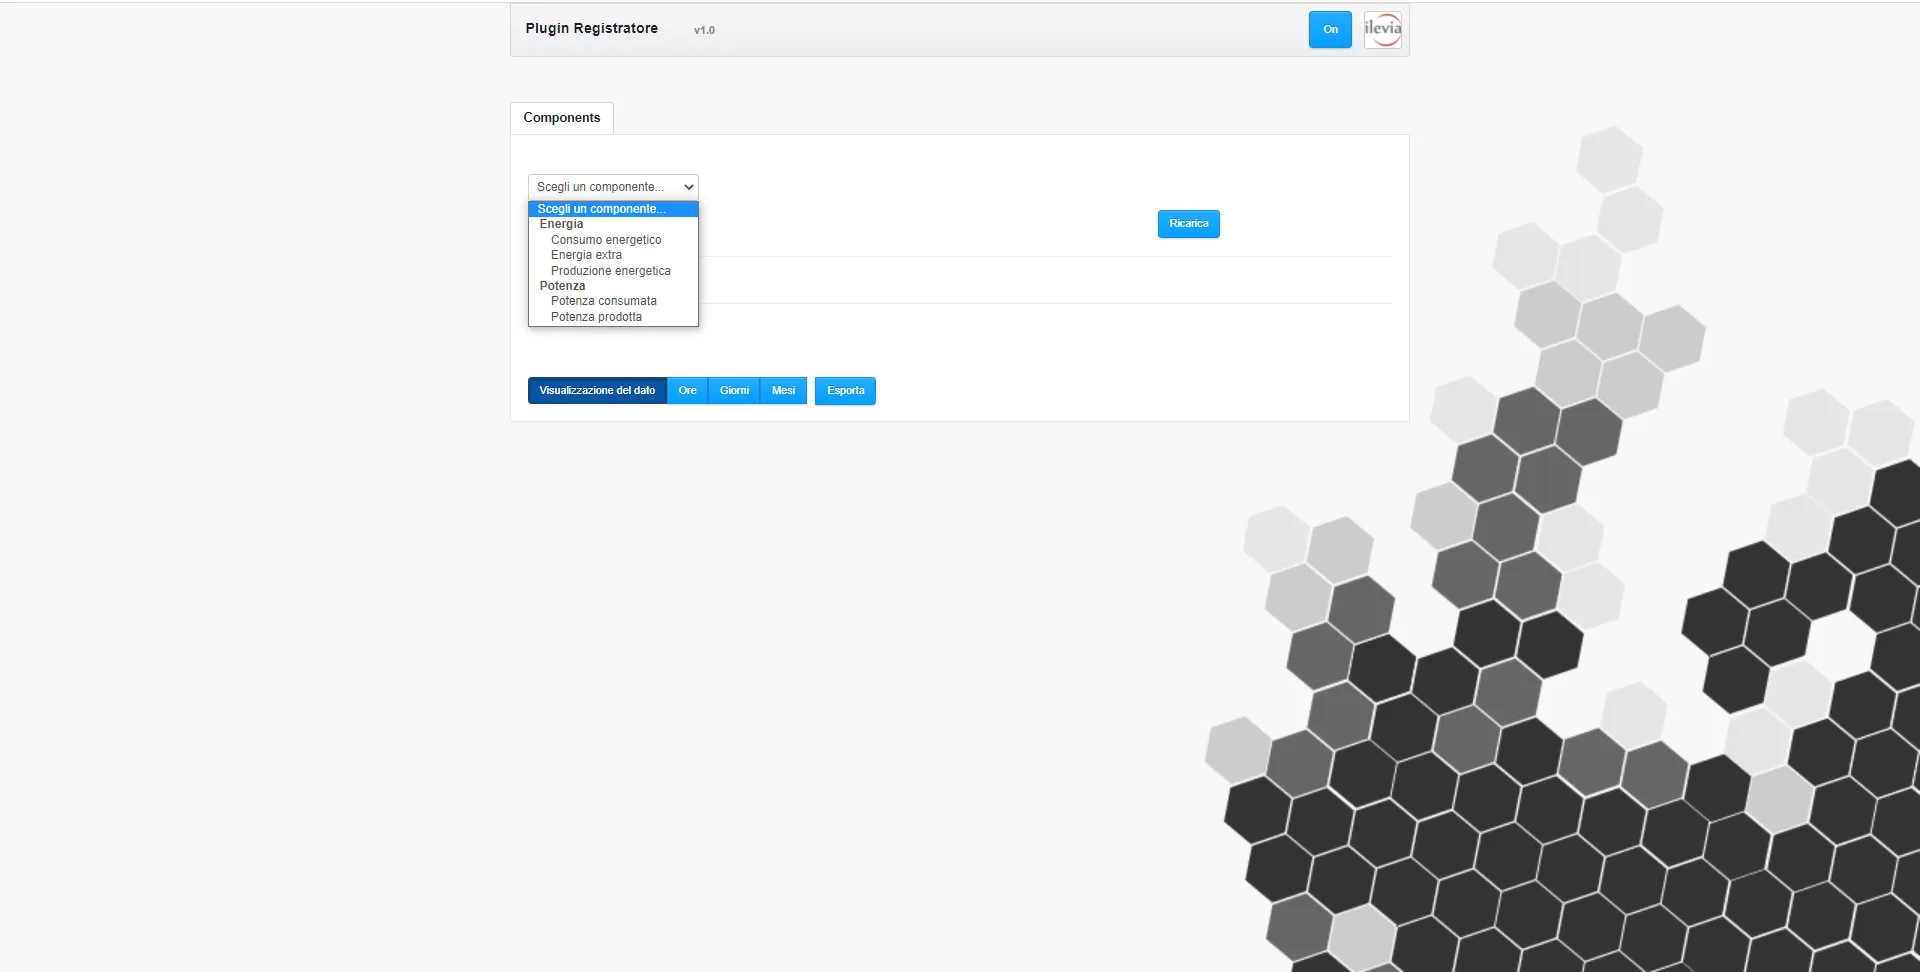
Now, from the Components drop-down menu, you can select the components whose graph you want to view.
Graph display
For meter-type components, the graph shows the data recorded up to that point. The display can be changed across different time modes: hours, days and months.
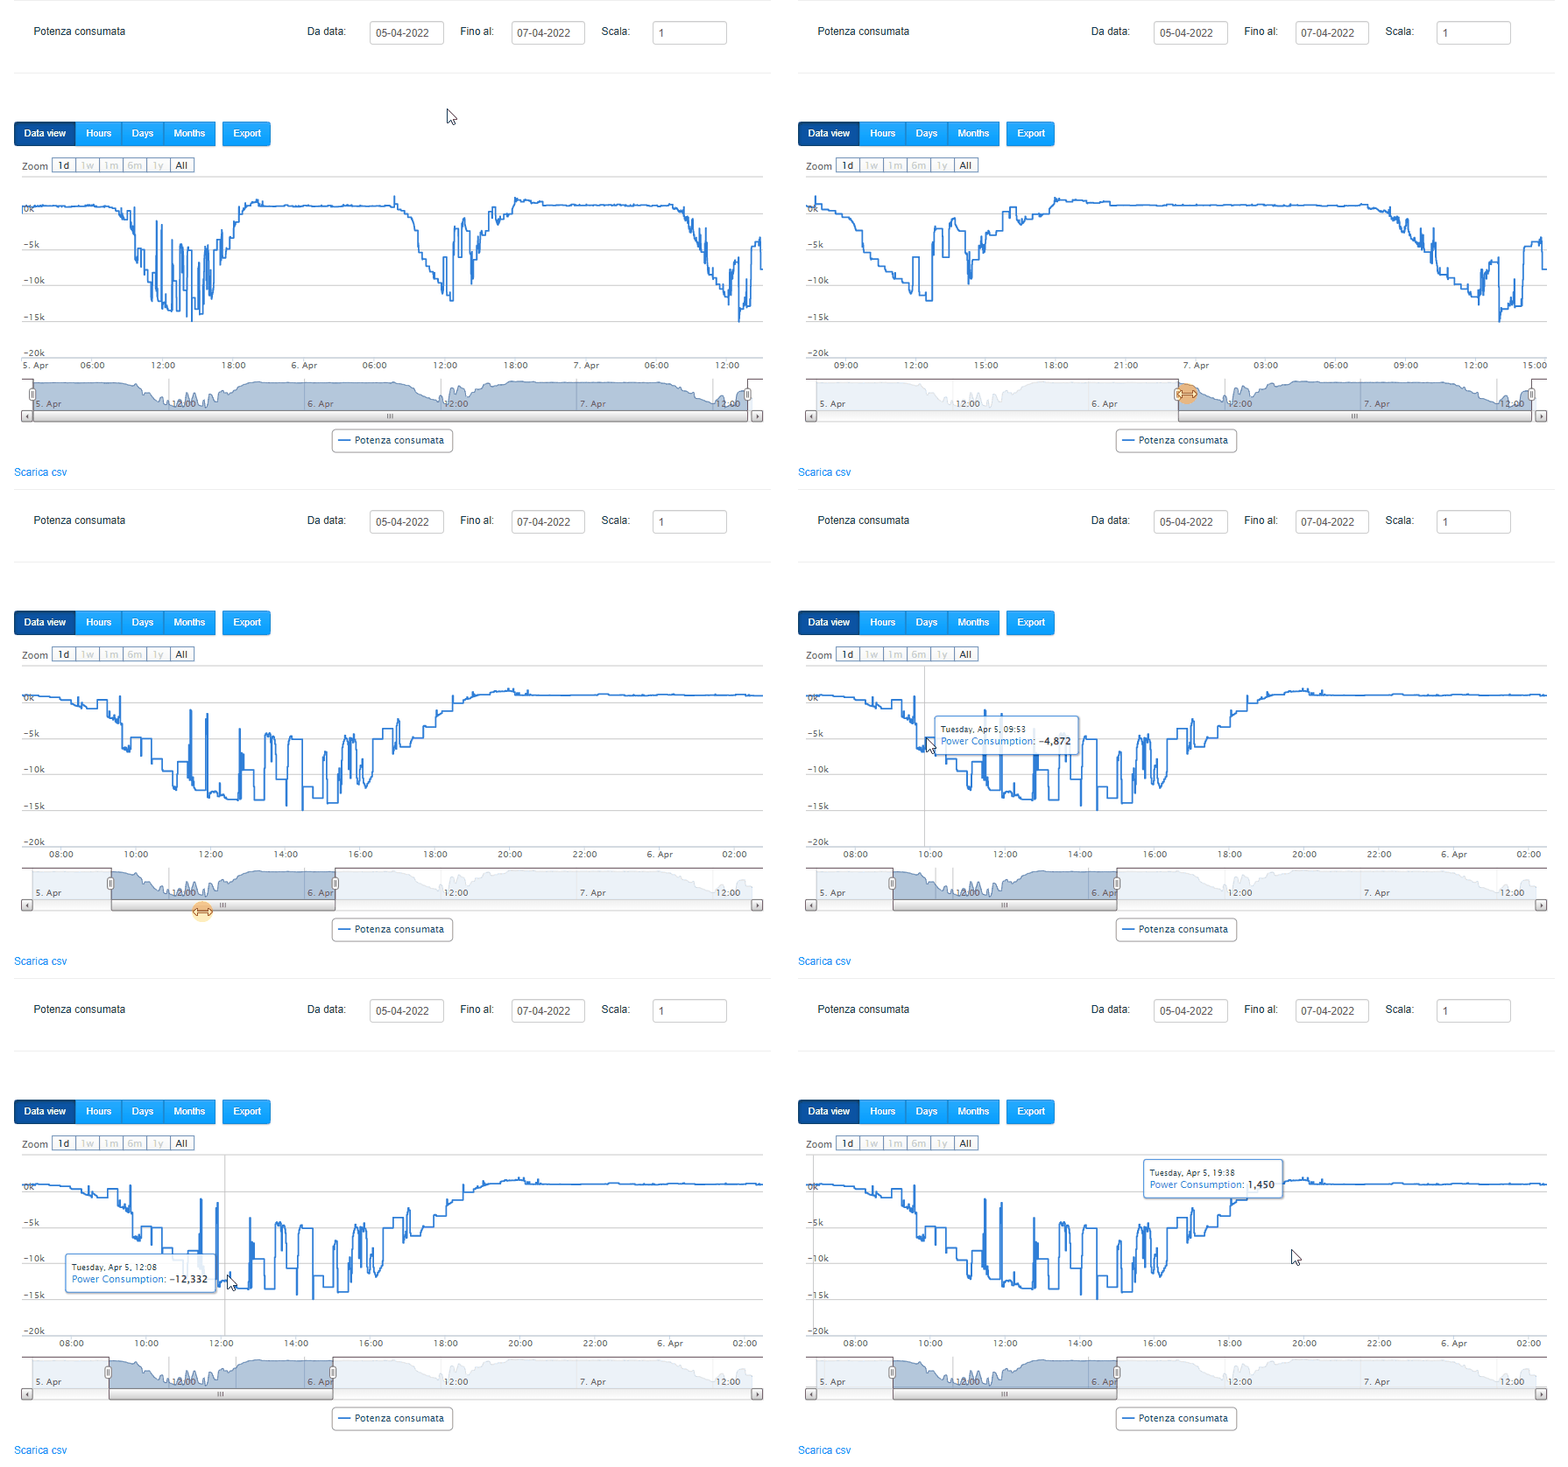
Consumed Power graph
The graph data can be downloaded in .csv format using the Download .csv button.
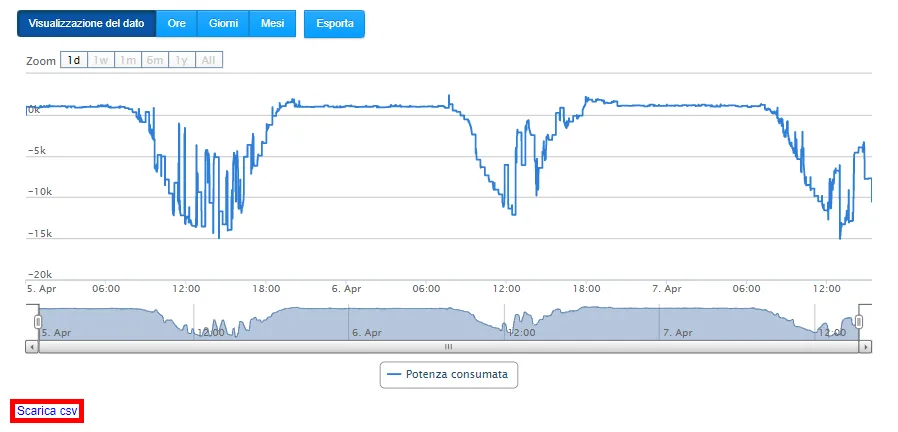
By clicking the Export button, you can download the recorded data in .xlsx format.

Make sure the browser does not block pop-ups: if it does, just enable them. The image below uses Google Chrome as an example:
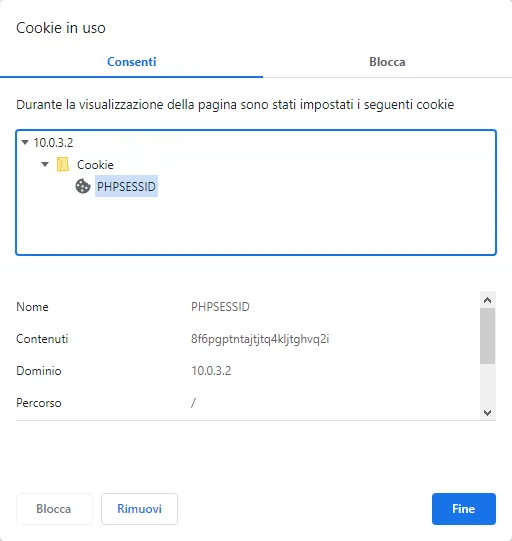
Exporting the database with the data
Export 1: via SFTP
The recorded data in the server database can be exported in two ways. We recommend using software such as Filezilla, which allows access to the server folders via SFTP protocol.
In the Host field, enter the server’s IP address preceded by “sftp://”; in Username and Password, enter eveweb; finally, click Quickconnect.

Once connected to the Ilevia server, navigate to the folder containing the recorded data.
The file path is as follows:
/http/logic/plugins/Recorder/config/plugindb.sqlite.
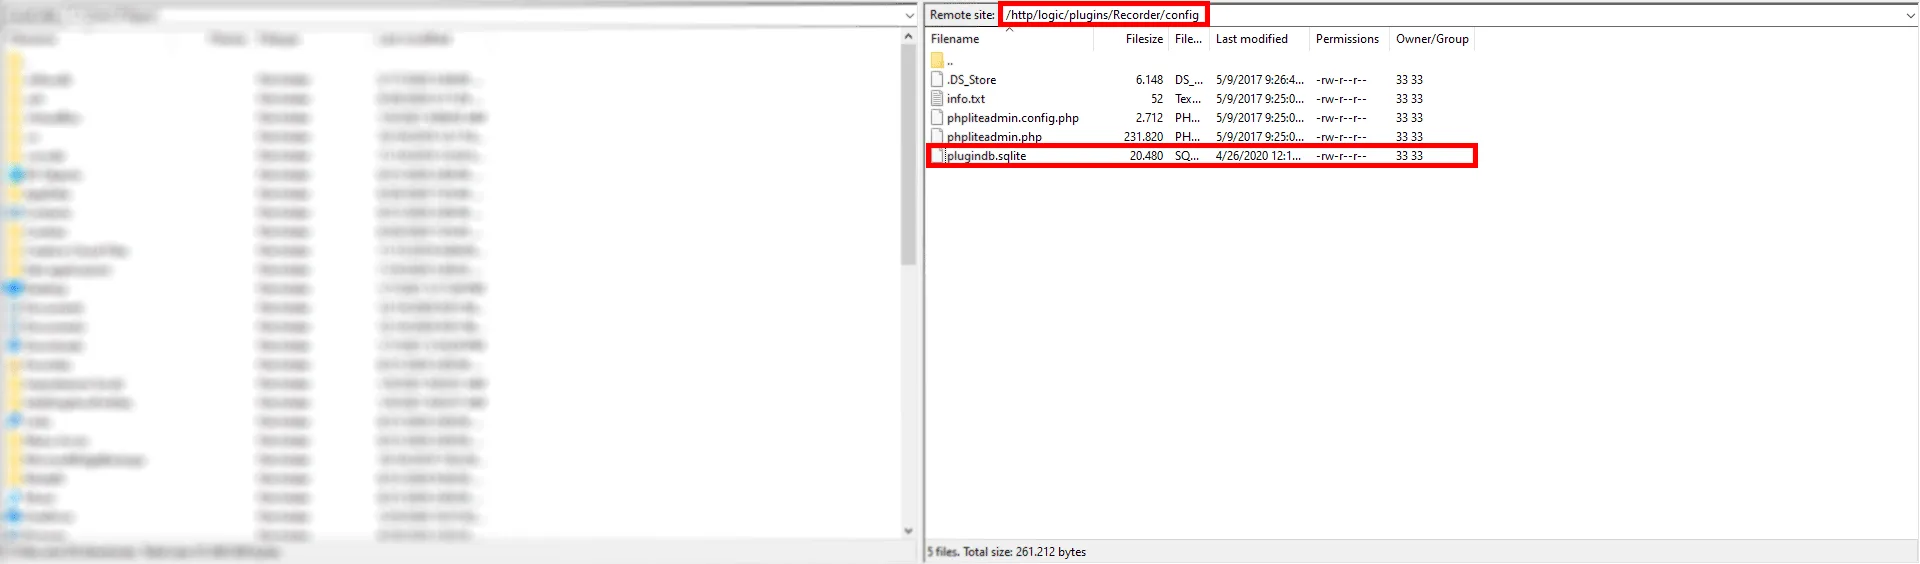
Export 2: from the browser
By entering the following link in the web browser address bar, you can download the plugindb.sqlite file.
server_ilevia_IP_address/logic/plugins/Recorder/config/plugindb.sqlite
Import
If you need to restore the database files, for example in case of issues with data saving, you can import them to the server using the following procedure.
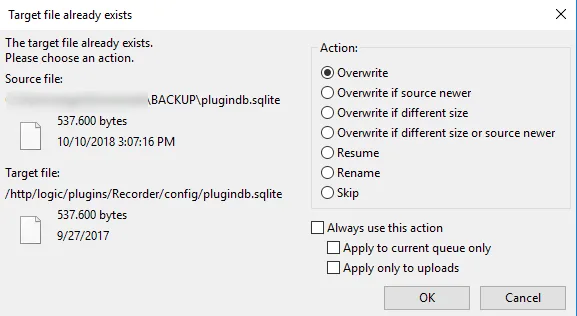
With software such as Filezilla, which allows access to the server via SFTP, enter the IP address in the Host field preceded by “sftp://” and eveweb as Username and Password; then navigate to the folder containing the plugindb.sqlite file. Drag the file from the folder on your computer directly into the Ilevia server folder.
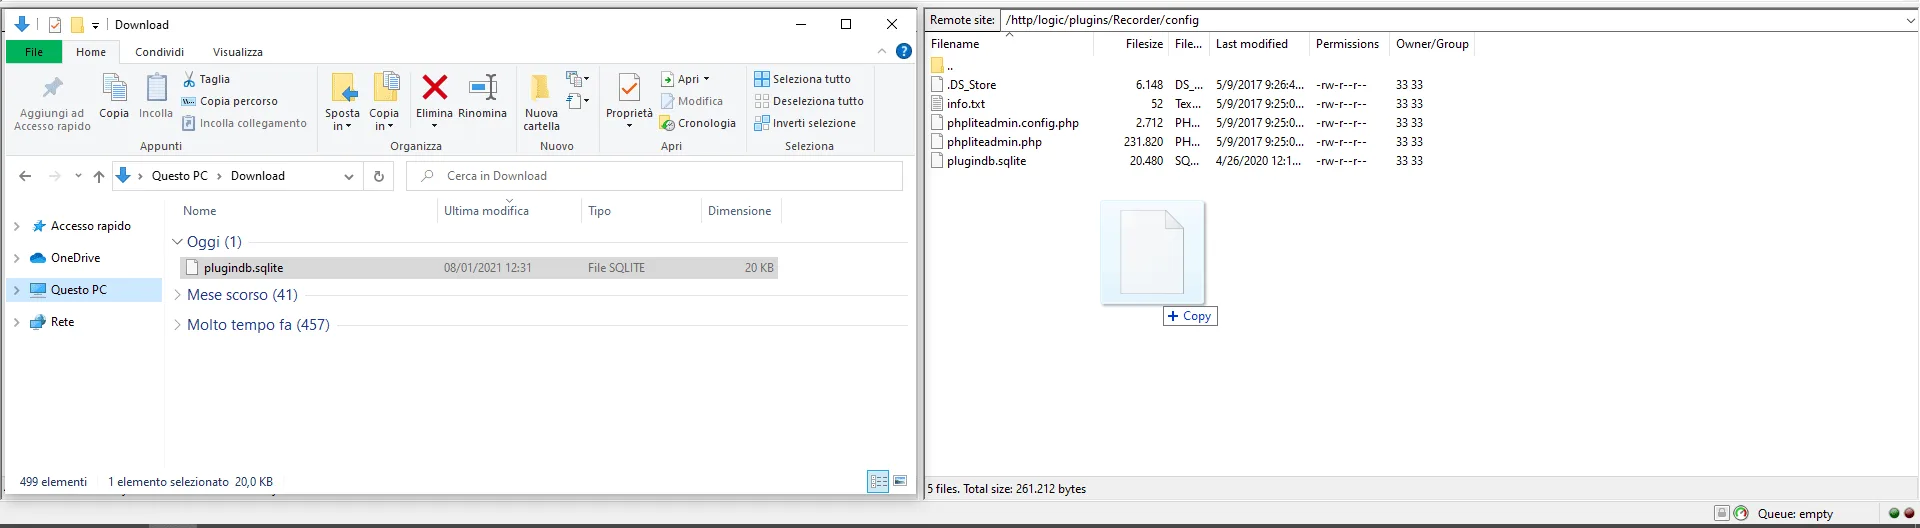
Once you have located the file on the server, drag the backup file into the window and confirm overwriting the data:
NOTE:
This component is required for the configuration of the Graphic component.