
Integrate Shelly Plus 1 with the Ilevia system
How to configure the Shelly Plus 1 device with the MQTT protocol so it can be managed with the Ilevia system.
INTRODUCTION
This guide explains how to integrate the Shelly Plus 1 device with the Ilevia system via the MQTT protocol, so that it can be controlled from Ilevia Manager and the Ilevia Control app.
Web interface configuration of the Shelly device
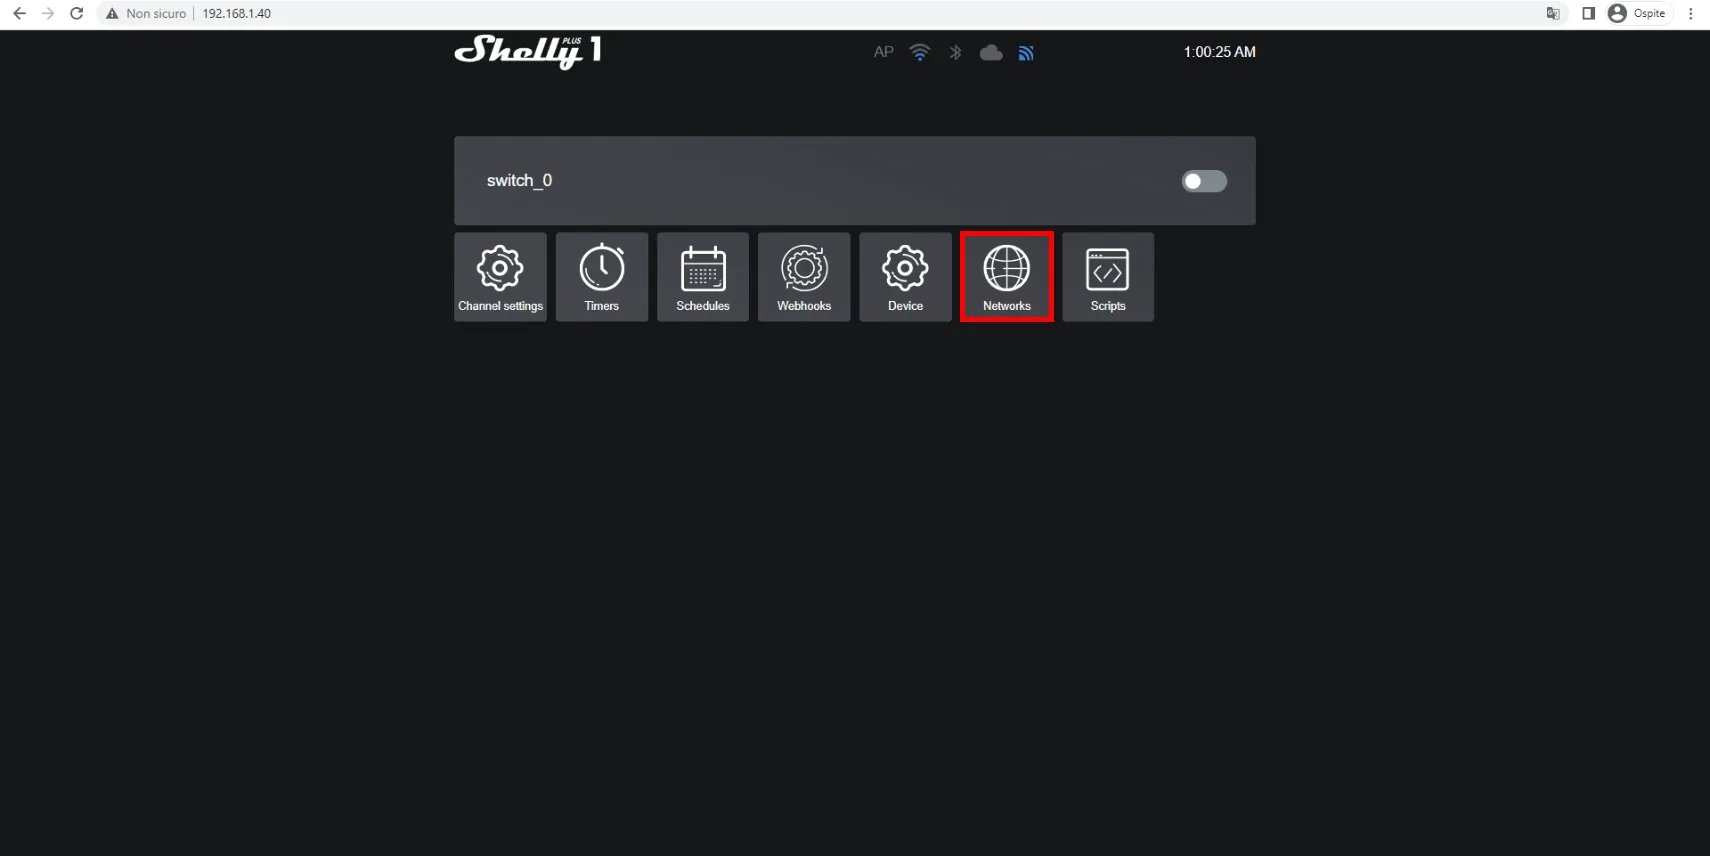
Step 1:
Access the Shelly device web page by entering its local IP address in your web browser search bar, then go to the Networks section.
Step 2:
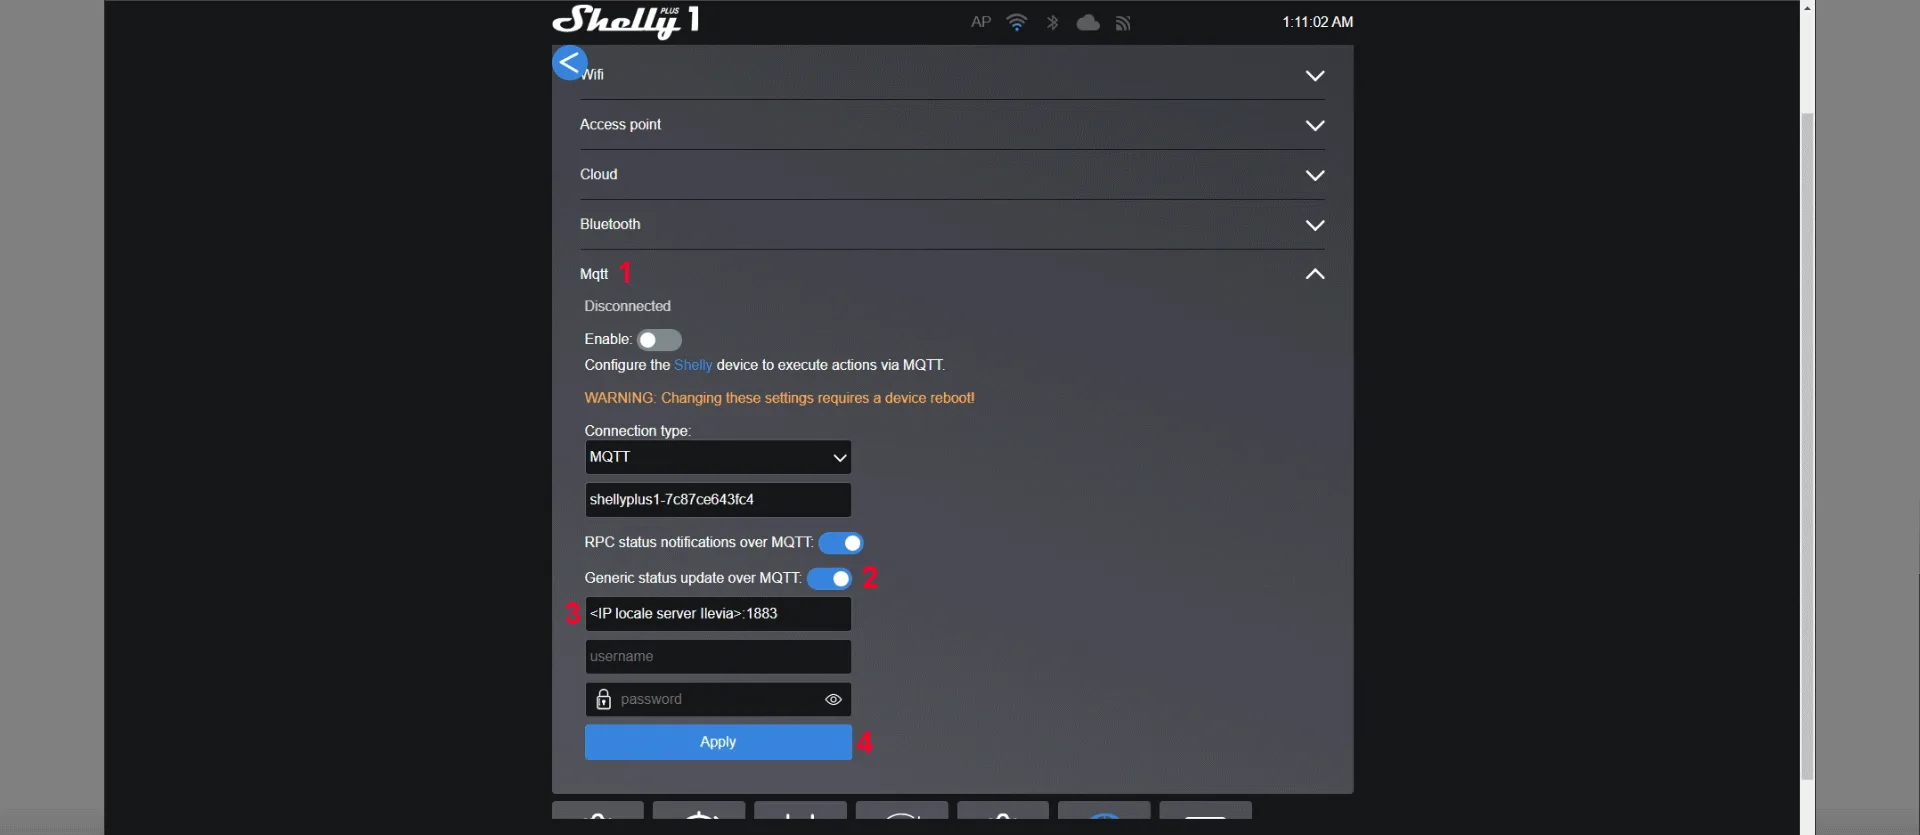
1. Open the MQTT menu. 2. Enable the Generic status update over MQTT option. 3. Add the local IP address of the Ilevia server. 4. Click APPLY to confirm the changes: the device will restart.
Ilevia Manager project configuration
Step 3:
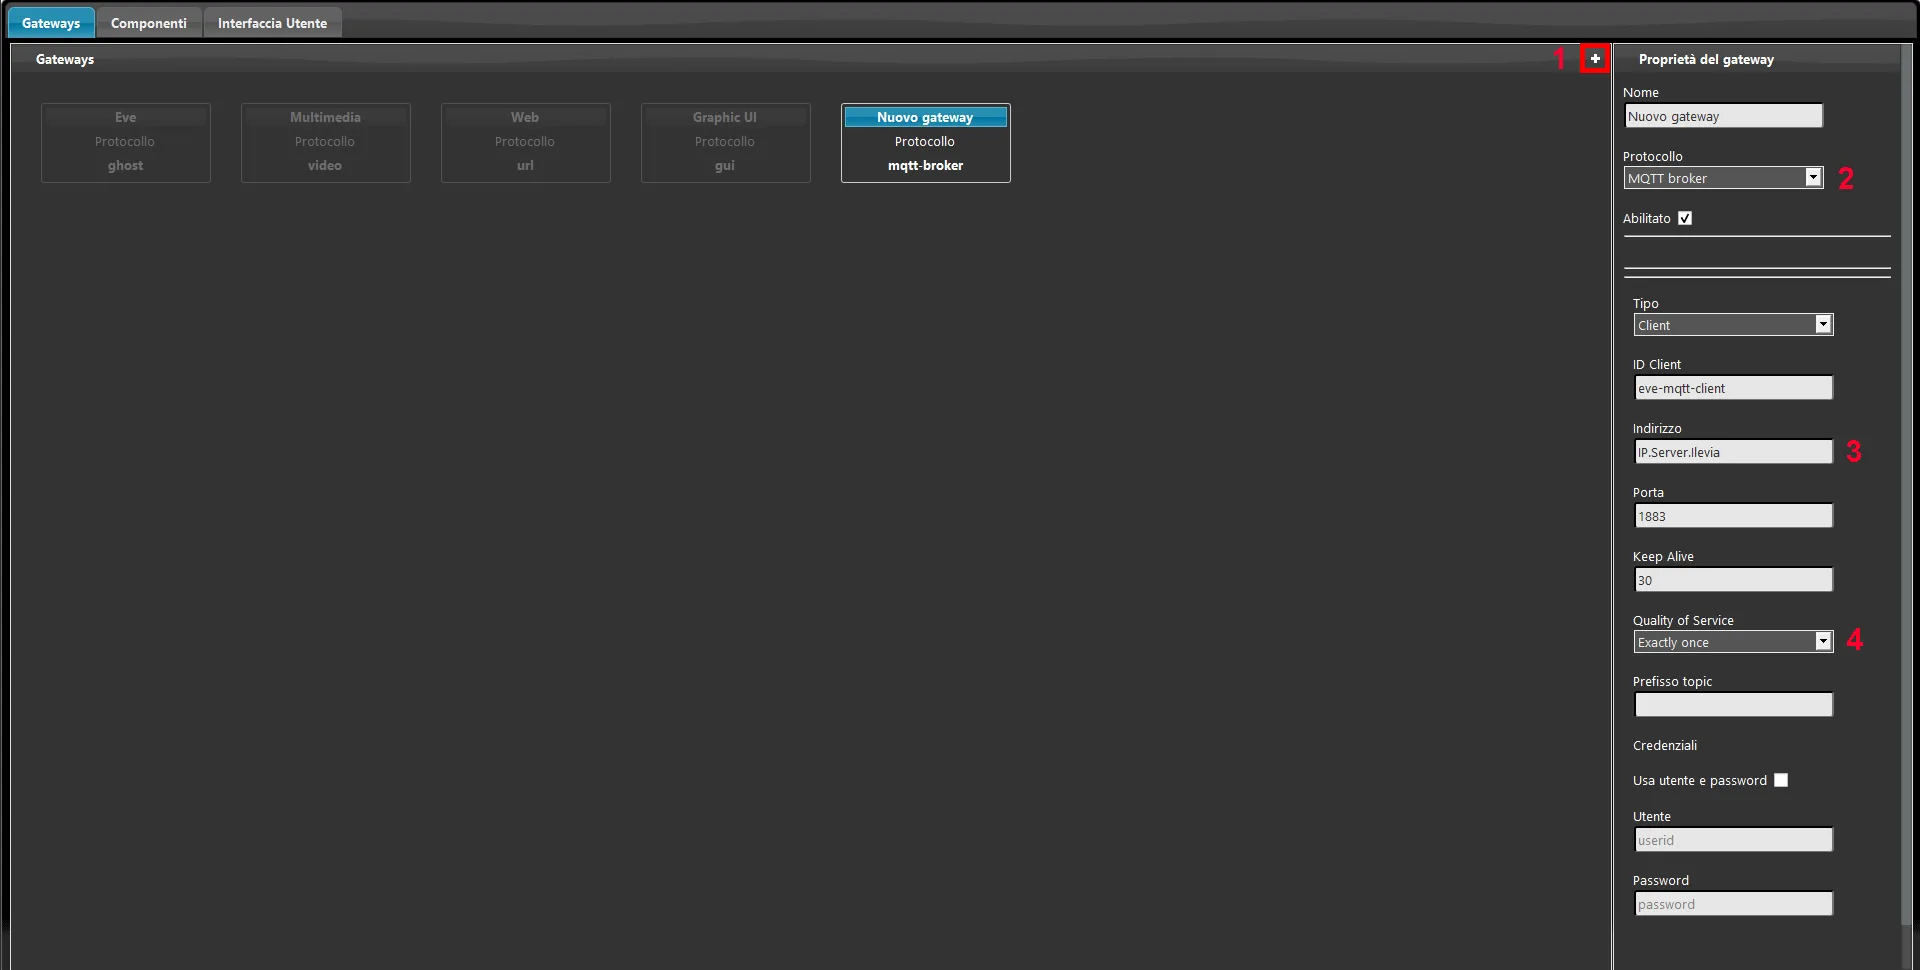
1. Open Ilevia Manager and create a new gateway. 2. Set the protocol to MQTT broker. 3. Set the “Address” parameter by entering the IP address of the Ilevia server. 4. Finally, set the Quality of service to “Exactly once”.
Step 4:
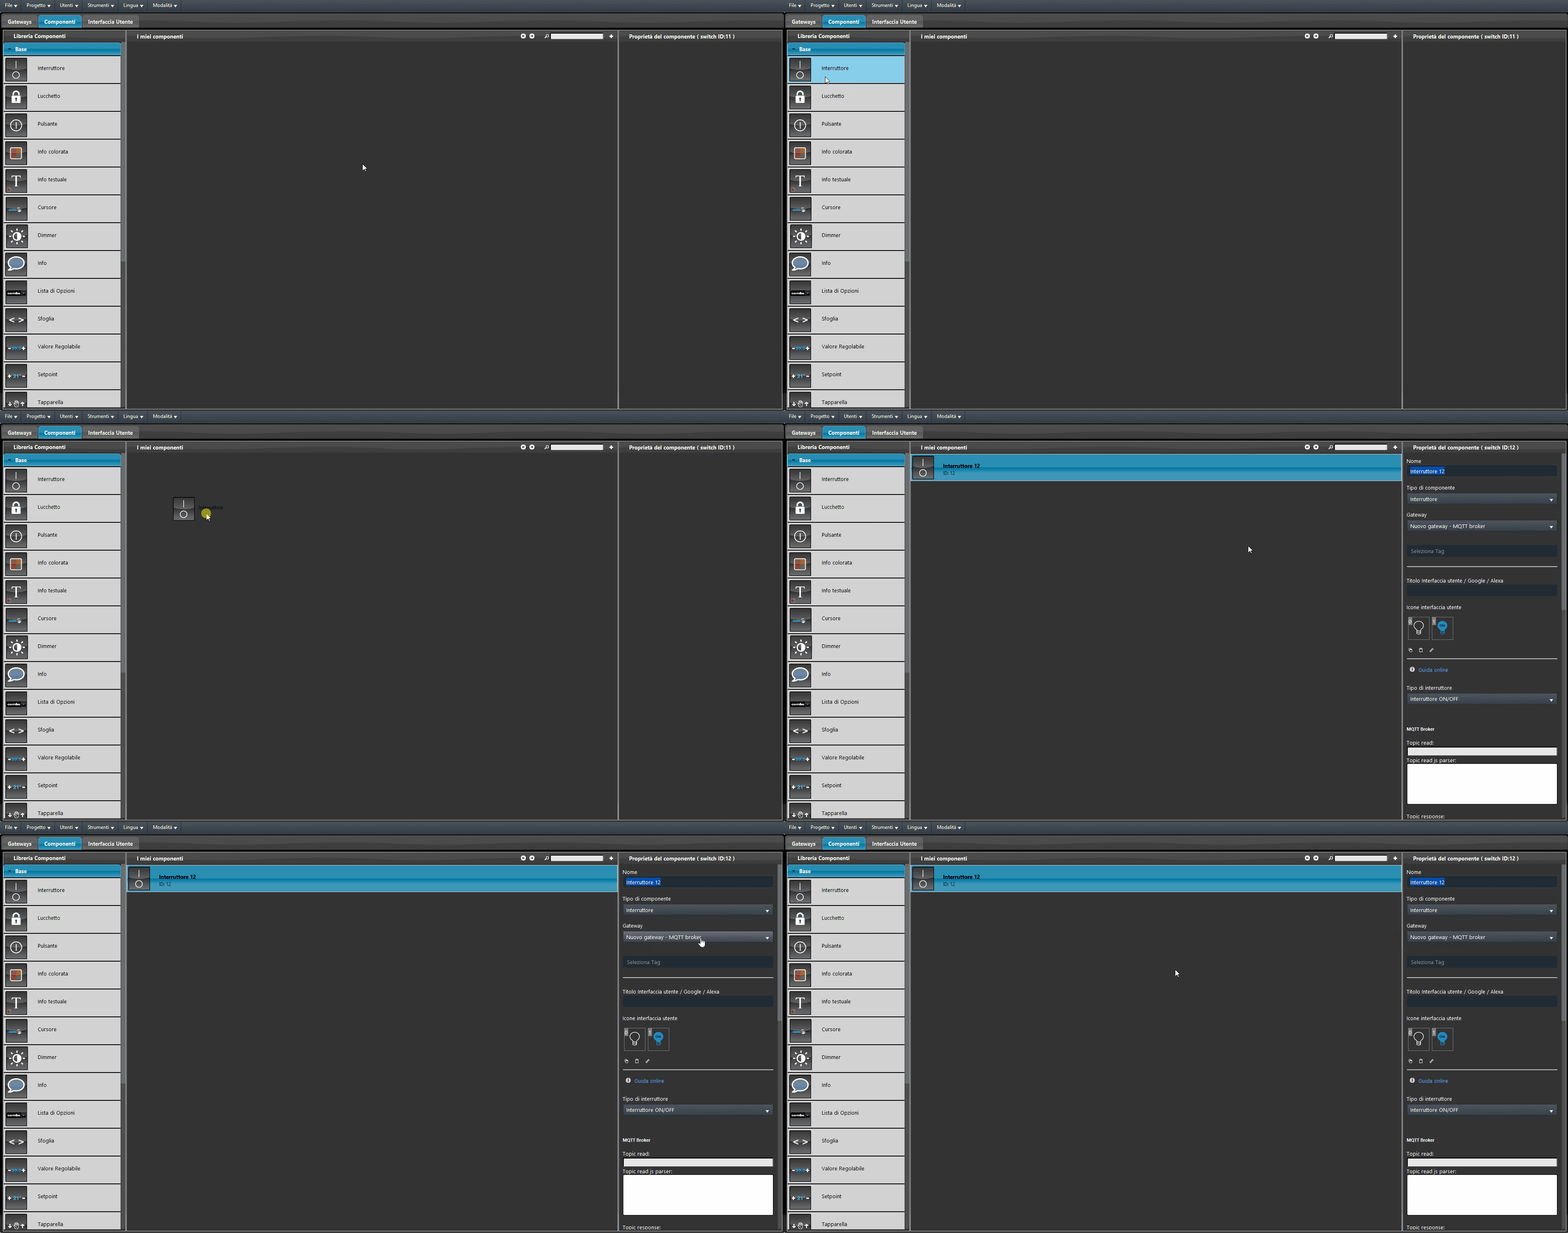
Add a new Switch component and make sure it uses the newly created gateway (MQTT).
Step 5:
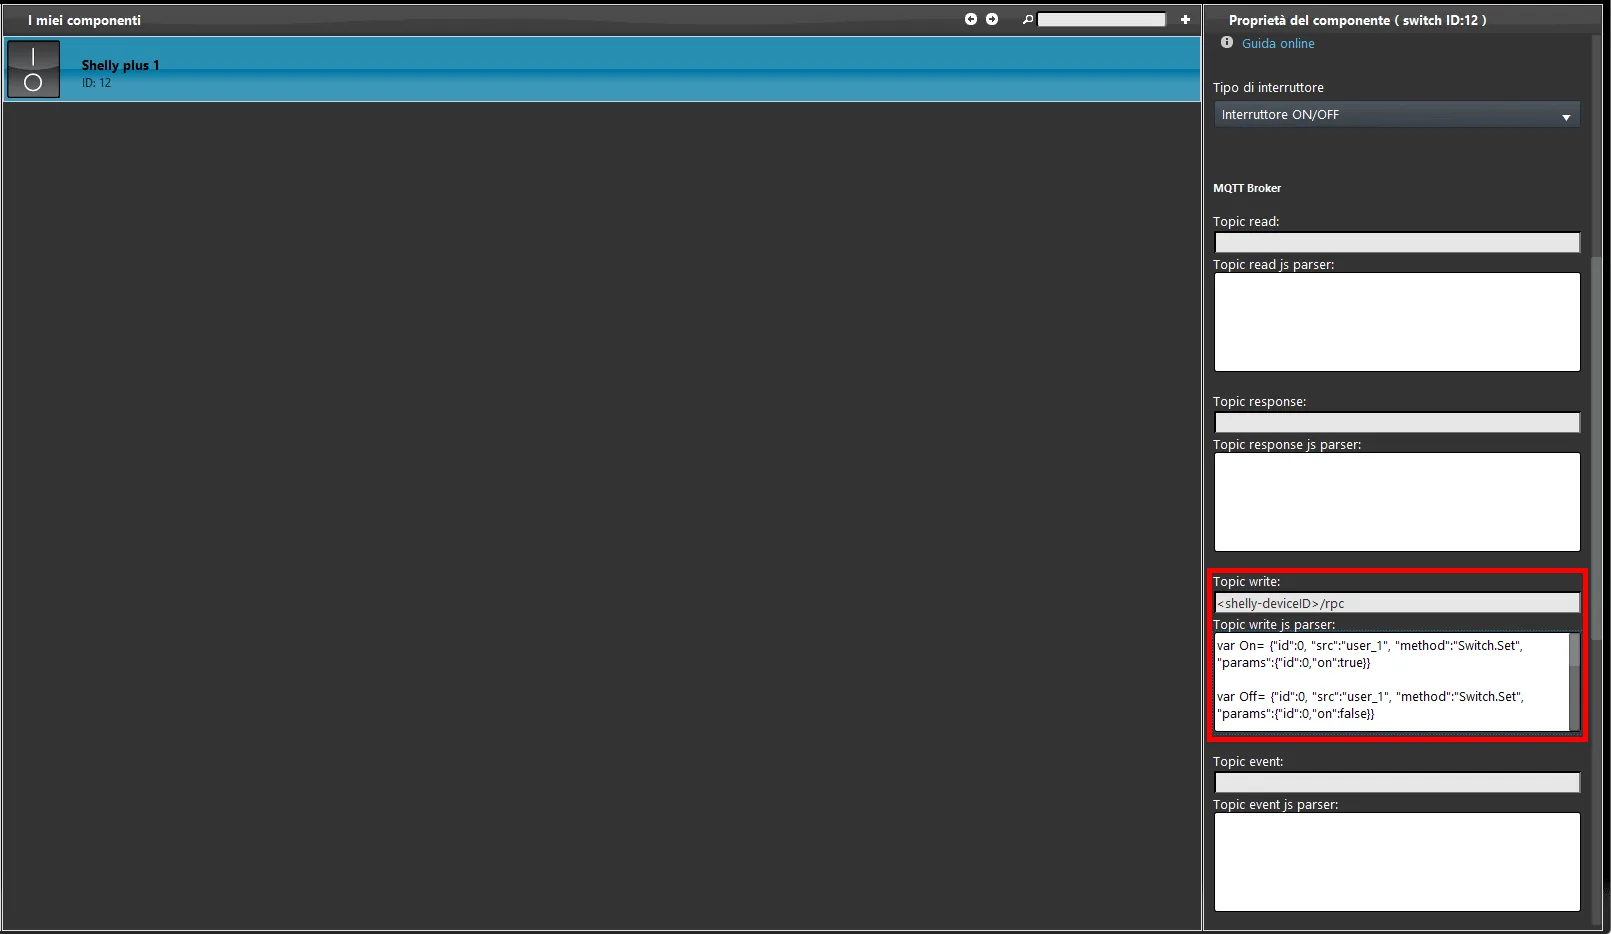
The first topic to configure is the Topic Write, that is, the one used to write the command. The topic to configure is: “<shelly-deviceID>/rpc”, where <shelly-deviceID> must be replaced with your device ID. All information on JSON setup is available on the Shelly website.
NOTE: the script shown in the figure is not displayed in full. Click here to view the script.
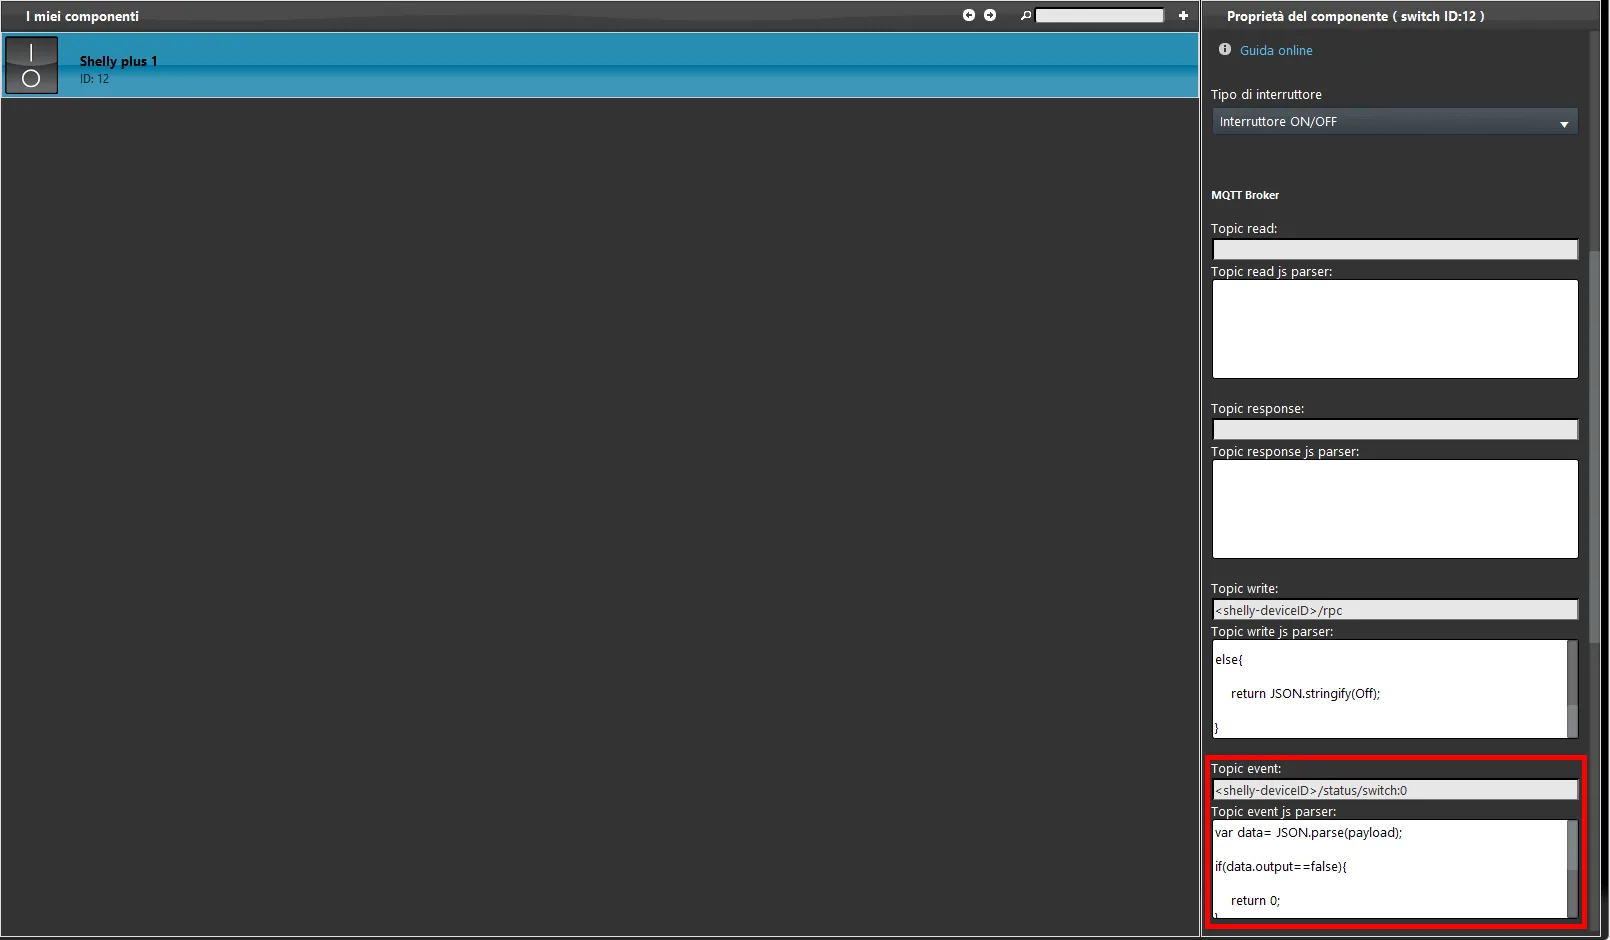
The second topic to configure is the Topic Event, that is, the one used to receive the status from the Shelly device. The topic to configure is: “<shelly-deviceID>/status/switch:0”, where <shelly-deviceID> must be replaced with your device ID. All information on JSON setup is available on the Shelly website.
Step 6:The second topic to configure is the Topic Event, that is, the topic used to receive the status from the Shelly device. The topic to configure is: “<shelly-deviceID>/status/switch:0”, where <shelly-deviceID> is replaced by your device ID. All information regarding JSON setup is provided on the Shelly website.
NOTE: the script shown in the figure is not displayed in full. Click here to view the script.
Step 7:
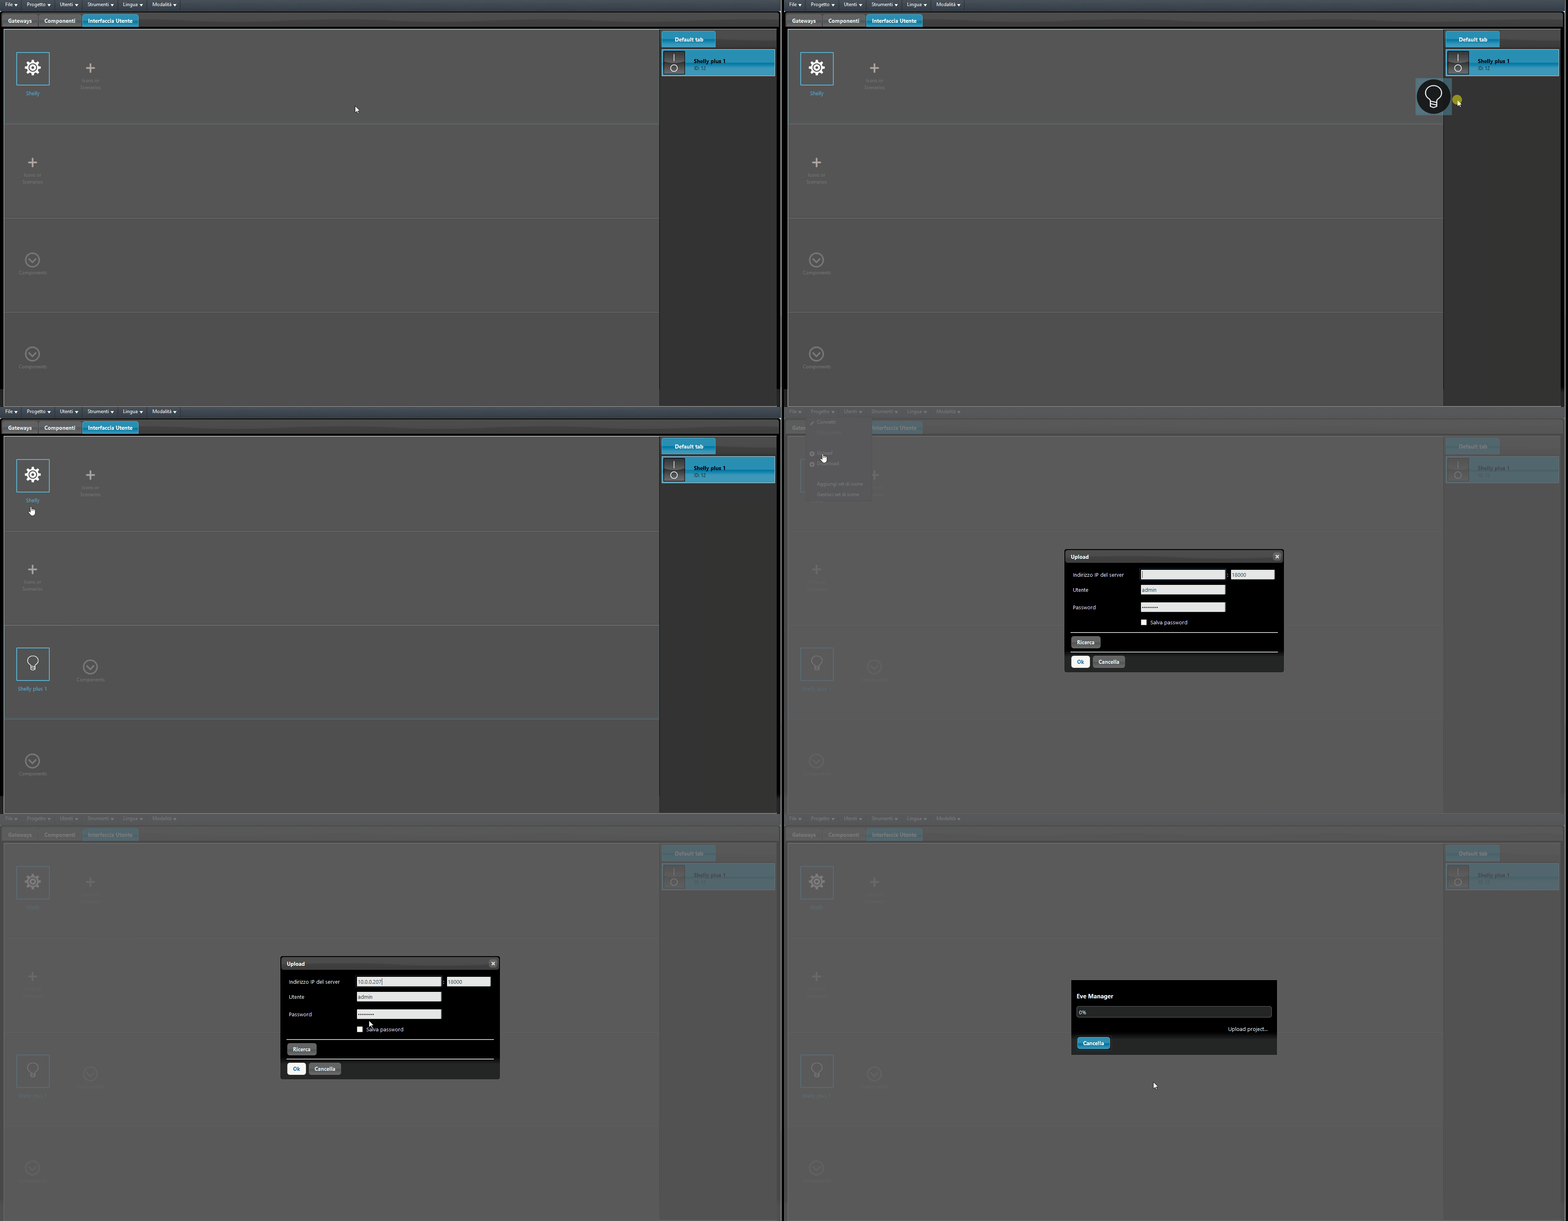
Add the component to the user interface and upload the project to the server, entering the correct IP address.
Functionality test
Step 8:
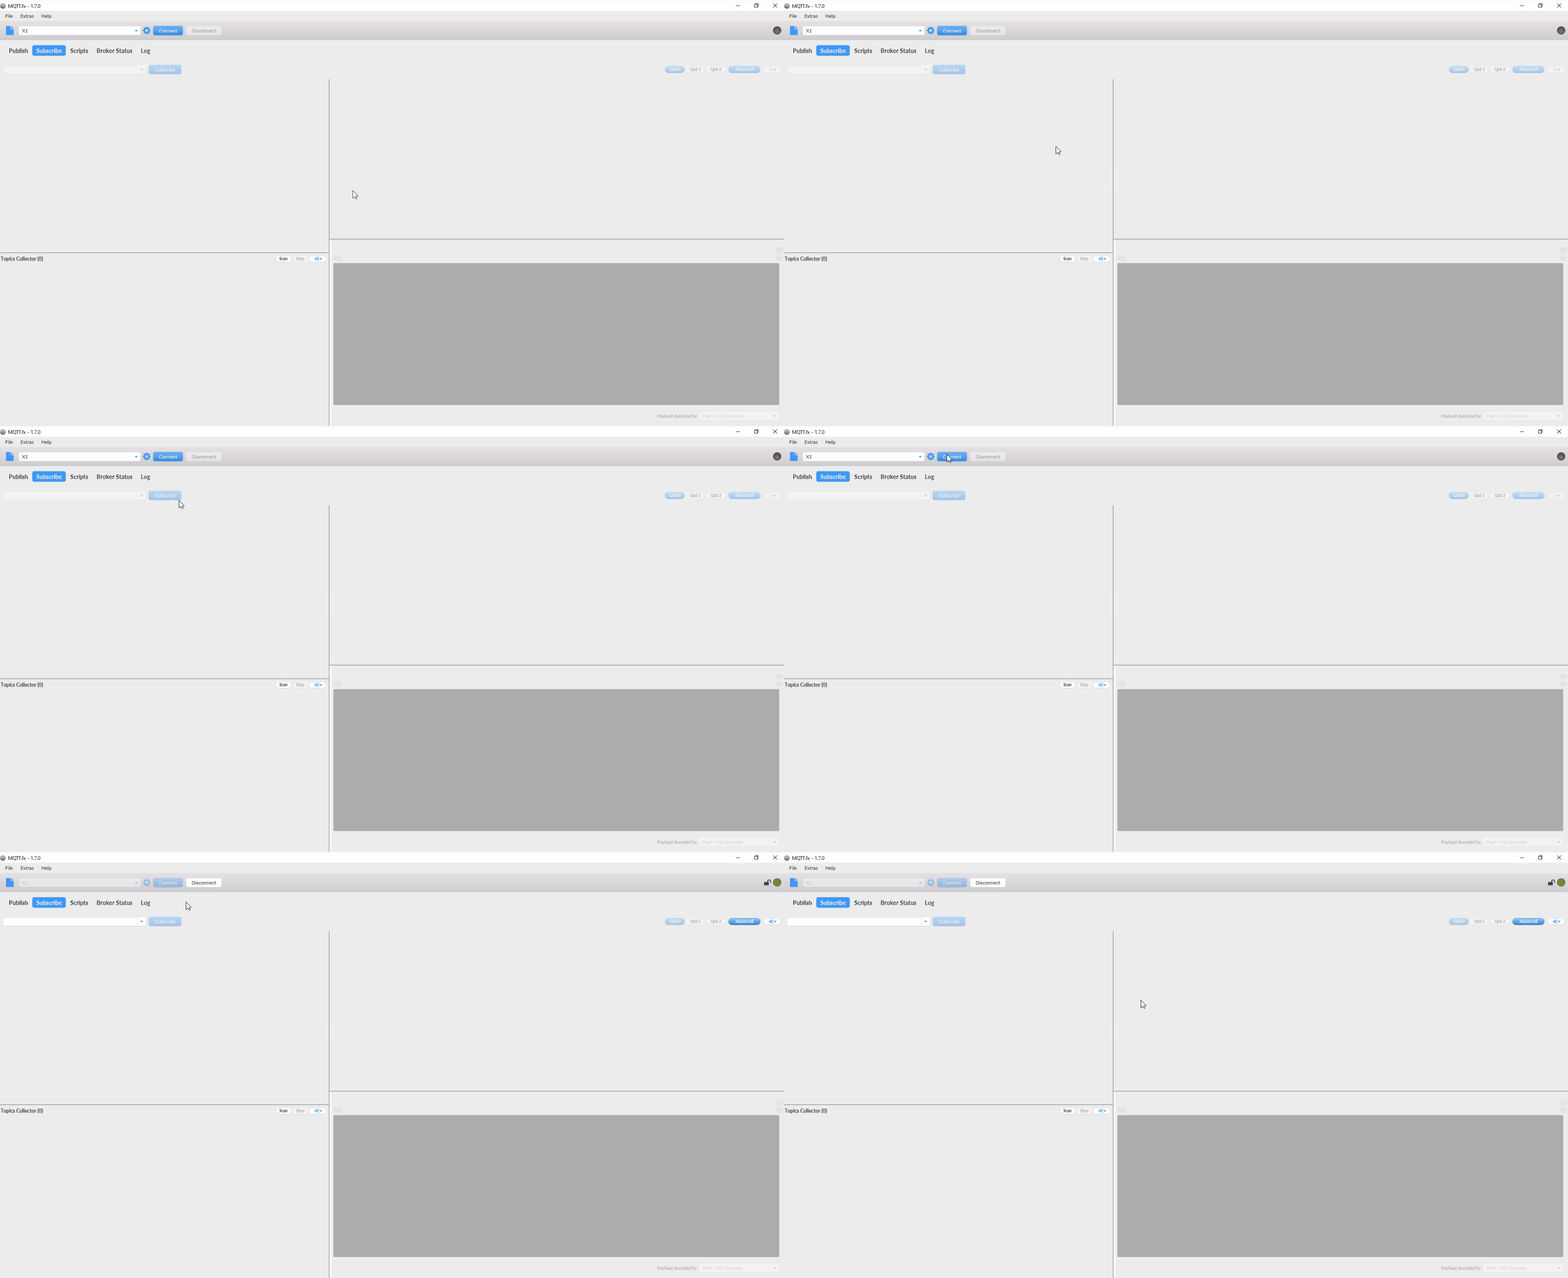
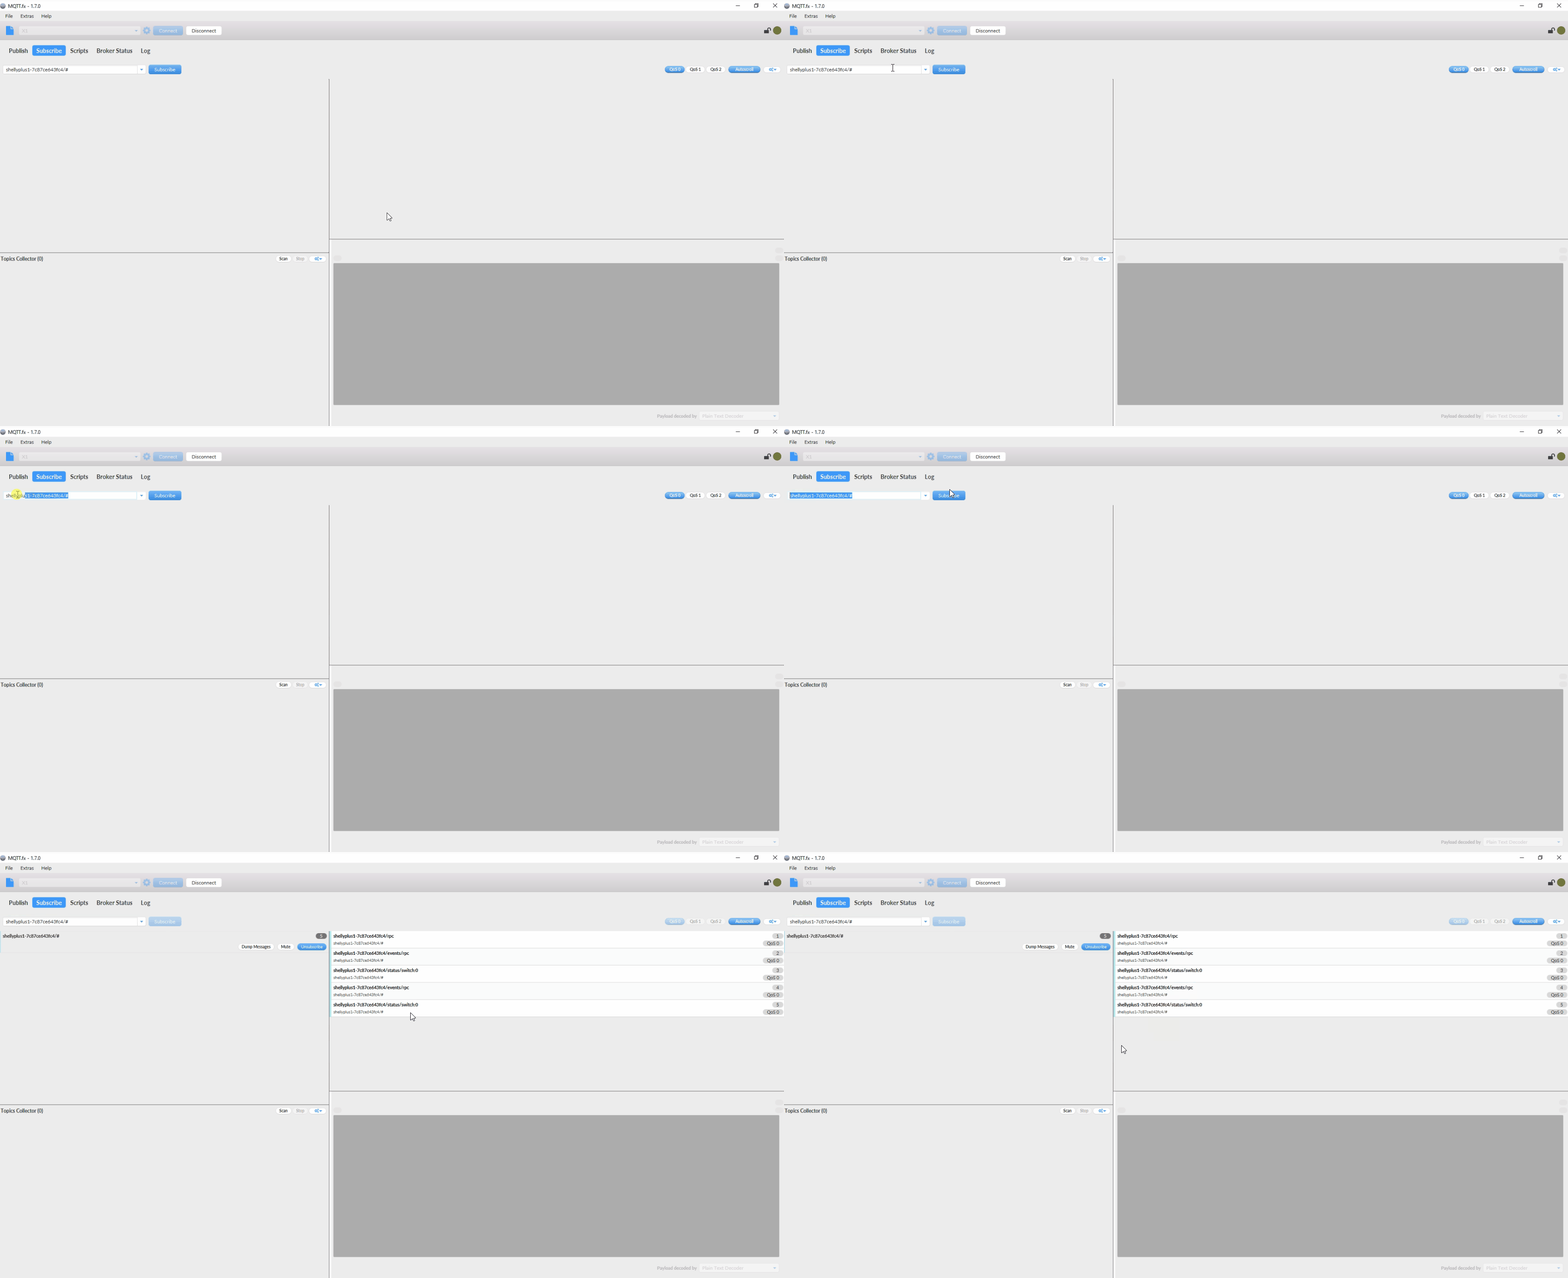
For illustrative purposes, we will use the MQTT fx software to view the flow of the various topics in the MQTT broker. For the complete MQTT fx configuration, refer to this guide. Once MQTT fx is configured, connect to the Ilevia server broker.
Step 9:
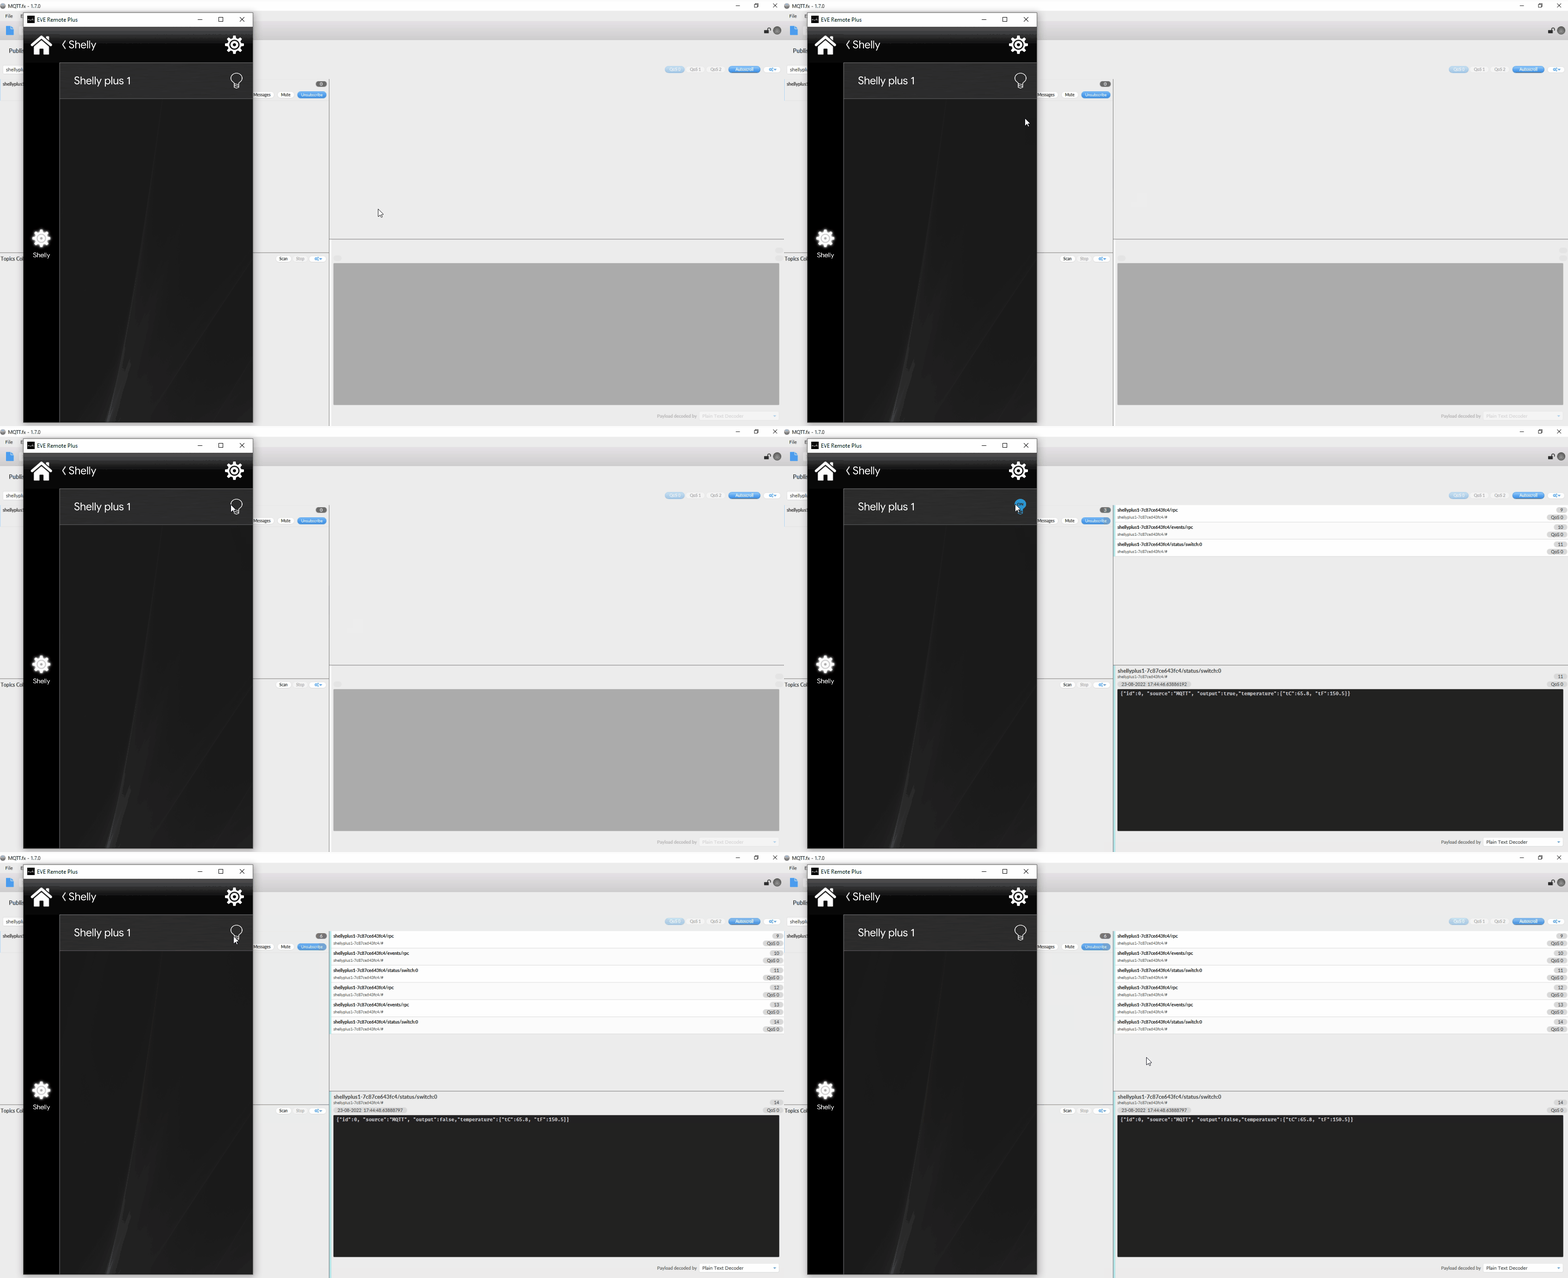
As shown in the image below, clicking the icon of our switch in the user interface of the Ilevia Control app sends the command and, as a result, the device status is received.
Step 10:
As you can see in the image below, clicking the icon in the user interface turns the Shelly device on and off.
Click the link to download the Shelly Plus 1 sample project and try it.