
Shelly Motion device integration with Ilevia
How to integrate the Shelly Motion sensor with the Ilevia server via MQTT: device, gateway and component configuration in Ilevia Manager.
Introduction
Shelly Motion is a first-generation Shelly device. In addition to motion detection, it reports other information such as vibration detection in case of tampering, lux measurement and more. This guide explains how to integrate all this information with the Ilevia server via MQTT.
Web interface configuration
Step 1:
Connect to the Shelly web interface: open a browser, enter the Shelly device IP address in the URL bar and press Enter.

Step 2:
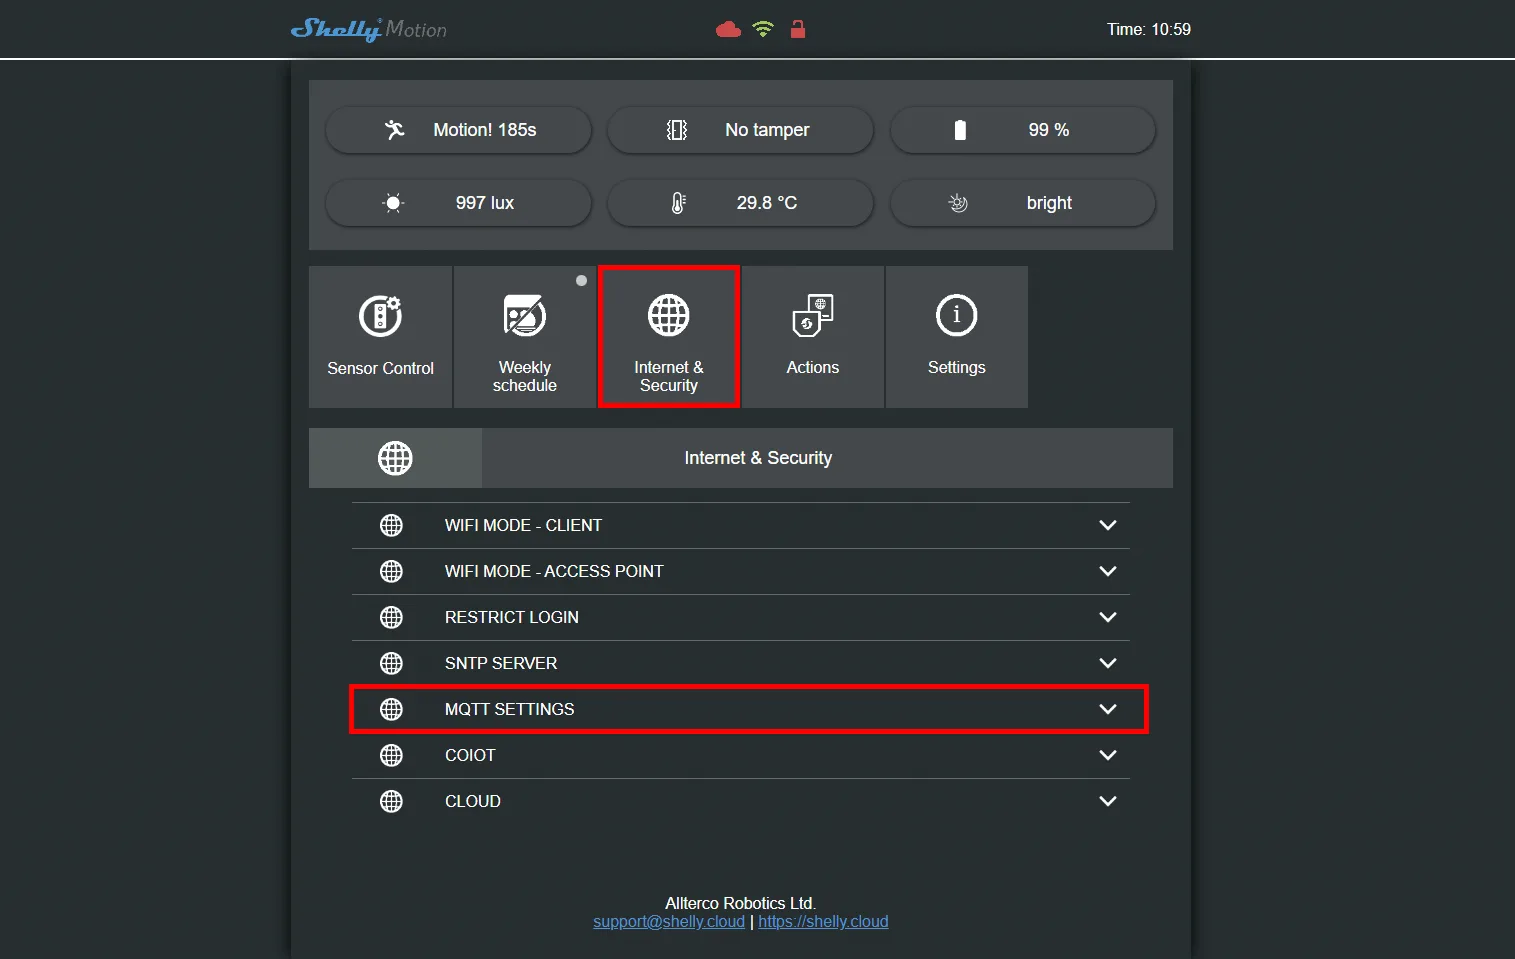
Go to the “Internet & Security” menu, then open the MQTT setting menu.
Step 3:
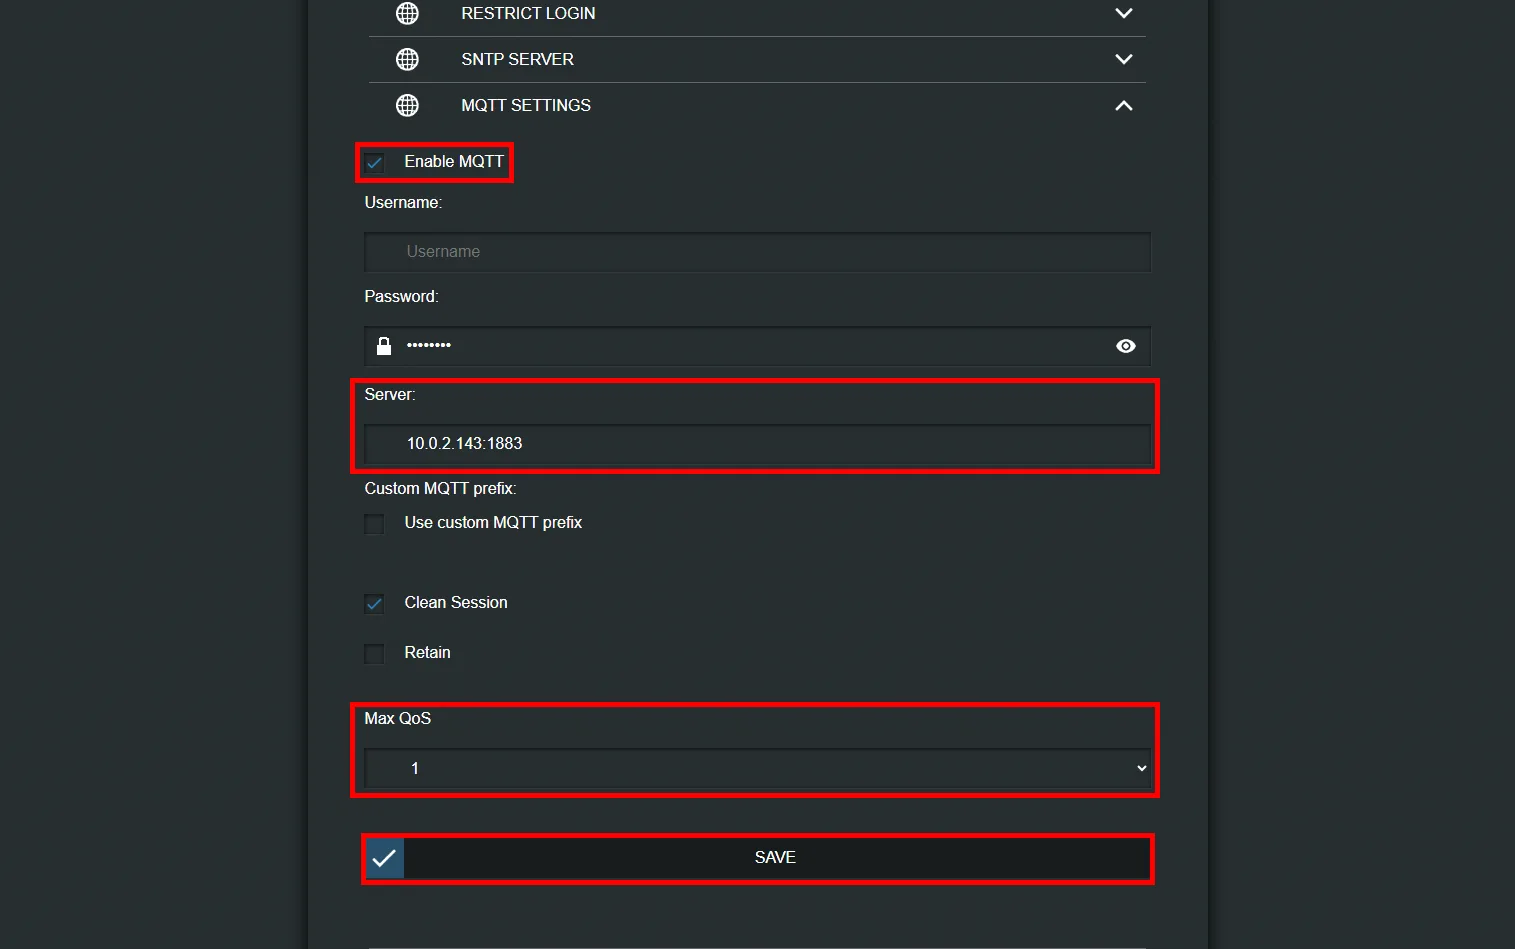
Enable the “Enable MQTT” checkbox, enter the IP address of your Ilevia server in the “Server” text field, set QoS to 1 and finally click Save.
Project configuration in Ilevia Manager
Step 4:
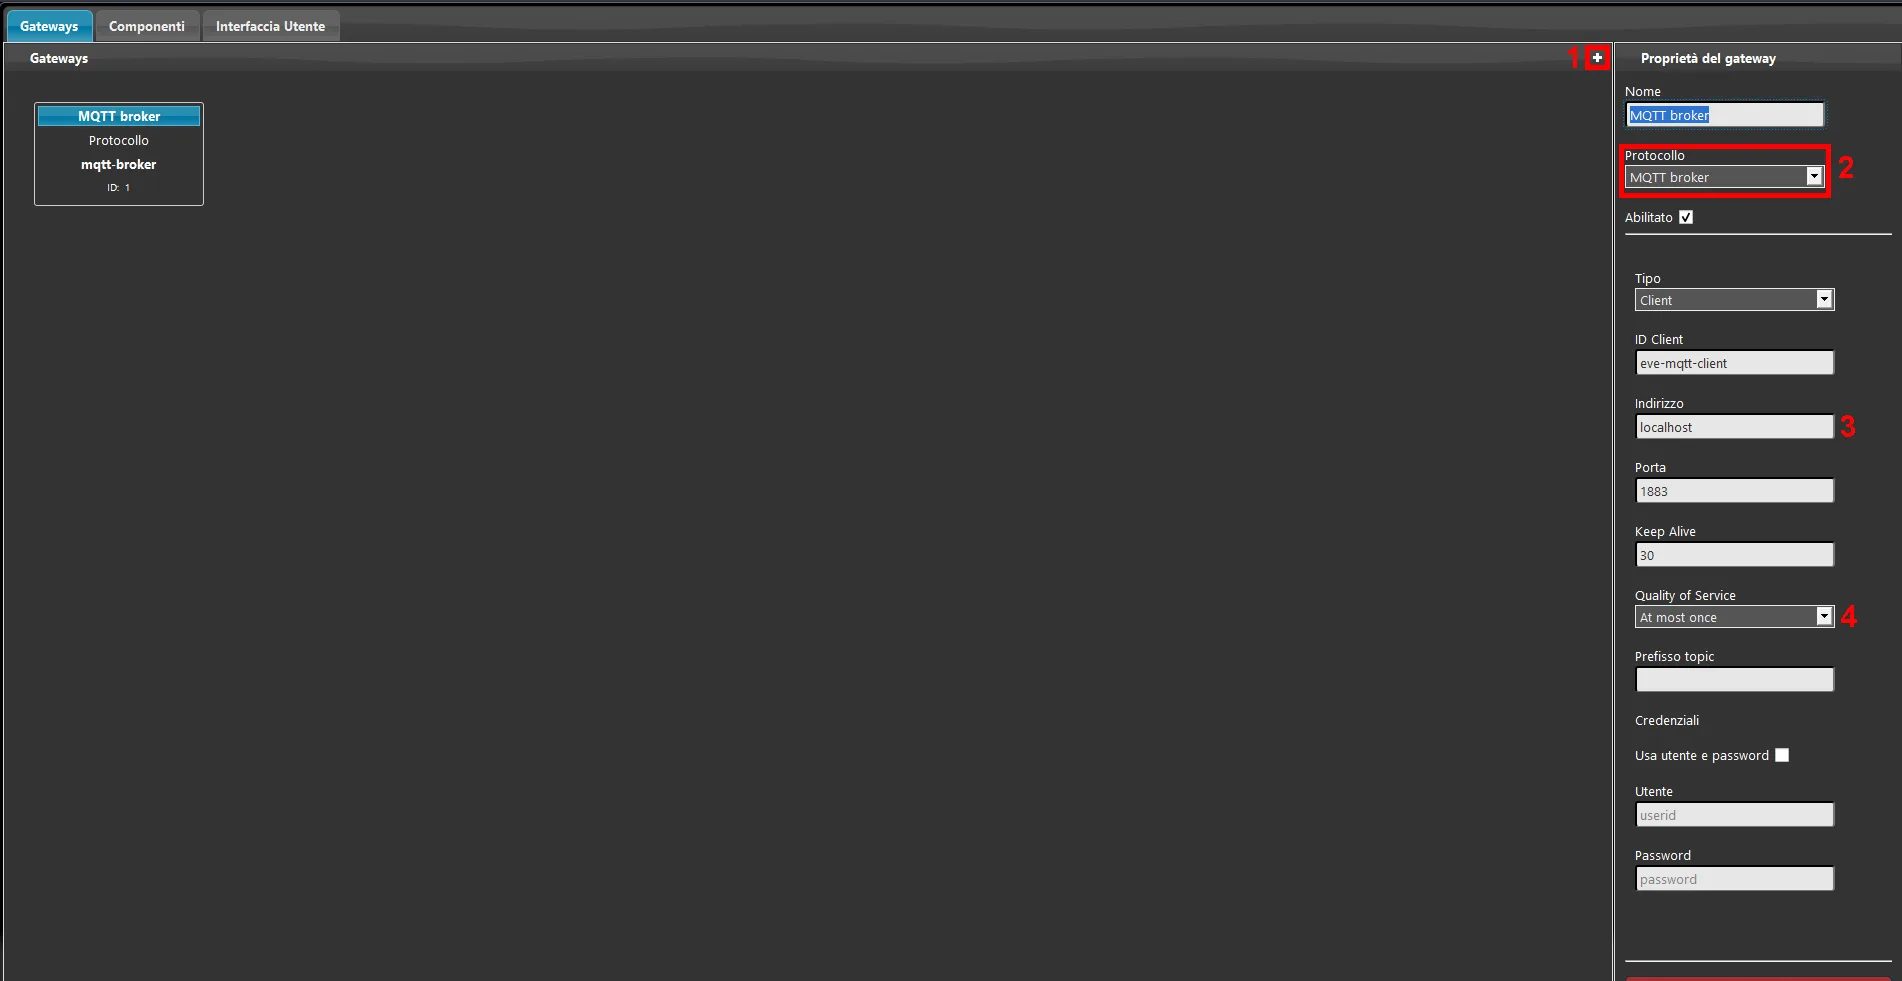
1. Open Ilevia Manager and create a new gateway; 2. set the gateway protocol to MQTT broker; 3. set the server address to localhost; 4. finally set QoS to “At most once”.
Step 5:
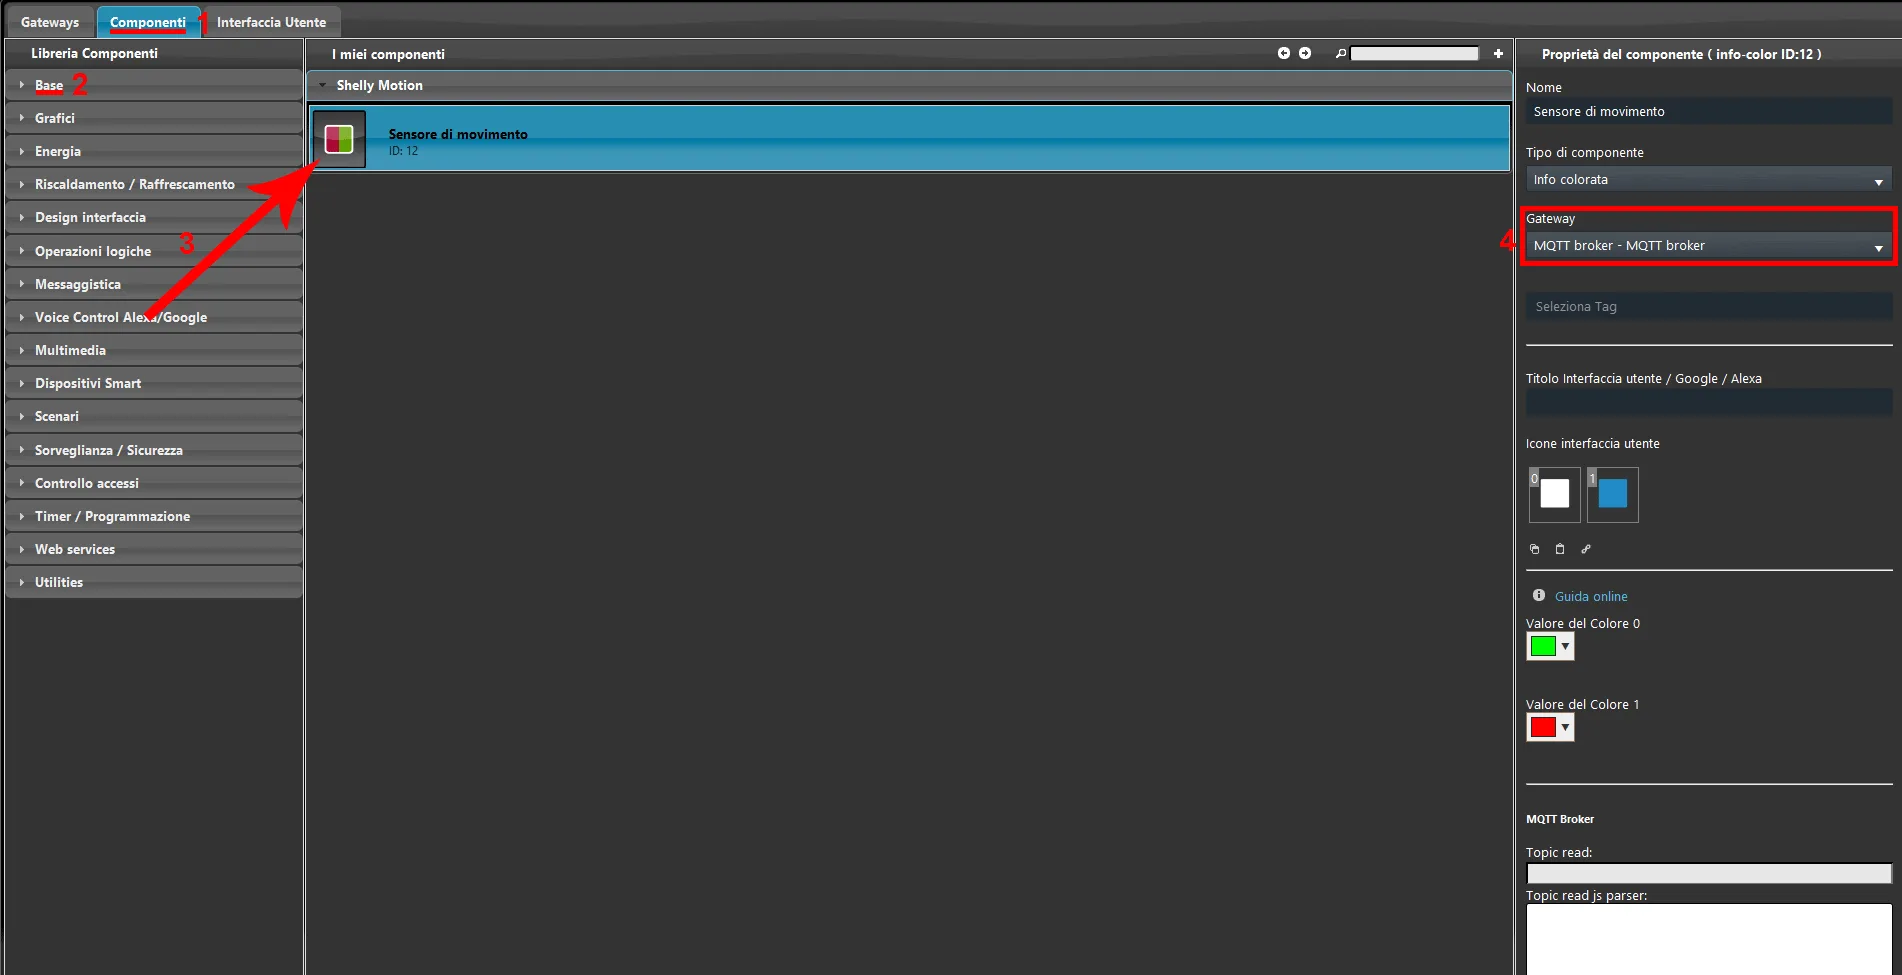
1. Go to the Components section in Ilevia Manager. 2. Open the Base drop-down menu in the “Component library”. 3. Add a new Colored info component to the project. Finally, make sure the newly created MQTT gateway is set in the component.
Step 6:
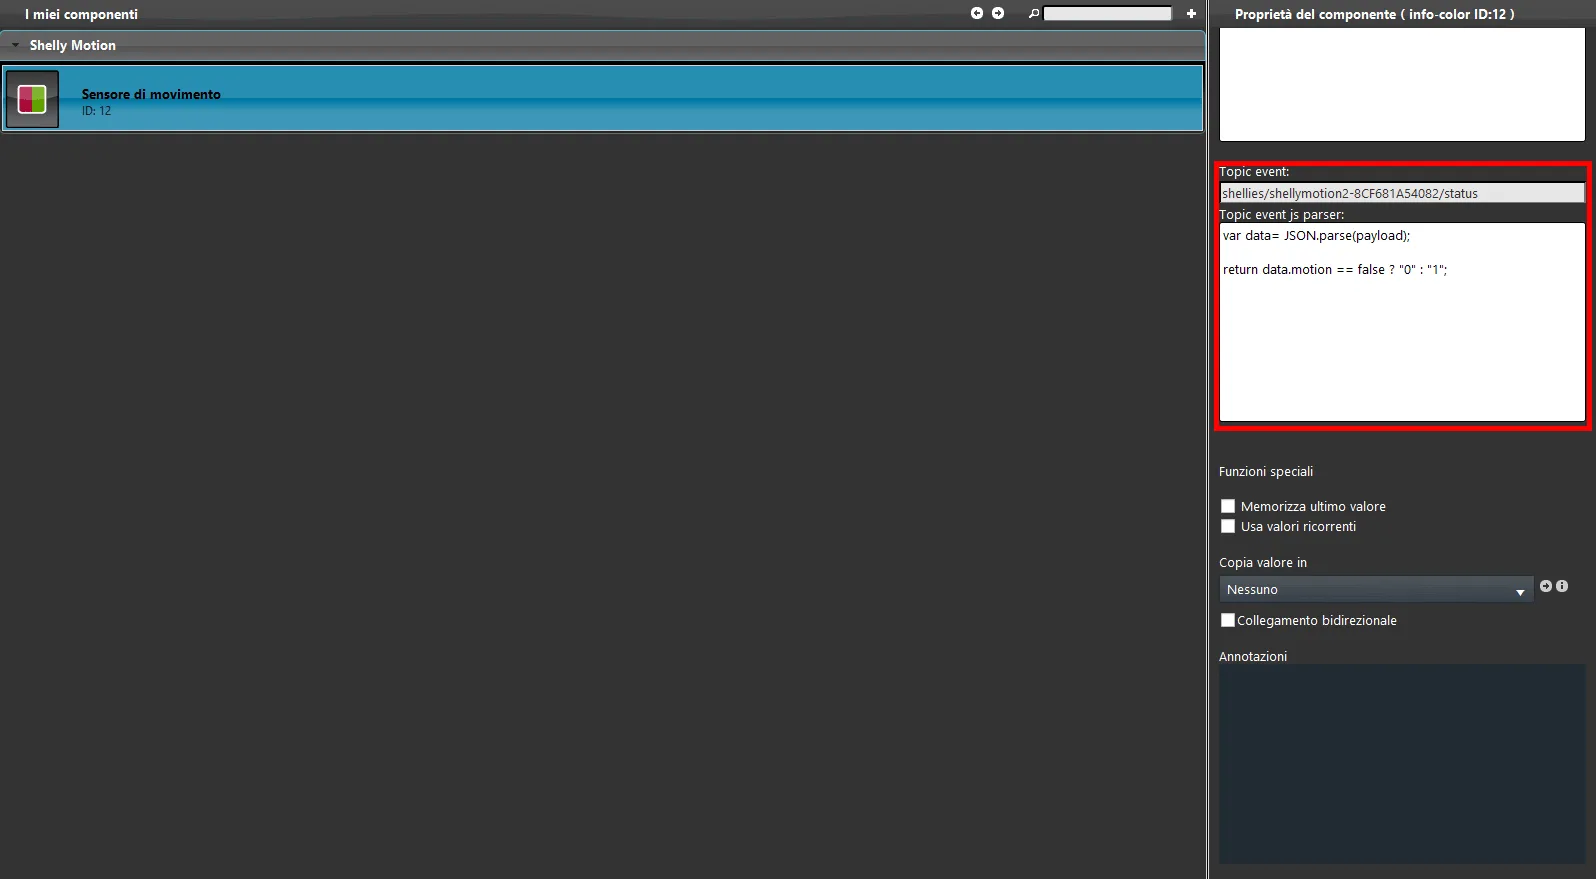
The next step is to set the Topic Event. This component will display the information coming from the Shelly device as a status. The topic used is the following: shellies/shellymotion2-<device-ID>/status, where <device-ID> must be replaced with the Shelly device ID. Finally add the script required to parse the payload received from the Shelly device.
Click the link to view the topic and script configurations.
Step 7:
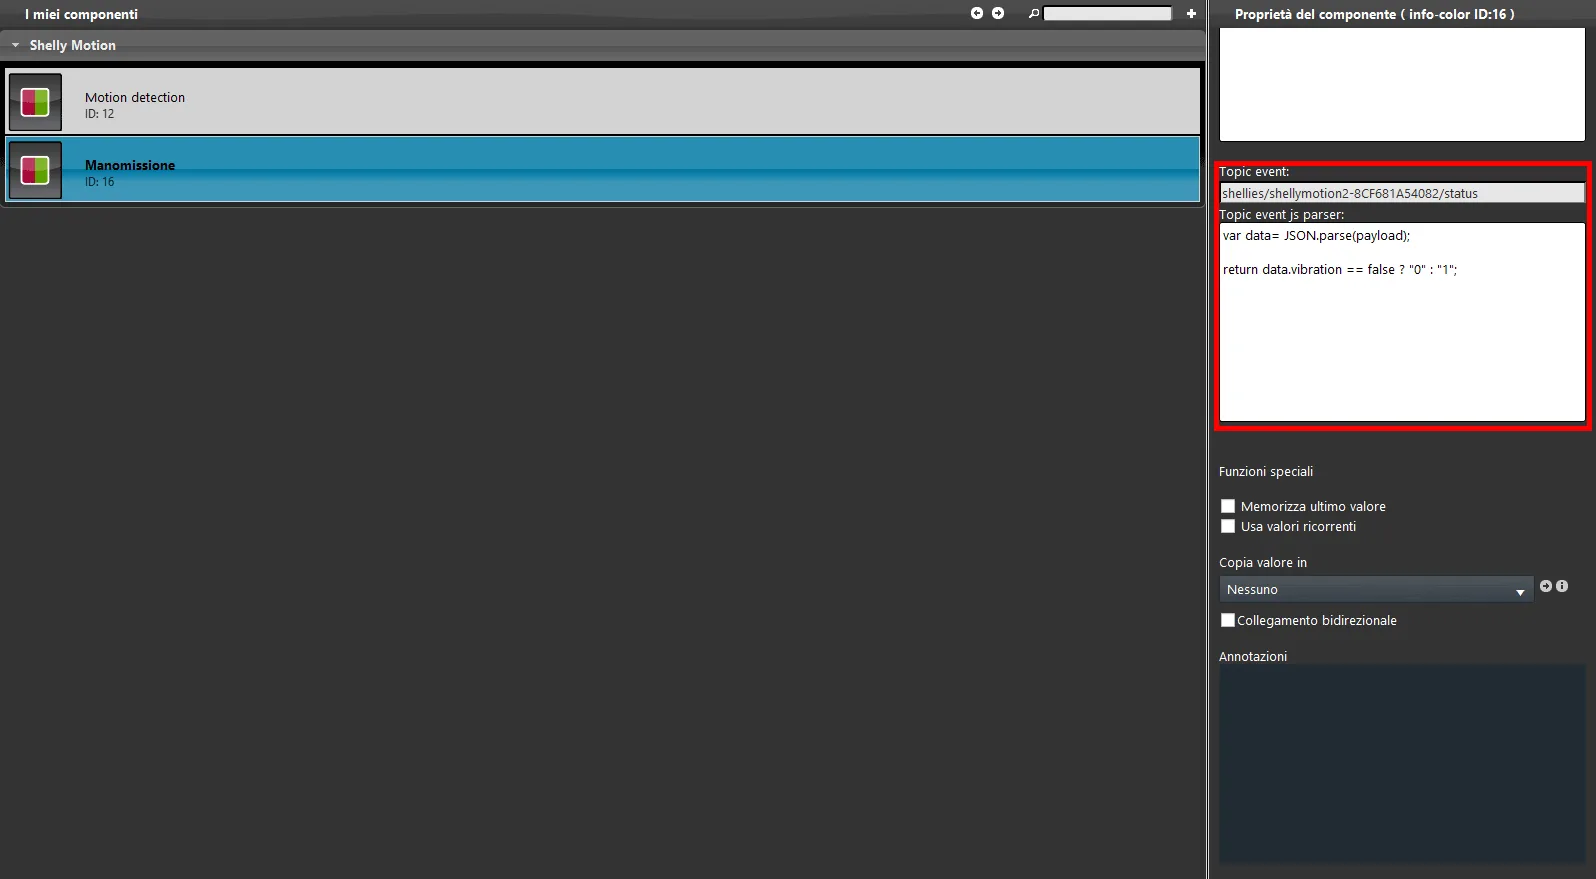
Add a second Colored info component to the project. The topic used is the following: shellies/shellymotion2-<device-ID>/status, where <device-ID> must be replaced with the Shelly device ID. Finally add the script required to parse the payload received from the Shelly device.
Click the link to view the topic and script configurations.
Step 8:
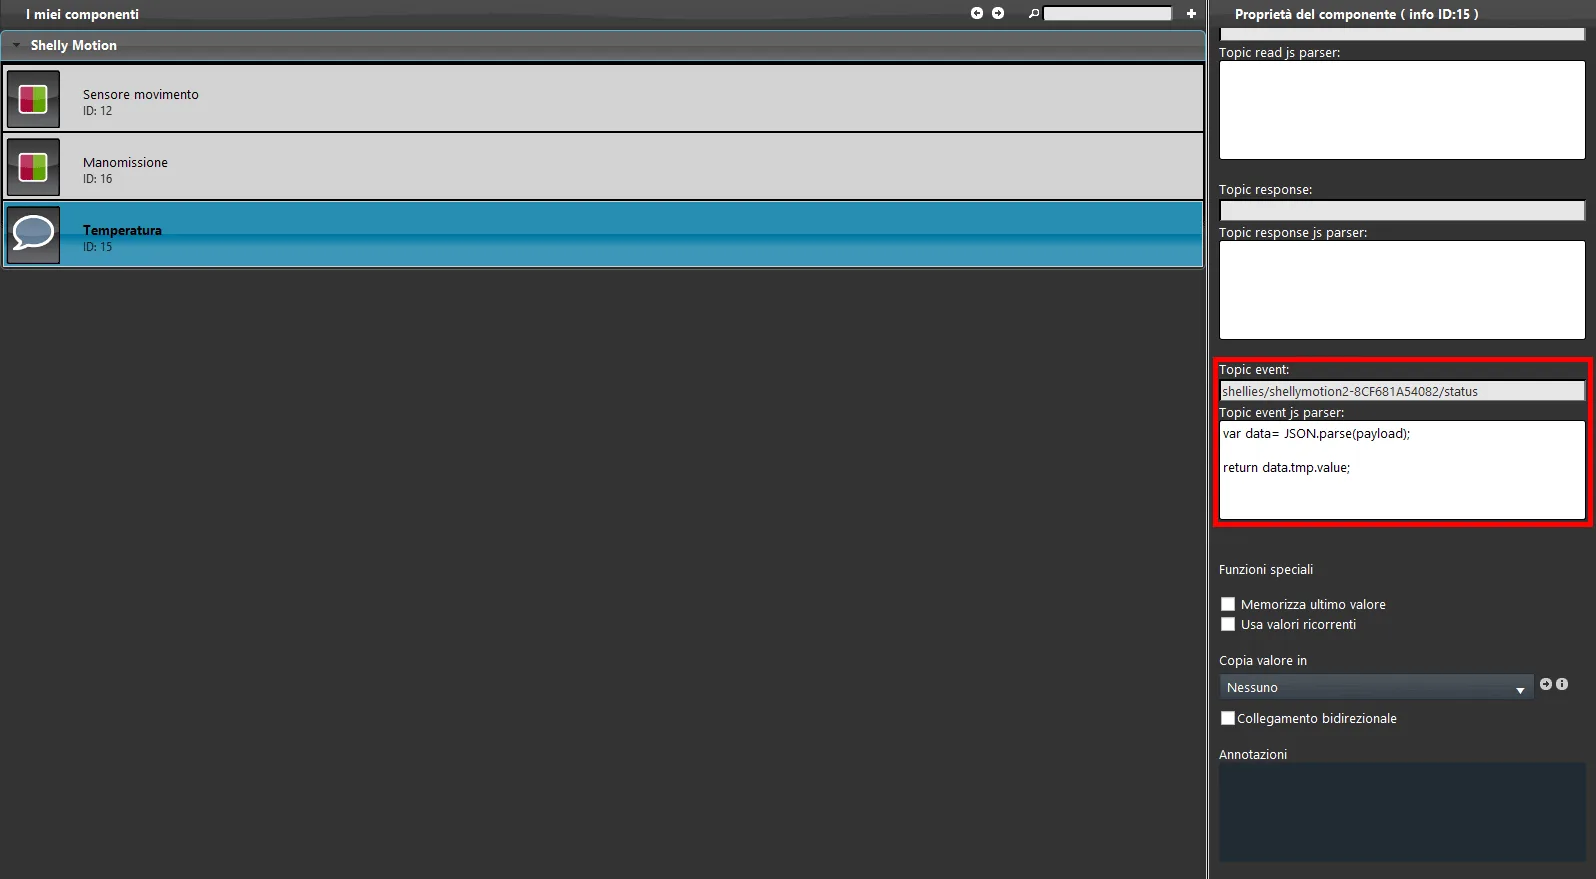
Add a new Info component to the project. This component will display the temperature value of the environment where the device is installed. The topic used is the following: shellies/shellymotion2-<device-ID>/status, where <device-ID> must be replaced with your Shelly device ID. Finally add the script required to parse the payload received from the Shelly device.
Click the link to view the topic and script configurations.
Step 9:
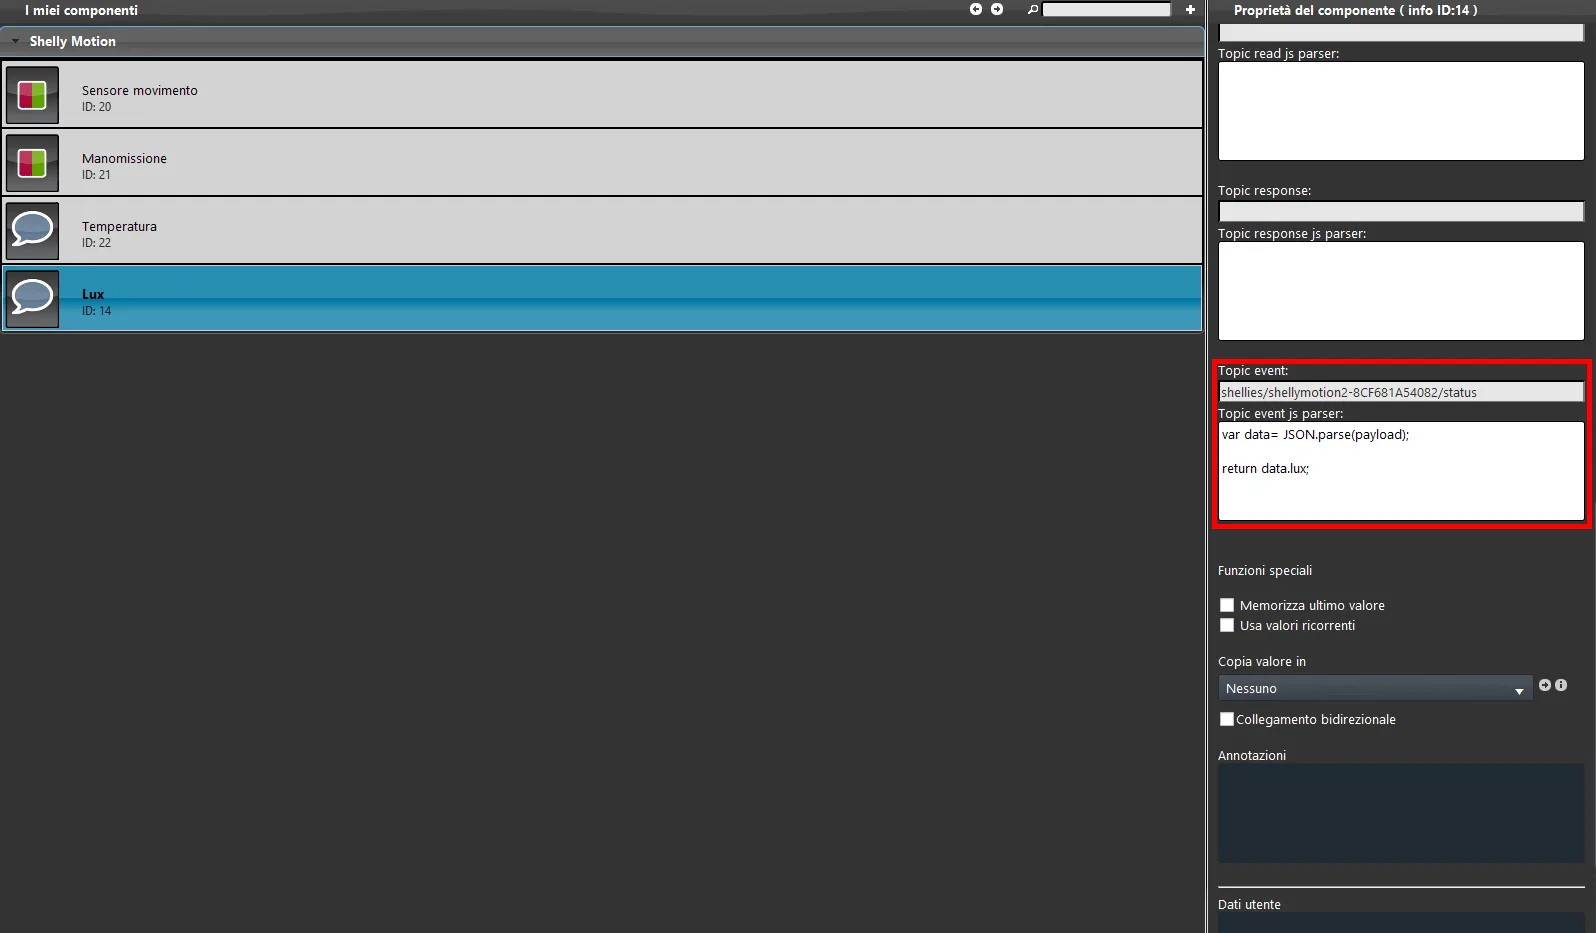
Add a new Info component to the project. This component will display the Lux value of the environment where the device is installed. The topic to configure is the following: shellies/shellymotion2-<device-ID>/status, where <device-ID> must be replaced with your Shelly device ID. Finally add the script that parses the payload received from the Shelly device.
Click the link to view the topic and script configurations.
Step 10:
Add a new Info component to the project. This component will display the device battery level. The topic to configure is the following: shellies/shellymotion2-<device-ID>/status, where <device-ID> must be replaced with your Shelly device ID. Finally add the script that parses the payload received from the Shelly device.
Click the link to view the topic and script configurations.
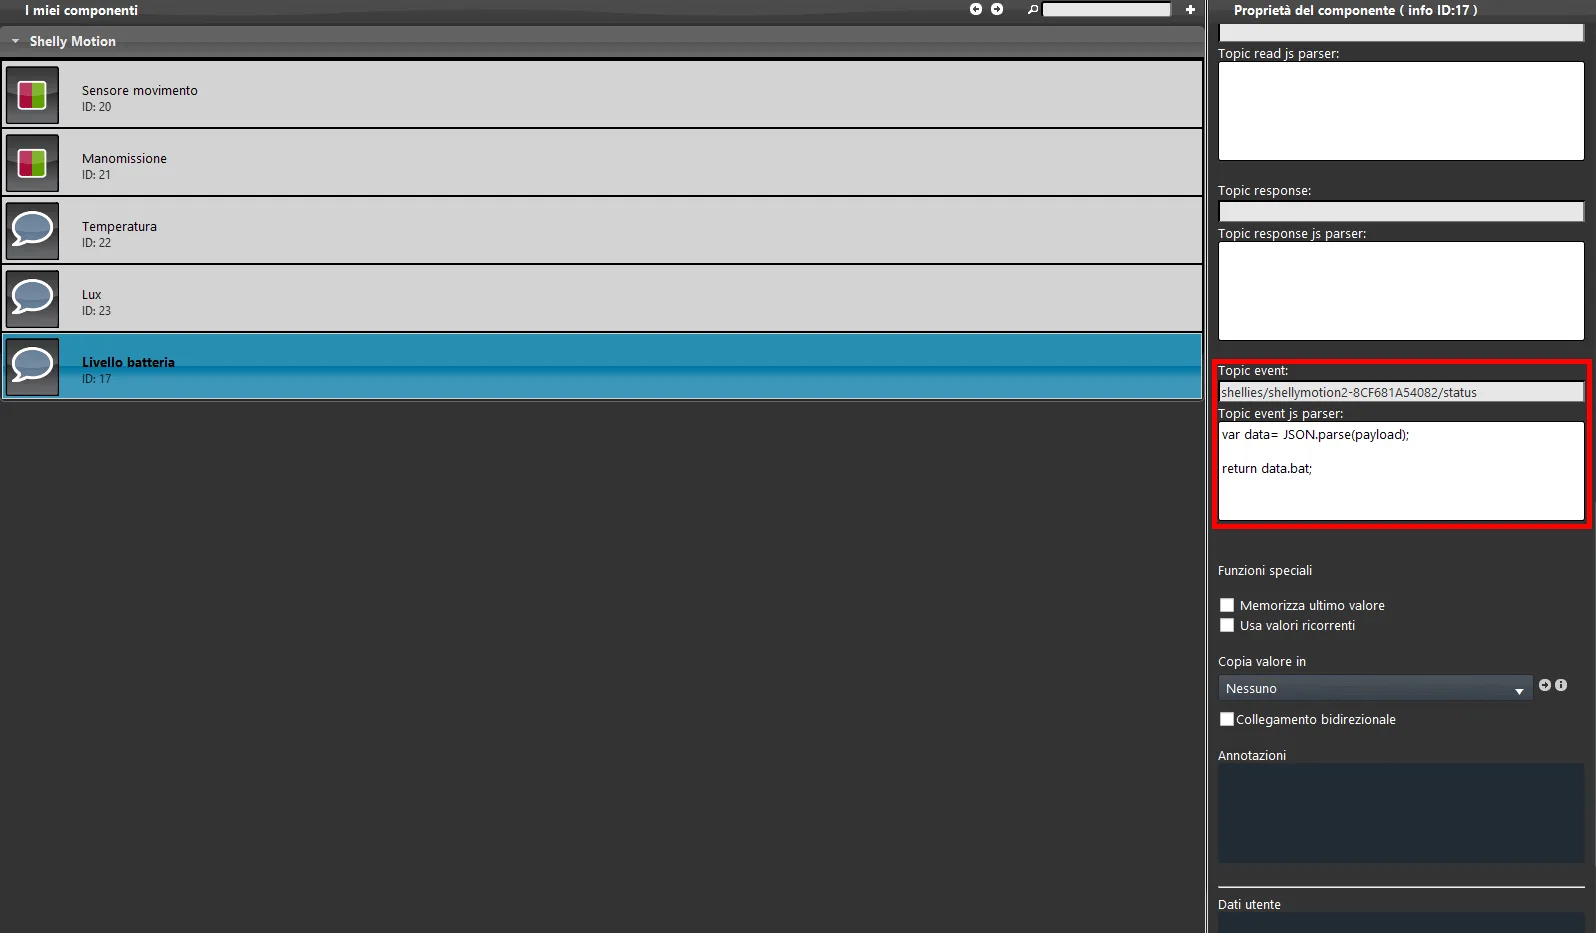
Step 11:
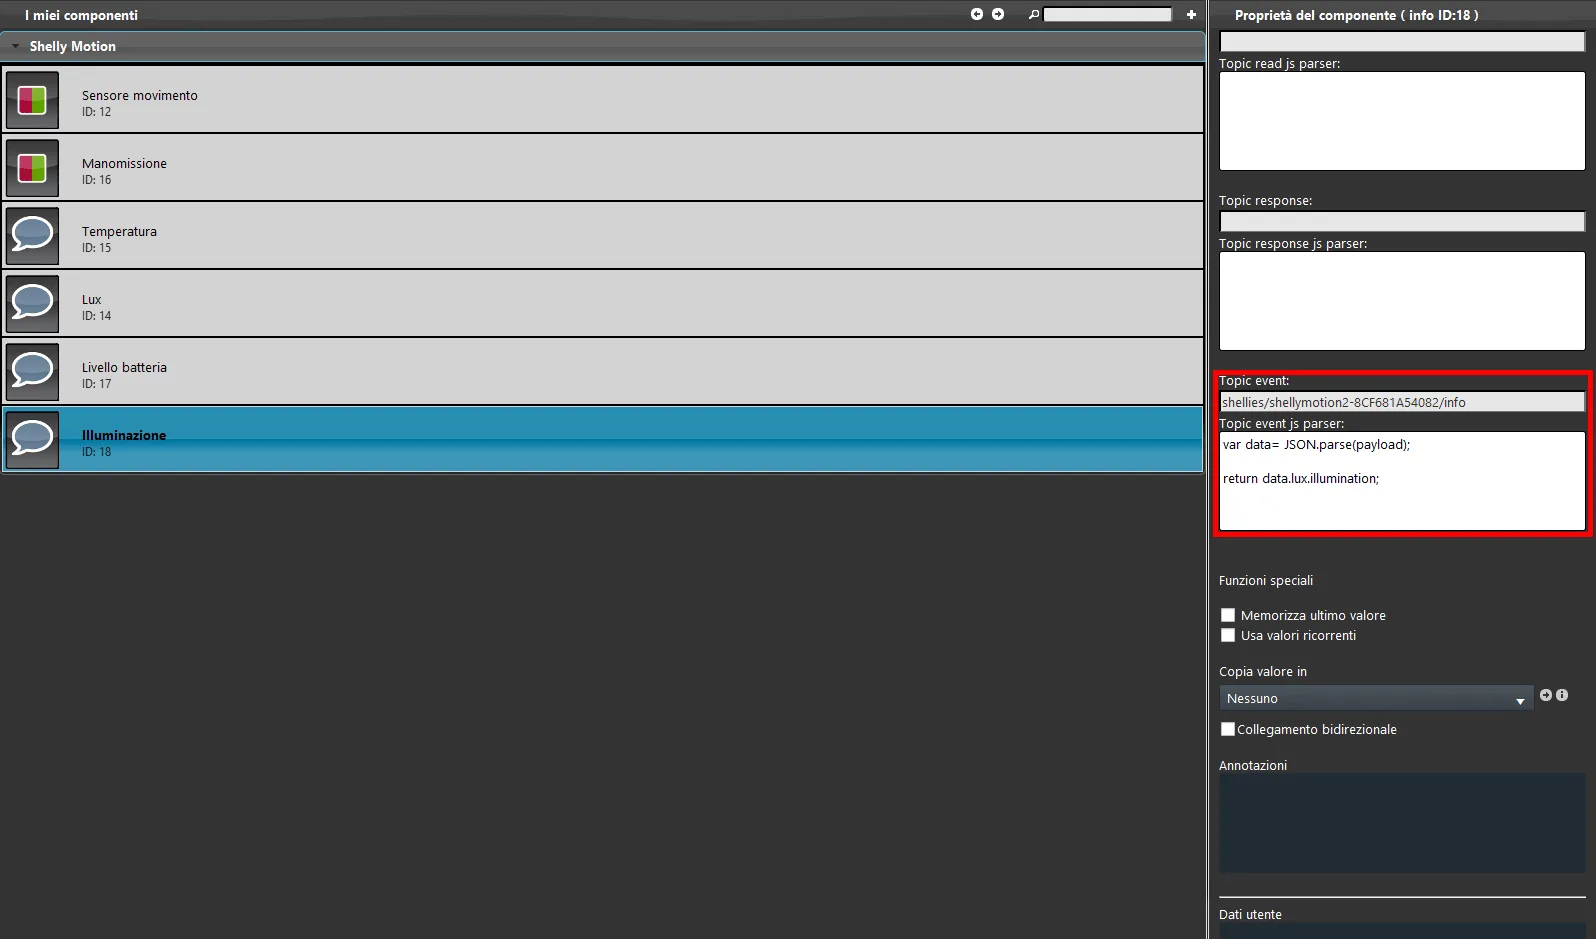
Add a new Info component to the project. This component will display the illumination value of the environment where the device is installed. The topic to configure is the following: shellies/shellymotion2-<device-ID>/status, where <device-ID> must be replaced with your Shelly device ID. Finally add the script that parses the payload received from the Shelly device.
Click the link to view the topic and script configurations.
Interface display
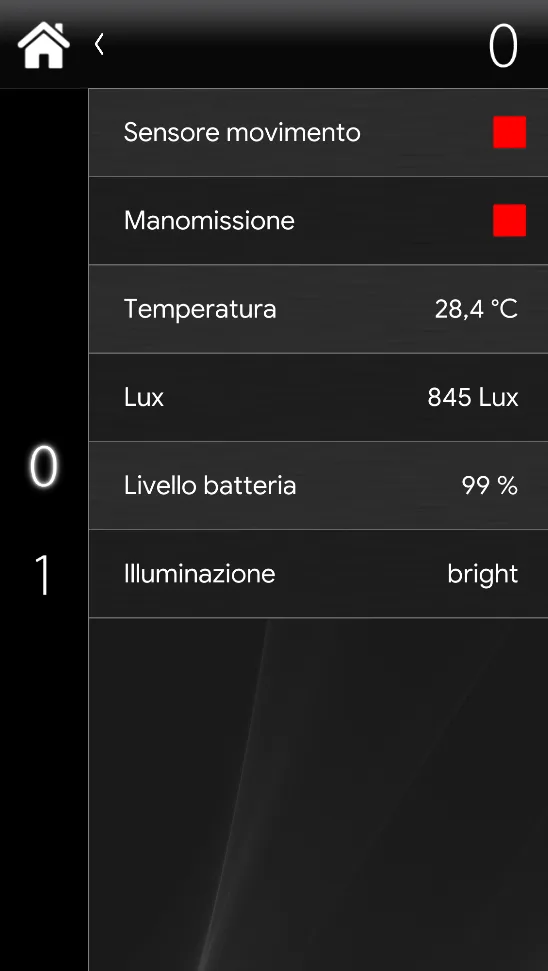
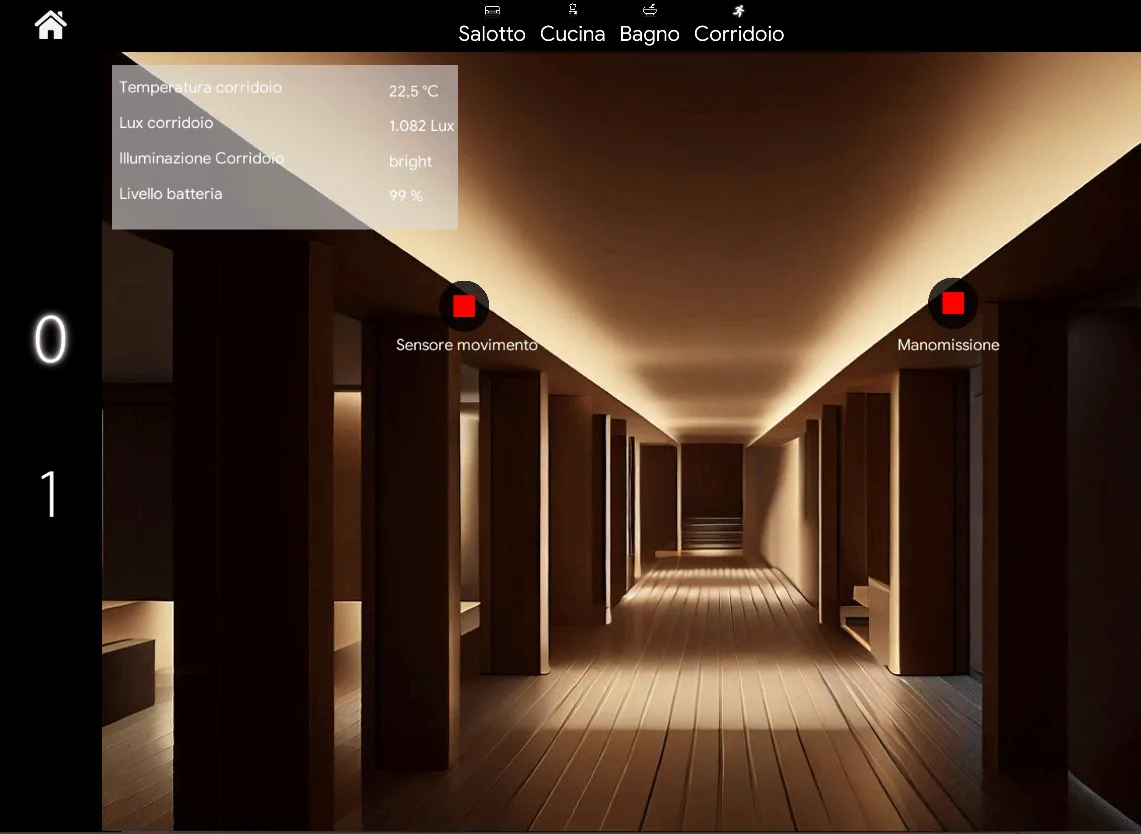
Here you can see some examples of how components can be displayed in the application interfaces Ilevia Remote Plus (Classic and Maps).
Classic User Interface
Map User Interface
Click the link below to download the Shelly Motion demo project.