
Integration of Shelly 4 Pro with MQTT in the Ilevia system
How to connect Shelly 4 Pro to the Ilevia server via MQTT and display the watt consumption of a channel in Ilevia Manager.
Introduction
Shelly 4 Pro allows you to control up to 4 channels and monitor the consumption of a specific cable or circuit; it can be easily mounted in the existing electrical panel. This guide explains how to connect it to the Ilevia server via MQTT and display the watt consumption of a channel in Ilevia Manager.
Wiring
Installation depends on your needs and available options; for mounting, refer to the Shelly website.
Web interface configuration
Step 1:
Connect to the device hotspot and access its web interface; the default IP address is 192.168.33.1.
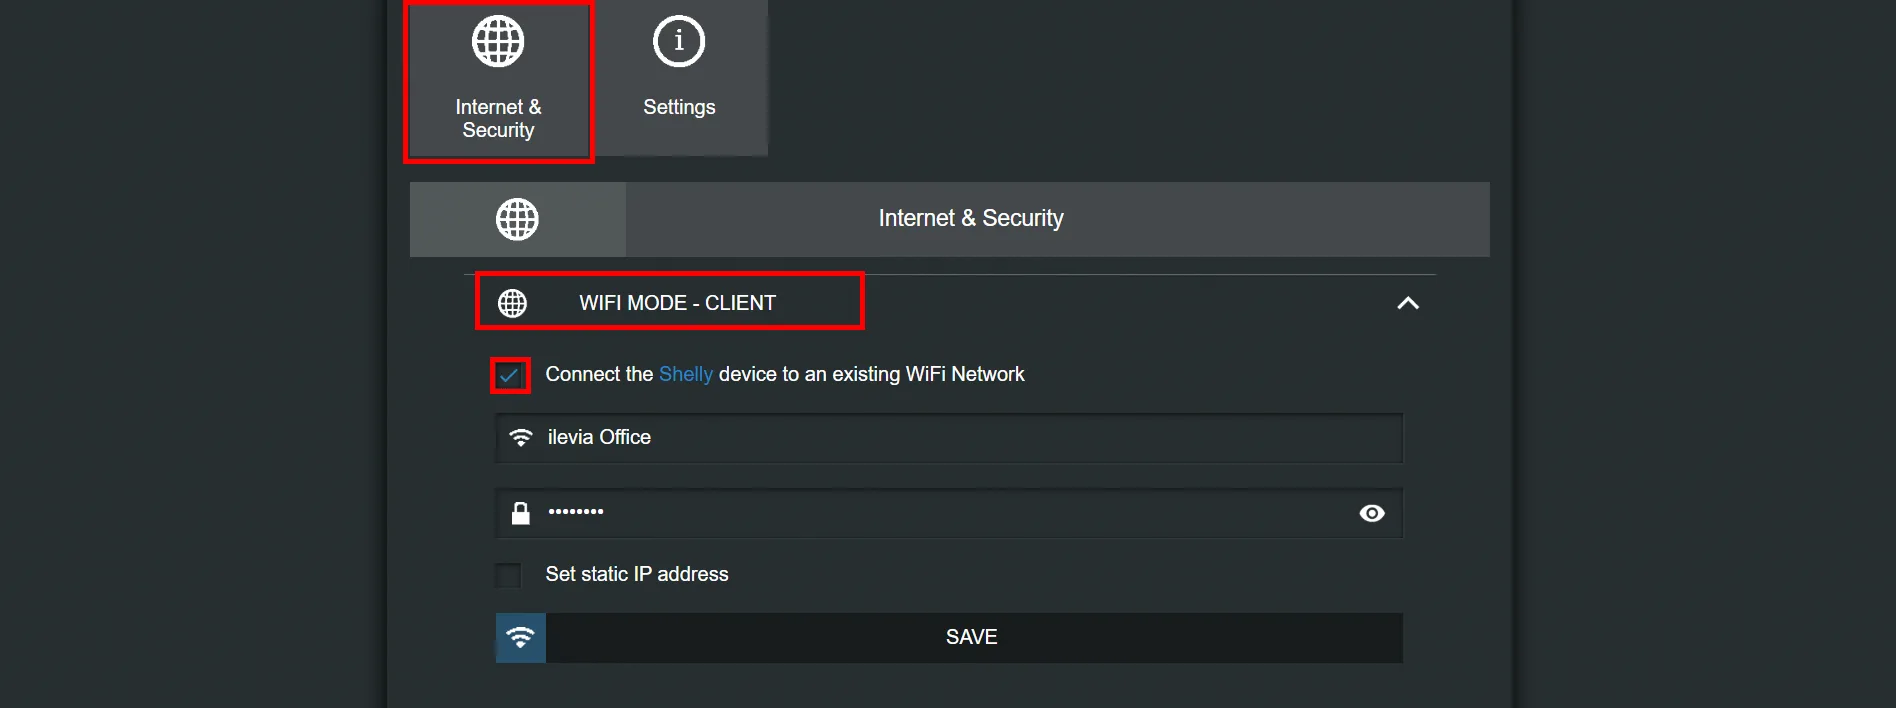
Click the Internet and security setting section, then Wifi mode client, select the “connect the shelly device to an existing wifi network” checkbox, and enter your Wi-Fi credentials.
Step 2:
To enable the MQTT protocol on the device via the web interface:
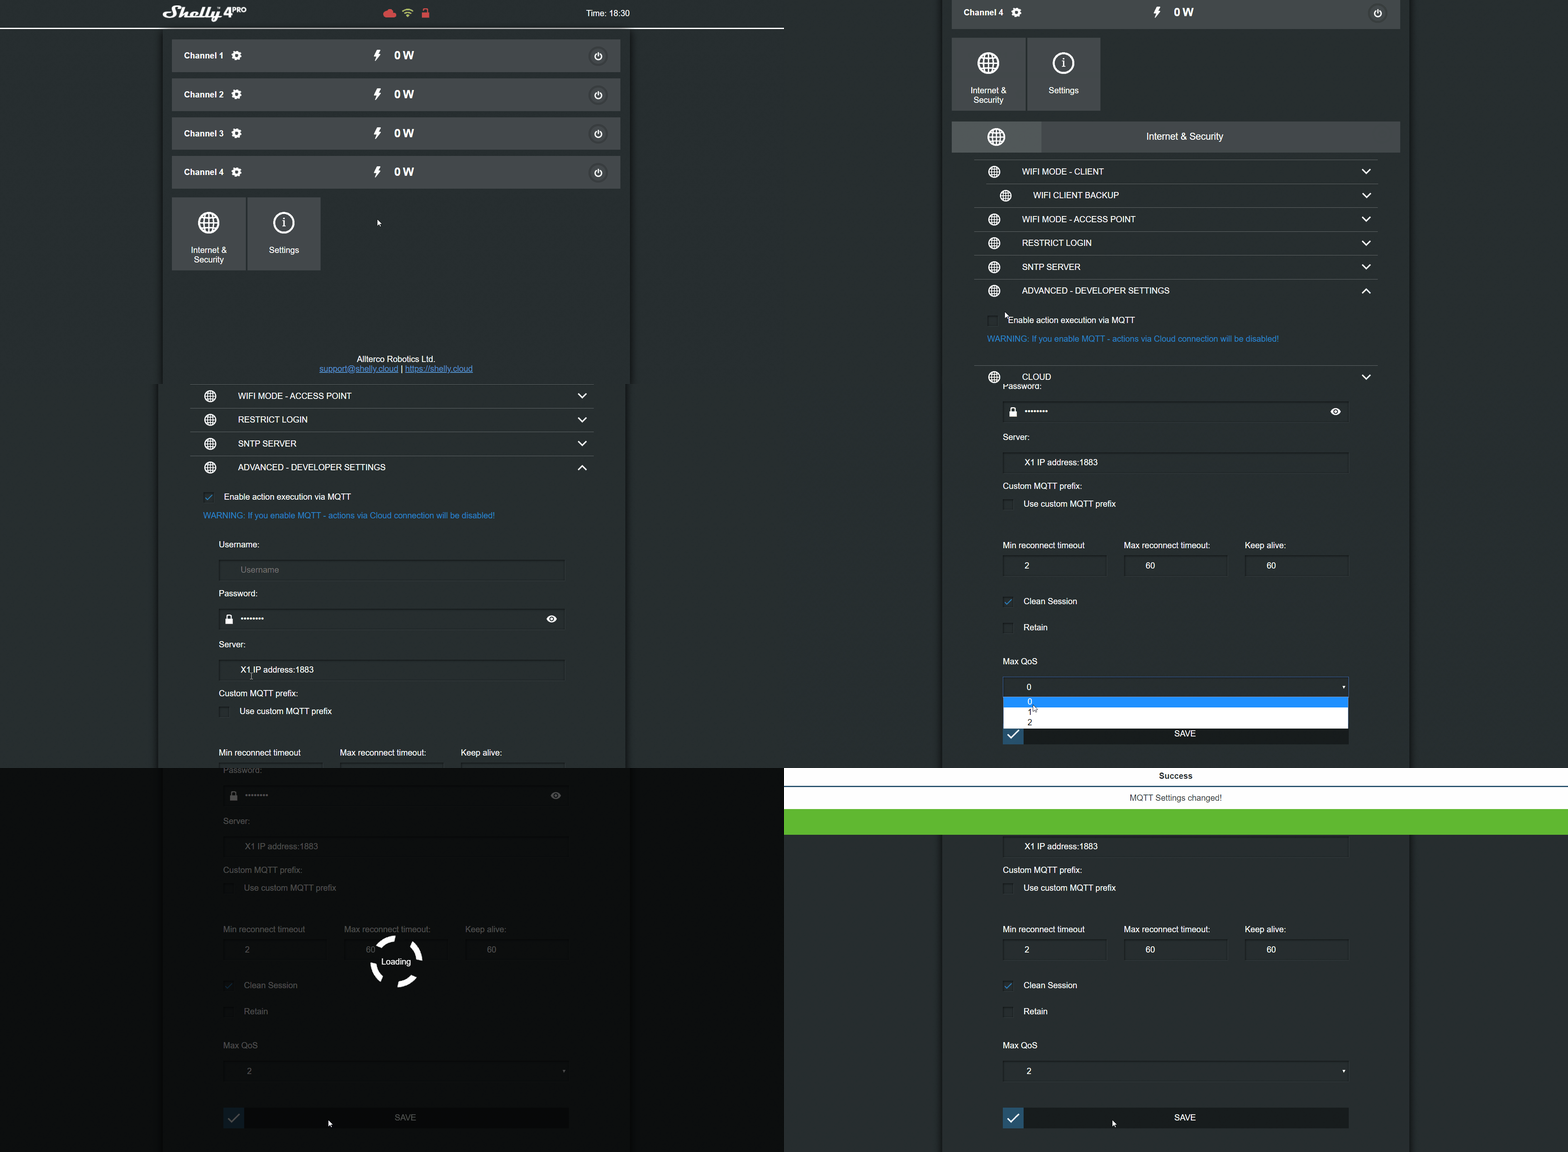
go to the Internet security settings section, then Advanced developer settings, and select the Enable action execution via MQTT checkbox;
enter the IP address of your X1 server and set QoS to 2.
Step 3:
You will need the device ID to set up the topics.
We have a guide that explains how to find the ID.
Step 4:
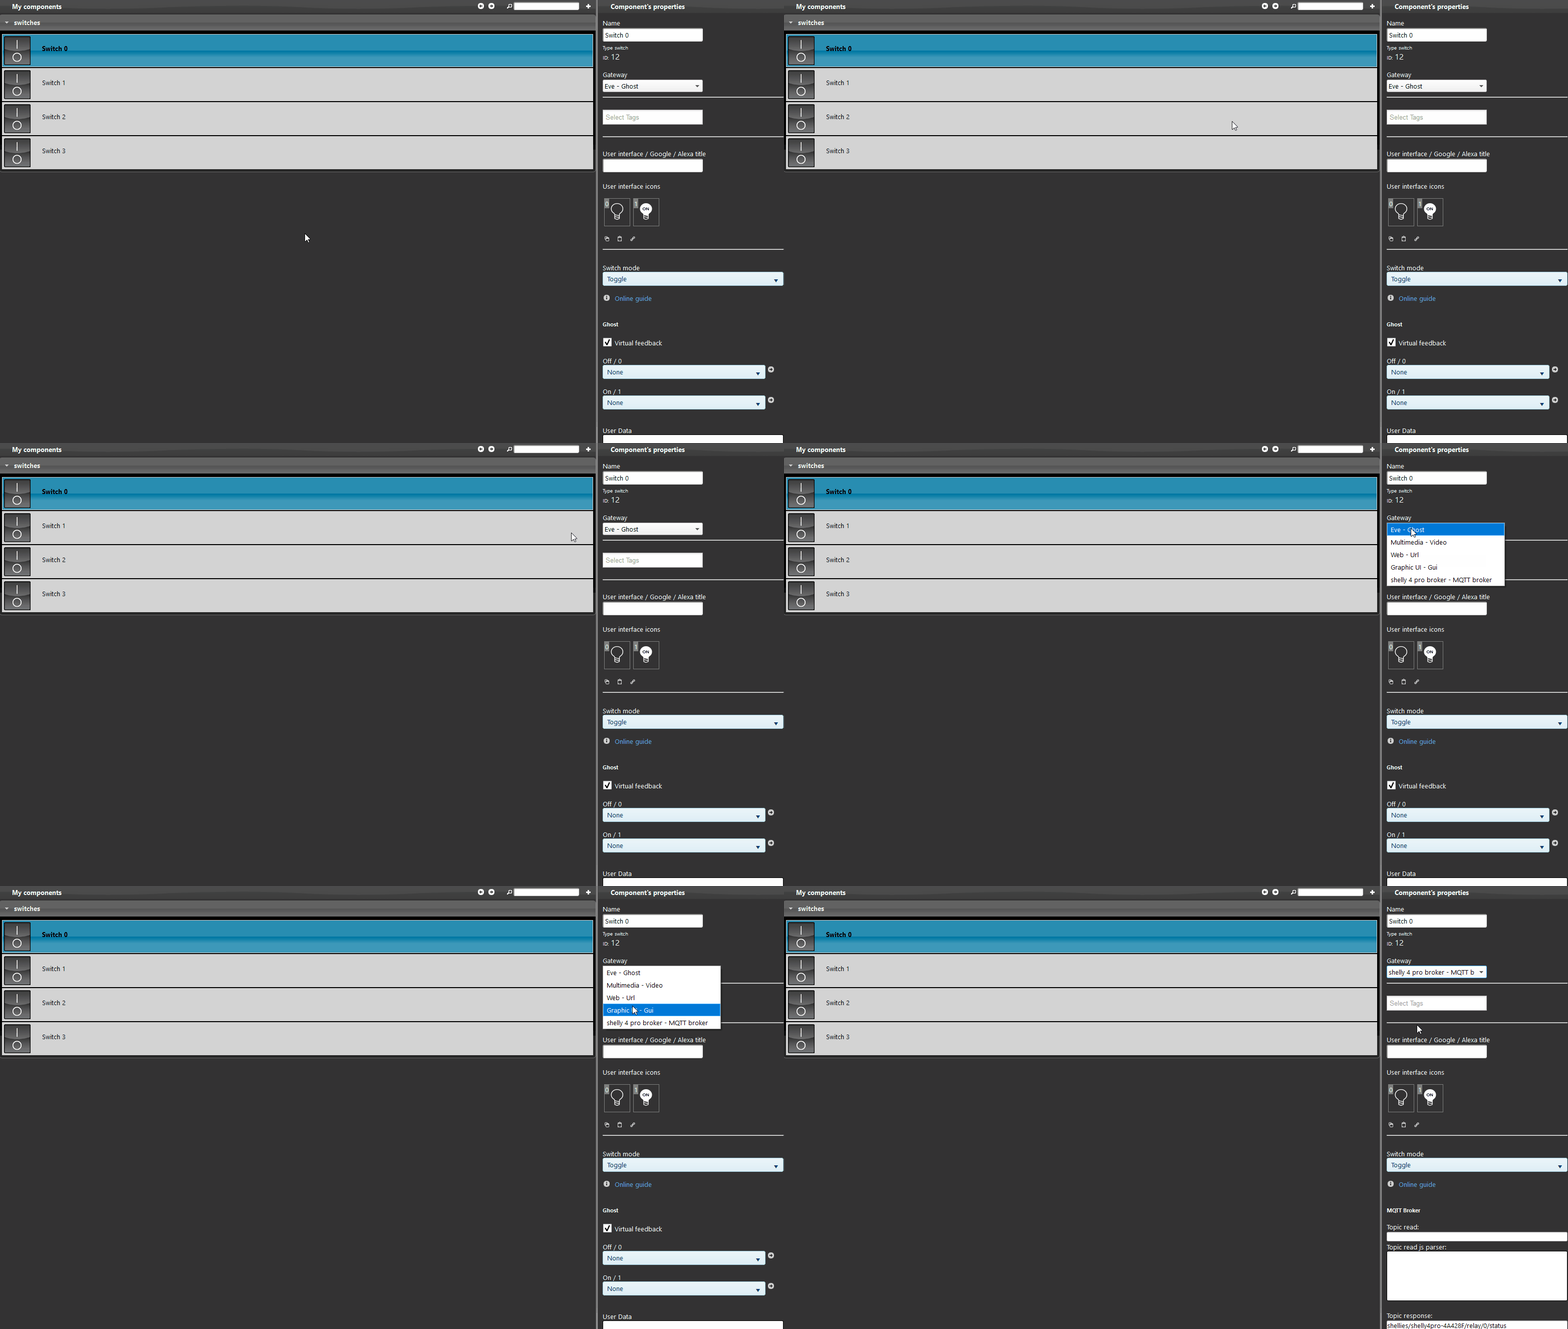
The next step is to set up the project in Ilevia Manager.
Create a new MQTT gateway following this guide, then return to this page to continue.
Step 5:
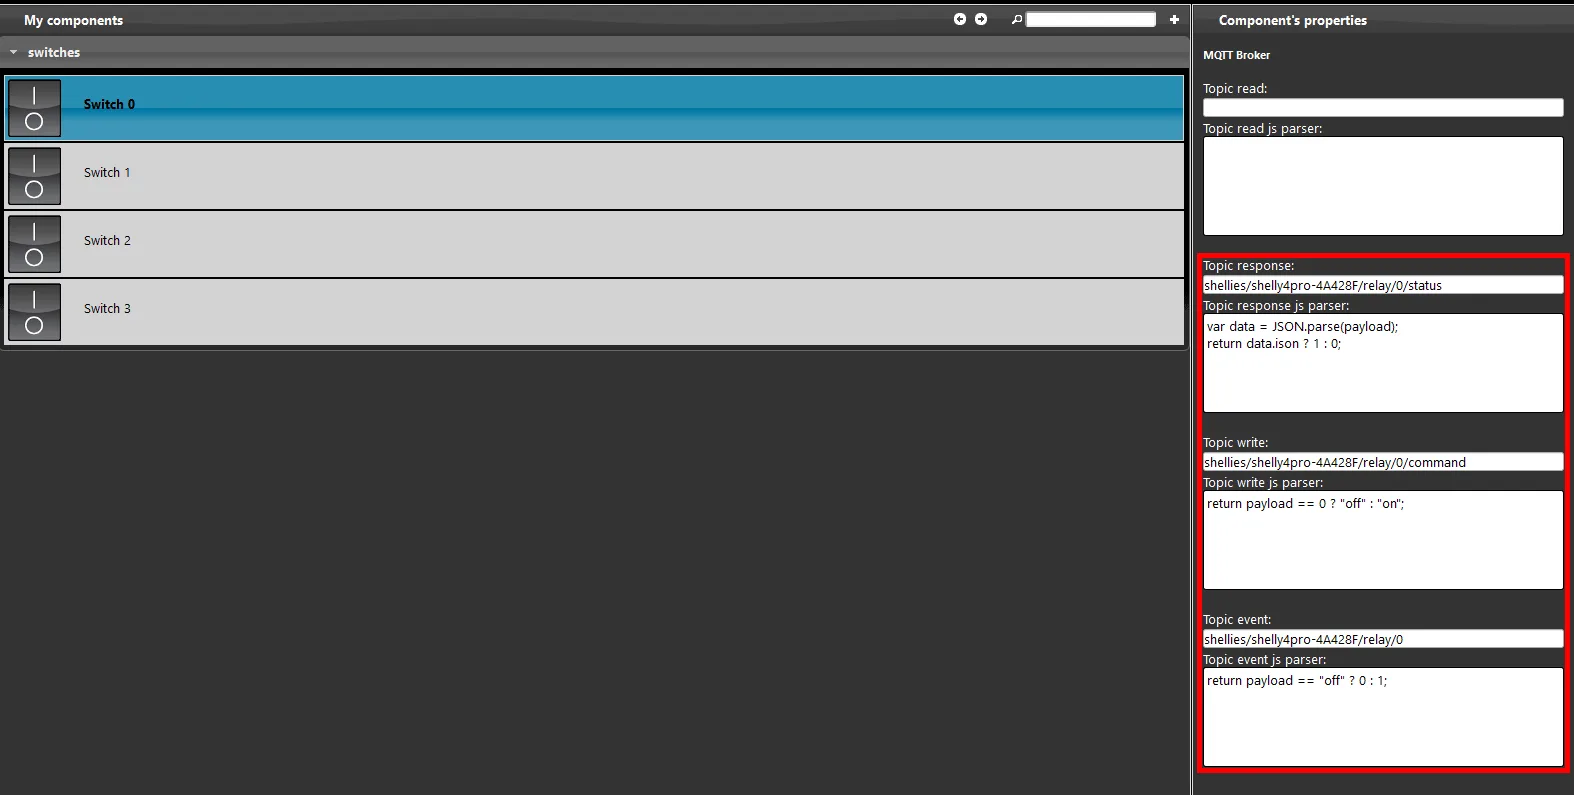
You can find the correct topic syntax in the Shelly website API documentation.
If you configure more than one switch in the project, you will need to change the number after “relay” in the topic.
Click this link to view the topics shown in the image below.
Step 6:
Info component setup:
The Info component displays the current watt value of a specific light.
Add the component to the project and set the gateway to MQTT.
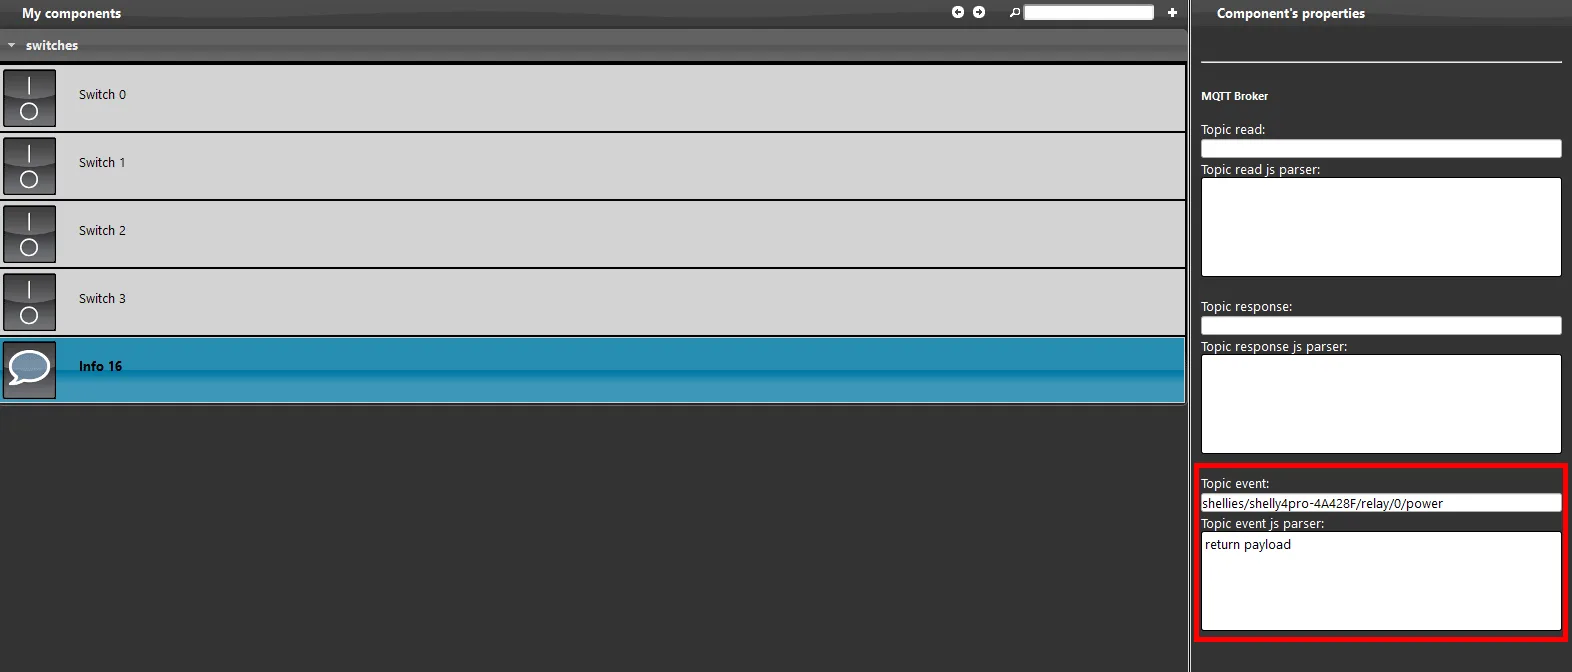
To display the value, you must subscribe to the topic.
The topic for this device is shellies/shelly4pro-deviceid/relay/<i>/, where <i> is the channel that will be displayed in the Info component.
Click this link to view the topics shown in the image below.
Step 7:
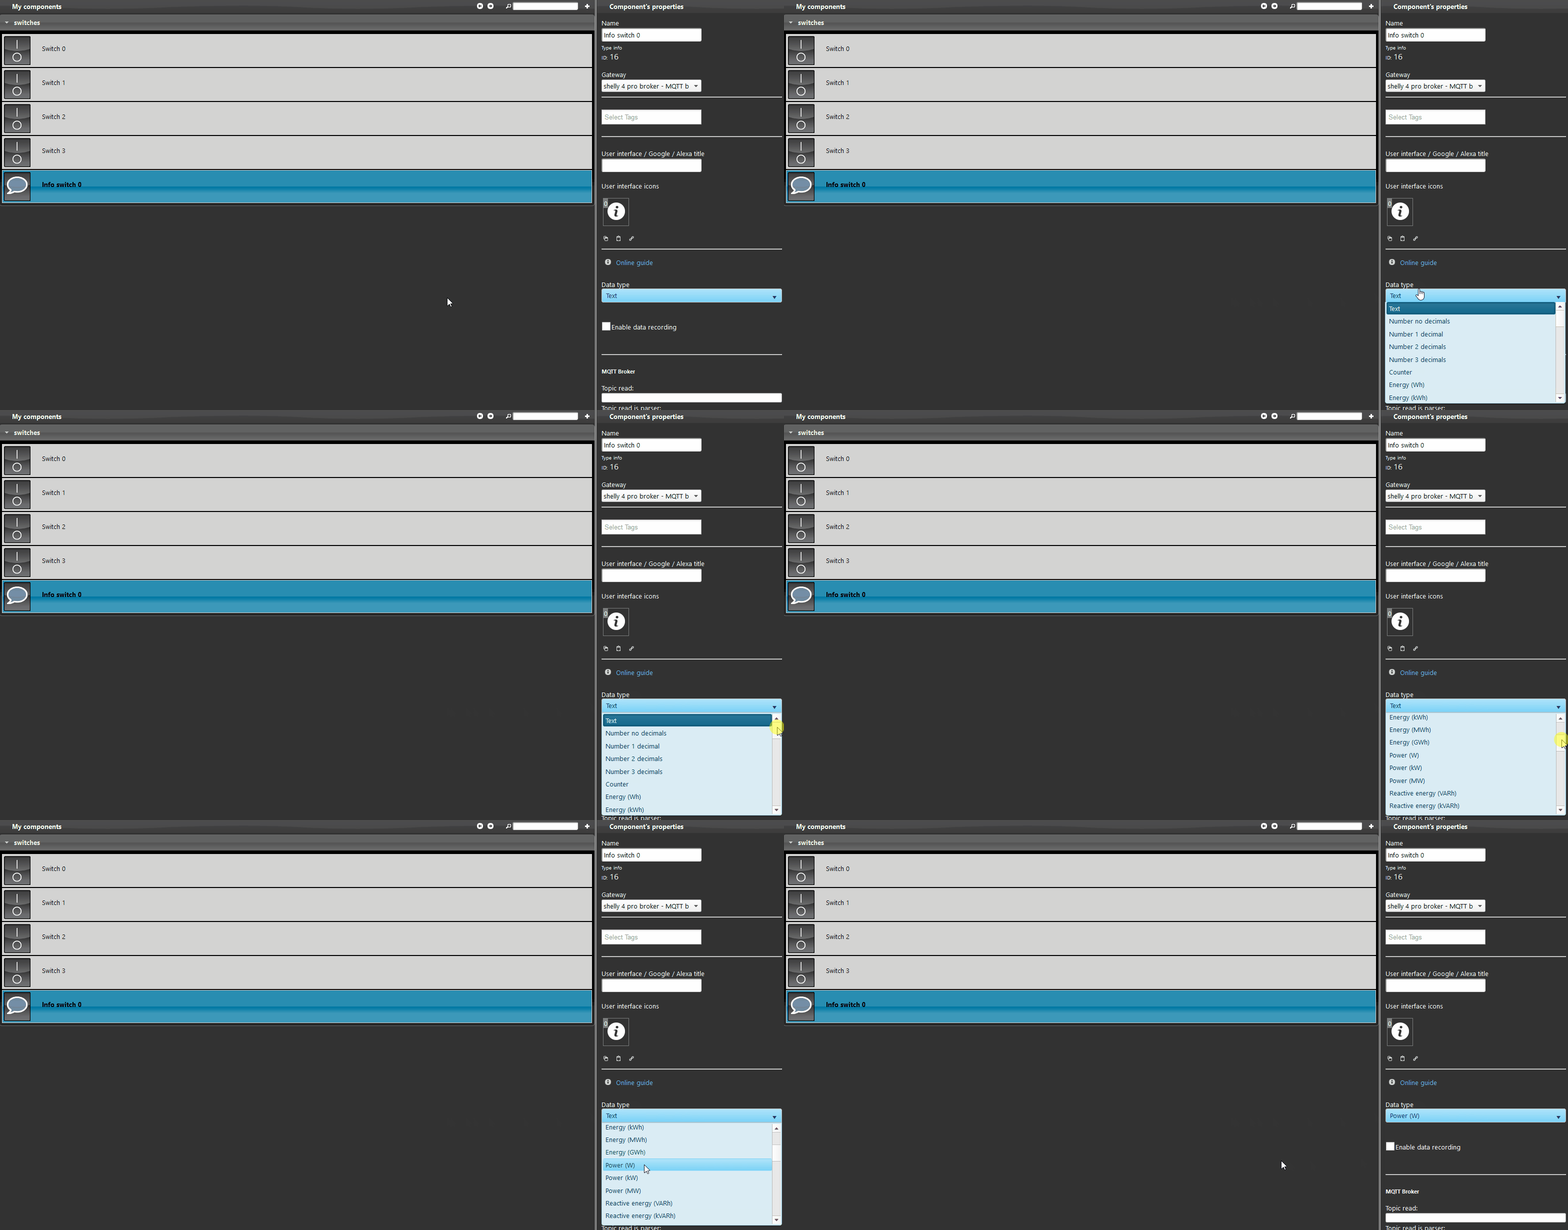
Select the unit of measure from the drop-down menu in the component: in this case it will show the watts consumed by the light.
Step 8:
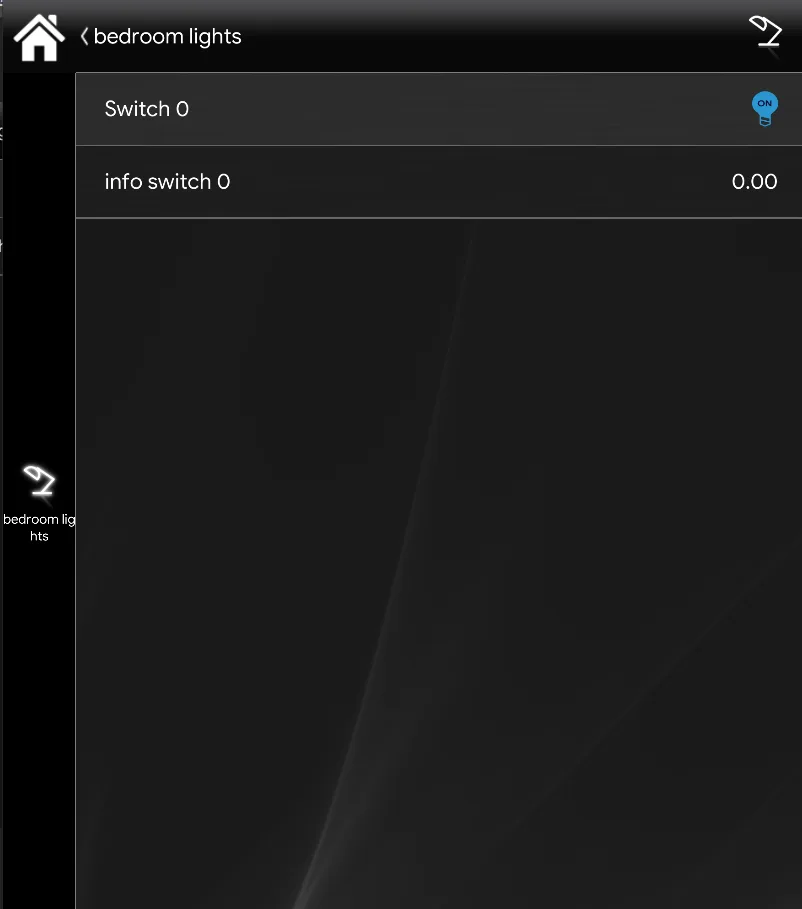
Upload the project to the X1 server and wait a few seconds: the Info component will display the correct power consumption of the lamp.
Troubleshooting
1. Make sure you have the latest available version of Ilevia Manager and the X1 server firmware.
2. Make sure the Shelly device is correctly connected to your network.
3. If you cannot connect the broker, check that your X1 server has been configured correctly.
Learn more about our dedicated Shelly solution
Frequently Asked Questions (FAQ):
How do I reset the Shelly 4 Pro device to its factory settings?
Press the button in the center of the device once, then hold it down for 10 seconds.