
Shelly Flood Integration with MQTT in the Ilevia system
How to configure the Shelly Flood sensor with the MQTT protocol in Ilevia Manager, with topic verification and the final result.
Introduction
This guide explains how to set up the Shelly Flood device with the MQTT protocol. The device allows temperature and liquid monitoring, with the option to set an emergency mode that will send an alert when a trigger event occurs.
This device requires a lithium battery model 3V CR123A.
Web interface configuration
Step 1:
Once connected to the device hotspot, enter the device’s default IP address (192.168.33.1) in your browser’s address bar.

Step 2:
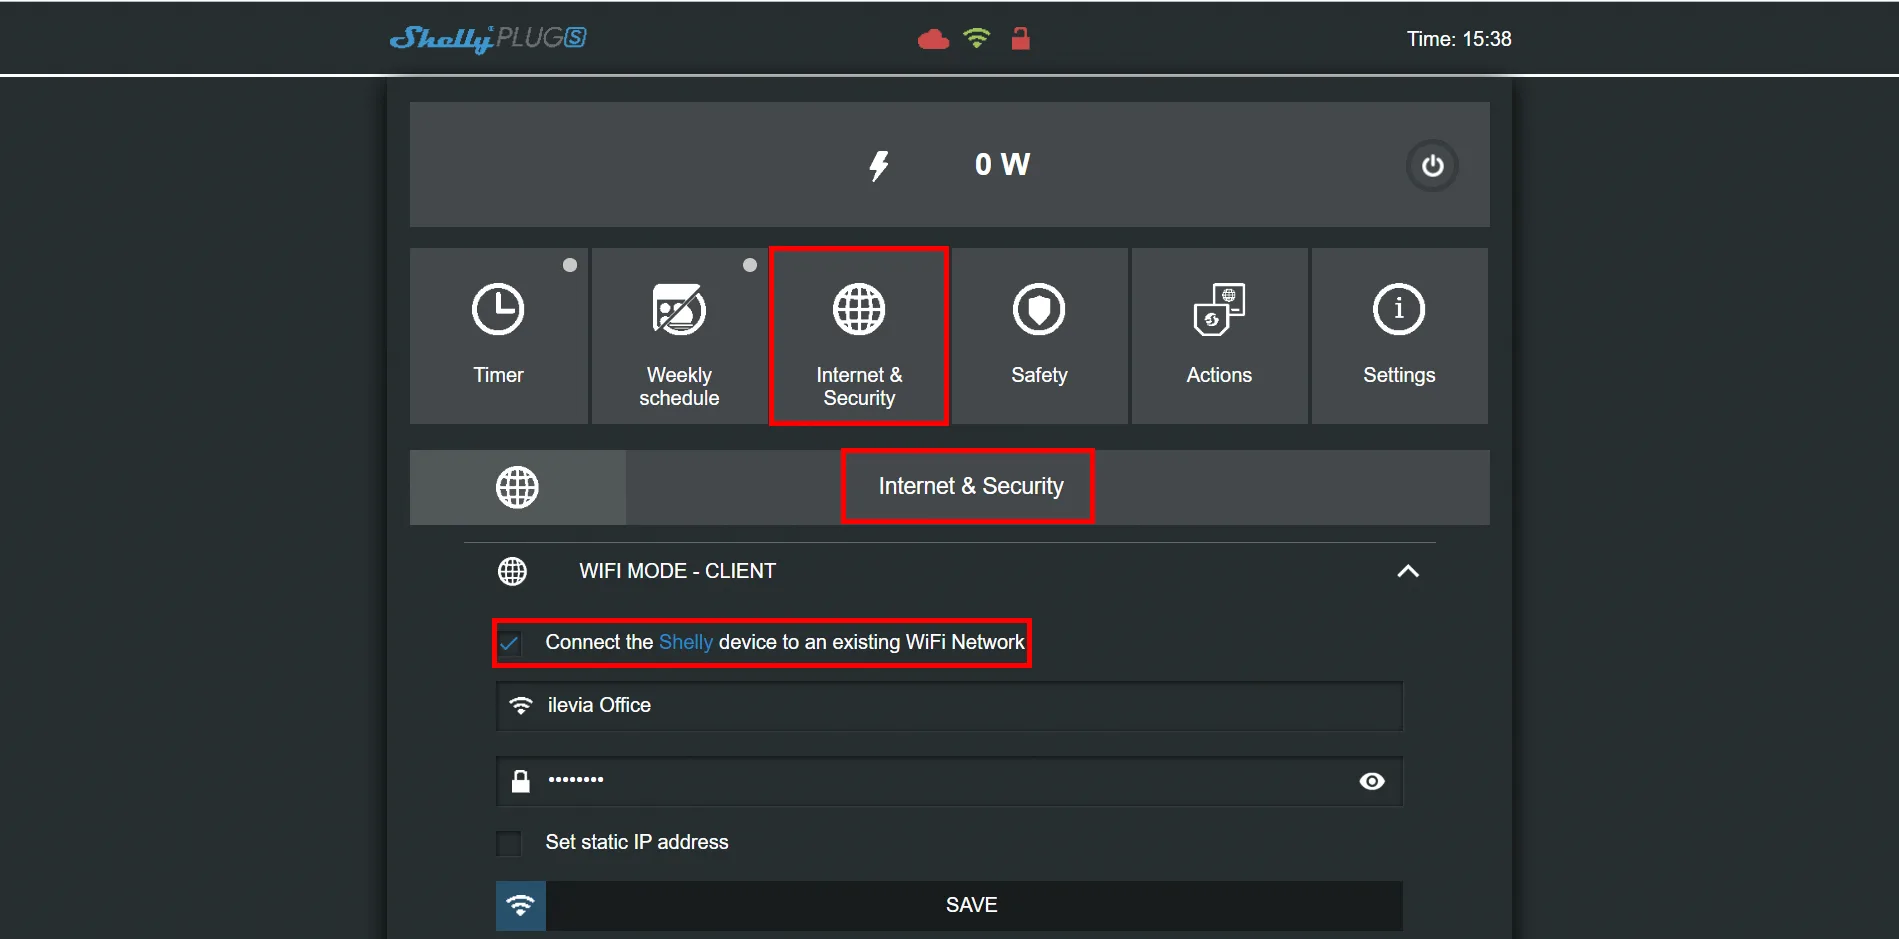
Now we will enable Wi-Fi mode on the Shelly device so that it connects to your Wi-Fi: go to “internet security”, then to “wifi client” and finally click the box “connect the shelly device to an existing wifi network”.
Step 3:
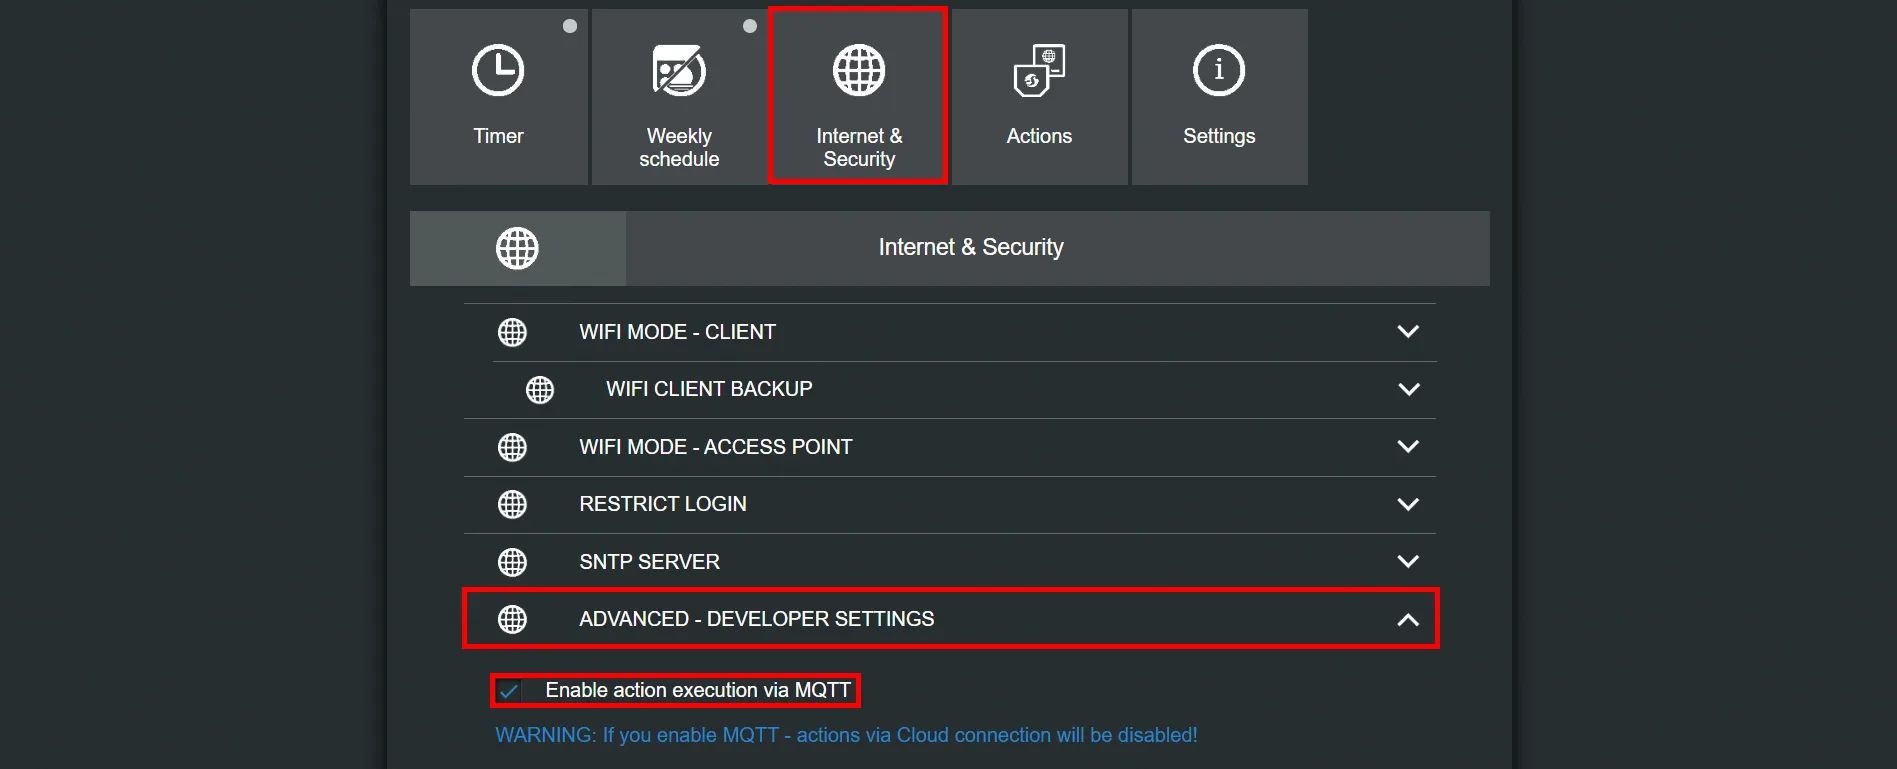
To set up MQTT on the device, go to Internet security, then “advanced developer settings” and click the box “enable action execution via MQTT”.
Step 4:
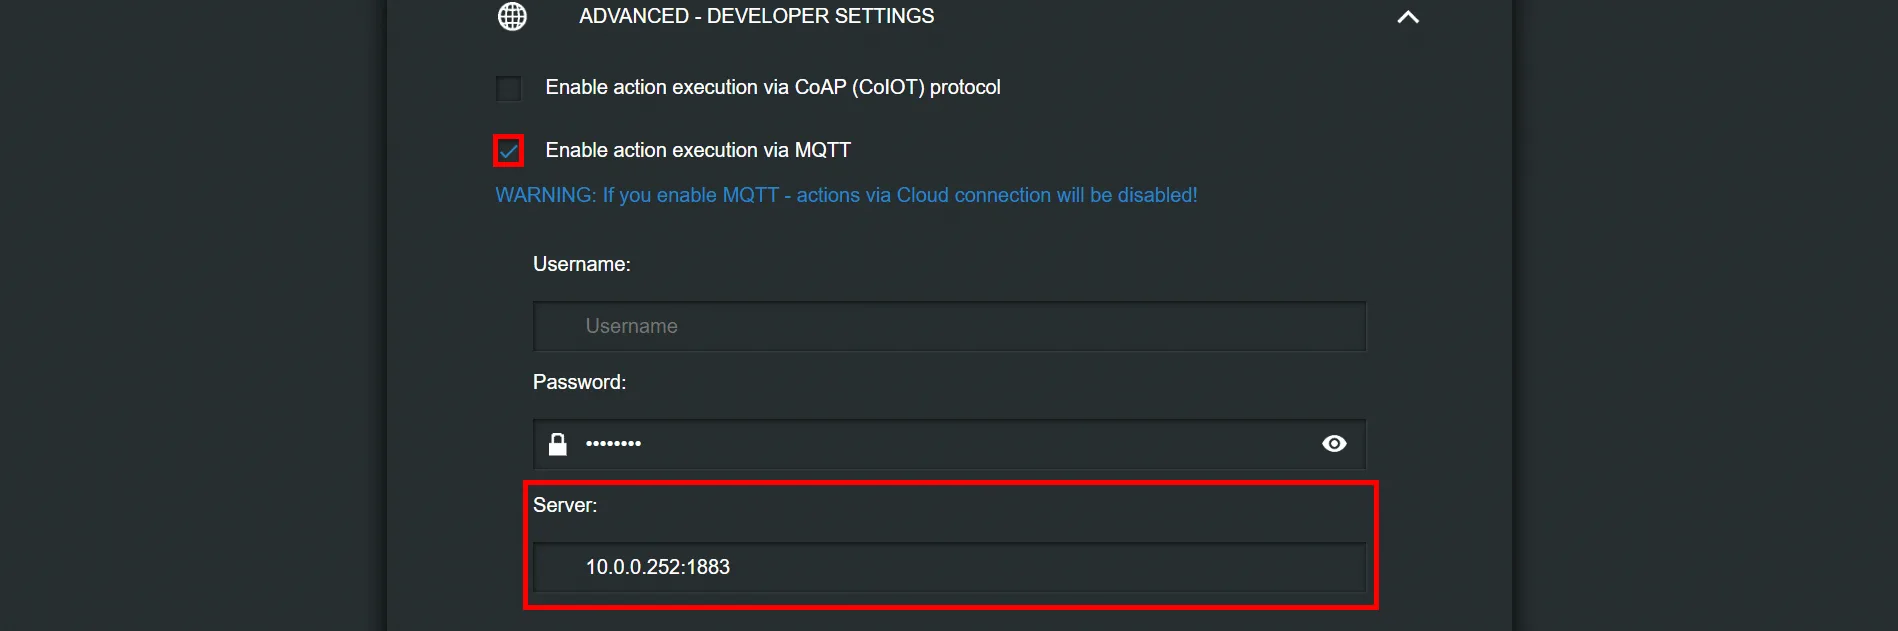
Enter the server IP in the text box “server”.
Step 5:
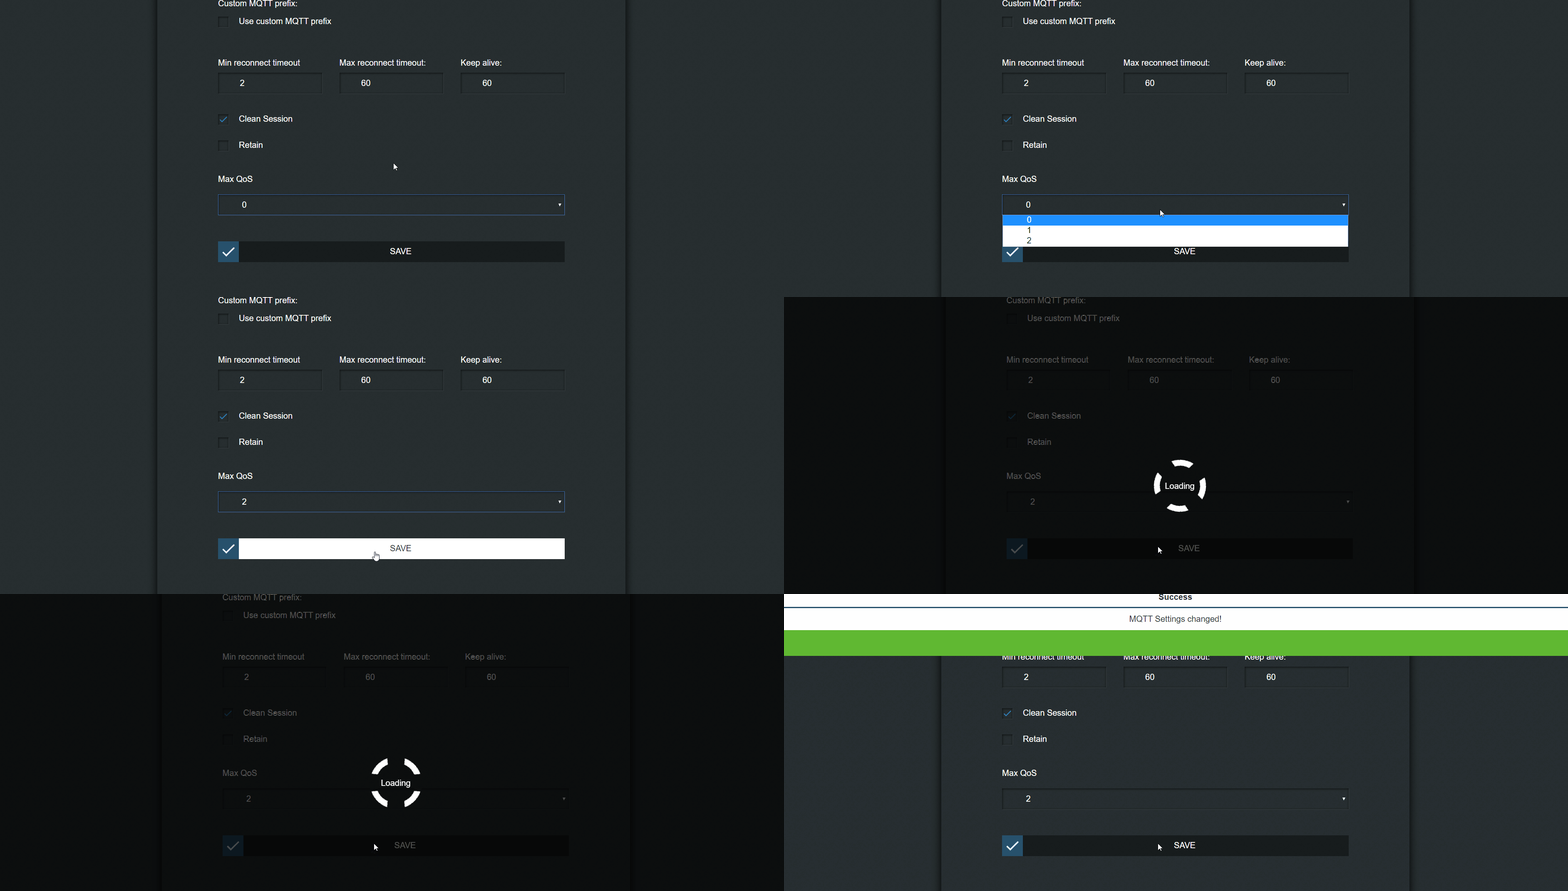
Set the Quality of Service (QoS) to 2.
Step 6:
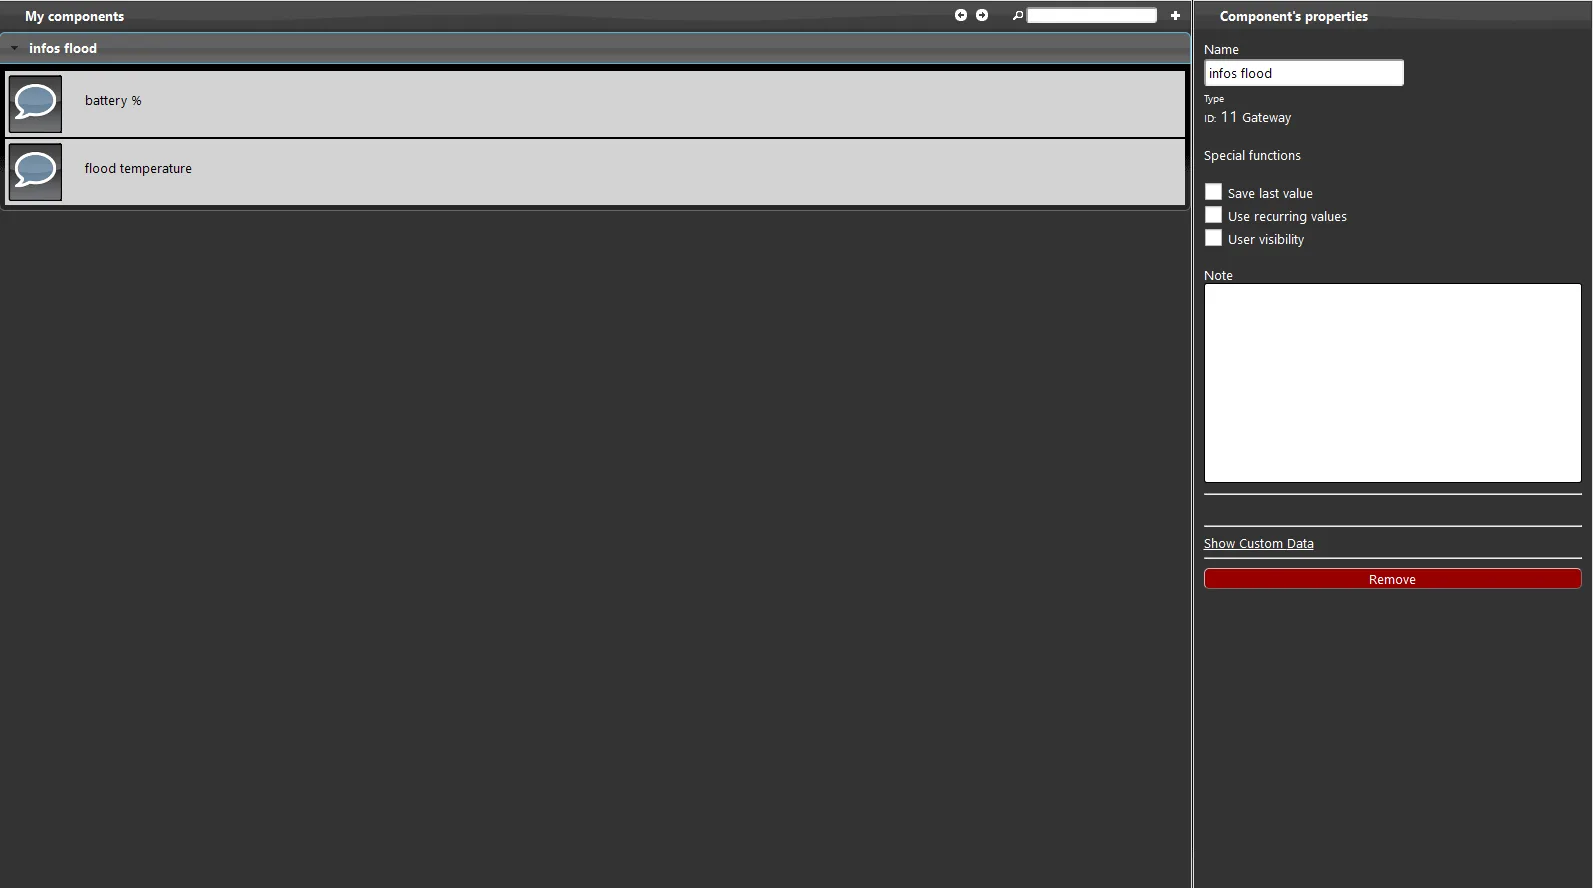
1. Create a new project with Ilevia Manager;
2. Create a new MQTT protocol as explained in this guide;
3. Add 2 info components from the basic section;
4. Create a new group and insert the two info components.
Step 7:
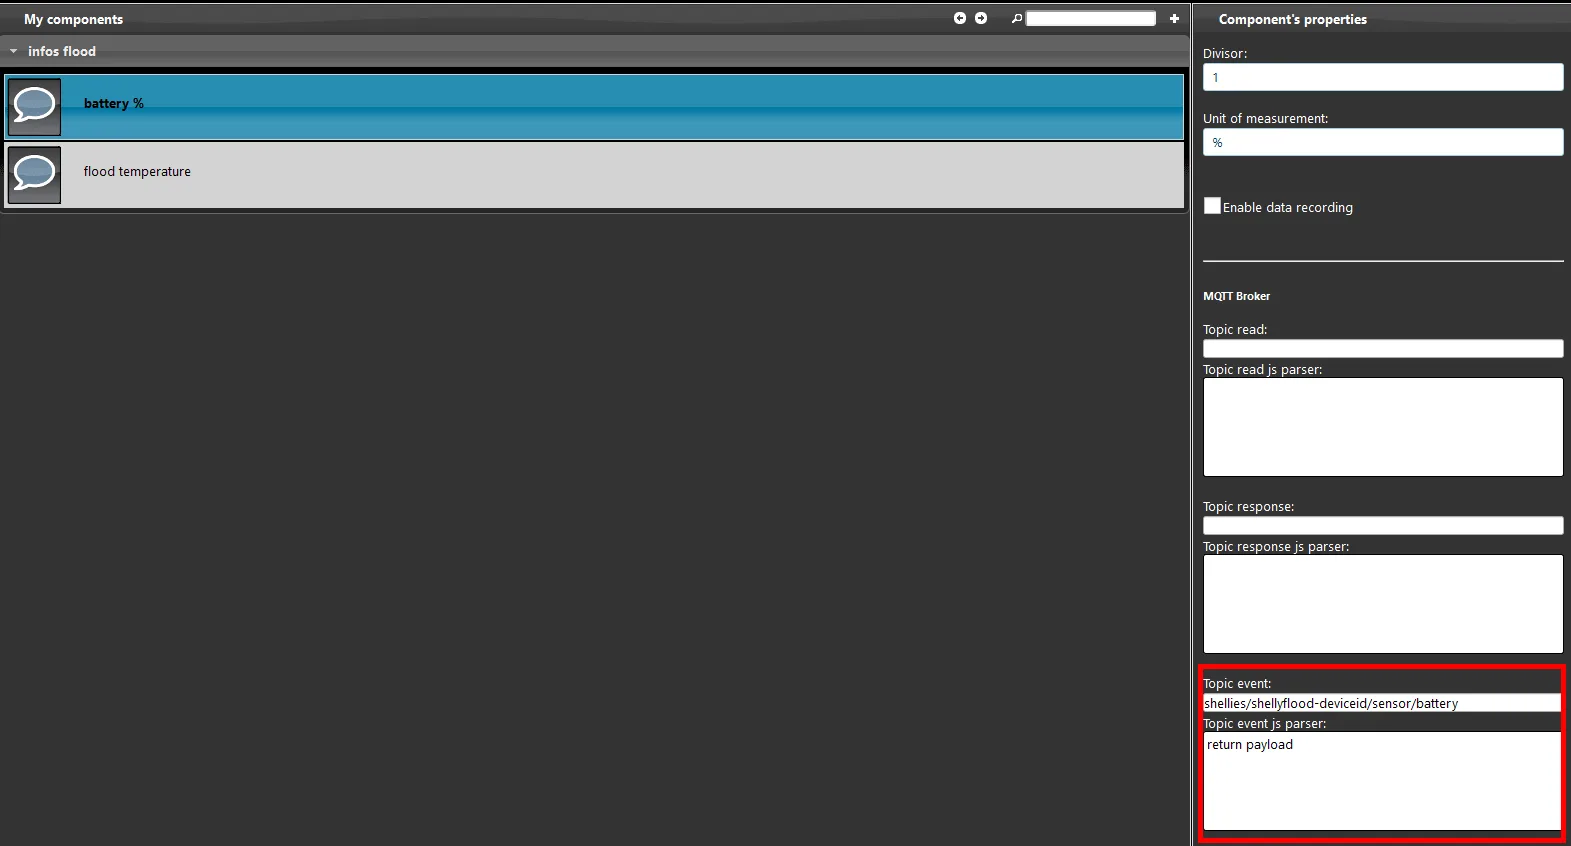
There is a guide that explains how to find the device ID.
Once you have the ID, you can configure the topics. You can find the topics for this device on the Shelly website.
The topics are shown in the image below.
By clicking this link you can view the topics shown in the image below.
Step 8:
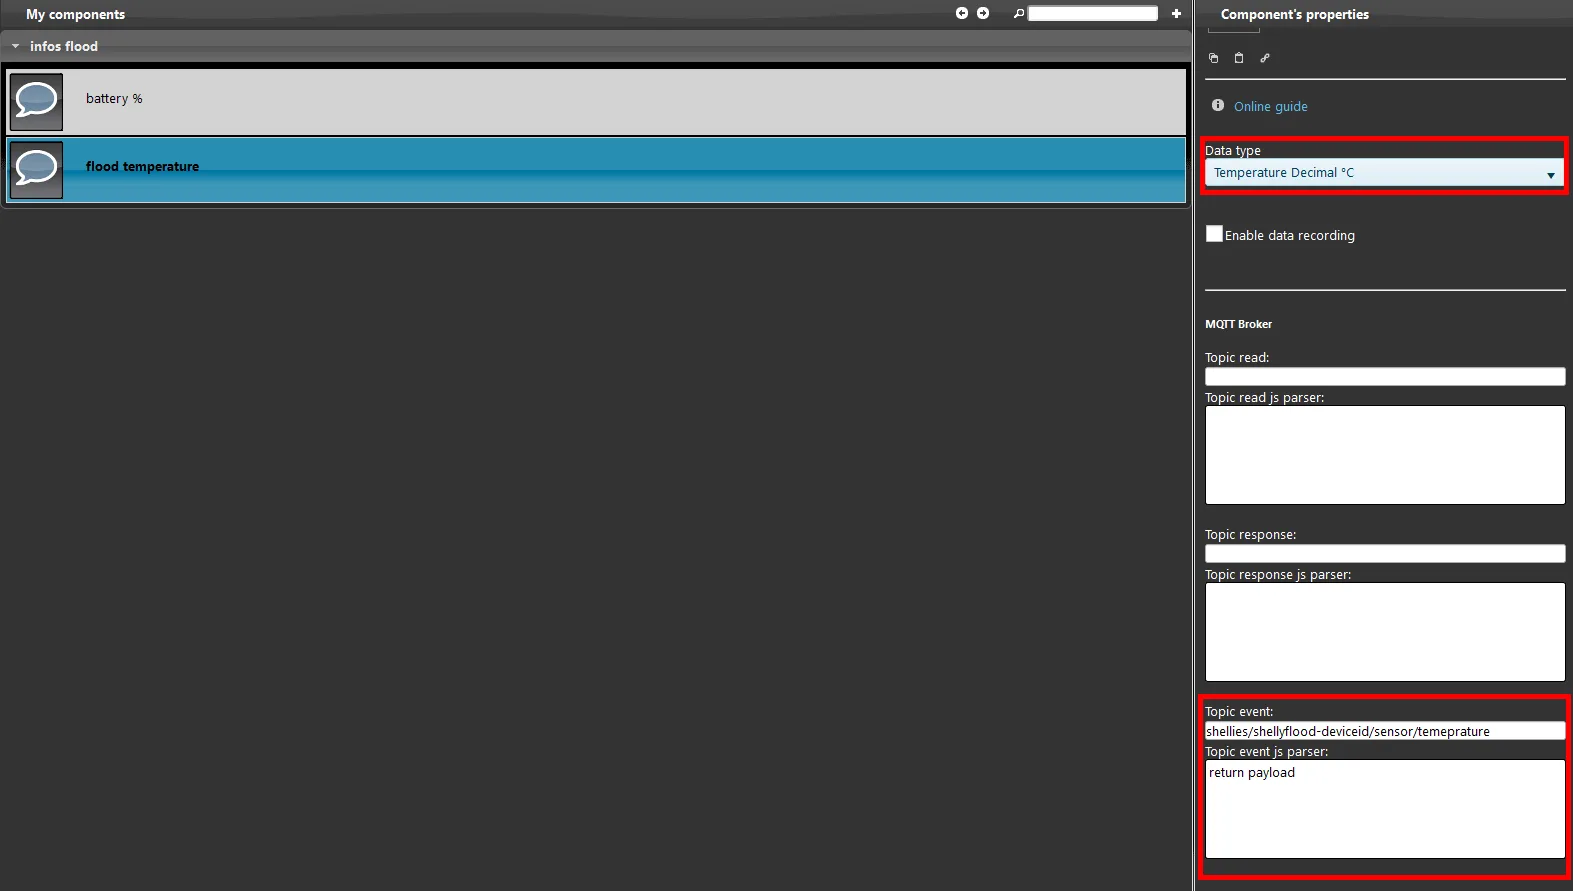
Set the other info component: this component will display the liquid temperature.
Enter the topic inside.
Set the temperature unit to “°C” as shown in the image below.
By clicking this link you can view the topics shown in the image below.
Step 9:
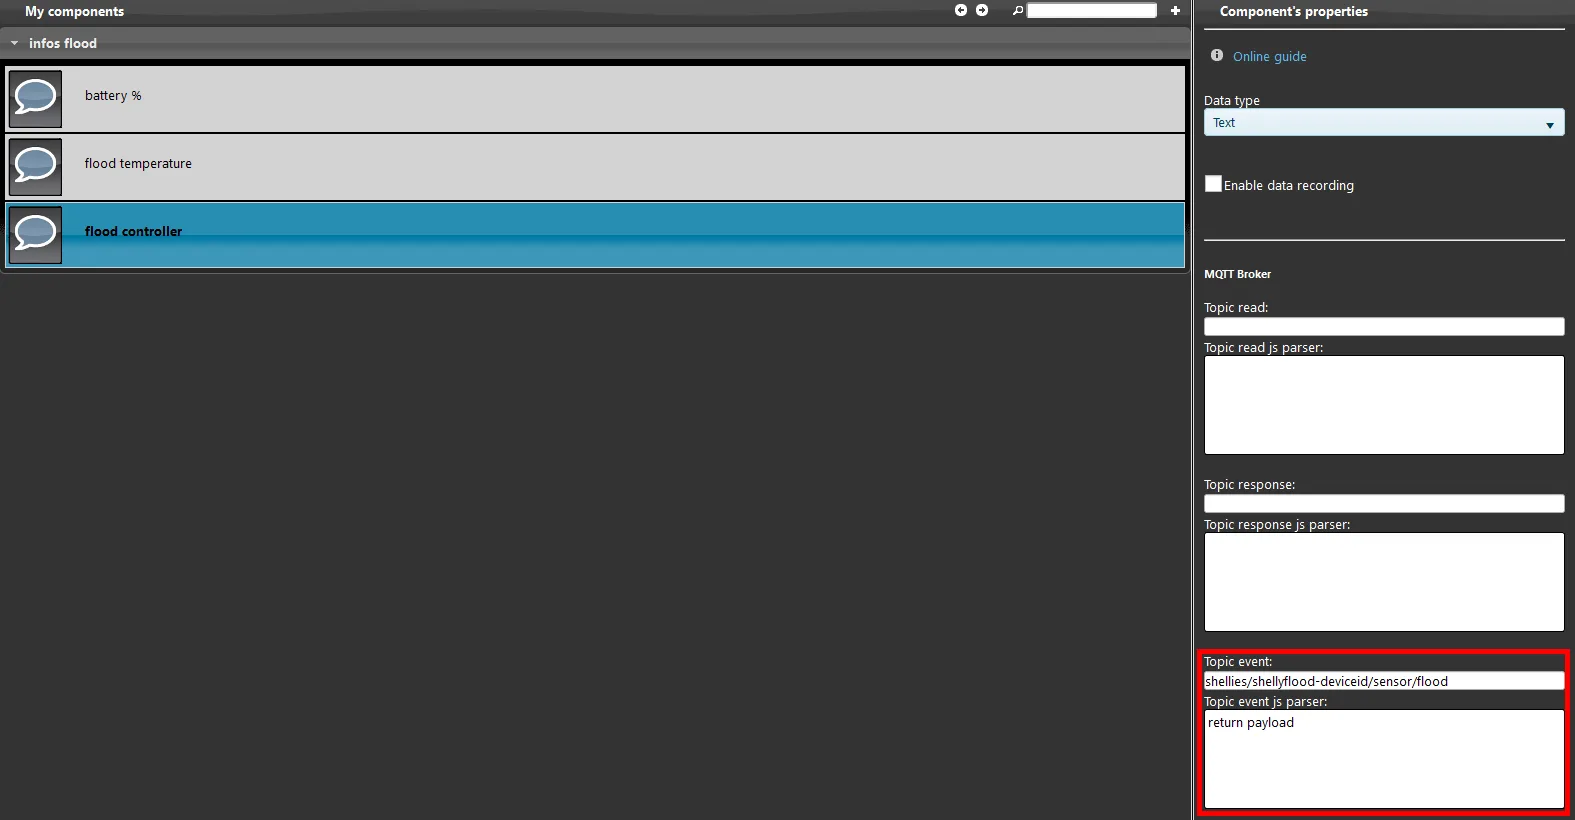
To set the shelly device in fluid control mode:
Add another info component to the project as shown in the figure below
write the correct topic to display the message payload
Click this link to view the topics shown in the image below.
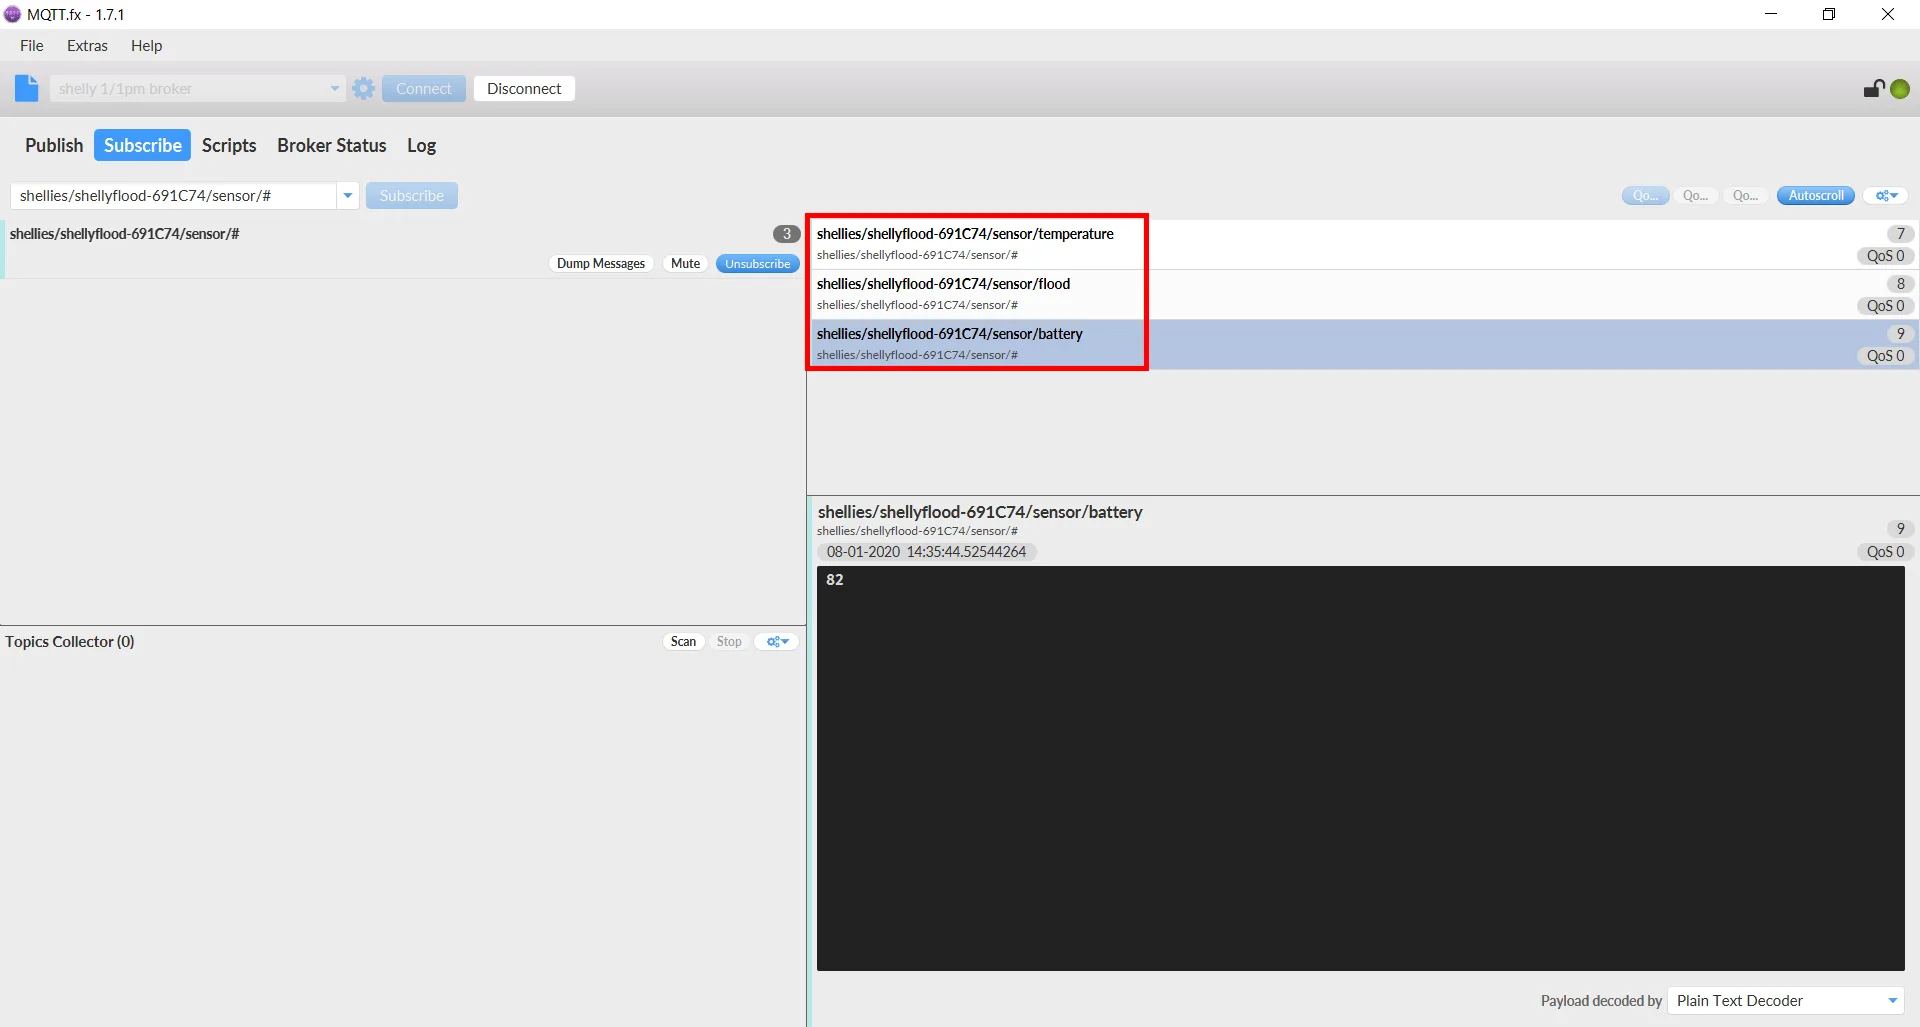
Step 10:
Download and install the MQTT fx debugging software.
Follow this guide if you have not already installed the software.
Subscribe to the topic “shellies/shellyflood-<deviceID>/relay/#”.
If the topics have been set correctly, you should see the information arriving.
Step 11:
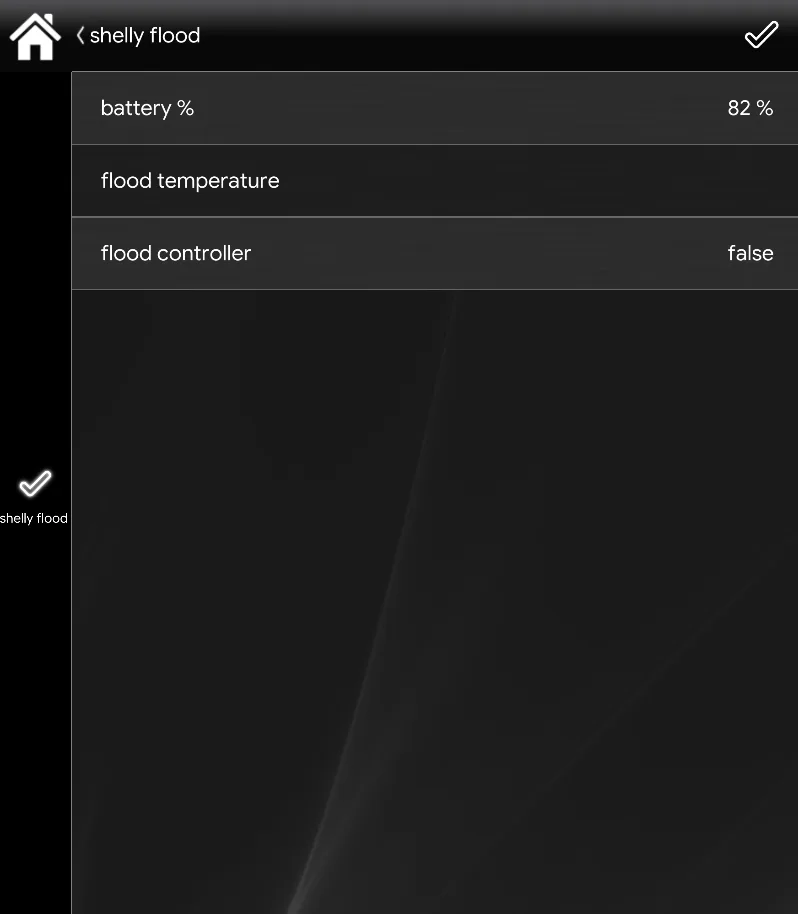
This is how the finished project will appear within the Ilevia Control application.
Troubleshooting
1- Make sure you have the latest available version of Ilevia Manager and the X1 server firmware.
2- Make sure the shelly device is correctly connected to your network.
3- If you cannot connect the broker, check that your X1 has been configured correctly.
Find out much more about our Shelly dedicated solution
Frequently asked questions:
Why is my Shelly Flood not connecting to the local network?
Check that the Shelly Flood has been powered on correctly and that the battery has been installed correctly.