
Shelly Dimmer device integration with Ilevia
How to connect a Shelly Dimmer device to the Ilevia system via MQTT and control switching on/off and brightness from Ilevia Manager.
Introduction
The Shelly Dimmer lets you control the brightness of lamps.
With a single device, you can turn a light on or off and control its brightness.
Step 1:
After making the necessary connections, connect to the hotspot created by the device and enter the device's default IP address (192.168.33.1) in the browser address bar.

Step 2:
To set Wi-Fi client mode:
1. Go to Internet & Security settings.
2. Select WiFi client.
3. Select the Connect the Shelly device to an existing WiFi network checkbox.
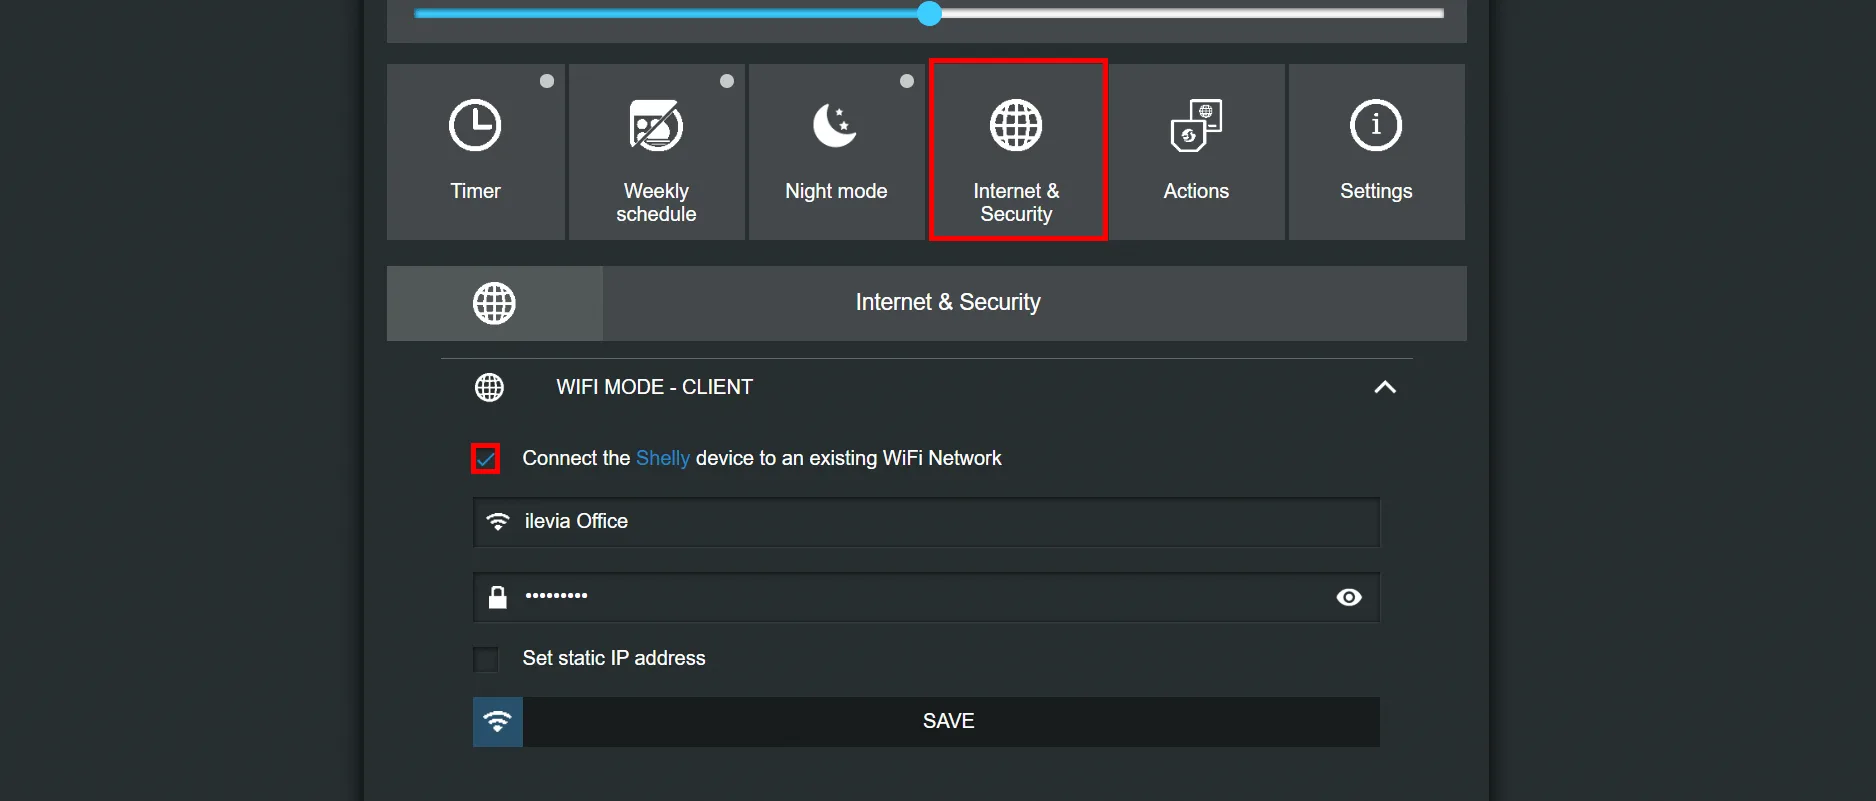
Step 3:
To set the MQTT protocol on the device:
1. Internet & Security settings
2. Advanced - Developer settings
3. Select the Enable action execution via MQTT checkbox.
4. Set the server IP address.
5. Set the Quality of Service (QoS) to 2.
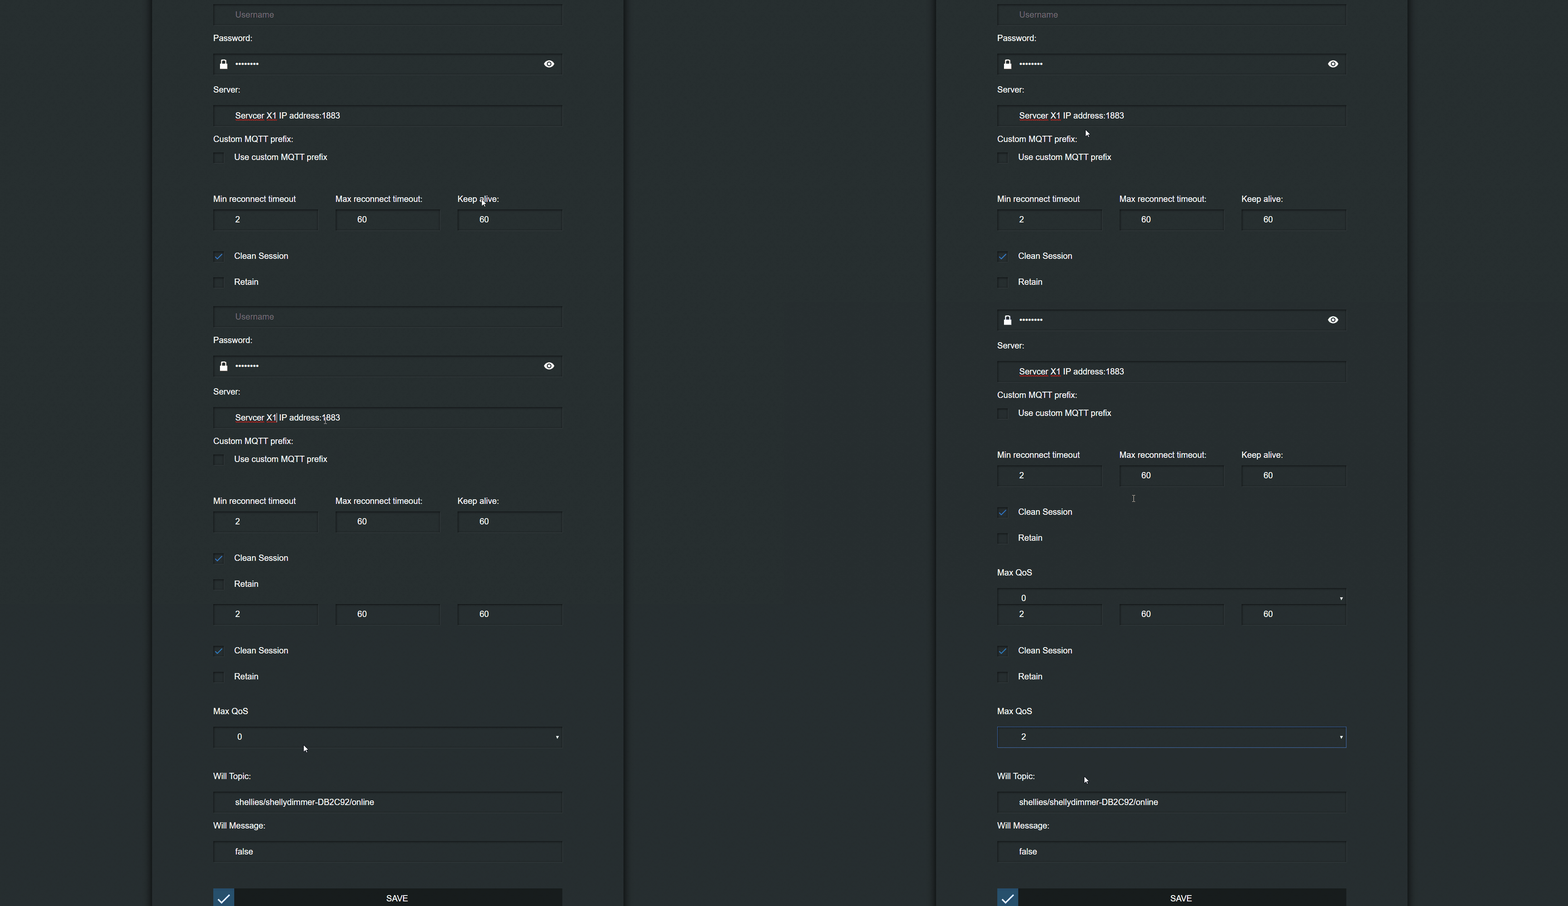
Step 4:
Open your configuration software (Ilevia Manager) and create a new MQTT gateway: this guide explains how to do it.
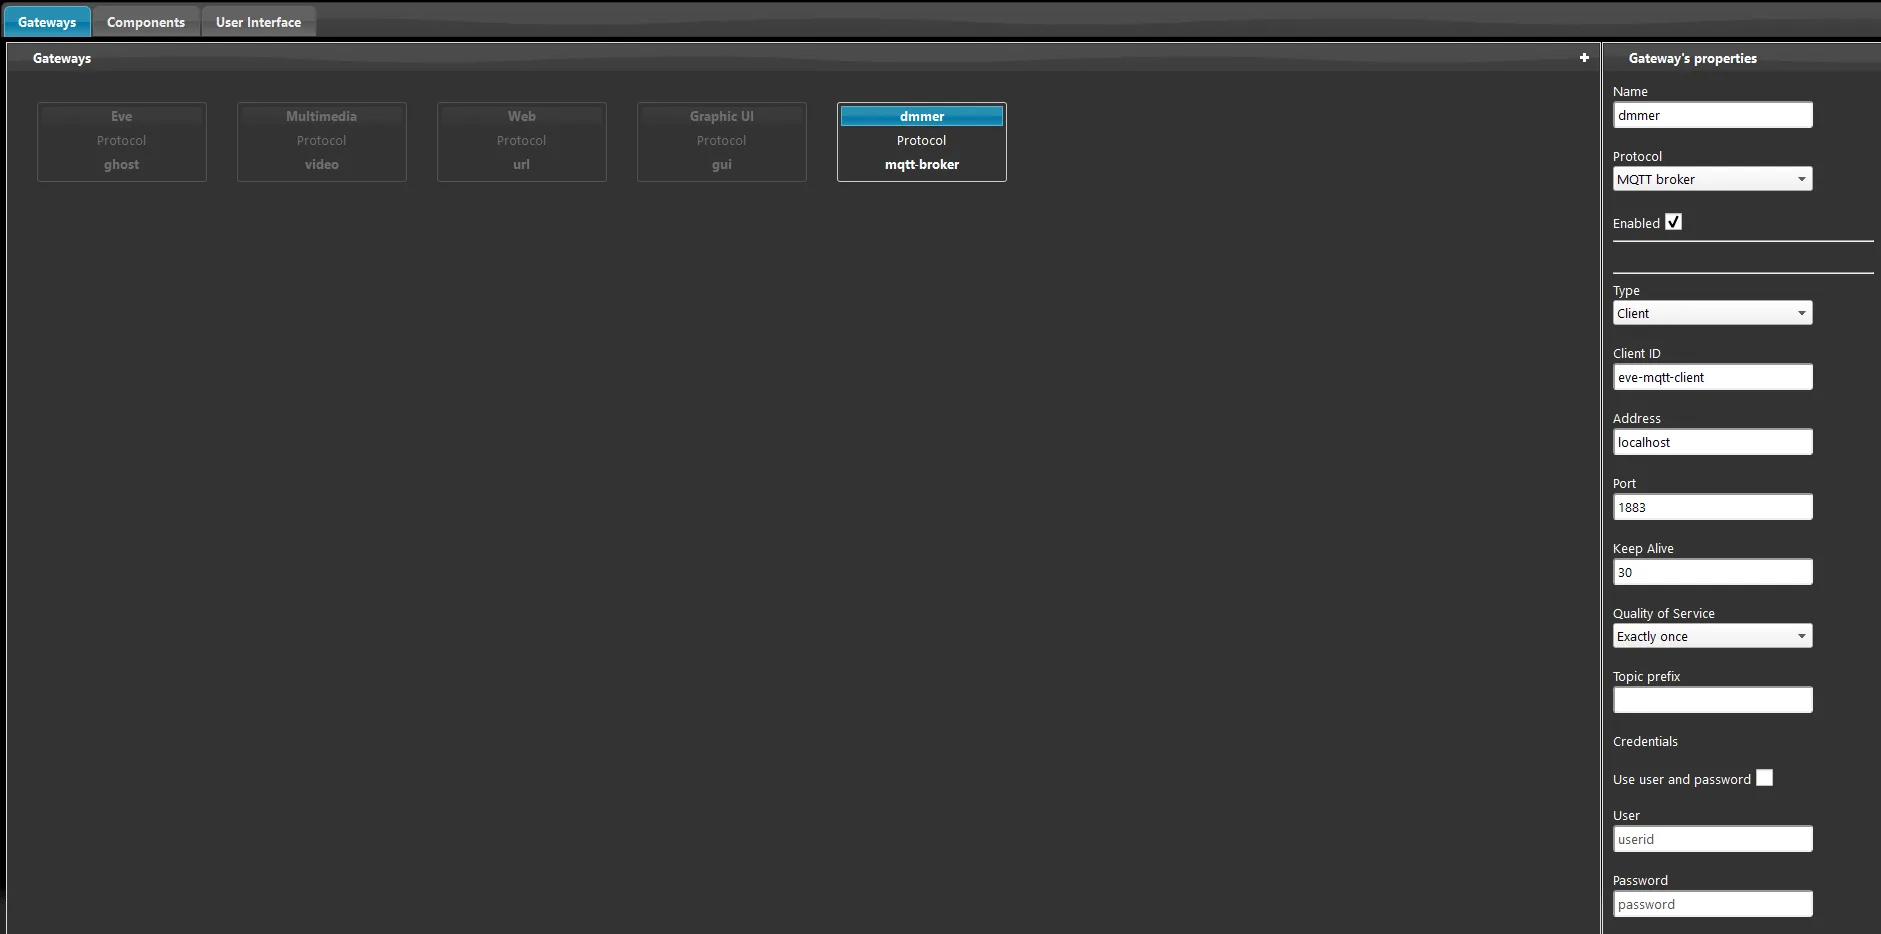
Step 5:
Add a Switch component to the project and change its gateway to the one you created.
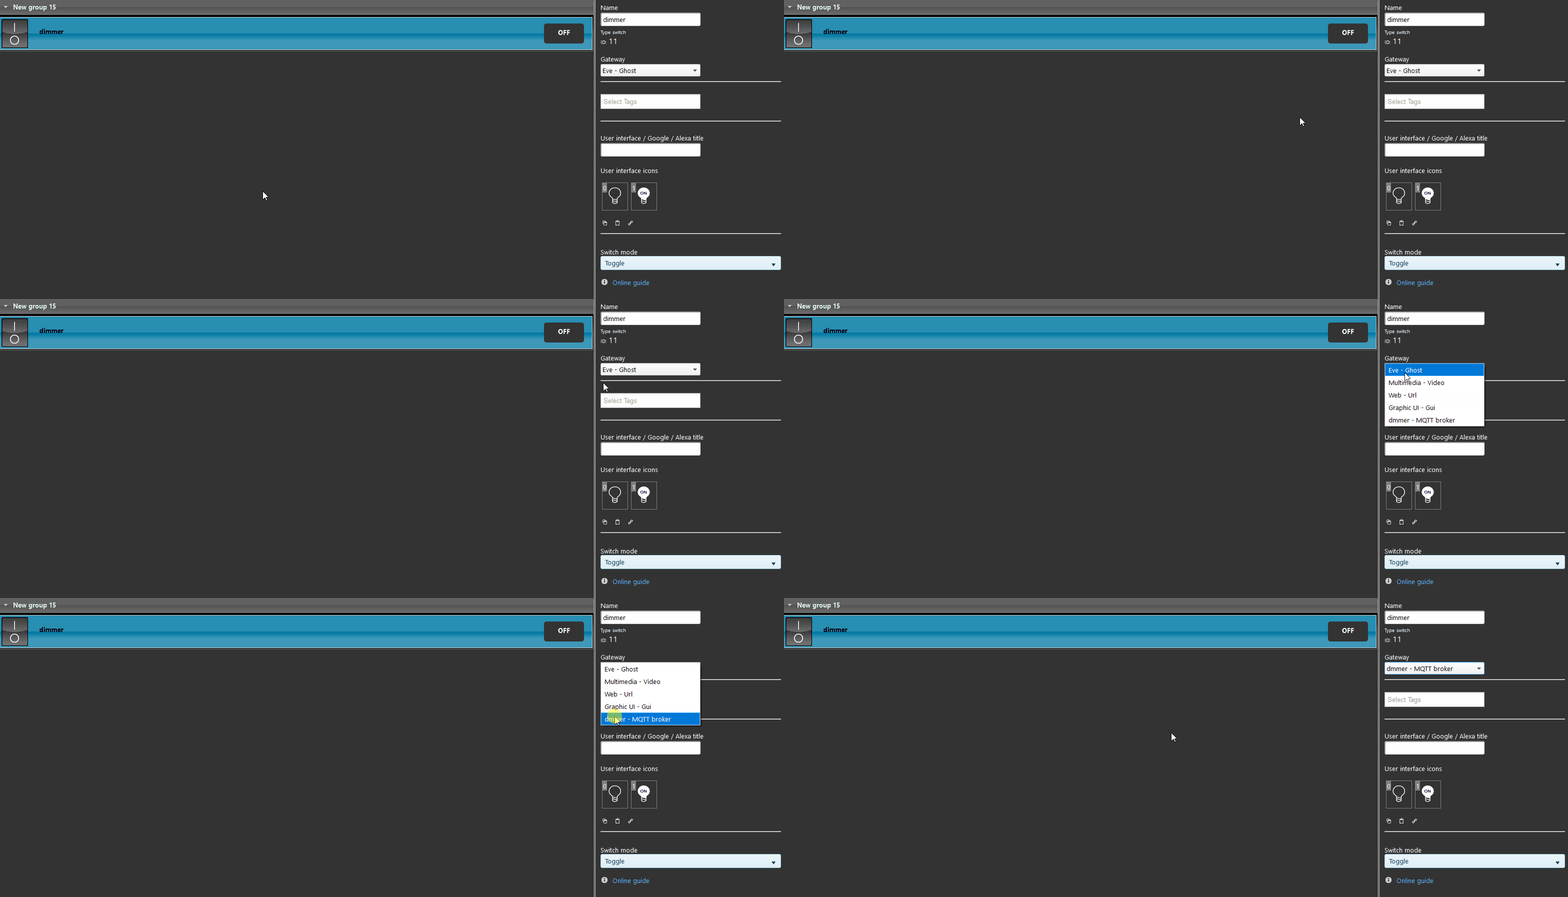
Step 6:
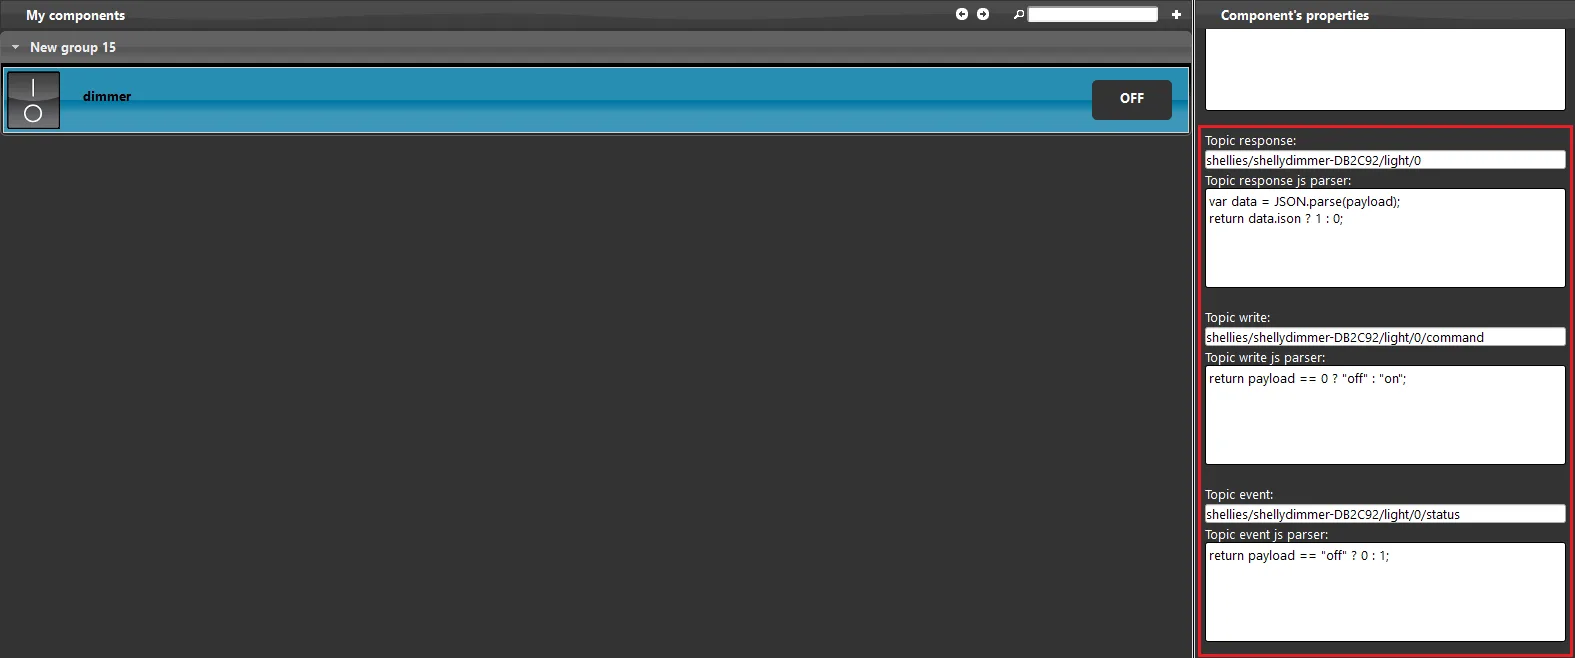
Set the topic: you can check the topic structure on the Shelly website.
Each of the three configured topics is explained in detail in the file indicated below.
Click this link to view the topics shown.
HOW TO SET THE DIMMING FUNCTION
Step 7:
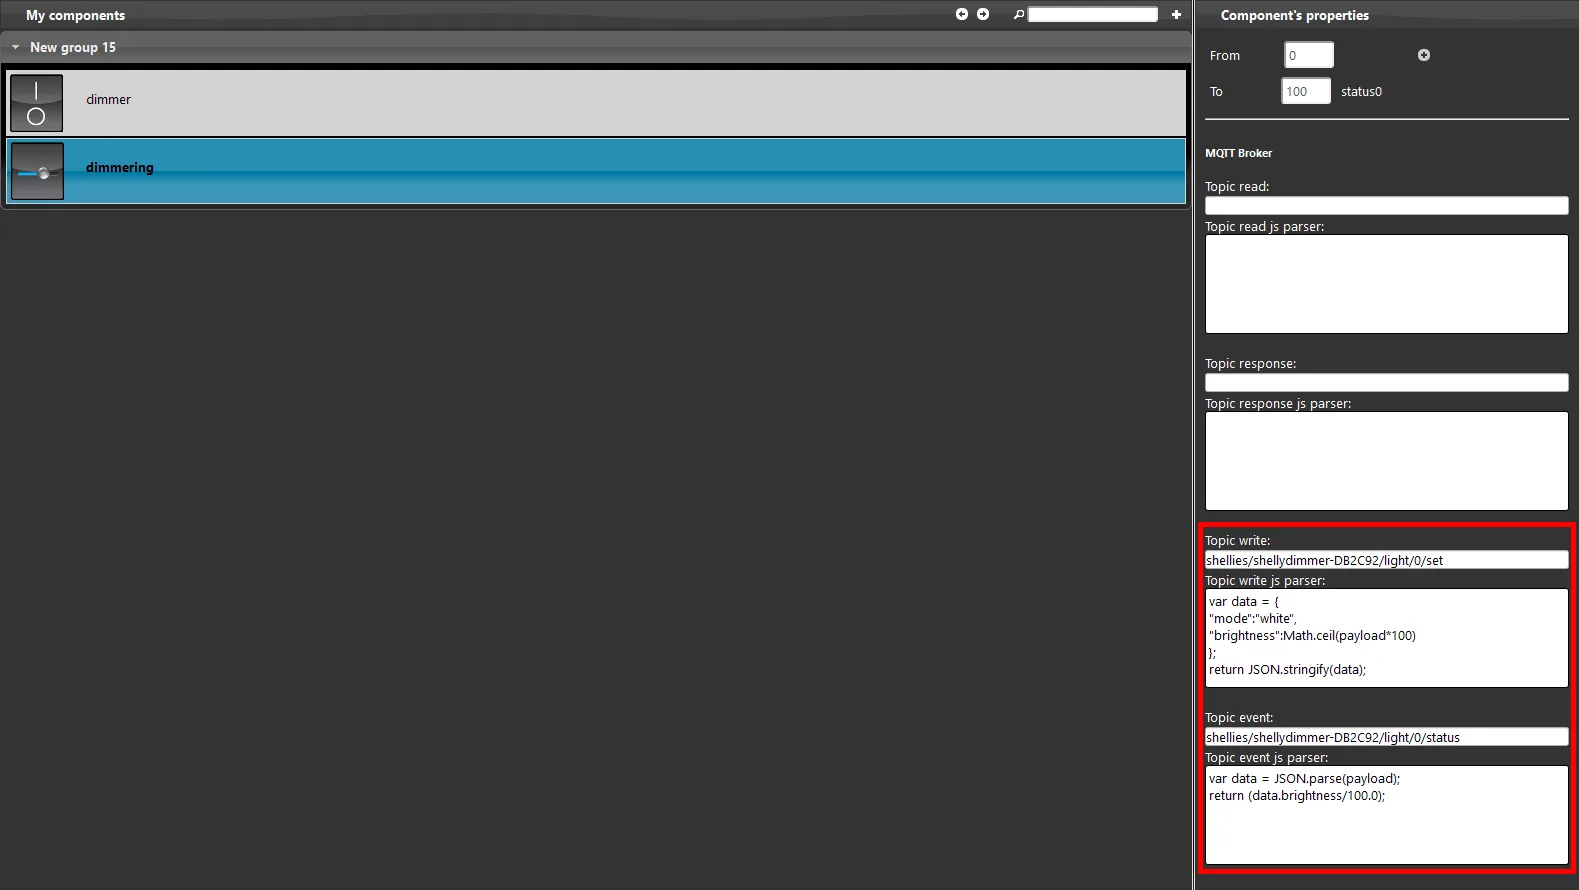
To set up the dimmer function on a light with Shelly MQTT, add a Slider component to the project.
Change the component gateway to the MQTT gateway.
Set the topics as shown in the image below.
Click this link to view the topics shown.
Step 8:
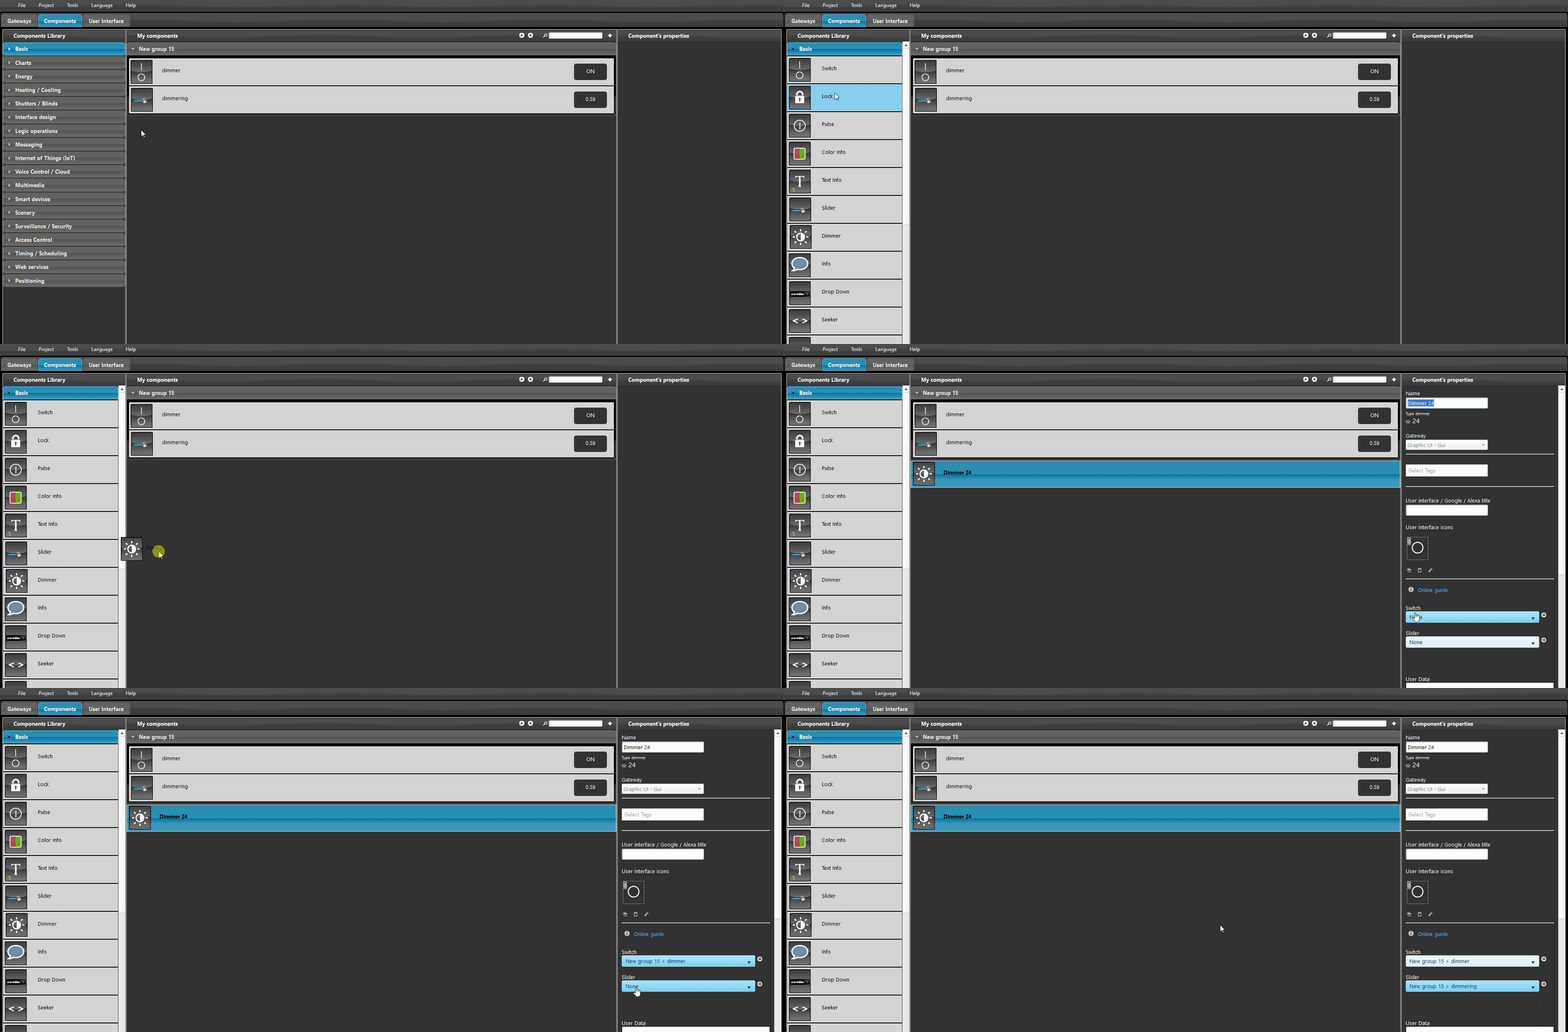
Add a Dimmer component to the project and select the two Switch and Slider components from the respective drop-down menus within the component.
Step 9:
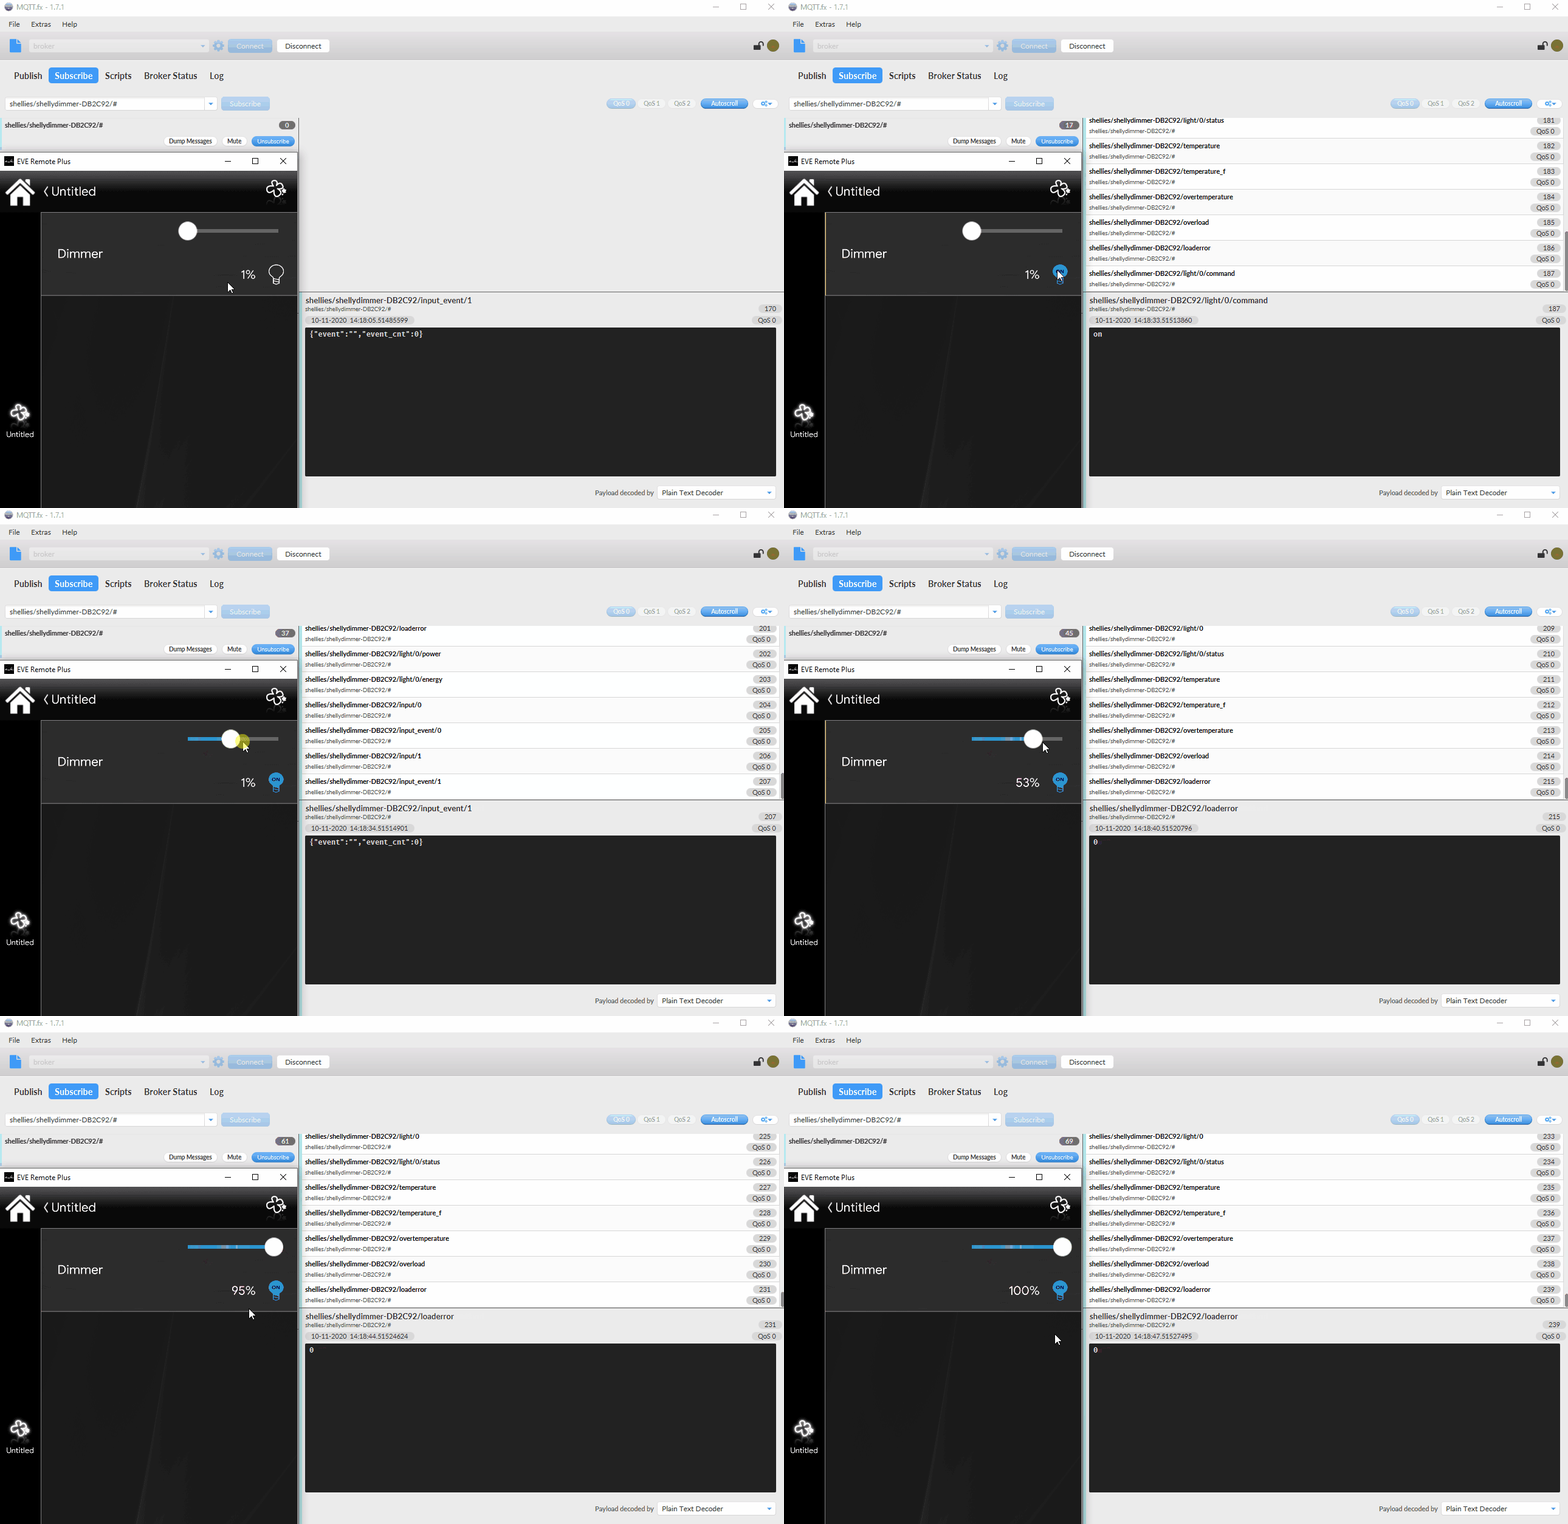
Let's verify that everything has been configured correctly: download and install the MQTT fx debug software (see the guide).
Subscribe to the topic: shellies/shellydimmer-<deviceID>/light/0/#
and try turning the light on and off.
You should see the messages exchanged between the devices.
TROUBLESHOOTING
1- Make sure you have the latest available version of Ilevia Manager and the X1 server firmware.
2- Make sure the Shelly device is correctly connected to your network.
3- If you cannot connect to the broker, check that your X1 has been configured correctly.
Learn more about our Shelly dedicated solution.
FAQ:
My device does not connect to my Wi-Fi
Check that your network has no restrictions or IP address assignment issues and that the entered credentials are correct.