
IP Camera
How to configure the IP Camera component in Ilevia Manager, create and test the RTSP URL, and how it is displayed in the Ilevia Control app.
INTRODUCTION
It allows you to add an unlimited number of IP Cameras in the Ilevia Control app user interface. If you use the Ilevia Control web app, refer to the “Component configuration for Ilevia Control” section at the bottom of this page.
USE CASES
The user wants to be able to view the live stream from their IP Camera installed at home at any time, even when away from home, thanks to the ability to enter the URL with a dynamic IP.
COMPONENT PROPERTIES
VIDEO
This component was created through the Multimedia gateway.
For further information, you can refer to the chapter “Gateway / protocols”.
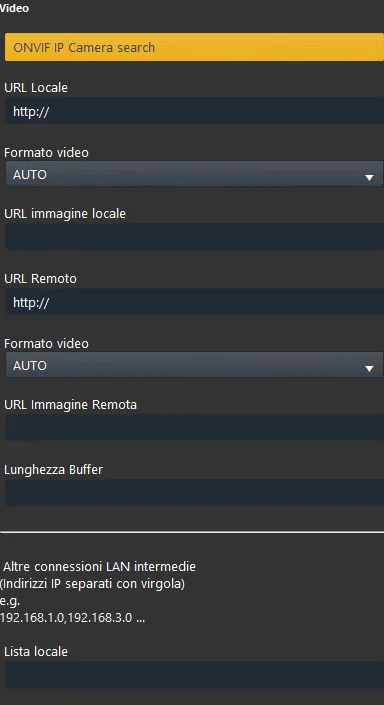
ONVIF IP camera search: Enables the search for IP cameras connected to the local network that support the ONVIF protocol, for direct configuration;
Local URL (Text field): Enter the local video stream URL;
Video format (local): Choose the video format from the values listed below;
AUTO: Ilevia will try to set the correct video format automatically;
H264: works in both viewing modes;
MJPEG: works in both viewing modes;
JPEG: works in both viewing modes.
Local image URL: Enter the local image URL to display an image instead of a black screen. We recommend using this site to find your camera’s URL;
Remote URL: Enter the remote video stream URL. We recommend using this site to find your camera’s URL;
Video format (remote): Choose the remote video format, with the same values listed for the local format;
Remote image URL: Enter the URL that will allow the image to be displayed remotely. For example, you can use this attribute to send an image to your email when someone rings the doorbell, or to have an image directly within the application.
Connection type: The TCP protocol is recommended for better results in terms of quality and image delivery.
Buffer length: This is the delay time applied to the stream coming from the configured RTSP URL.
Local list: Used to distinguish the local network from the remote one.
How to create and test the RTSP URL
Introduction: RTSP can be used in many software applications and allows you to view a stream from an IP camera. To test the URL, we recommend using VLC software.
Step 1:
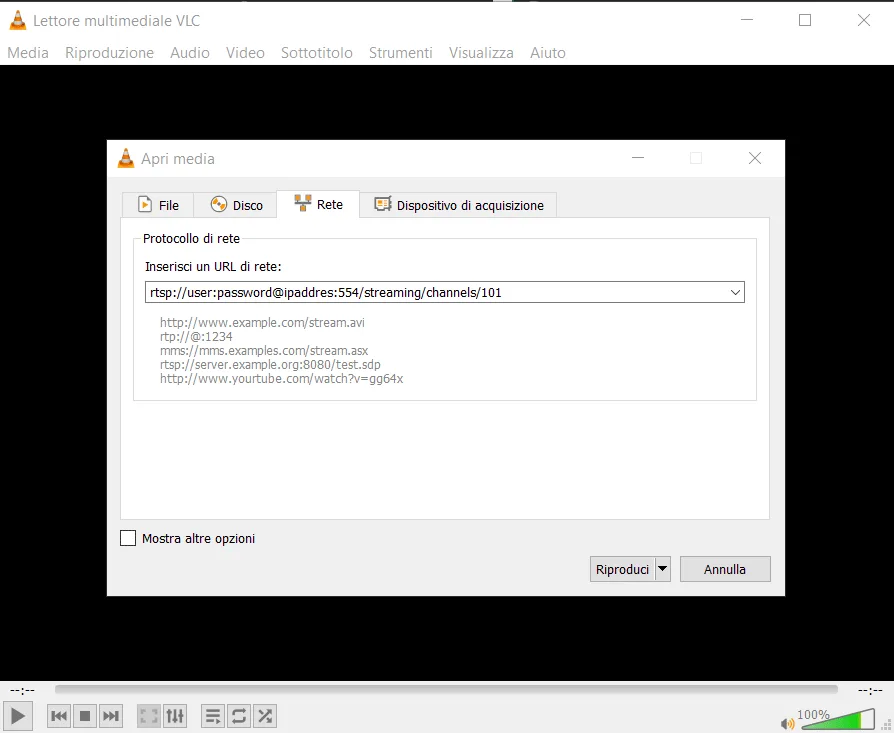
First, you must have access to the camera stream. The URL can have the following format: rtsp://username:password@IPADDRESS/camera_settings
1. After the two slashes, the first word is the username you use to access the camera; the second word is the password you use to access the camera.
2. After the @ symbol, replace the word “IPADDRESS” with the IP address you use to connect to your camera.
In case of a dynamic IP, by using %public_ip% as in the example rtsp://username:password@%public_ip%/camera_settings you can automatically retrieve your dynamic IP address, achieving a stable and continuous connection to your IP Camera.
Note: the variable %public_ip% will be replaced with your current dynamic IP.
REMEMBER THAT EVERY CAMERA IS DIFFERENT AND HAS ITS OWN PARAMETERS. This guide only shows how to view the camera video stream in software such as VLC; for device settings, we recommend contacting the manufacturer.
Note: To access the camera from outside, we recommend contacting your installer. In any case, the port to open to the outside is 554.
Step 2:
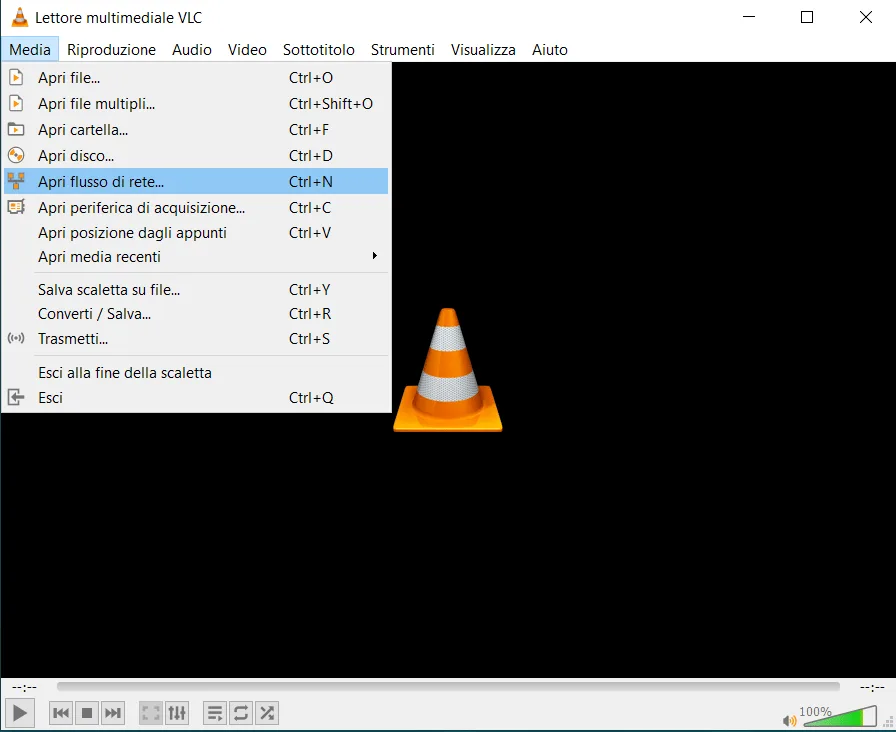
Now that we have the URLs, we can test them. In our guide, we will use VLC software for testing purposes. Open VLC Media Player, click Media at the top left of the screen, and select the “Open Network Stream” option to open the screen where you can enter the URL.
Step 3:
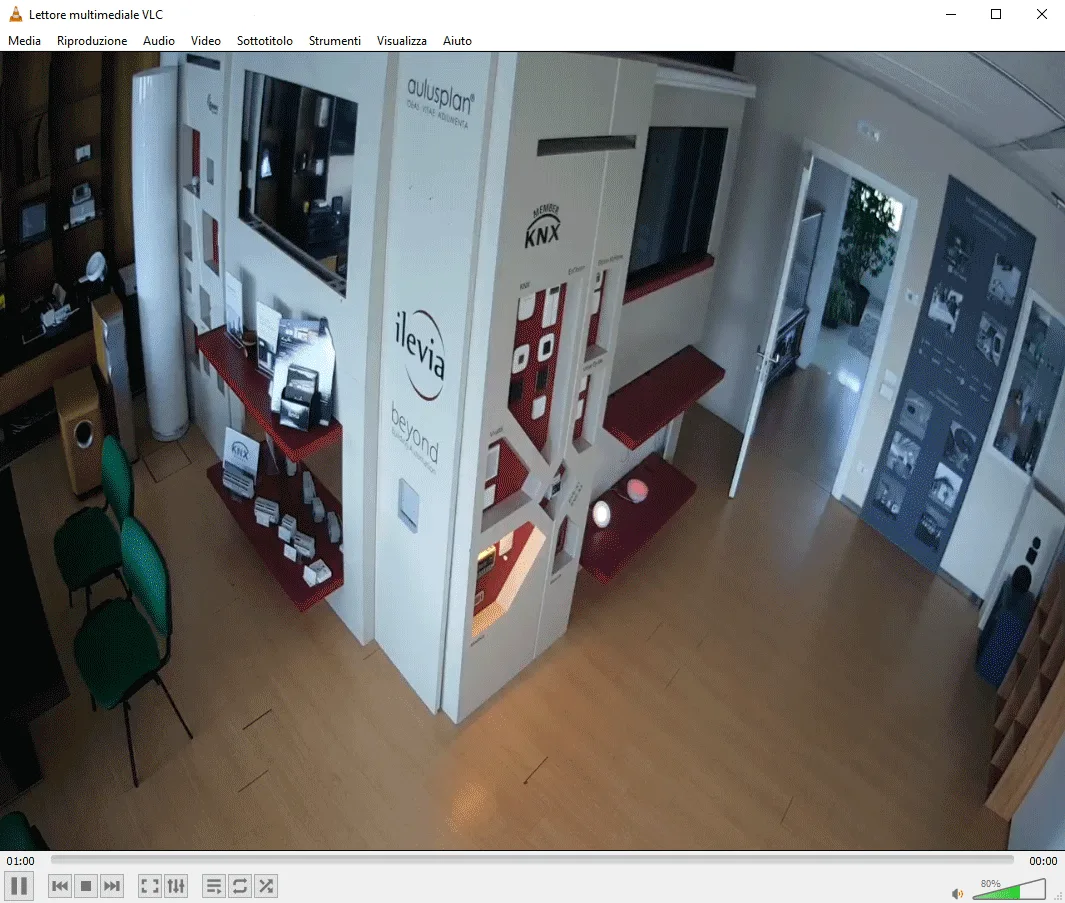
Now configure the URL with your username, password, and IP address. Once the URL is correctly formatted, copy and paste it into the window, then click Play to start playback.
There are three possible display modes: “CLASSIC”, “MODAL”, and “HIDDEN”. For more information, refer to the “Common properties” guide.
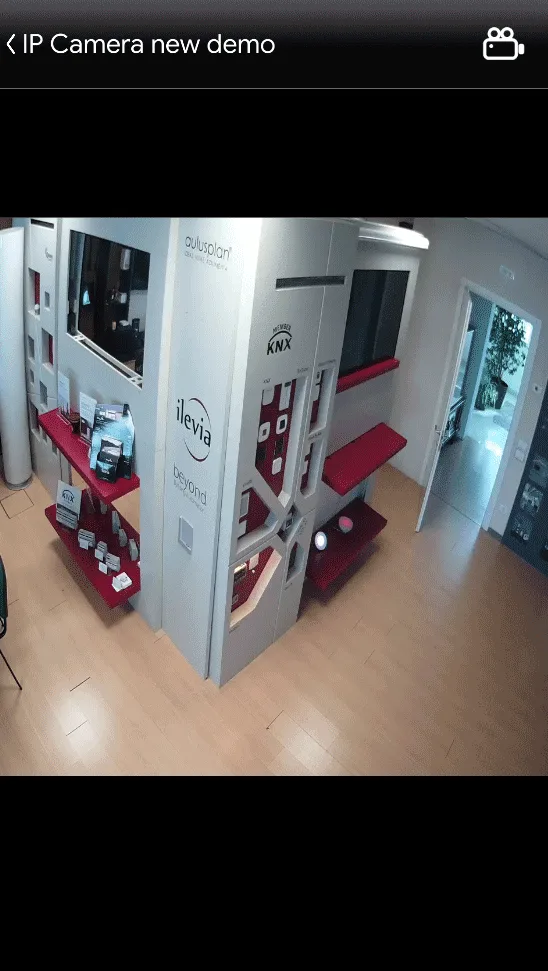
Classic view
This is the visual result of the IP camera component within the Ilevia Control app (classic mode).
By clicking on the IP camera, you can enlarge the image for a full view.
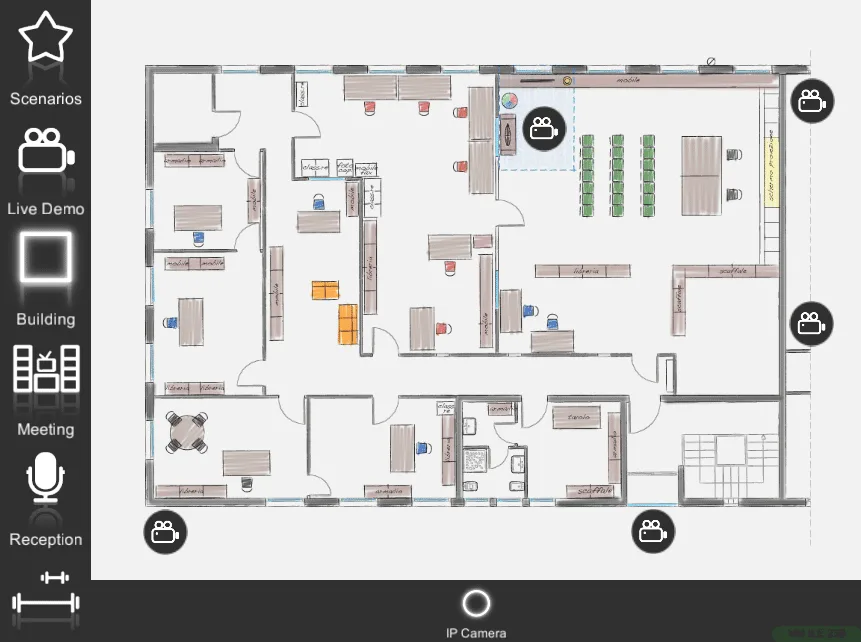
Map view
This is one of the possible outputs of the component in the Ilevia Control app (map mode).
With map view, you can immediately see playback.
You can adjust the size of your IP Camera according to your needs.
You can also add all the IP cameras you need within the Ilevia Control interface.
CLASSIC VIEW
The Classic view requires access to the IP camera component interface to view its stream.
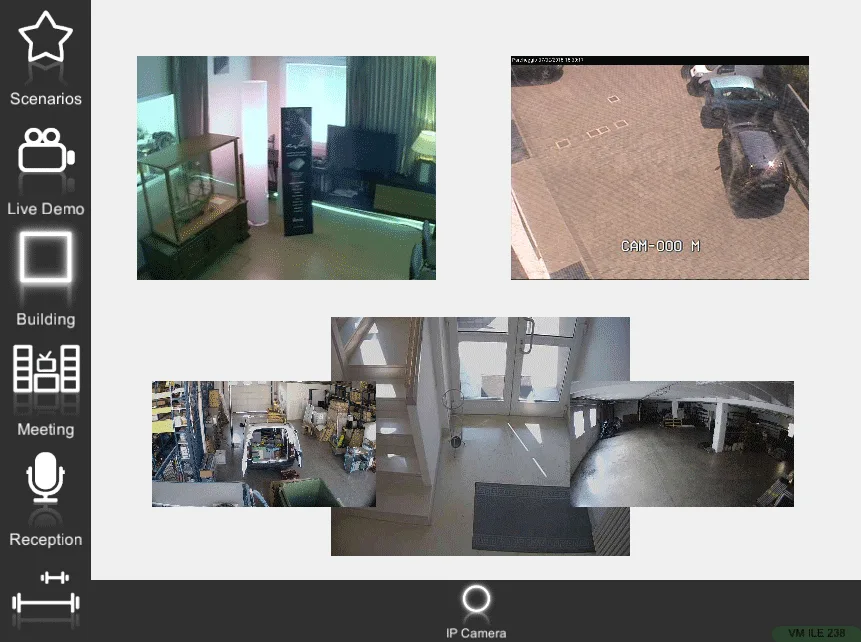
MODAL VIEW
The Modal view, available only with the Maps user interface, lets you view the IP camera stream directly, without having to click the component icon in the user interface.
In this case, you can see the default icon:
IP Camera ⇒ Camera Icon

Default icon (customizable icon)
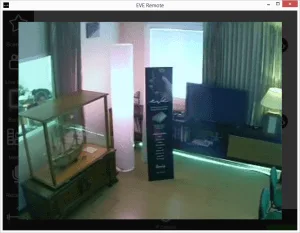
Modal (view within the user interface)
CLASSIC VIEW
MODAL VIEW
Component configuration for Ilevia Control
The IP camera component requires a few settings to display the stream also within the Ilevia Control app.
The first setting concerns the RTSP URL configuration: they must be set to the same value for both the Remote and Local parameters.
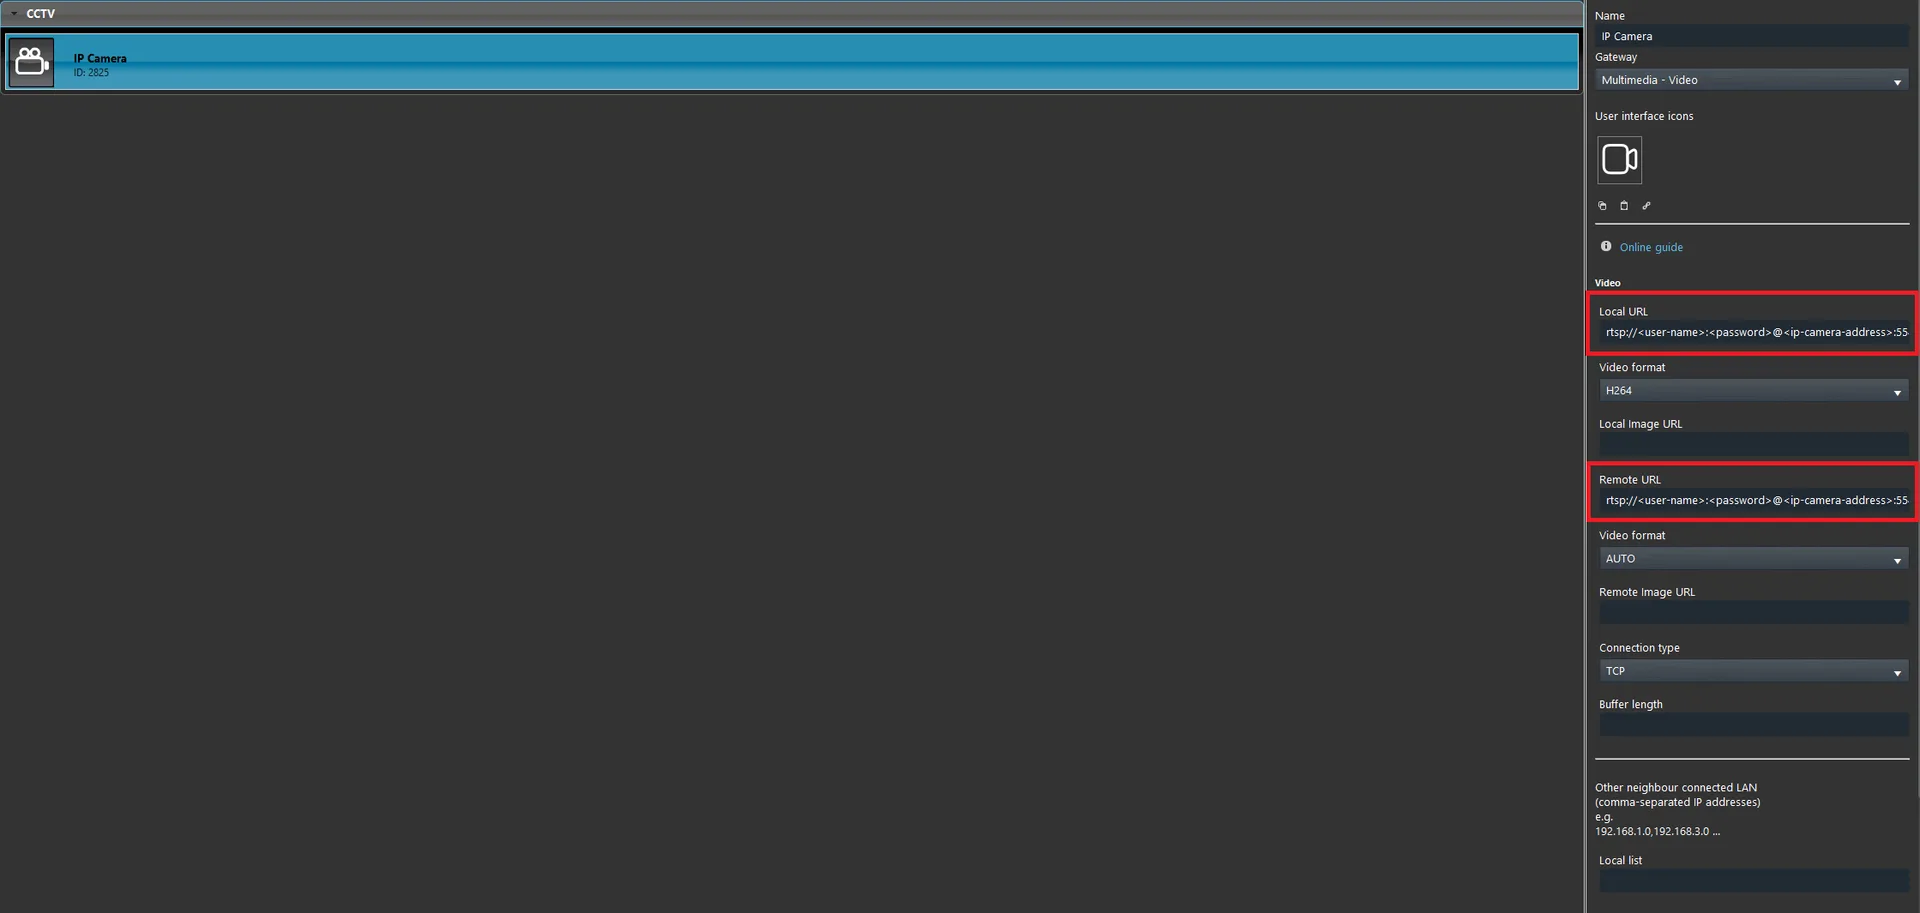
To display the stream in the Ilevia app also remotely, it is necessary to apply port forwarding on port 1984 to the Ilevia server IP address.
N.B. To display the stream in the web app, you must use the HTTP version.