
Shelly Duo Bulb with MQTT in the Ilevia system
How to integrate the Shelly Duo Bulb into the Ilevia system via MQTT protocol: switching on, brightness, and white tone from Ilevia Manager.
Introduction
The Shelly Duo Bulb is a light bulb that lets you set the white tone WW/CW (Warm White/Cold White): in addition to brightness, you can also adjust the light tone. This guide explains how to configure the device to communicate via MQTT and integrate it into the Ilevia system.
Use cases
The user wants to integrate the Shelly Duo Bulb device so it can be controlled from the Ilevia Control app.
Web interface configuration
Step 1
Turn on the Shelly Duo device, connect to its Wi-Fi network, and enter the default IP address 192.168.33.1 to access its web interface.

Step 2
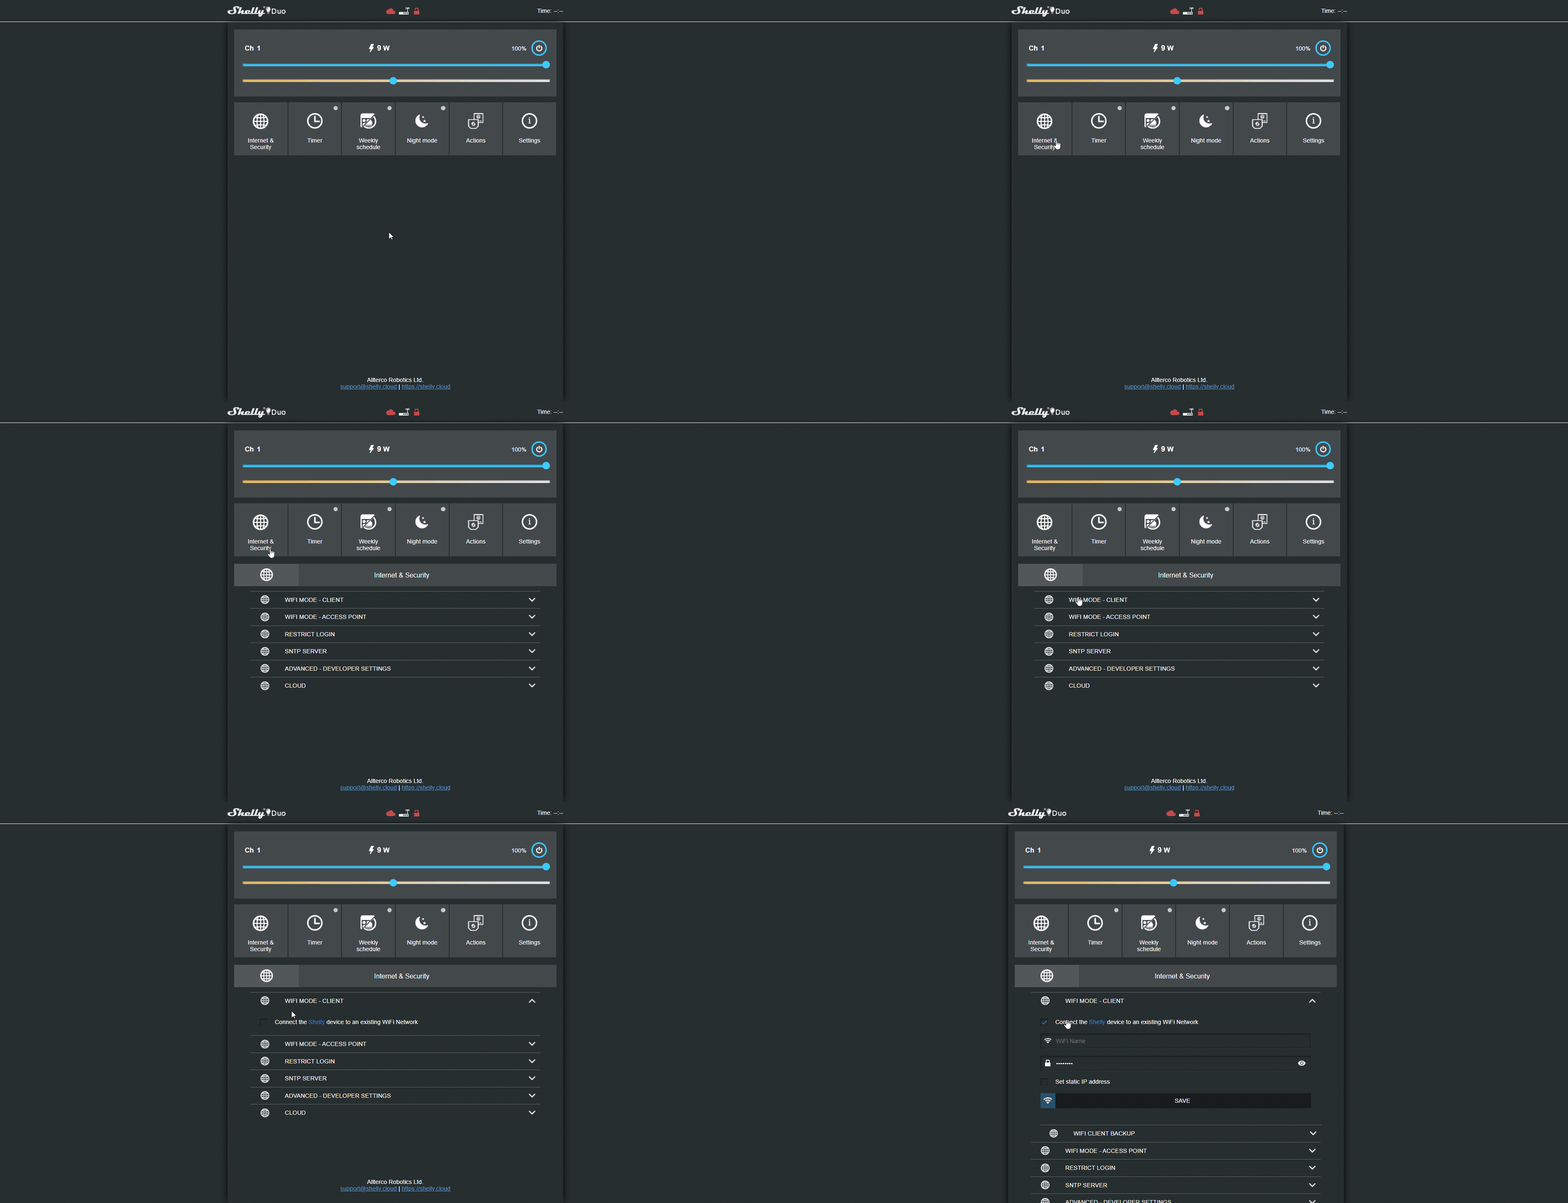
To connect the device to your local network, open the “Internet security settings” menu and go to the “Wifi mode client” section.
Step 3
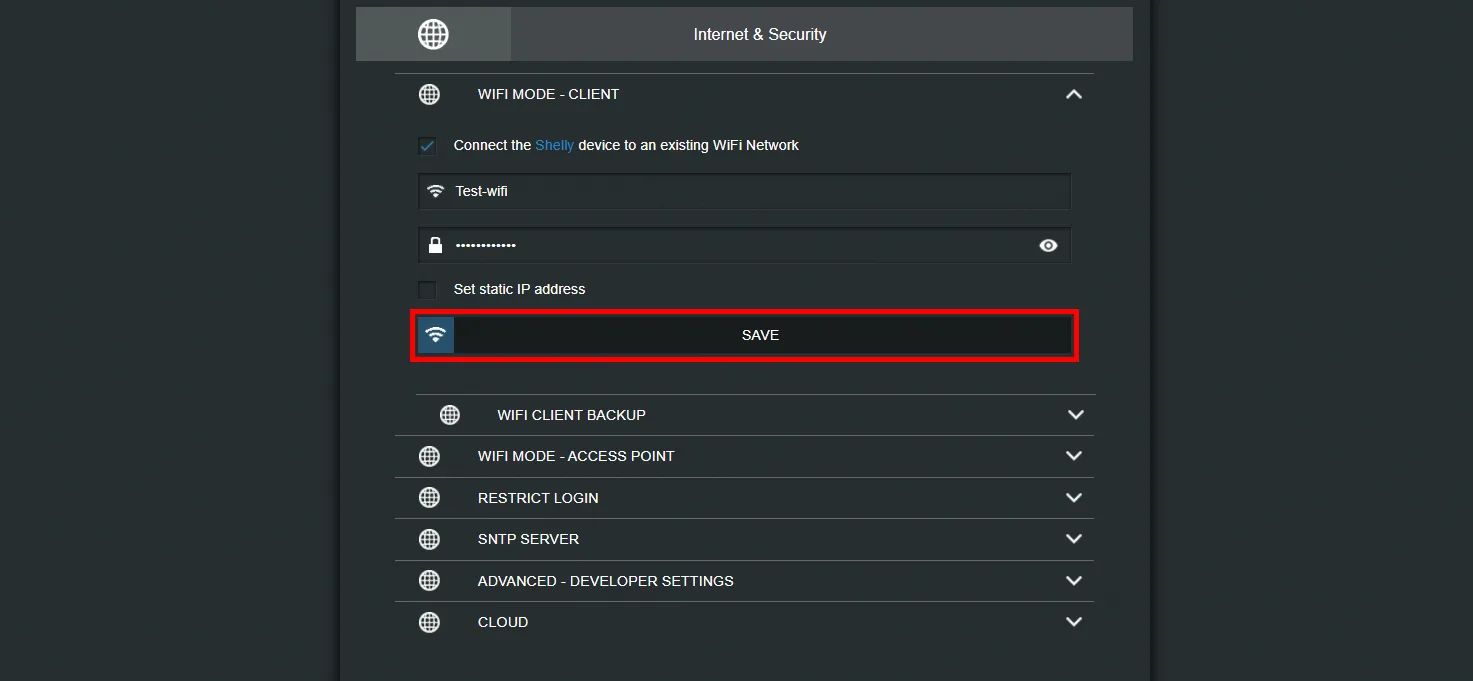
Enter your local network credentials and click Save. The Shelly device will try to connect to the configured network.
Step 4
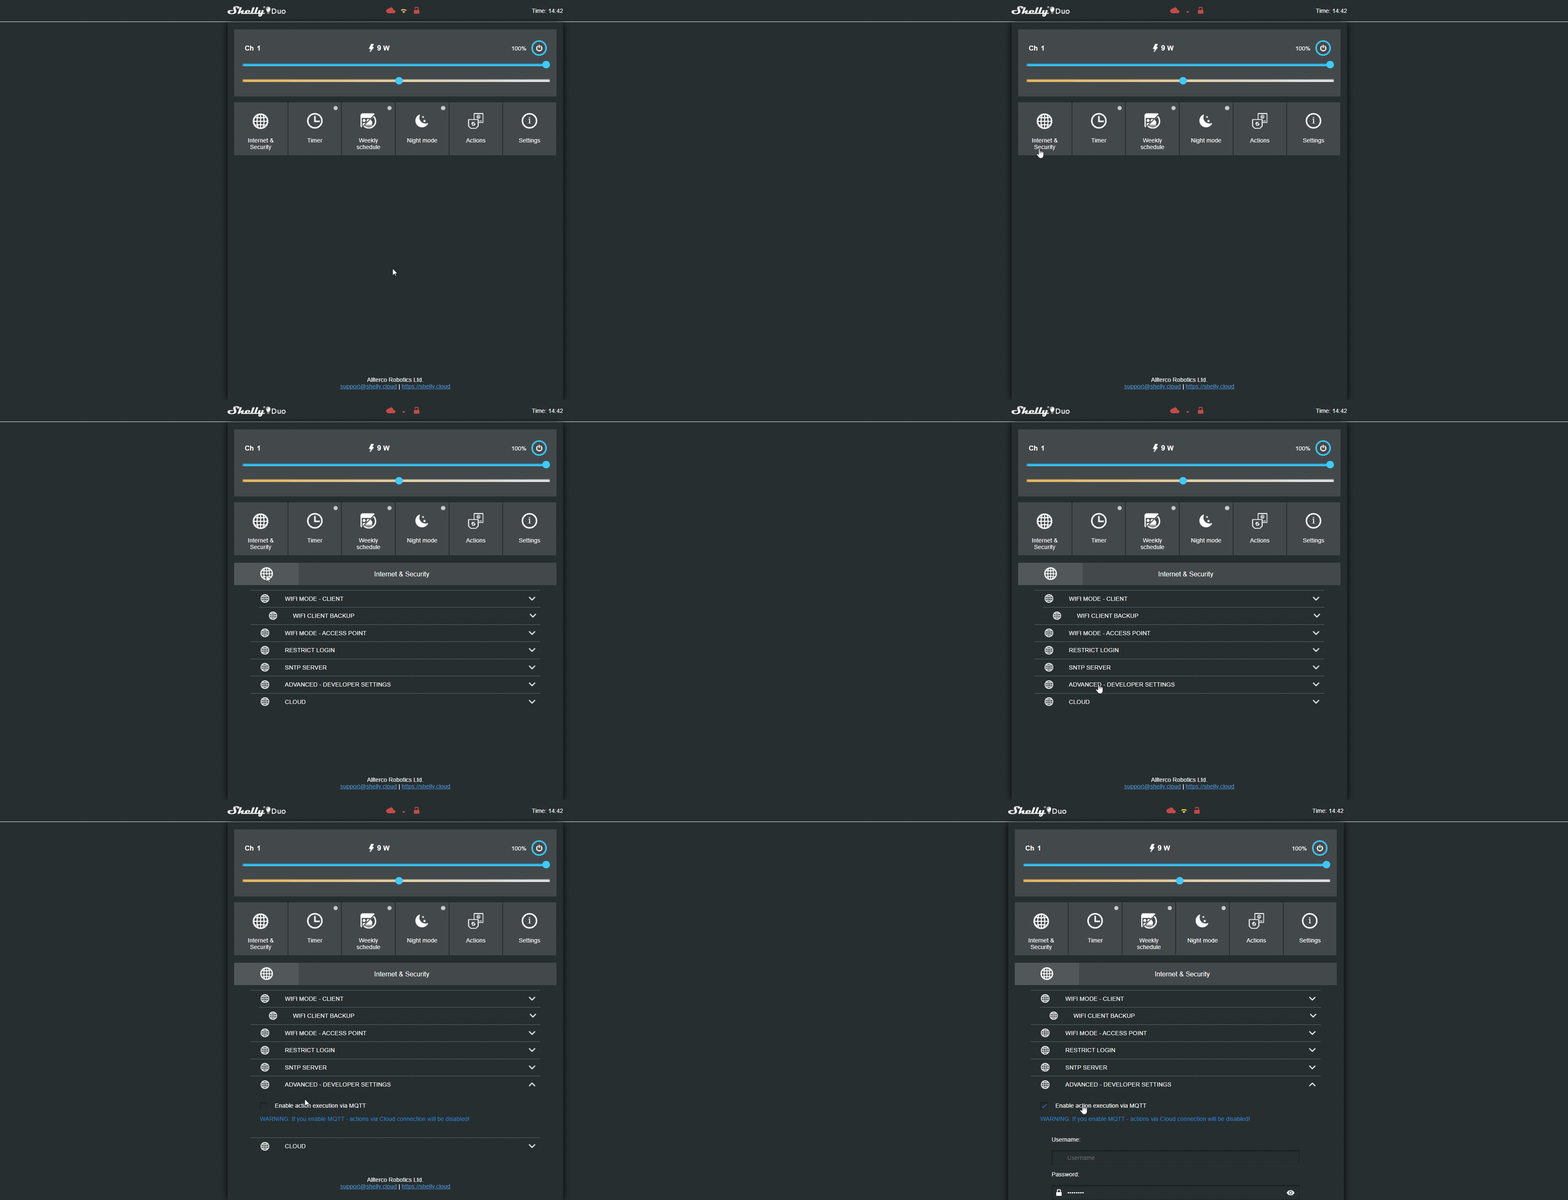
Reconnect to the Shelly device web interface once it has connected to your local network, then open the “Internet and security settings” menu, go to the “Advanced developer settings” section, and select the “Enable action execution via MQTT” checkbox.
Step 5
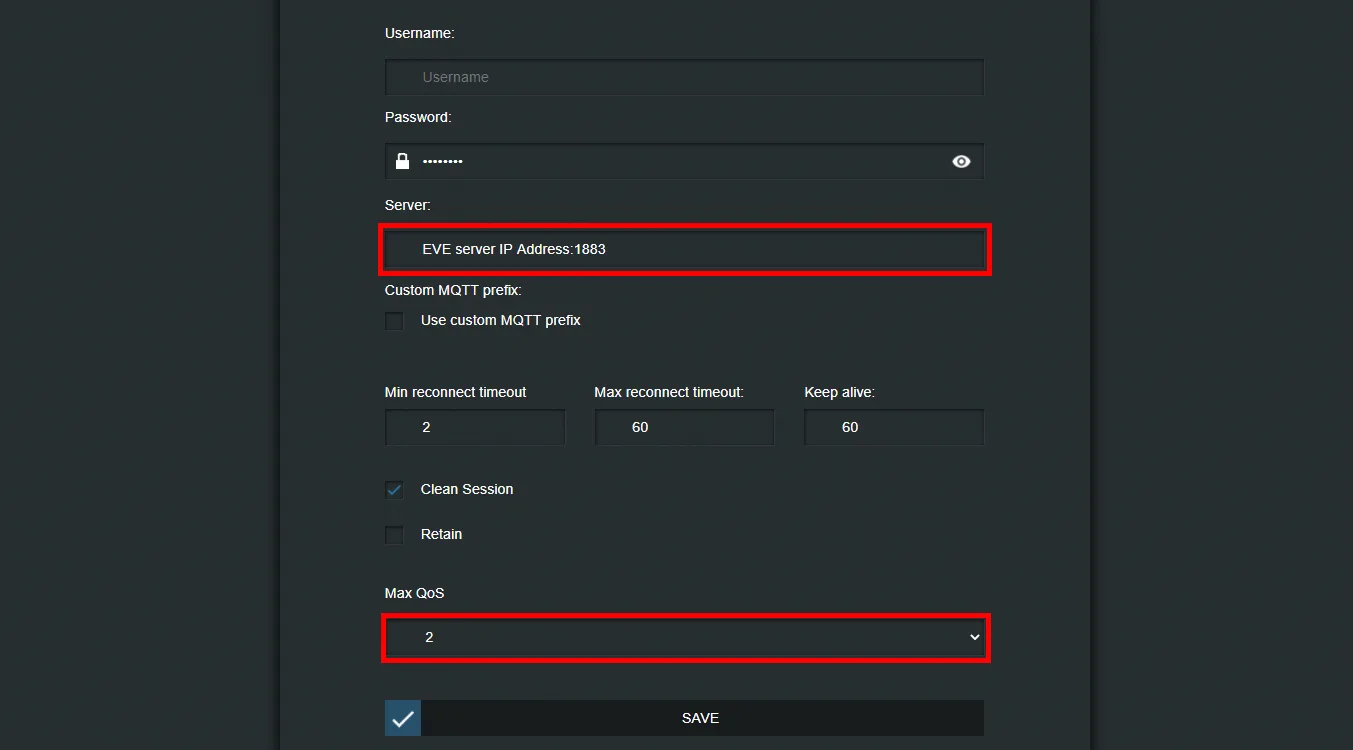
Now that the “Advanced developer settings” are enabled, configure the MQTT settings to allow the Shelly device to communicate and exchange data with the X1 server.
Enter the X1 server IP address in the “server IP address” field, set QoS to 2, and click Save.
Topic configuration
Step 6
Open Ilevia Manager and create a new MQTT gateway in the Gateway section, as explained in this guide.
Step 7
Add a Switch component to the project and set the MQTT gateway created previously as the gateway.
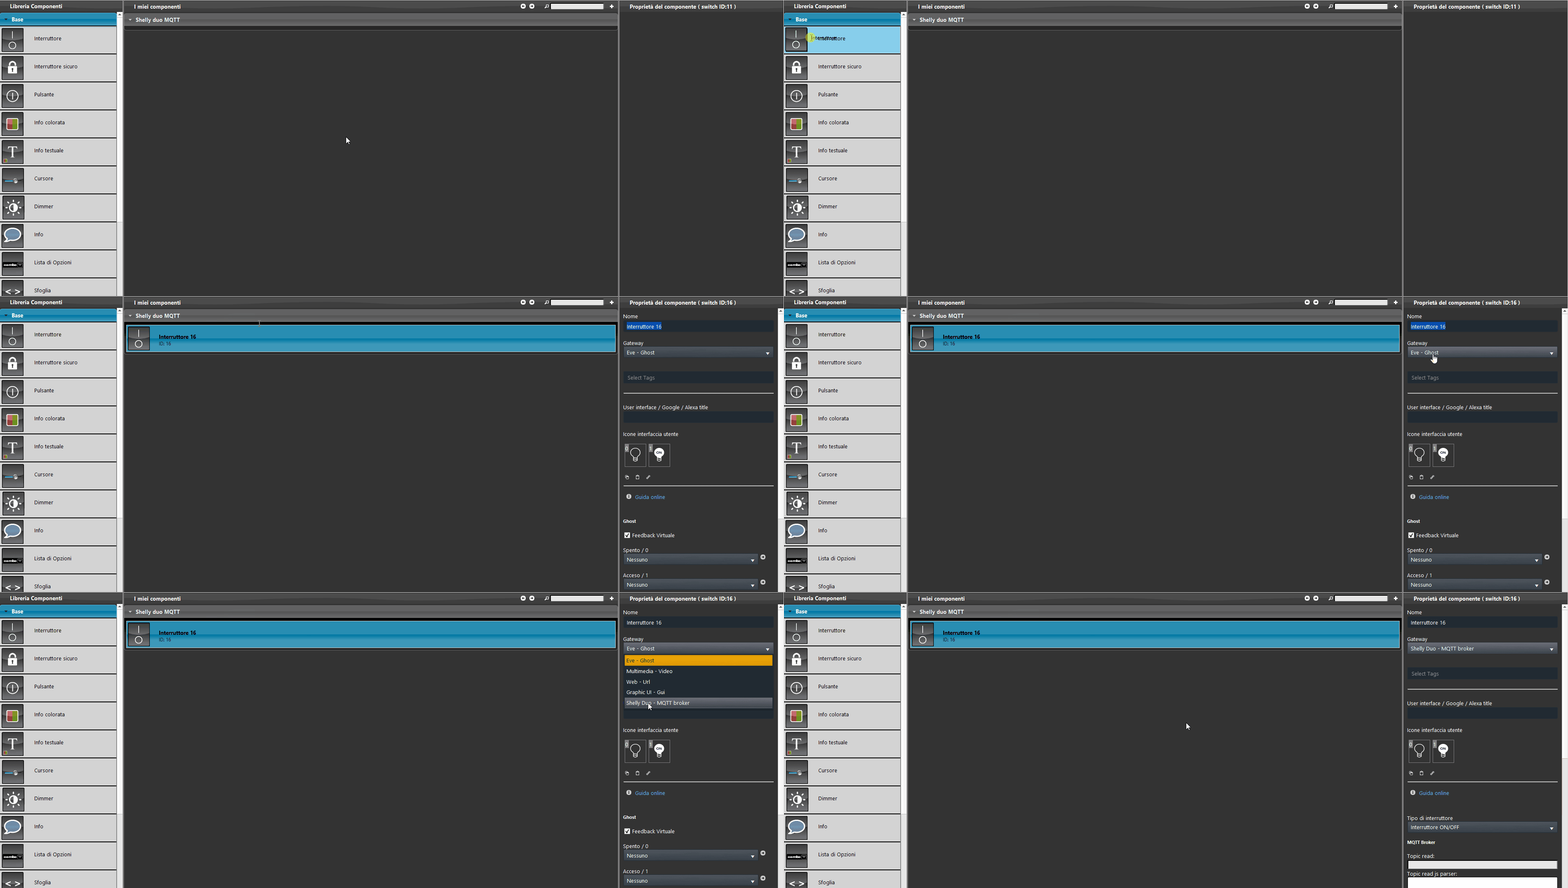
Step 8
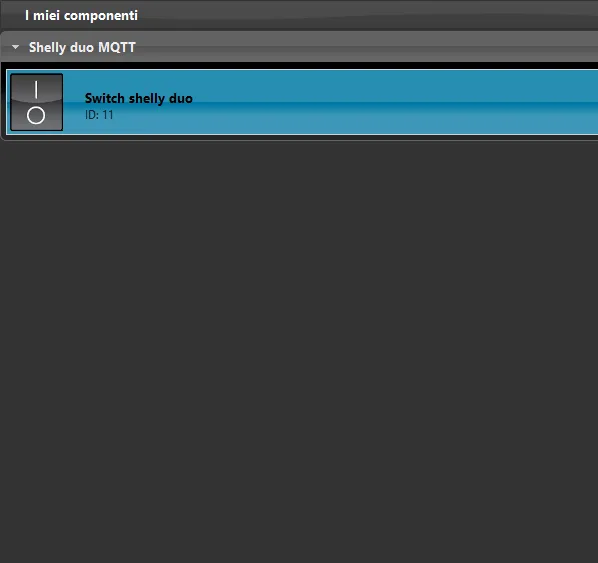
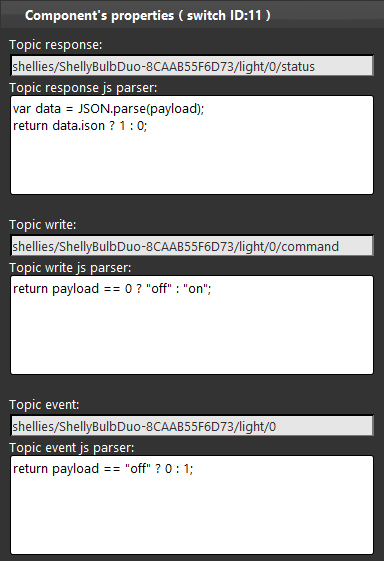
The topics are configured to receive the Shelly Duo device state (feedback) and to set its state to On or Off.
By clicking on this link you can view the topics shown in the image below.
Step 9
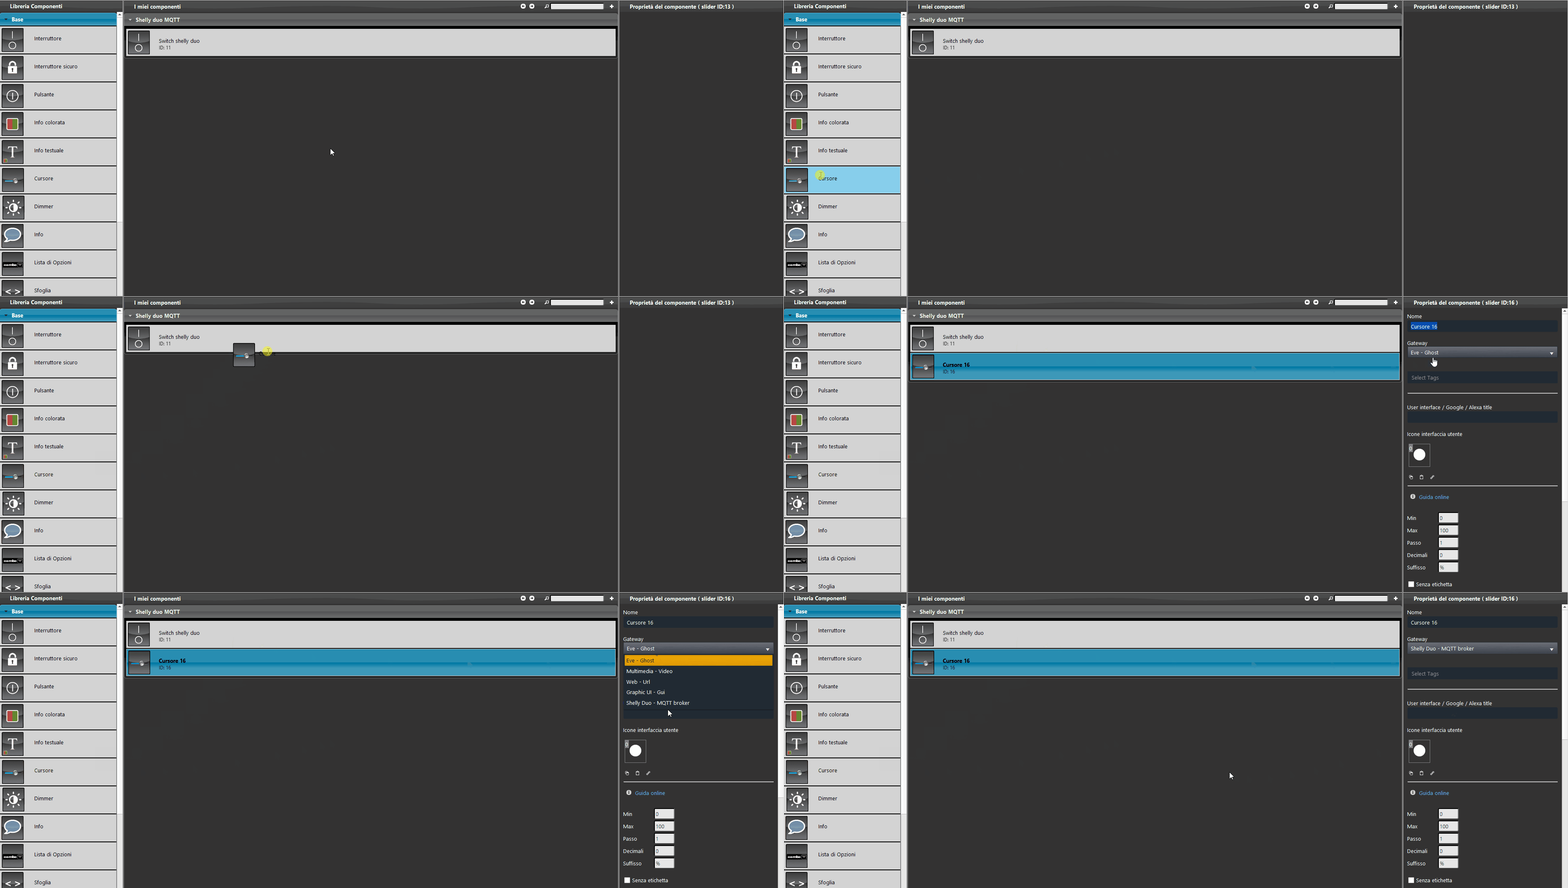
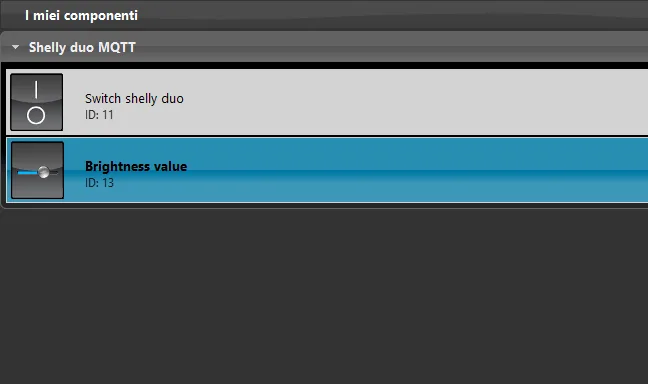
To adjust the brightness, drag a Slider component from the Basic section of the component library into the project and set the previously created MQTT gateway as the gateway.
Step 10
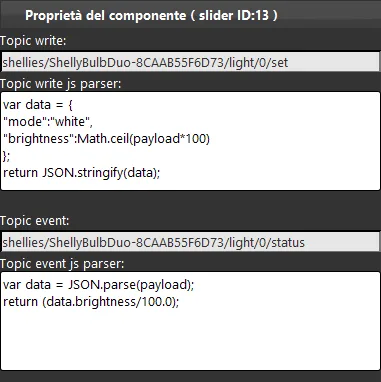
The topics shown below allow you to set the brightness of the Shelly device: whenever the user sets a percentage in the Ilevia Control app, the script set in the Write topic sends the payload with the desired percentage.
By clicking on this link you can view the topics shown in the image below.
Step 11
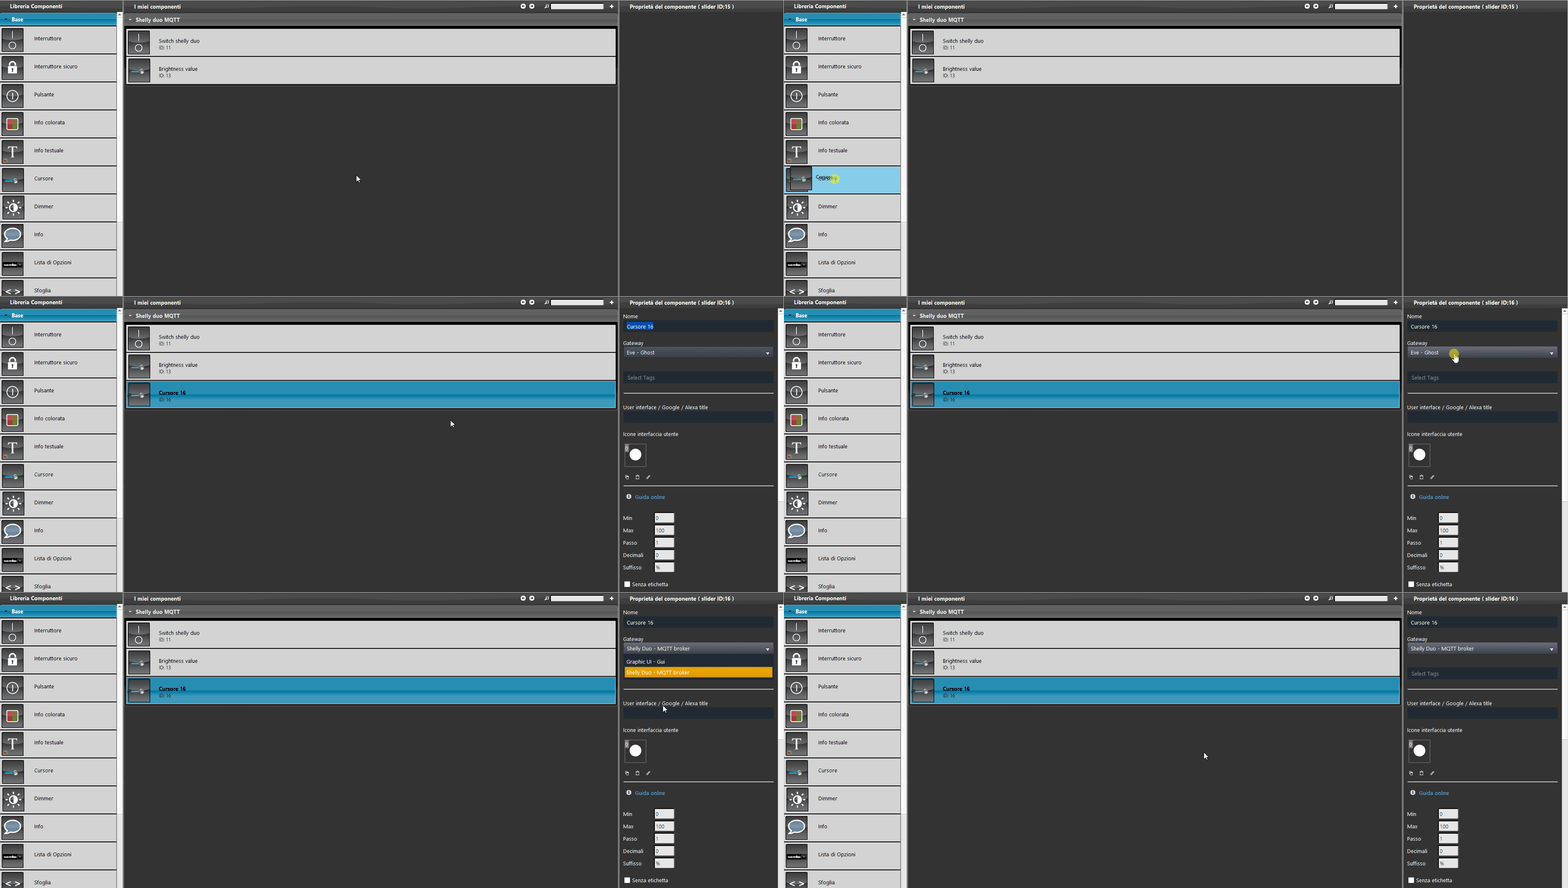
A feature of this device is the ability to set the light tone, warmer or cooler. To configure it, drag a new Slider component from the component library into the project and set the previously created MQTT gateway as the gateway.
Step 12
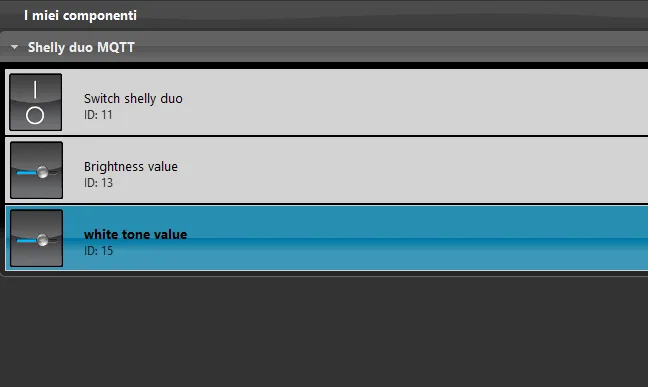
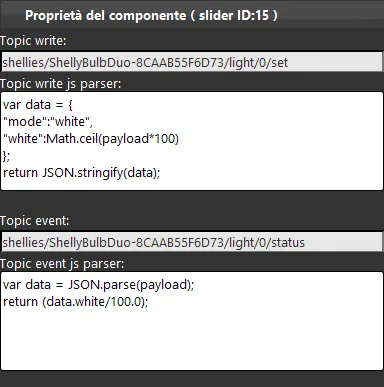
The topics are similar to those of the slider that controls brightness: only the data sent to the device via the topic changes. In this case, the Write topic sets the value of the white data inside the payload.
By clicking on this link you can view the topics shown in the image below.
Step 13
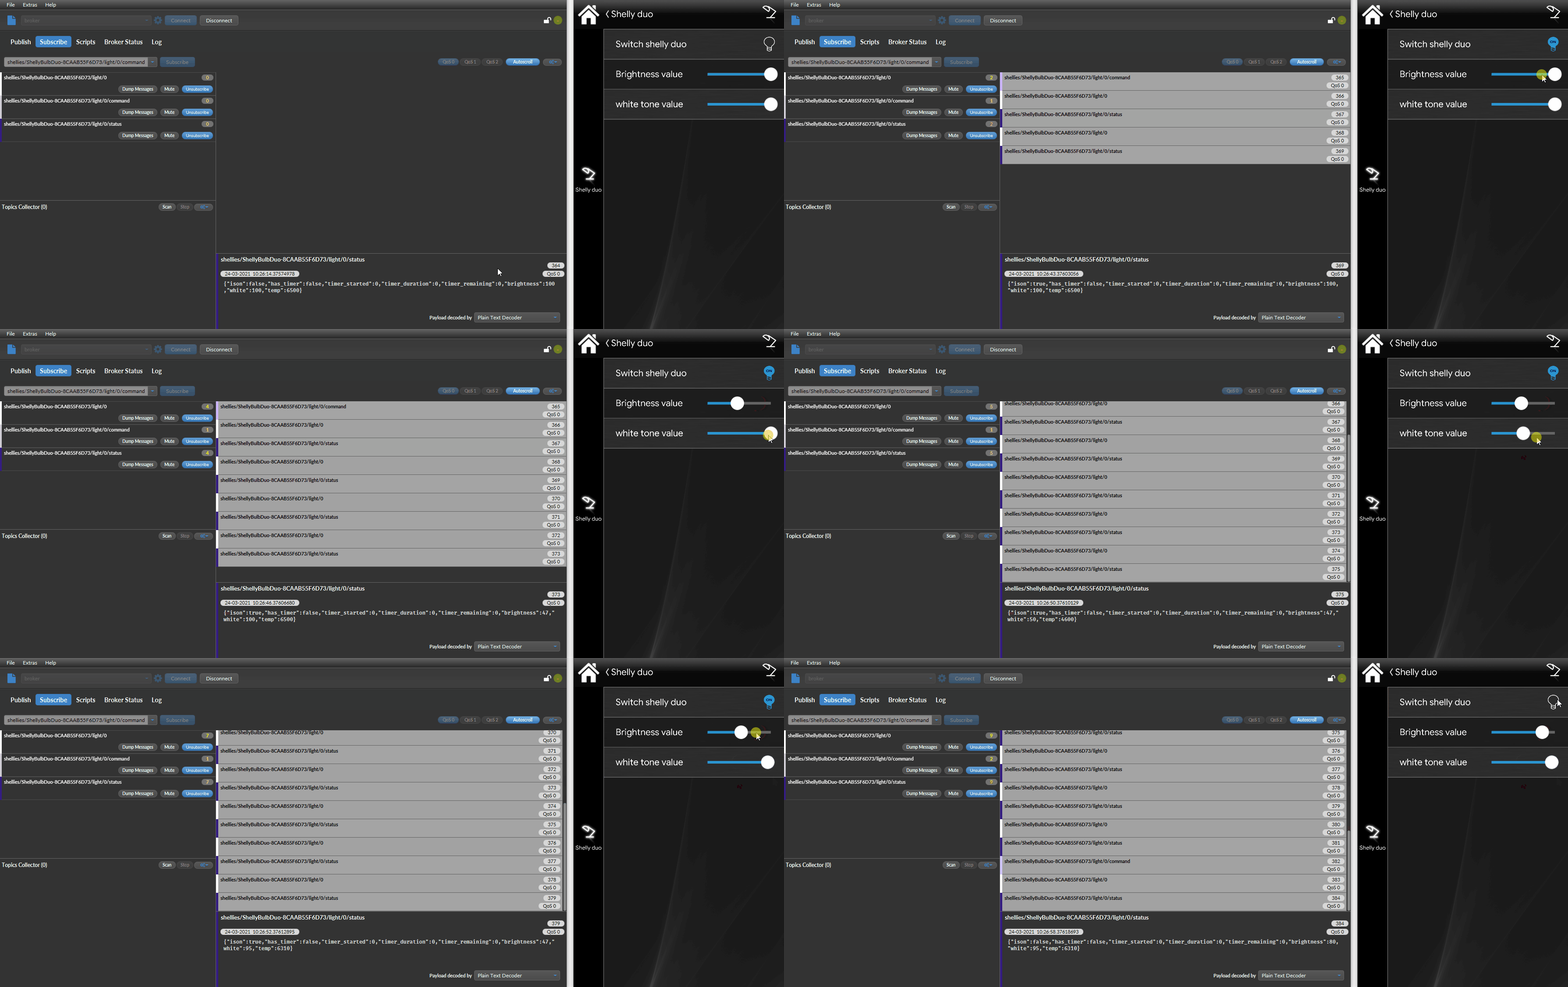
The image below shows the result of the topic configuration in the Ilevia Control app.
Troubleshooting
1. Make sure you have the latest available version of Ilevia Manager and the X1 server firmware.
2. Make sure the Shelly device is correctly connected to your network.
3. If you cannot connect to the broker, check that the X1 server is configured correctly.