
Shelly Energy Meter Integration with MQTT in Ilevia
How to configure the Shelly Energy Meter device via MQTT in the Ilevia system to monitor energy consumption.
Introduction
This Shelly device lets you monitor the energy consumption of a specific cable.
This guide explains how to set it up via MQTT.
Web interface configuration
Step 1:
Turn on the Shelly device and connect to its hotspot, then open its web interface by entering the device’s default IP address, which is 192.168.33.1.
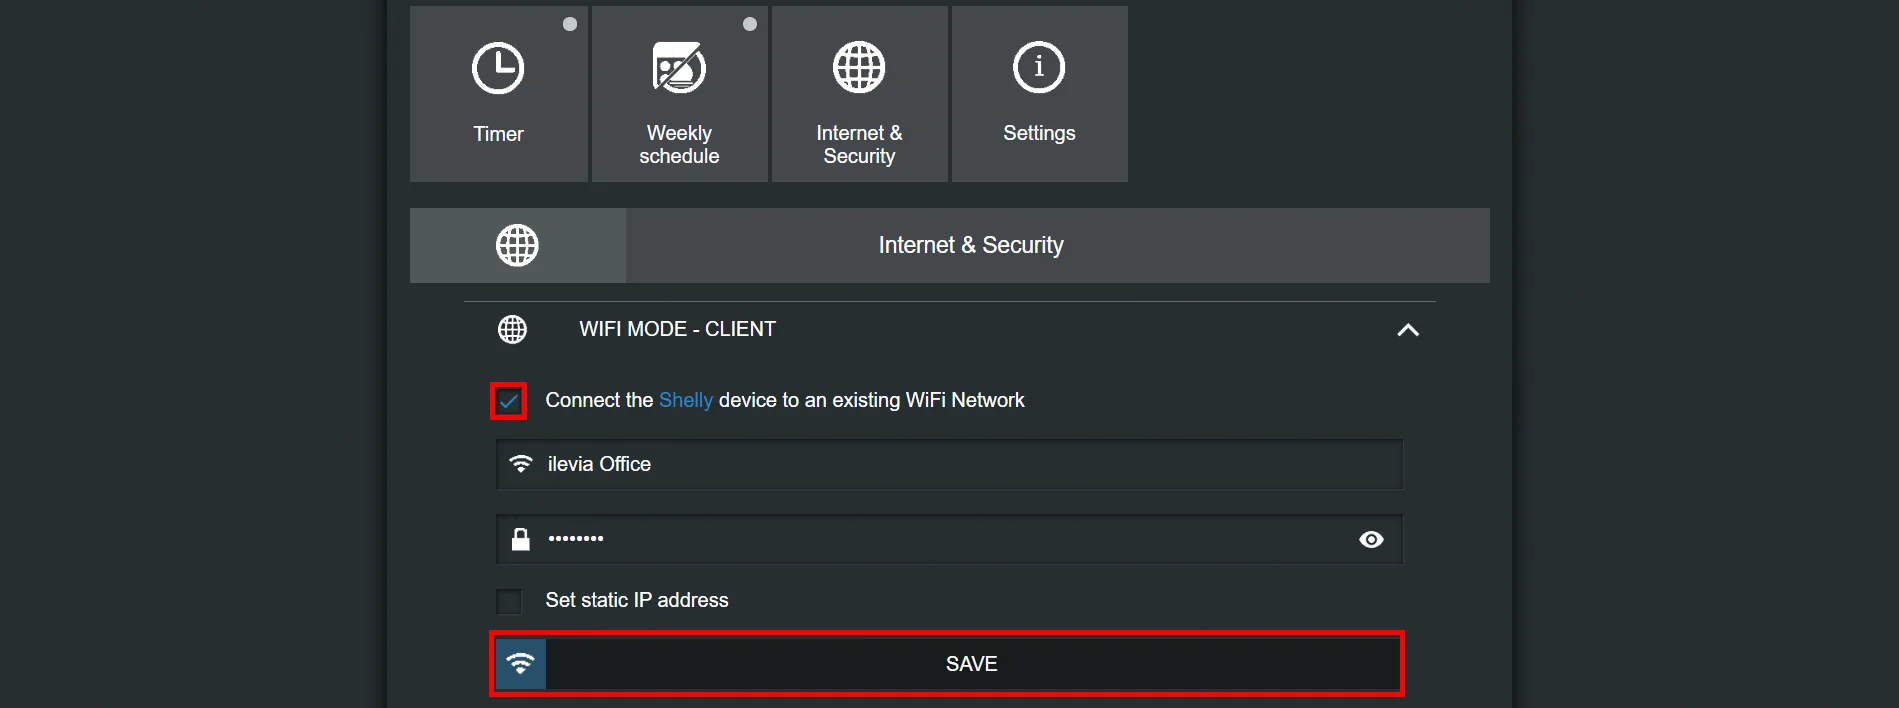
Go to “internet security settings” and “wifi mode client” sections, then select the “connect the shelly device to an existing WIFI network” checkbox. Enter the wifi credentials in the appropriate fields.
Step 2:
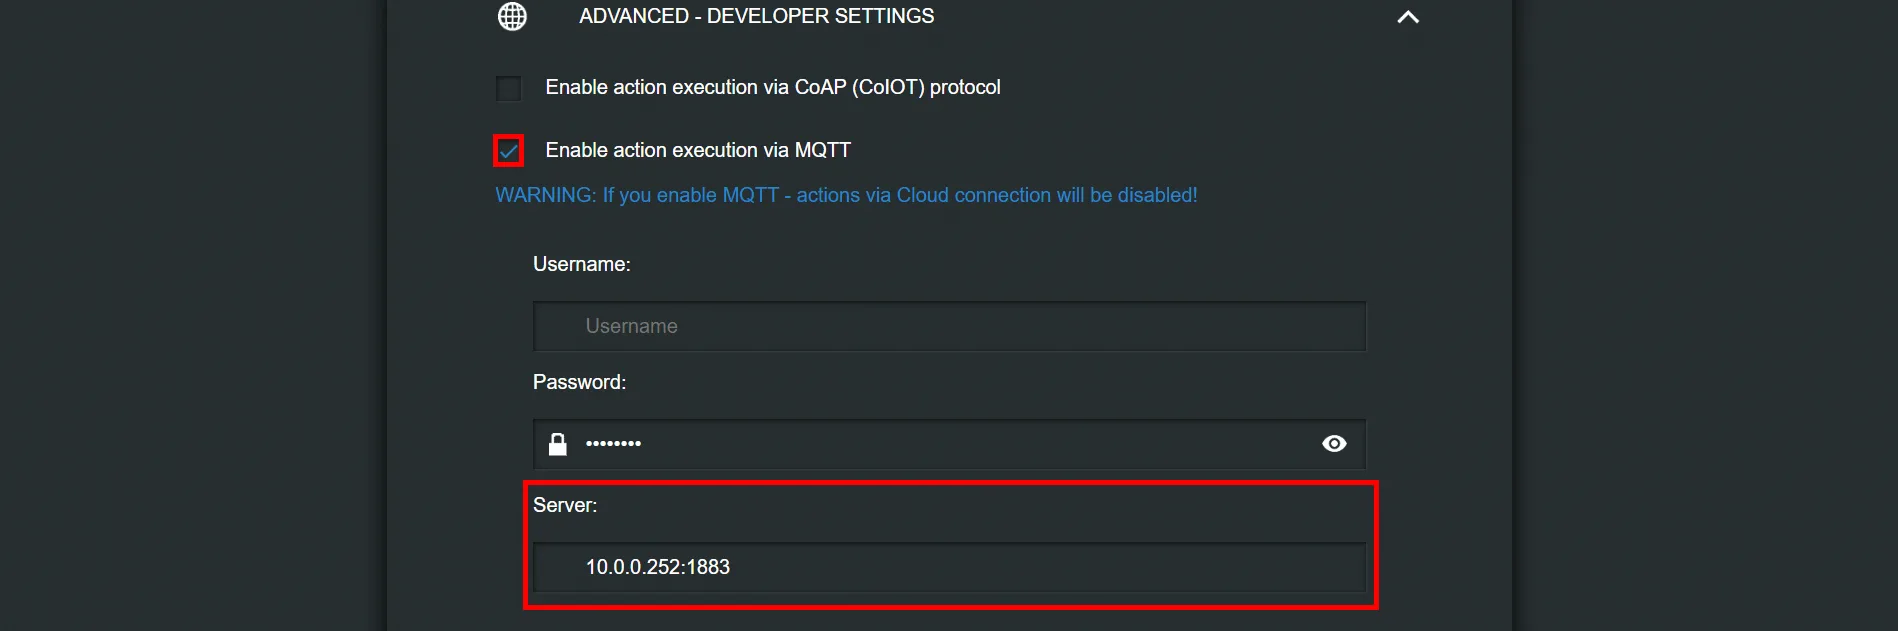
The next step is to enable the MQTT protocol on the device: in “internet security settings”, go to “advanced developer settings” and select the “enable action execution via MQTT” checkbox. Then set the server IP address to that of your X1.
Step 3:
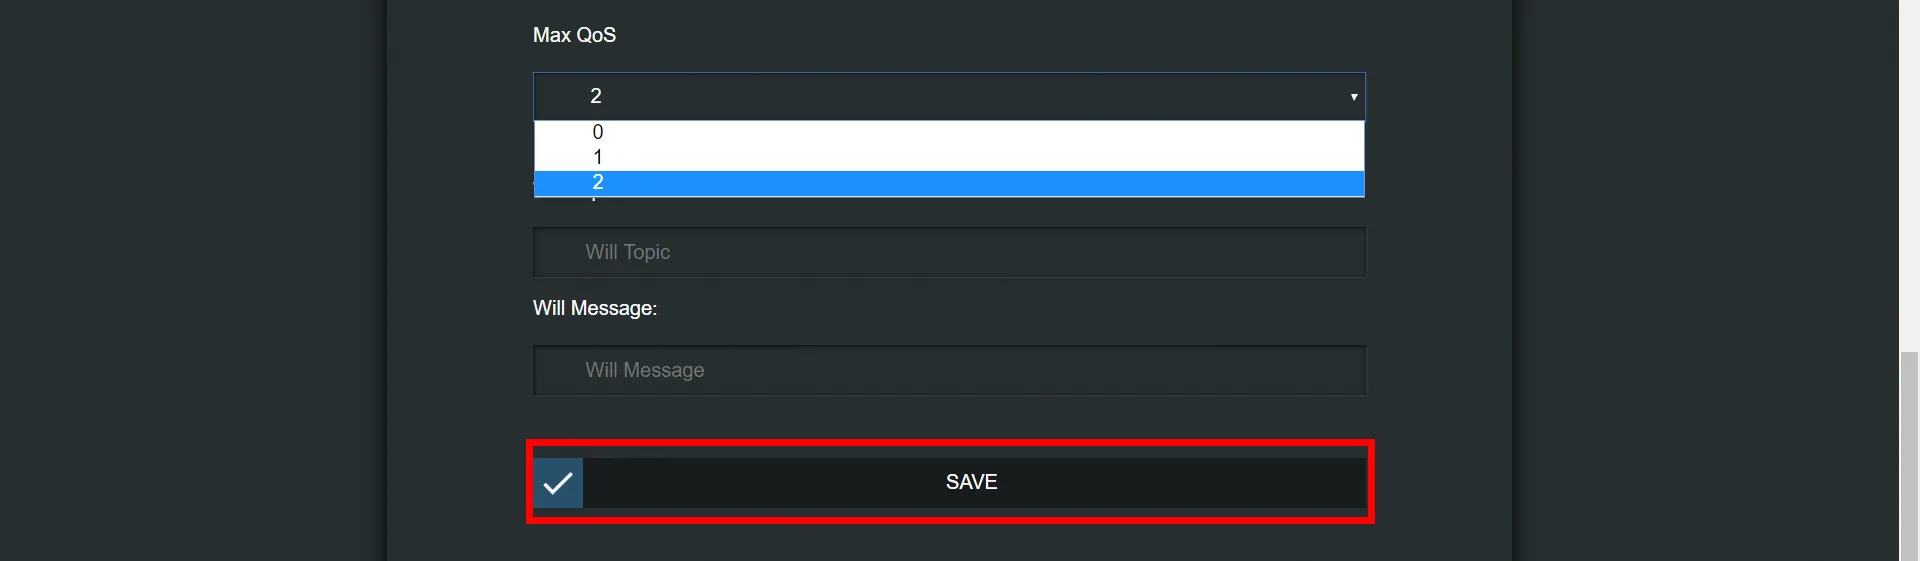
Set the Quality of Service (QoS) to 2, then click Save.
Topic configuration
Step 4:
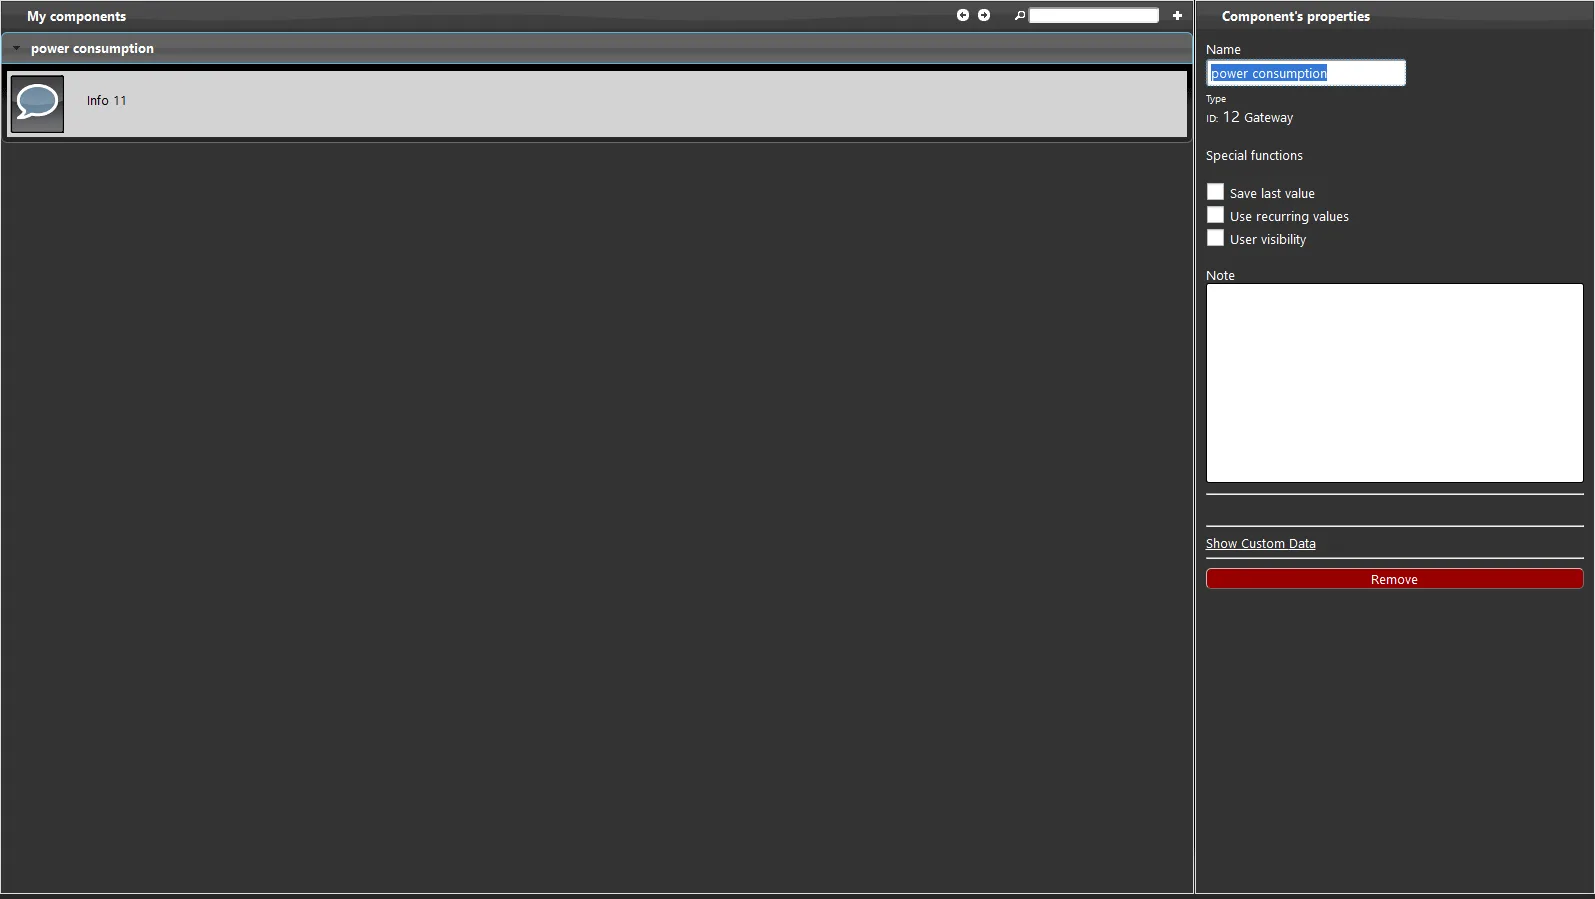
Create a new group in the Ilevia Manager project, then add an Info component inside the group (the component must be placed in a group to display the data).
Step 5:
To create a new MQTT gateway, see the MQTT gateway properties page.
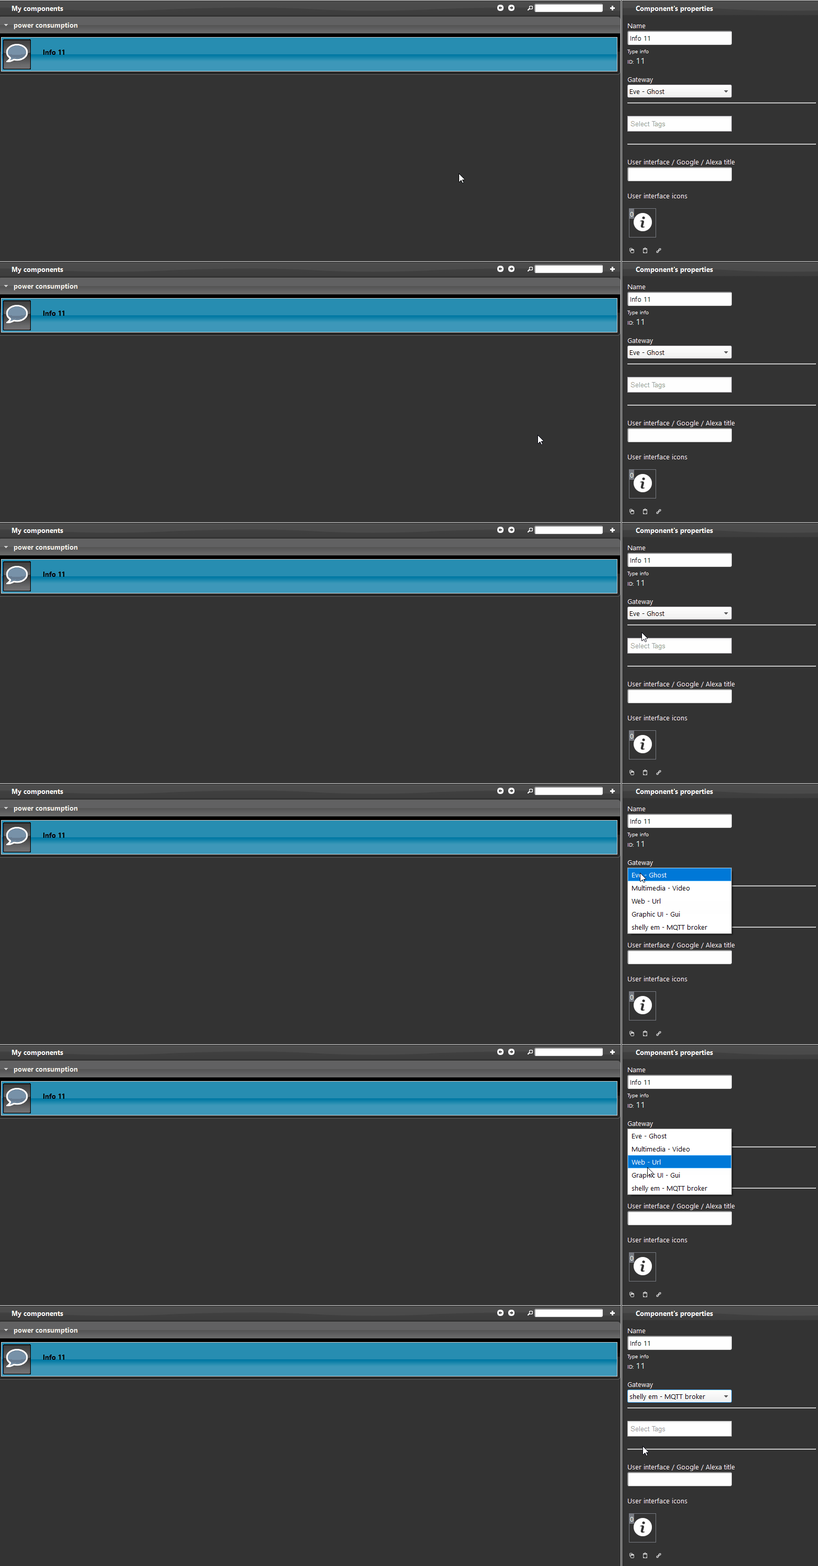
Change the gateway protocol from the gateway drop-down menu and set it to the one created for MQTT.
Step 6:
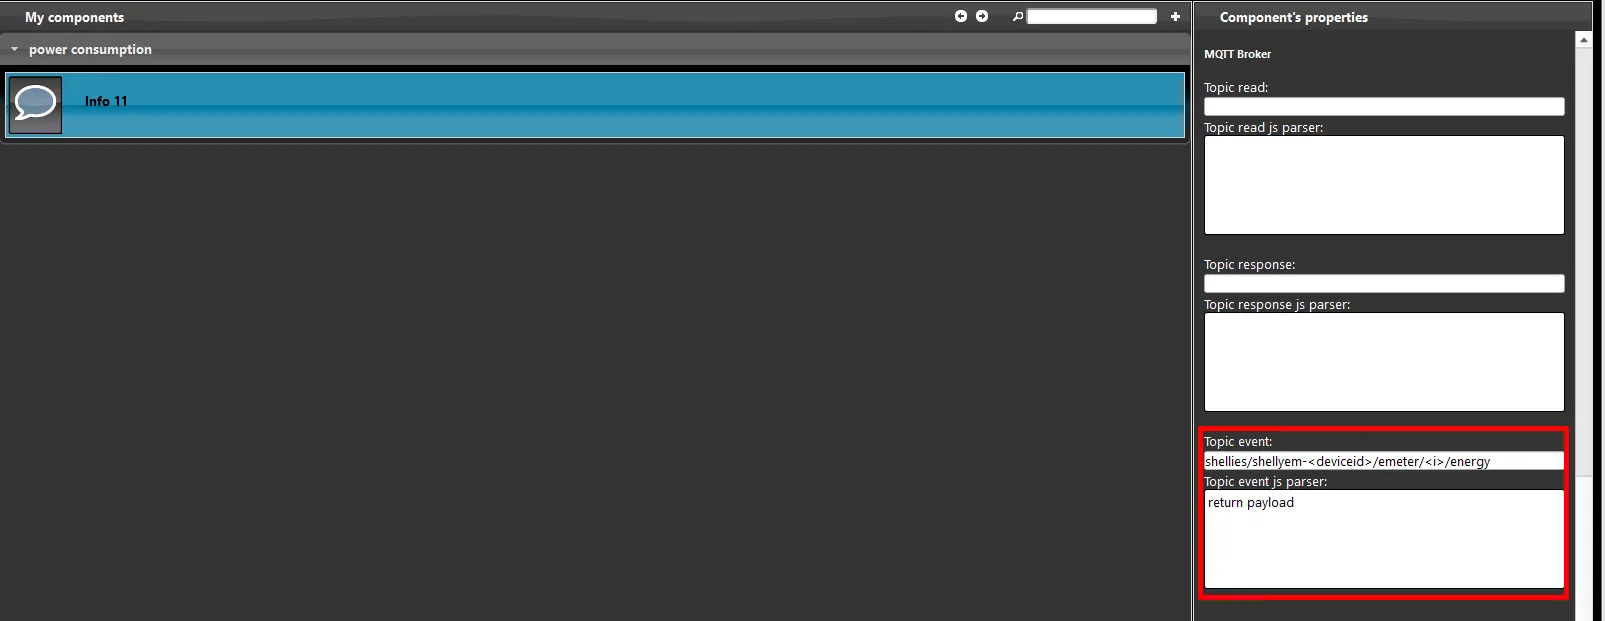
The topic will report the energy meter value.
The “topic Event” is the one we will set for this operation.
Click this link to view the configuration of the illustrated component.
Step 7:
Upload the project to your X1 and wait a couple of seconds.
You will now see the real-time values inside the Info component.

Troubleshooting
1- Make sure you have the latest available version of Ilevia Manager and the X1 server firmware.
2- Make sure the Shelly device is correctly connected to your network.
3- If you cannot connect the broker, check that your X1 has been configured correctly.
Frequently asked questions
Why is my Shelly device not connecting to the local network?
Check that the credentials are entered correctly.
Why is the Info component not showing any information?
Make sure the component is inside a group in the project and that the Logic module is updated and running.