Map (Map template)
How to create an interactive map template with background and linked components in the Classic interface of Ilevia Manager.
Introduction
This component lets you create a custom map template in the Classic user interface: you can then create multiple maps with interactive components inside them. Each map template can be customized individually.
Use cases
The user wants to build an interface where each room can be controlled by consulting a floor plan instead of a menu.
An owner of a B&B facility can use this component to check the status of all the rooms in the building.
Component properties
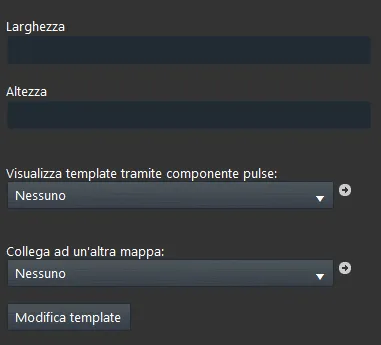
Width: This text field lets you set a specific width for the component when the map opens.
Height: This text field lets you set a specific height for the component when the map opens.
Show template through pulse component: This option list lets you link a Pulse component that will trigger the opening of the Map template.
Link another map: This option list lets you link another Map template so that you can apply display levels to the Map template component.
Edit Template: Clicking this button opens the dialog window for editing the map template, allowing you to add devices inside it.
Edit template
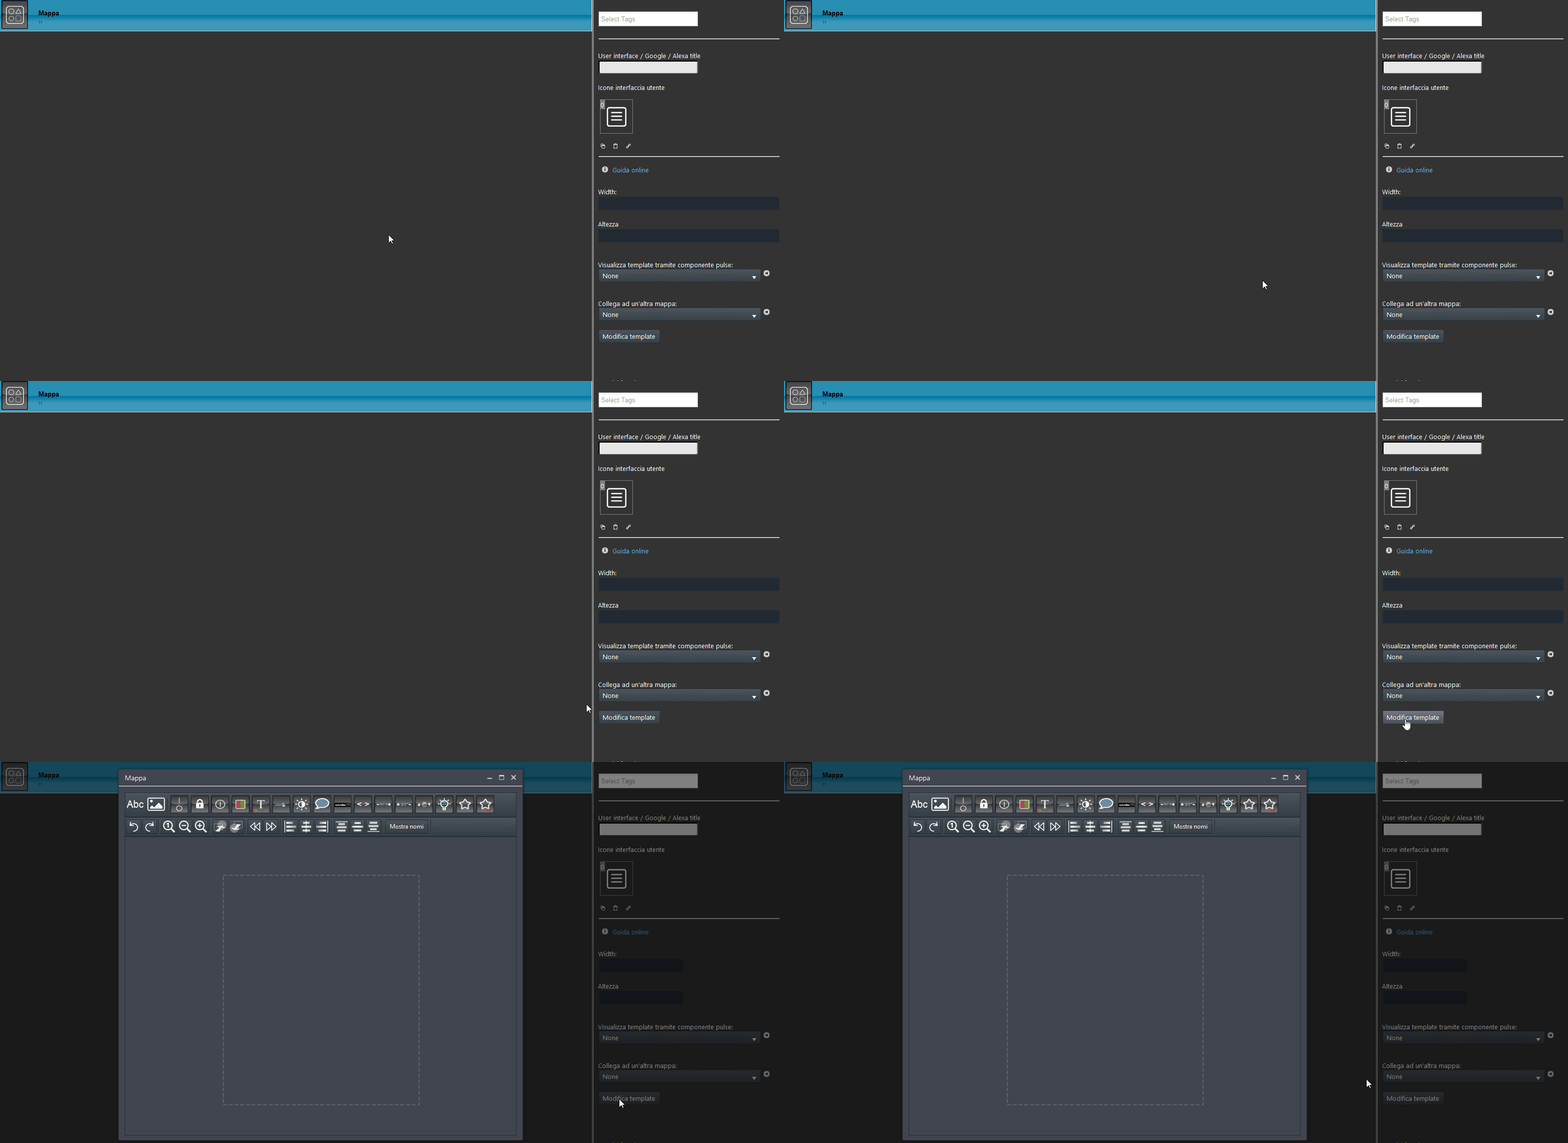
By clicking the “Edit template” button in the component properties, you will access the Edit template editor, where you can configure your Map template with the components set up in the project.
How to add a background image to the Map component
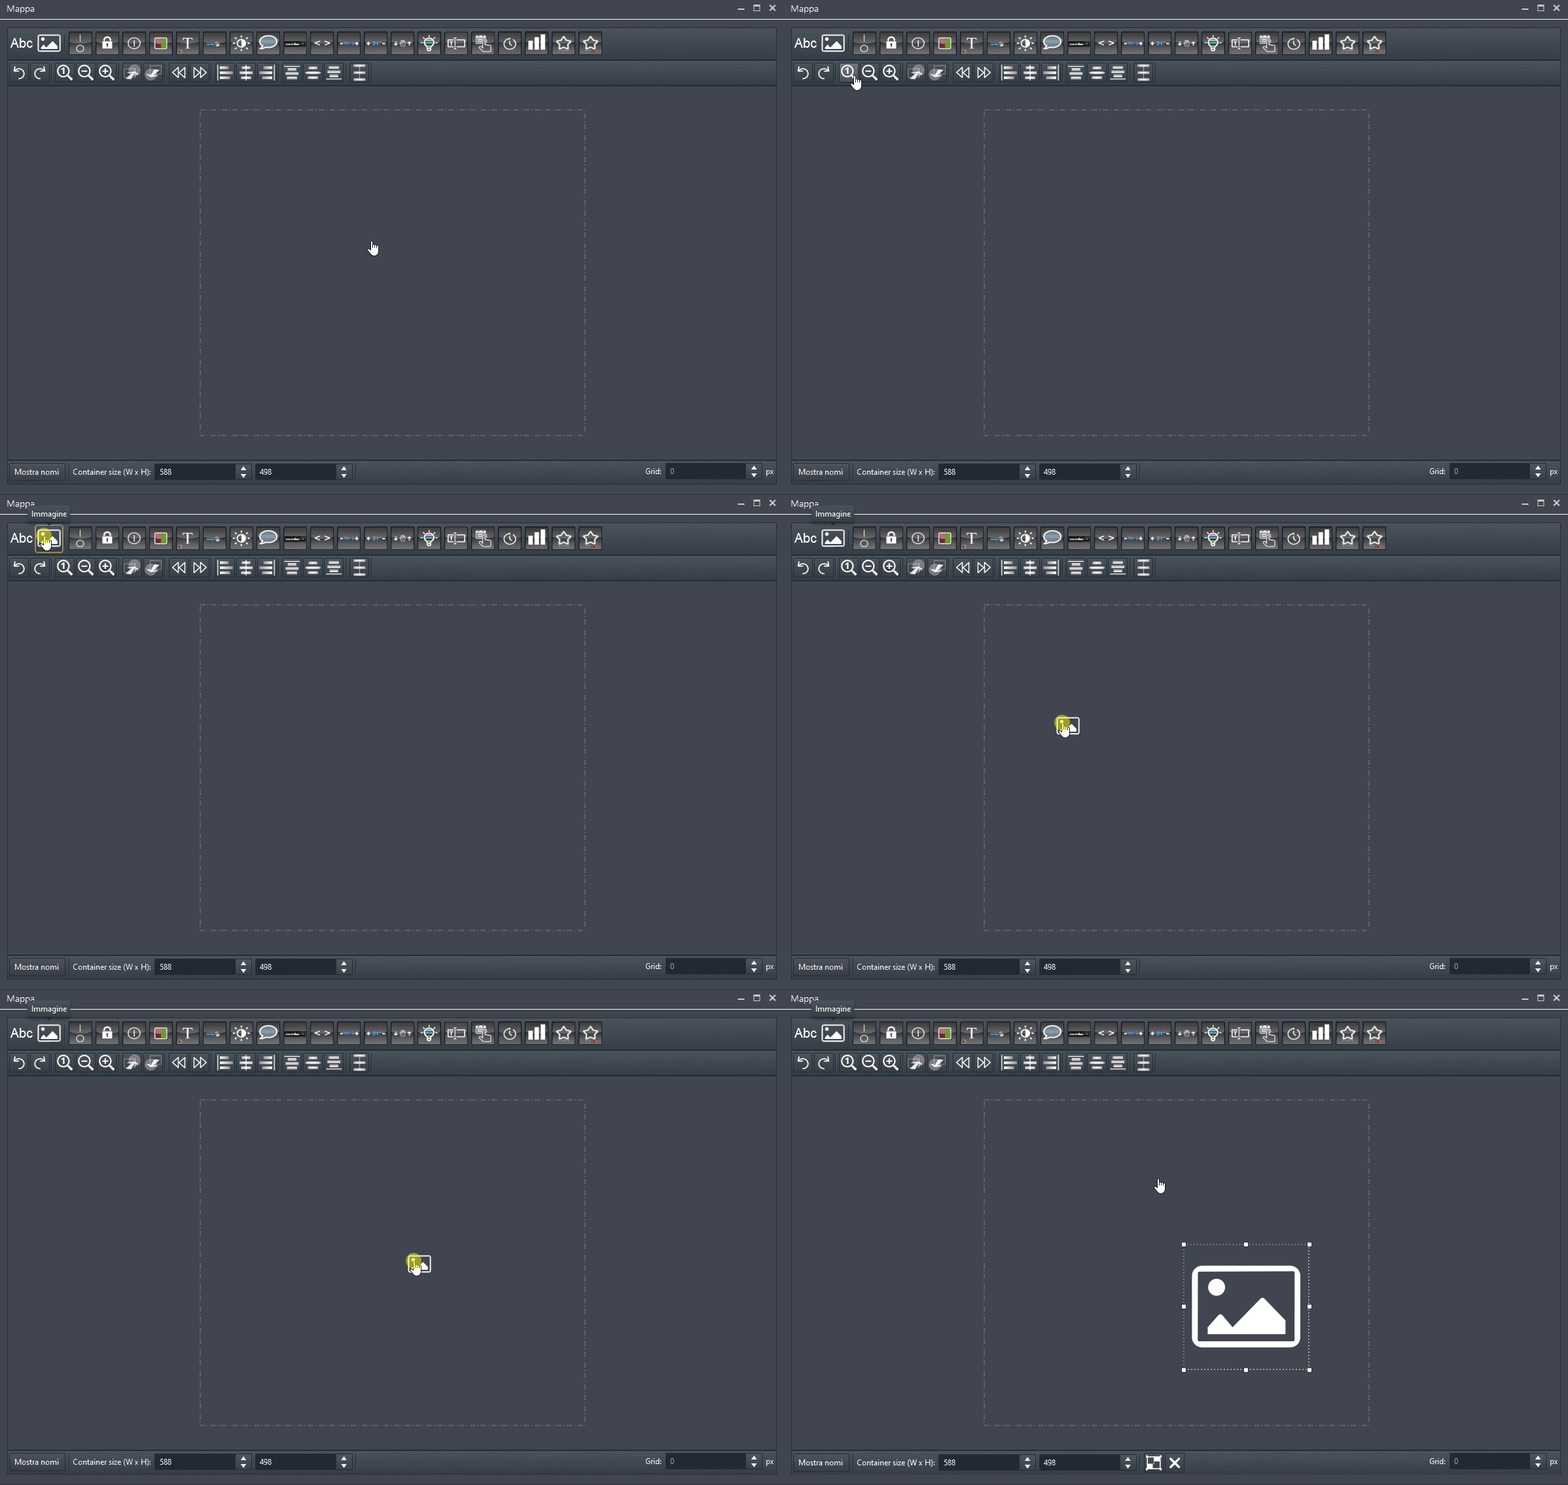
Step 1:
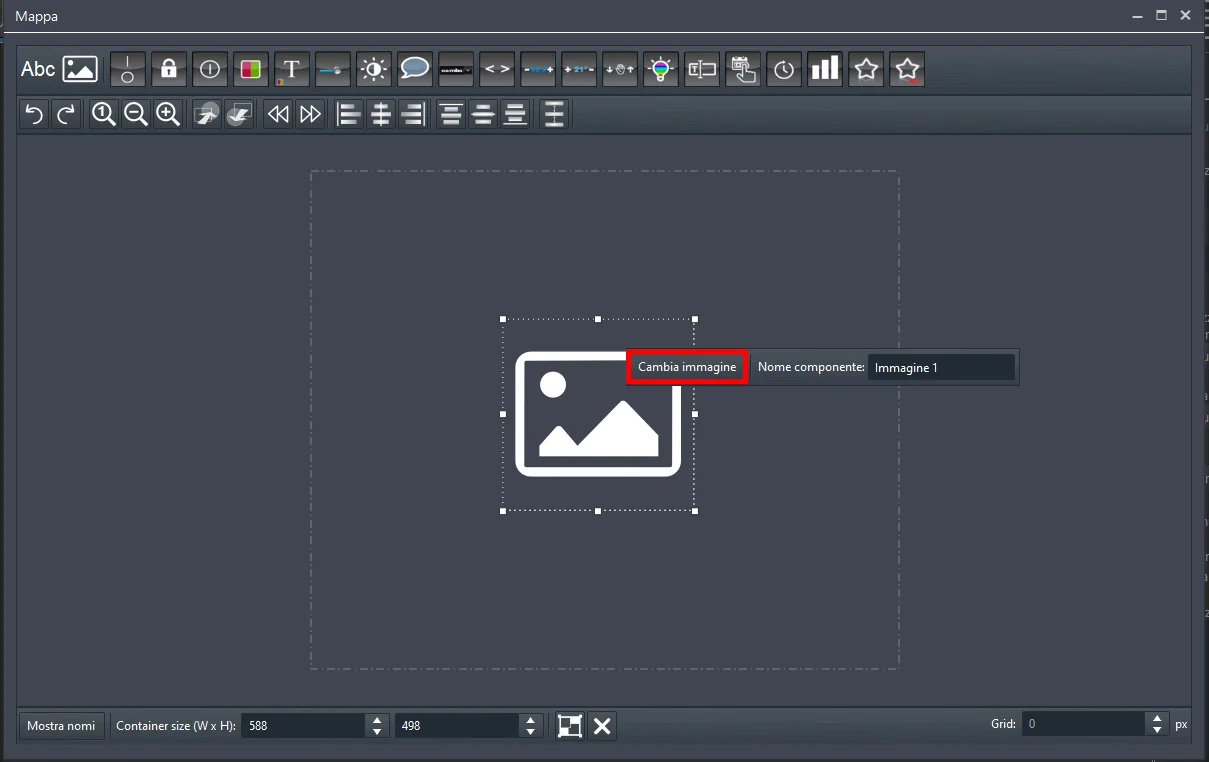
To add a background image in Edit template, drag the image component into the interface.
Step 2:
To select the desired image, double-click the image component in the Edit template section, then click “change image“.
Note: The image can be resized as needed, and you can add more than one image component within the same Map template section.
How to connect the components in the project to the components inserted in the Map component
The Map template component lets you create new components that will be linked to existing components in the “My components” section.

To connect components to the Map component, proceed as follows.
Step 1:
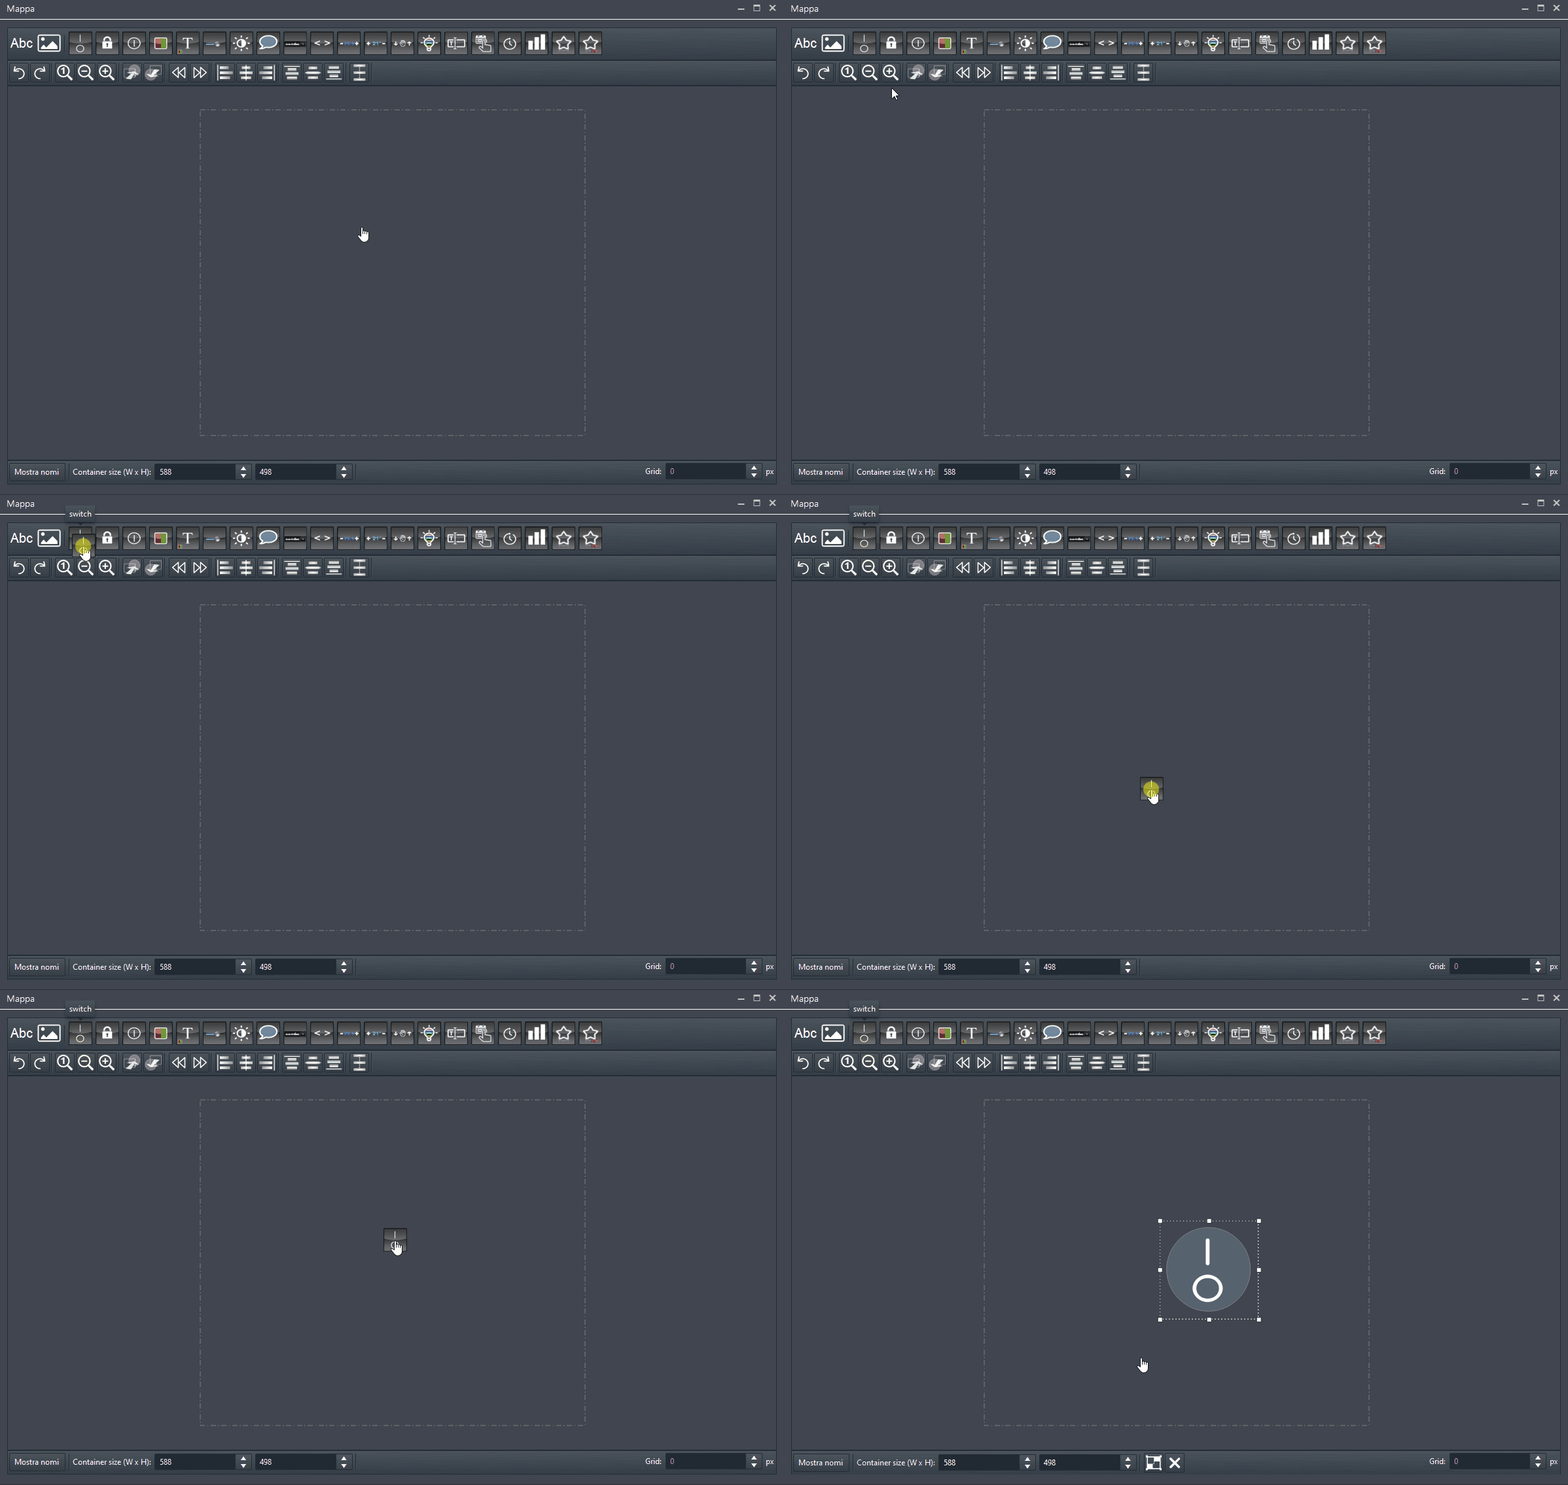
Add a specific component by dragging it from the component bar at the top of the Edit template window.
Step 2:
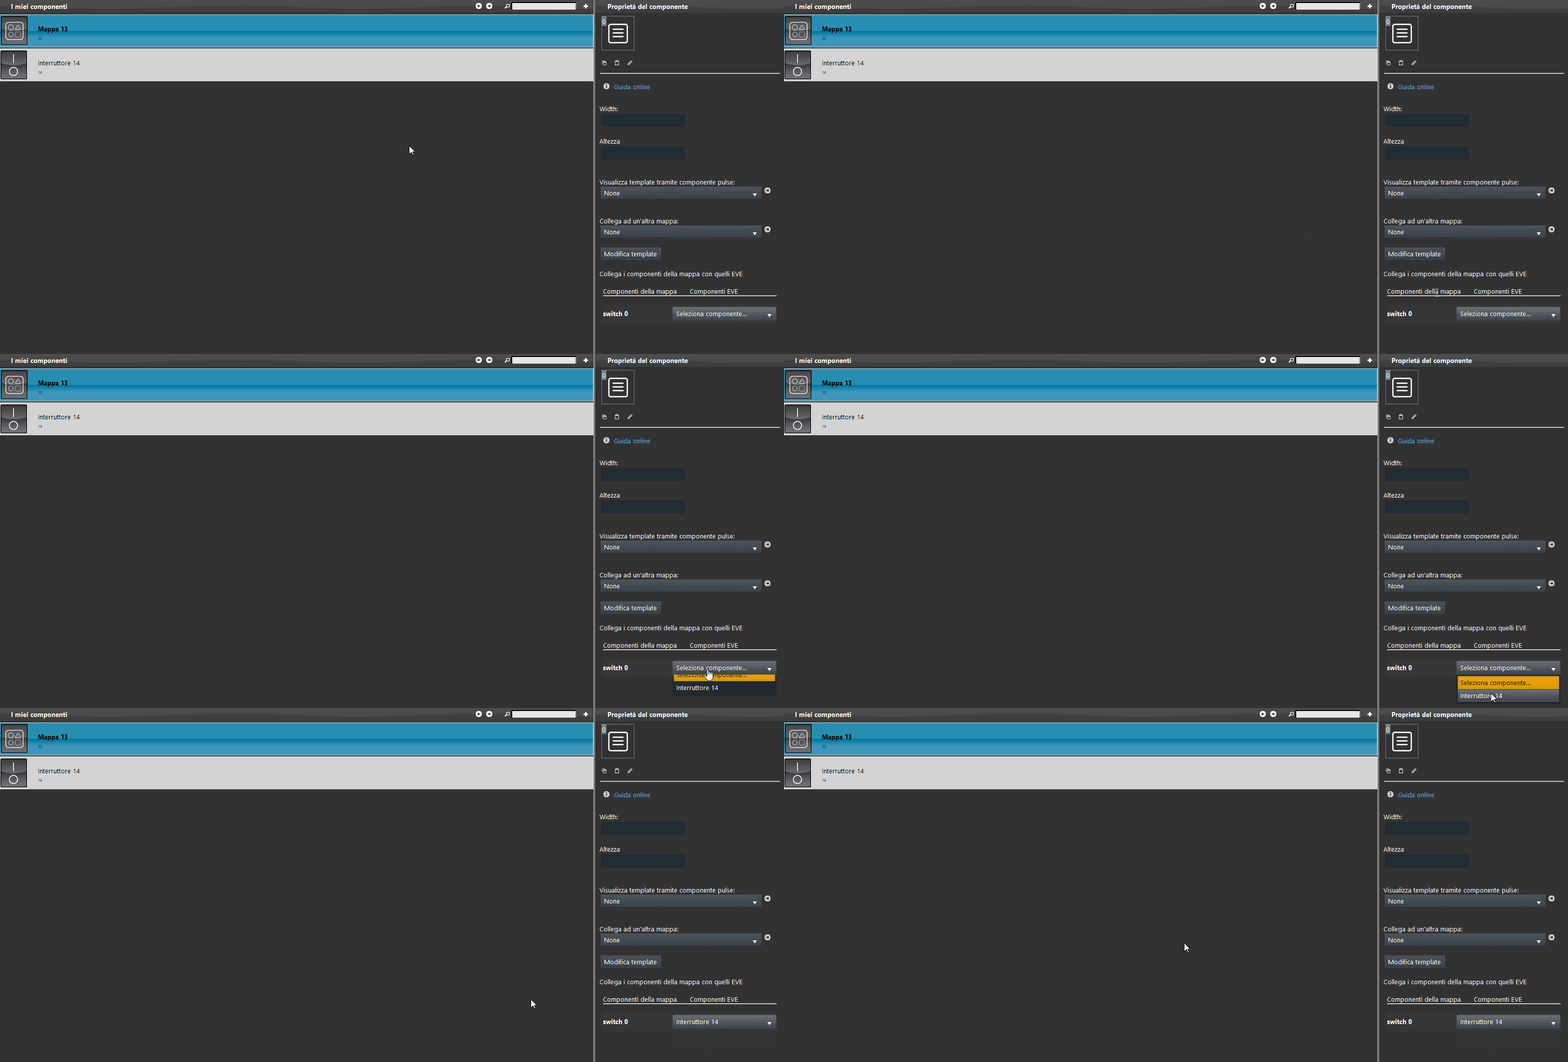
To link a component to a component within the project, go to the Edit template section; below the Edit template button, a new section will appear that allows you to link the switch in the “My components” section previously added within the project.
Edit template editor interface tools
The Edit Template section includes tools to make the template as customizable as possible.

Undo & Redo
 | These two tools let you redo or undo an action performed in the Edit template section. |
Reset, Forward or Back Zoom


| These three tools let you increase or decrease the zoom level in the Edit template section. |
Bring Forward or Send Backward 
 | These two tools let you move an object behind or in front of the background image. |
Previous or next shape 
 | These two tools let you select the previous or next shape, depending on the currently selected element. |
Align right, left or center 

 | These three tools let you align the selected components to the side of the nearest component based on the chosen alignment position. |
Align top, middle or bottom 
 | These three tools let you align the selected components to the top, center or bottom. |
Container settings
This toolbar makes it faster to set up and display components and resolution.

Show names

This button lets you enable or disable the display of component names within the template editor.
Container size

Here you can enter the container dimensions of the Map template. component
Grid

Here you can enter the pixel dimensions of the grid that will be applied to the container. The grid lets you position elements inside the container using a grid-pixel criterion.
Cancel and close
This button closes the Map component editor without saving, meaning the latest changes will not be saved.
Background and container border color selection
The background of the Map component can also be created without a background image, allowing you to choose a single background color and the container borders.
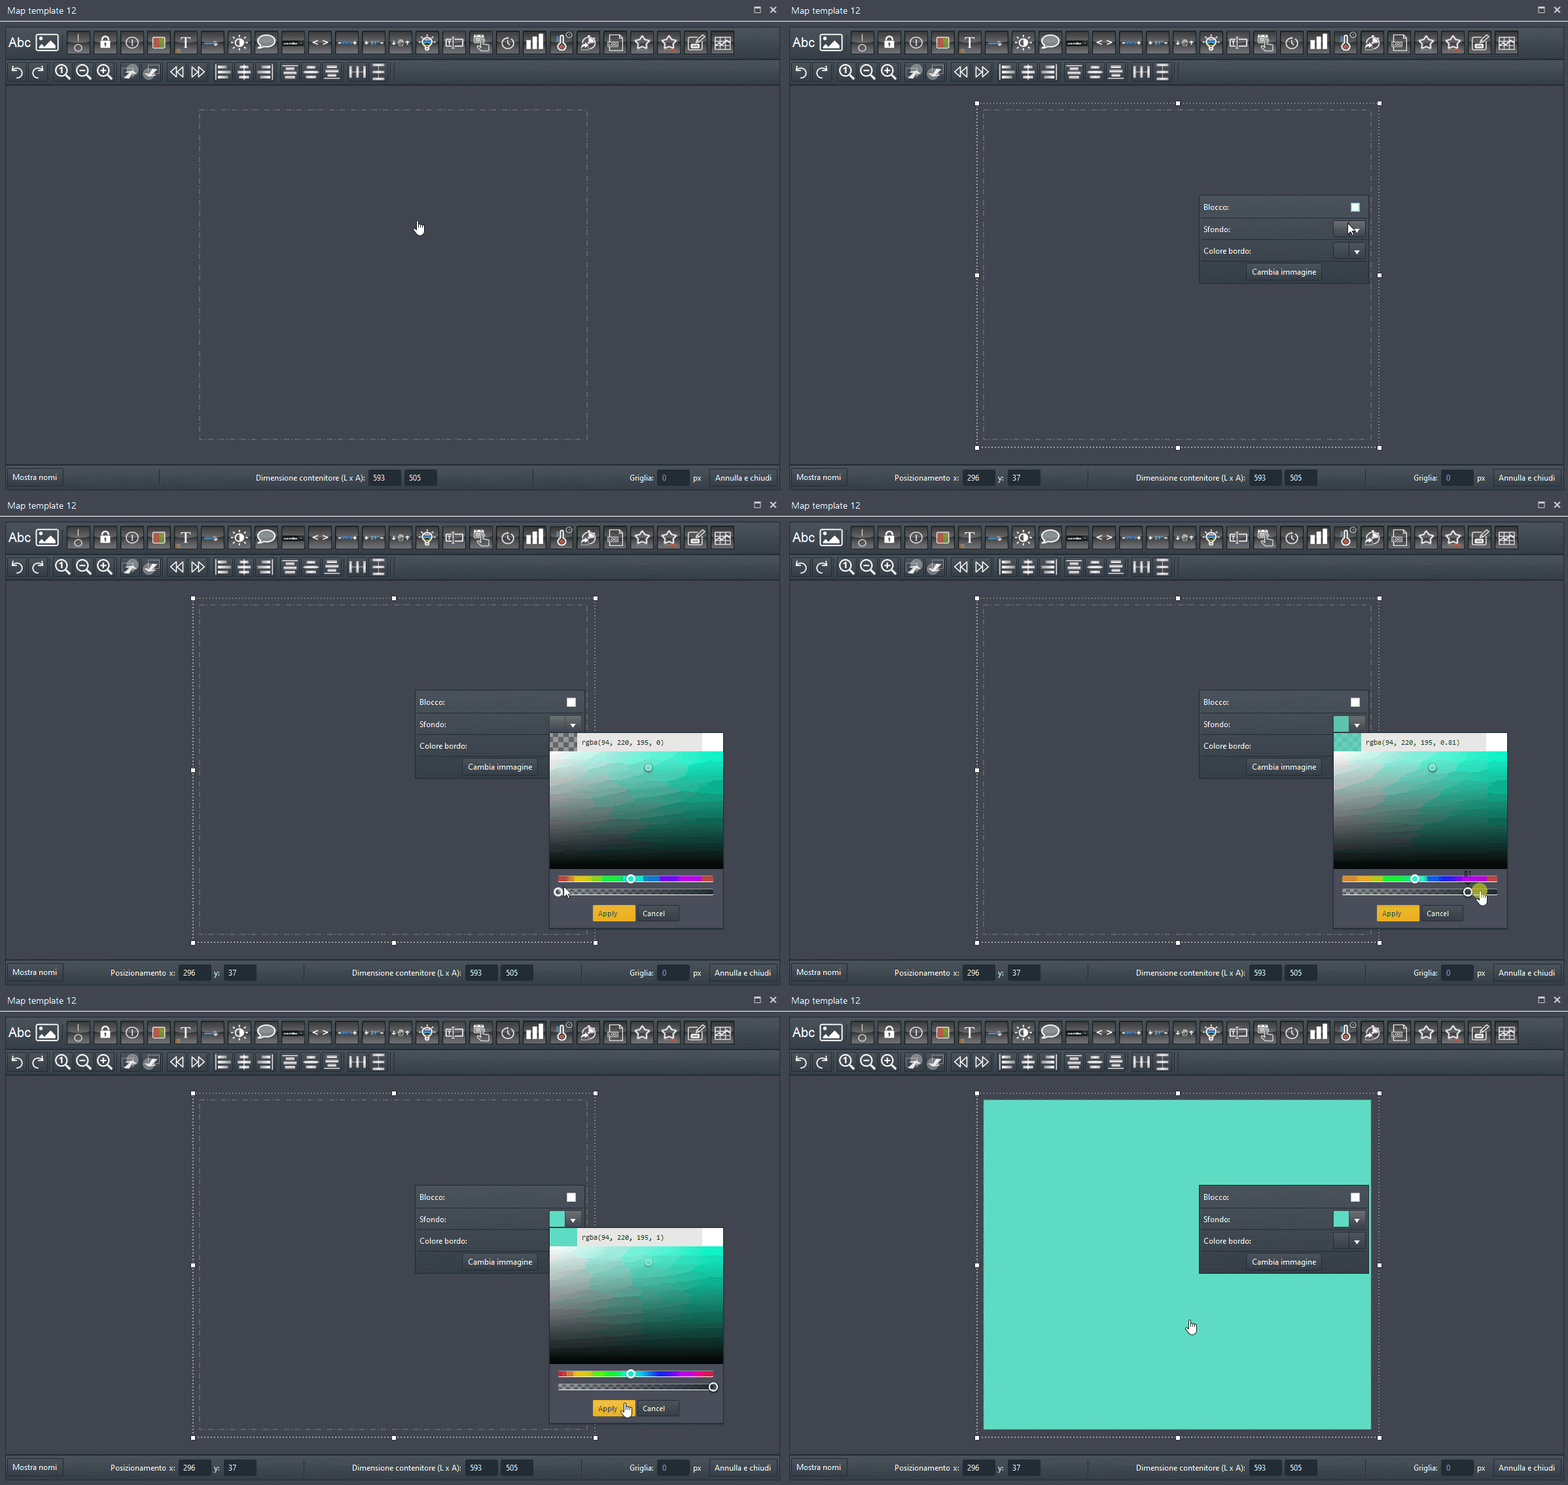
To do this, click on an empty area of your container; a new window will open. Then click the first color picker to select the background color. Once clicked, a palette will open, allowing you to choose the desired color that will be applied to the container. After selecting the color, also check the opacity slider located just below the slider for selecting the background color.
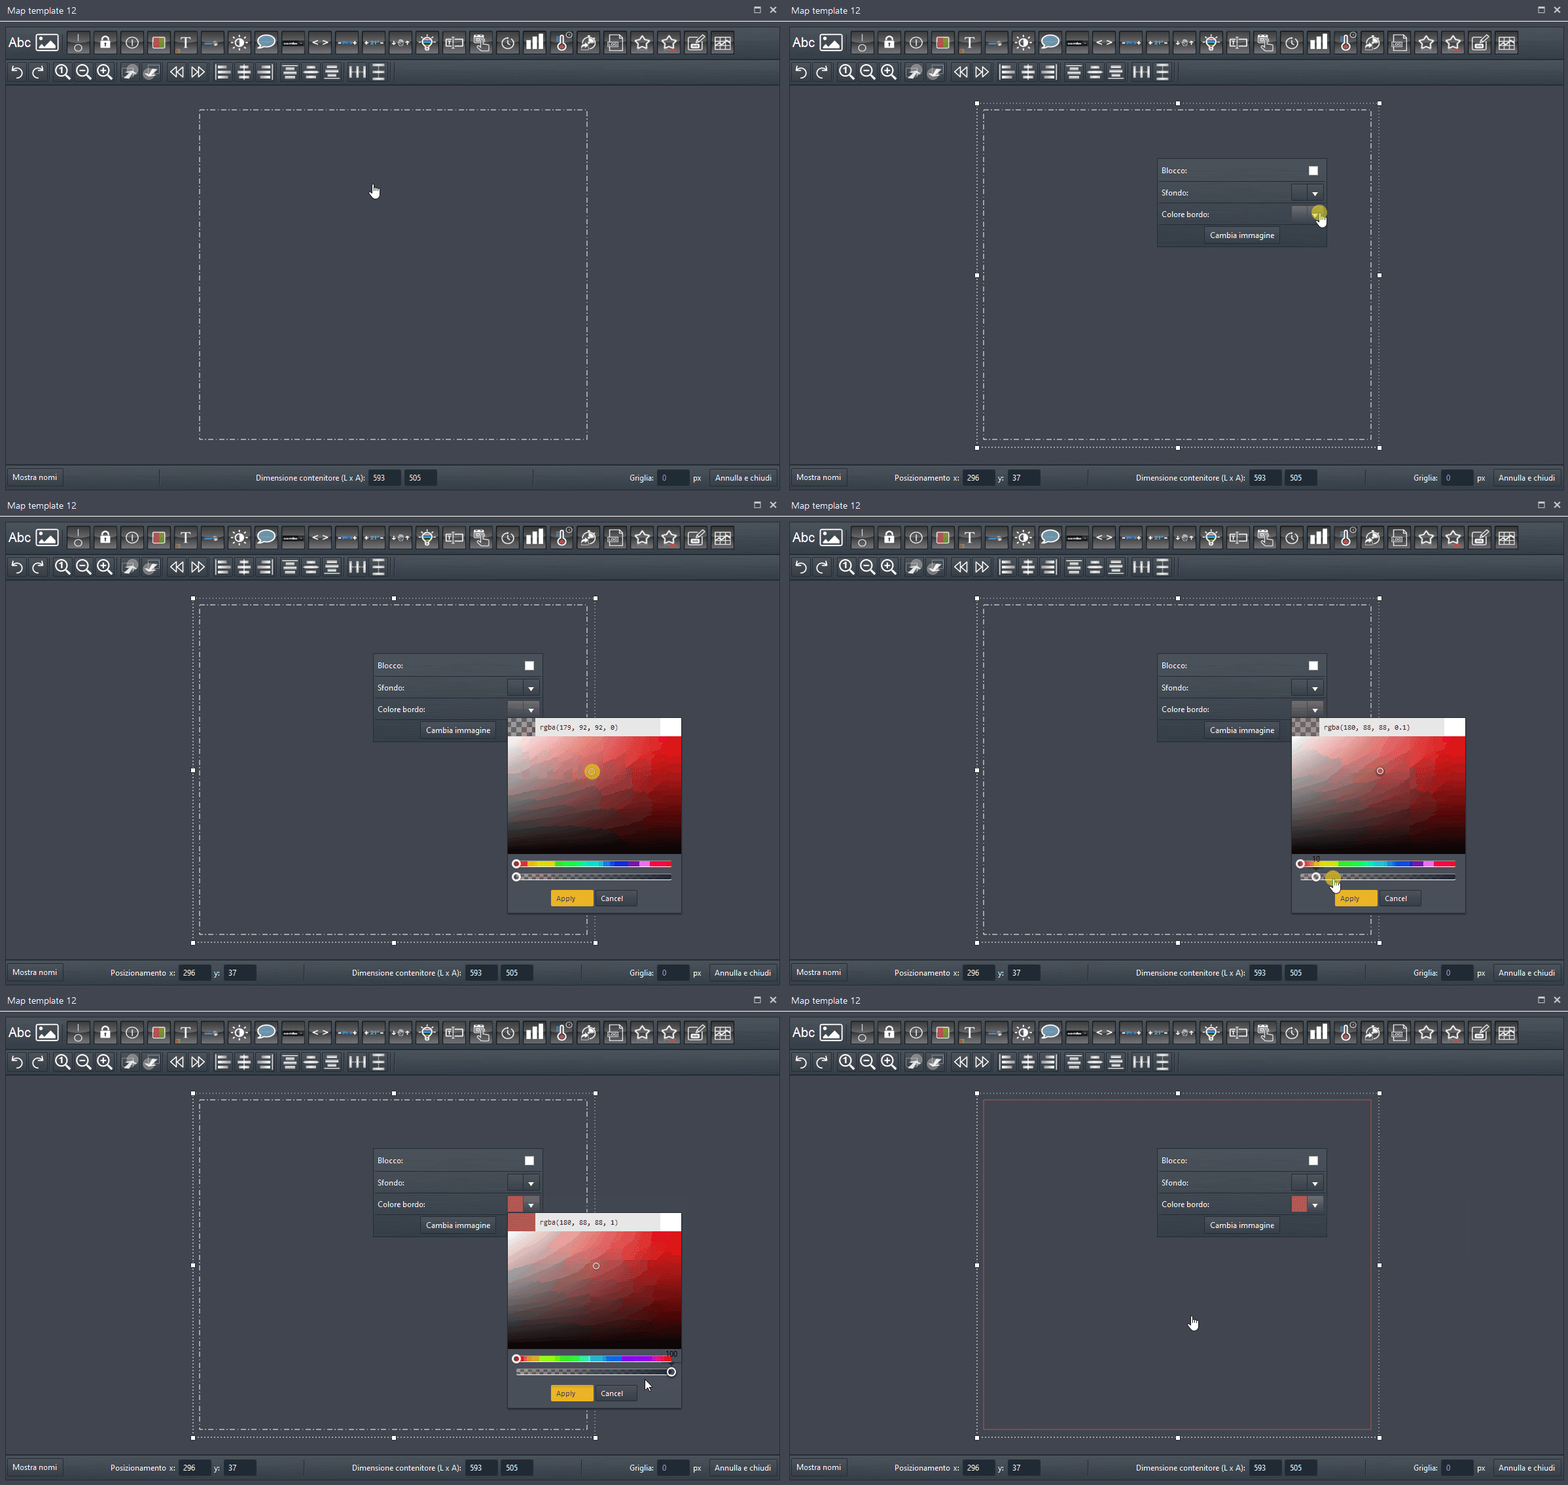
You can also select the border color of the Map component container. You can do this by left-clicking inside the container and selecting the picker called Border color.
Visual result of the Map template component
To apply the Map template component correctly within the user interface, you will need to add a trigger component to allow the user to open the Map template.
Then add a Button component to the project, then click the Map template component to display its properties. Click the drop-down menu “Display template through pulse component” and select the Button component added earlier.
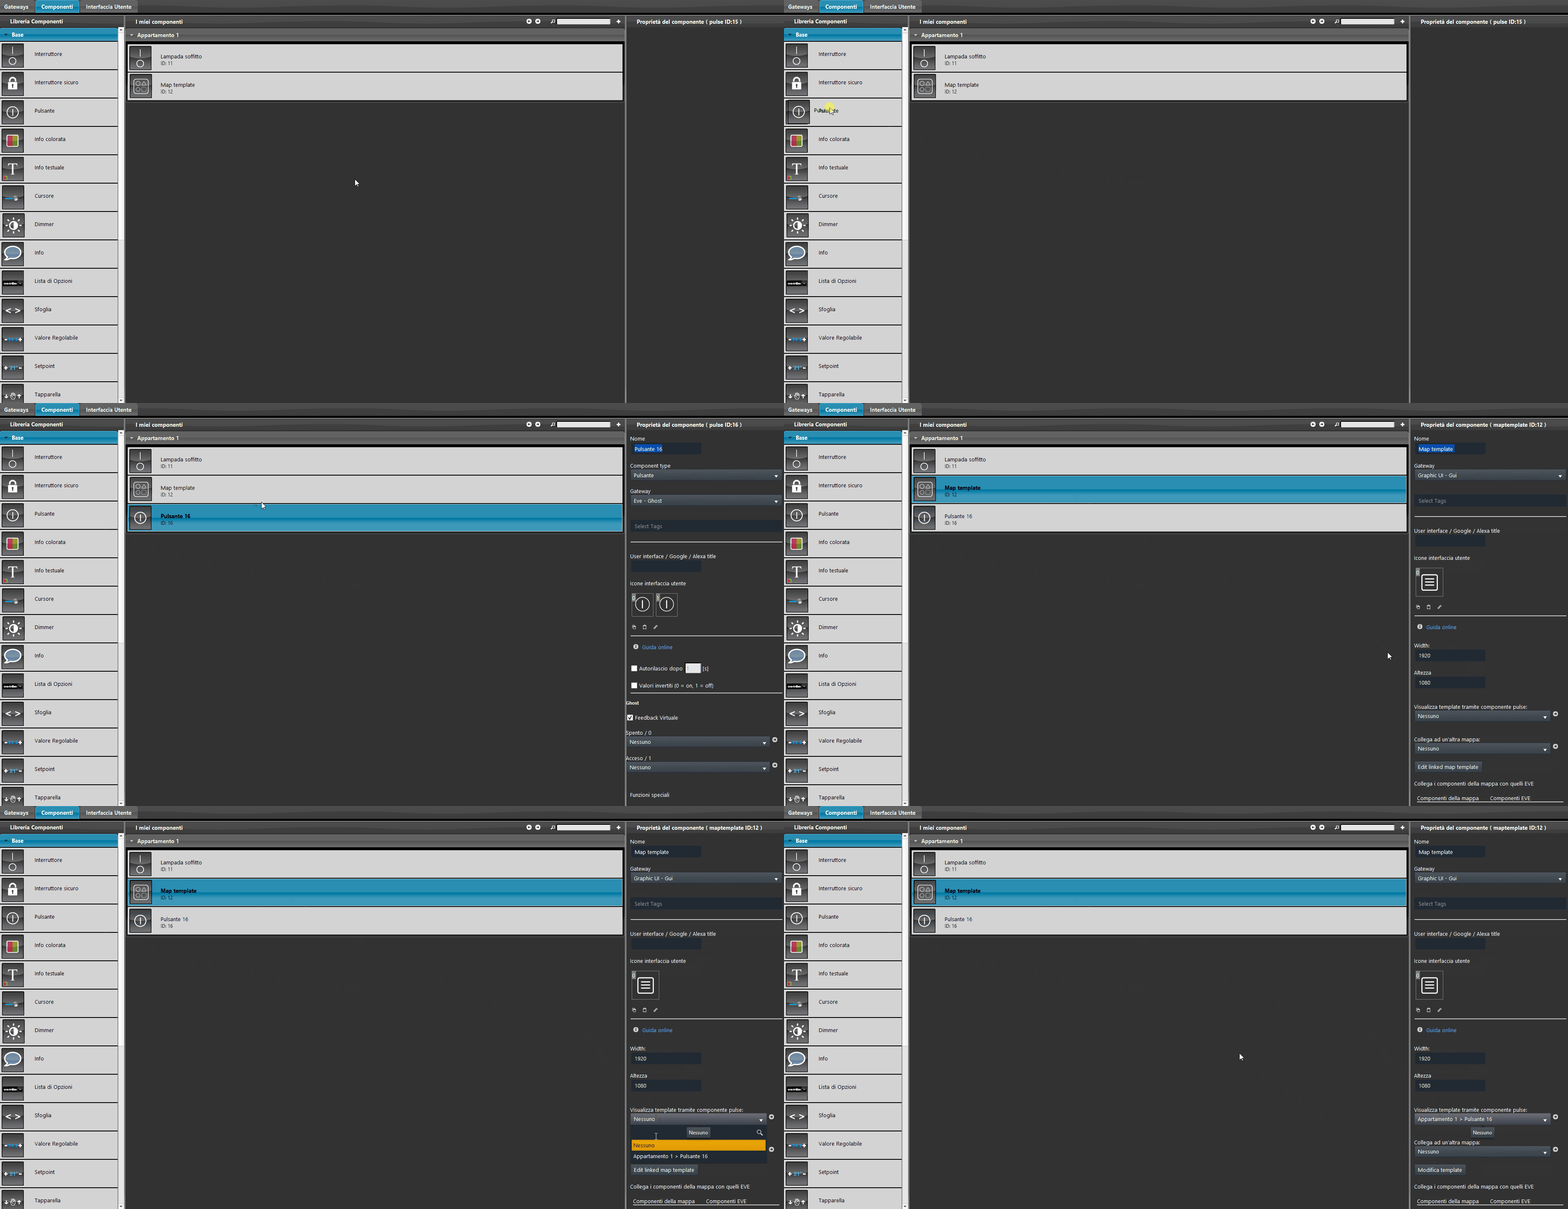
Open the User Interface menu and add the Button and Map template components: simply drag them from the components menu on the right side of the screen. The two components can be configured independently; we suggest adjusting them within the user interface so as to obtain the objects with the correct resolution once the interface is opened. In our case, we applied a resolution of “1440 x 900” to the user interface and a 300% scale factor to the Map template component.
Configuration of multiple Map Template components
If you need to create more than one Map template in the same project and want to apply the same template to all of them, there is a dedicated options list for this operation.
Step 1:
Add a new Map template component to the project, and open its Template editor from the component properties.
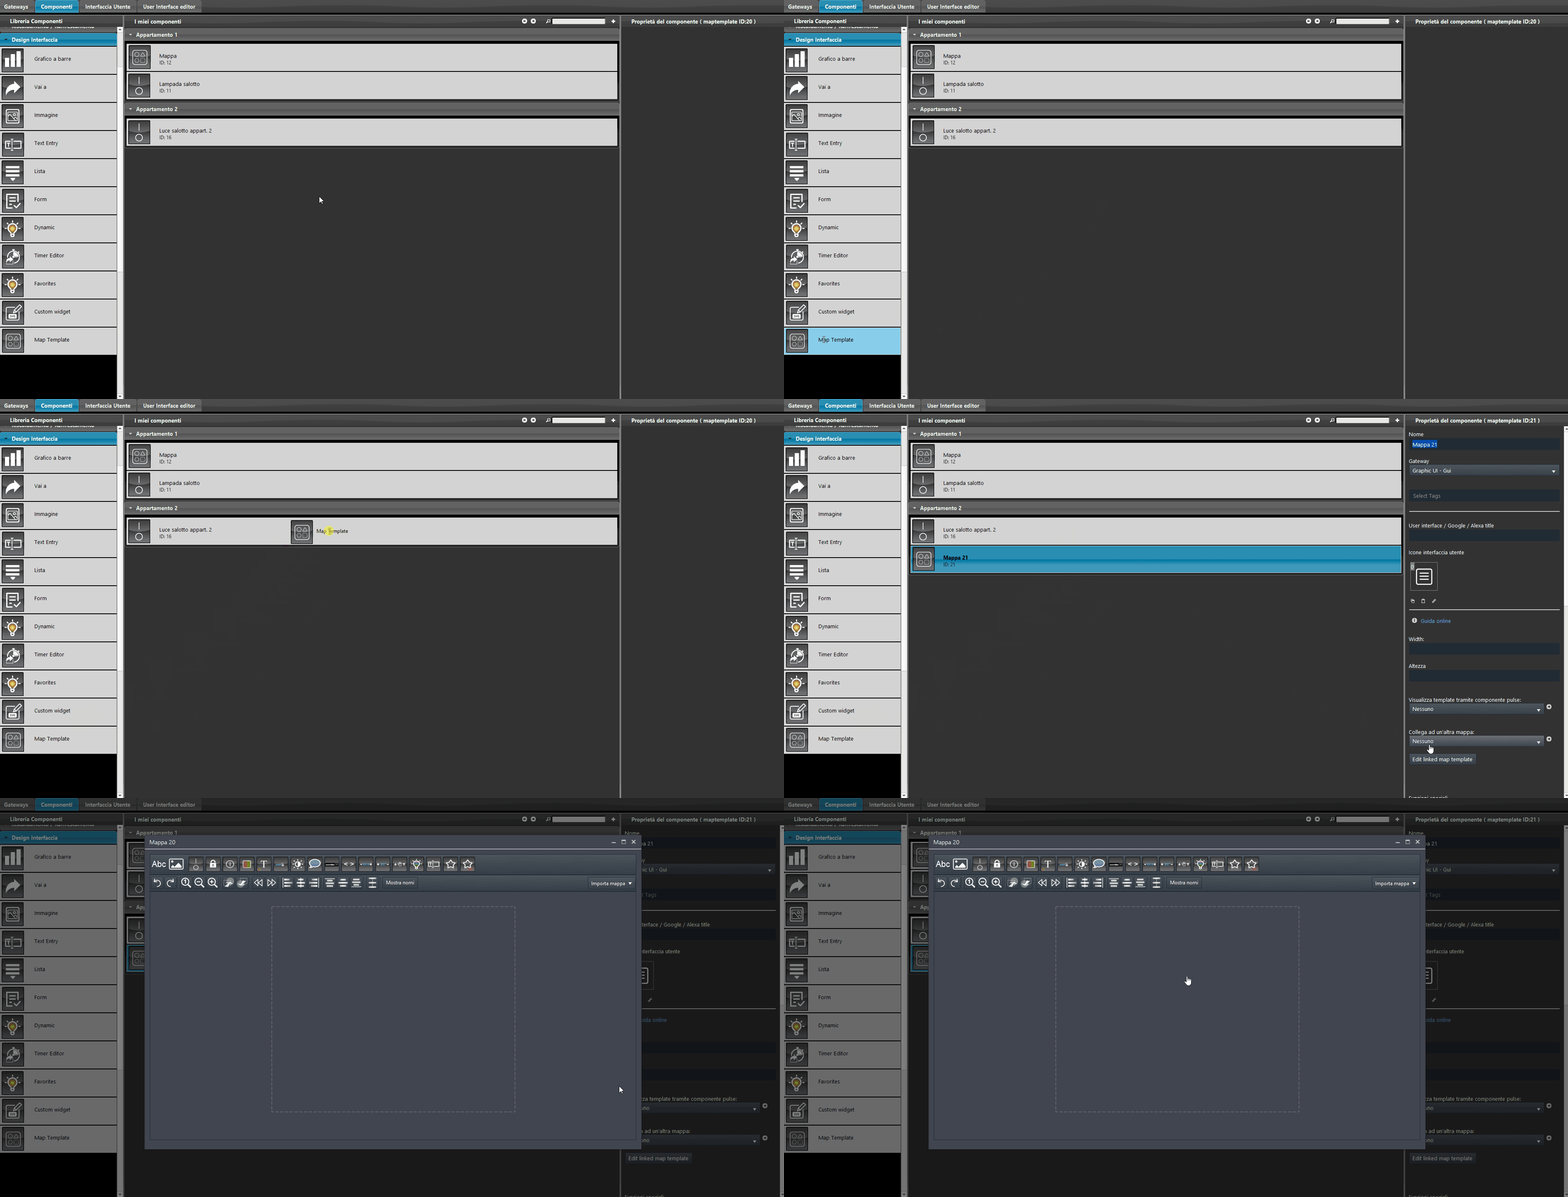
Step 2:
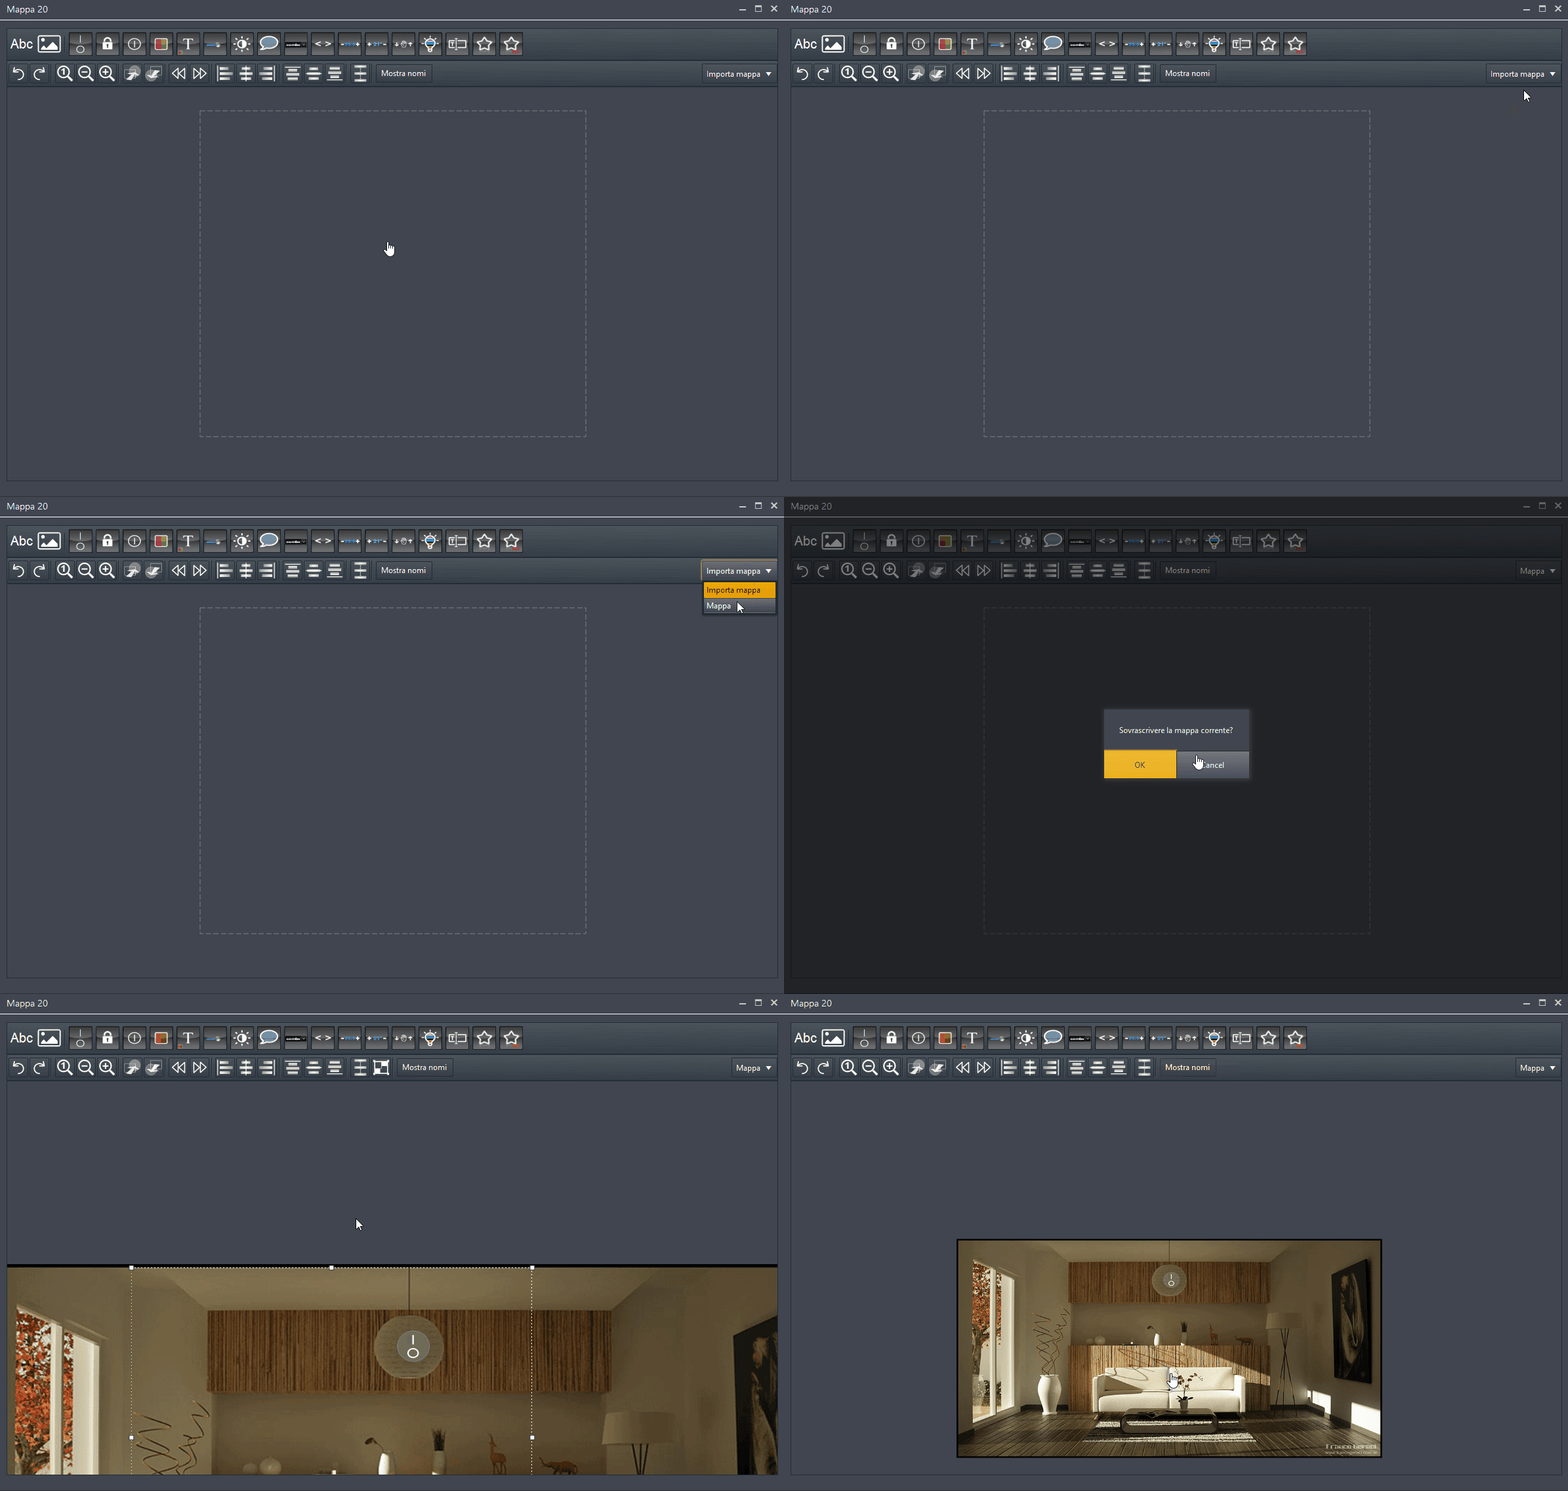
If multiple Map template components are present within the same project, a new options menu will appear on the right side of the Tools menu called “Import map“; click it and select the source Map template you want copied into the current component. Once the Map template is selected, a message will be shown: “Overwrite current map“; confirm by clicking OK.