
User group: filter the interface by user
Explanatory guide on how to configure user groups within a project in the Ilevia Manager configuration software.
Introduction
The User group setting, in the user settings, lets you manage users with a keyword that works as a filter once it is entered in an object in the user interface editor. Let us consider 3 user types: the admin user, who has full access to the components and the interface; the Guests user, who has access only to certain components and rooms; the Gardener user, who uses the interface only to start irrigation or open and close the gate. The User group lets you decide what each user can view and which rooms they can see in the user interface.
Step 1: in this project, 3 users have been created: 1. admin, 2. Guests, 3. Gardener. The users are configured as follows: the admin user has full access to the user interface; the Guests user has access only to specific rooms; the Gardener user has access only to the outdoor area of the house (outdoor lights, irrigation and outdoor gates). Go to the Users menu and click Edit user, then click the Linked button at the bottom of the user configuration window: this is used to link the users, so they share the same user interface as the admin user.
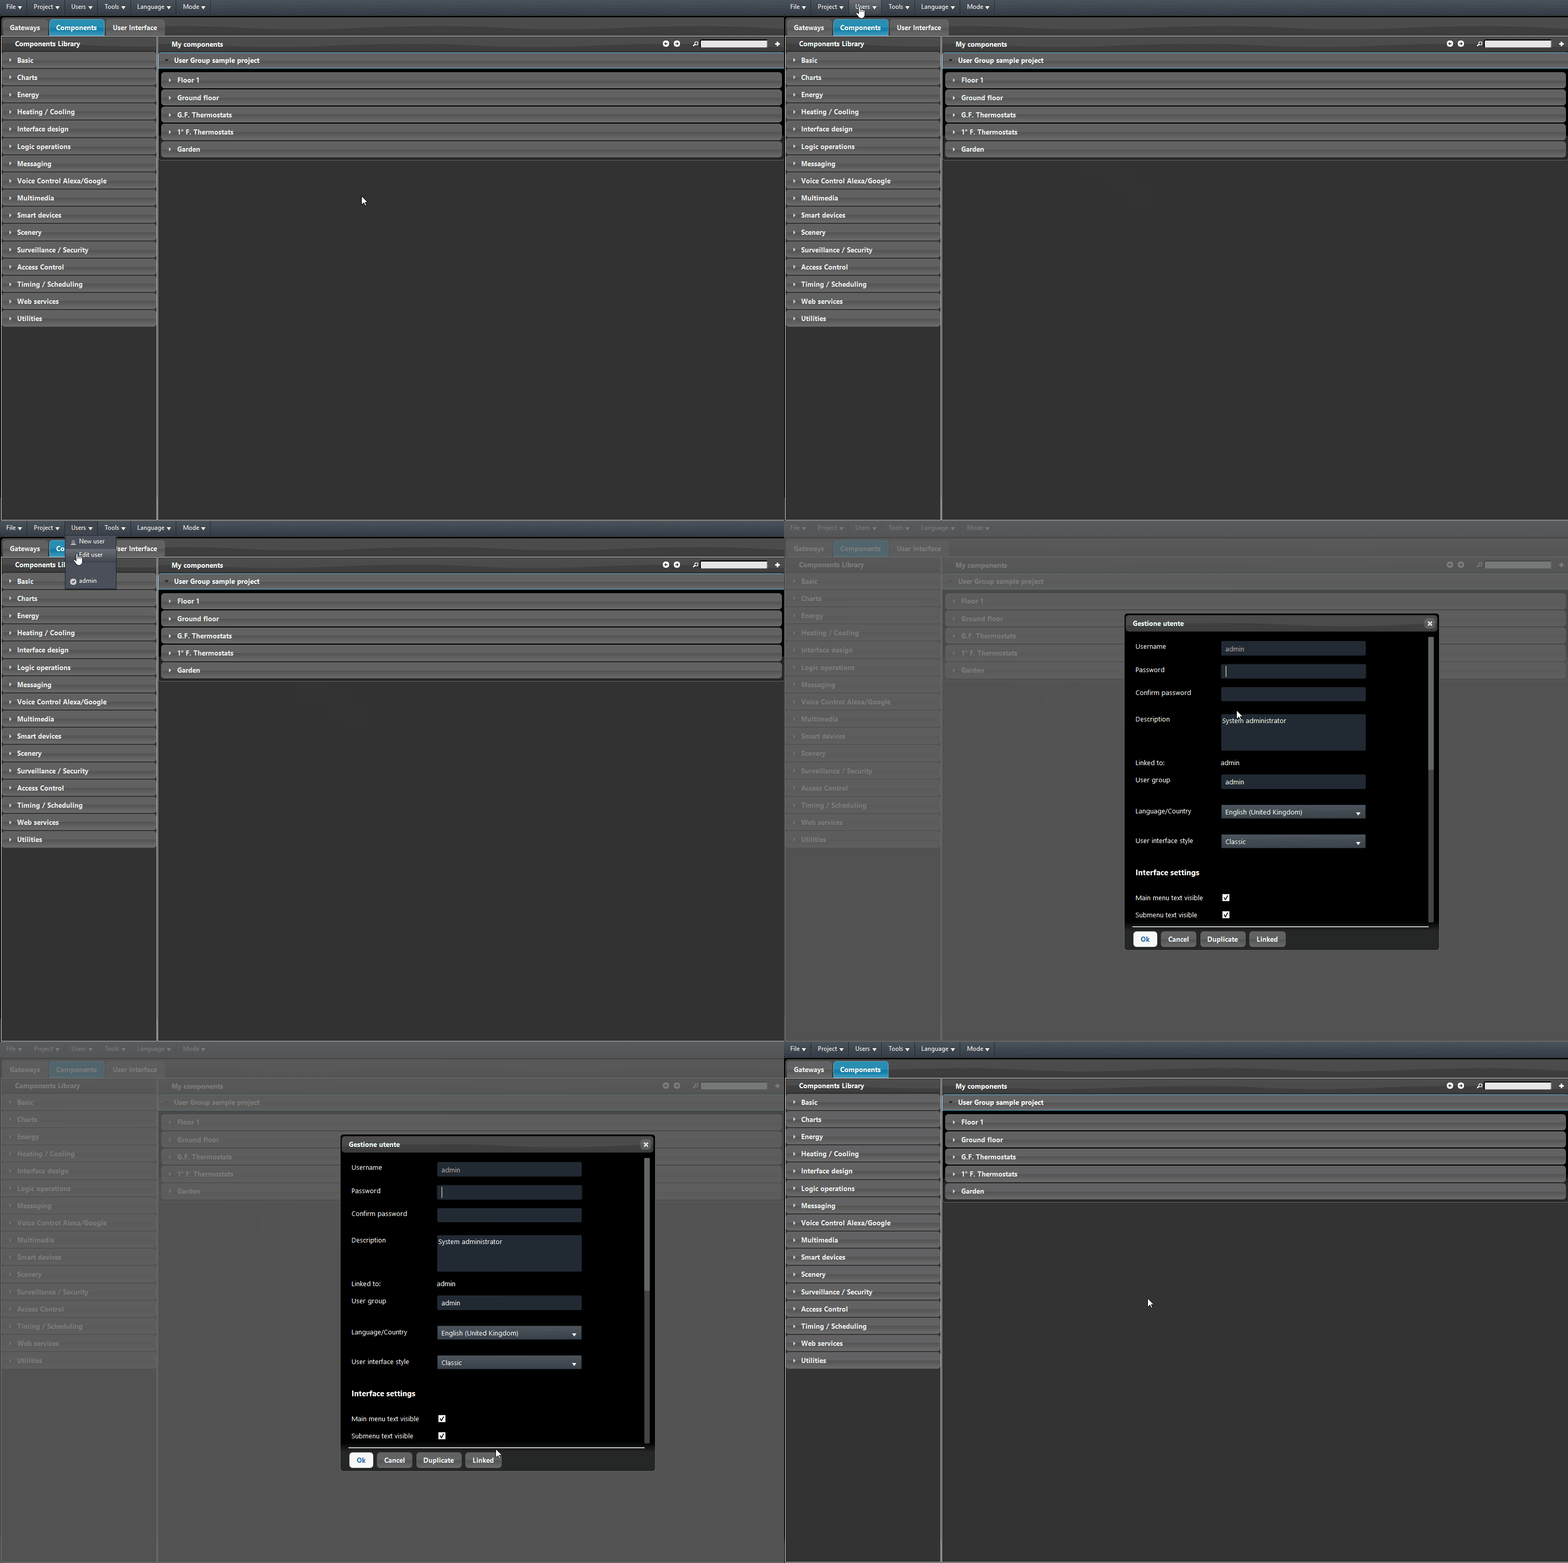
Step 2:
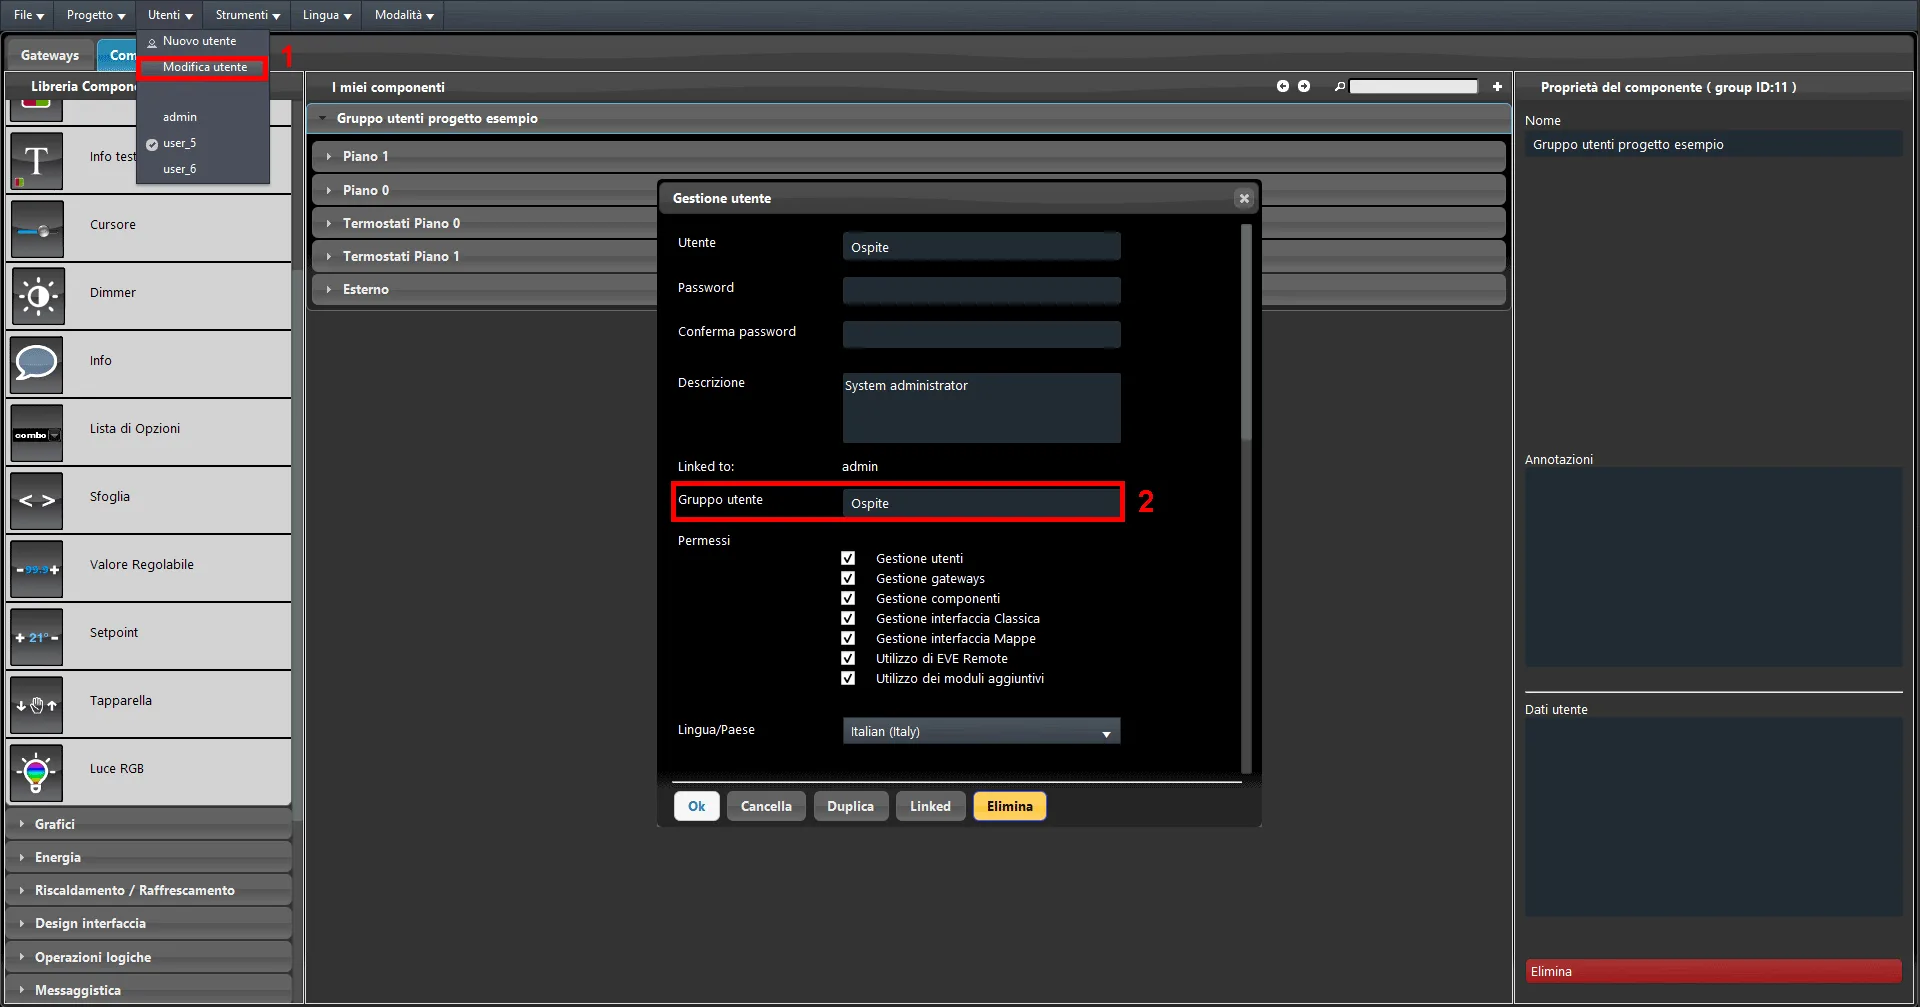
After creating the users, apply the User group. 1. Open the Users menu. The admin user has full access to the interface by default, so no User group change is required. Select the second user in the list, named Guests for this test, and click Edit user: the settings window opens. 2. In the User group text field, enter Guests.
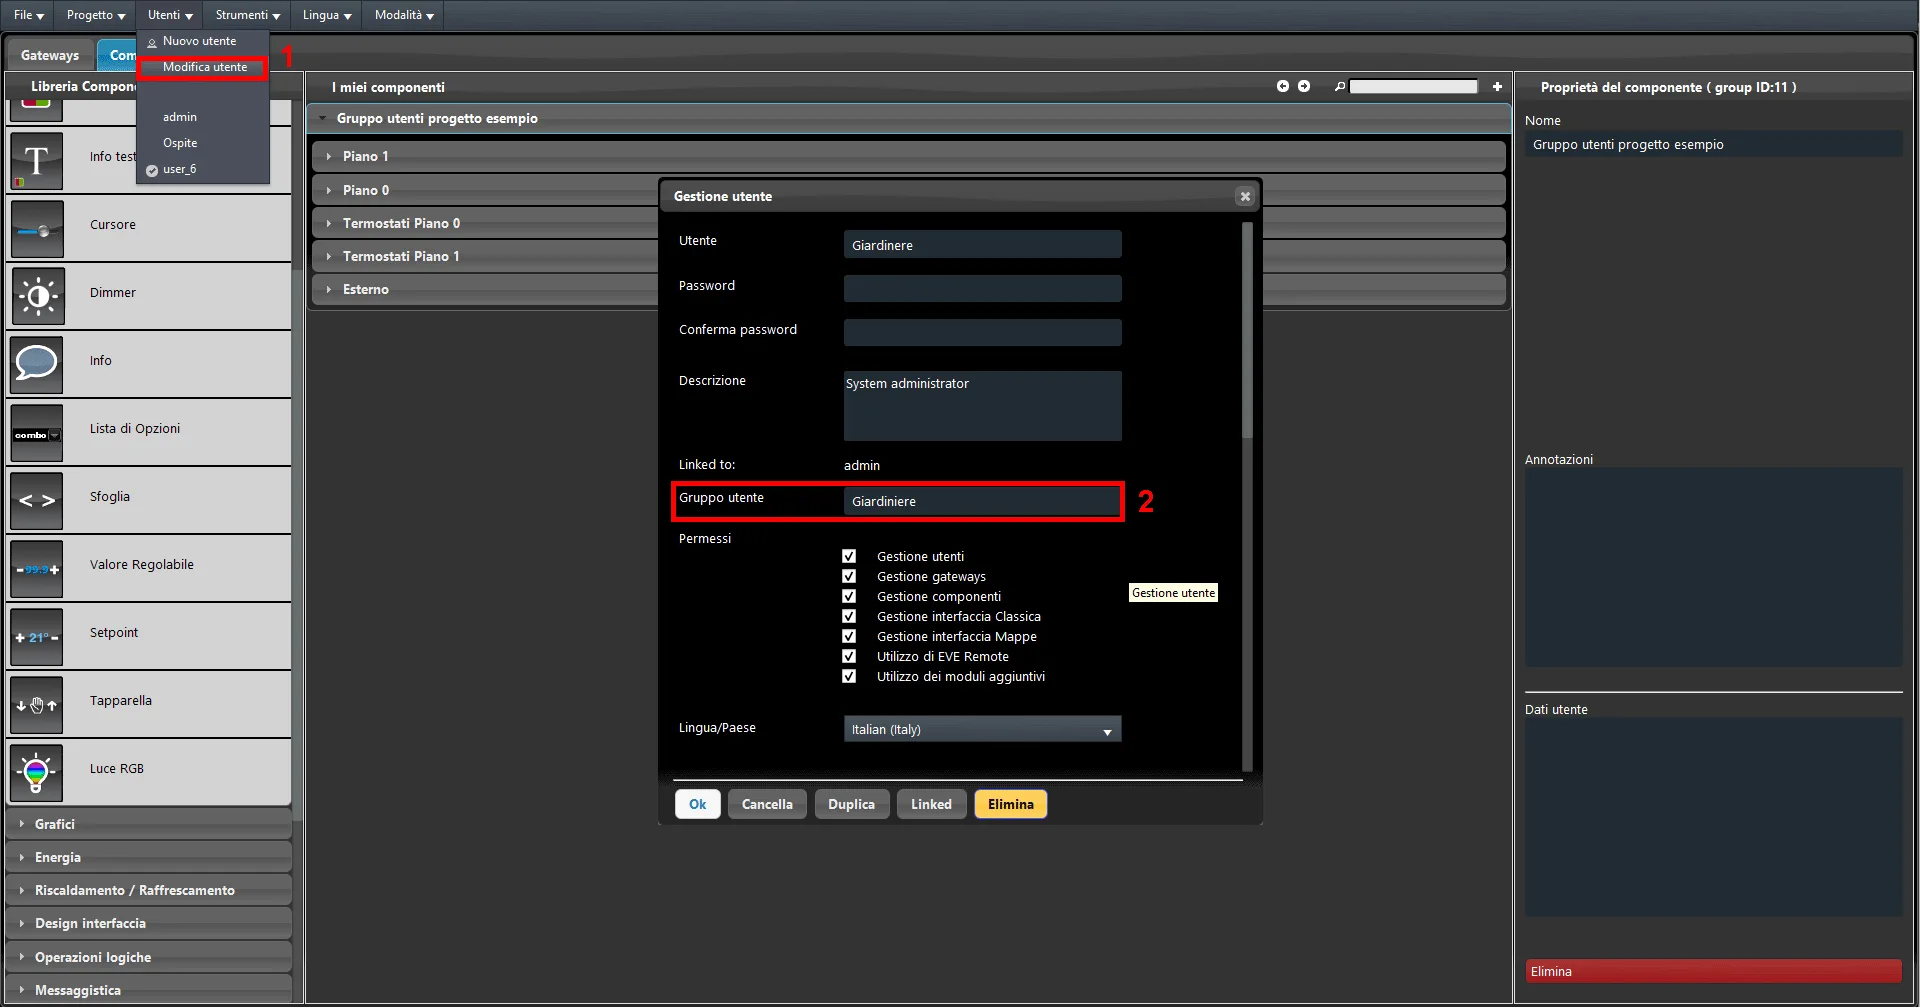
Step 3: 1. Go to the Users menu and select the third user in the list. 2. Click the Edit user button and change the user name to Gardener. Then enter the text Gardener in the User group text field.
Step 4: go to the Users menu and select the admin user, then open the interface editor by clicking the User interface section at the top of the Ilevia Manager screen. In this case the user interface has already been created; in a new project, you will need to create the menus and import the components into the interface.
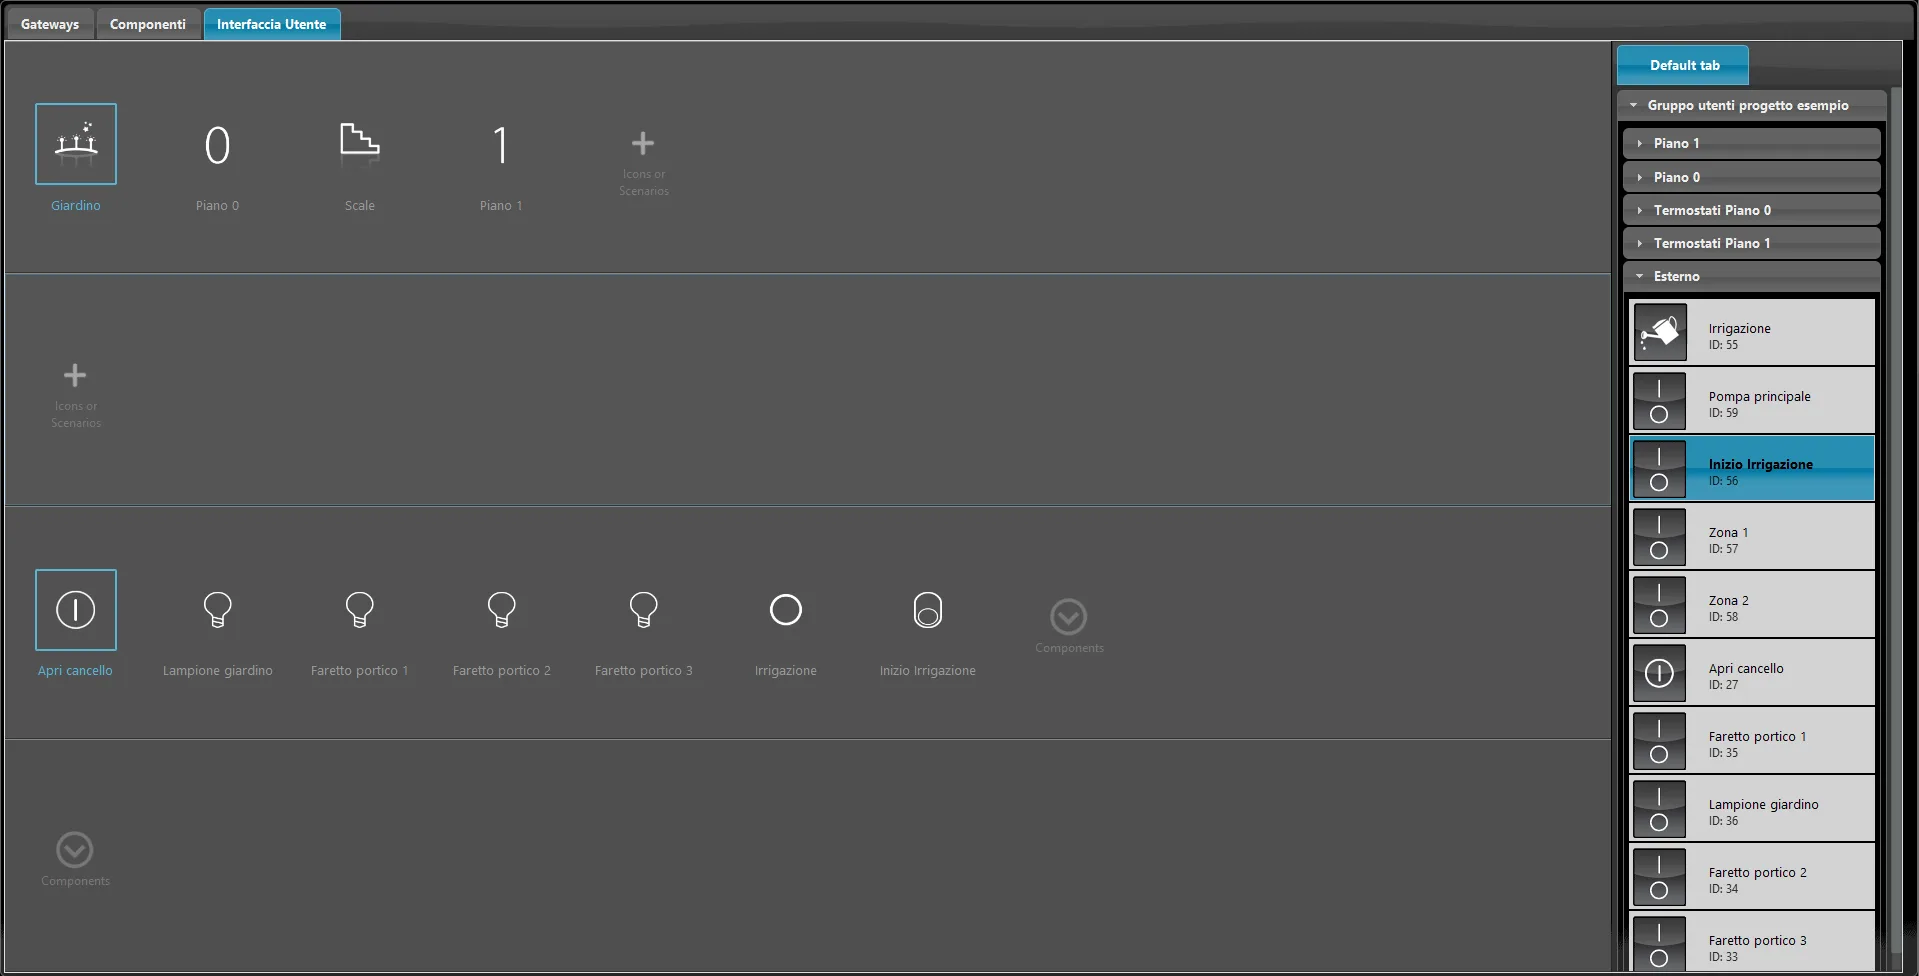
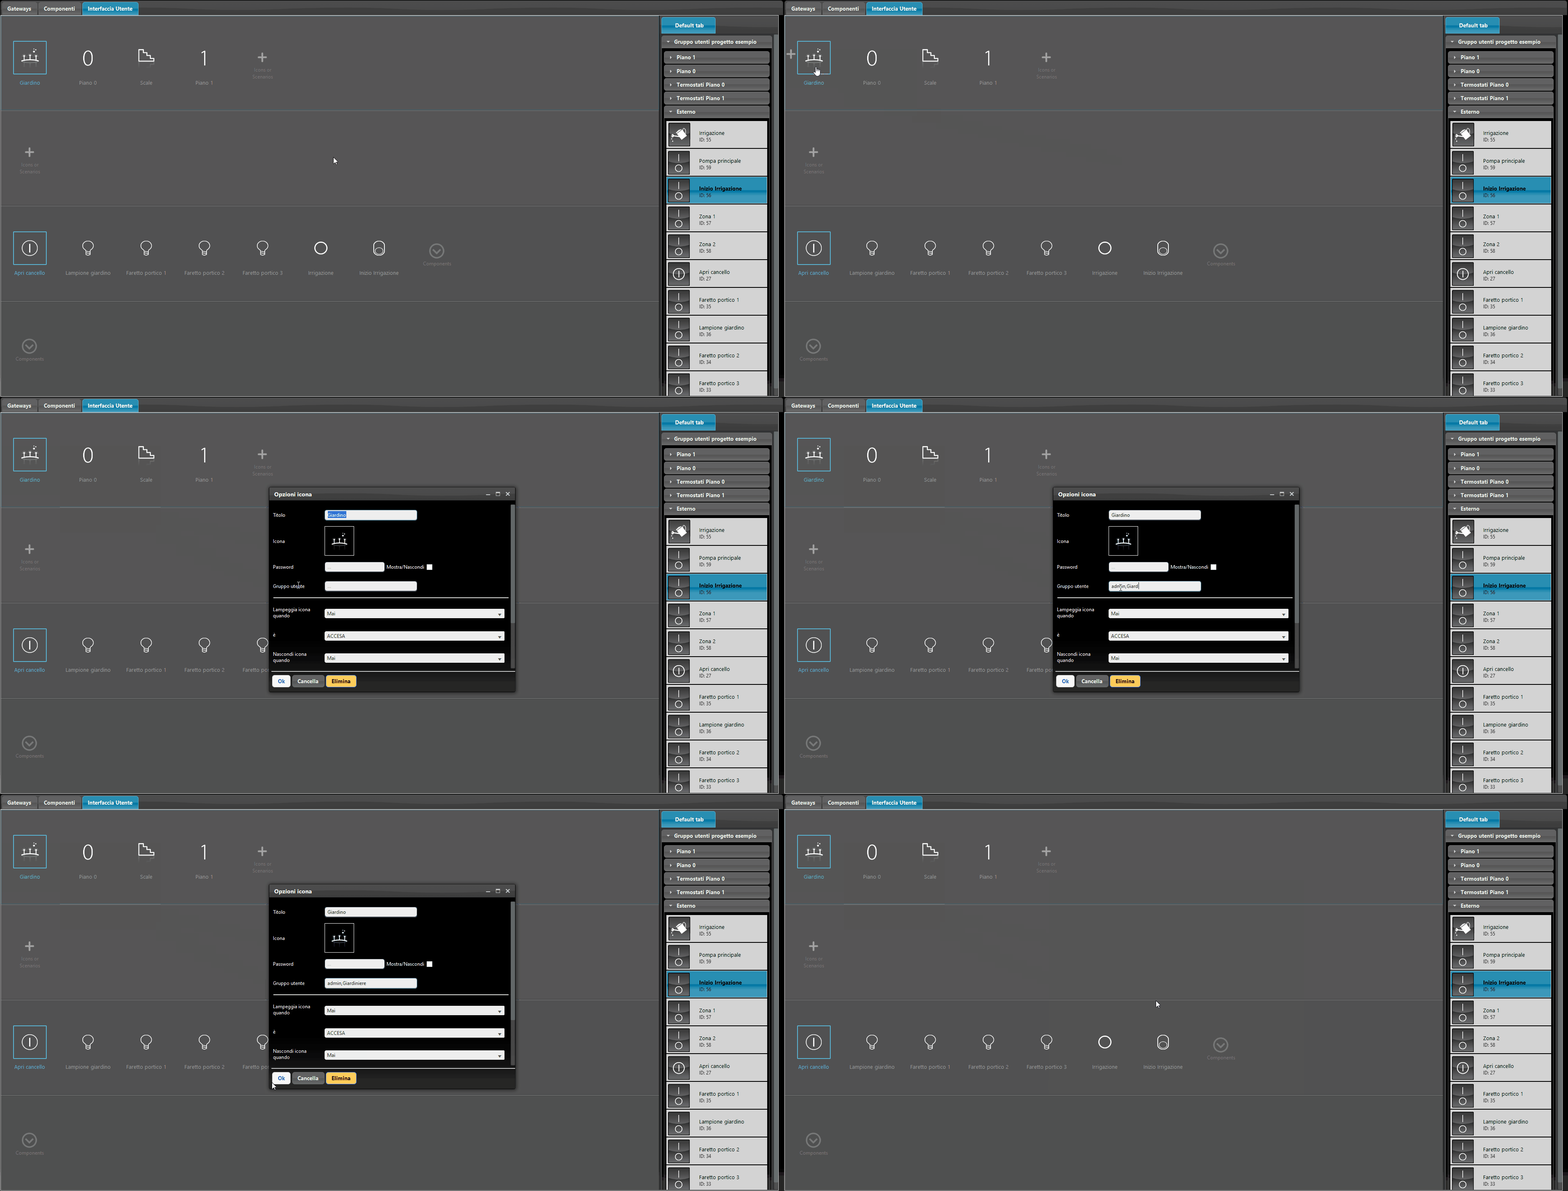
Step 5: open the menu in the user interface with a double left-click. When the “Icon option” menu opens, add the User group keyword in the dedicated text field. In this project, the menu configuration is as follows:
Garden: admin, Gardener;
Ground floor: admin, Guests;
Stairs: admin, Guests;
First floor: admin, Guests.
Step 6:
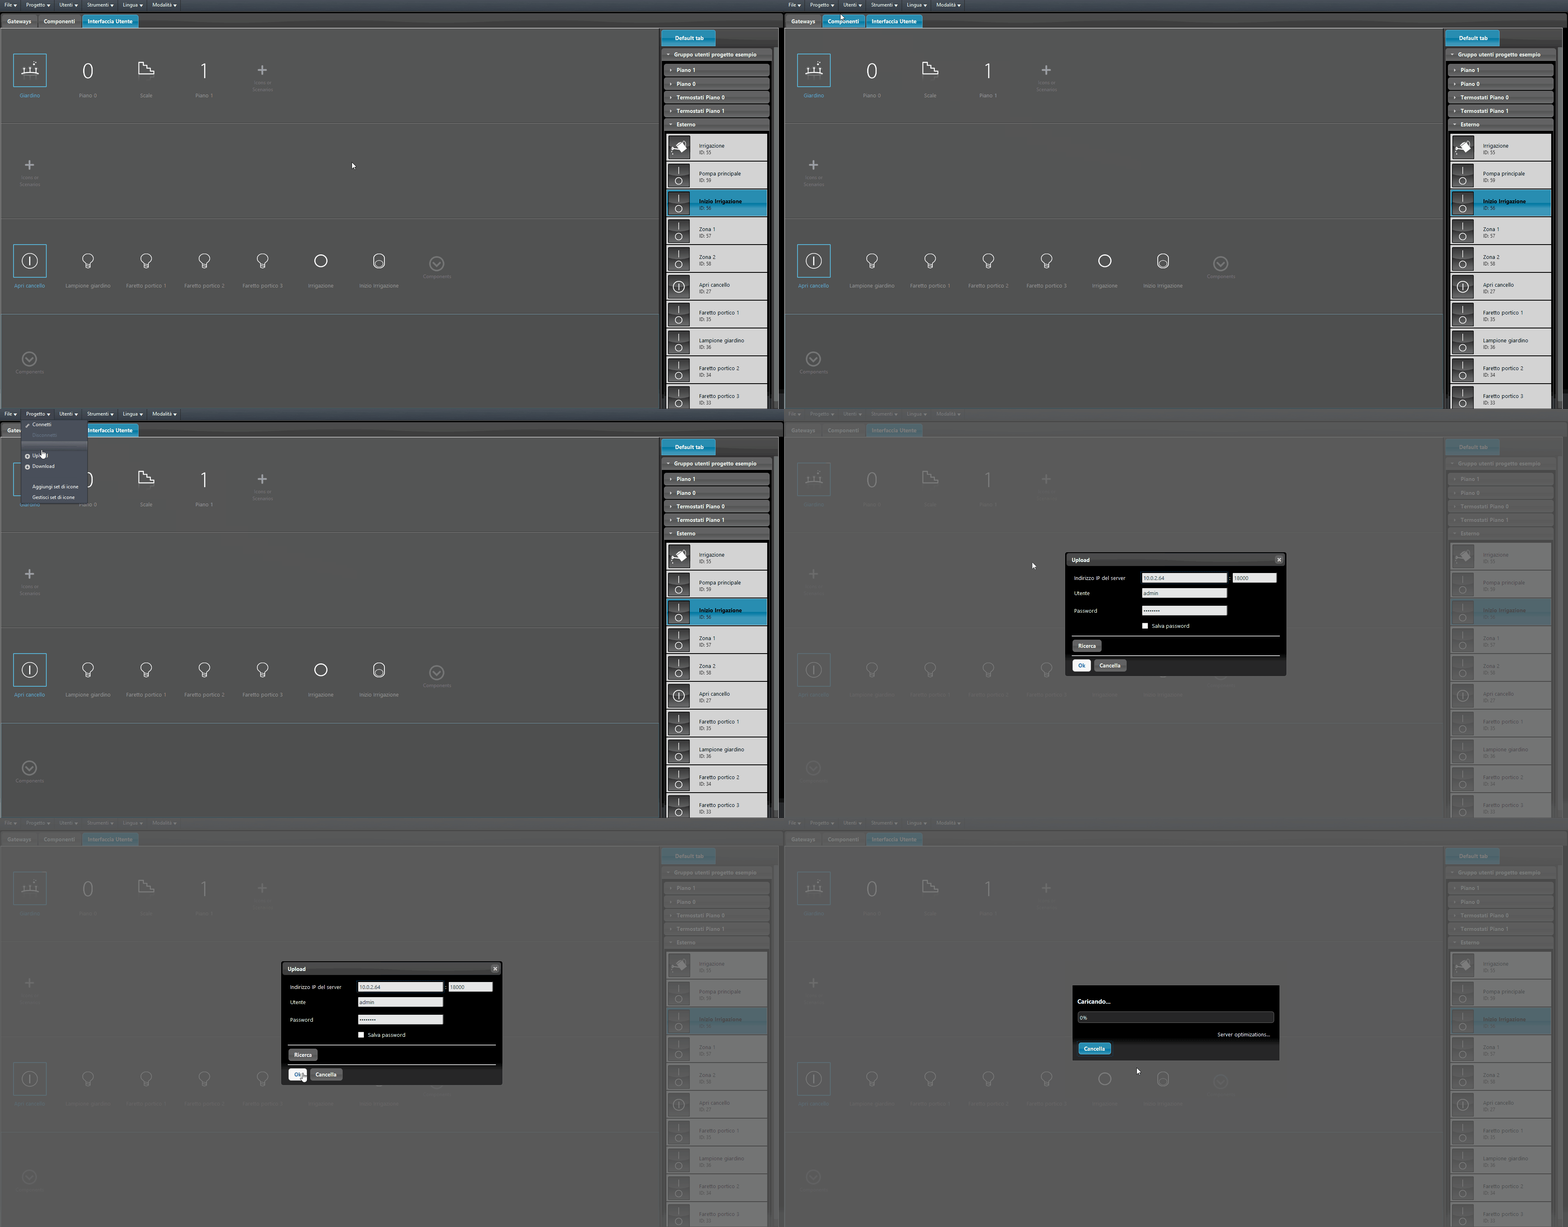
Upload the project to the server to apply the changes made to the user interface.
User interface display
In the images below, you can see the different interfaces displayed depending on the user.
Admin
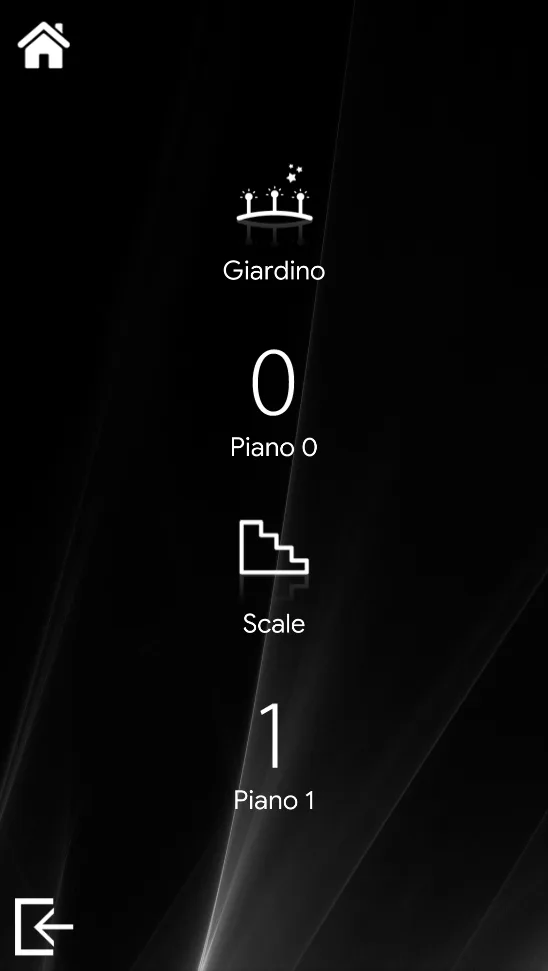
Guests
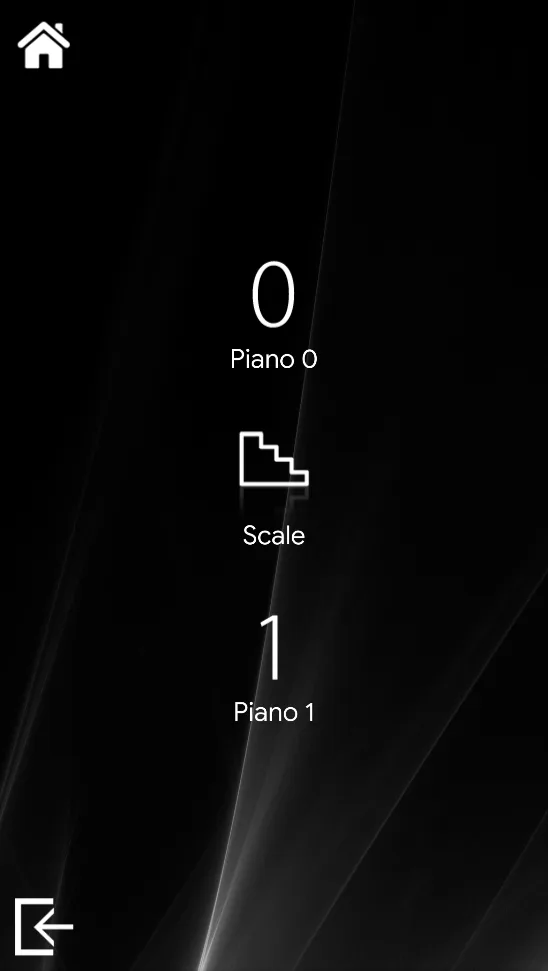
Gardener
Download the sample project
Click here to download the sample project and try it yourself.