Importing a custom icon set
How to create a PNG file with custom icons and import it as a new icon set in Ilevia Manager.
Introduction
System integrators can add new icons to Ilevia Manager. In this guide, you will see how to create a custom icon set and import it into the software.
It is often the case that customers request a wider range of icons. By creating custom icons, system integrators (or user interface specialists) can offer the best possible experience and are free to use both the default icons and their own at the same time.
Photo editing software
To add new icons, you need to use a professional image editing program, such as Photoshop.
Launch your image editor and follow the procedure.
Step 1: Create a new PNG file and set the width and height (maximum 2048×2048 pixels);
Step 2: Set up a grid to better manage the space.
We recommend setting the grid to 128×128 pixels. This will allow you to create 256 squares, corresponding to 256 icons.
Step 3: Copy and paste the custom icons into the PNG file, making sure not to insert icons larger than the size set for the grid.
We suggest setting the icon size slightly smaller than the size set in the grid to avoid any overlap.
Step 4: Save the PNG file on your device.
Add a new icon set
After creation, you can import the file into Ilevia Manager.
Launch Ilevia Manager (version 5.5.3.5 or later) and follow the steps below.
Step 1:
Select Project -> Icons -> Add new icon set to open the “Add new icon set” dialog box;
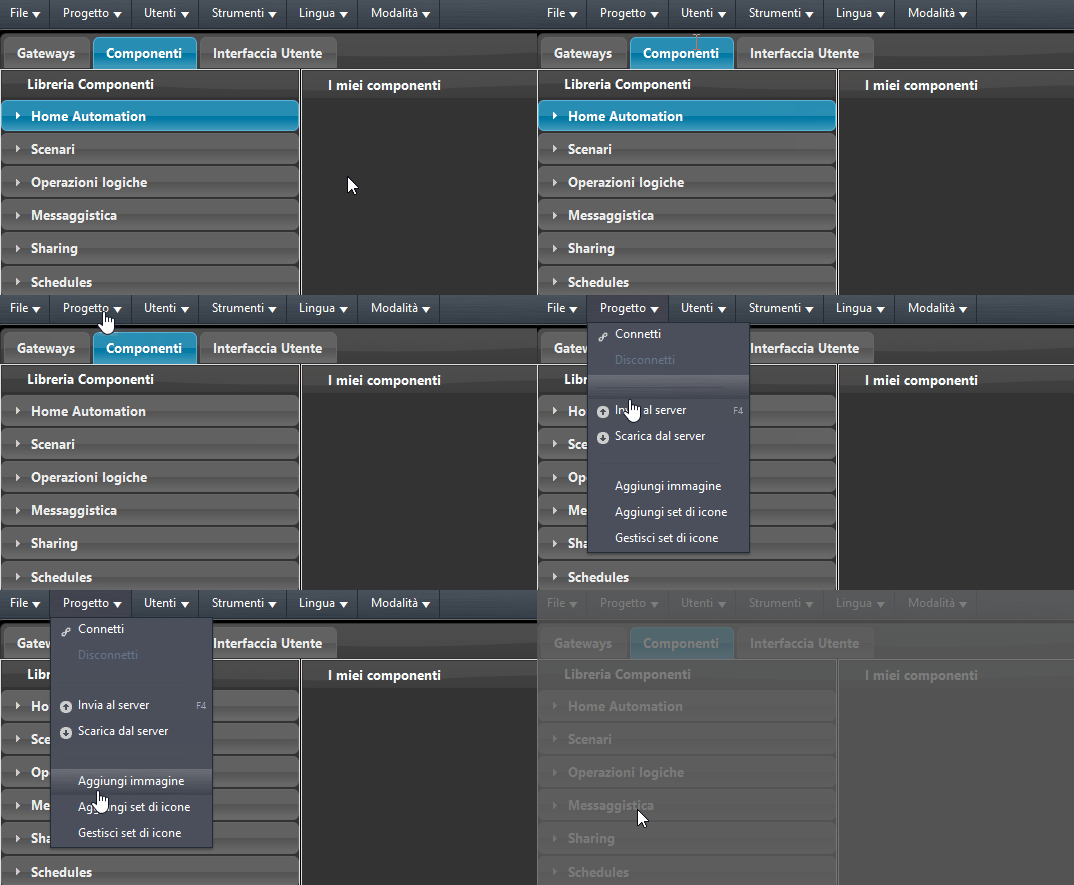
Step 2:
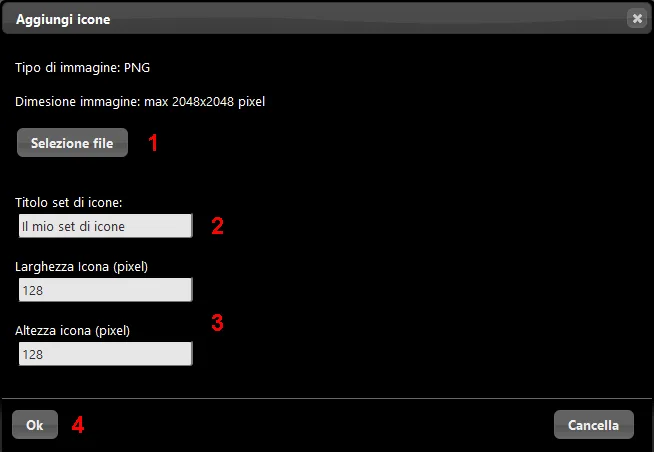
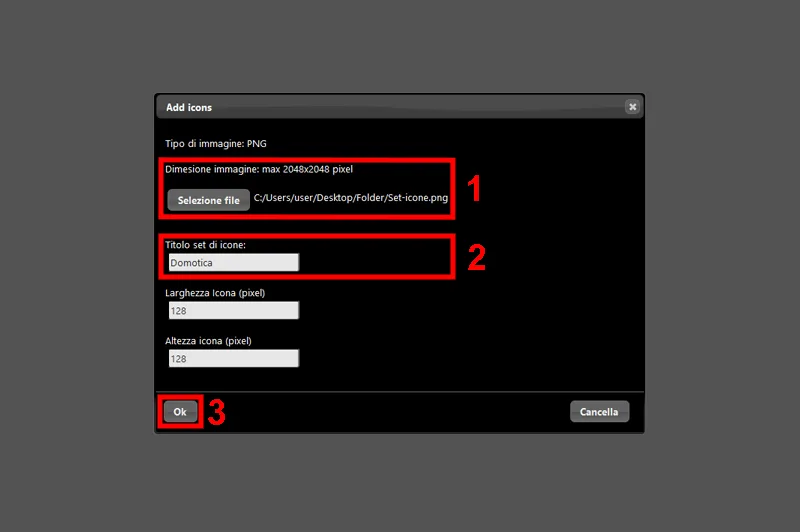
1. Click “Select File” and choose the PNG file you created. 2. Choose a title to customize the icon set. 3. Enter the value used for the grid inside the image. 4. Click “Ok” to confirm the action.
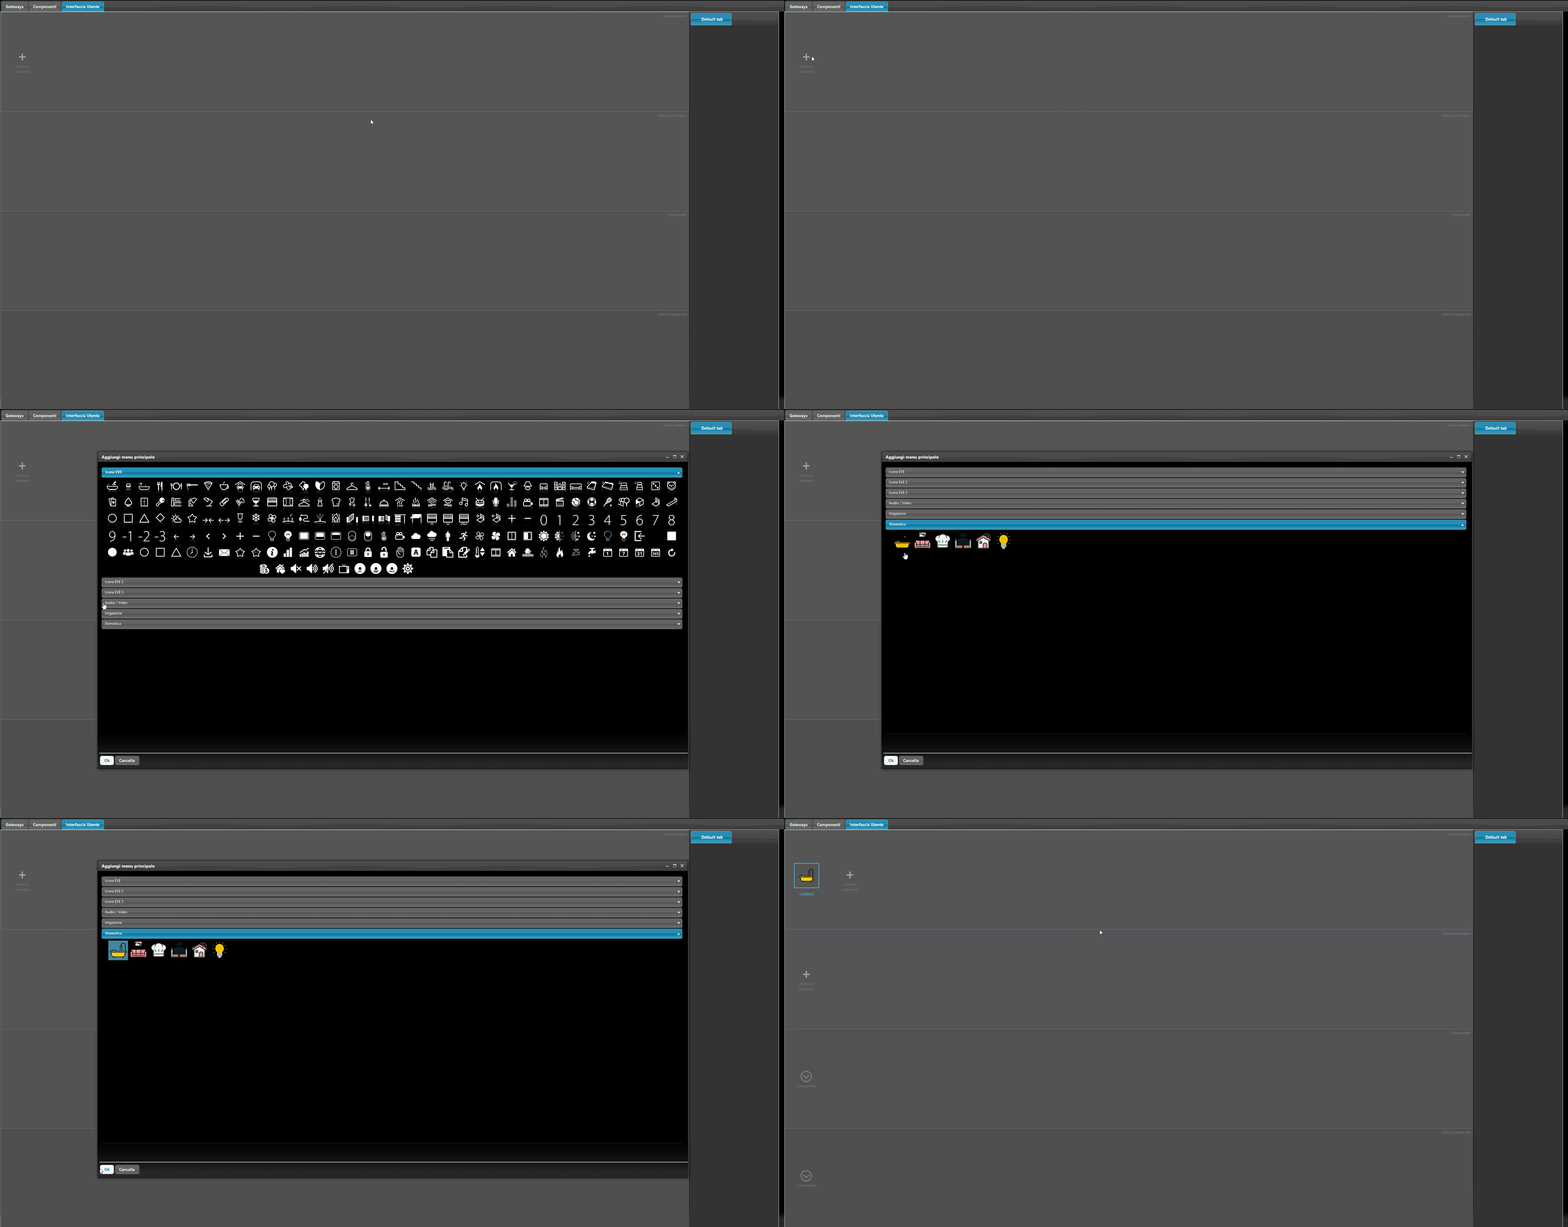
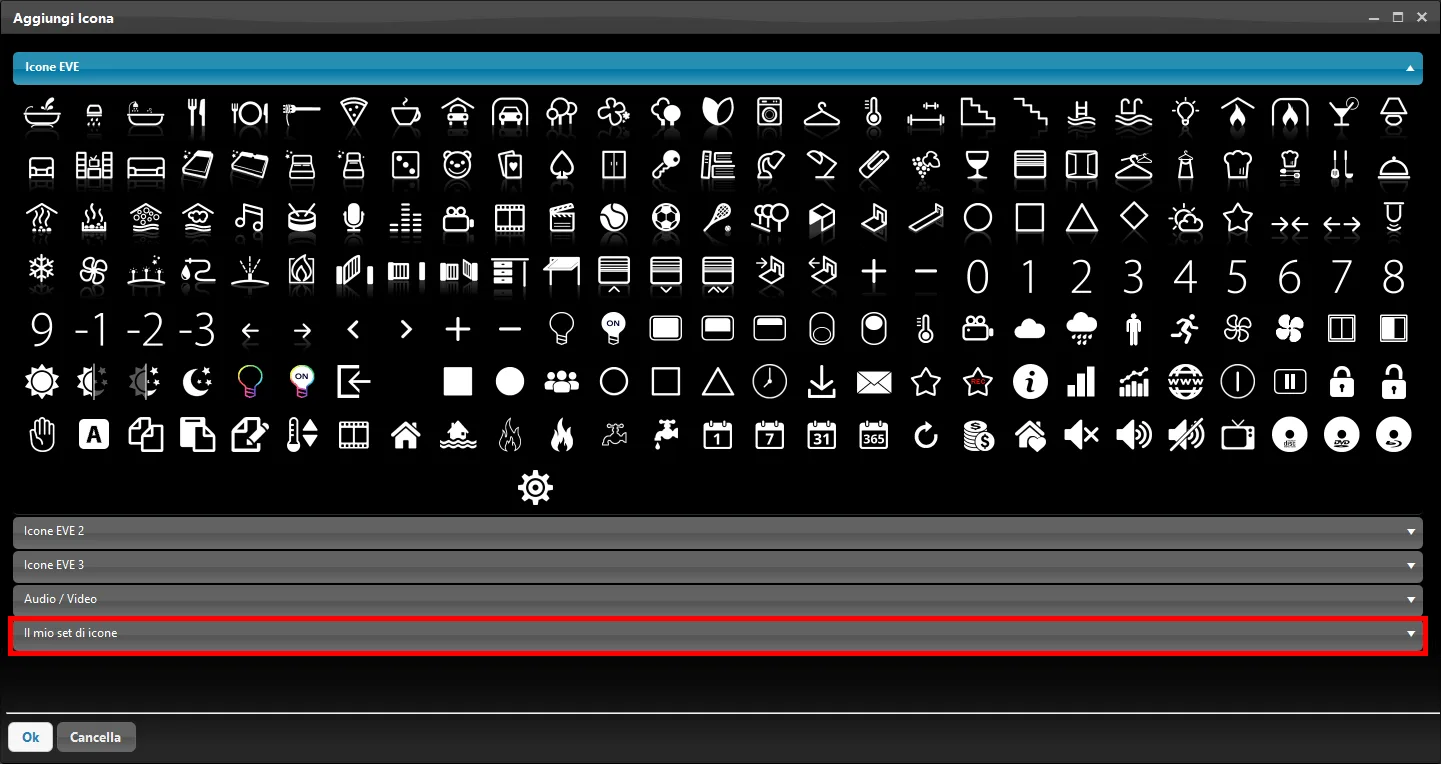
Once all steps have been completed correctly, the result will be visible in the User Interface section, as shown in the following image.
The new icon set is linked to your PC: it will therefore be available for creating the user interface of this project and future ones. The set will also be available whenever you download from the server a project that contains it.
How to manage icon sets
To manage your icon sets, click the Project item in the main menu and then Manage icon sets.
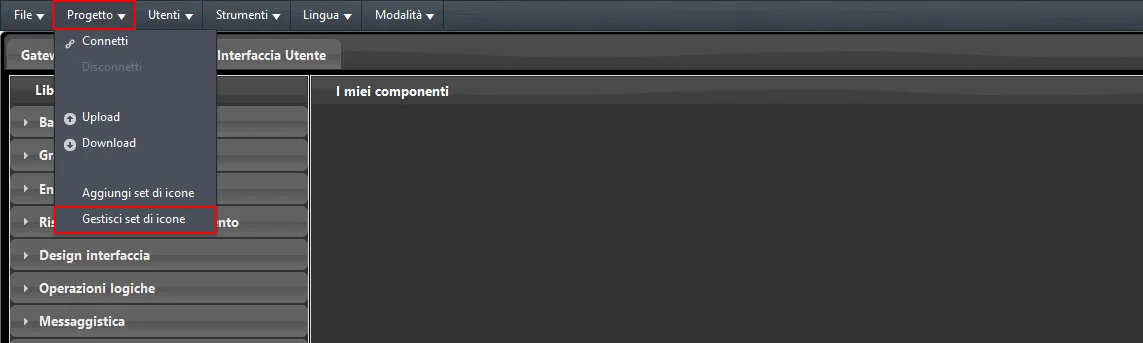
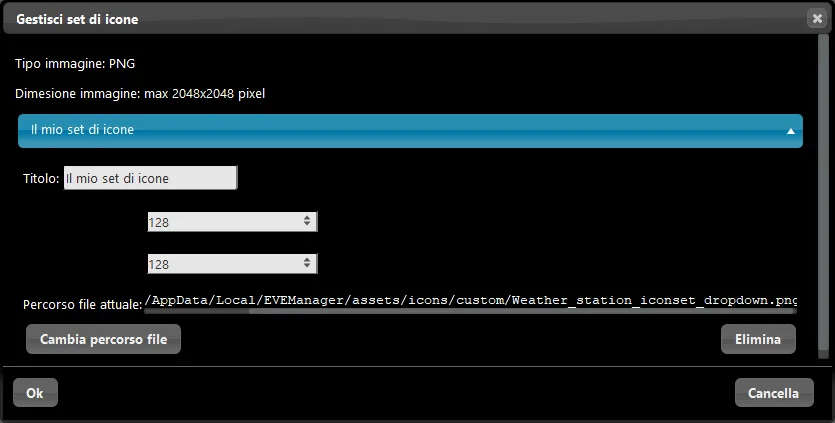
As you can see from the image below, the menu for managing icon sets allows you to edit set details, such as the name and size, and to delete them.
Sample icon set project
This section shows how to import a sample icon set in Ilevia Manager.
Step 1:
Download the sample icon set from the link below.
Click the link to download the demo file with the custom icon sizes.

Step 2:
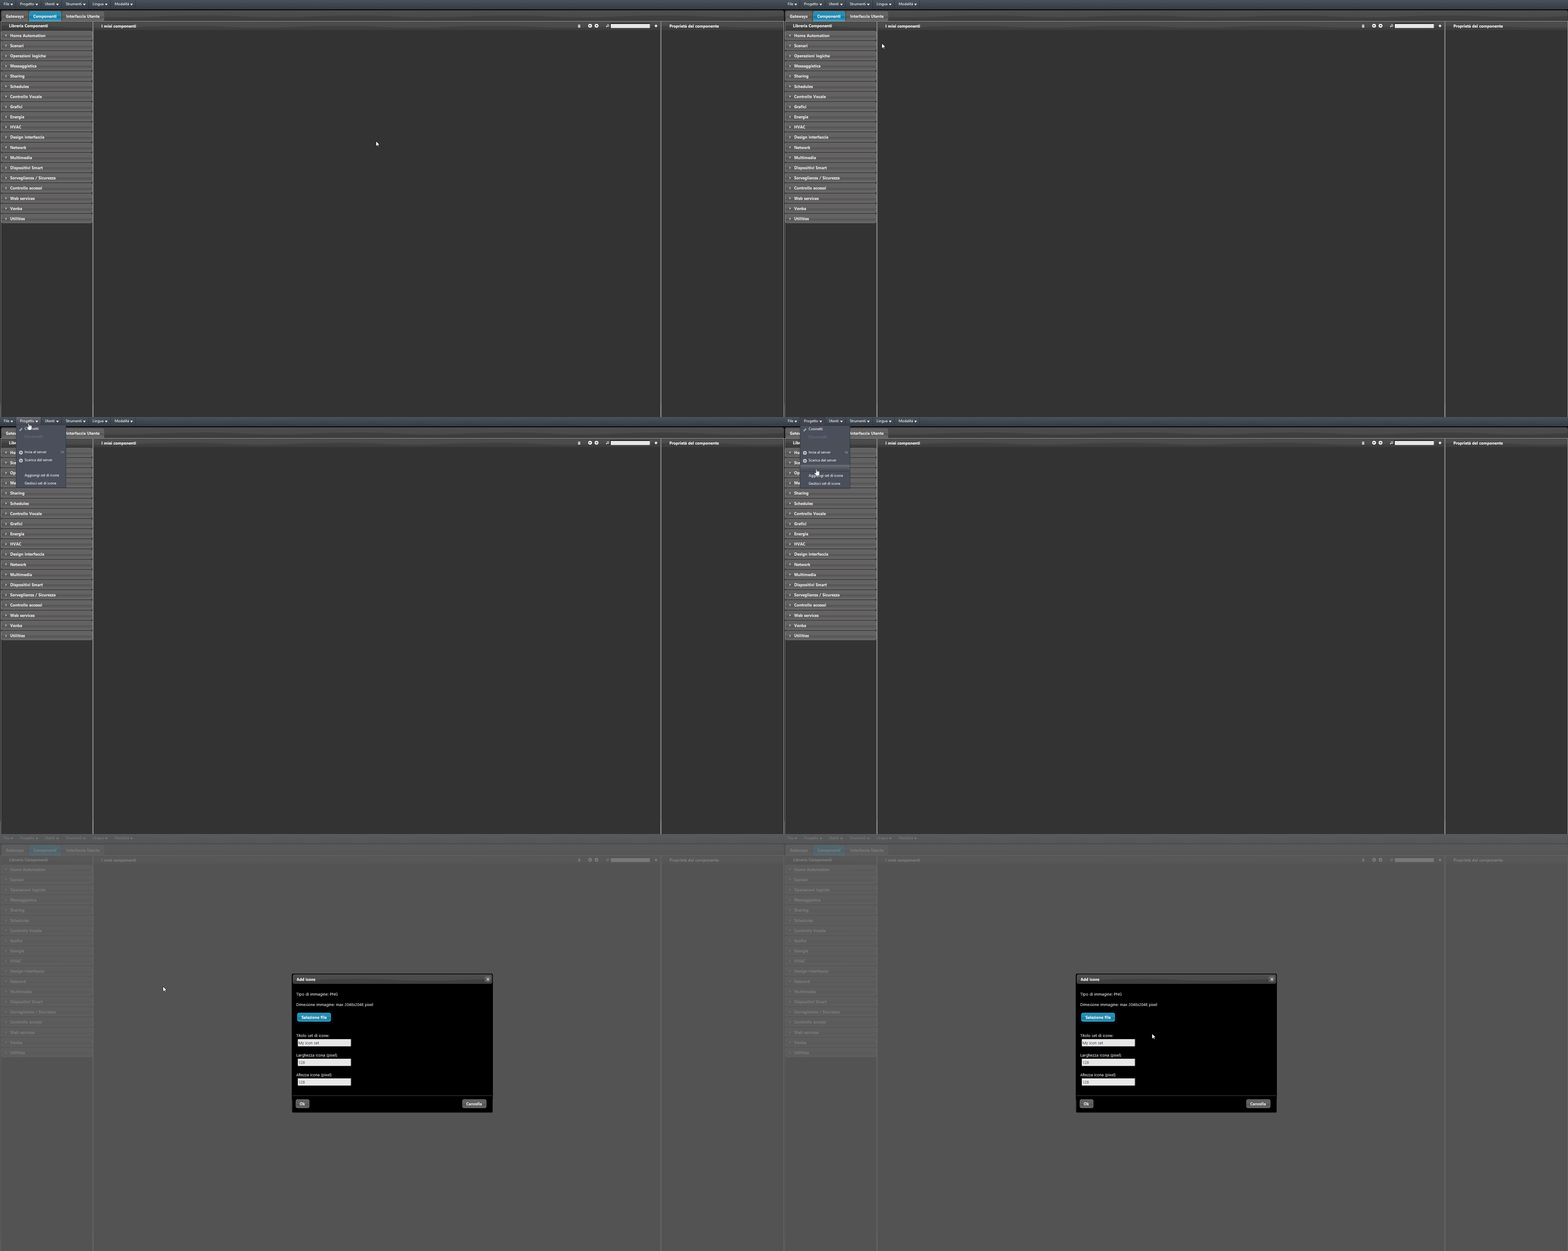
Open Ilevia Manager, go to the Project menu and click Add new icon set.
Step 3:
1. Select the icon set file from your local files. 2. Choose a name for your icon set. 3. Click Ok to confirm.
Conclusion
Go to the user interface section and click “+”. Scroll down until you find your icon set. Select one of the icons to add a new menu to the user interface.