
Shelly Plug integration with the MQTT protocol
How to configure Shelly Plug devices with the MQTT protocol and integrate them into the Ilevia system via Ilevia Manager.
Introduction
This guide explains how to set up the MQTT protocol on the Shelly Plug device and use it in the Ilevia system.
You can find more information about the topics we will use on the Shelly website.
Web interface configuration
Step 1:
Connect to the device hotspot,
then enter the default IP address (192.168.33.1) in the browser address bar.

Step 2:
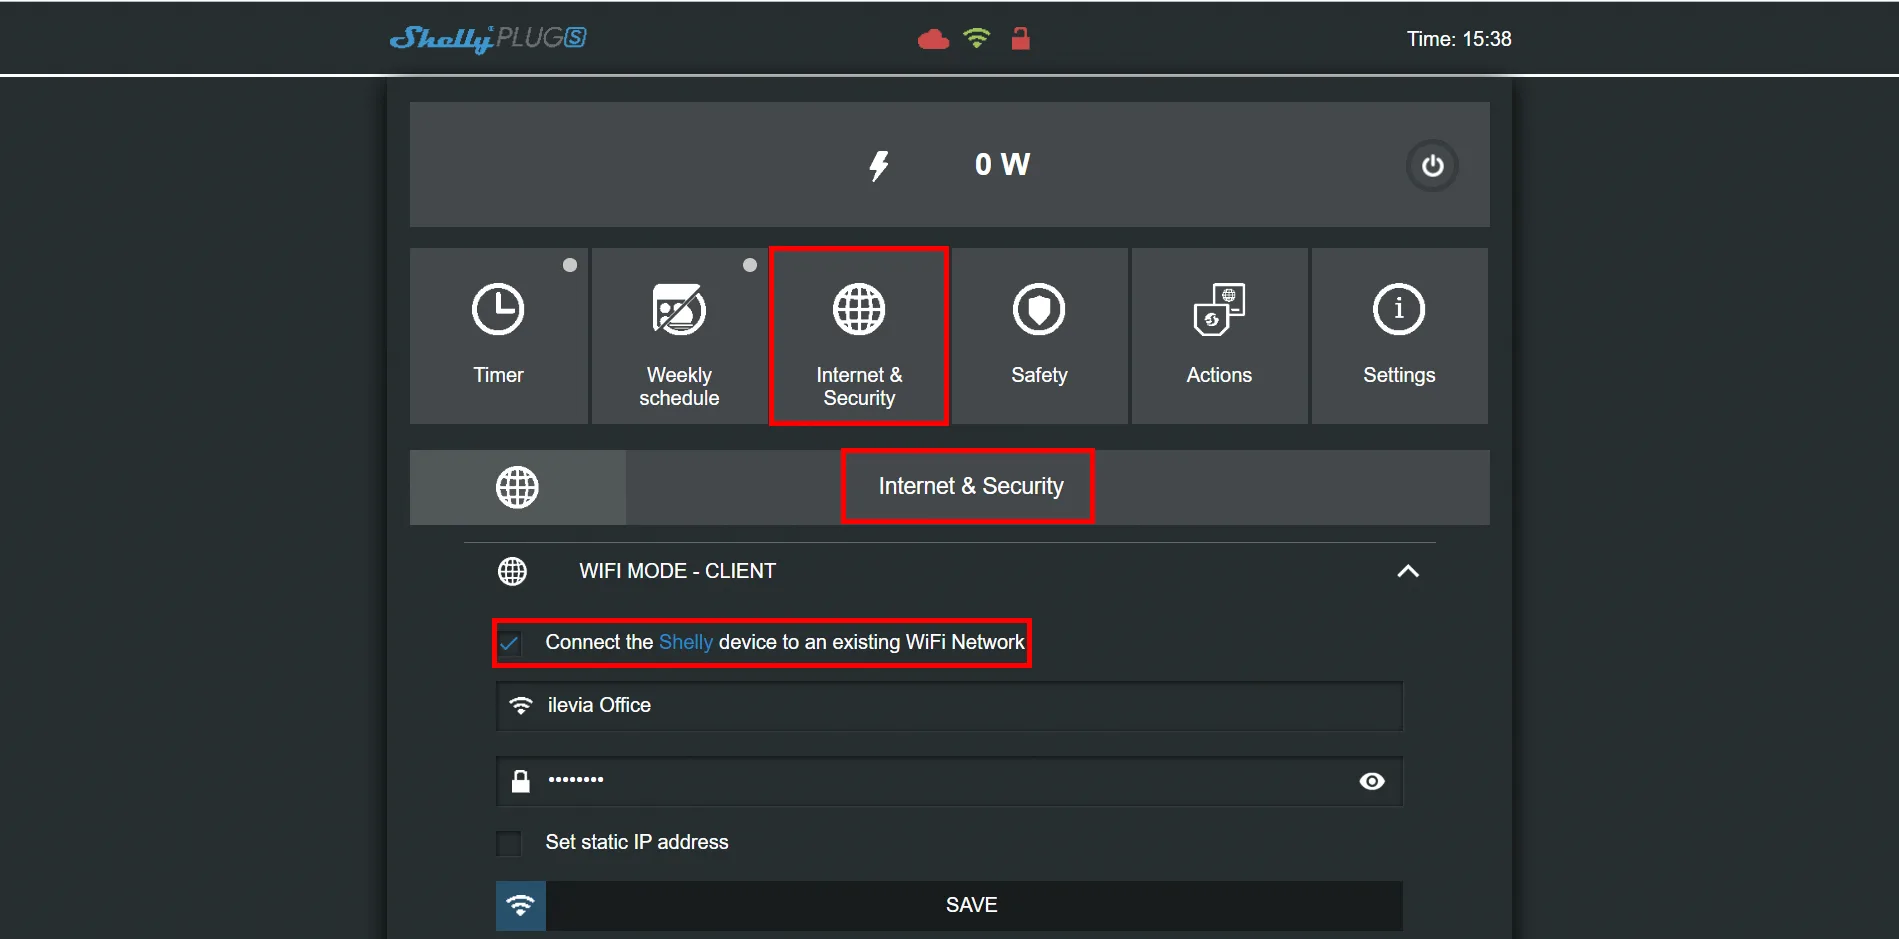
Go to the “Internet & security” menu, open the “WIFI MODE-CLIENT” section and enter your Wi-Fi credentials in the corresponding text fields.
Step 3:
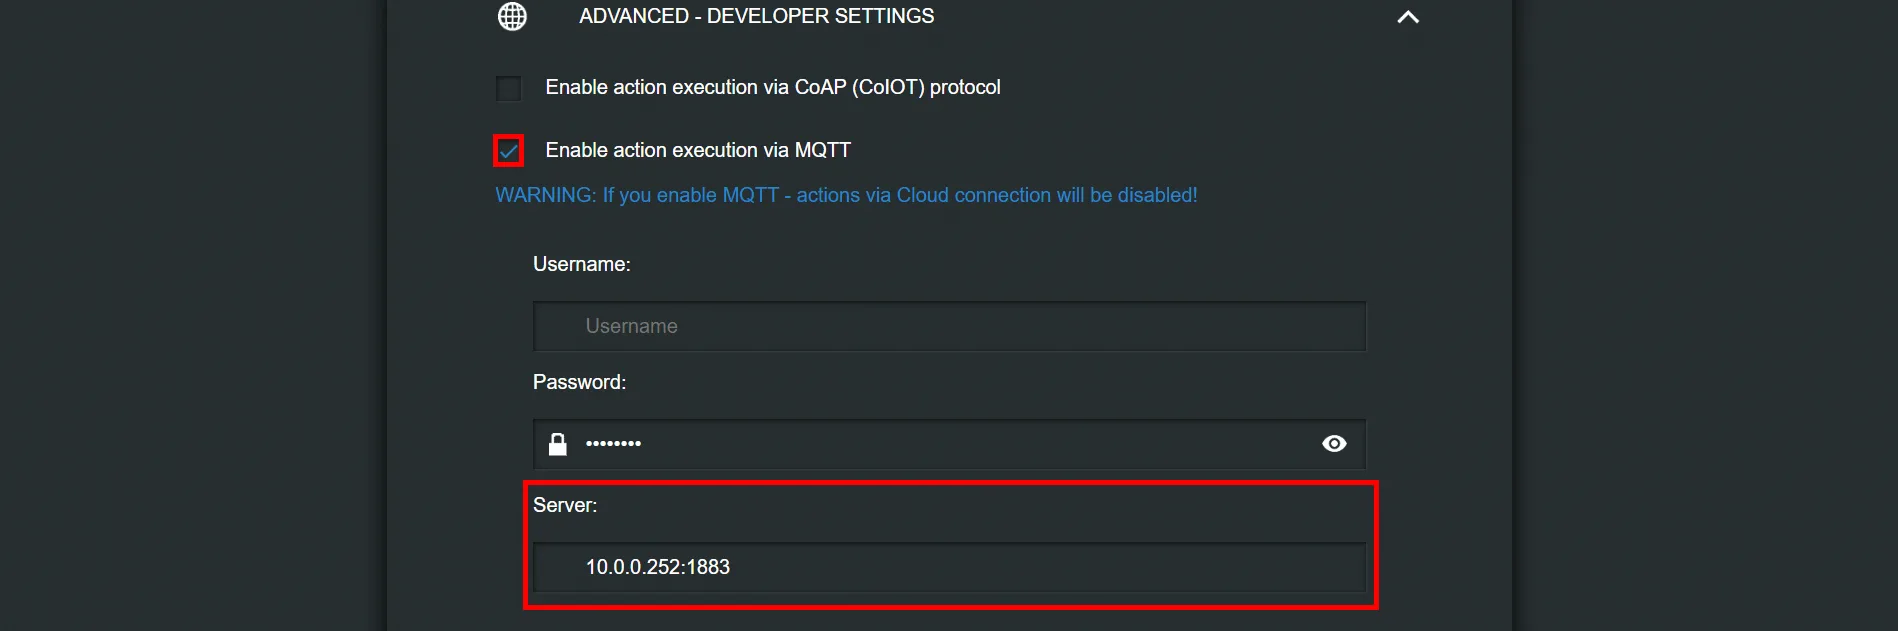
Enable the MQTT protocol in the “Advanced developer settings” section,
then enter your X1 server IP address.
Step 4:
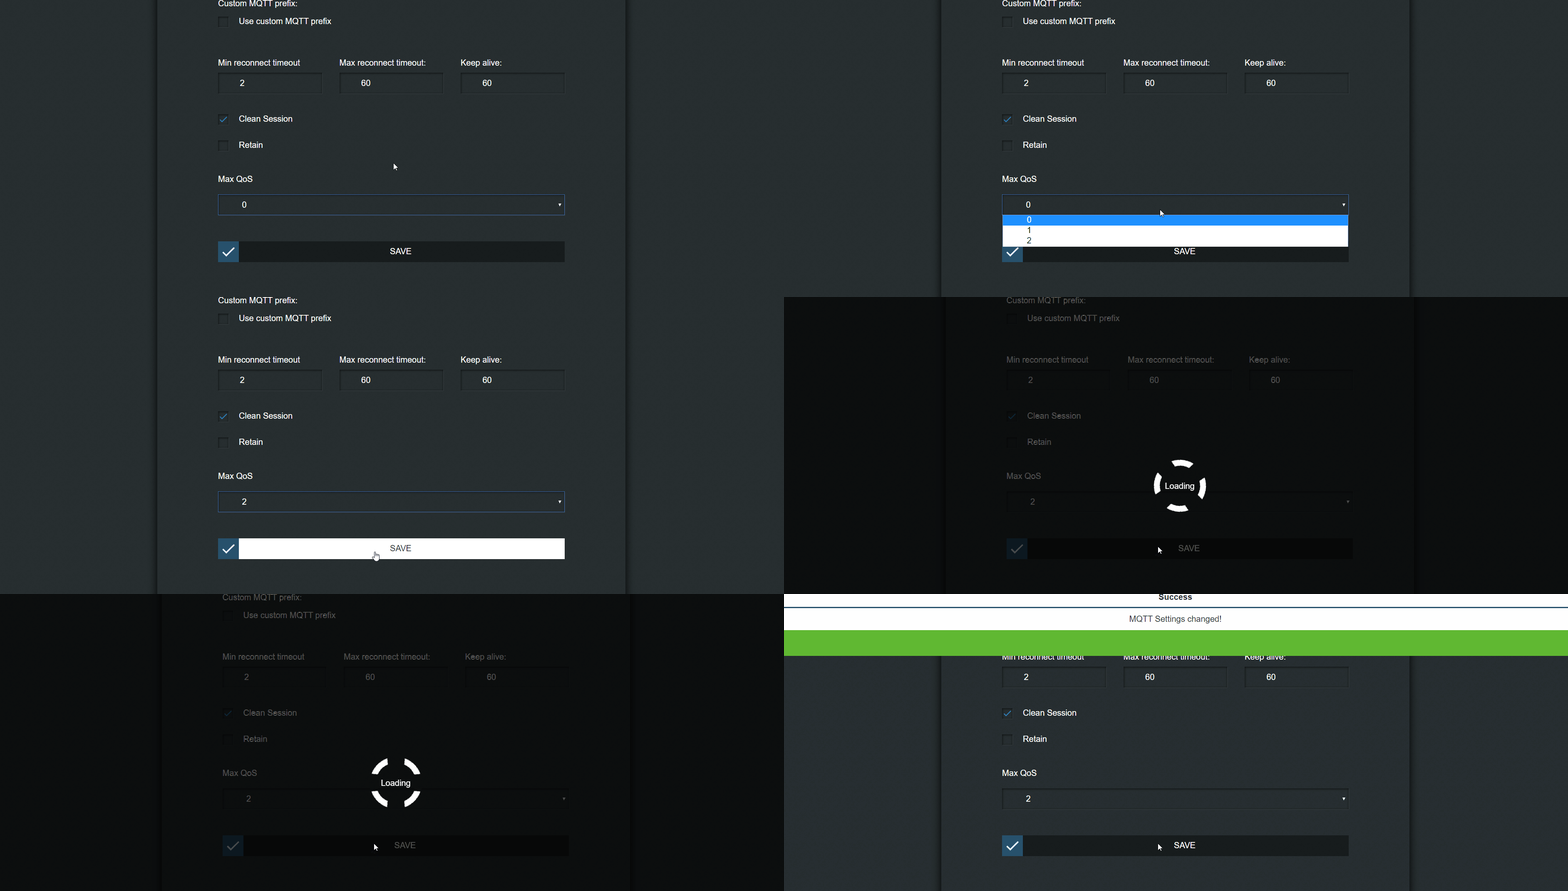
Set Quality of Service (QoS) to 2 and click Save.
Topic configuration
Step 5:
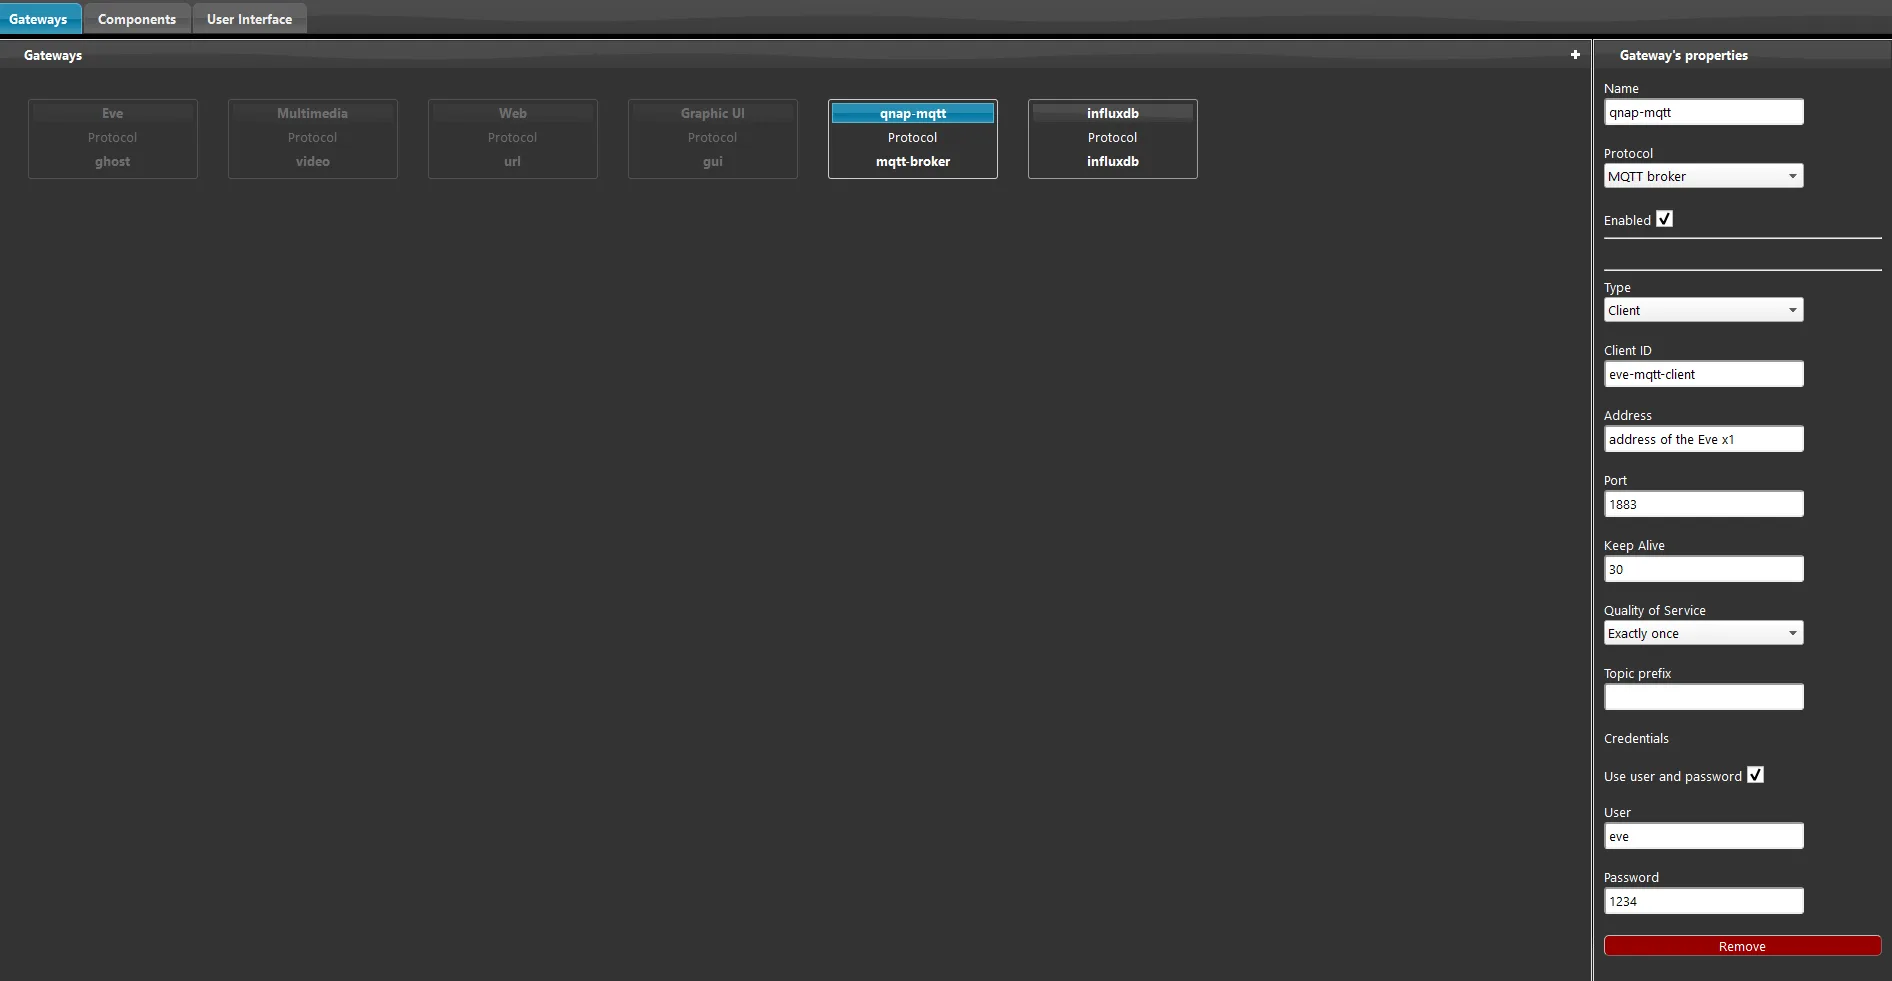
Create a new gateway in the Ilevia Manager supervision software.
Here is the guide for creating it.
Step 6:
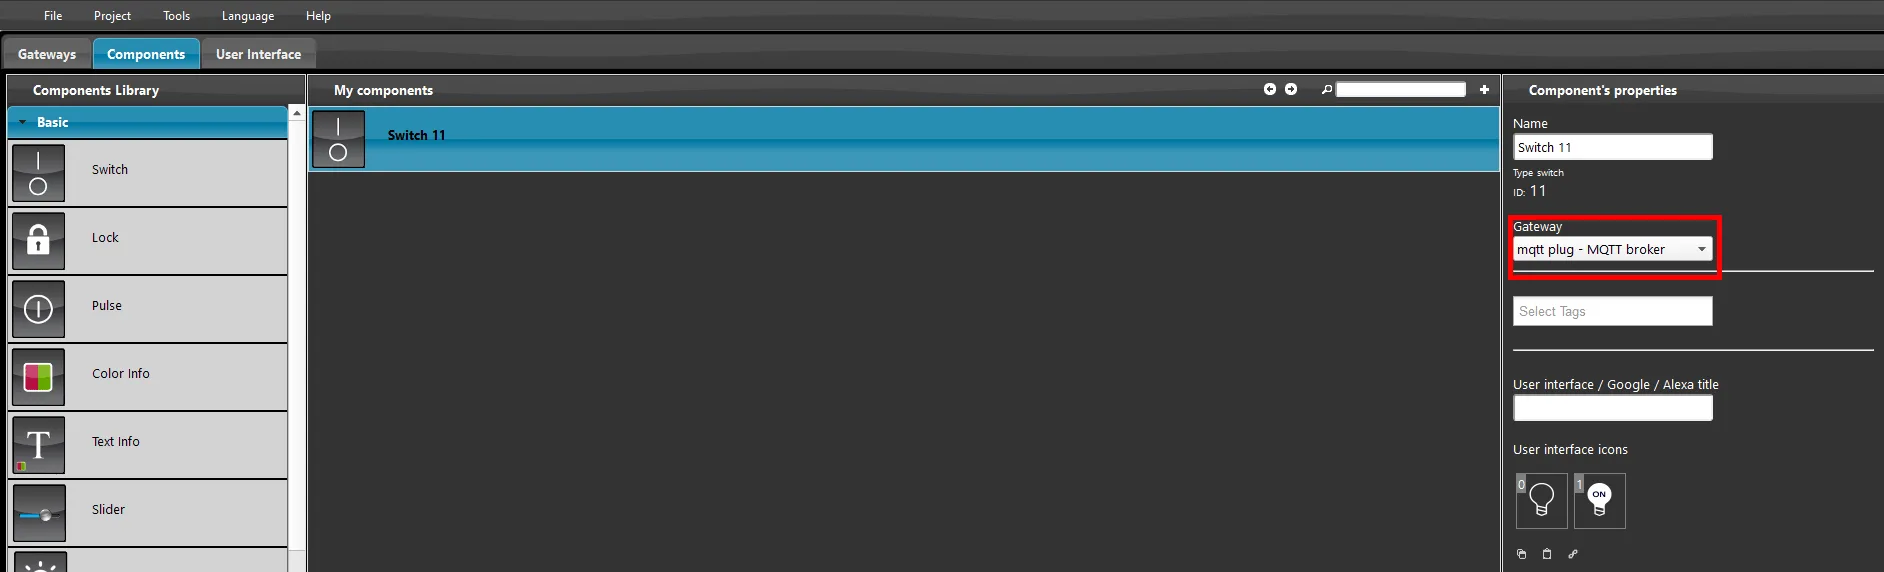
Add a Switch component and change its gateway to the
MQTT broker gateway just created.
Step 7:
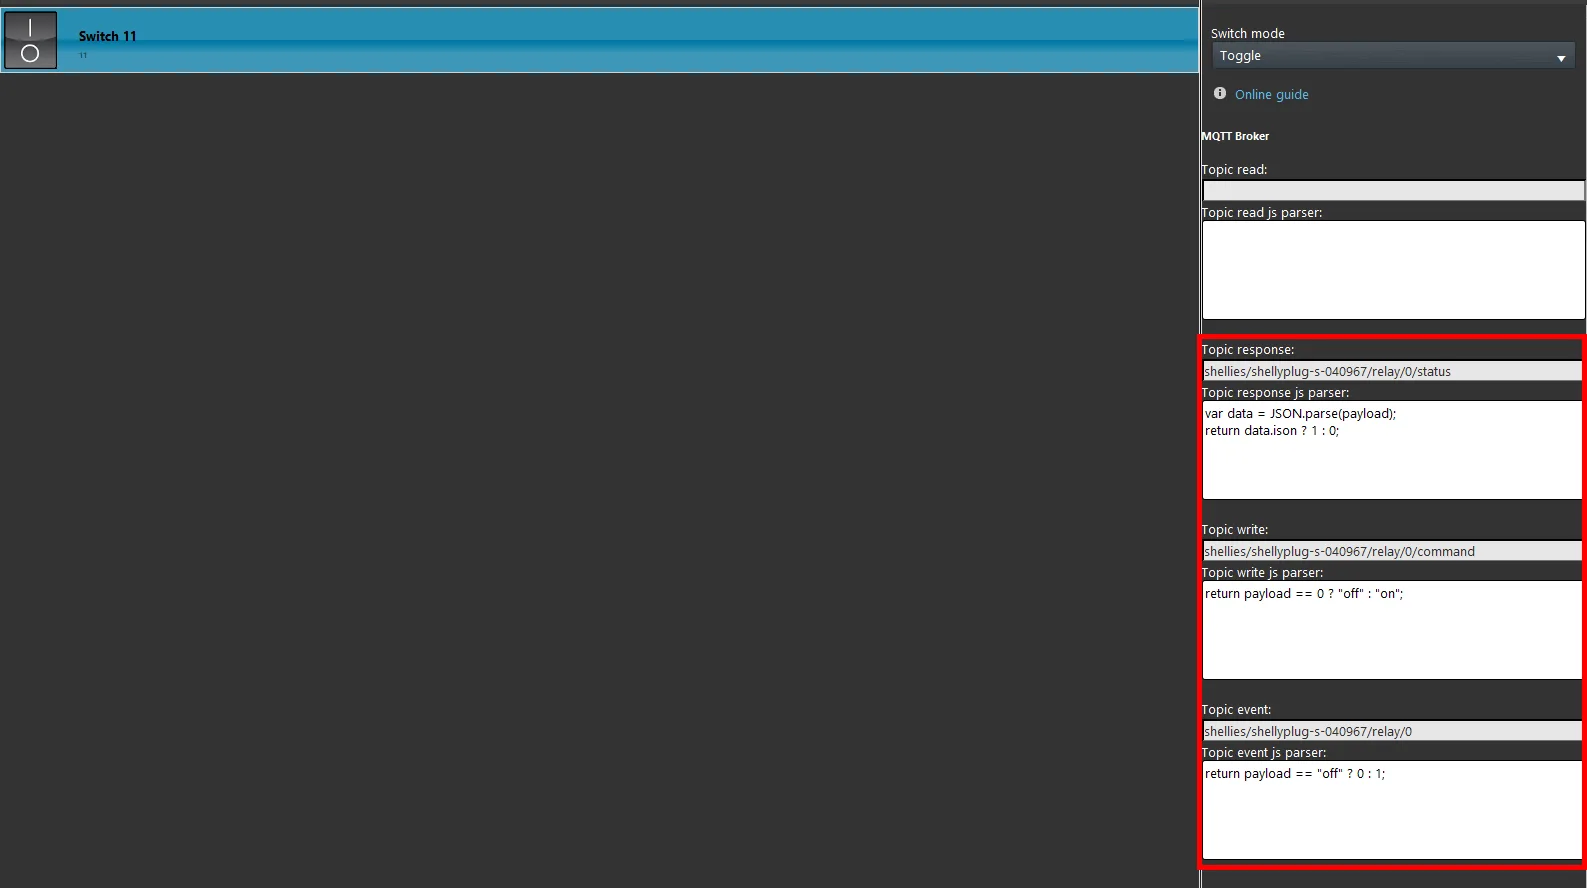
Set the topics as shown in the image below;
you can also find the topics on the Shelly website.
Click this link to view the illustrated topic configuration.
Step 8:
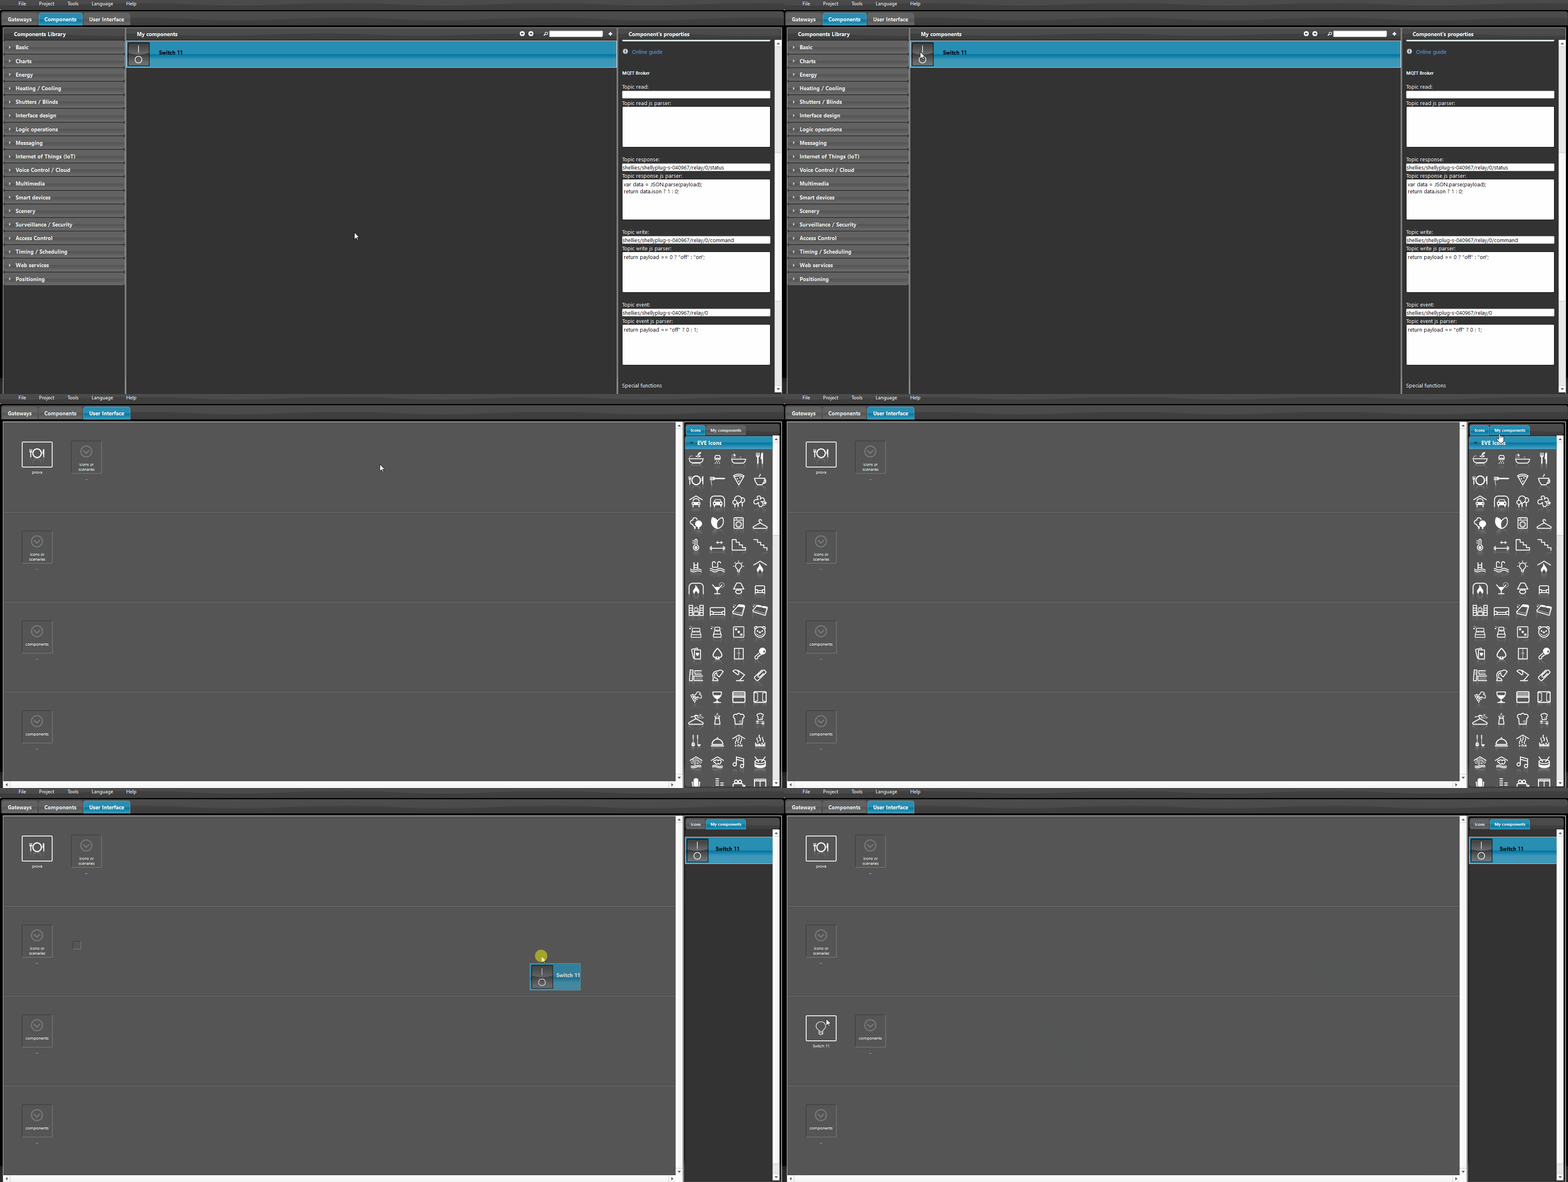
Add the components to the user interface and upload the project to the X1 server.
Step 9:
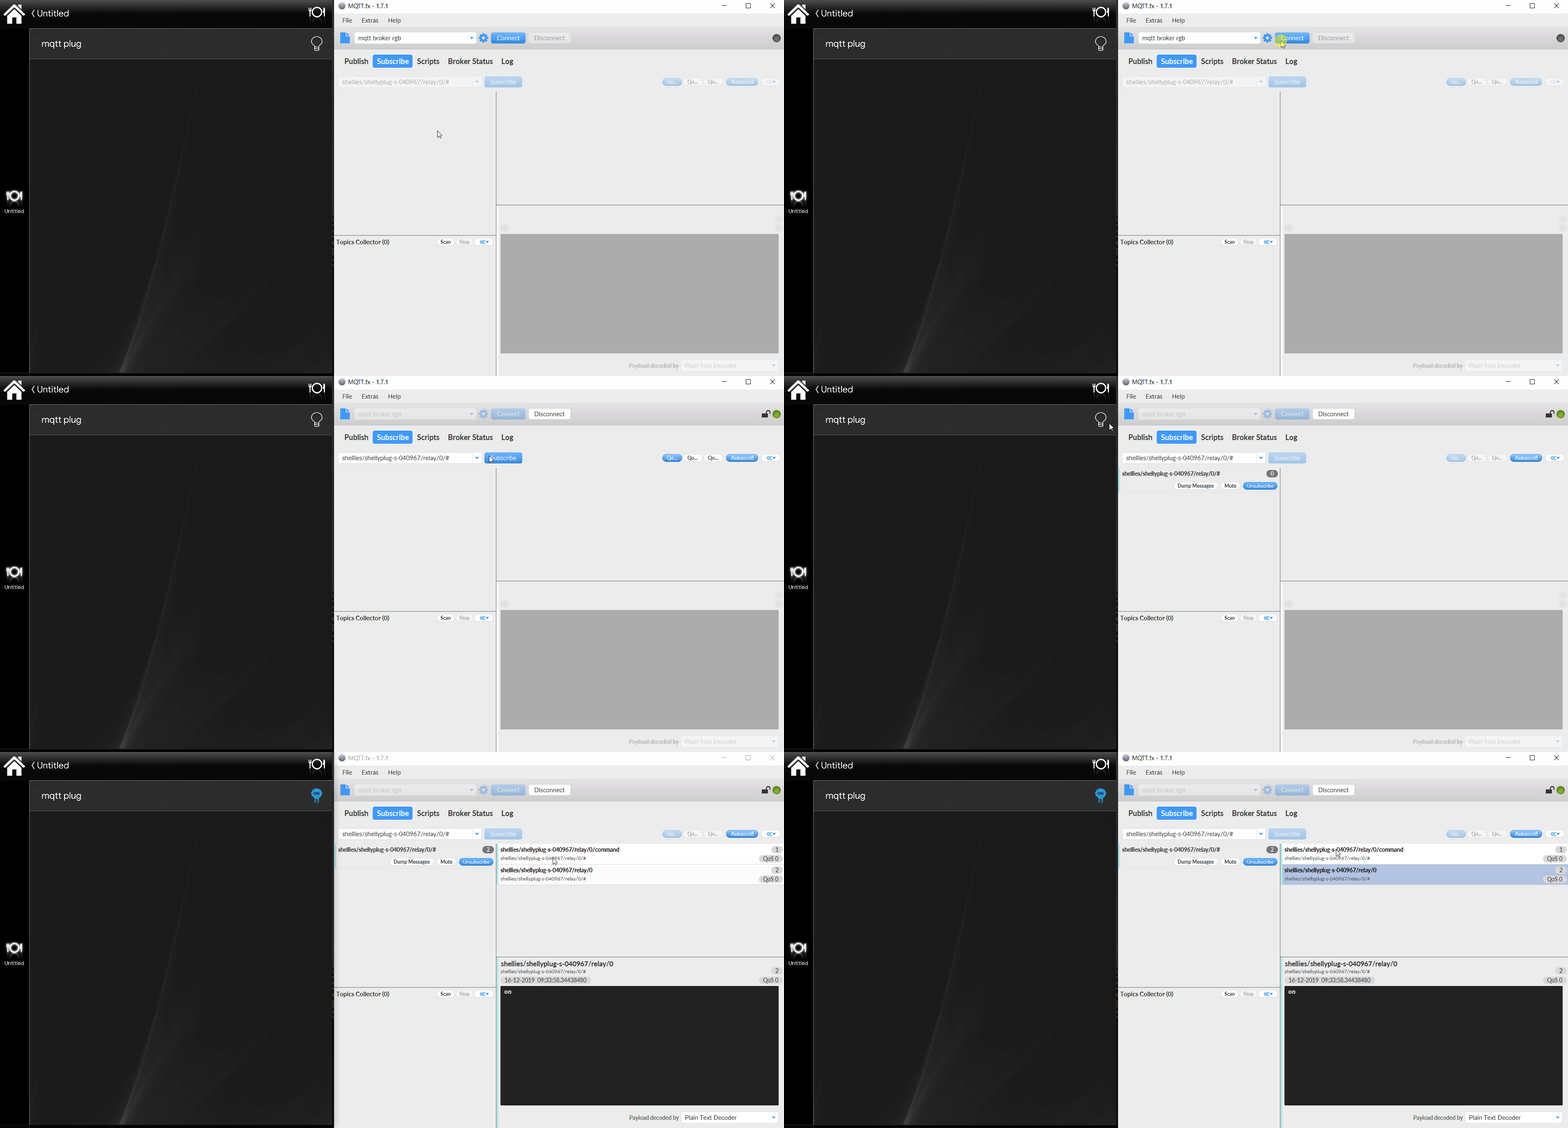
Download and install the MQTT fx debug software; refer to this guide that explains how to configure it.
As you can see, the topics have been set correctly.
Troubleshooting
1. Make sure you have the latest available version of Ilevia Manager and the X1 server firmware.
2. Make sure the Shelly device is correctly connected to your network.
3. If you cannot connect to the broker, check that your X1 has been configured correctly.