
Shelly 2.5 integration with MQTT in the Ilevia system
How to configure Shelly 2.5 with the MQTT protocol in Ilevia Manager, both as two relays and as a shutter command with calibration.
Shelly 2.5 relay function
Introduction
The Shelly 2.5 device lets you control 2 separate lights or a shutter motor. This guide explains how to set up both functions available on the device.
Web interface configuration
Step 1:
Connect to the Shelly device hotspot, then access the web interface by entering the following IP address: 192.168.33.1.

Step 2:
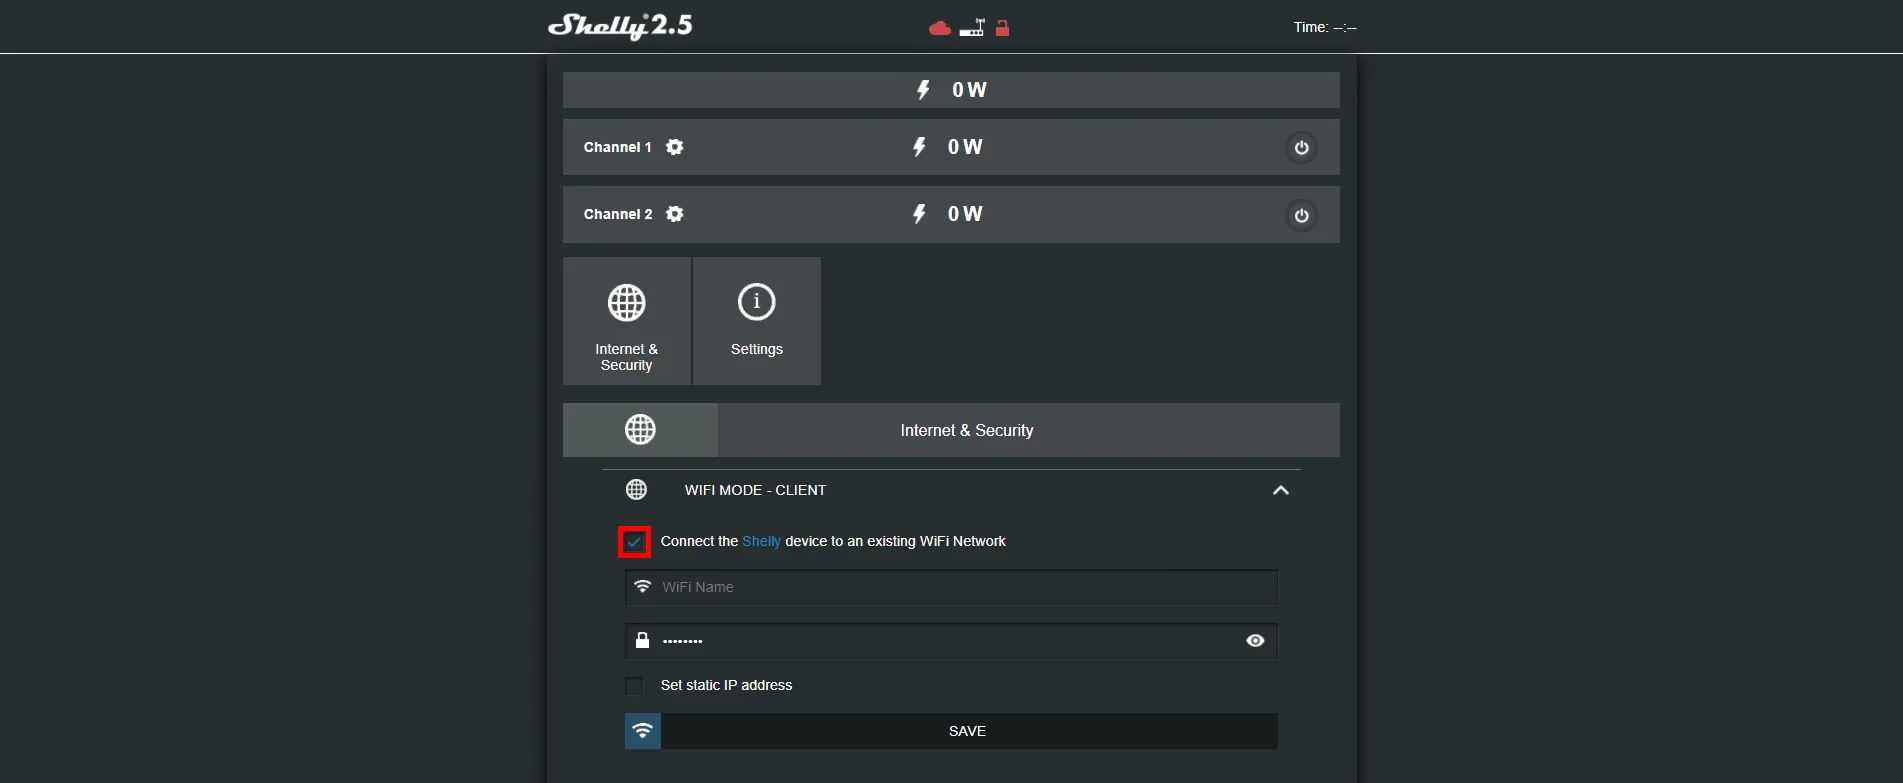
Go to the Internet security settings section, then wifi mode client and select the checkbox “Connect the shelly device to an existing WIFI network”.
Enter your wifi credentials in the corresponding text fields.
Step 3:
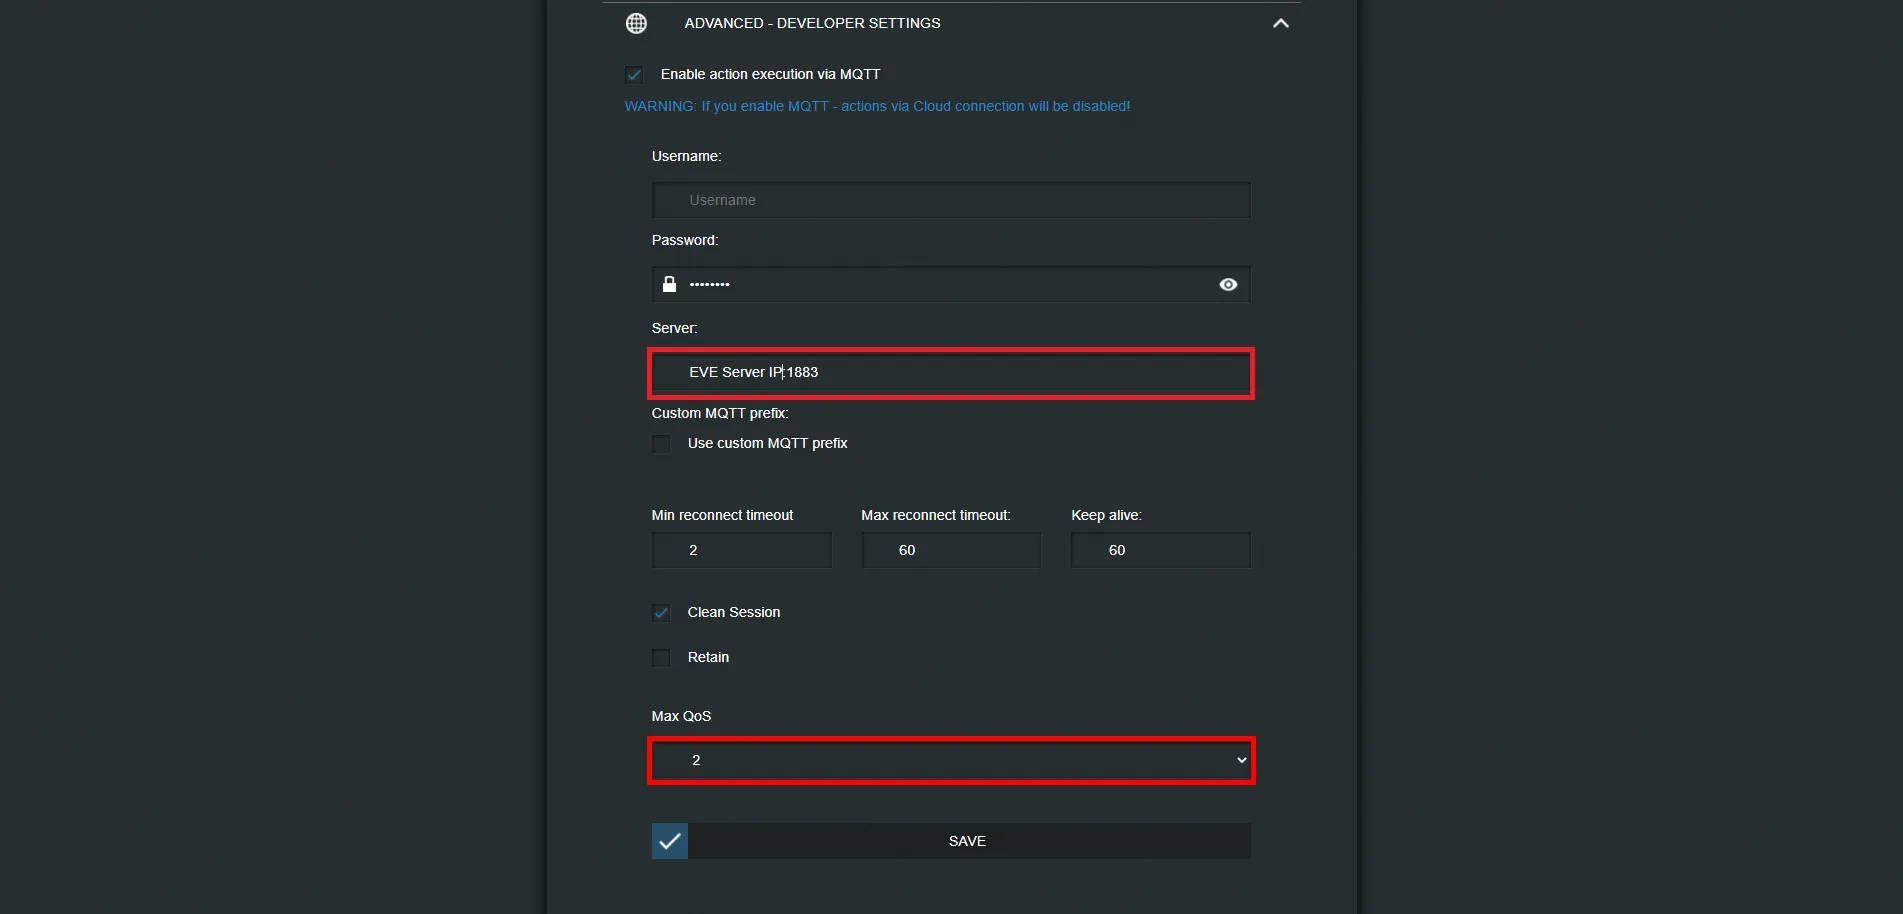
Now we will enable the MQTT protocol on the shelly device. Go to the internet & security menu and enable the checkbox “Enable action execution via MQTT”.
It will be necessary to enter the IP address of the Ilevia server in the “Server“ text field.
Topic configuration:
Step 4:
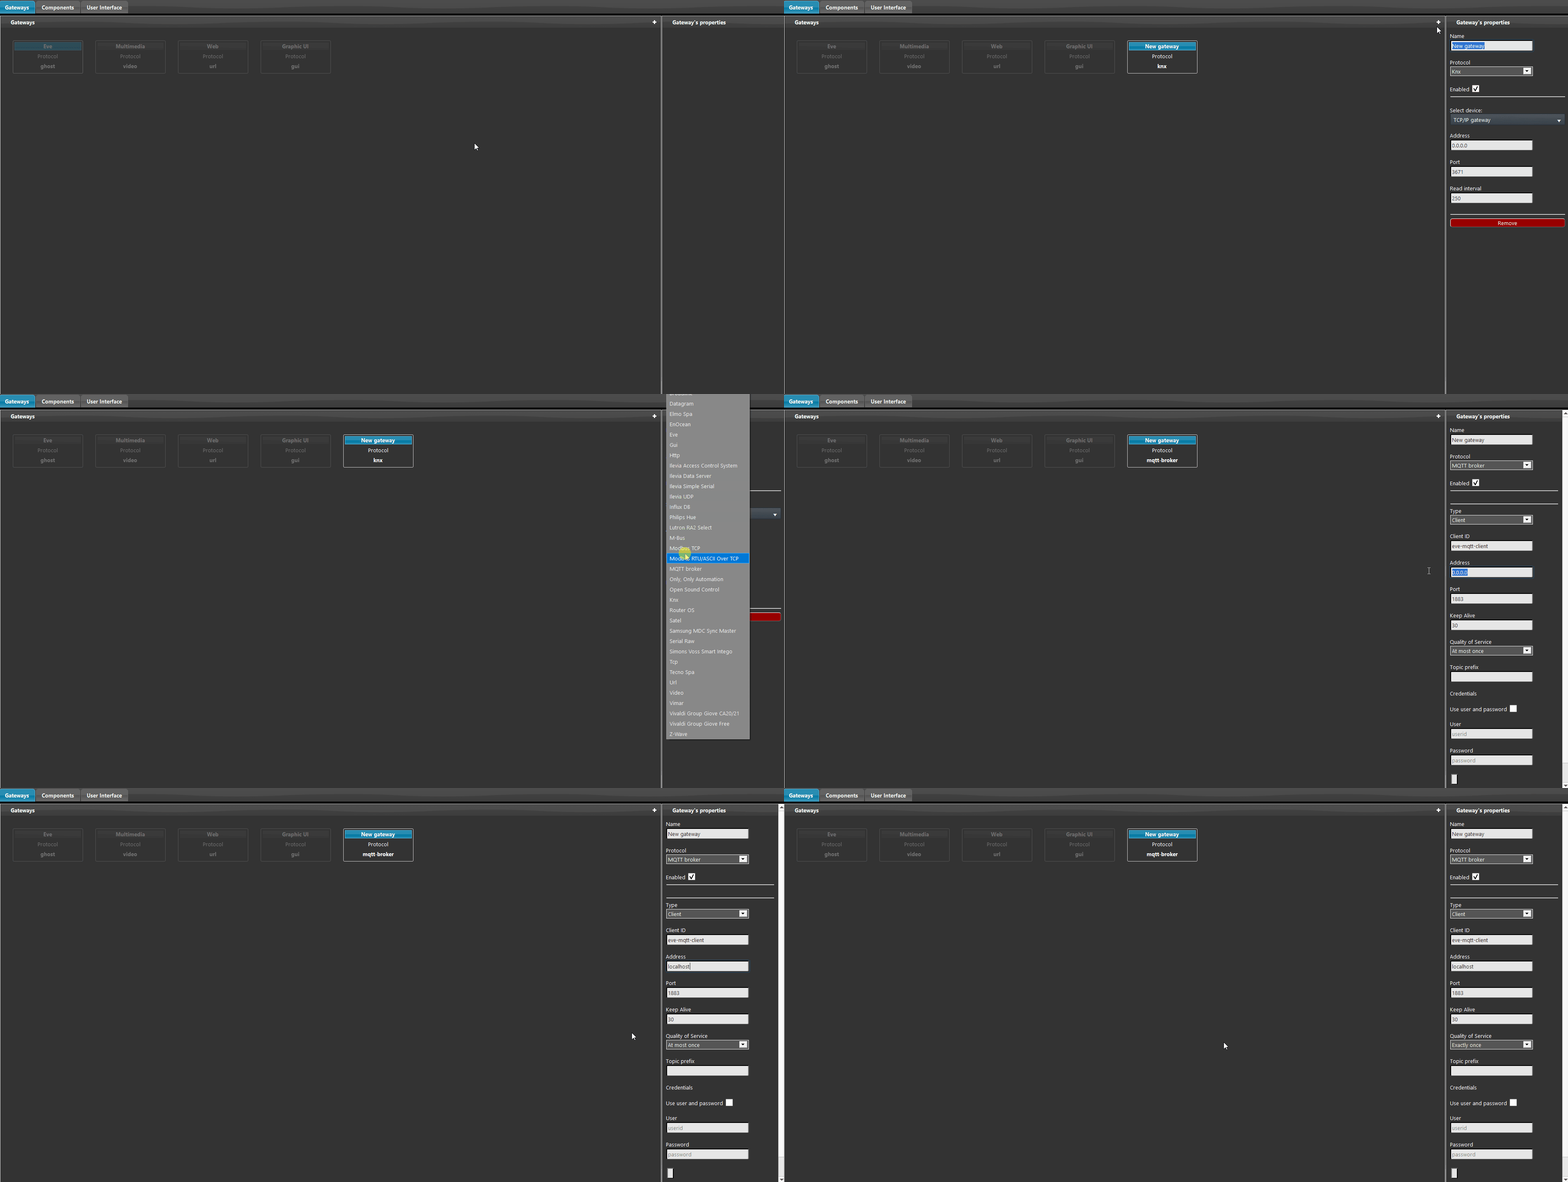
Open the Ilevia Manager home automation configuration software, create a new MQTT gateway by selecting it from the options list. Then enter the server IP address in the appropriate “address” text field, and set QoS to “exactly once”.
Step 5:
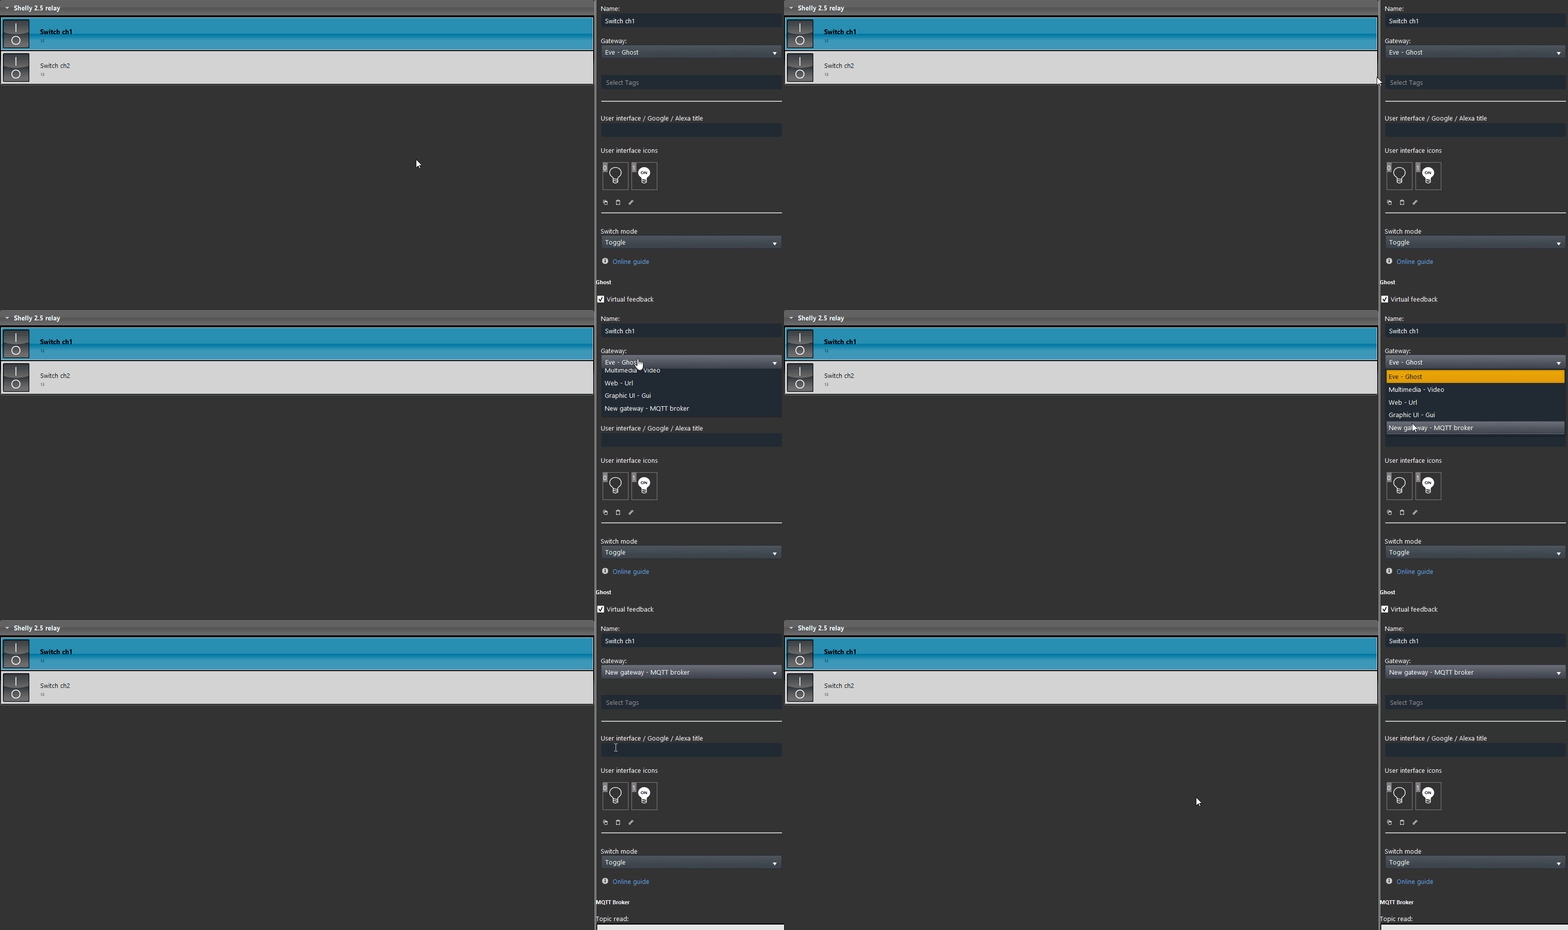
To set the topics correctly, it will be necessary to set the component gateway to the MQTT one.
Step 6:
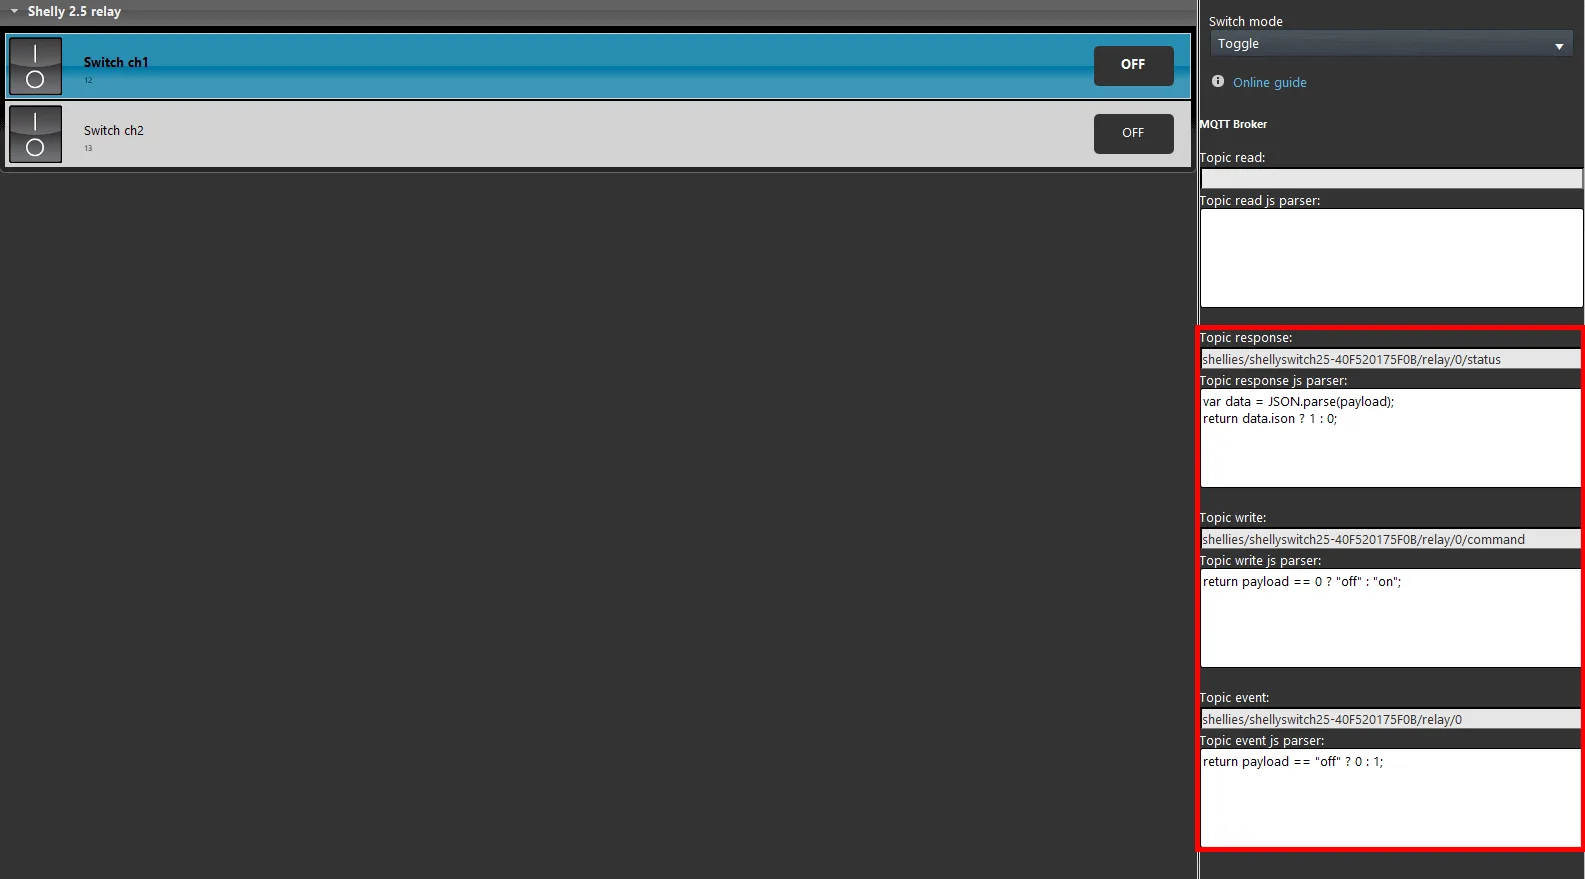
Below you can see the configuration of the two switch devices with their respective topics.
Click this link to view the Topic configuration.
Step 7:
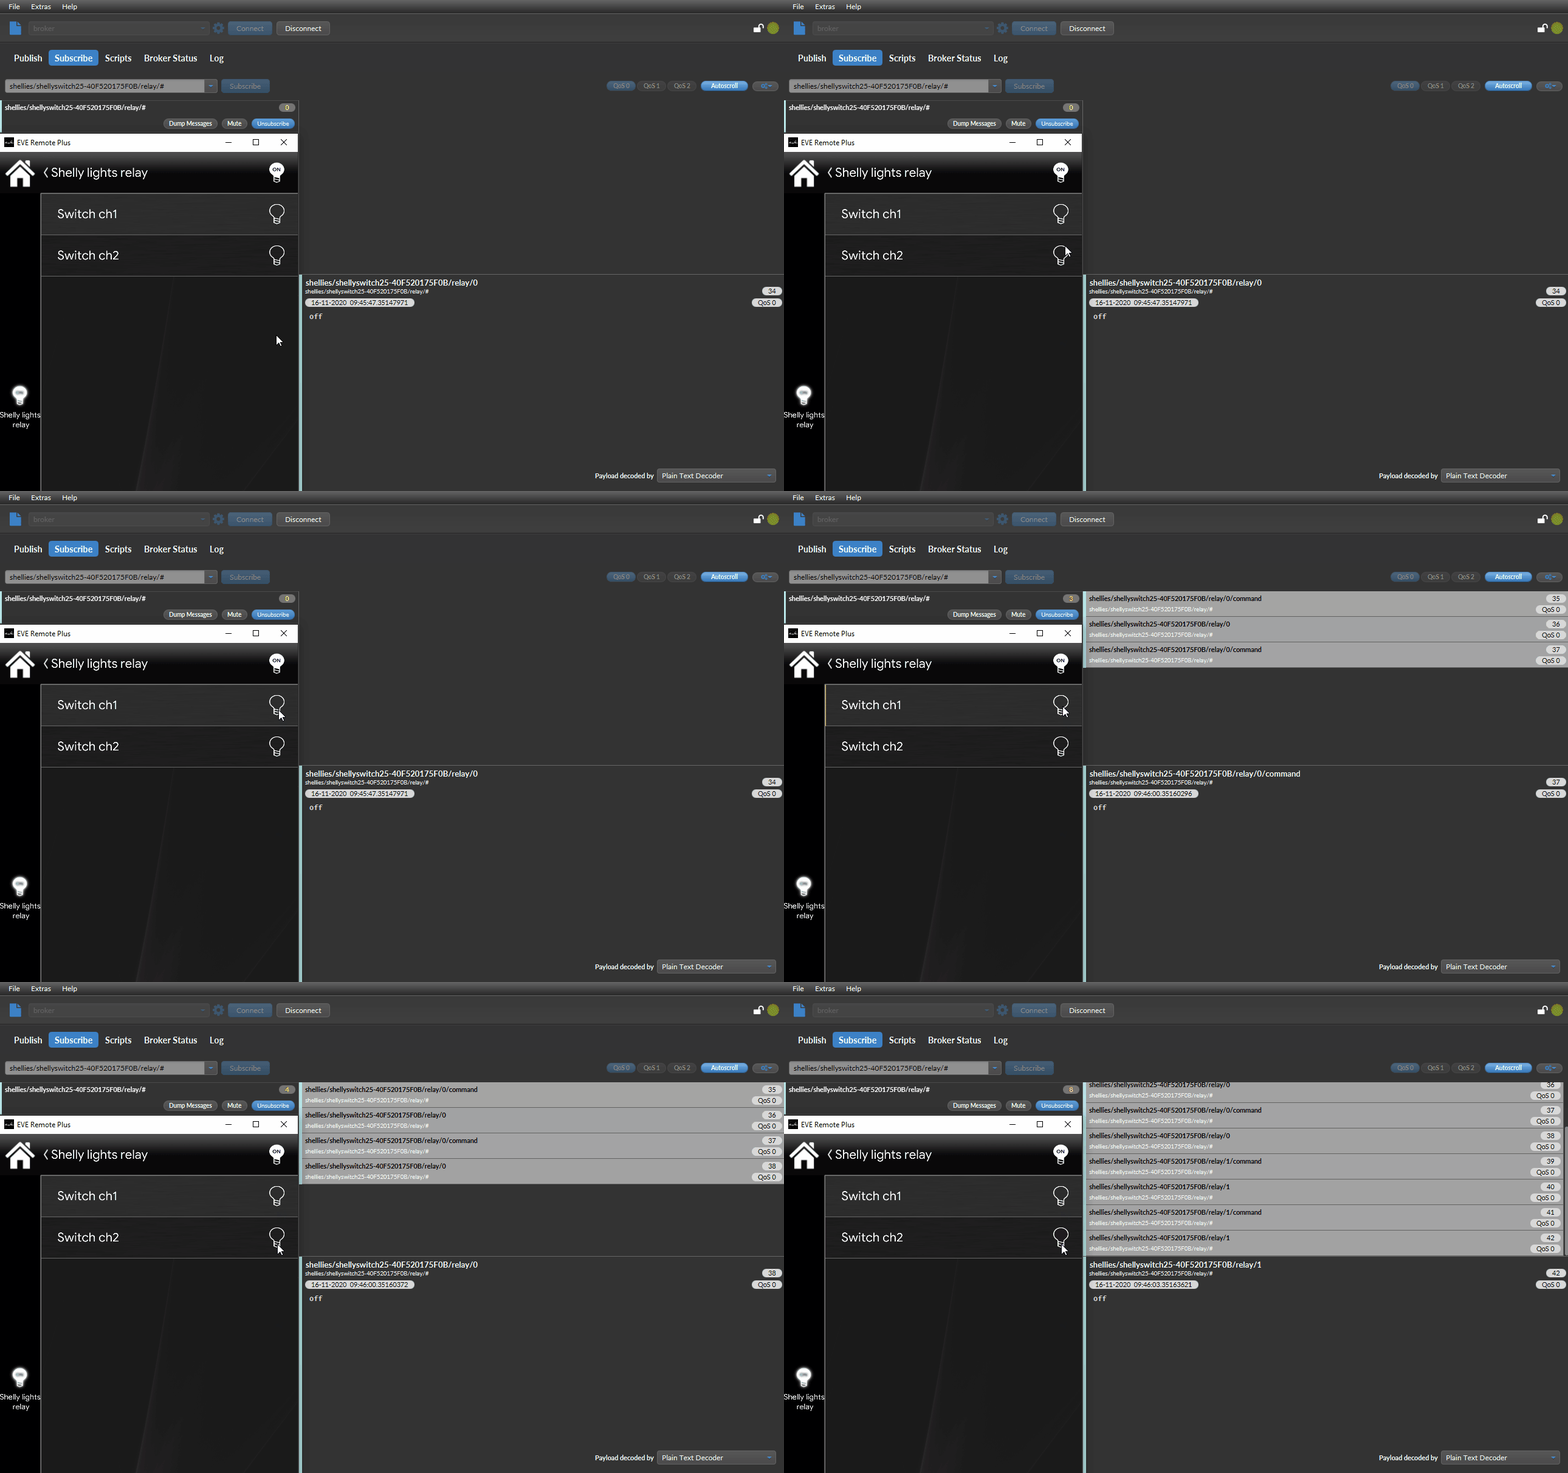
This is how the components will respond to MQTT commands within the classic User interface, and how the topics are represented when passing through the Ilevia server broker.
Shelly 2.5 Roller shutter function
Introduction
The Shelly 2.5 device has a second function beyond controlling two separate switches, in fact this device can also control a shutter.
Web interface configuration
Step 1:
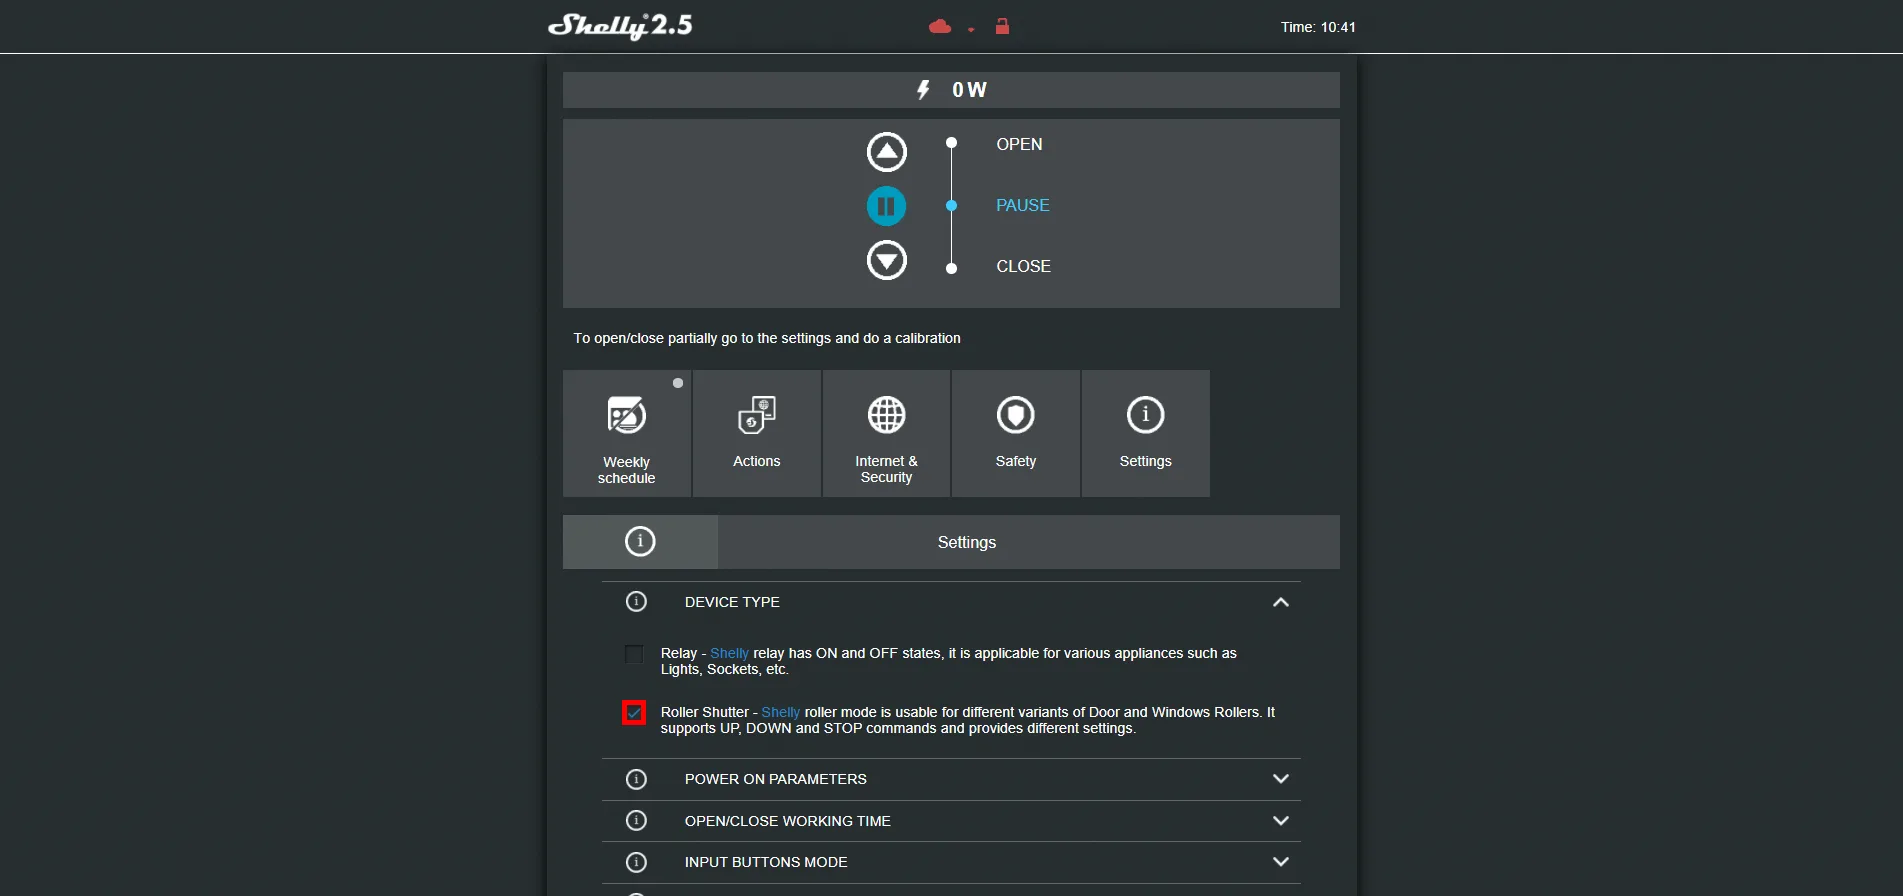
First, it will be necessary to set the operating mode of the shelly 2.5 device from “Relay” to “Roller shutter“. From within the web interface of the Shelly 2.5 device, go to the “settings” menu and select the second checkbox in the “Device Type” section.
Topic configuration
Step 2:
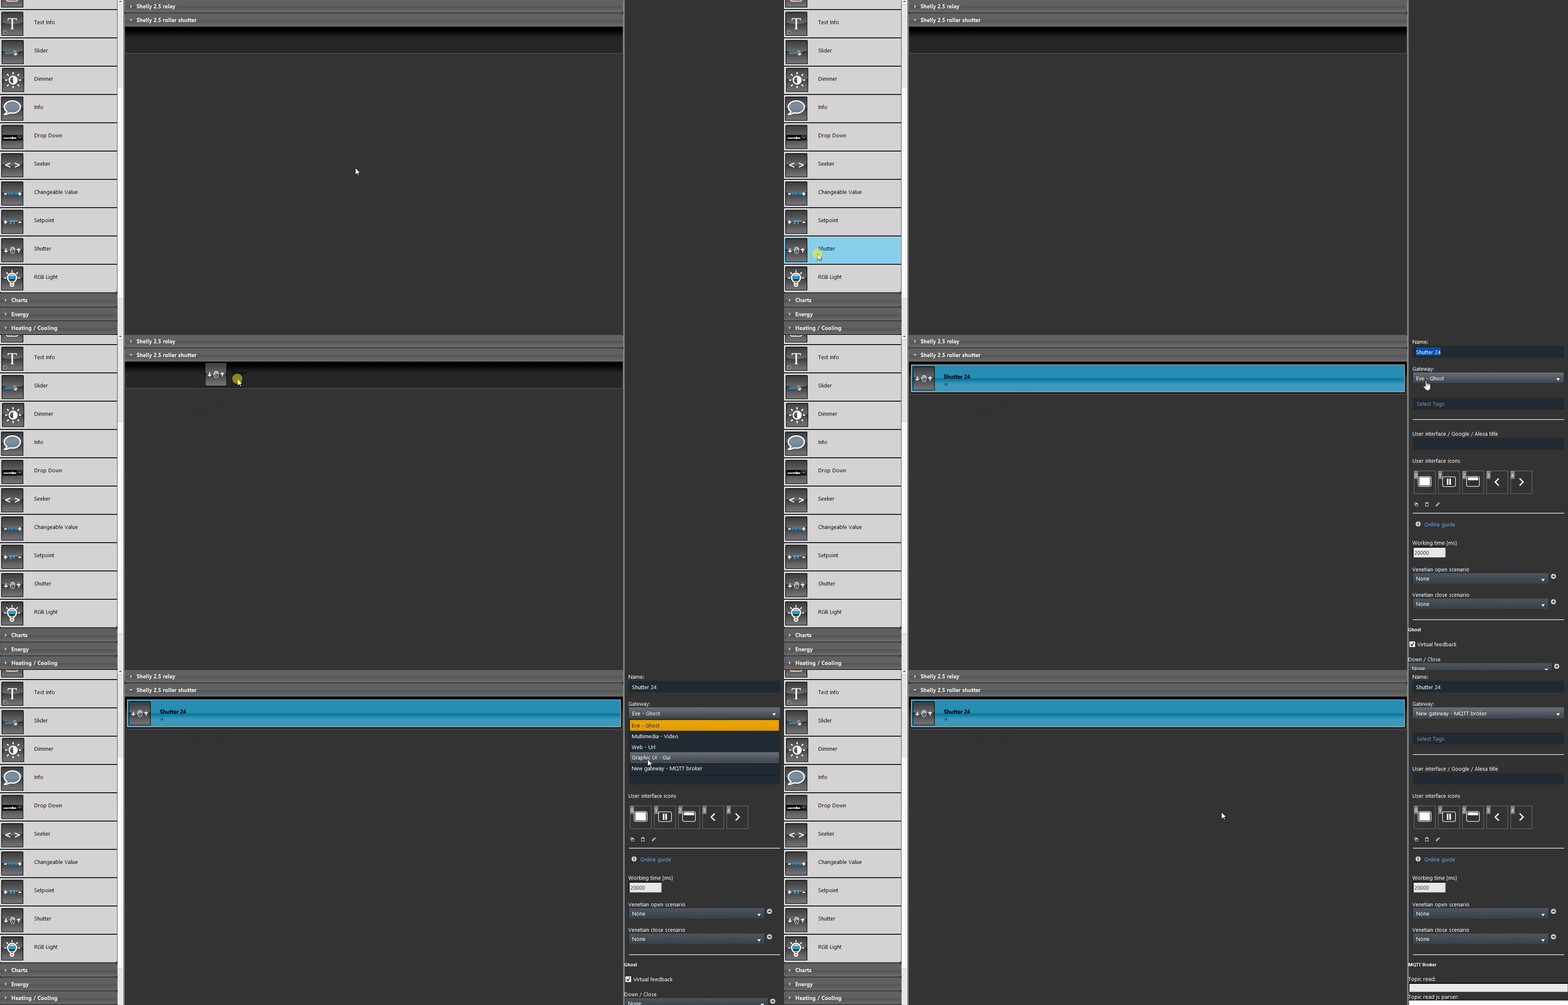
Drag a Shutter component into the components section of Ilevia Manager, then change its gateway to the MQTT gateway we created earlier.
Step 3:
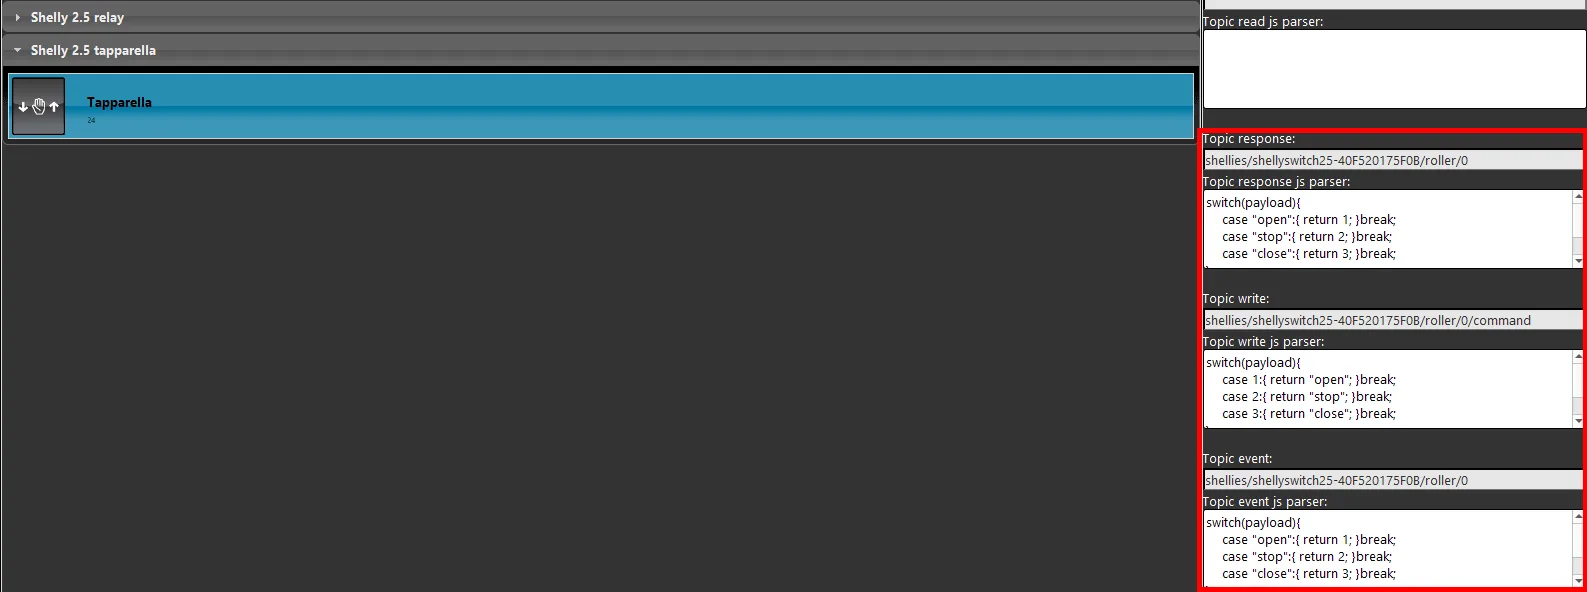
In this case the topics have been designed to execute three different commands: as you can see in the image below, the script takes the state from the device and “translates” the value in both directions (command write and read).
Within the Ilevia system, the values used to actuate the commands are 1, 2, 3 (open, stop and close).
Click this link to view the topic configuration.
Slider component configuration for setting the shutter opening percentage
Step 4:
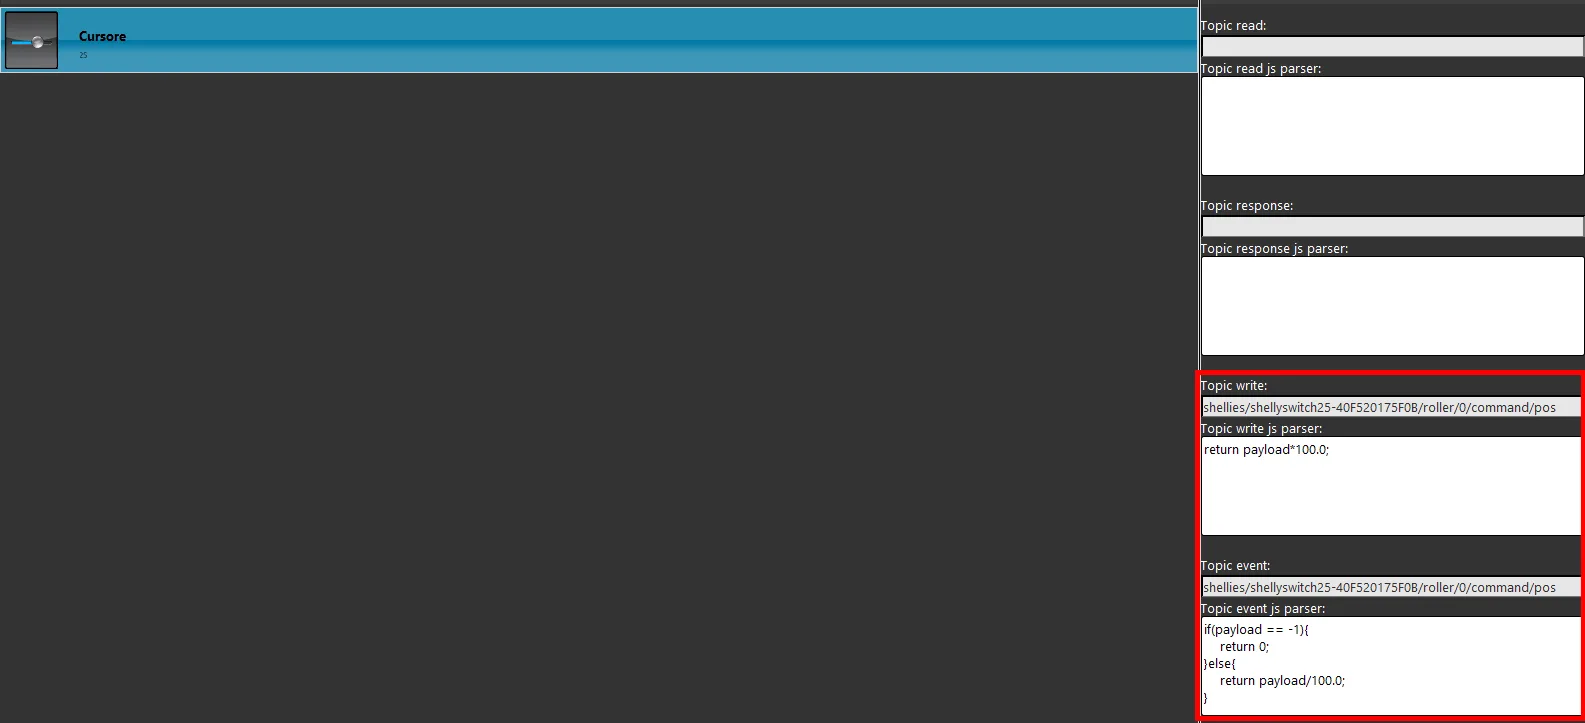
Now we will configure the slider component, which will allow you to set a specific percentage for the shutter. Add a Slider component within the Components section in Ilevia Manager, and assign it the MQTT gateway.
Then complete the topic configuration as shown in the image below.
Click this link to view the Topic configuration.
Scenario configuration for shutter calibration
Step 5:
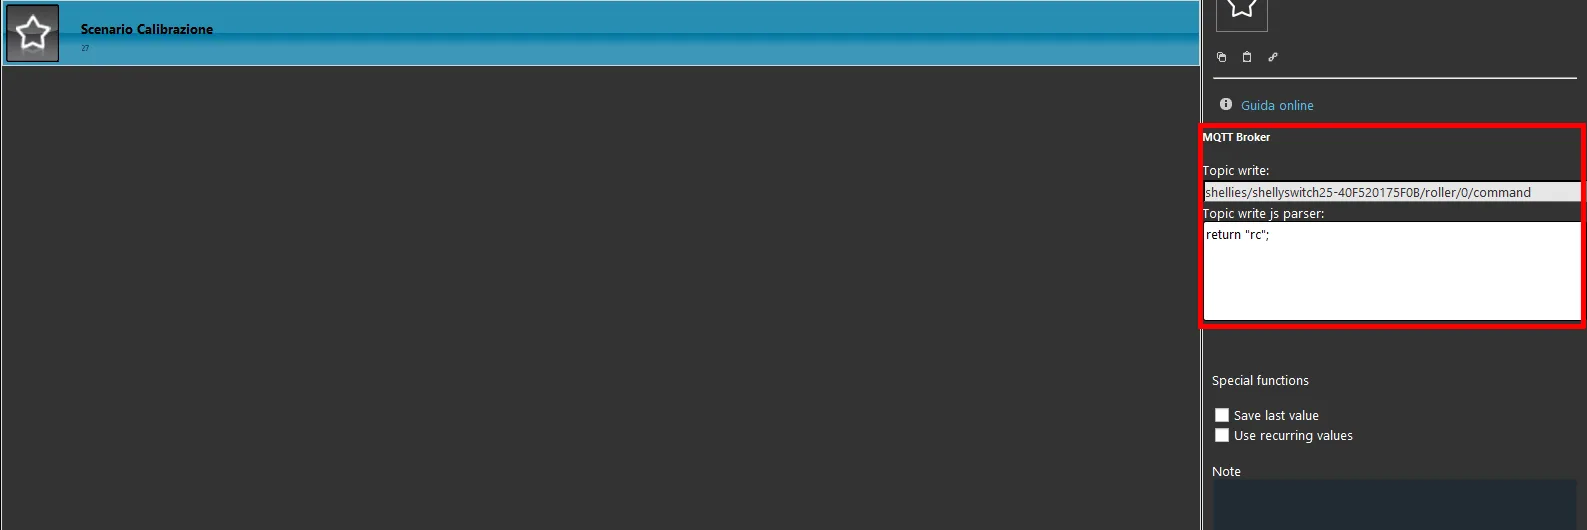
The Shelly 2.5 device accepts an MQTT command to calibrate the shutter. In our case, the command will be sent by a Scenario component, configured with the MQTT protocol and the topic setup as shown in the image below.
Click this link to view the topic configuration.
Step 6:
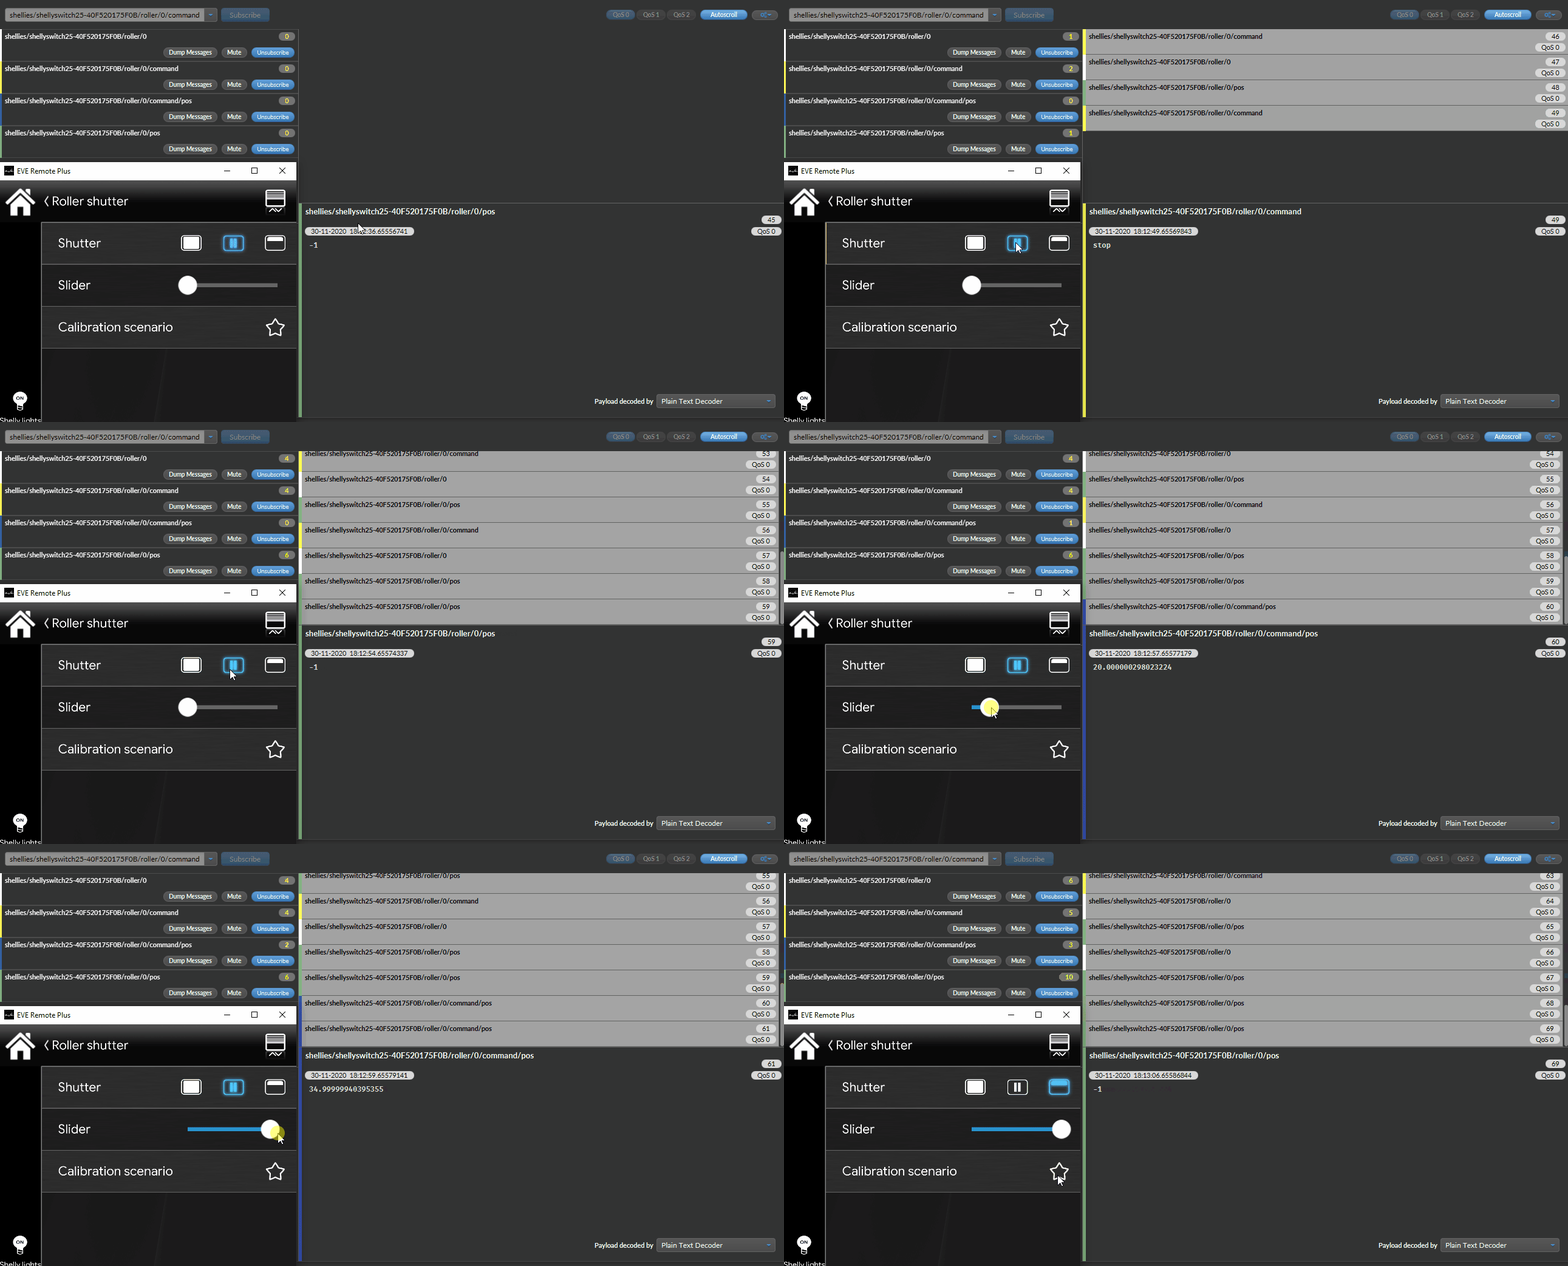
Let's test it: add the components within the user interface and try the configured commands.
Troubleshooting
1- Make sure you have the latest available version of Ilevia Manager and the X1 server firmware.
2- Make sure the shelly device is correctly connected to your network.
3- If you cannot connect the broker, check that your X1 has been configured correctly.