
Importing an ETS project into Ilevia Manager
How to import a .knxproj file exported from ETS into Ilevia Manager, with keywords, rules, and component creation.
Introduction
The Ilevia Manager software allows you to import a .knxproj file exported directly from ETS software to speed up Ilevia project configuration.
Project import procedure
ETS project settings before import
Before importing the ETS project, prepare the project to get the most out of Ilevia’s KNX importer. The importer in the Ilevia Manager software uses keywords to match group objects and create the component in the project.
Make sure that each group address representing a specific device function has a specific keyword. This information is very important for Ilevia’s importer to recognize and match the addresses to the component created in the Ilevia Manager software.
For example: if you set the keyword for lighting devices as “Light On/Off”, it must necessarily be different from other devices representing other On/Off devices that use the same Data Point within the ETS project.
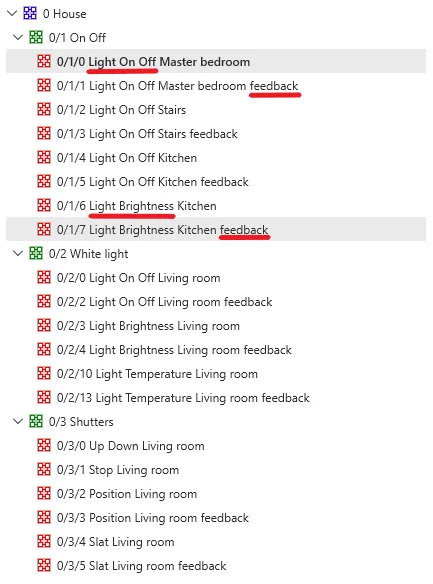
Click the link below to download the ETS Demo project and try it yourself.
Import procedure
Step 1:
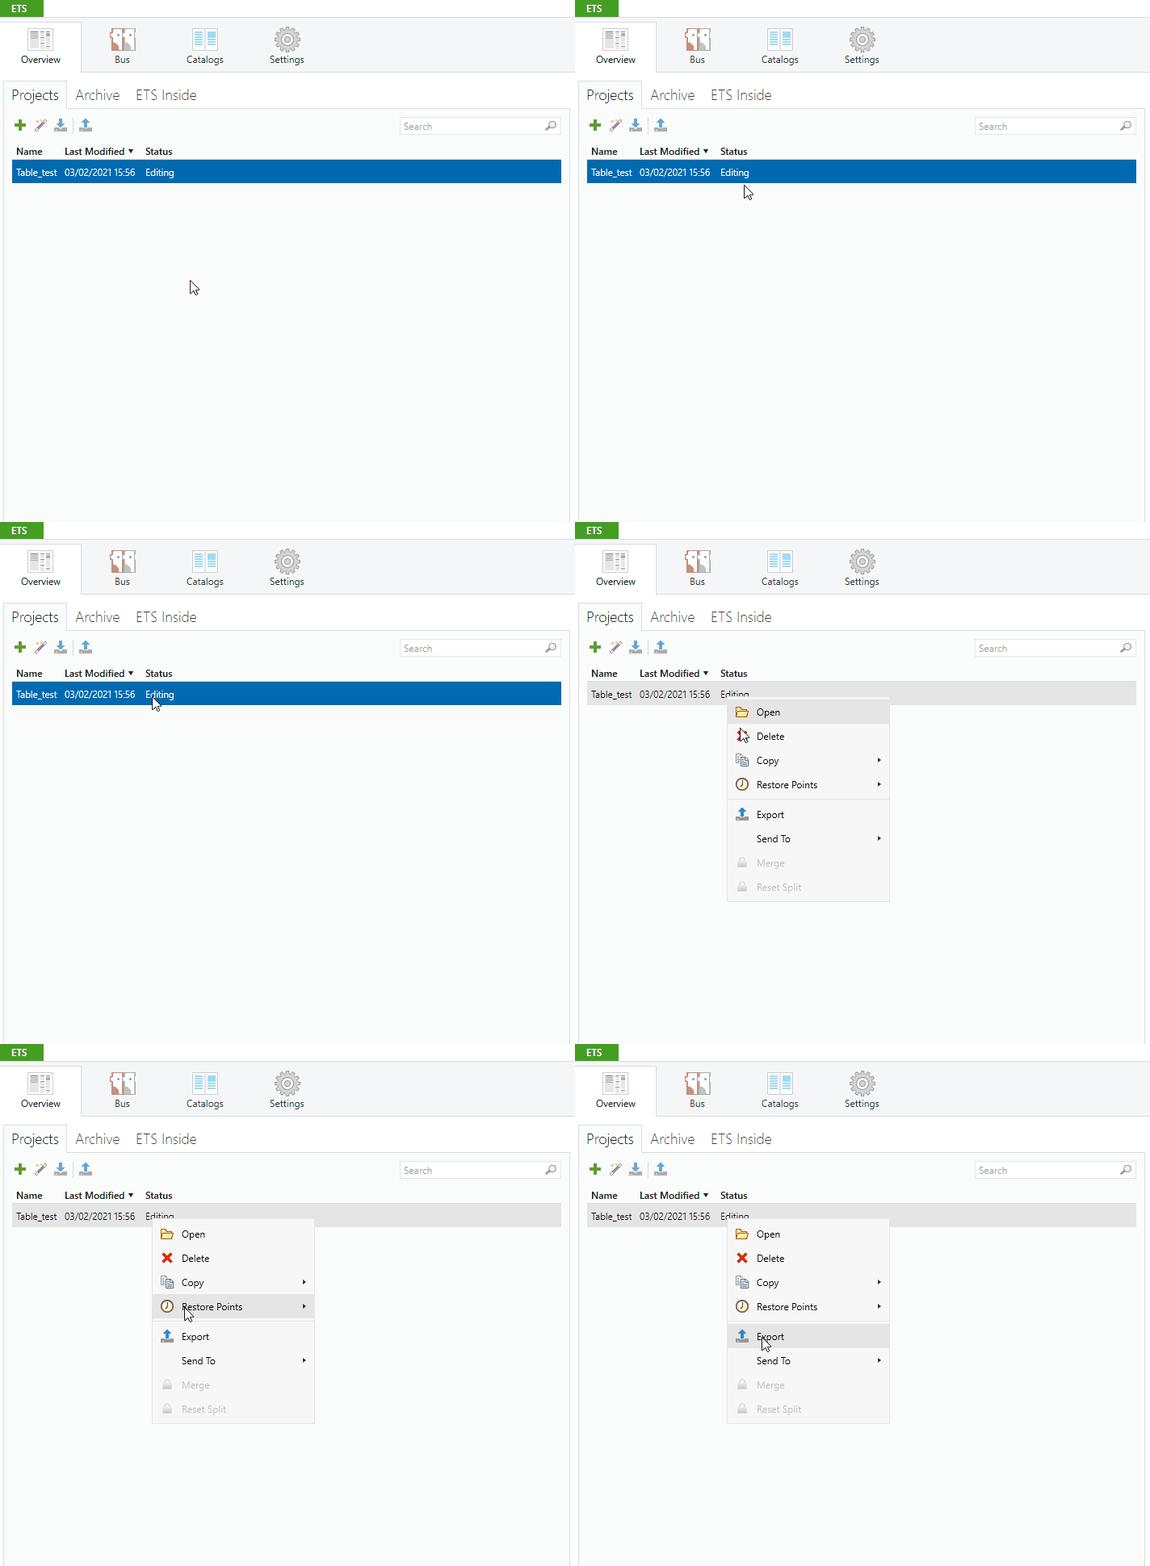
Open your ETS software, right-click the project, and select export.
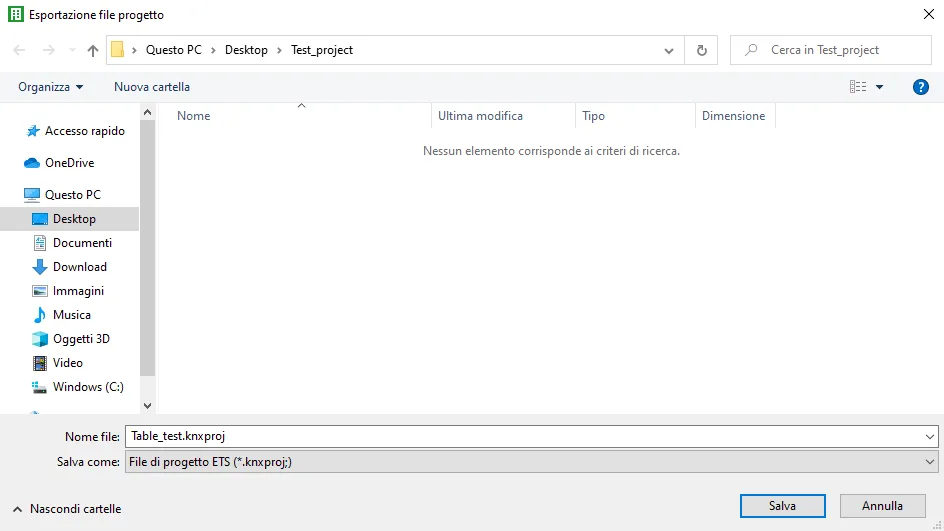
Once you click the “Export” button, a new window will appear. Make sure the file extension is .knxproj from the “Save as” drop-down menu, then click Save.
Step 2:
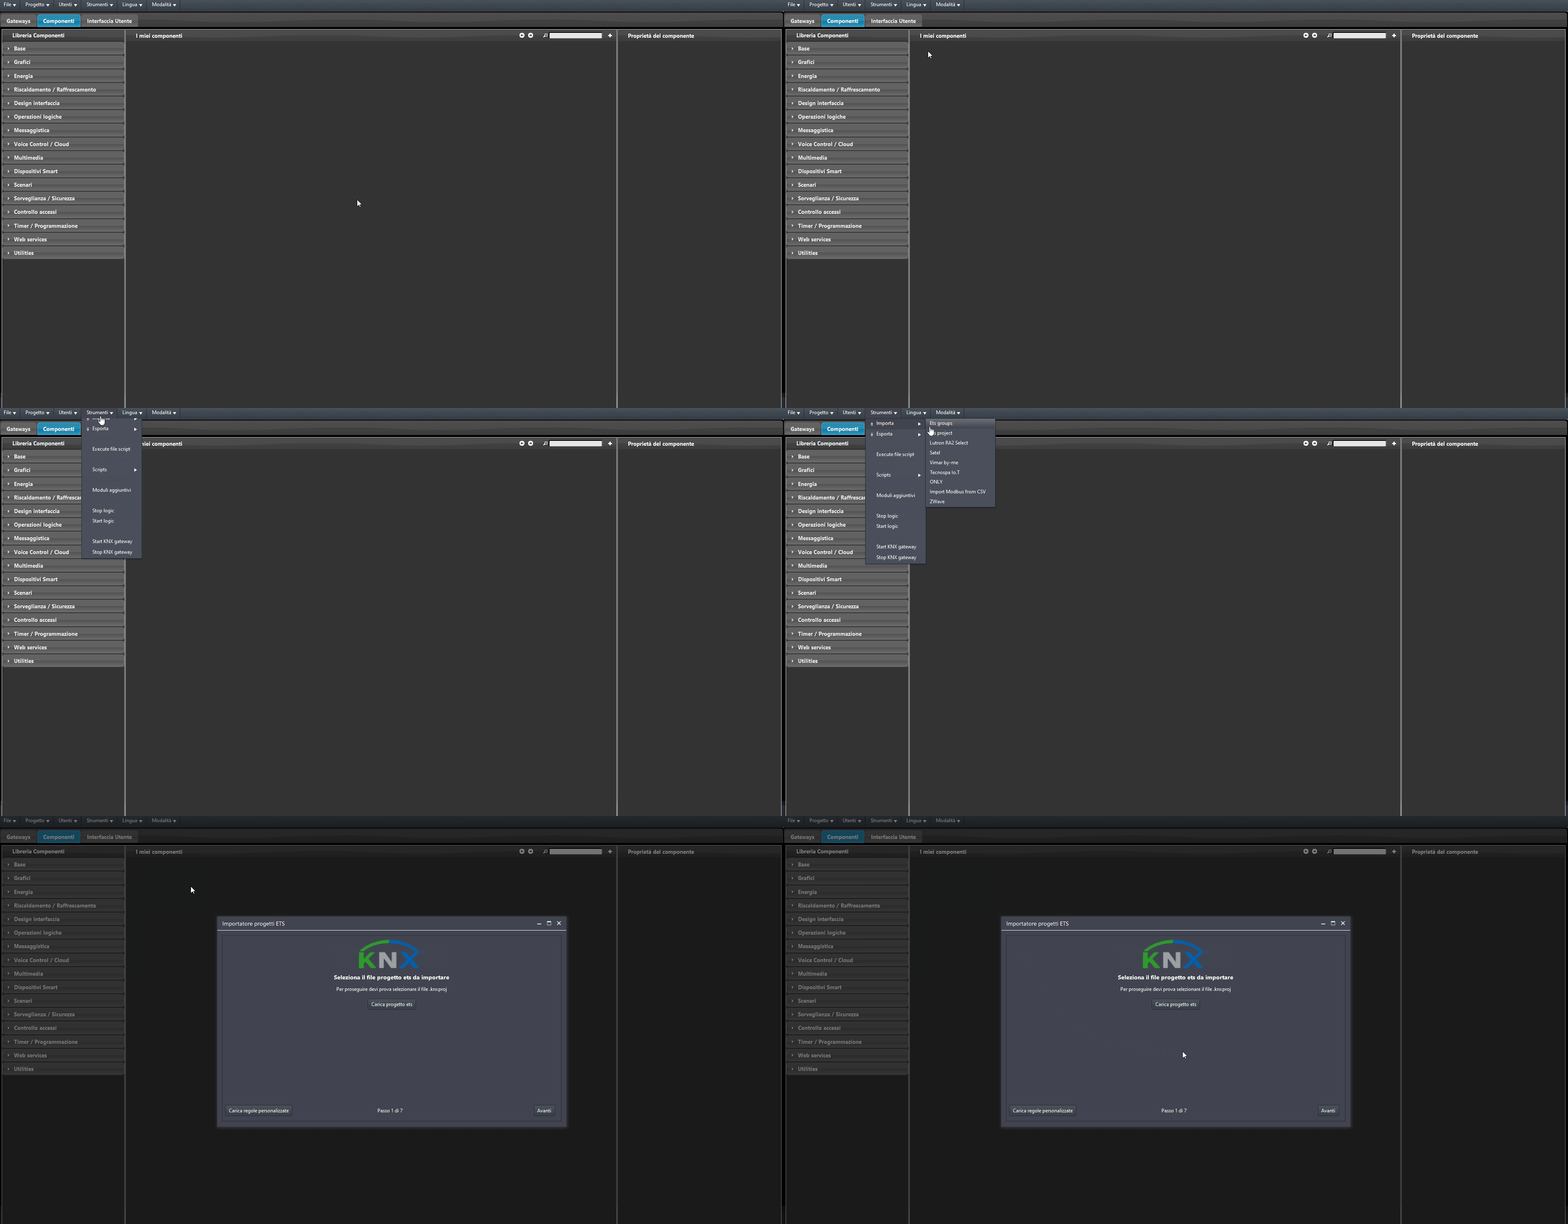
Open the Ilevia Manager configuration software and go to the “tools” menu at the top of the screen, then click the “Import” button, and finally click “ETS project“.
Step 3:
Click on “ETS project” and a new window will appear in the center of the screen. To open the ETS project in Ilevia Manager, click the “Import” button at the top left of the import screen.
ETS project password
Before importing the ETS project into Ilevia Manager, make sure you have removed the password from the project. To remove the password from the ETS project, follow these steps:
1: On the main ETS page, hover over the project and click Details;
2: Finally click Change password, then Delete password.
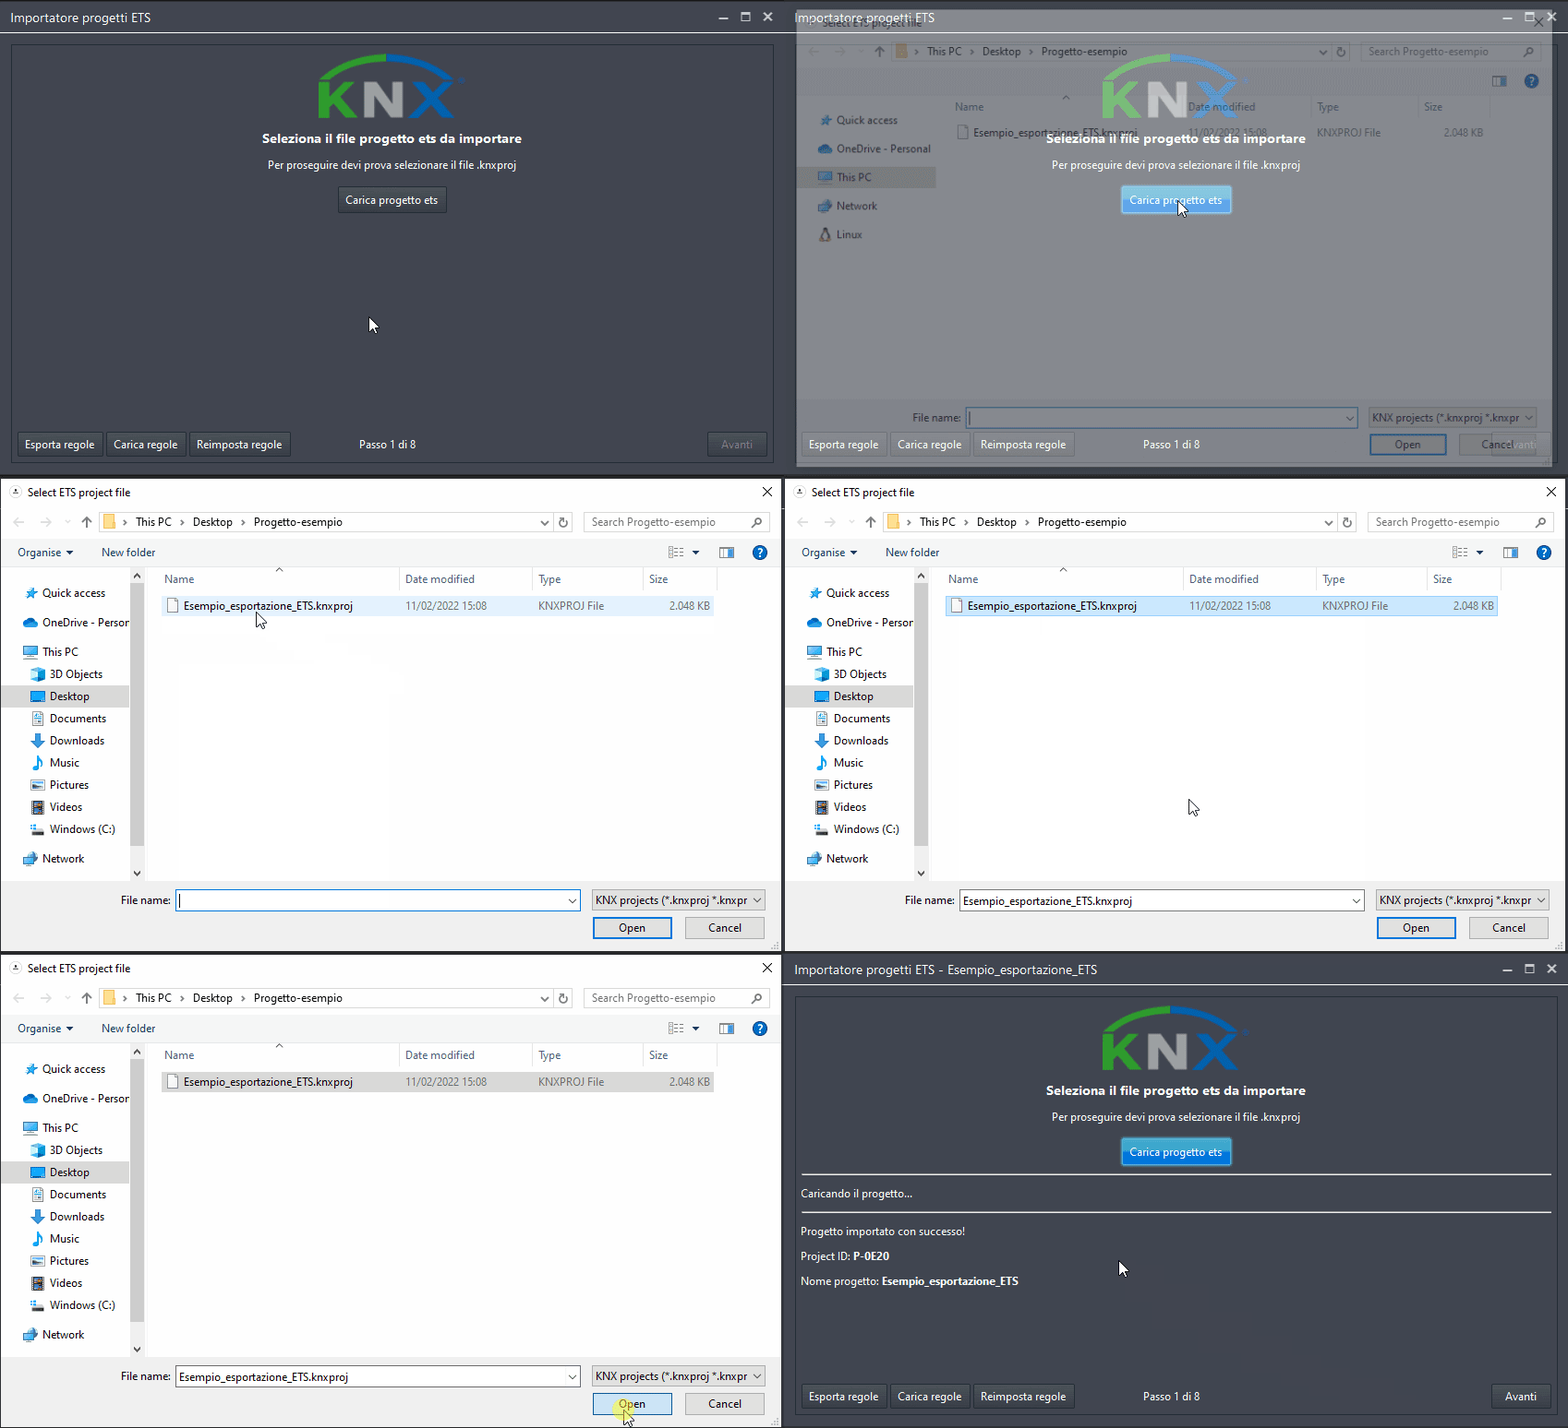
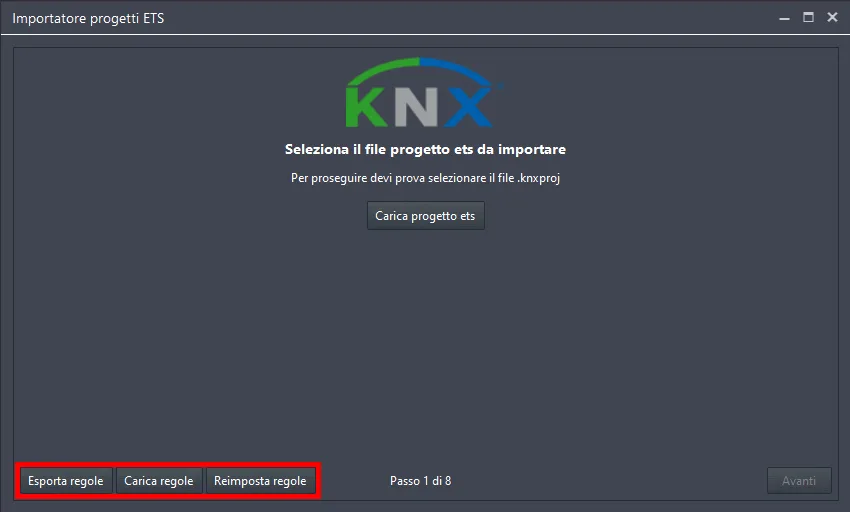
Step 4: At the bottom of the import screen there are 3 buttons. These buttons manage the rules created during ETS project import into Ilevia Manager, such as keywords for matching group addresses (Command / status, Up / Down – Stop) and the other rules set in the importer “Advanced mode”, which will be covered in the following steps.

Export rules: This button lets you export the rules created in the ETS project importer steps of Ilevia Manager.

Load rules: This button lets you load rules exported from other versions of Ilevia Manager.
Reset rules: This button lets you reset the rules created in the steps during ETS project import into Ilevia Manager.
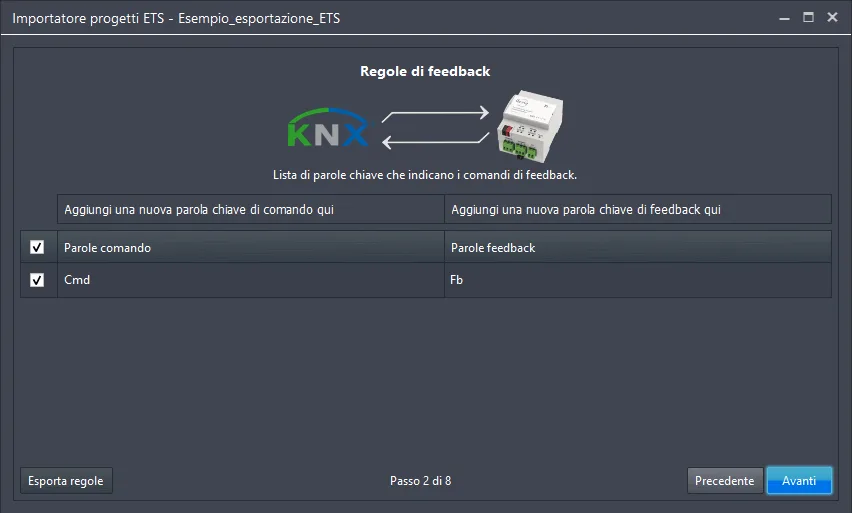
Step 5: After loading the project, click “Next” at the bottom left of the window. Here you can set the keywords that the ETS importer will use to match the group addresses so as to create a single component with both addresses included in the Ilevia project. If this step is not configured, once the Ilevia project is created they will be imported as two separate components: one will have only the write address and the second will have the feedback address. We suggest choosing keywords such as Cmd for the write address and Fb for the feedback address. These keywords will be recognized if they are present in the name of the individual address in ETS. This option can be disabled/enabled by checking or unchecking “Enable text-based feedback recognition“.
Step 6:
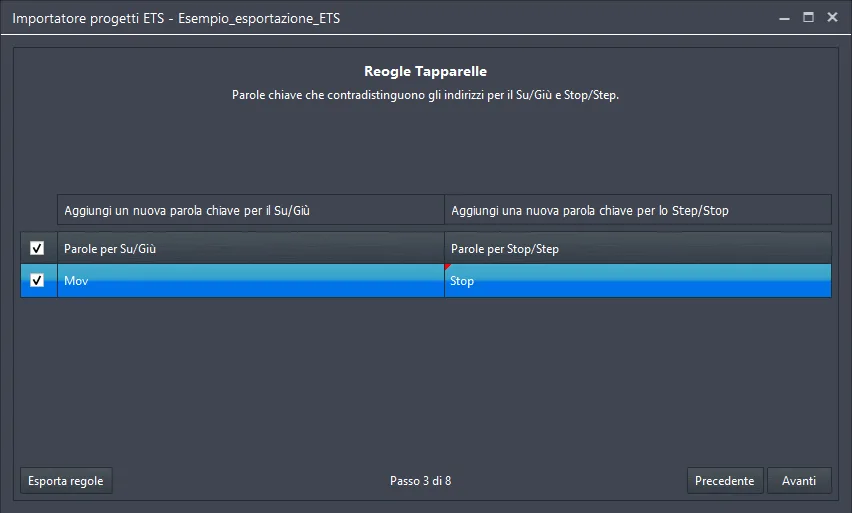
This step allows you to set keywords for matching group addresses related to Blinds. Pay attention to the keywords you enter: they must be the same as those set in the names of the group addresses in the ETS project.
Step 7:
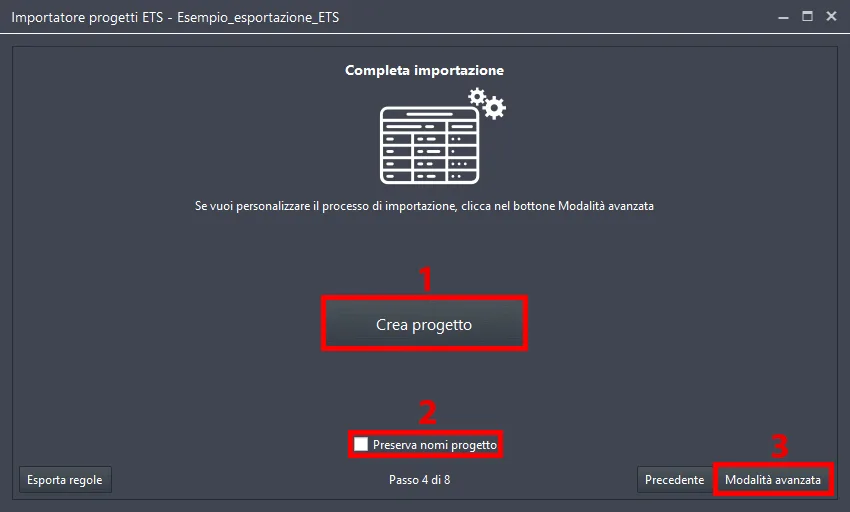
After setting the keywords, you can create the components within the project. You can choose to: 1. click Create project to create the project immediately, or continue with the import; 2. enable the Keep project names checkbox, which preserves the components created by a previous import; 3. click Advanced mode, which allows you to set more rules and filters for the import.
Step 8:
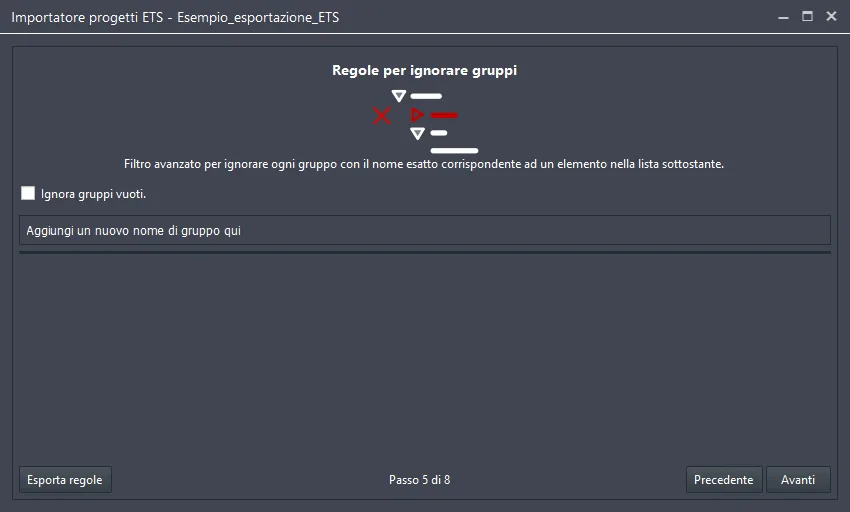
Once you click “Advanced mode”, you can continue with the import operation. In this new step, you can add group names within the ETS project that the importer will not add to the Ilevia project. You can also choose to ignore the import of empty groups by leaving the “Ignore empty groups” checkbox selected.
Step 9:
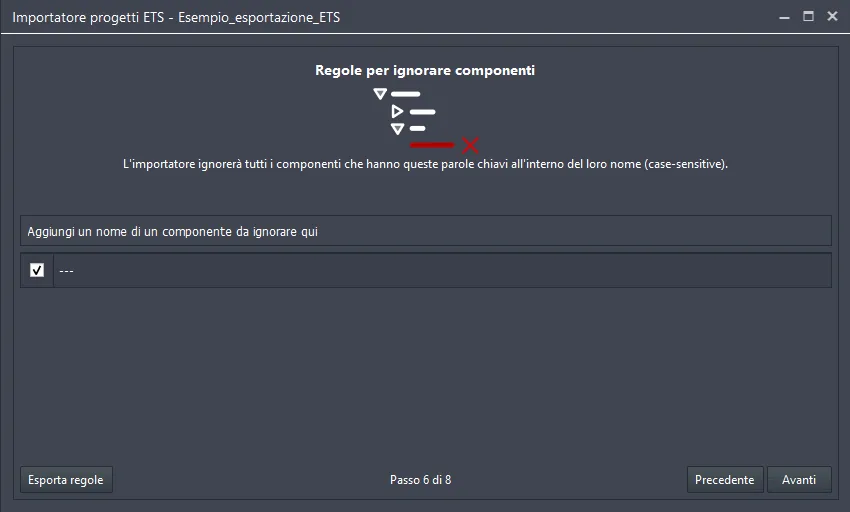
This step allows you to set specific import rules for group addresses from the ETS project, adding special characters or keywords associated with the addresses set within the ETS project. This provides further filtering of the elements that will later be imported into the Ilevia project. As shown in the example below, all addresses containing the “—” characters will not be imported into the Ilevia project.
Step 10:
This is the final step of the ETS importer. First, disable the checkbox called “Show only undefined”; otherwise, only the components that the importer could not identify the type of “dpt” for, and therefore could not associate with an Ilevia Manager component, will be shown in the list. On the left side of the screen, you can see all the groups created within the ETS project. On the right side, all components that will be imported into the Ilevia project are displayed; it shows all component types assigned based on the “dpt” type that each group address has.
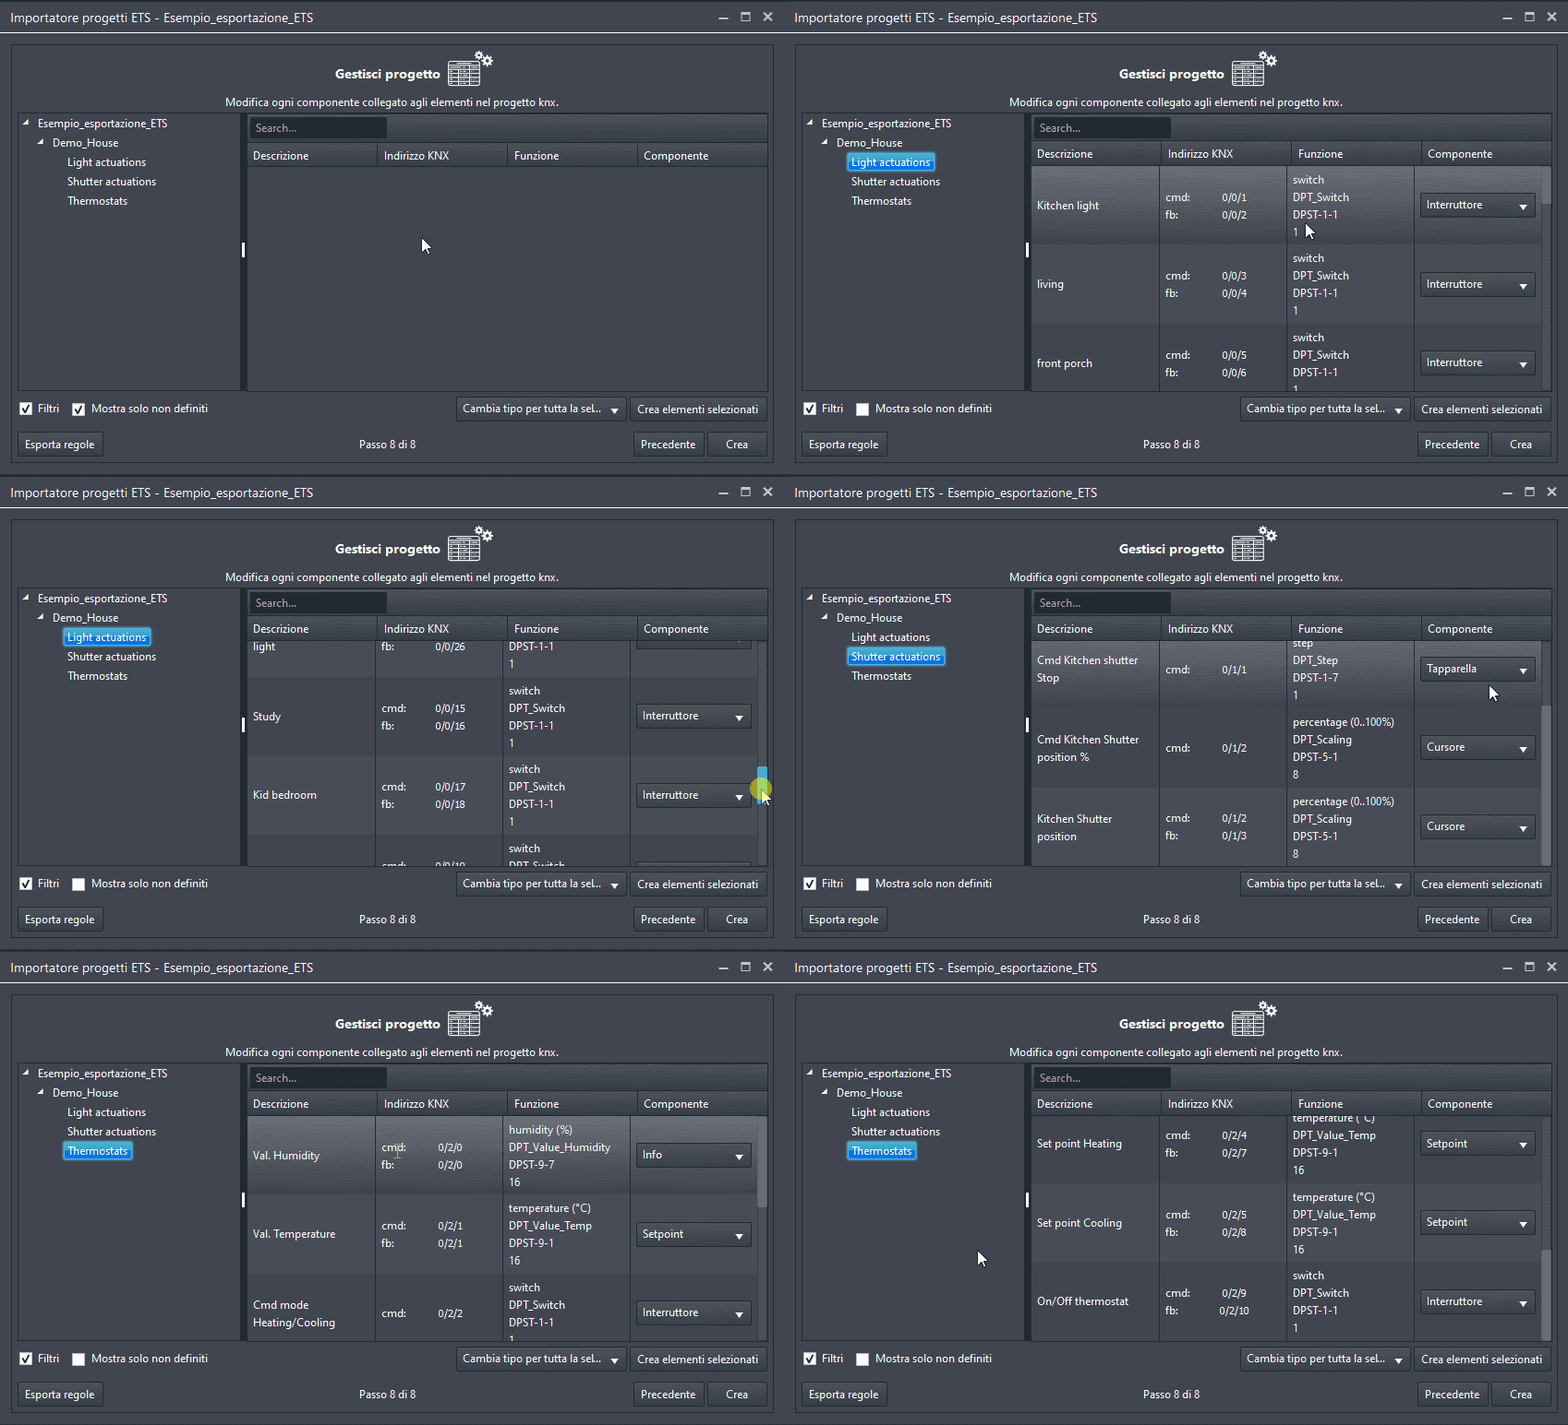
Importer functions
The tenth step allows a preview of the associations and of the component type that will be created within the Ilevia Manager project. Additional options are shown below the component list, explained individually in the following table.

Filters  | If enabled, this checkbox applies the filters set in the previous steps. |
Show only undefined  | If enabled, this checkbox shows only the objects that the importer could not recognize, that is, the group addresses for which no “dpt” was specified. |
Component type selector  | This option list allows the user to select multiple components within the importer component list and change the component type. |
Create selected components  | This button creates only the components selected in the component list on the right side of the importer. |
Export rules | If pressed, this button exports the rules created in the previous import steps. |
Save custom rules  | This button allows the user to save the custom rules set in the configurator steps. These rules are saved in a file called “rules.json” in the following path. File path: Users\Admin\AppData\Local\EVEManager\knx_wizard |
Previous & Create  | Previous: Allows the user to go back to the previous importer steps. Create: This button finalizes the import process and therefore creates the Ilevia project with the components associated with the correct group addresses. |