Connection to the X1 server from Ilevia Manager or direct
How to connect the Ilevia X1 server to Ilevia Manager via local network or by direct connection to the PC, using a static IP address.
Introduction
To perform the first connection, connect the LAN network cable to the device and then connect the power supply. The server will boot from the board that contains the firmware and user data (SD card for the Raspberry Pi device) and will automatically receive the IP address from the router (DHCP server). It is important that the server is connected to the same local network as your computer, so that you can use the search command in the configuration software Ilevia Manager.
Connection to the server (Ilevia Manager)
Follow the steps below:
Step 1: Open the configuration software Ilevia Manager (click the following link to download it: download Ilevia Manager);
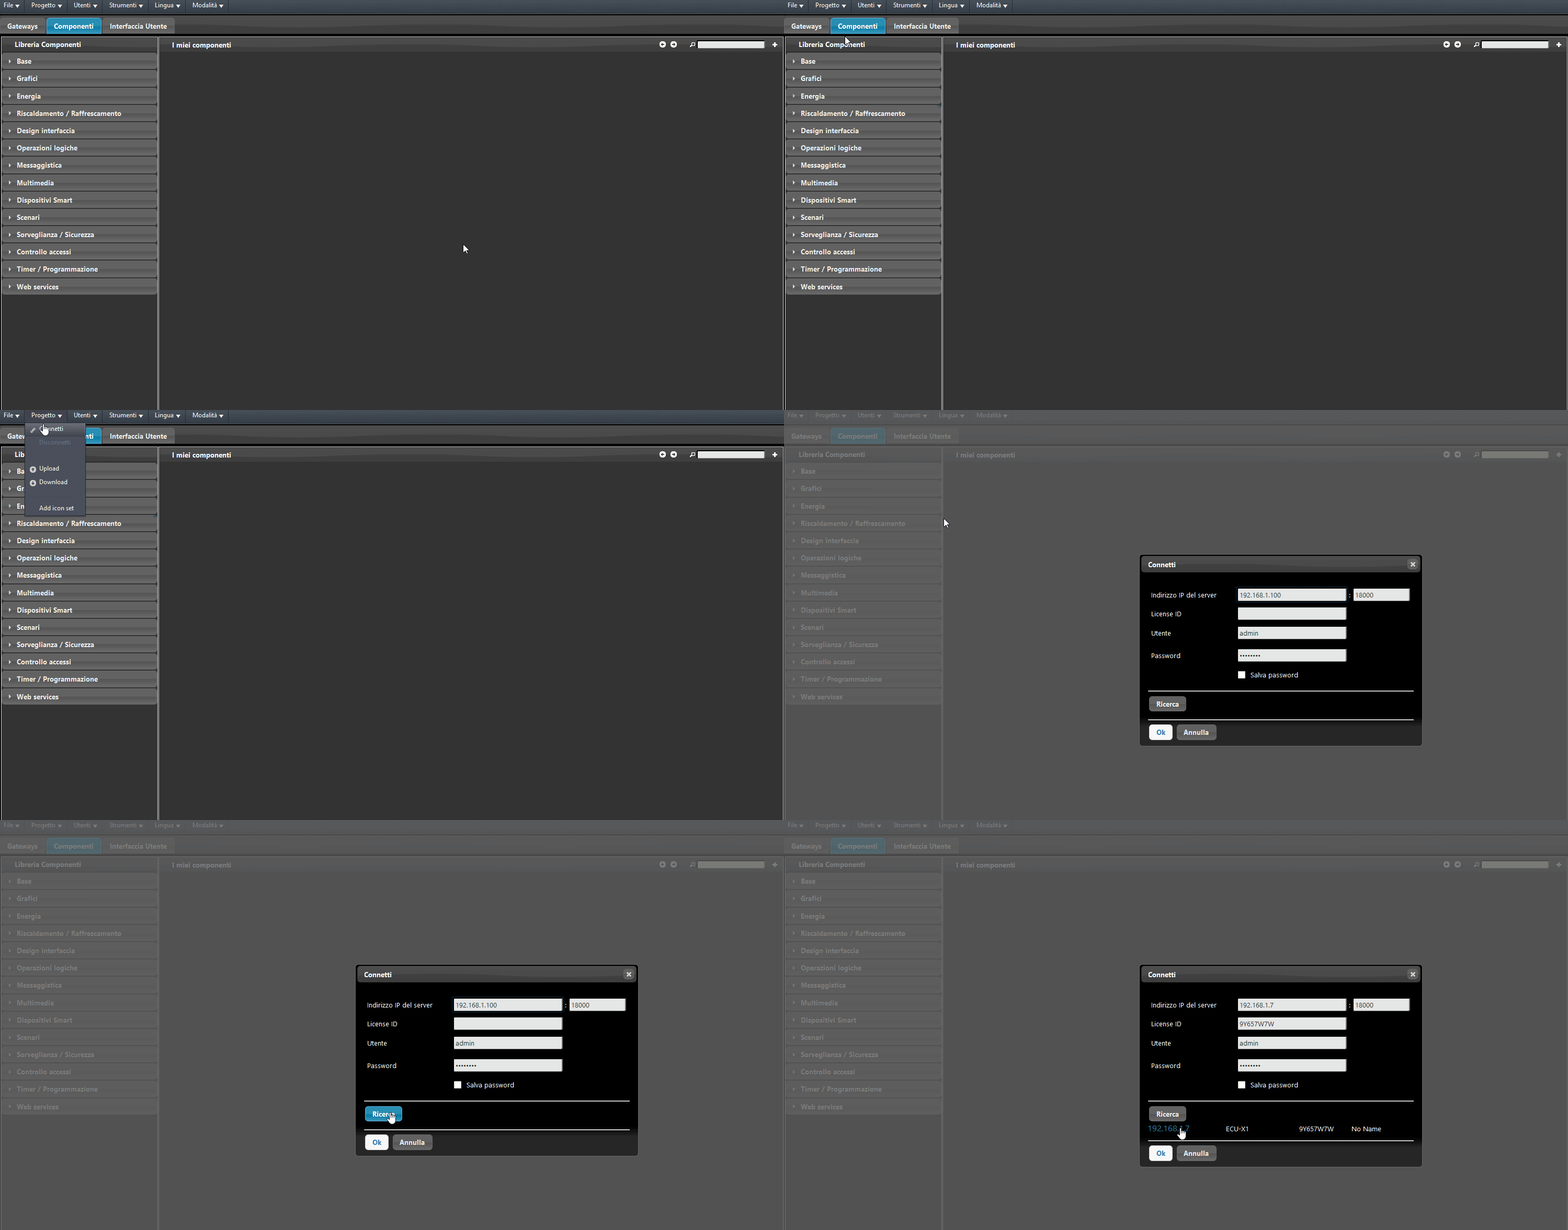
Step 2: Select Project from the top menu, then click Connect. A new window will appear in the center of the screen.
Step 3: Click the Search button to find the server within your local network. Your server details will be displayed in the space below.
Can't find the server?
Use this link. The browser will open and show a list of IP addresses of all Ilevia servers present on the network. If there is only one Ilevia server on the local network, the link will take you directly to that server's web configuration panel. Copy the IP address from the URL bar and paste it into the Server IP address text field in the dialog box in Ilevia Manager.
Step 4: Click the IP address of your server in the list displayed in the dialog box.
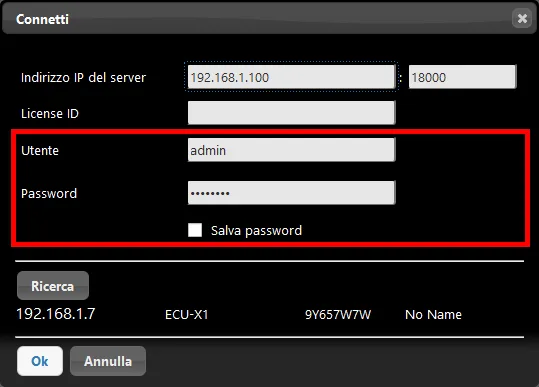
Step 5: Enter the credentials in the appropriate text fields and click OK (default credentials: Username: admin / Password: password).
You are now connected to your Ilevia server and can start configuring your project.
Connection to the server (direct connection)
If no router is available, or if you need to configure the server quickly, you can connect the server directly to your PC. You can also find the procedure on the page Direct connection to the server via PC.
Set a manual IP
If there are no DHCP servers or routers assigning IP addresses to the server, you will need to set one manually in the form 192.168.1.x. > How to change network settings (disable the DHCP option and use a static IP address)
Step 1: ADAPTERS
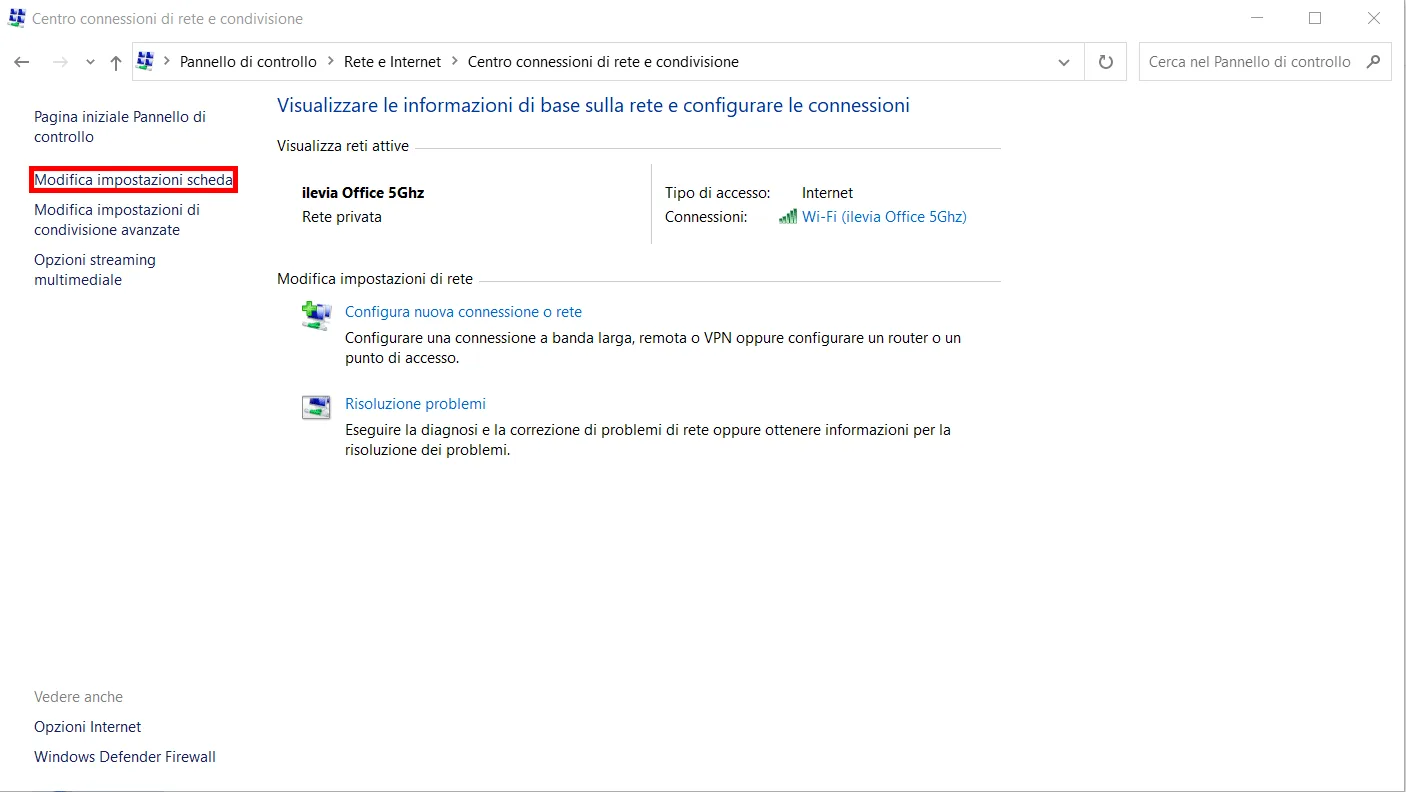
Open the Windows Control Panel and go to “Network and Sharing Center”. On the left side of the screen you will find the “Change adapter settings” option: clicking it displays all network adapters on your device.
Step 2: ADAPTER PROPERTIES
Right-click the network adapter (the one connected to the Ilevia server) to access the adapter properties.
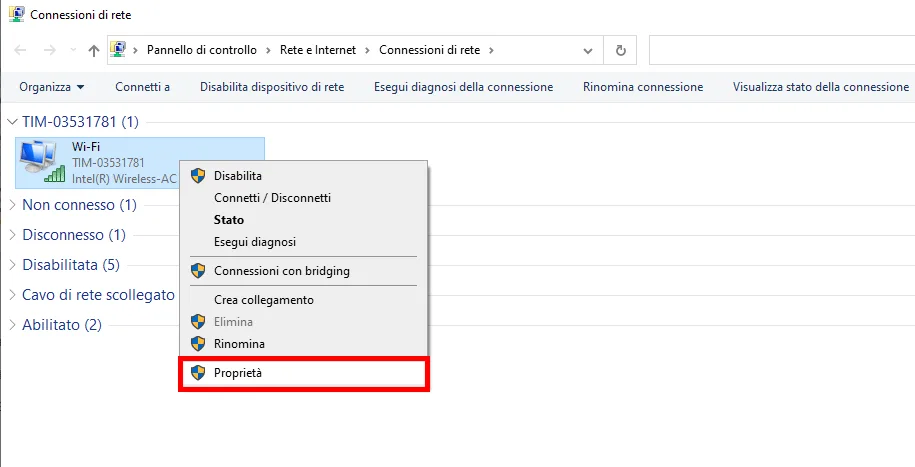
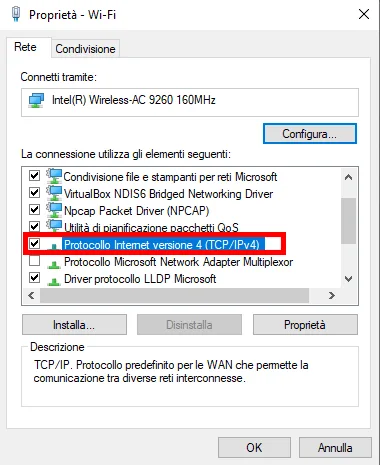
Step 3: IPV4 Scroll to the Networking section, select “Internet Protocol Version 4 (TCP/IPv4)” and click the “Properties” button to change the adapter's IPv4 properties.
Step 4: IPV4 PROPERTIES
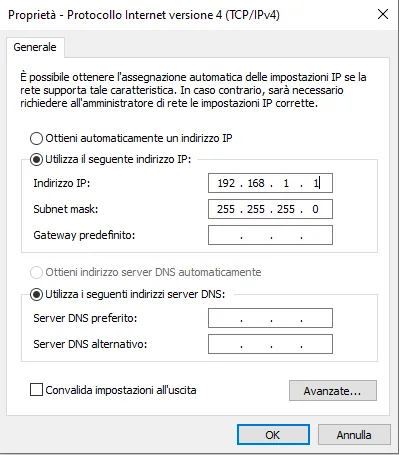
Here you can assign a static IP address to your computer. Click the “Use the following IP address” option and enter an IP address and the corresponding network mask. The computer IP address must not be the one the X1 server will use for the connection. By default, in the absence of a router, the server IP address is 192.168.1.100, so the computer IP must be different, for example 192.168.1.1 (simulating a router).
Press Enter after entering the IP address: the network mask will be completed automatically with 255.255.255.0. Now click OK and close the Windows Control Panel.