
Calculator component usage example
Step-by-step example of using the Calculator component in Ilevia Manager: sum of two adjustable values with the result displayed in an Info component.
INTRODUCTION
In this guide you will see in practice the usefulness of the Calculator component within an Ilevia project.
In this example, the operation is performed using two input components. The components used are for demonstration purposes only: the Calculator allows you to use different types of components.
COMPONENT CONFIGURATION
Step 1:
First, drag two Adjustable value components into the “My components” section.
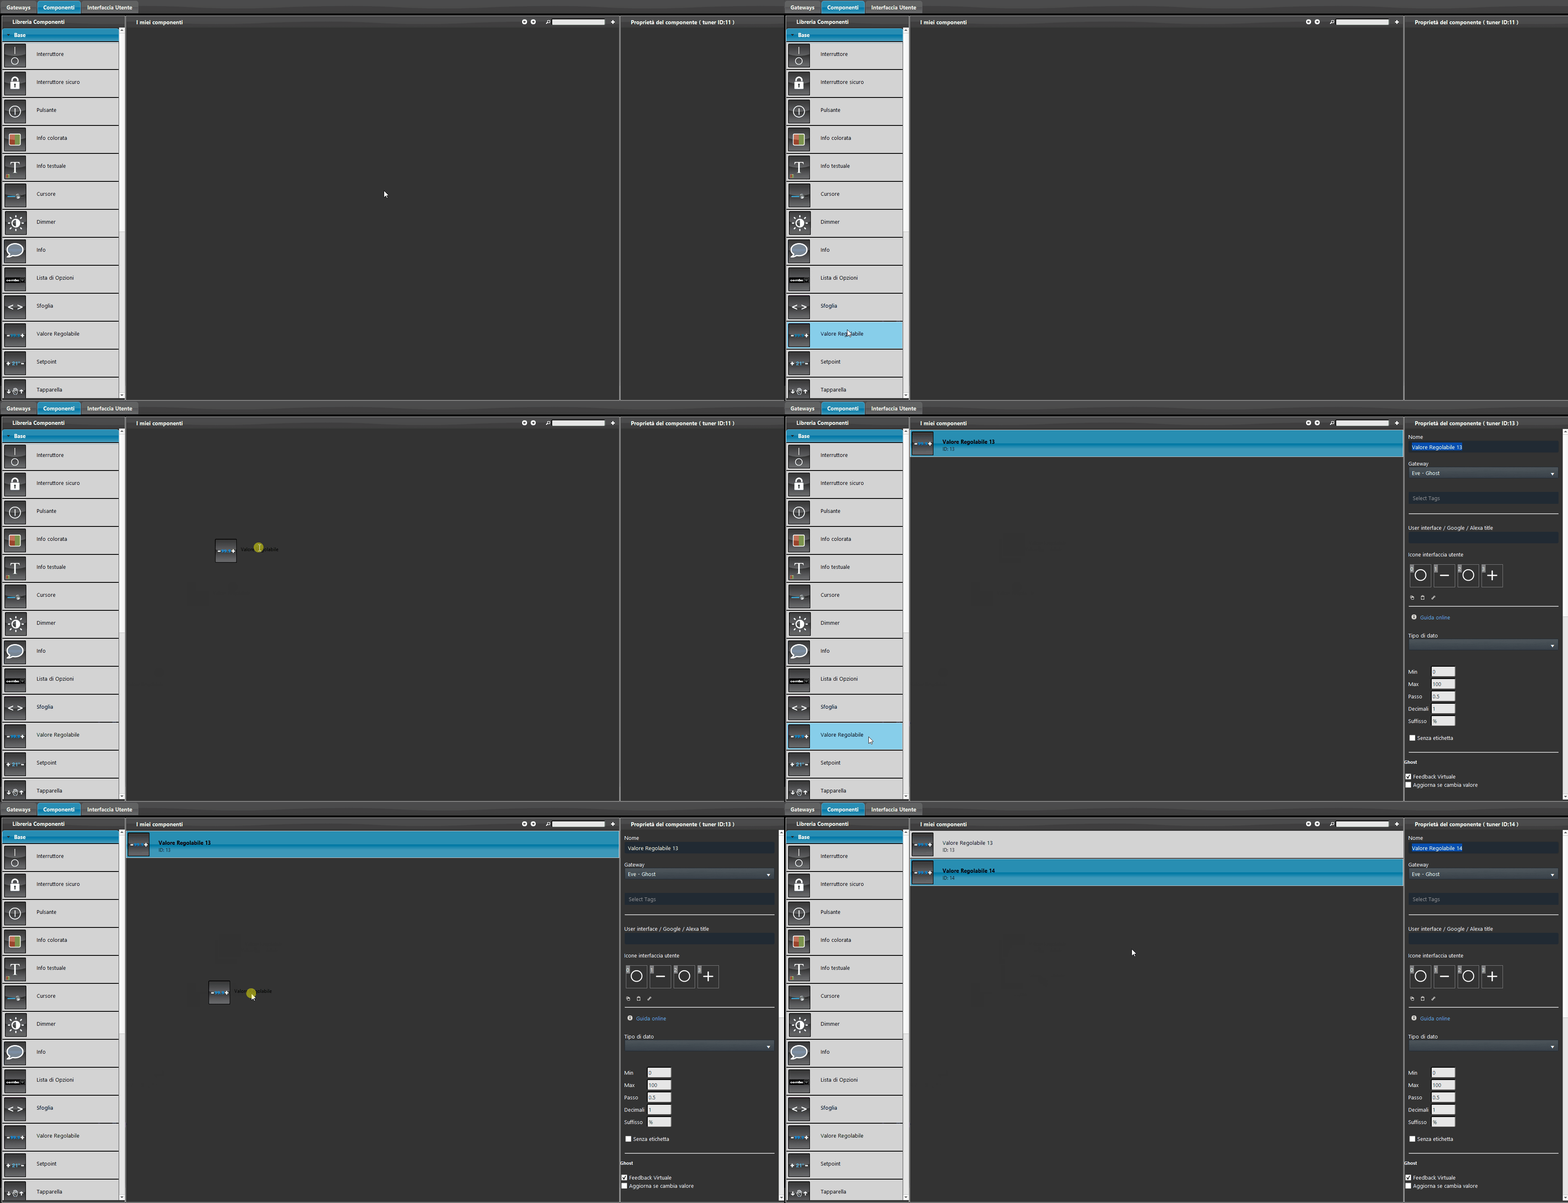
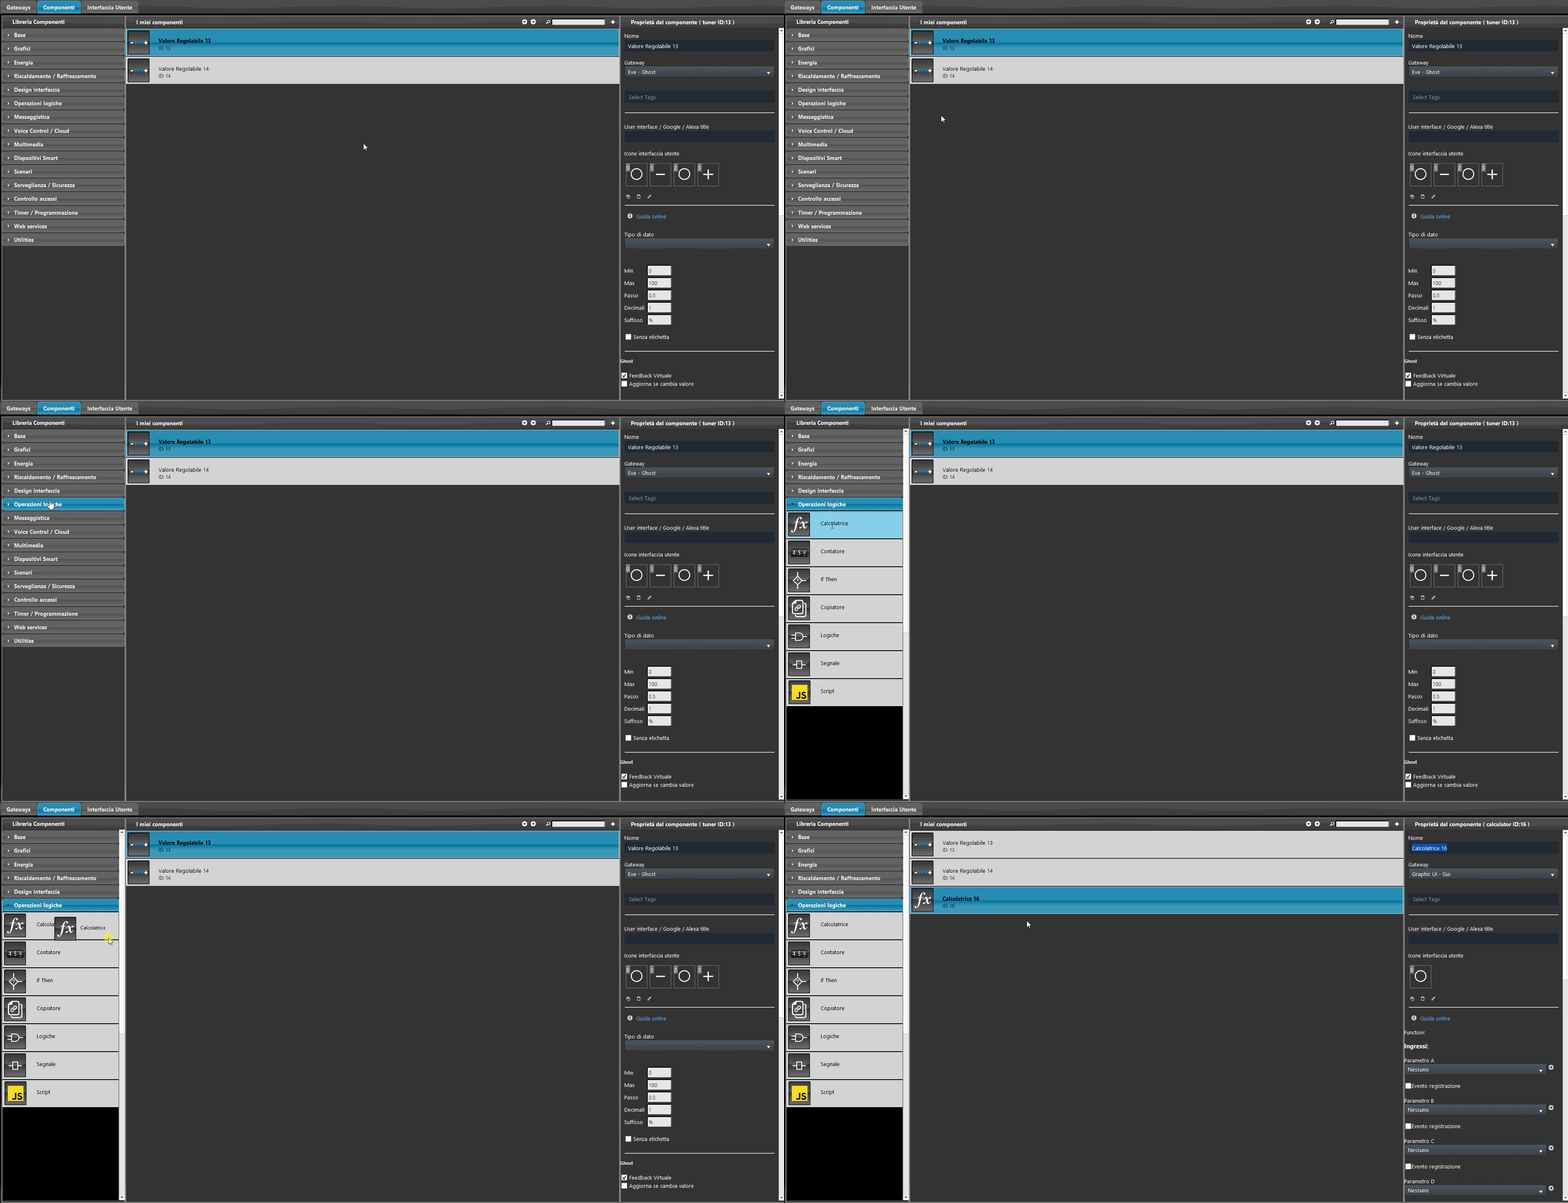
Step 2:
Then go to the “Logical operations” menu on the left, in the “Component library” section, and add a new Calculator component to the project.
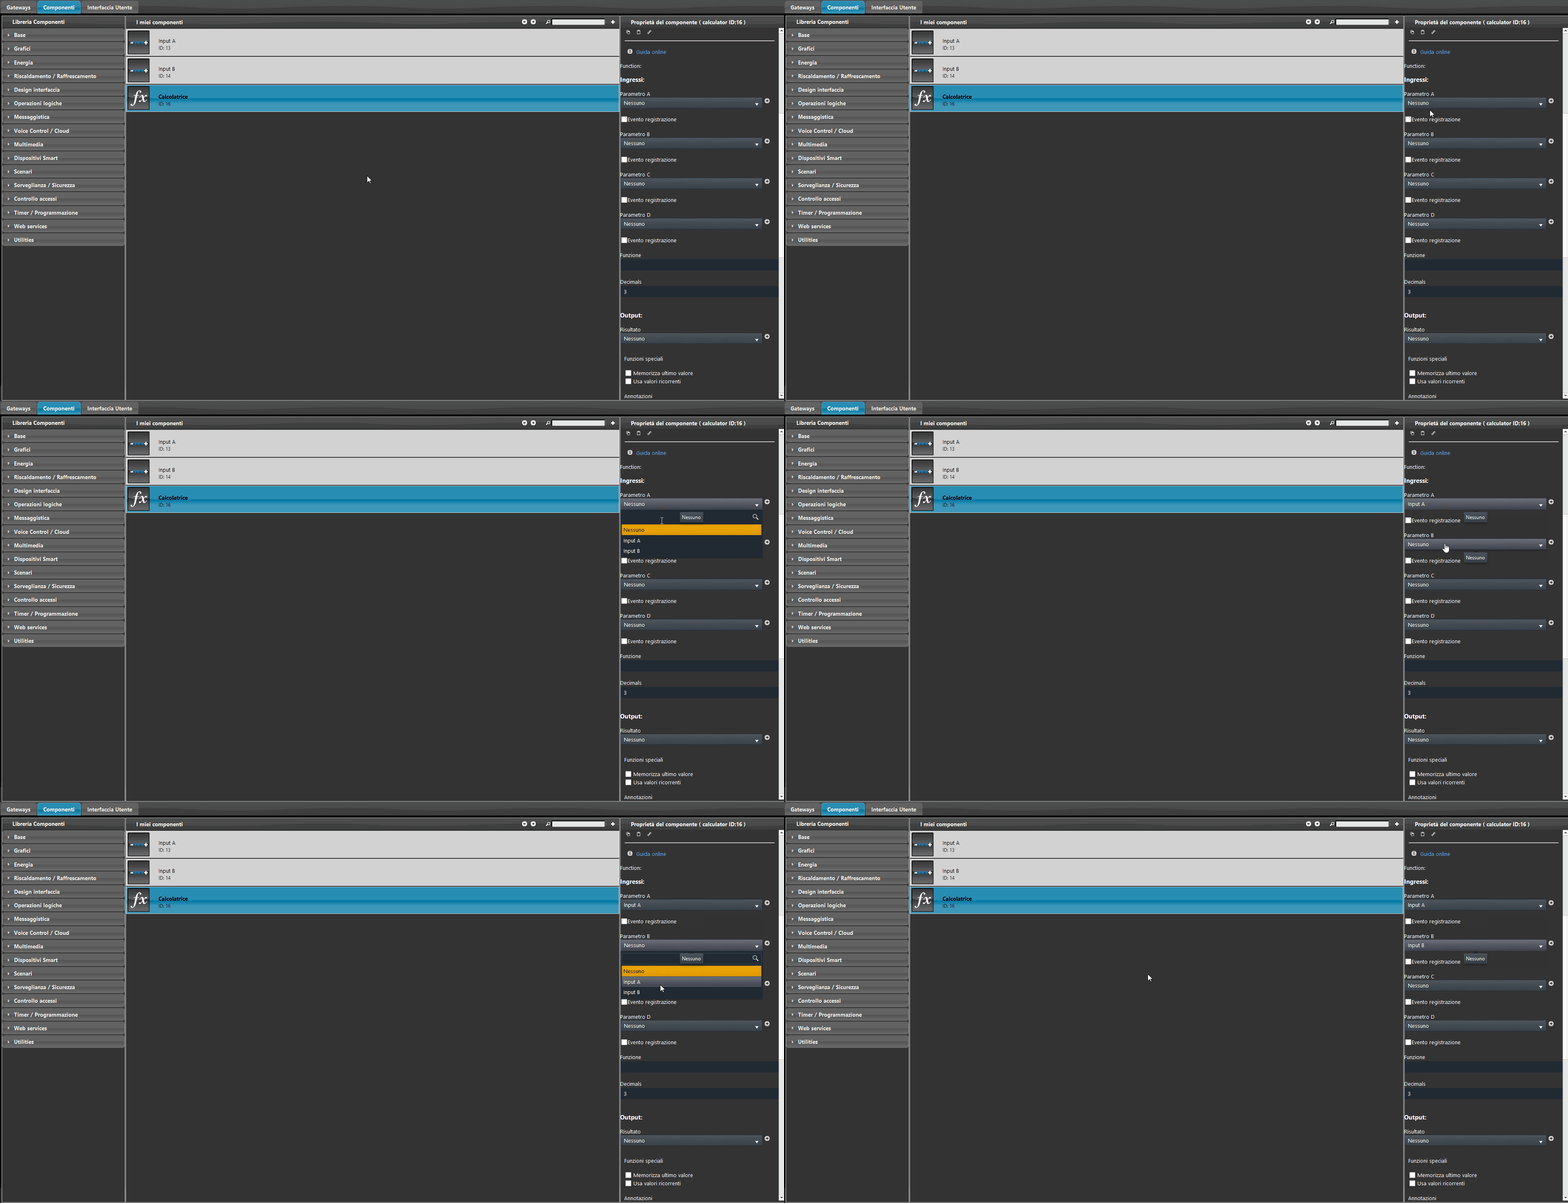
Step 3:
To add the input components, click the corresponding drop-down menus in the properties of the Calculator component.
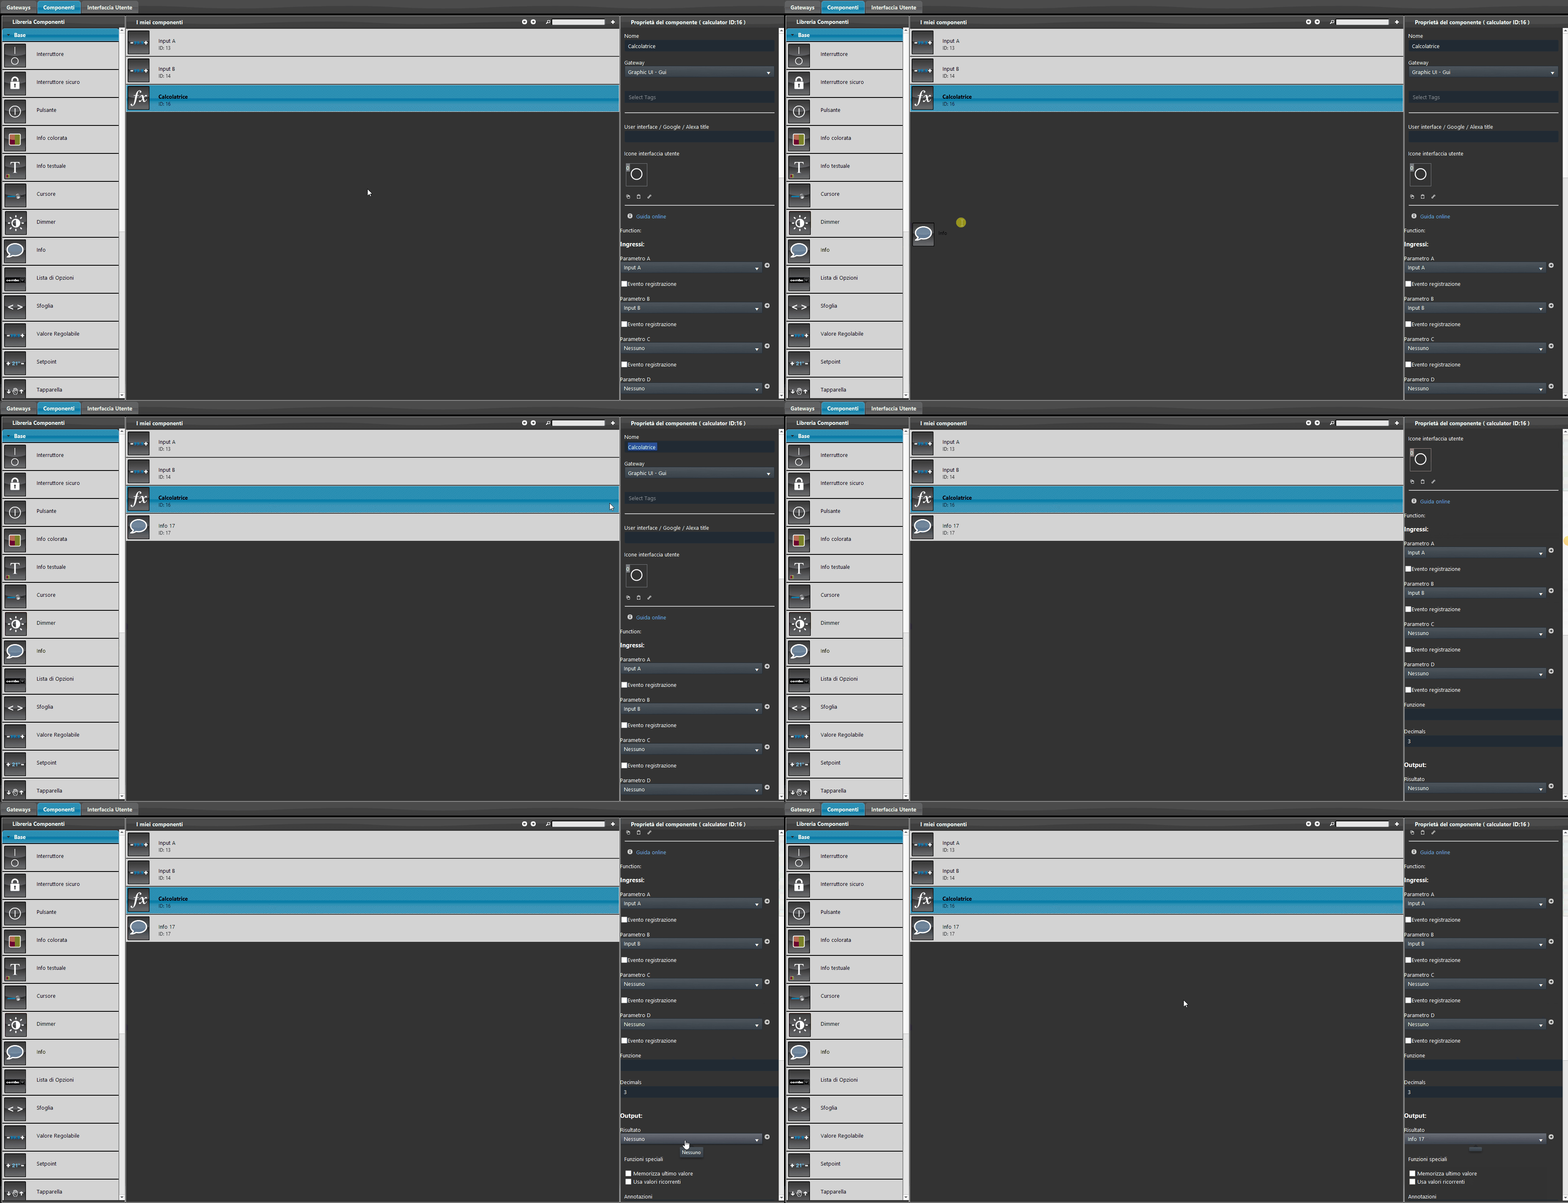
Step 4:
Add a new Info component in the “My components” section: it will be used as the output of the operation performed by the Calculator component.
Step 5:
Once the component has been added, the next step is to set the operation that will be performed by the Calculator: in this example it adds the value of the first input to the second.
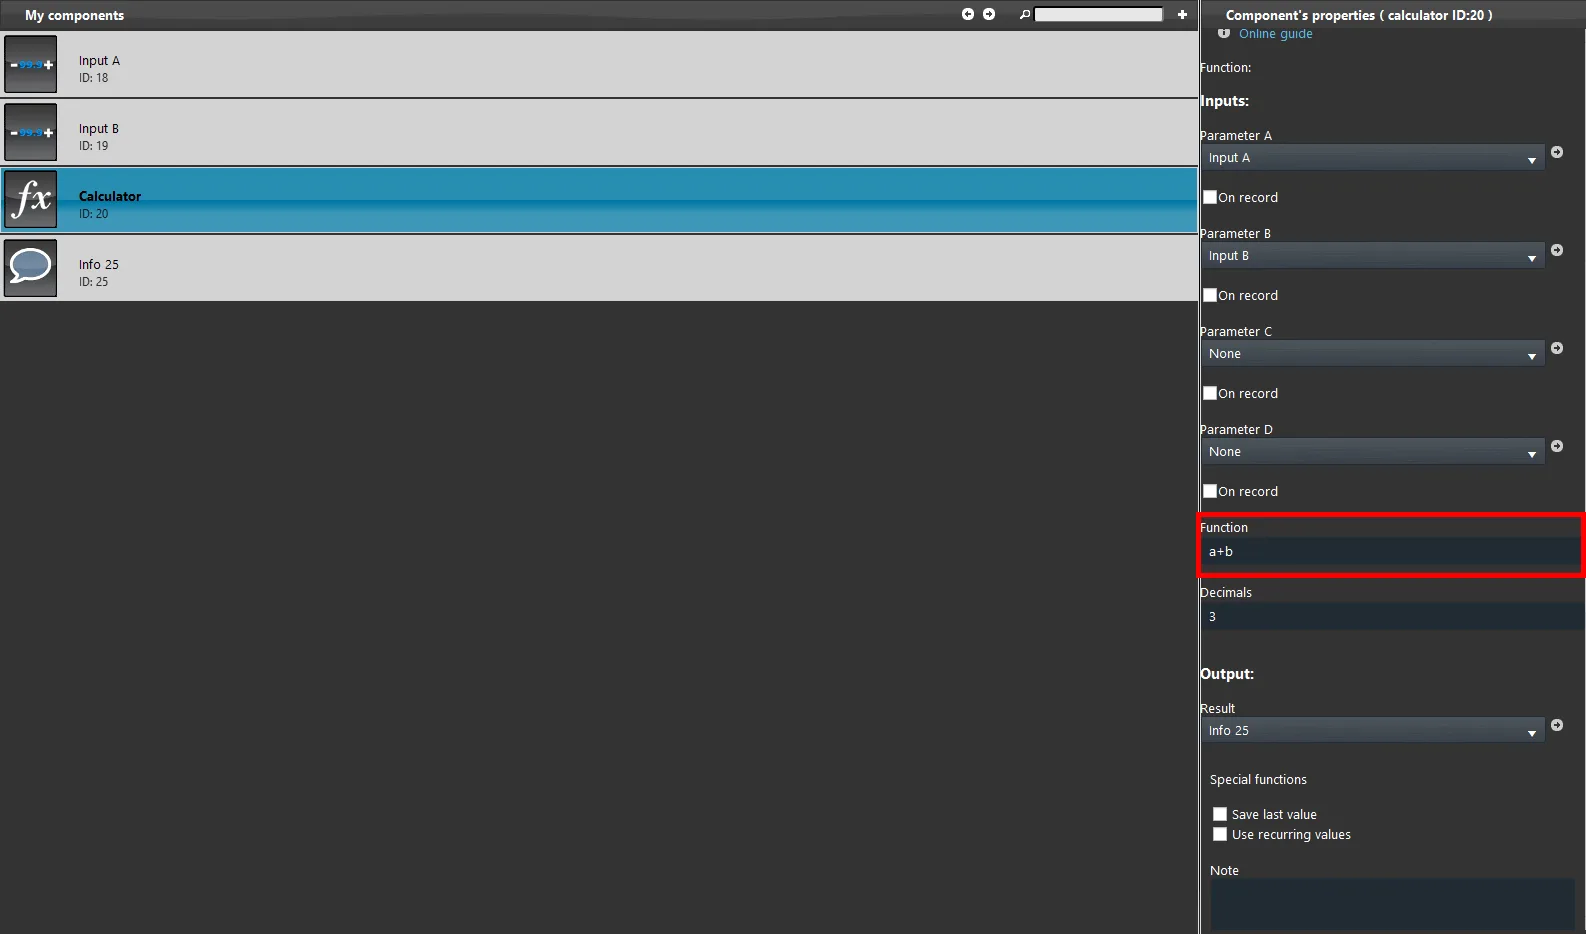
Step 6:
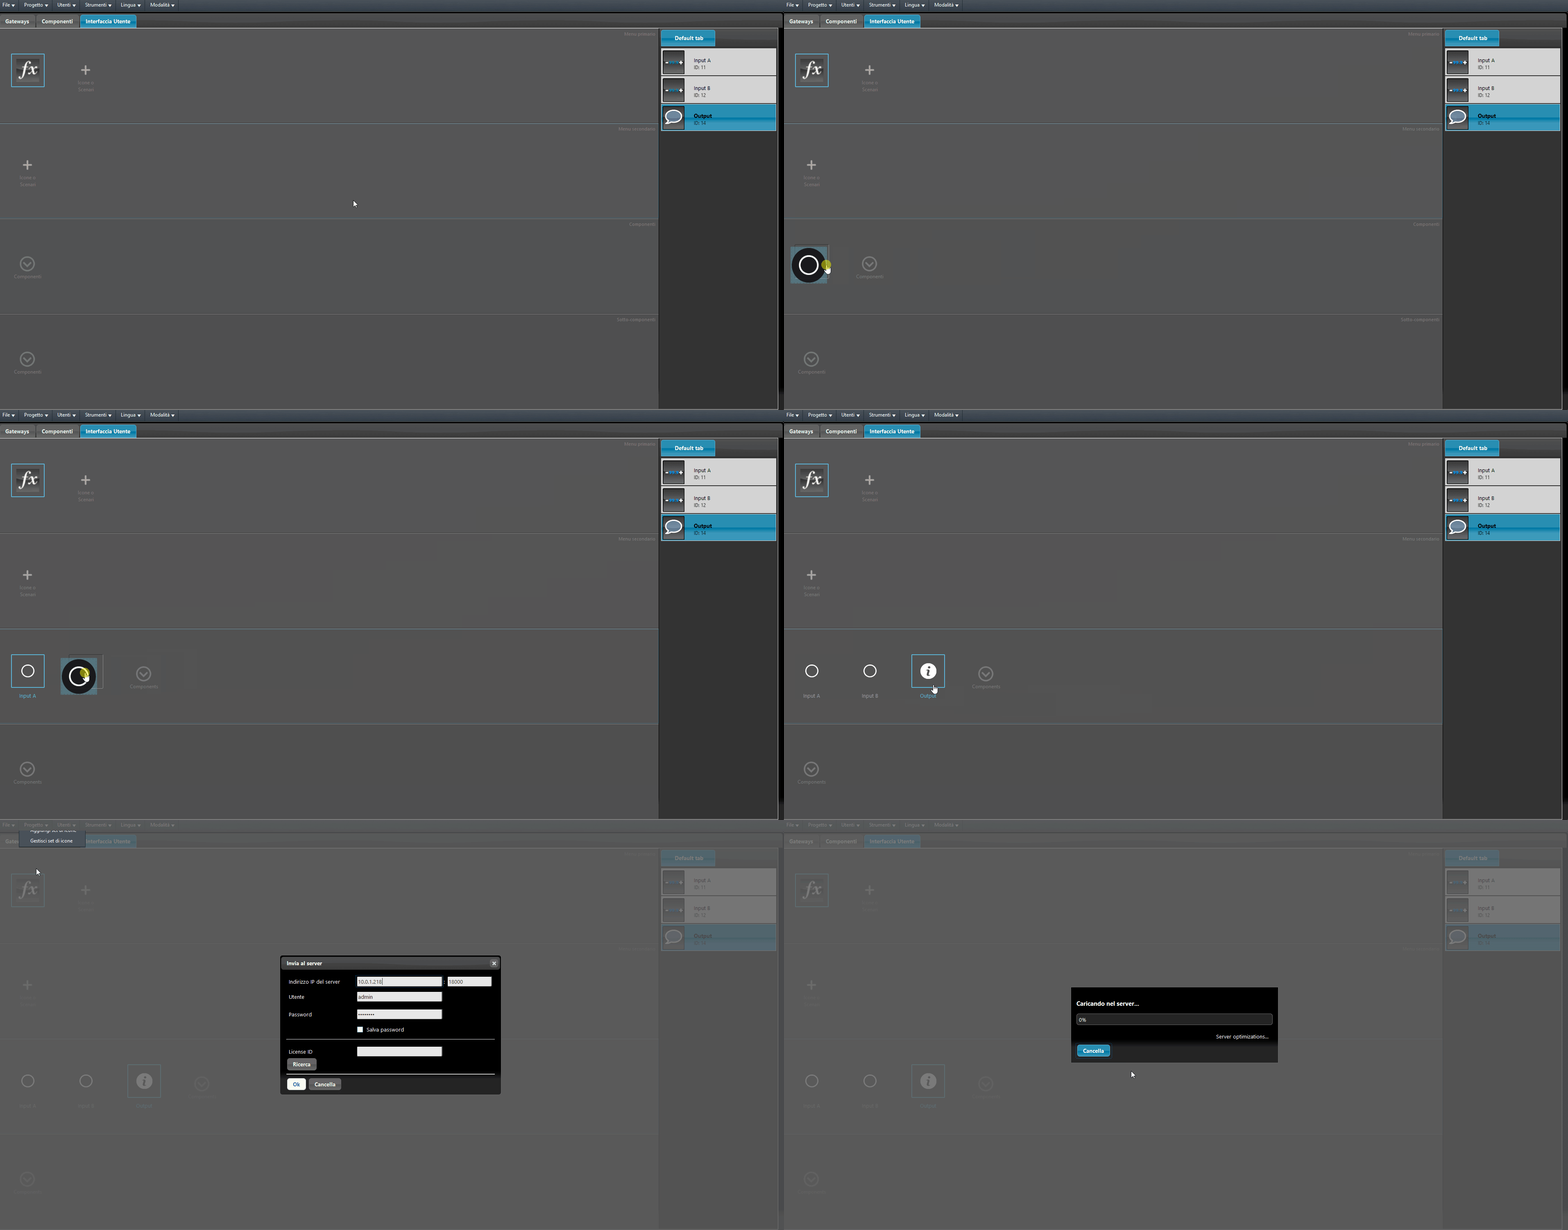
To test the Calculator component, add the components to the user interface and upload the project to the Ilevia server.
Visual result
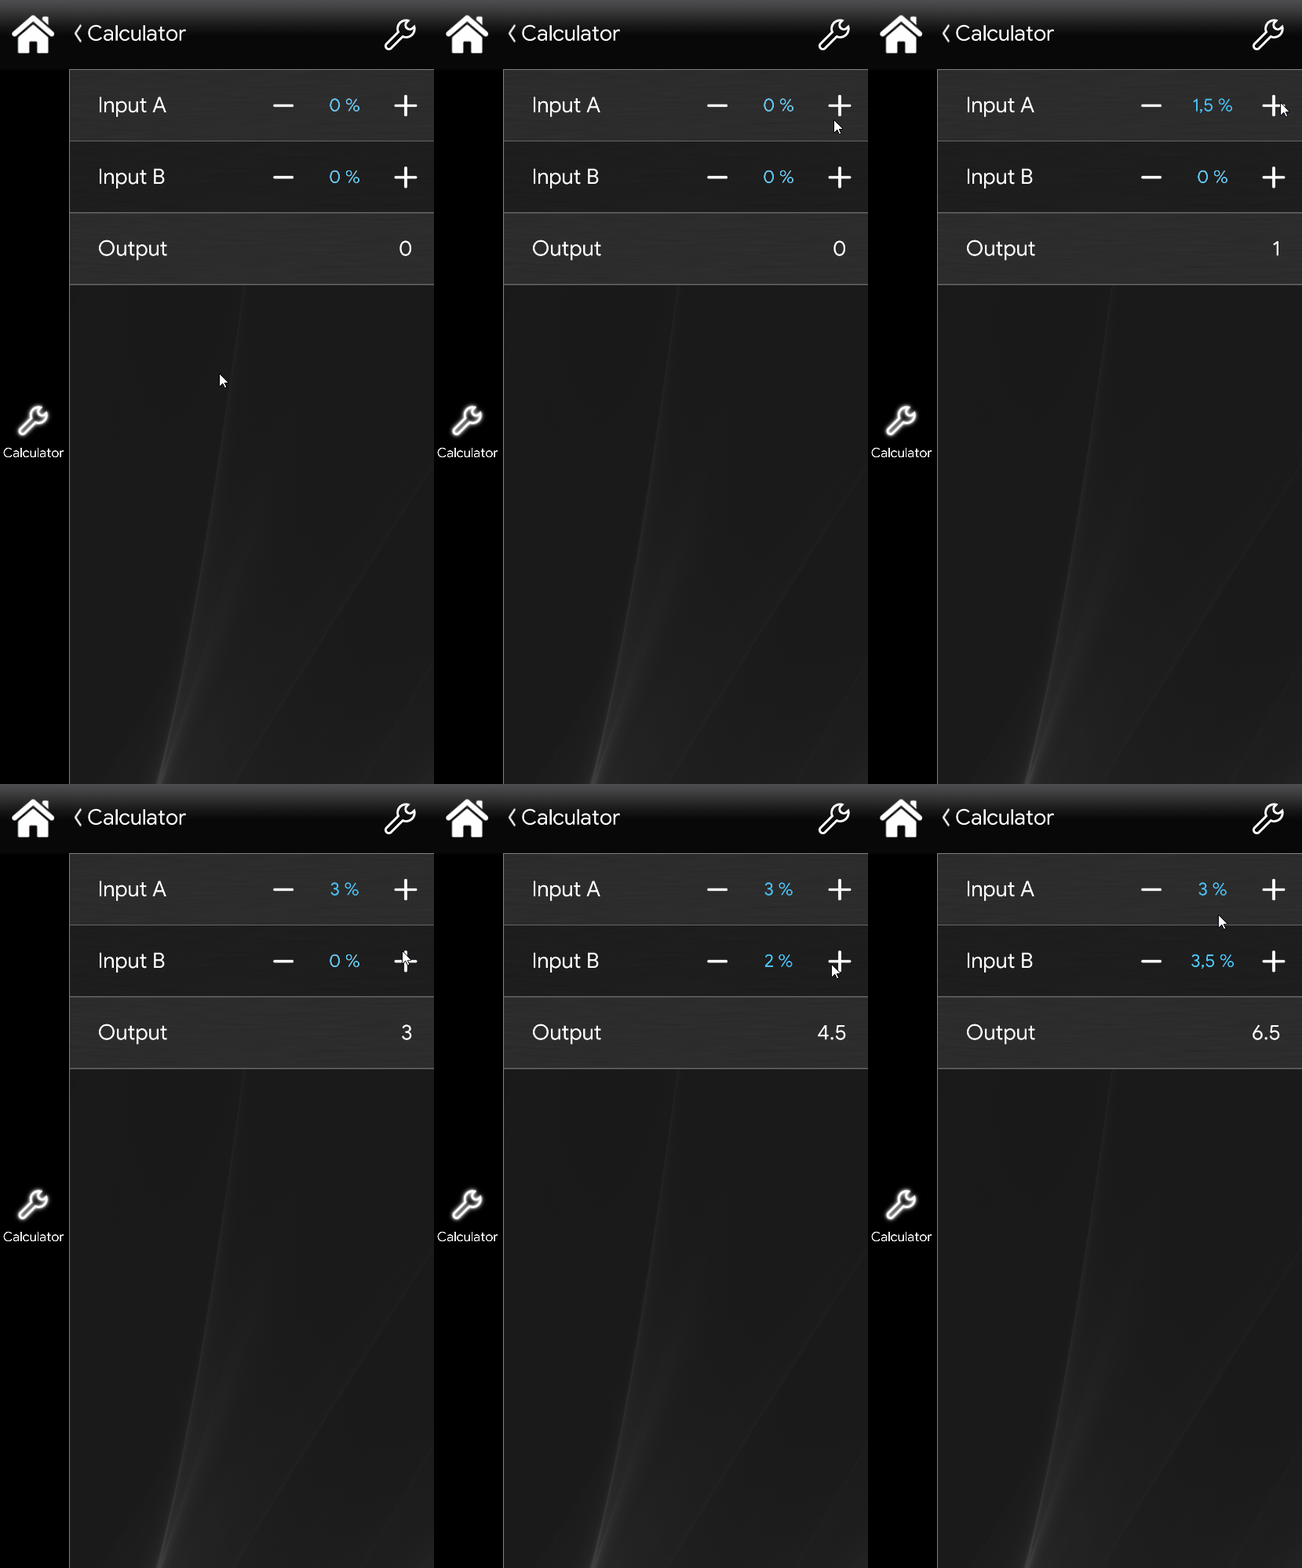
To test the operation of the Calculator component, change the value of the Adjustable value components.
In our case, the operation performed is a+b, but many operations are possible.
Download the test project
Click the link to download the sample project and try it.