Integration of the Doorbird intercom with the Ilevia server
How to configure the Doorbird intercom (SIP) and Ilevia Manager to receive intercom calls in Ilevia Control.
Introduction
Intercoms are communication devices designed for instant 2-party communication within specific areas. They typically consist of a Master unit and multiple sub-units, and allow direct communication without the need for external networks. This guide shows how to integrate the Doorbird intercom (model D1101V-F-GB, firmware V000150) with the Ilevia server.
Intercom configuration
Step 1:
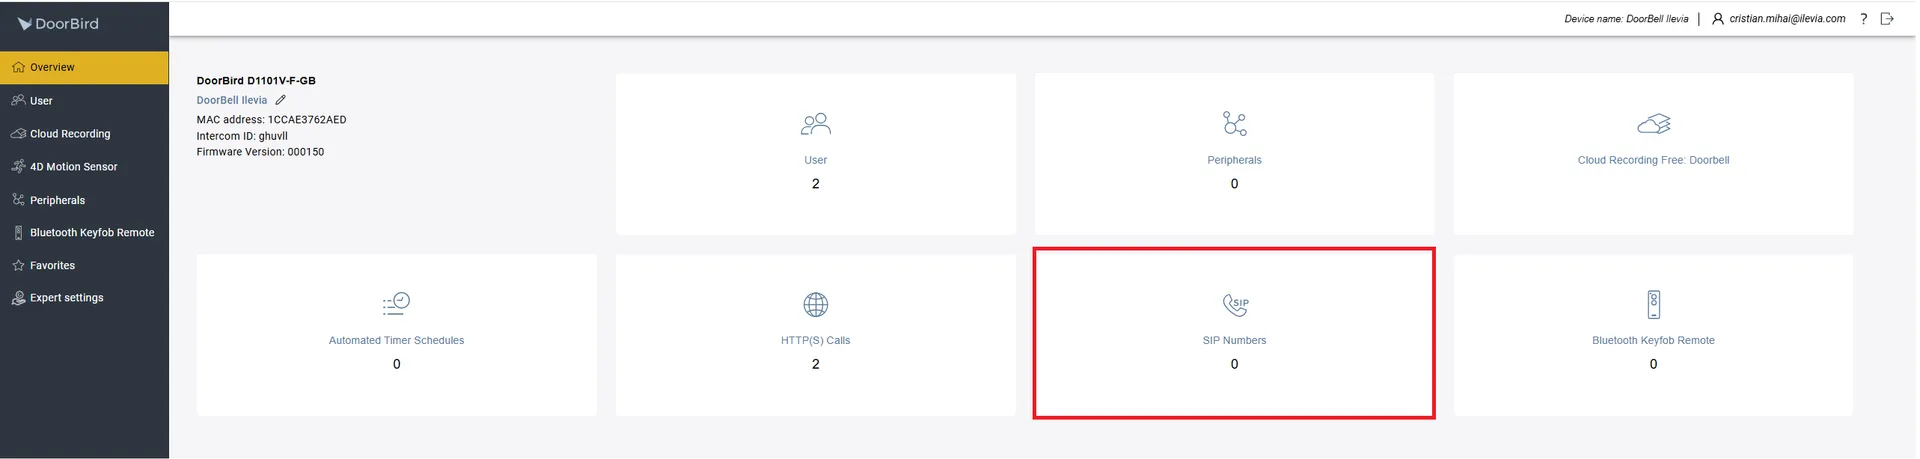
Connect and log in to the Doorbird intercom interface. Open the Overview section.
Step 2:
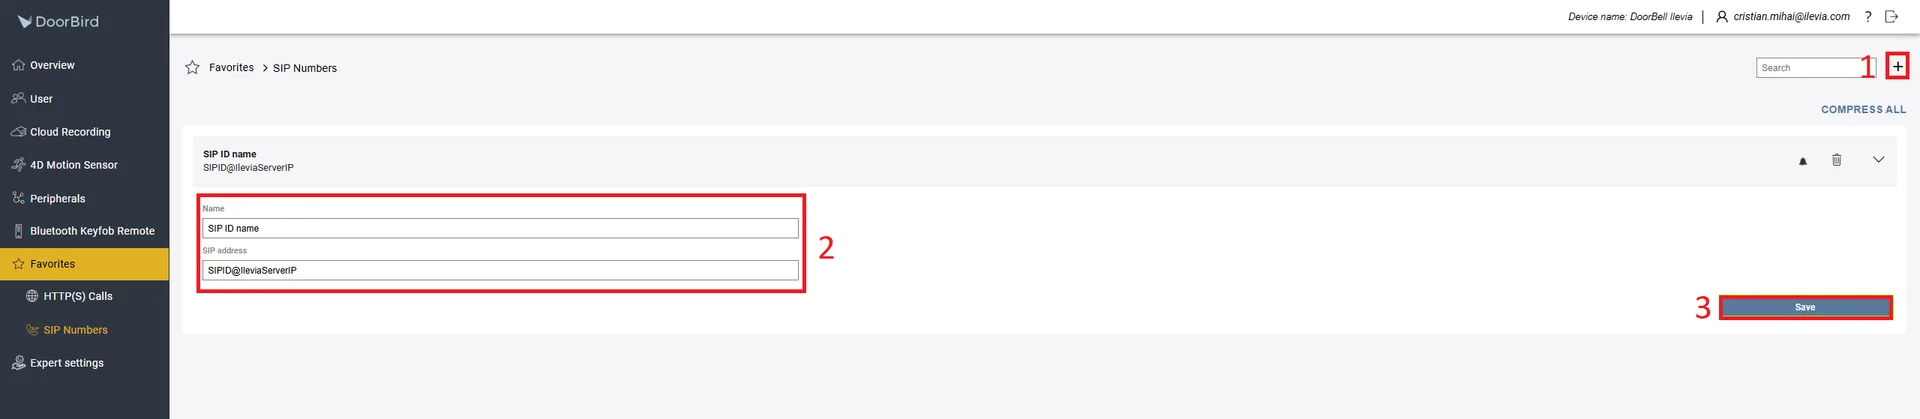
1. Click “+“;
2. Create a new SIP user ID and SIP ID, and enter the Ilevia server IP address in the SIP Address parameter (replace <Ilevia server IP> with the Ilevia server IP address).
3. Click Save to apply the settings.
Step 3:
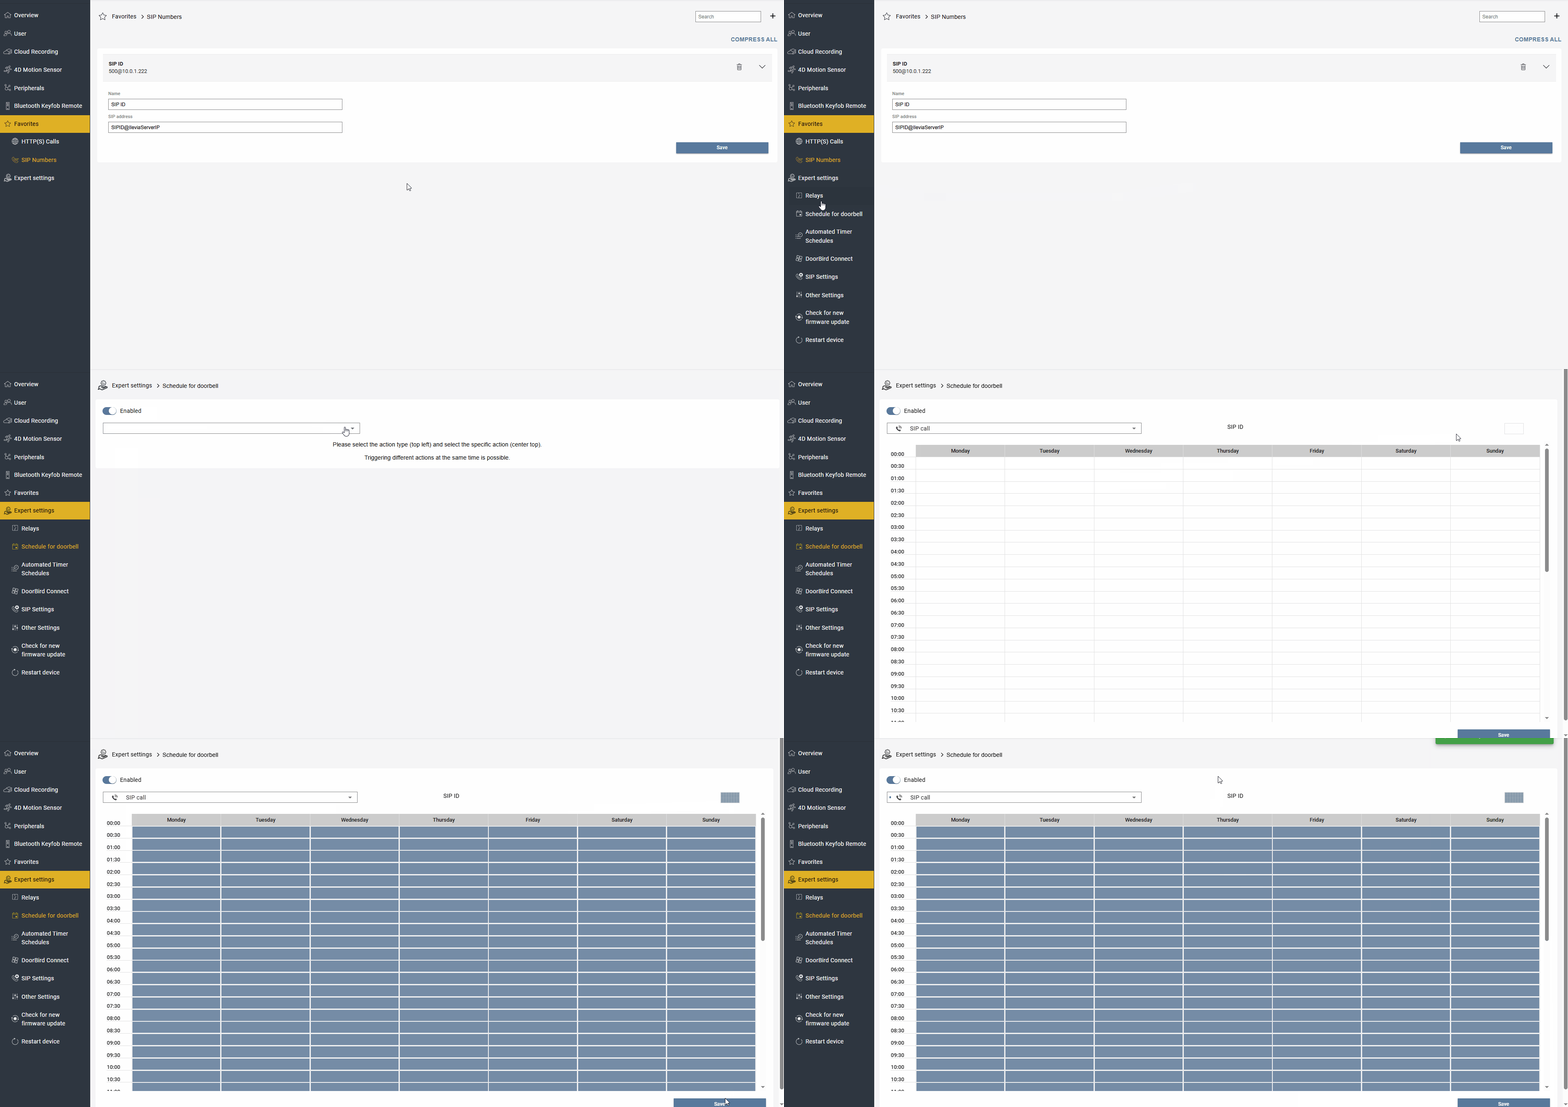
Open the Expert settings menu in the web interface and open “Schedule for doorbell”. Click Enable to enable the parameters, select “SIP calls” from the drop-down menu and finally select all days of the year ("Select all" button).
Step 4:
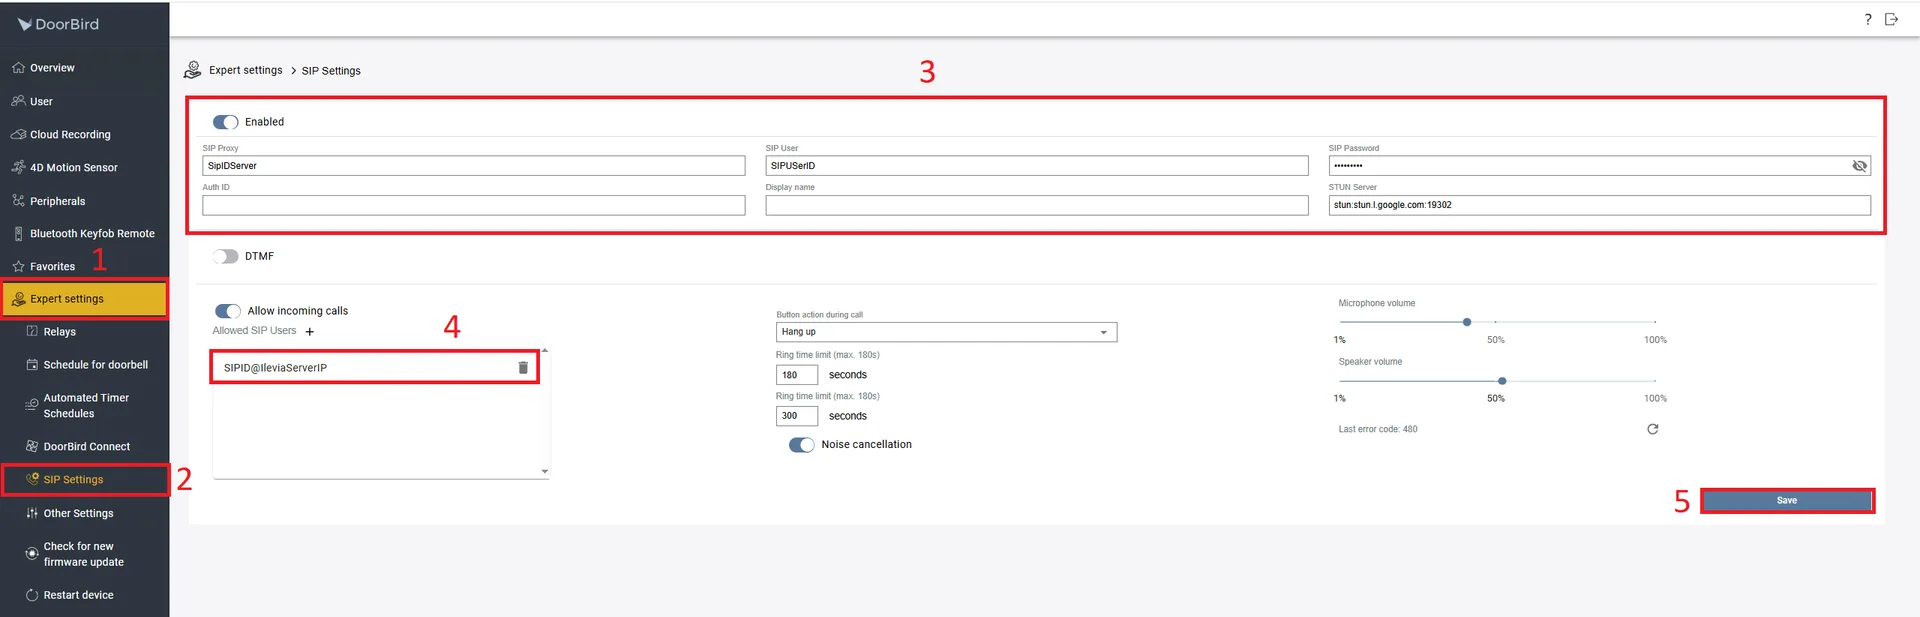
1. Go to Expert settings;
2. Go to SIP Settings;
3. Enable the SIP settings option. Replace IleviaServerIP with the Ilevia server IP, then replace SIPUserID with an ID of your choice. Add a password for the SIP user.
4. Enable Incoming calls and add a new enabled SIP User. Replace SIPID with the desired SIP ID that is set in the SIP Group component in the Ilevia Manager software.
5. Finally click Save to save the settings.
Ilevia Manager configuration
Step 1:
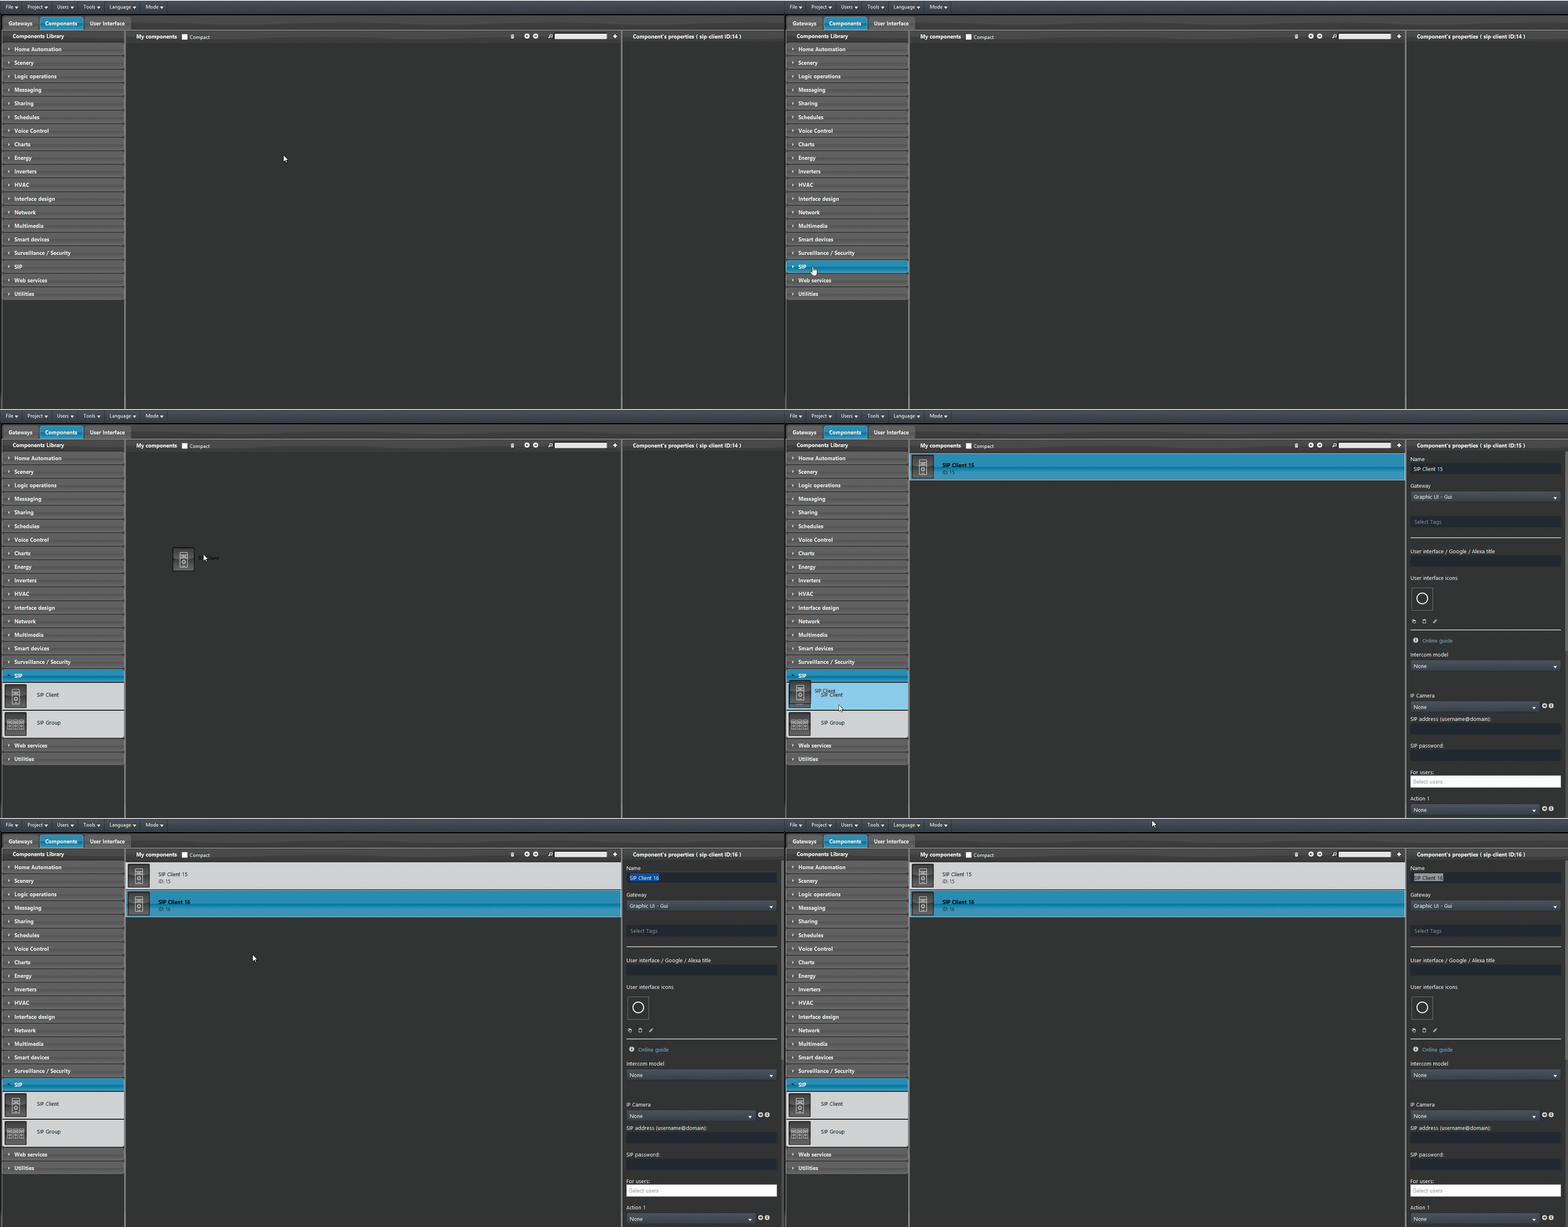
Open the configuration software Ilevia Manager, open the SIP section from the component library and add 2 SIP Client components.
Step 2:
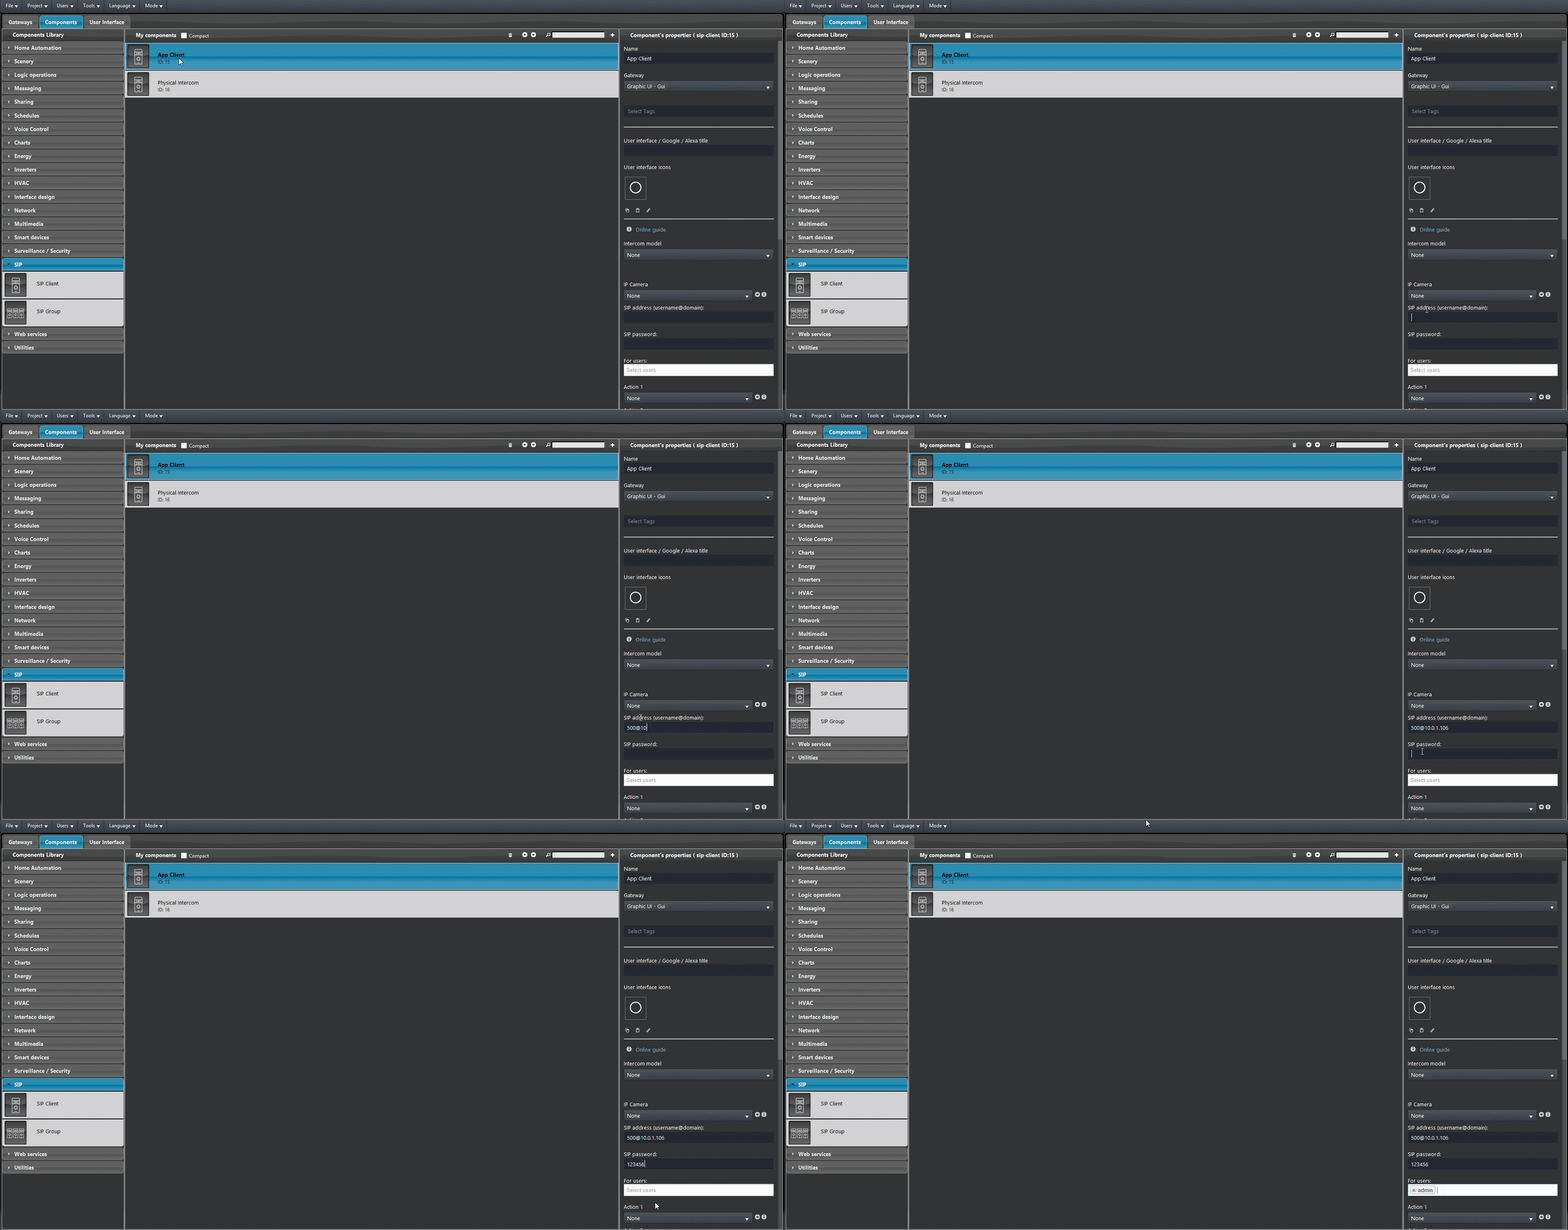
Select one of the 2 SIP Client components and, in the menu on the right, enter the following in SIP address: <SIP-Address>@<Ilevia-server-IP-address>. Replace <SIP-Address> with the SIP ID set in the intercom configuration and replace <Ilevia-server-IP-address> with the IP address of your X1 server. Finally, enter the password set in the intercom configuration in SIP Password and select the user who will receive the calls in For users.
Step 3:
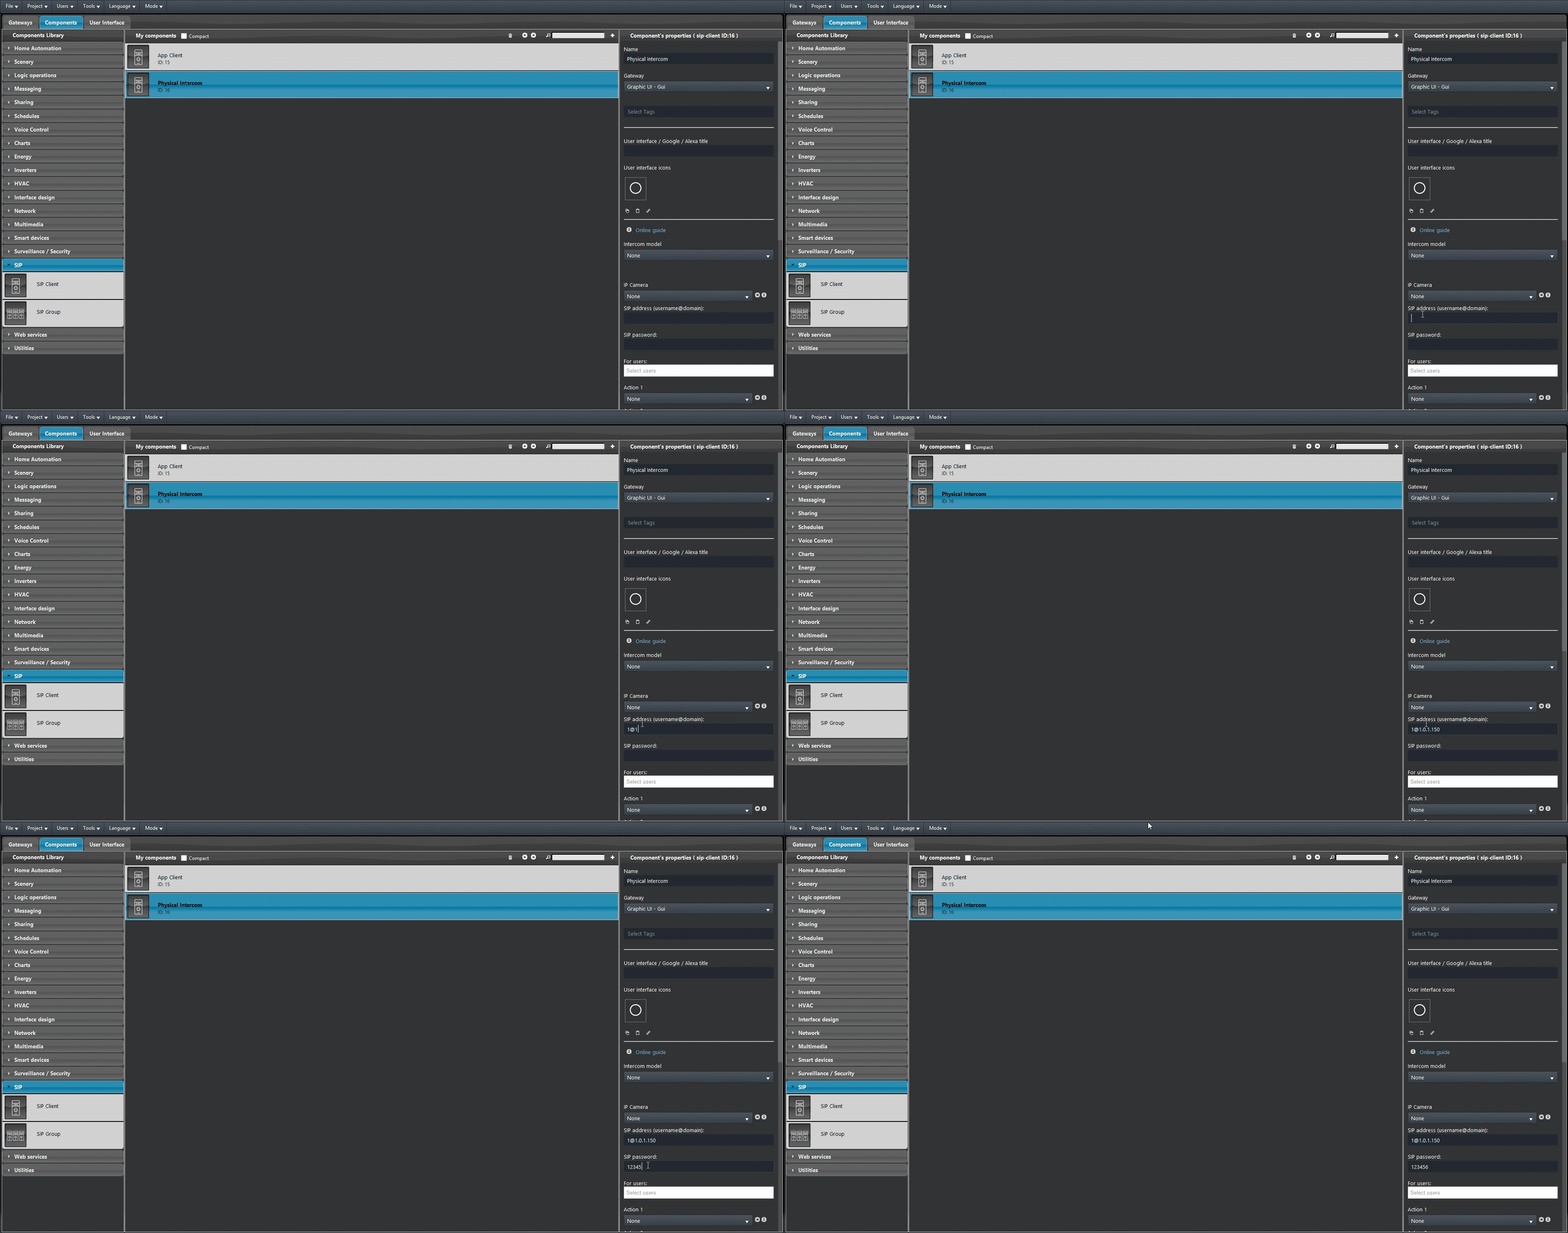
Select the second SIP Client and, in the menu on the right, enter the following in SIP address: <SIP-Address>@<Doorbird-intercom-IP-address>. Replace <SIP-Address> with the SIP user ID set in the intercom configuration and replace <Doorbird-intercom-IP-address> with the IP address of your Doorbird intercom. Finally, enter the password set for the SIP user in the intercom configuration in SIP Password.
Step 4:
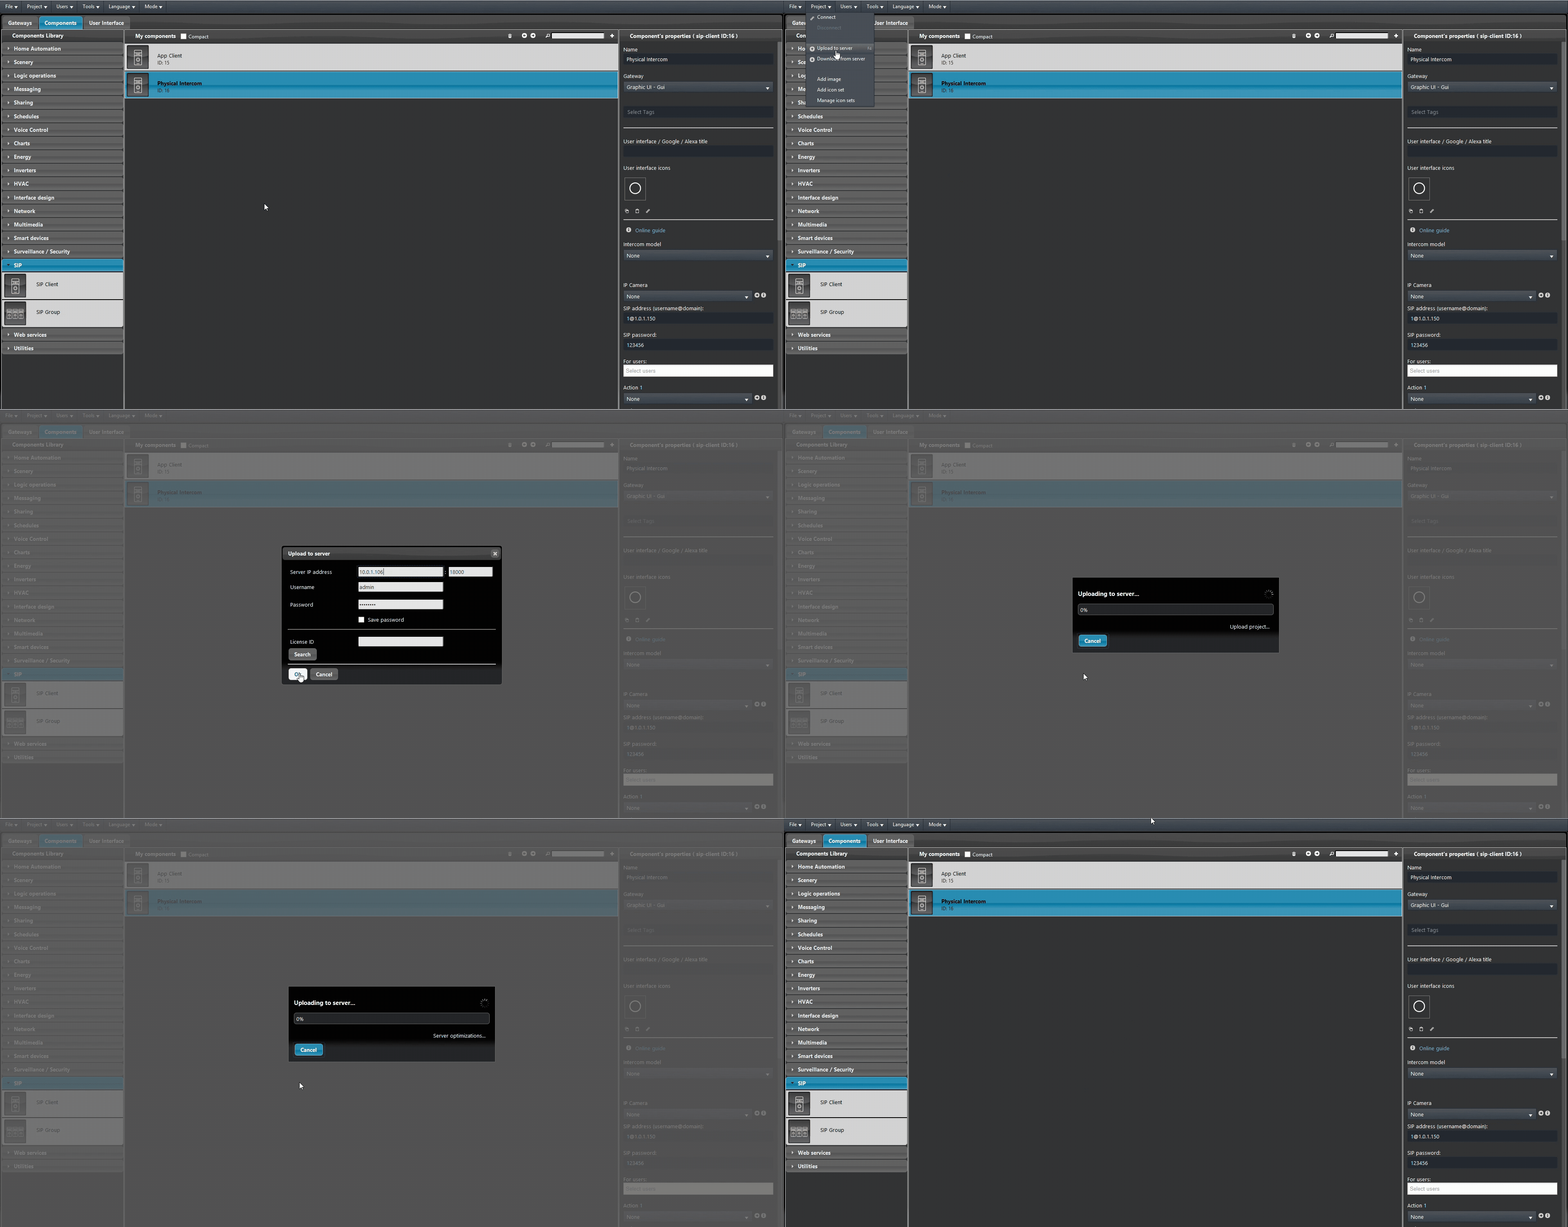
Finally, upload the project to the server.
Camera integration (optional)
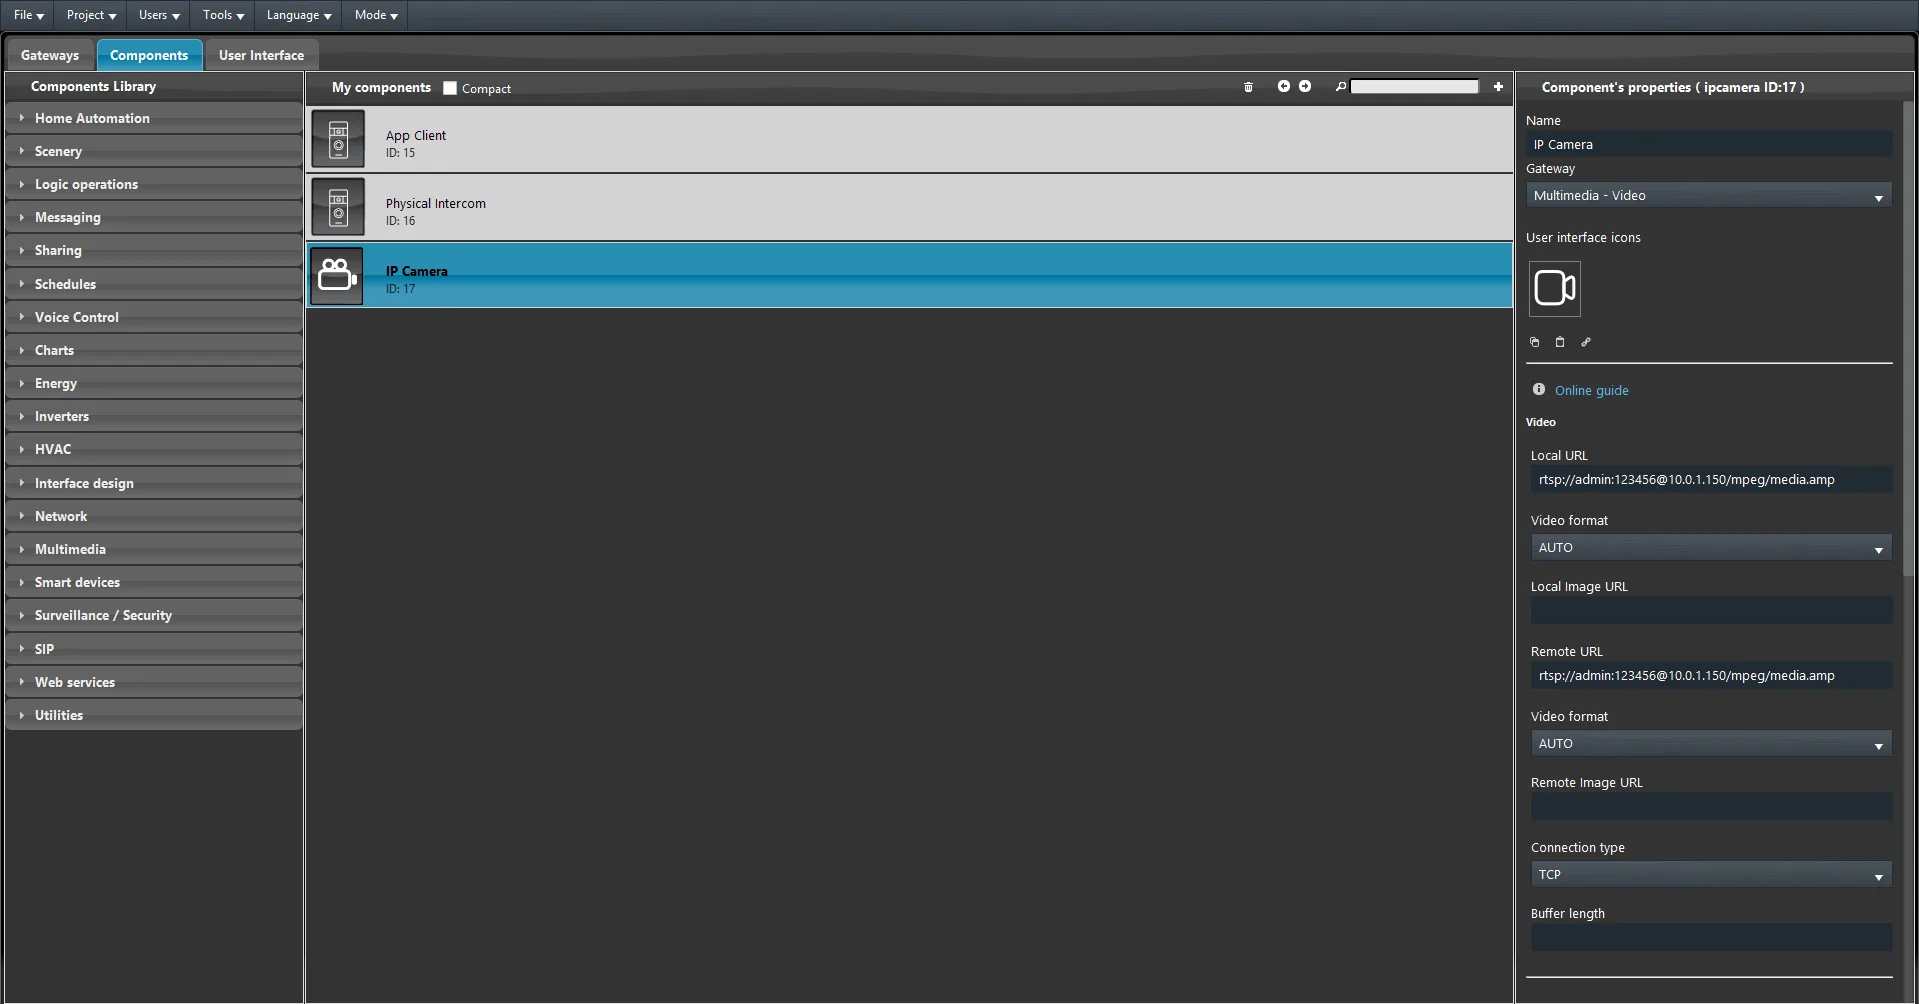
Add a new IP camera component to the project, then apply the RTSP URL in the component parameters as follows.
rtsp://<User1>:<User1 password>@<Intercom IP address>/mpeg/media.amp
Where <User1> must be replaced with the user name present in the intercom web interface (e.g. admin), <User1 password> with the actual user password and <Intercom IP address> with the current IP address of your intercom on the local network.
Ilevia Control
Step 5:
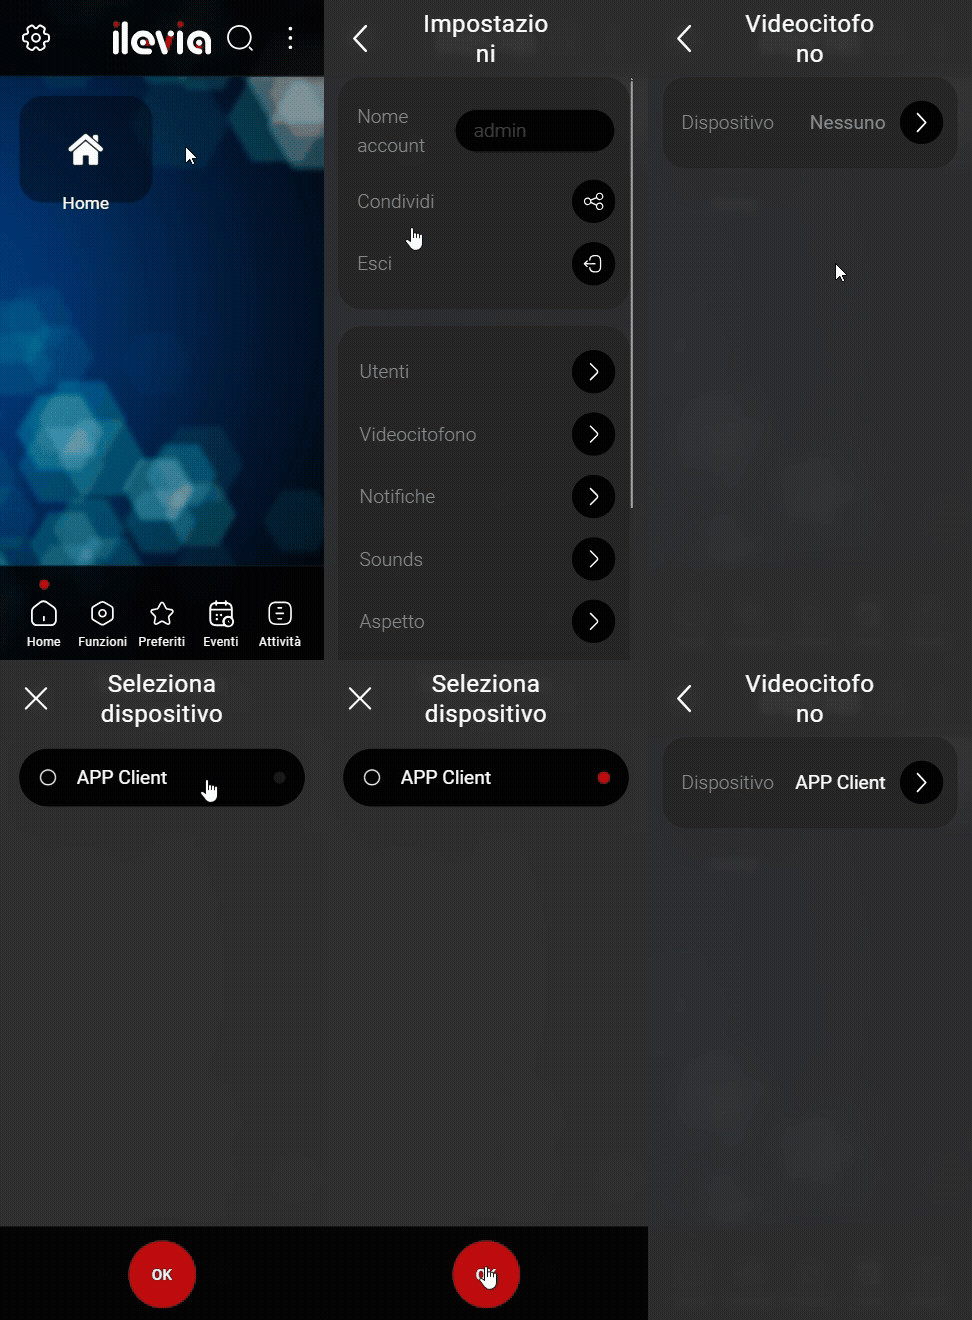
Open the Ilevia Control app and go to the settings, select Video intercom and then go to Device. In this window, select your intercom by clicking it and then press OK.
Interface display
Step 6:
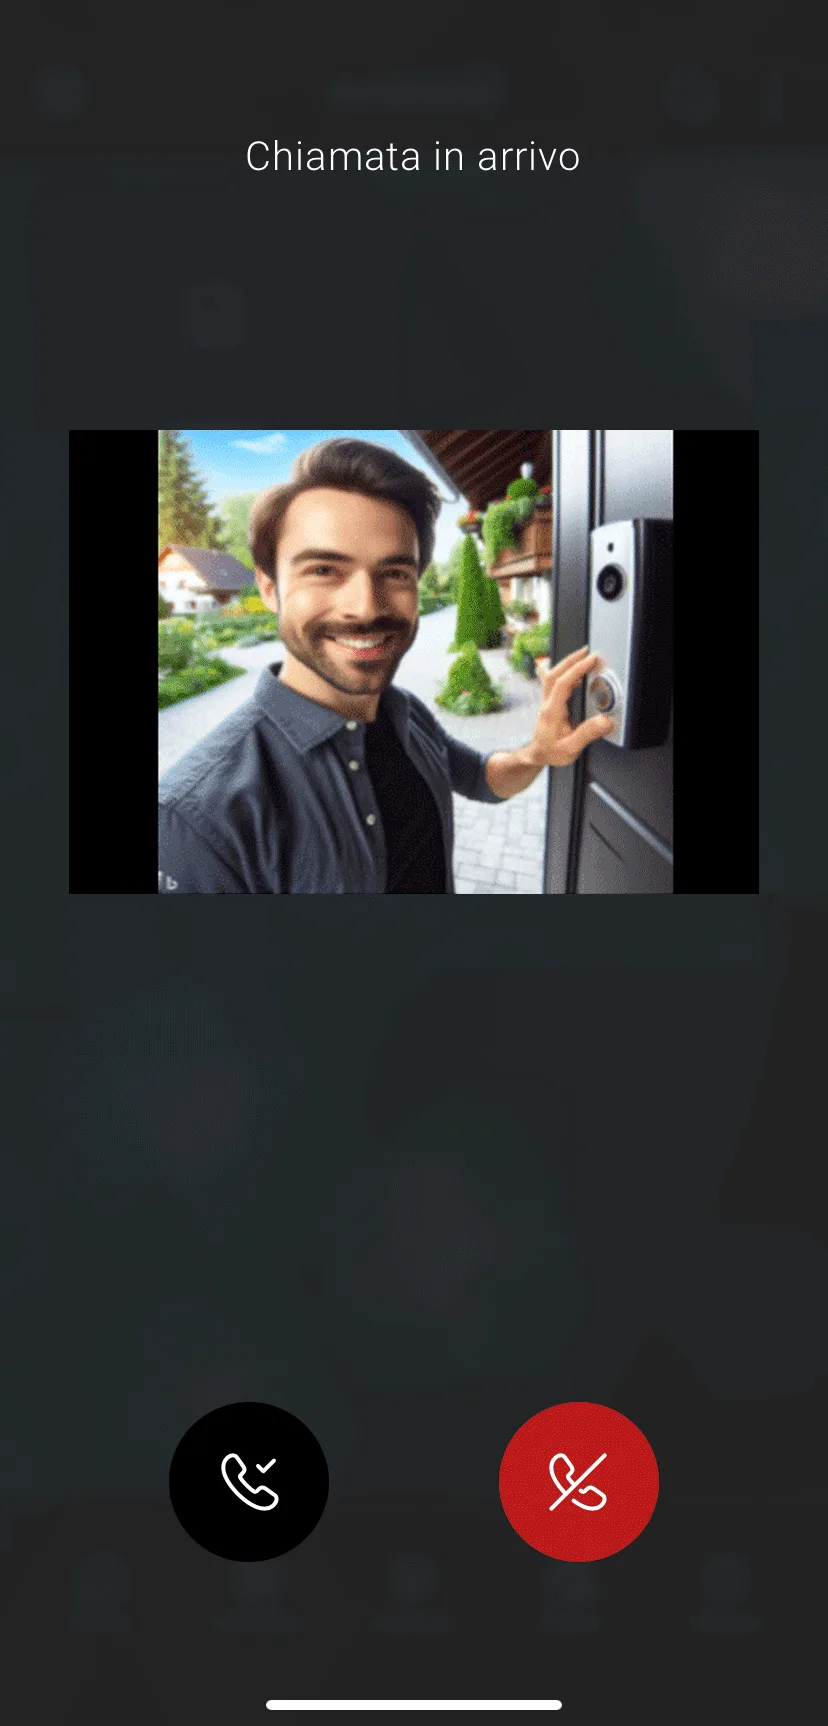
Click the intercom button to place the call. If the configuration is correct, you will receive a notification if the app is closed, otherwise a call screen will be displayed allowing you to accept or reject the call.
Call screen
Call notification