
Firmware installation on Raspberry Pi server
Procedure to download the Ilevia Suite firmware, write it to an SD card, and start the Ilevia server on Raspberry Pi.
Introduction
The Ilevia Suite for Raspberry Pi software can be downloaded for free but has a limited validity of 168 hours (7 days).
Procedure
Follow the steps below:
Step 1: download the server firmware for Raspberry Pi;
Step 2: extract the .img file from the compressed folder;
Step 3: insert the SD card (at least 16 GB) into the SD reader;
Step 4: format the SD card with the SDFormatter software for Windows and Mac OS;
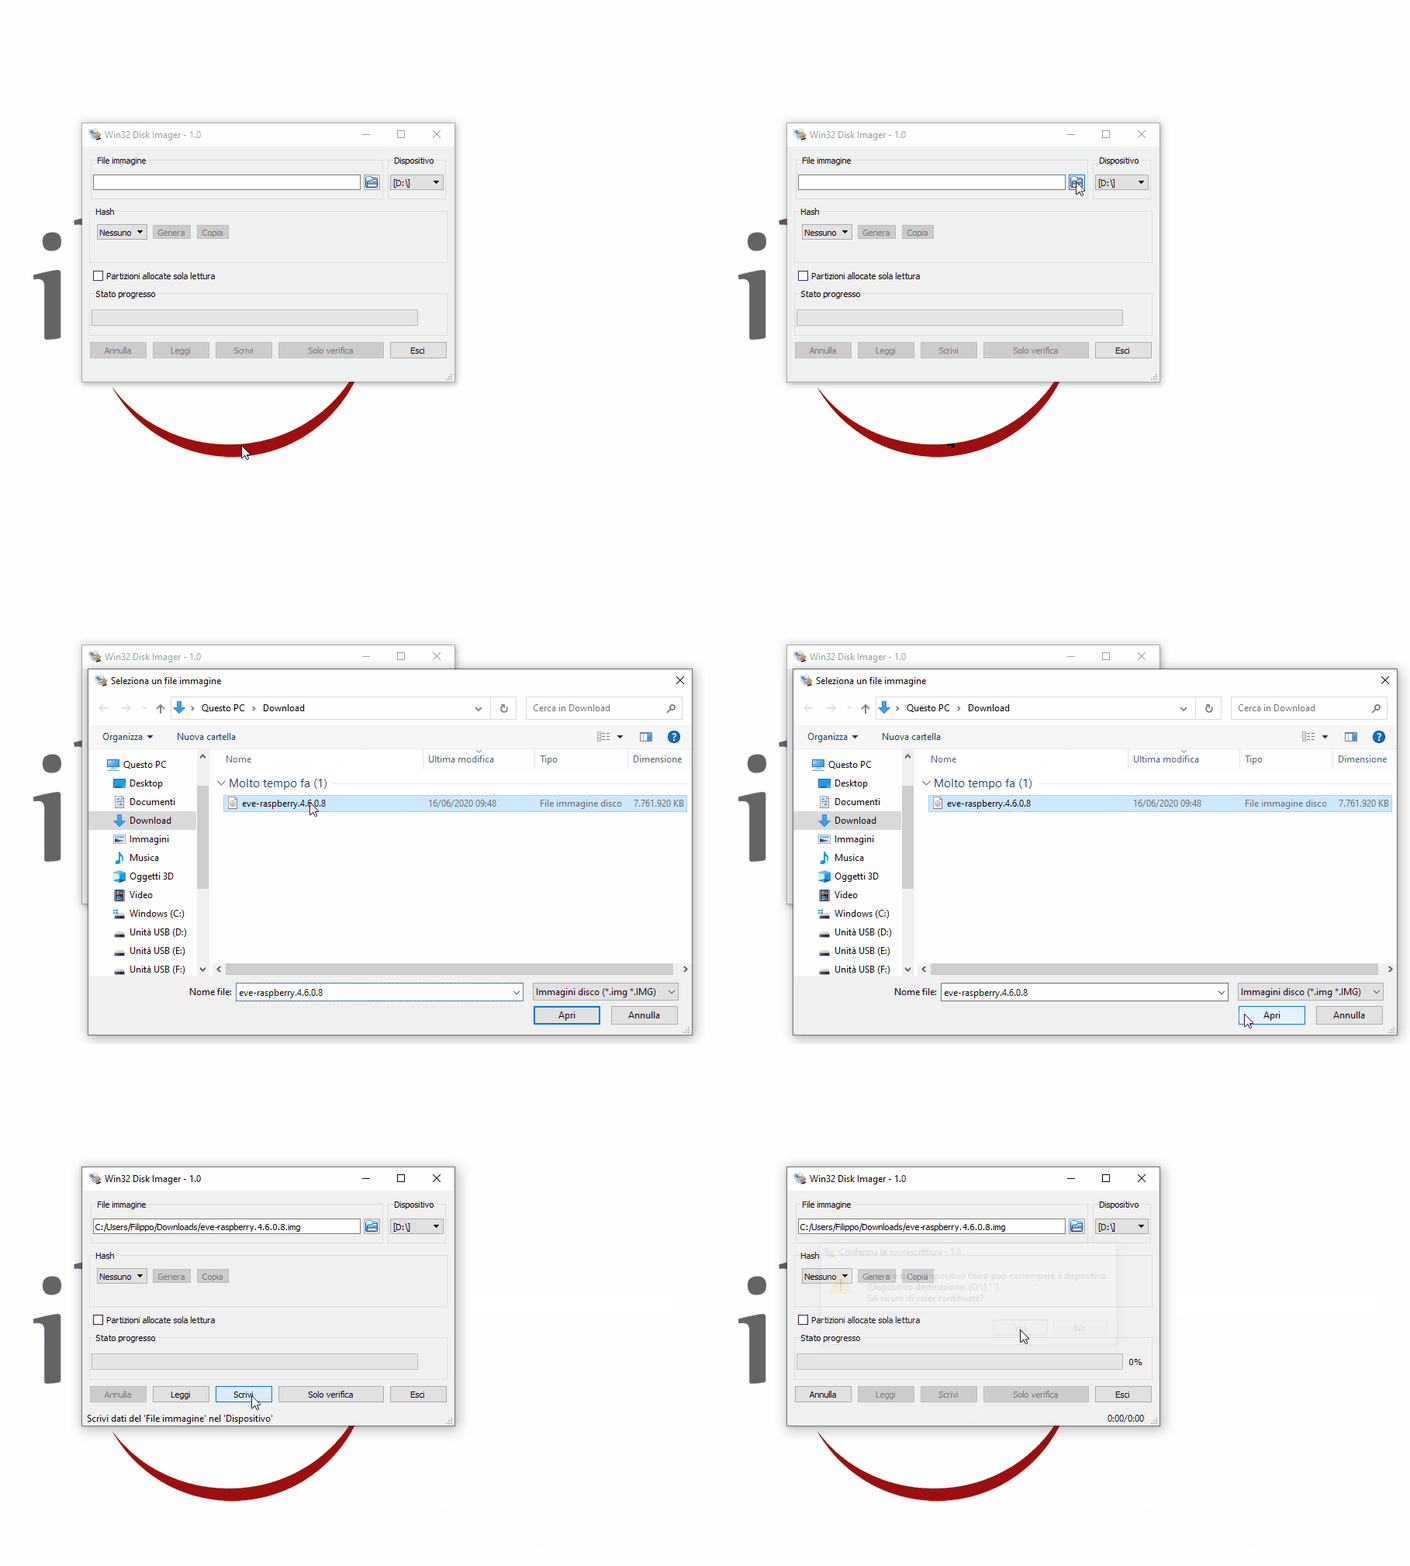
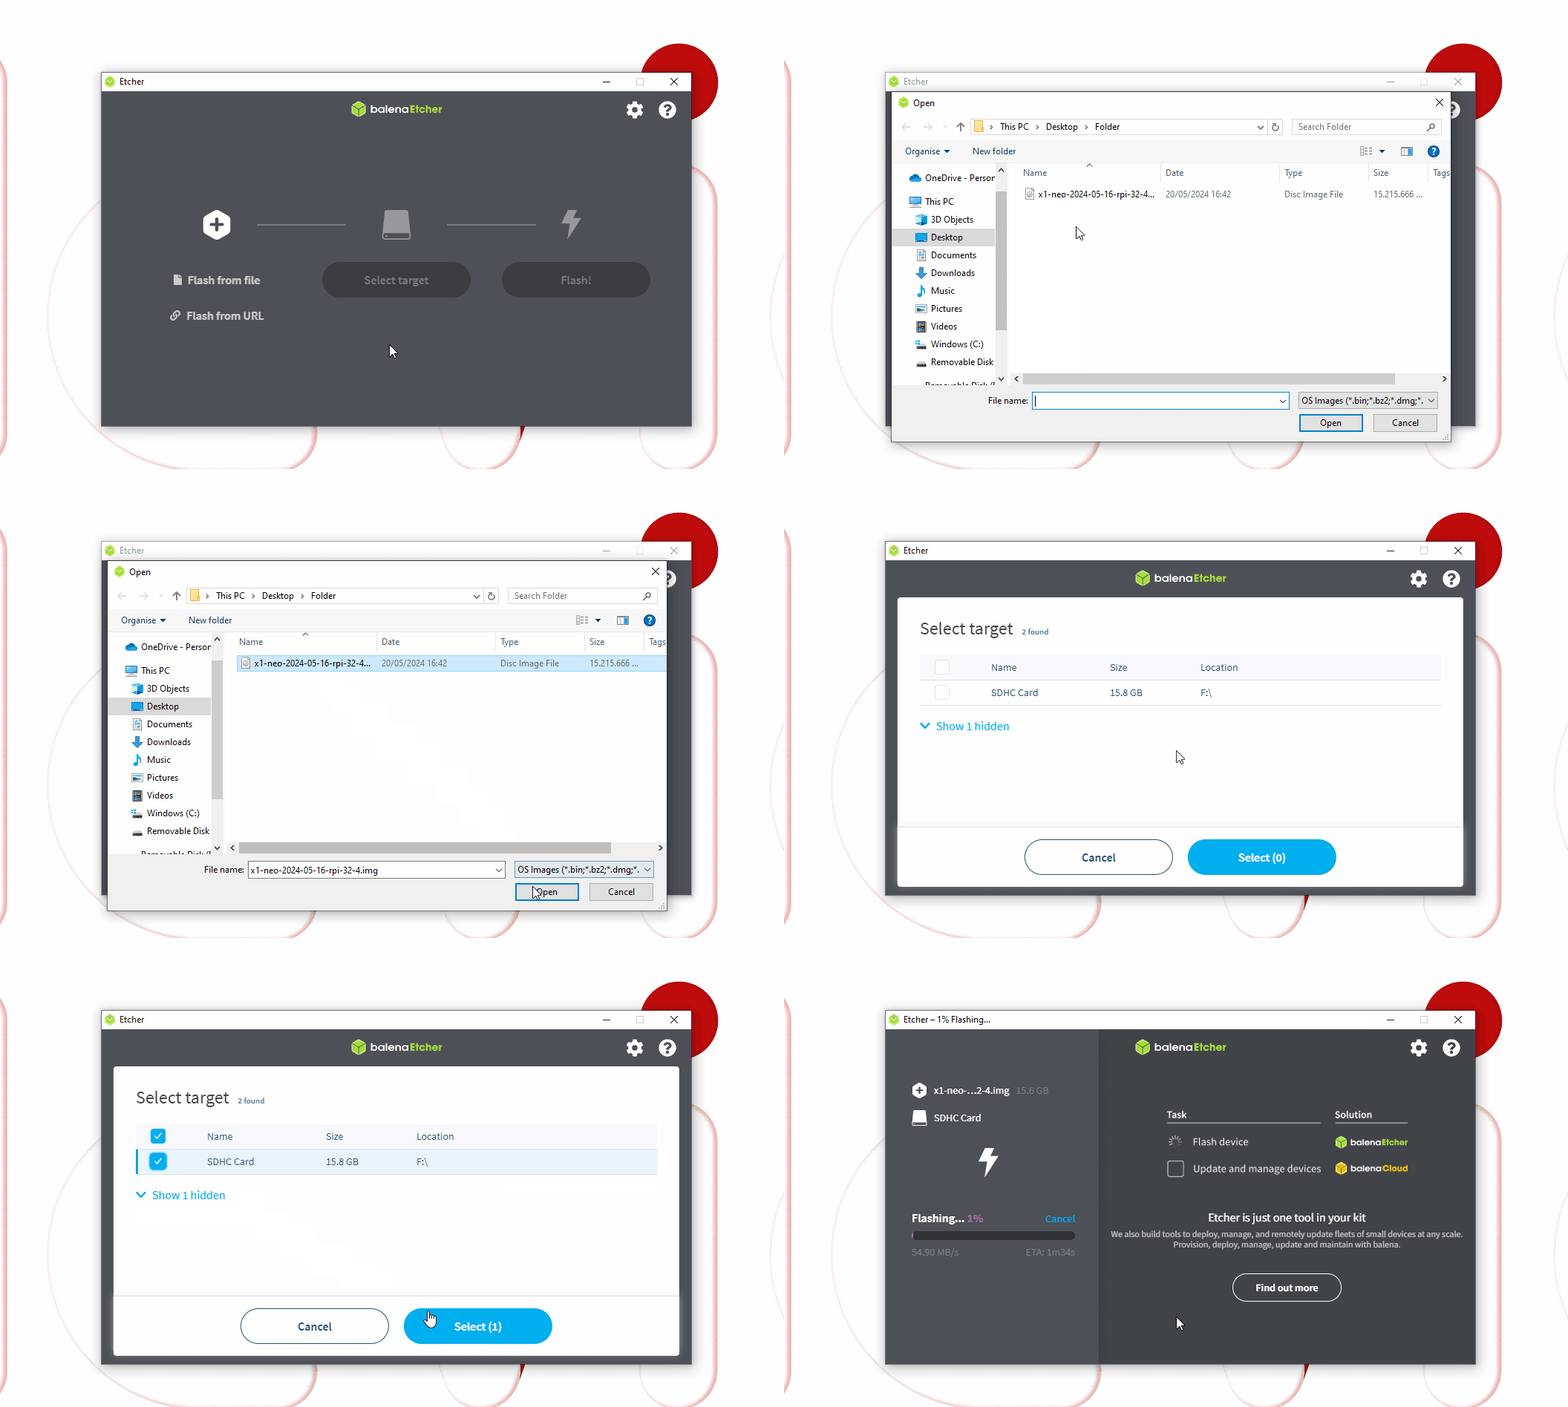
Step 5: write the .img file to the SD card using Win32 Disk Imager for Windows or Etcher for Mac OS;
Win32DiskImager
Balena Etcher
Step 6: remove the SD card from the SD reader;
Step 7: insert the SD card into the Raspberry Pi;
Step 8: connect the Ethernet cable to the Raspberry Pi port;
Step 9: connect the Raspberry Pi to the power supply via its micro USB connector.
Wait about twenty seconds: after this time the Ilevia server will be operational.
Congratulations! The Ilevia server is now operational. You can start configuring your project!